IMPORTANT INFO
- Proj4-2 can be only done on the hive machines.
- PLEASE START EARLY. A limited number of clusters can be initialized at once under the cs61c master account. That means that if you procrastinate on the project right now, there's a good chance that you won't be able to start a cluster easily as we get closer to the deadline, when traffic is heaviest.
- With missing Step 4.5 and Step 5.5, you will lose your points on part 2.
- Don't forget to fill in part2.txt.
Updates
- April 27 @ 7:35PM: Updates on the spec, and proj4_ec2. We will use c3.x8large instances for this project. Discard the previous recording and destroy all instances. There will be updates on proj4_sterter soon.
- April 27 @ 8:35PM: Updates on the starter repo including a batch script and new configs. Run git pull proj4_starter part2. Also read Step 2 for more information on batch execution.
- April 27 @ 8:45PM: New template of part2.txt avaiable. Run git pull proj4_starter part2.
- April 28 @ 2:50PM: New patch on part 2. Now you can run all benchmarks. It also includes a new benchmark, ec2-cnn-full(50,000 images). Run git pull proj4_stater part2. Also updates on Step 2.
- April 28 @ 4:20PM: Small fixes on part2. Run git pull proj4_stater part2.
- April 29 @ 1:30PM: Do not run any instances right now! We will penalize them. A new instruction will be available very soon.
- April 29 @ 7:30PM: Now we are ready again! Before a new start, please read this piazza post carefully. This spec is updated with new directions.
- April 30 @ 7:45PM: You can submit your proj4-2 (part2.txt) now.
- April 30 @ 9:30PM: Updates on proj4_stater. You are supposed to calculate $ / 50,000 images, not $ / 10,000 images. This is because we are interested in a full dataset(50,000 images).
Introduction
In the second part of Project 4, we'll use the power of EC2 to run image classifiers. We'll be using 5, or 10 c3.x8large machines at a time, each with the following specifications:
Model: c3.8xlarge
Cores: 32
Mem: 60 GiB
Storage(SSD): 2 x 320 GB
Features:
* High Frequency Intel Xeon E5-2680 v2 (Ivy Bridge) Processors
* Support for Enhanced Networking
* Support for clustering
* SSD-backed instance storage
Price: $1.680 per Hour(very expensive!)
Thus, when we're working with 10 instances (machines), we're working under the following "constraints":
Cores: 320 Total
Memory: 577.5 GB Total
Storage(SSD): 10 x 2 x 320 GB = 6.4TB
That's quite a huge amount of power!
Step 0: Update Your Repo for EC2
Before you do anything, make sure you commit and push your changes! Otherwise you risk losing your work!
Only one person needs to add the part 2 files to the repository. Communicate with your partner before doing this step. Make sure you have committed and pushed your changes to project 4-1 to GitHub first. Then, create a new branch called part2:
git checkout -b part2
Next, pull the part2 files from the part2 branch in the proj4_starter repository:
git pull proj4_starter part2
Finally, push the proj2 branch to GitHub:
git push origin part2
Now, files are ready for EC2, but to optimize, we highly recommend you use cache() for the RDDs before reduces.
Step 0.5: Create Your Account
For your convenience, we provide another repository. To obtain files, run:
git clone git@github.com:cs61c-spring2015/proj4_ec2.git
cd proj4_ec2 # Go inside the directory that was created
Now, you can see a couple of files including Makefile. To obtain your account and certificate, run:
make account
You should be able to see a 32 digit key at the end when successful. If you see '403 InvalidClientTokenId The security token included in the request is invalid' at the end (You may see this before Done, but it's ok), repeat:
make clean ; make account
It can fail a lot, so be patient. Sometime, logout and login can work. If you finish this step successfully, you don't have to repeat this step.
Step 1: Launch Test Instances
First, let's describe how your code will run on EC2. Through AWS, we'll be renting a cluster -- which is just a set of computers connected together on a fast local network. Spark runs on top of these machines and designates one as a master and the rest as slaves The master runs the driver program which oversees all operations and allocates work to slaves (aka worker nodes). Slaves are used to perform all parallelized operations, such as map and reduce.

If you finish the previous steps successfully, you first want to test your code. Let's launch your own EC2 instance for testing by running:
make launch-test
It will launch three affordable instances(c3.large). It will take a few minutes, so also be patient here even if you see some 'Connection refused' messages.
You can see the following capture when you succeed:
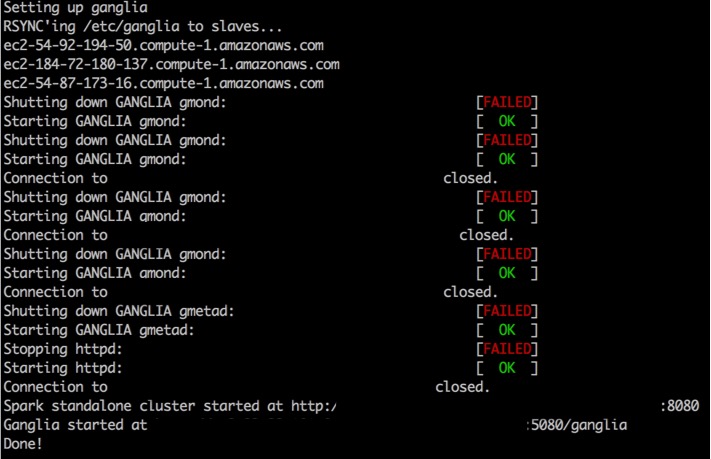
Even if you failed this command, you have already launched your instances, so you must not go to bed without destroying them. Also, if you fail this step, run:
make resume
to copy necessary files to the instances.
Note that Spark also provides you a nice Web UI. To access this, you need the master's URI. Run:
make master
This will show you the master's URI such as ec2-xxx.compute-1.amazonaws.com. Jump into ec2-xxx.compute-1.amazonaws.com:8080 on your brower, and it will show you like:
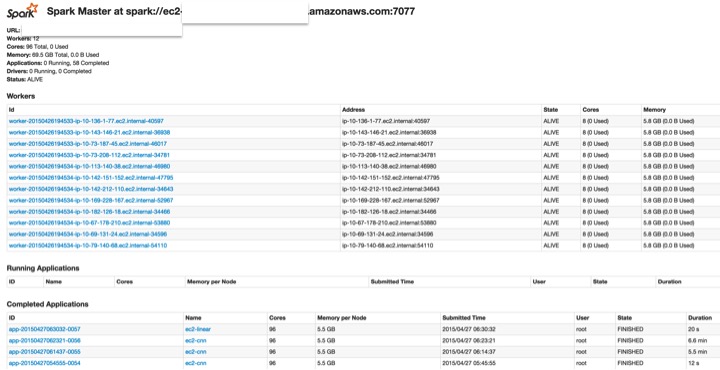
Using this, you'll be able to view job status and all kinds of cool stats in your browser, as long as the cluster is still running by reloading the page. You'll need some of this information to answer the required questions later.
Also, watch the progress on ec2-xxx.compute-1.amazonaws.com:4040. It will give you the execution status in detail.
Step 2: Log in EC2 Instances and Run Tests
You're ready to ssh into your EC2 instances after Step 1. To do this, run:
make login
Now, you're on EC2! This another linux machine. To deploy your code here, first clone your repo here:
# note that we use HTTPS instead of SHH to clone your repo.
# it will ask your acount information
git clone git clone https://github.com/cs61c-spring2015/proj4-XX-YY.git
cd proj4-XX-YY
git checkout part2 # make sure your are on the part2 branch.
To initialize, run:
./setup_ec2.sh
Finally, you're ready to deploy your code on EC2! First, to test your code on EC2, run:
make ec2-cnn-test
It will give you the test results. You should meet the performance guidelines as follows:
- Training performance: 12.88 imgs / sec
- Total runtime: 7.76 min
Step 3: Destroy Test Instances
Finally, once we're all done grabbing all the information/data we need, and have run all the jobs that are needed, we go ahead and shutdown the cluster. This destroys all data that we placed on the machines in the cluster. In addition, the URLs you used earlier to see the web GUI will cease to function. Thus, be sure that you grab all the data you need to finish your project before terminating. In order to terminate, run the following from the hive machine:
make destroy
Step 4: Run Your Code on Five Instances
We highly recommend you test your code first, and run your code on more powerful instances (c3.x8large)
After testing your code, you would love to run your code with very large datasets on five instances of c3.x8large, which is powerful but expensive. This step is a repetition of Step 1 ~ 3. For this, launch your five instances of c3.x8large with:
make launch-small
Even if you failed this command, you have already launched your instances, so you must not go to bed without destroying them. Also, if you fail this step, run:
make resume
to copy necessary files to the instances.
Next, you can ssh in these instances with:
make login
On your instances, you also have to run the followings to copy your files:
git clone git clone https://github.com/cs61c-spring2015/proj4-XX-YY.git
cd proj4-XX-YY
git checkout part2
Our final goal is to see the speedup for convolutional neural networks on EC2.(Don't run these benchmarks with launch-test.) For this, you have the following benchmarks:
- ec2-cnn-large
- ec2-cnn-huge
- ec2-cnn-full
To run all of them while you are doing something else, run:
./setup_ec2.sh
screen
./batch.sh
The output will be available from ec2-'benchmark'.log to fill in part2.txt. Note that you don't have to worry about losing connections because you ran a terminal multiplexor. You can return to the previous execution by running:
screen -r
Step 4.5: Destroy Your Five Instances
Please note that this is the most important step of part 2. if you leave an instance running for an unreasonable amount of time (for example, overnight), you will lose points(these are not EPA points, points on part 2!)
Once we're all done grabbing all the information/data we need, and have run all the jobs that are needed, we go ahead and shutdown the cluster. This destroys all data that we placed on the machines in the cluster. In addition, the URLs you used earlier to see the web GUI will cease to function. Thus, be sure that you grab all the data you need to finish your project before terminating. In order to terminate, run the following from the hive machine:
make destroy
Note that your are only allowed to run five instances for longer than 7 hours! (7 x 5 x 1.6 = $56)
Step 5: Run Your Code on Ten Instances
This step is almost the same as Step 4, but start with make launch-big instead of make launch-small to launch ten instances of c3.x8large.
Step 5.5: Destroy Your Ten Instances
Please note that this is the most important step of part 2. if you leave an instance running for an unreasonable amount of time (for example, overnight), you will lose points(these are not EPA points, points on part 2!)
Once we're all done grabbing all the information/data we need, and have run all the jobs that are needed, we go ahead and shutdown the cluster. This destroys all data that we placed on the machines in the cluster. In addition, the URLs you used earlier to see the web GUI will cease to function. Thus, be sure that you grab all the data you need to finish your project before terminating. In order to terminate, run the following from the hive machine:
make destroy
Note that your are only allowed to run ten instances for longer than 5 hours! (5 x 10 x 1.6 = $80)
Screen - terminal multiplexer
Programs such as screen and tmux are terminal multiplexors. They enable two main features: (1) to have multiple terminal windows within one, (2) to be able to reconnect to an ssh connection if your network connection drops. Here we'll focus on (2).
You will likely find screen to be a very valuable tool even beyond proj2-2!
screen works by creating sessions. So let's first begin by logging into a lab server, and creating a new session called foo
$ screen -S foo
You'll notice you are now in a new blank shell prompt. From here you can run any commands you'd like.
You can explicitly detach from your session with the keyboard shortcut: (Ctrl+A) D. Or you might find yourself accidentally detached if your network connection dies. When you are detached, any processes in the session still continue to run (which isn't true with a normal ssh connection).
In either case, to reconnect to the session, you can ssh onto the same server and reconnect with:
$ screen -rd foo
If you forget the name of your session or want to see all of your open sessions, use screen -ls.
screen -h.
Sanity check exercise: can you and your partner create a new session called calendar that runs the command cal? Simulate your network dropping, by X-ing out of the ssh connection. Can you reconnect to the calendar session? How do you delete a session you are done with? (check screen -h)
Submission
Make sure that your implementation is correct and passes all the provided tests! If not, you risk losing all points for the entire project.
There are two steps required to submit proj4. Failure to perform both steps will result in loss of credit:
First, you must submit using the standard unix submit program on the instructional servers. This assumes that you followed the earlier instructions and did all of your work inside of your git repository. To submit, follow these instructions after logging into your cs61c-XX class account:
cd ~/proj4-XX-YY                             # Or where your shared git repo is
submit proj4-2
Once you type submit proj4-2, follow the prompts generated by the submission system. It will tell you when your submission has been successful and you can confirm this by looking at the output of glookup -t.
Additionally, you must submit proj4-2 to your shared GitHub repository:
cd ~/proj4-XX-YY                             # Or where your shared git repo is
git checkout part2                           # IMPORTANT! Make sure you are on the correct branch!
git add -u
git commit -m "project 4-2 submission"
git tag "proj4-2-sub"                        # The tag MUST be "proj4-2-sub". Failure to do so will result in loss of credit.
git push origin proj4-2-sub                  # This tells git to push the commit tagged proj4-2-sub
Resubmitting
If you need to re-submit, you can follow the same set of steps that you would if you were submitting for the first time, but you will need to use the -f flag to tag and push to GitHub:
# Do everything as above until you get to tagging
git tag -f "proj4-2-sub"
git push -f origin proj4-2-sub
Note that in general, force pushes should be used with caution. They will overwrite your remote repository with information from your local copy. As long as you have not damaged your local copy in any way, this will be fine.
Reference
- Learning Multiple Layers of Features from Tiny Images, Alex Krizhevsky, 2009.