Introduction
Sergei Mikhailovich Prokudin-Gorskii (1863-1944) was a man well ahead of his time. Convinced as early as 1907 that colour photography was the wave of the future, he won Tzar's special permission to travel across the vast Russian Empire and take colour photographs of everything he saw, including the only colour portrait of Leo Tolstoy. And he photographed thousands of coloured pictures of people, buildings, landscapes, railroads, bridges, etc. His idea was simple: record three exposures of every scene onto a glass plate using a red, a green, and a blue filter. Never mind that there was no way to print colour photographs until much later, he envisaged special projectors to be installed in multimedia classrooms all across Russia where the children would be able to learn about their vast country. Alas, his plans never materialised: he left Russia in 1918, right after the revolution and never to return again. Luckily, his RGB glass plate negatives, capturing the last years of the Russian Empire, survived and were purchased in 1948 by the Library of Congress. The LoC has recently digitised the negatives and made them available on-line.
The goal of this project is to take the digitised Prokudin-Gorskii glass plate images and, using image processing techniques, automatically produce a colour image with as few visual artefacts as possible. In order to do this, we extract the three colour channel images, place them on top of each other, and align them so that they form a single RGB colour image. A few further enhancements has been employed.
 |
|---|
| Gorskii Glass Plate |
Approach
As you can see from the above an image of Gorskii glass plate. From top to bottom, it was taken with colour filter BGR. So our first step is to split the image into 3 parts with each representing a colout channel. We then stack the RGB channels together to create our coloured image. As you can imagine, there will be preblems like alignement, borders, etc. In the following, we will address each of these issues.
Alignment Stretegies (SSD vs CC vs NCC)
For align the three channels of a relatively low reolution image, we first fix a single channel say B and have R and G align to in. To do so, we first look at a fixed part of B and call this target window. Then we search this window (called scanning window) on R and G to find a best match. To quantify how close the target window and the scanning window are, we explored 3 different stretrgies - Sum of Squared Differences (SSD), Cross-Correlation (CC). and the Normalized Cross-Correlation (NCC).
As we tried all 3 method, we found that SSD to be the best approah as it was able to align all sample images but one. Following are some comparisms.
 |
 |
 |
|---|---|---|
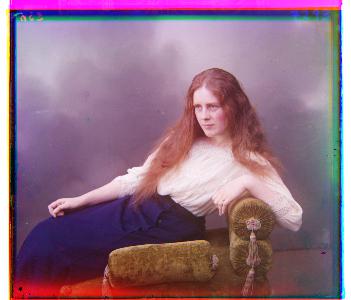
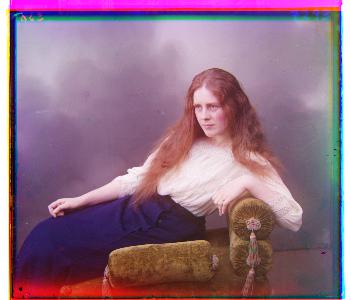
| Lady (CC) Green Offset: (50, 6), Red Offset: (112, 12) |
Lady (NCC) Green Offset: (52, 8), Red Offset: (112, 12) |
Lady (SSD) Green Offset: (52, 8), Red Offset: (113, 14) |
 |
 |
 |
|---|---|---|
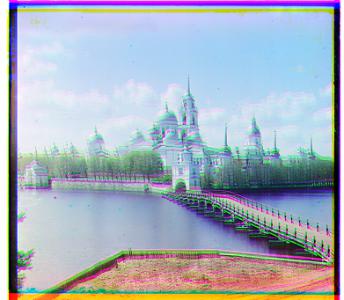
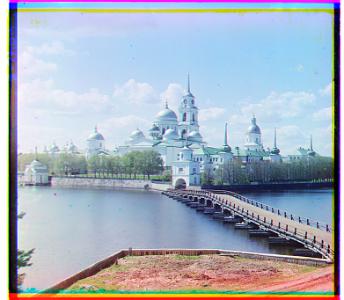
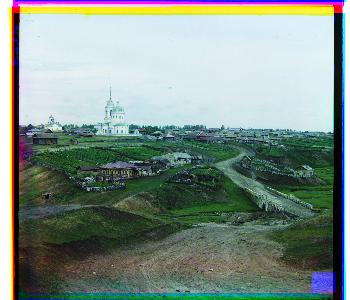
| Monastery (CC) Green Offset: (1, 2), Red Offset: (3, 2) |
Monastery (NCC) Green Offset: (-3, 2), Red Offset: (3, 2) |
Monastery (SSD) Green Offset: (-3, 2), Red Offset: (3, 2) |
 |
 |
 |
|---|---|---|
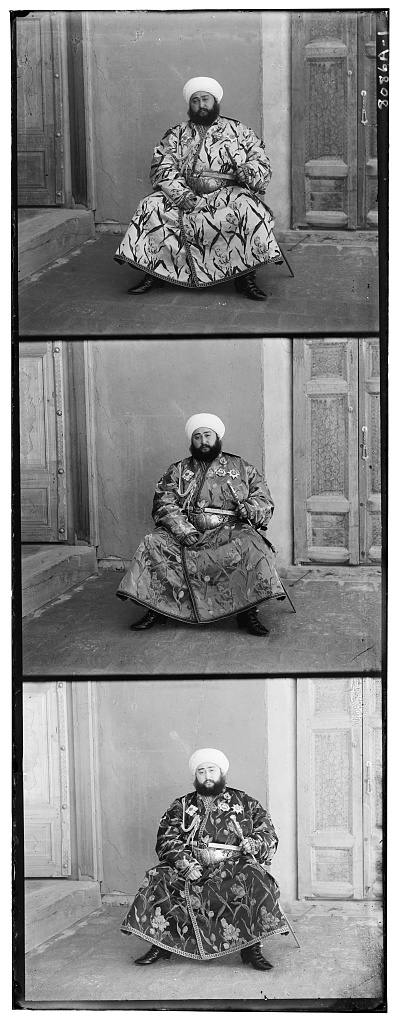
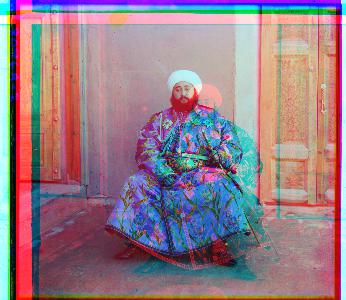
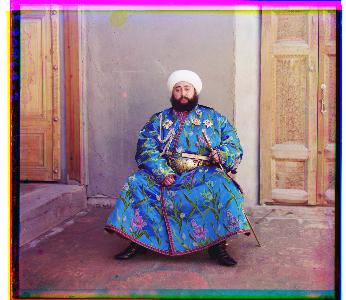
| Emir (CC) Green Offset: (48, 24), Red Offset: (253, 253) |
Emir (NCC) Green Offset: (48, 24), Red Offset: (253, 253) |
Emir (SSD) Green Offset: (48, 24), Red Offset: (253, 253) |
Multi-Scale Alignment
For high resolution pictures, a simple SSD search will take quite a while to run. So instead of searching over the higer resolution image, we reduce the image resolution recursively until the time it takes to run become managable. Then we align back up the stack. Each lower stack made the upper stack easier to run since the maximum possible displace has been reduced by the scaling factor. Such technique is called image pyramid.
Result of the rest of the sample images plus few extra using SSD stretegy will be shown below. Result with CC and NCC are visible via ./assets/g2c/
 |
 |
|
|---|---|---|
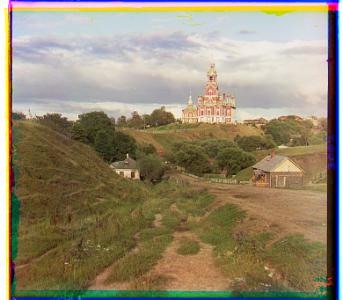
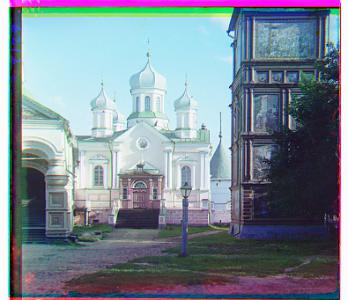
| Cathedral Green Offset: (5, 2), Red Offset: (12, 3) |
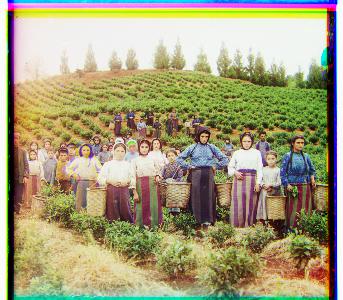
Harvesters Green Offset: (59, 17), Red Offset: (123, 15) |
Icon Green Offset: (41, 18), Red Offset: (90, 23) |
 |
 |
 |
|---|---|---|
| Nativity Green Offset: (3, 1), Red Offset: (8, 0) |
Self Portrait Green Offset: (77, 29), Red Offset: (175, 37) |
Settlers Green Offset: (7, 0), Red Offset: (15, -1) |
 |
 |
 |
|---|---|---|
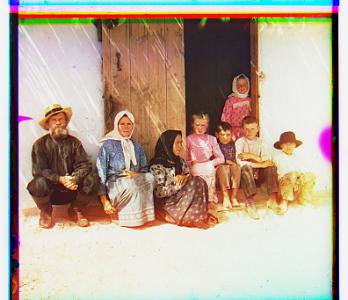
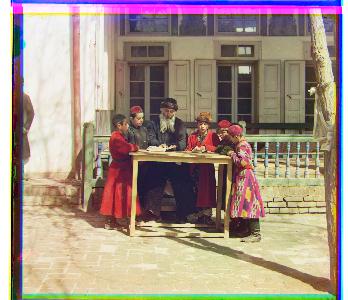
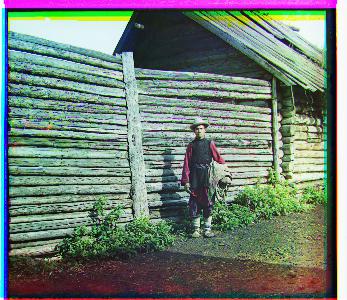
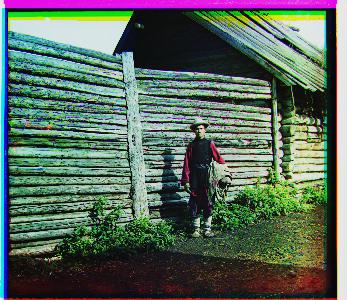
| Three Generation Green Offset: (51, 14), Red Offset: (109, 11) |
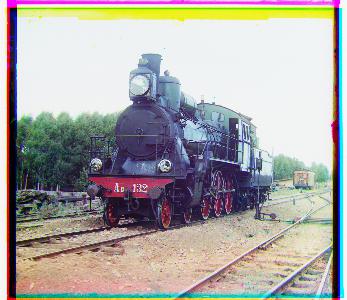
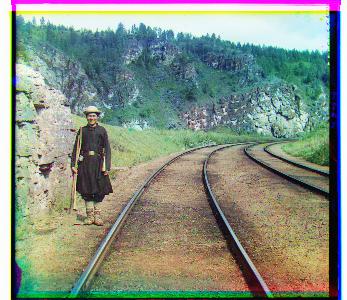
Train Green Offset: (42, 7), Red Offset: (86, 32) |
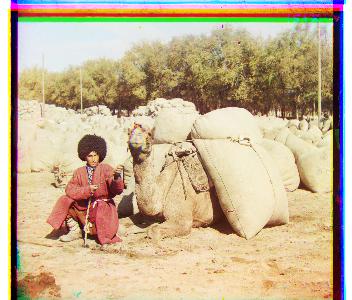
Turkmen Green Offset: (56, 22), Red Offset: (117, 29) |
 |
 |
 |
|---|---|---|
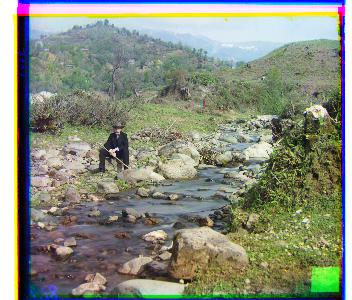
| Village Green Offset: (64, 12), Red Offset: (137, 22) |
Girls Green Offset: (-15, 10), Red Offset: (11, 20) |
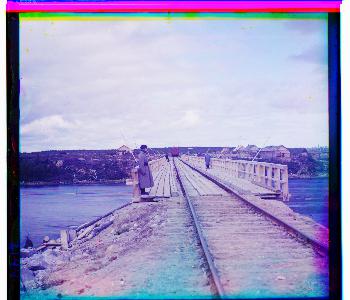
Station Green Offset: (43, -11), Red Offset: (-136, -21) |
 |
 |
 |
|---|---|---|
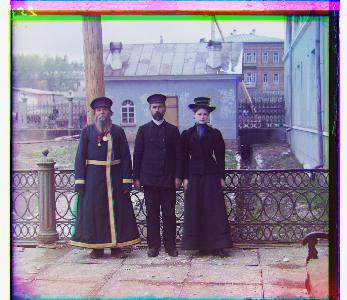
| Teacher Green Offset: (70, 39), Red Offset: (146, 62) |
Switchman Green Offset: (50, 21), Red Offset: (118, 22) |
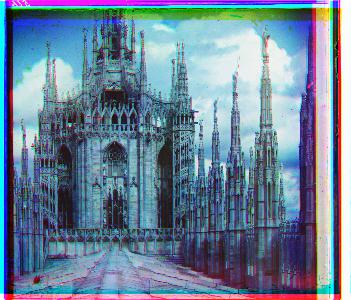
Milan Cathedral Green Offset: (-11, -19), Red Offset: (6, -57) |
Edges Detection
As you might have noticed that in the very beginning, the image 'Emir' is not alignment correctly. This is due to the highlight pixel distribution is not the same across the three channels. To address this, we use Canny Edge Detector and use edges as a feature to alight the three channels.
Following is a comparism with and without Canny. Both are using SSD.
 |
 |
|---|---|
| Emir (SSD) Green Offset: (48, 24), Red Offset: (253, 253) |
Emir (SSD + Canny) Green Offset: (49, 24), Red Offset: (106, 41) |
 |
 |
|---|---|
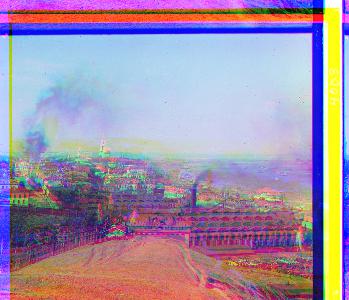
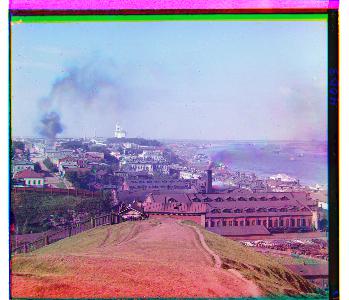
| City (SSD) Green Offset: (253, -190), Red Offset: (253, -190) |
City (SSD + Canny) Green Offset: (43, -17), Red Offset: (102, -35) |
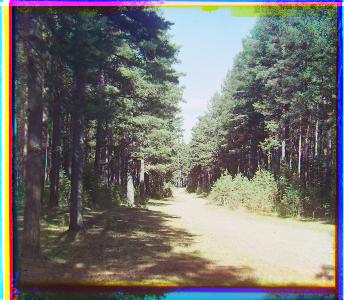
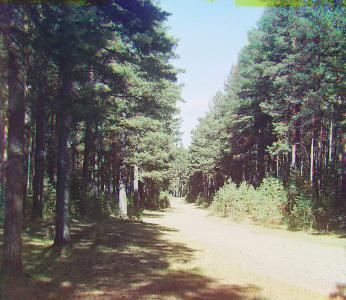
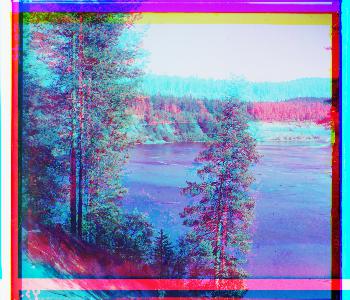
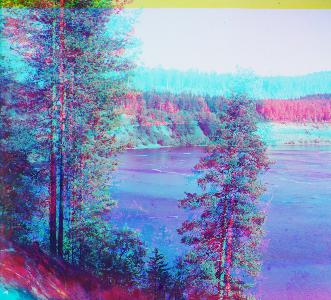
Border Removal
As the negatives were scanned from glass plate, they all have white/black/colour borders around them. Automatic cropping will remove these unwanted borders. The algorith looks at the average intensity of a row/column. For example, a horizontal white border will have a really high average intensity across. It progessively scanns a set amount of border in propotion to the image size. Then these borders will be removed across all three channels.
 |
 |
|---|---|
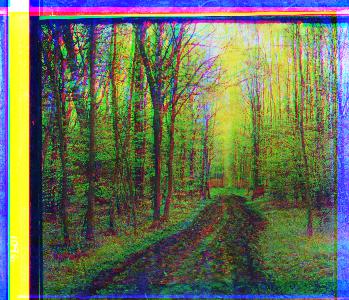
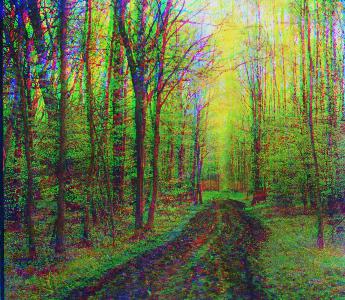
| Forest | Forest (Cropped) |
 |
 |
|---|---|
| Kyshtym | Kyshtym (Cropped) |
 |
 |
|---|---|
| Suna | Suna (Cropped) |
Auto Contrast
Since the photos are taken with glass plate, they all tend to be low in contrast. To automatically adjust for this, we boost each images' contrast. To do so, we applied a Logistic function in to the image - essentially a S-curve.
 |
 |
|---|---|
| Eashkir | Eashkir (Boosted contrast) |
 |
 |
|---|---|
| Eevgenievsky | Eevgenievsky (Boosted contrast) |