CS 194-26 Final Project - Seam Carving and Fake Miniatures
Austin Luong
Seam Carving
Seam Carving is technique for shrinking images. Typical methods of resizing that simply compress and squeeze images to their new size, often creating a unnatural and/or thin looking image if the aspect ratio is not held constant. Seam carving avoids these deformaties by instead finding "seams" in the image that when removed create the least noticeable change in the image. These seams are constantly removed from the image until the image is of the desired size. This technique can often result in better resize results as it leaves most of the highly detailed elements of the image at their original size while removing the less detailed and usually less important elements.
Energy Functions
In order to find the least important seam in the image, we need to define and energy function that maps a pixel (x, y) to a measure of how important that pixel is to the image. One common energy function is the magnitude of the x and y derivative at each point. This essentially is an edge detection measurement. As such, low energy seams will those that do not pass through as many edges.
Finding the Minimum Energy Seam
Once we have an energy mapping for the image, we can proceed to finding the least cost path through from top to bottom of the image (vertical seams) or from the left to the right of the image (horizontal seams). To do this, we can use a simple dynamic programming algorithm. Suppose we are trying to find vertical seams. Let cost(i, j) represent the cost of the minimum cost path from the top to of the image to pixel (i, j). Note that from each point the seam can go straight down, down and left 1 pixel, or down and right 1 pixel. This leads to the recurrence relation cost(i, j) = energy(i, j) + min(cost(i - 1, j), cost(i - 1, j - 1), cost(i - 1, j + 1)). We simply iterate through the table from top to bottom to fill in our cost table. We then can find the minimum cost path by taking the pixel at the bottom of the image that has the minimum cost path going through it and rebuilding our path in reverse. Horizontal seams can simply be found by transposing the energy map and running the above algorithm.
Carving the Image
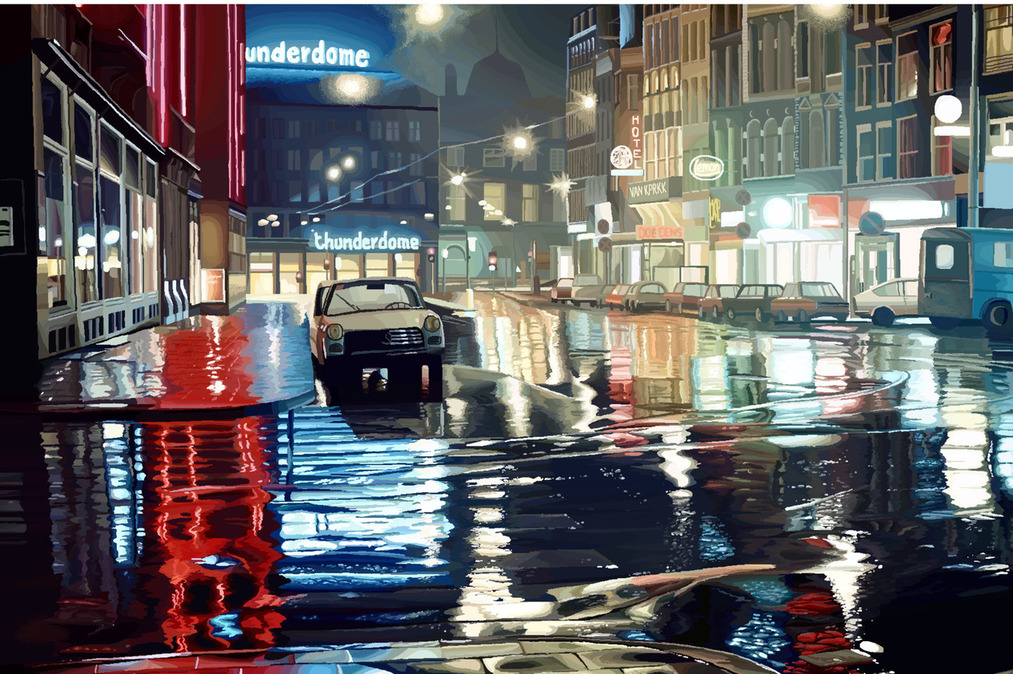
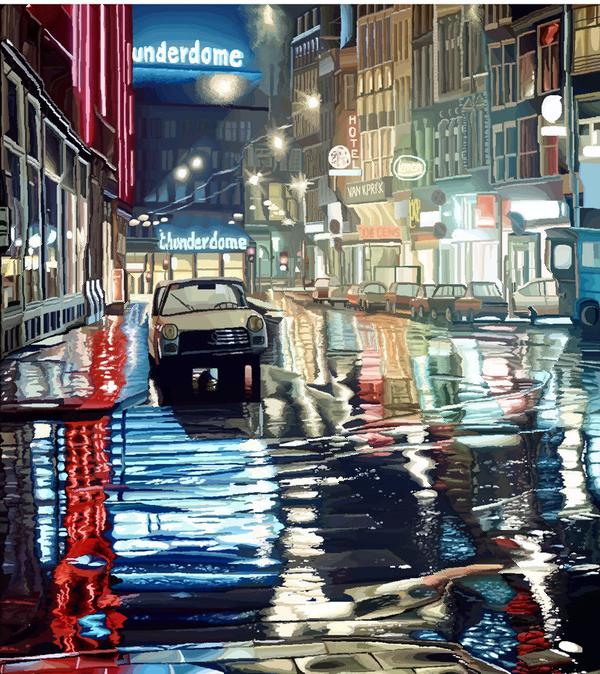
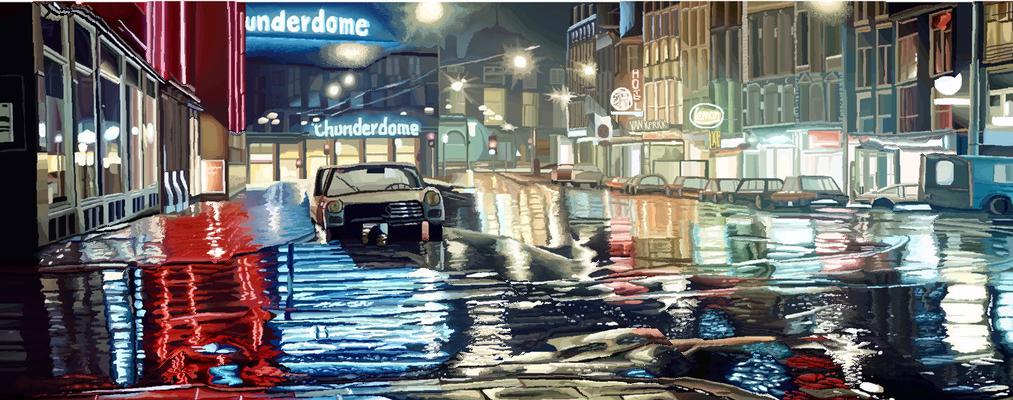
To carve the image to the right size, all we keep finding and removing minimum energy seams from the image until we have reach our desired image size (remove vertical seams to shrink width and vice versa). For all the results that follows, we show the original image, a horizontally shrunked image, and a vertically shrunken image (in that order).
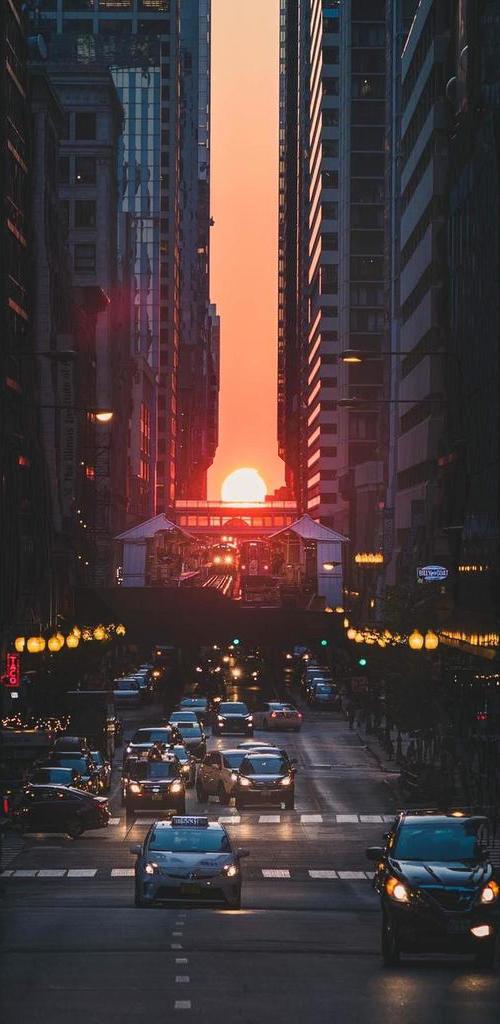
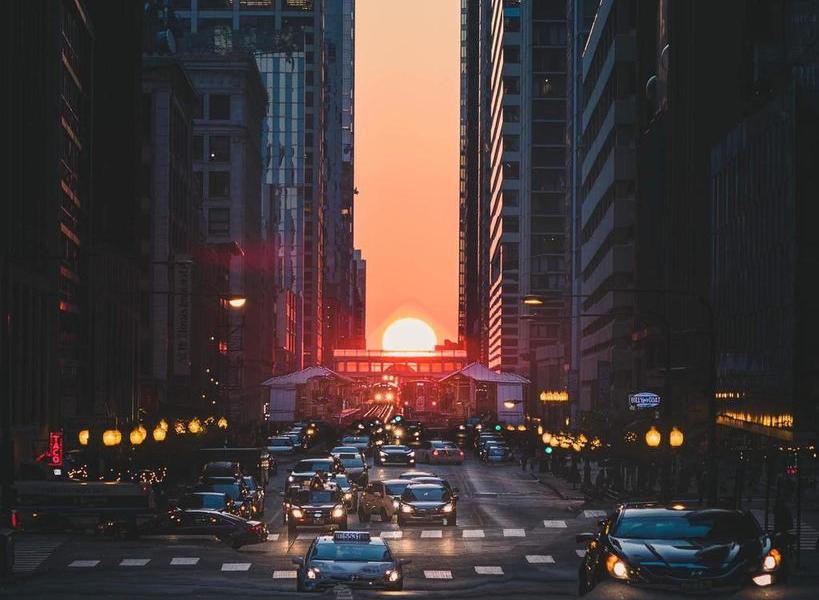
Chicagohenge

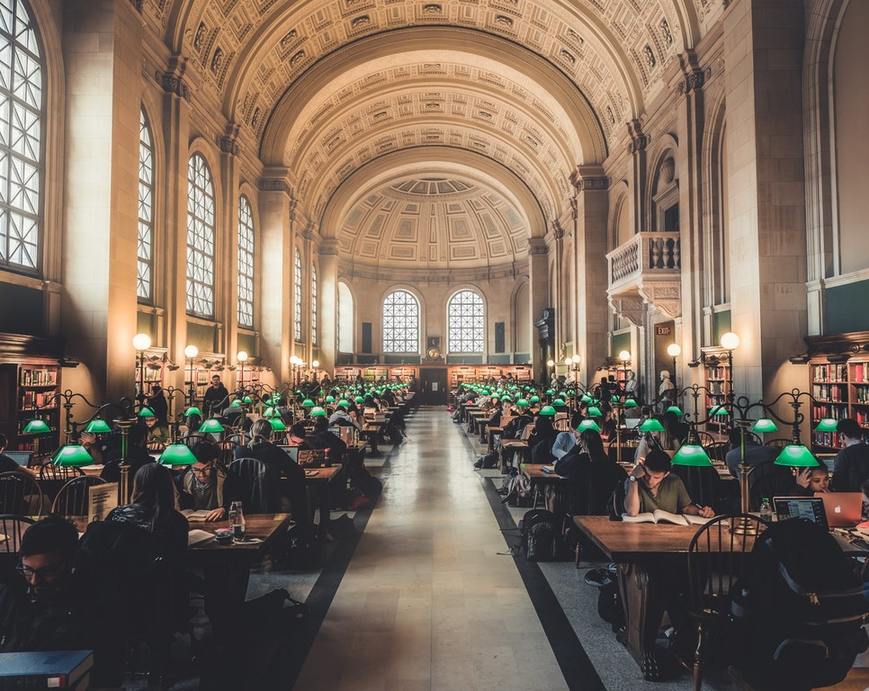
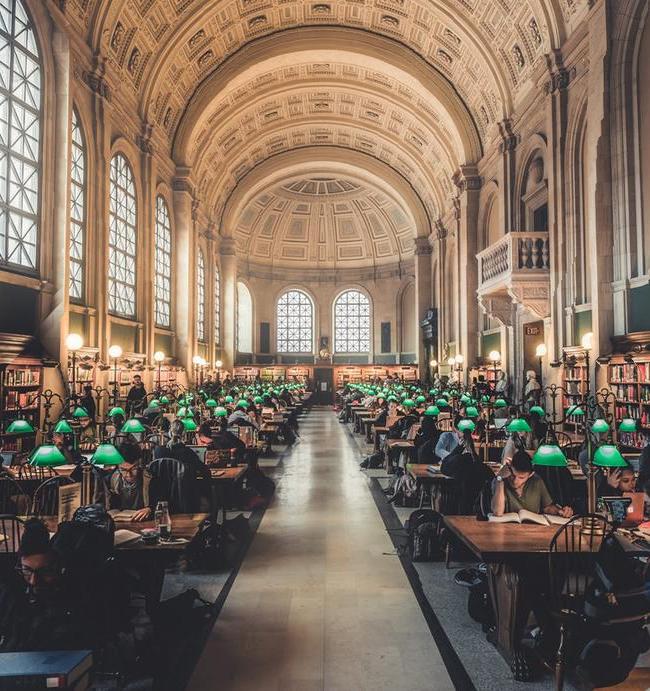
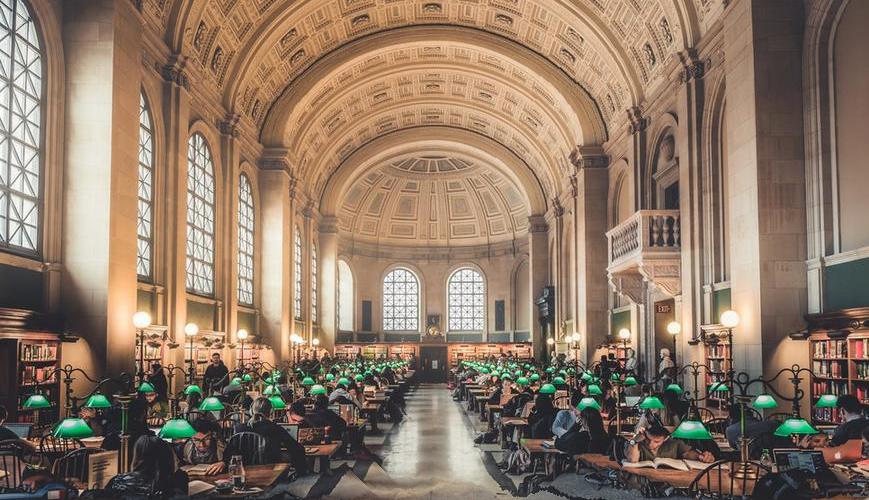
Library
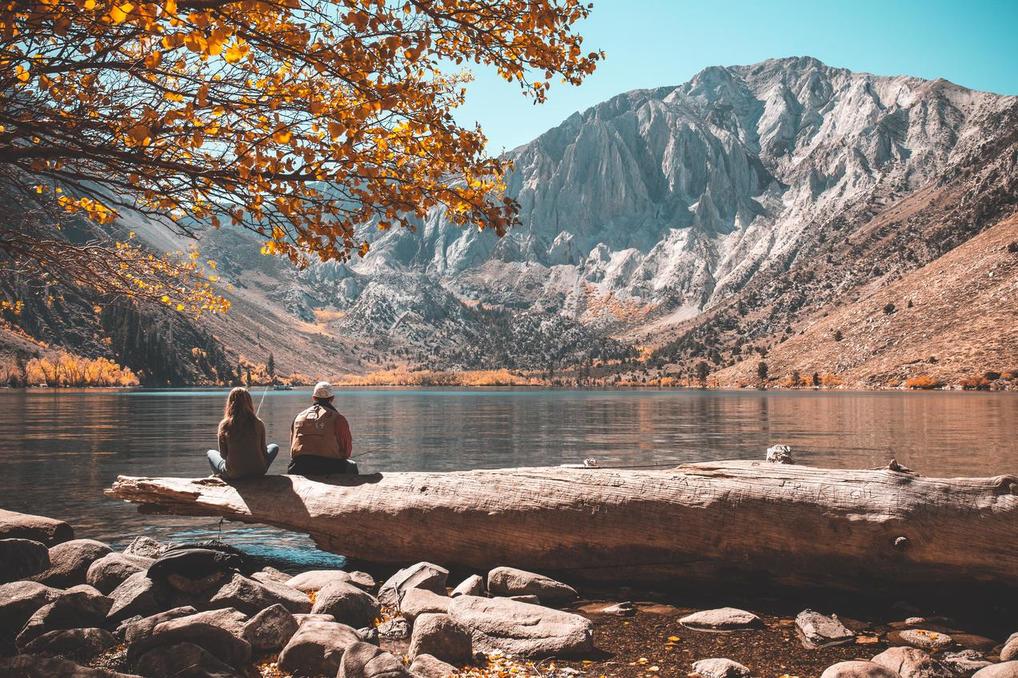
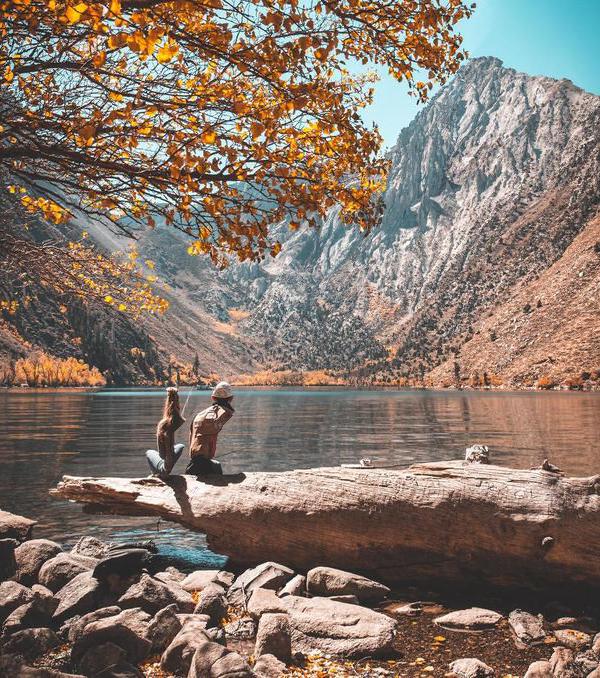
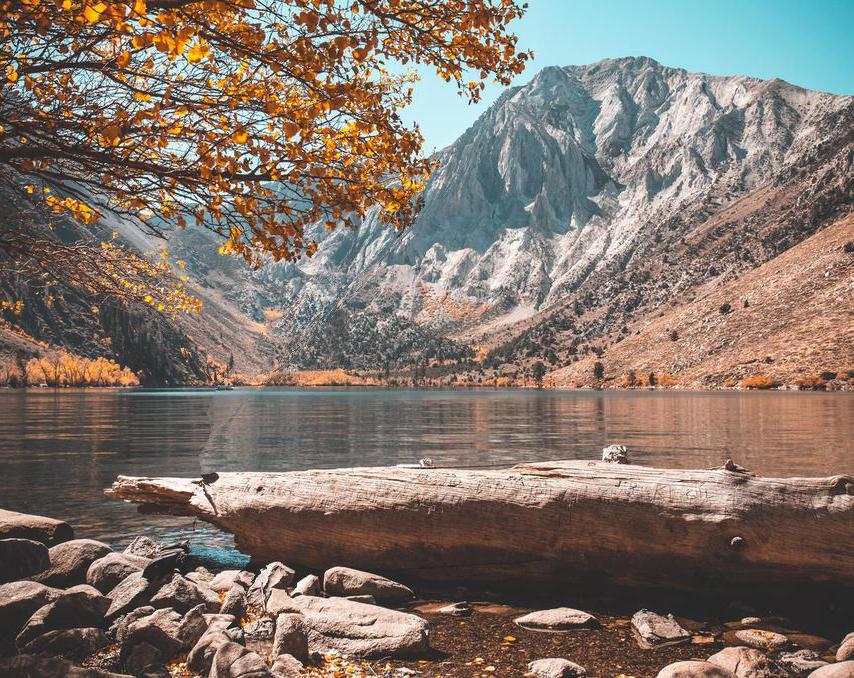
Mountain

Endgame
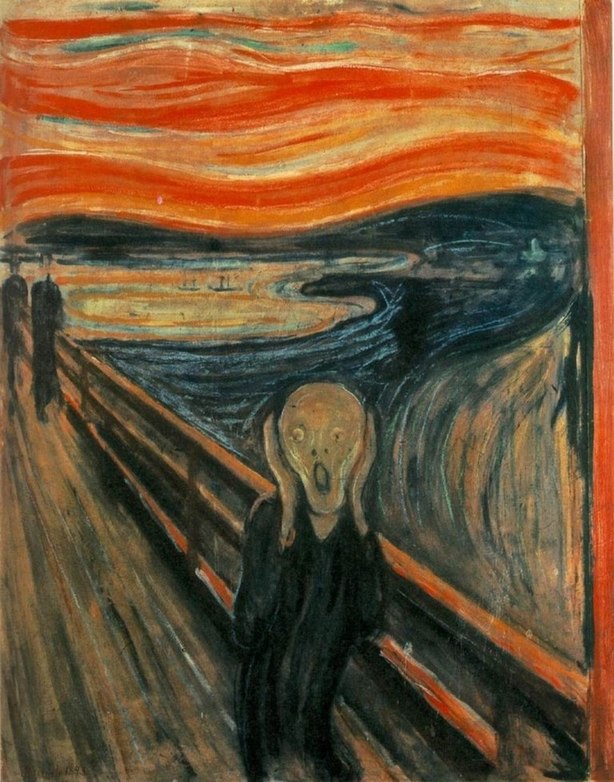
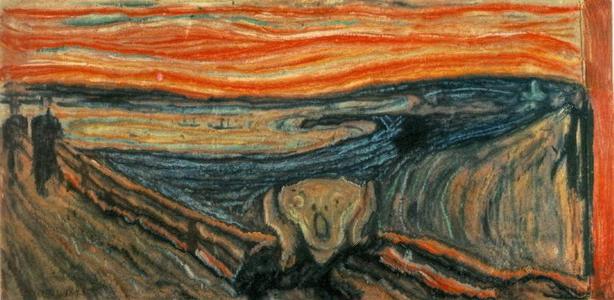
The Scream

White House

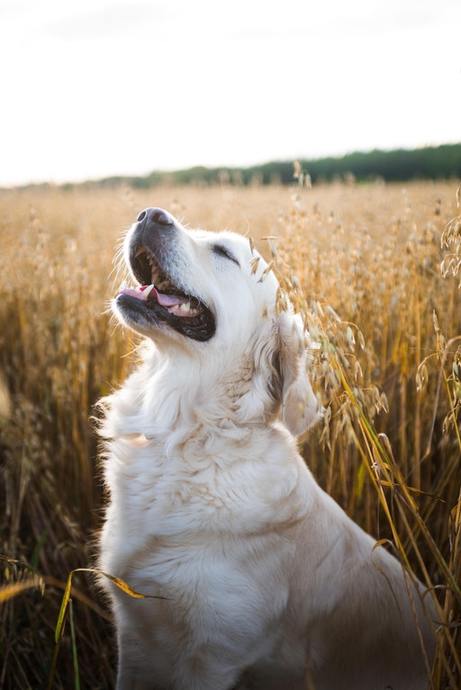
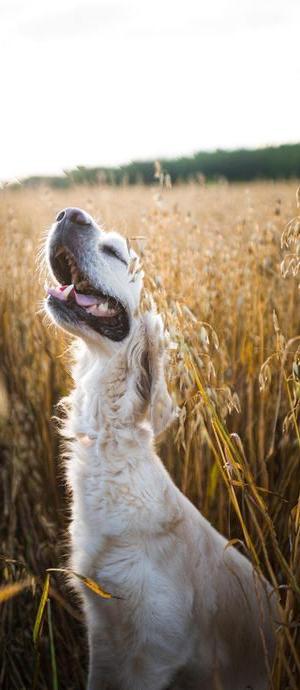
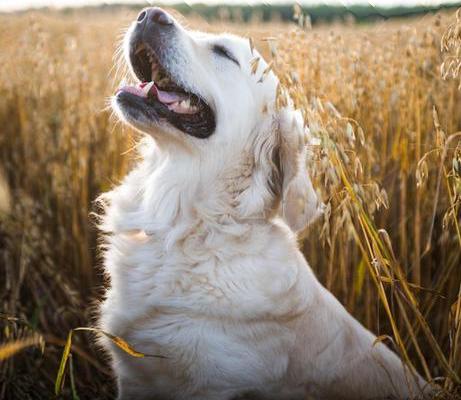
Dog
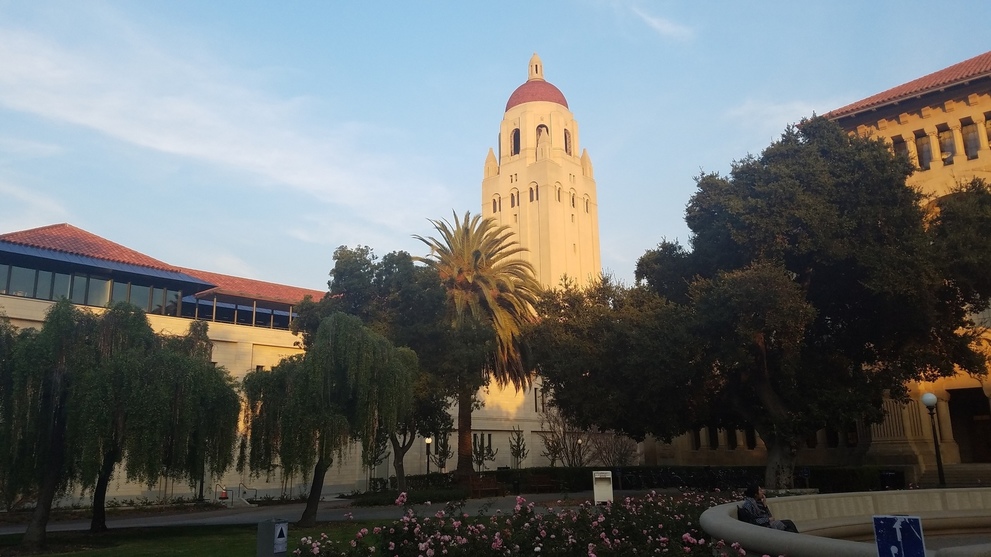
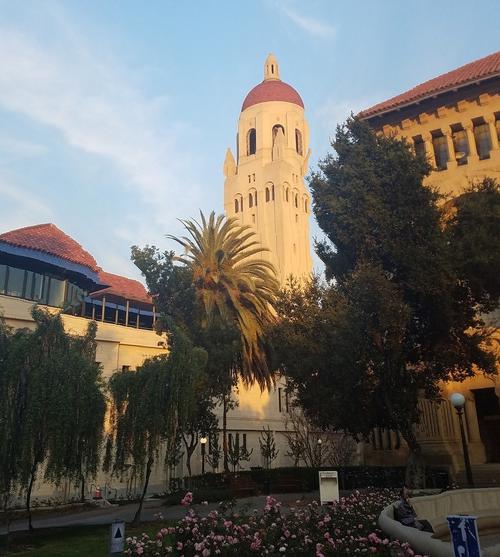
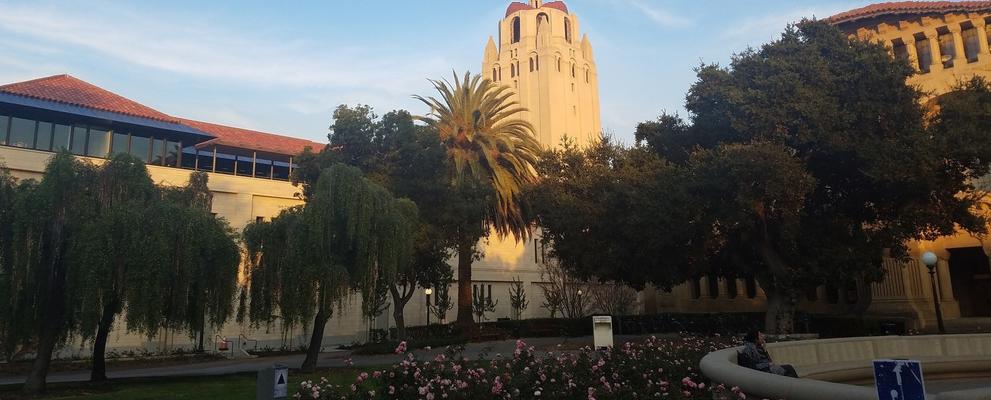
Stanford
Failure Cases
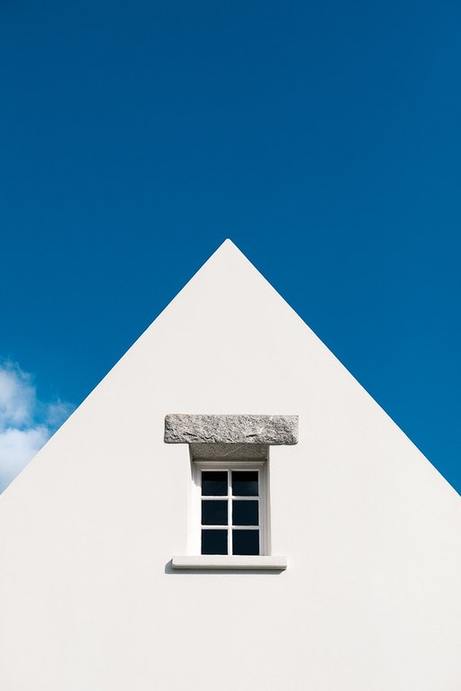
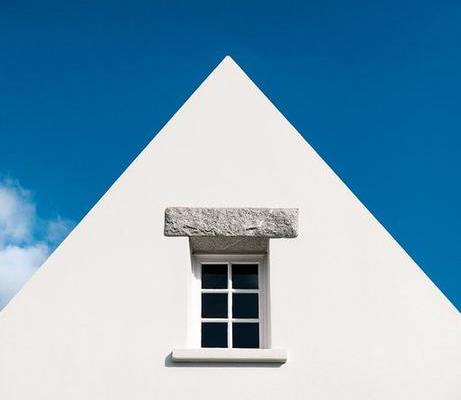
While most of the cases above performed well aside from some minor artifacts, there were some images that did rather poorly in some resize cases. One example is the case of the white building being shrunked horizontally. This happened simply because removing any vertical seam will result in the perfect edges of the triangle roof being disrupted. Seam carving does not modify or move original pixels in the image (other than horizontally / vertically) so cannot cases where the input pixels not allow for nice cuts. Another noticeably poor case was the horizontal shrinking of the dog. The resize resulted in the dog looking very abnormal and thin and was do simply to the image being too condensed already. As such, the best seams will need to go through the dog and make it look unnatrual.
Resize Animation
To better see the process of removing seams, I also created some short videos of the image at each iteration in the algorithm.
Object Removal
This technique can also be used to remove objects from the image. All we need to do is define mask that indicates the pixels that we want to remove from the image. Then, we adjust the energy of the corresponding pixels to be some low number (possibly even negative). As a result, the minimum energy seam will often be the pixels corresponding to the object (the lower the energy assigned, the more aggressively the algorithm will try to remove the image from the image). For this algorithm, we continue removing seams from the image until all of the corresponding pixels in the mask have been removed. We show the original image followed by the image with an object removed.
Nature > People
The Sun Has Set

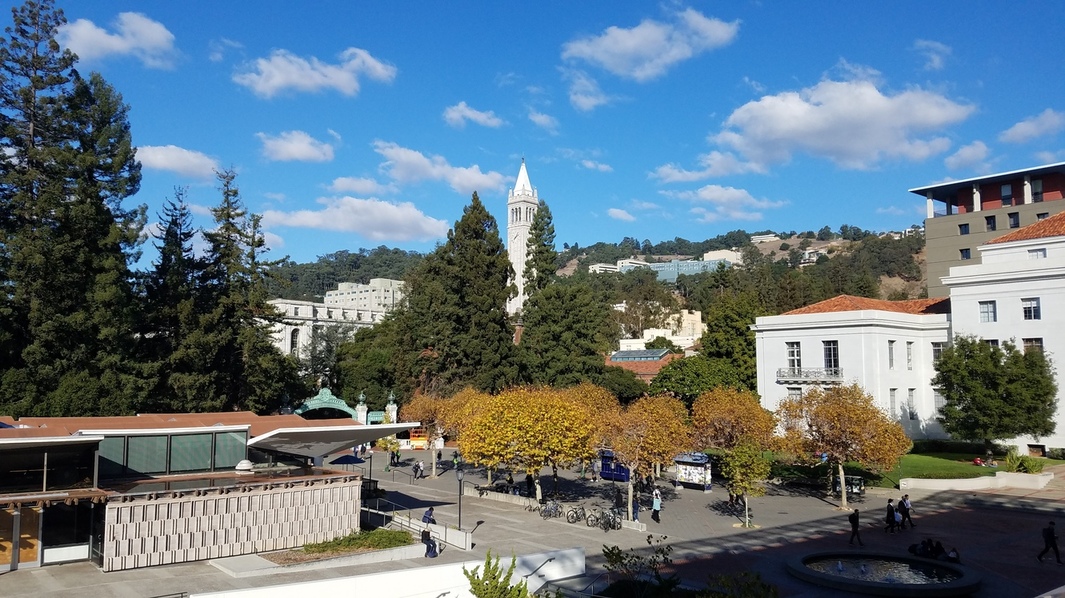
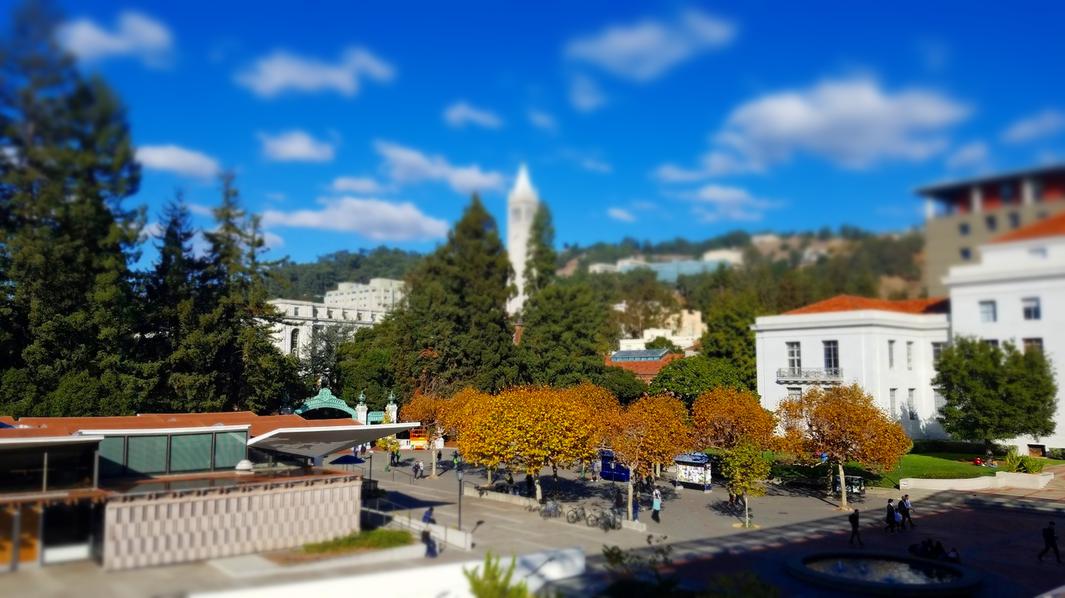
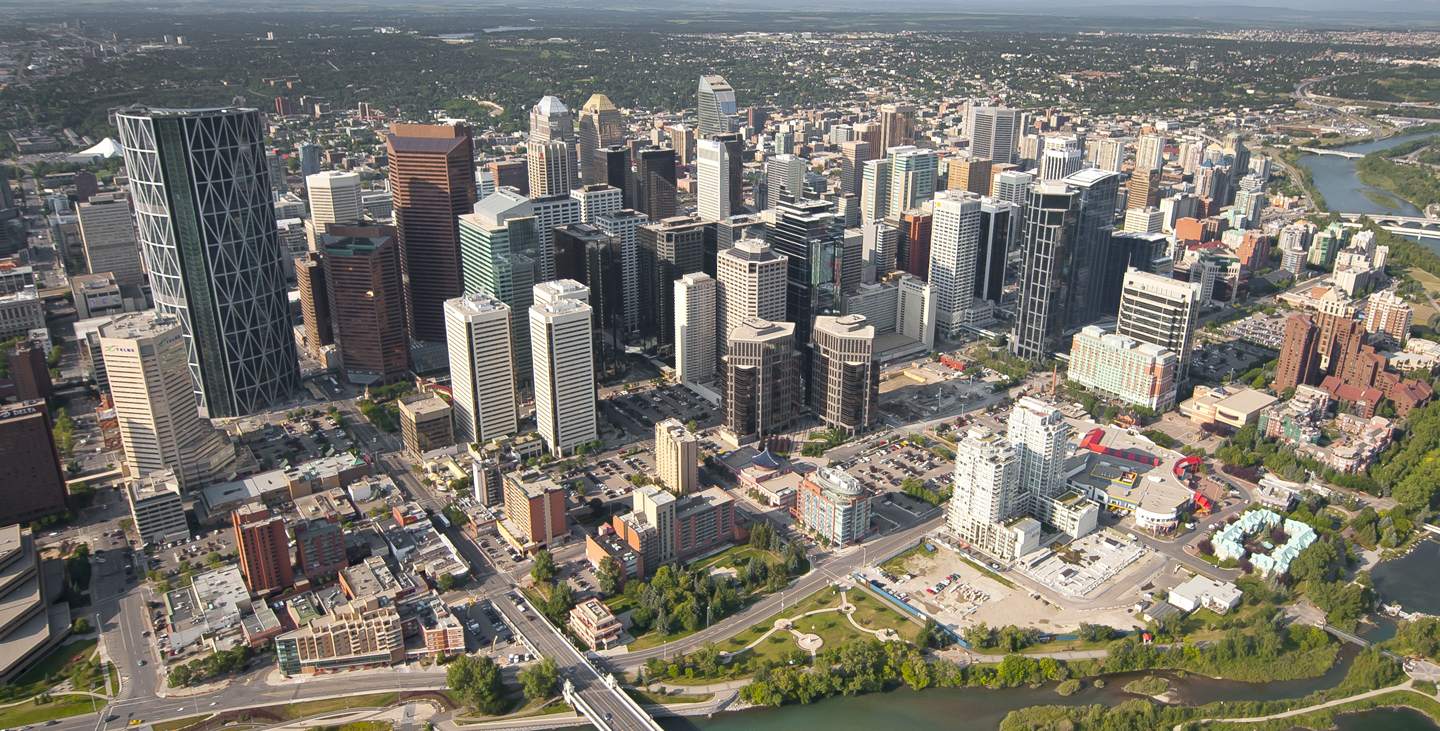
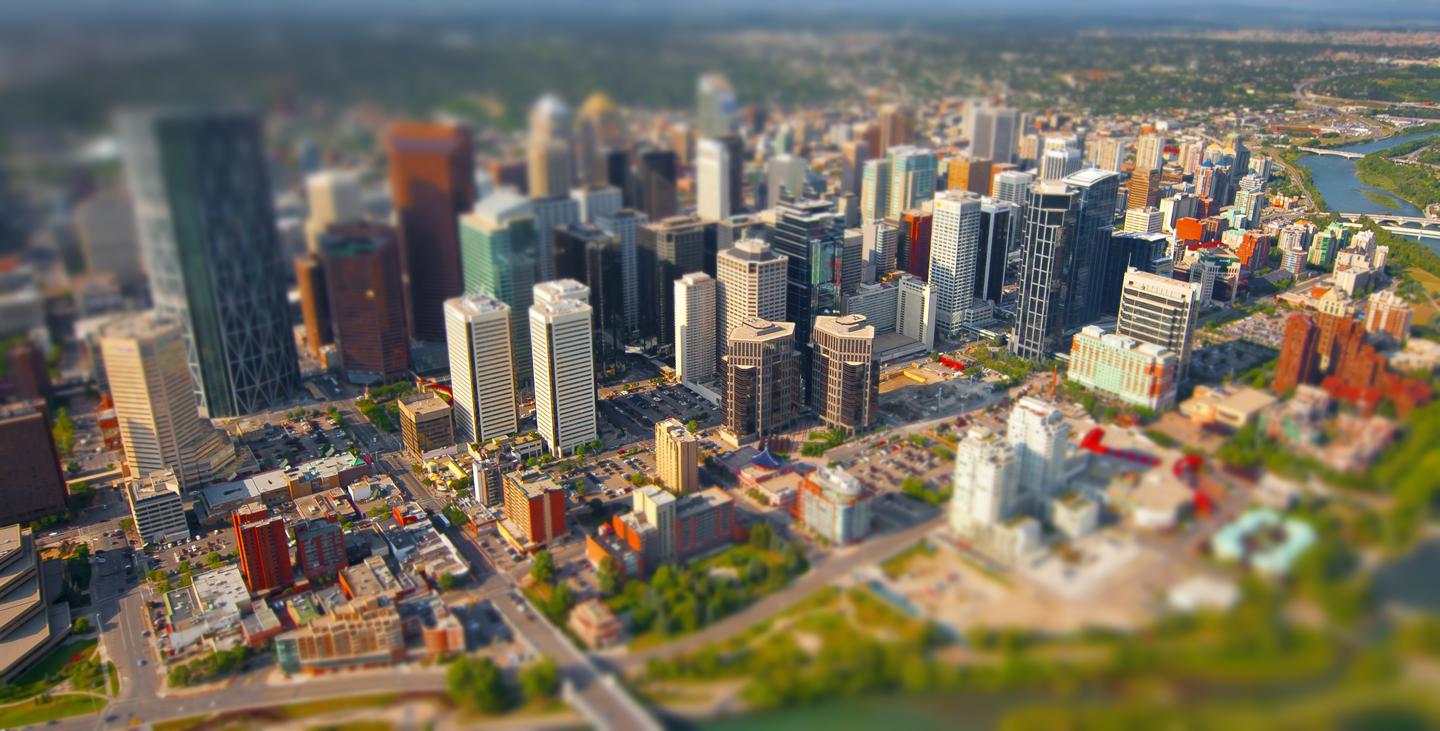
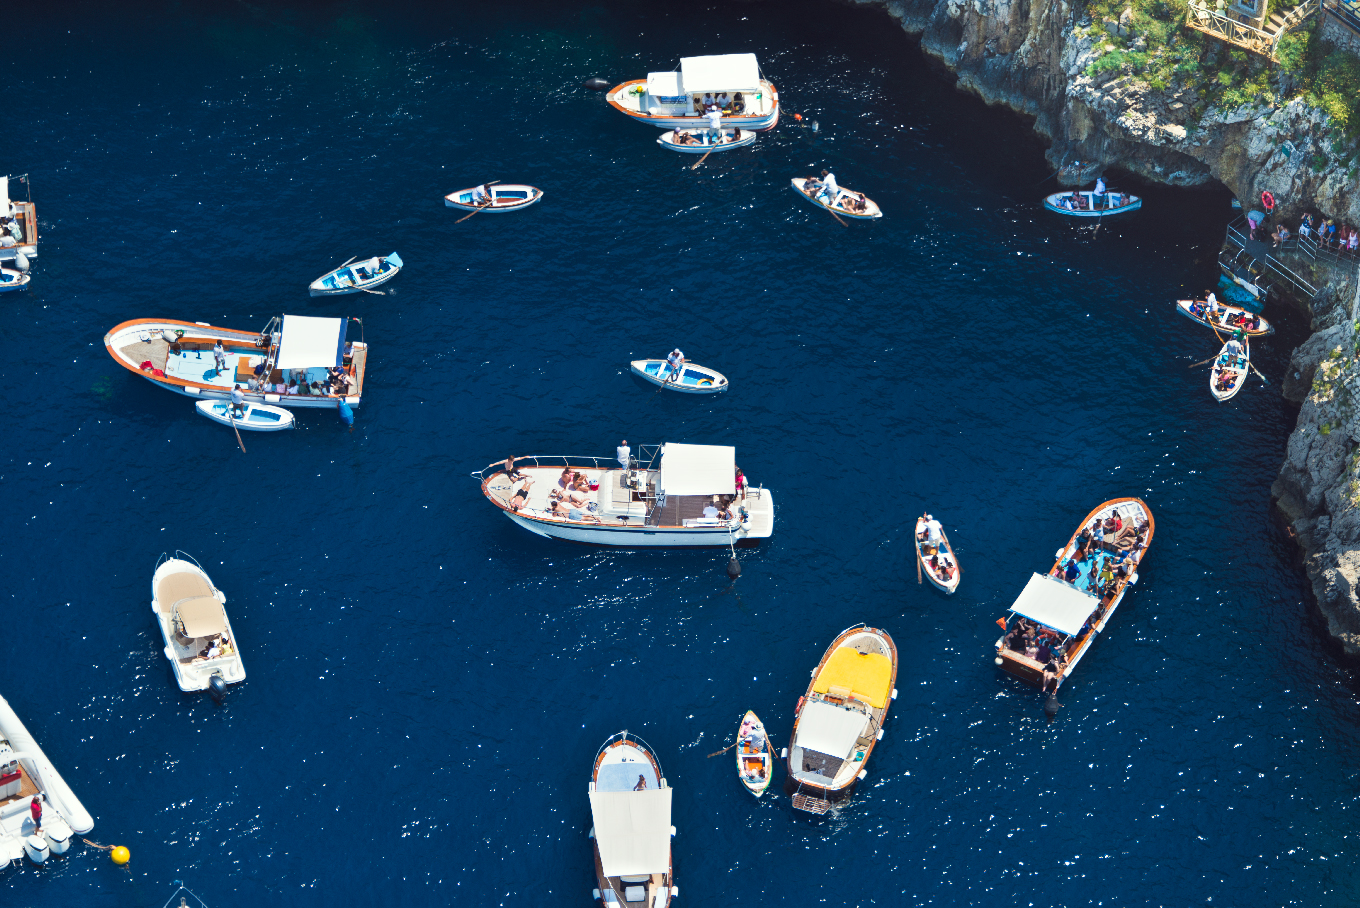
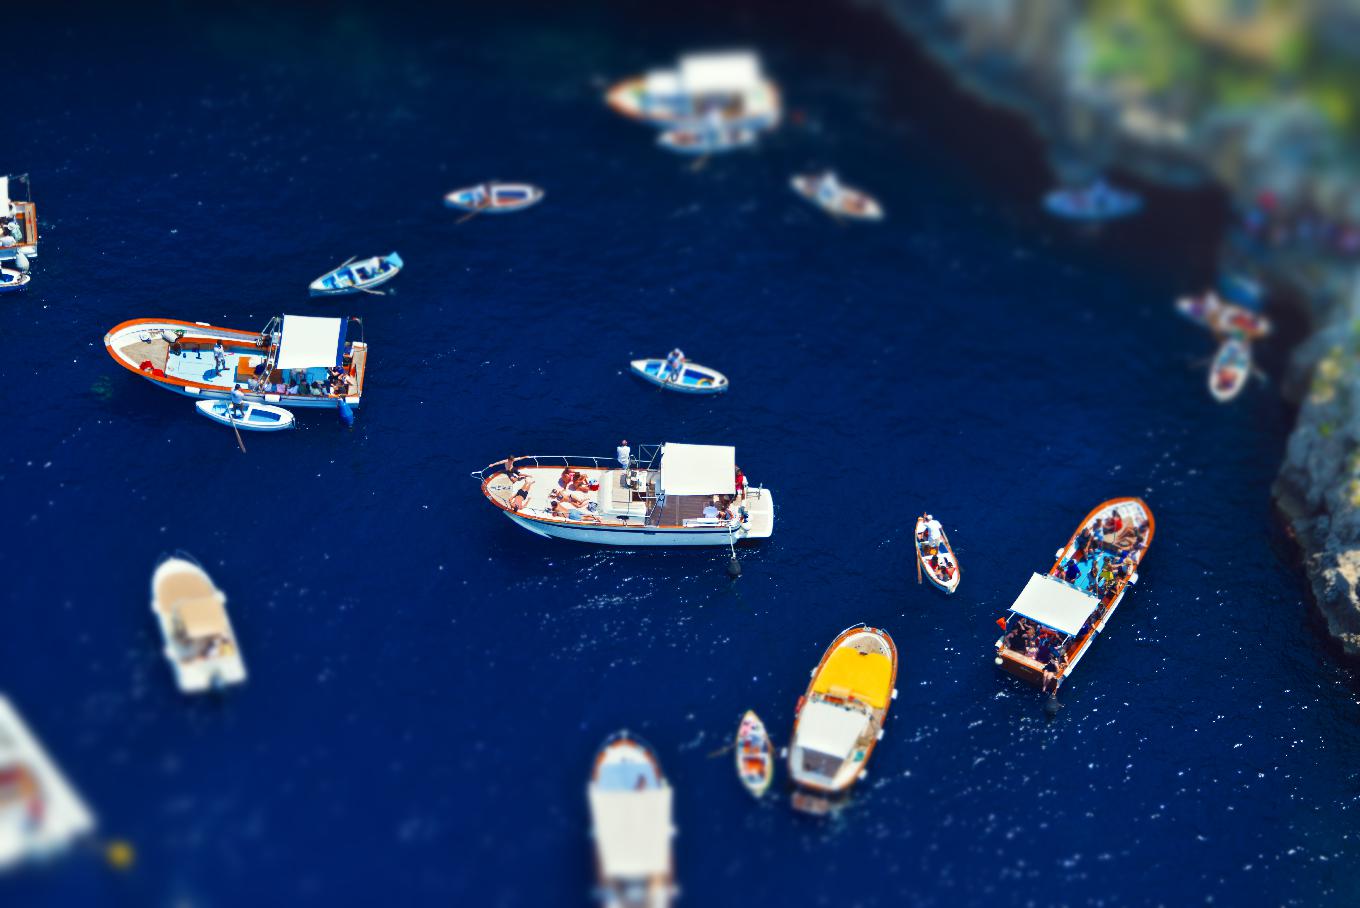
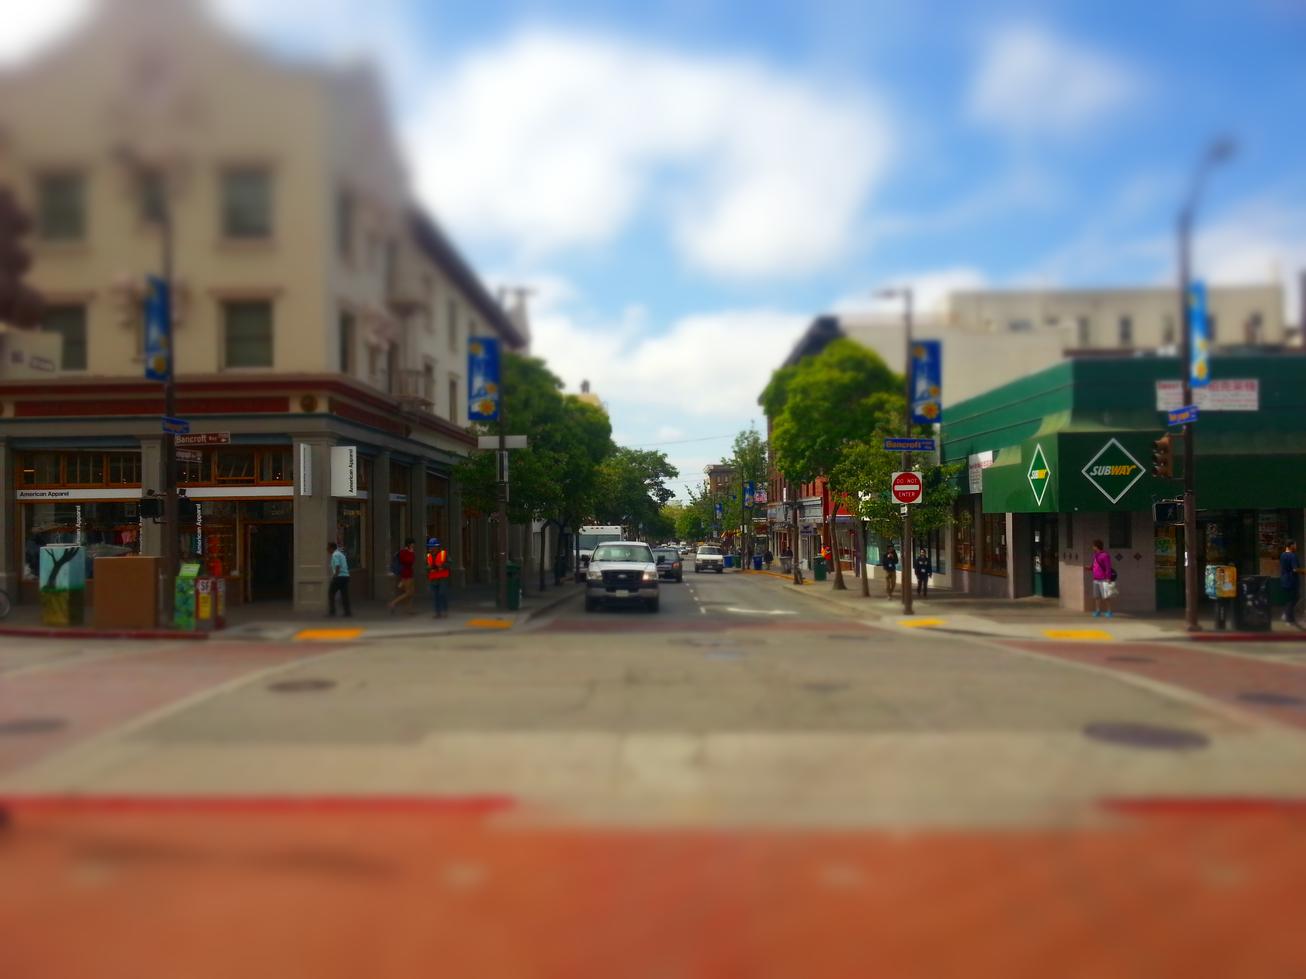
Fake Miniatures / Tilt Shift
Miniature faking (often associated with the tilt shift photography) is an illusion in which a photograph of a life-size location or object is processed to look like a photograph of a miniature scale model. This is done by creating a shallow depth of field that resembles close-up photography, making the objects in the image appear smaller than they are.
Setting A Focus Line and Increasing Saturation
The first step in creating the fake miniatures effect to is to set a focus line on which nearby objects will be focused. To do this, we created a simple interface to select two points to define this line. Additionally, to increase the miniatures look of our seen, we can increase the saturation of the image by some scale factor. This helps make the objects look more colorful and toy-like.
Fake Depth of Field
Next, we need to create our fake depth of field effect. We can do this first defining some size around our focus line that we want to have completely in focus. Using that size, we create a rectangular mask around the focus line. We apply a gaussian blur on the image and use the mask to select which parts of the image get blurred and part do not. To further increase the depth of field effect, we also can have several more levels (sizes) of masks that we can use to increasingly blur the image farther and farther away from the focus line. To make the blurring transition a bit smoother, I also blurred the masks some set amount.
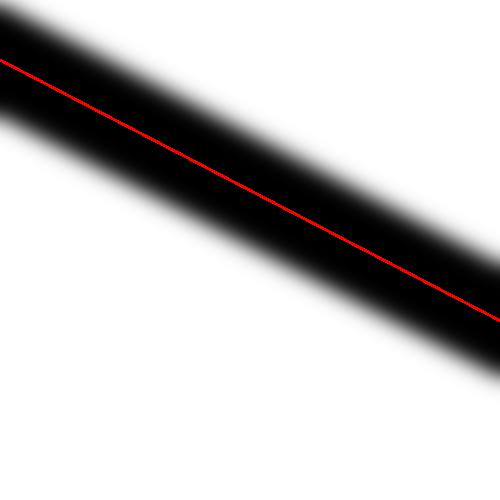
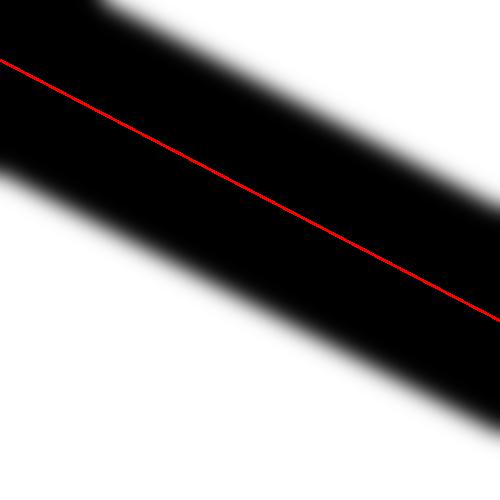
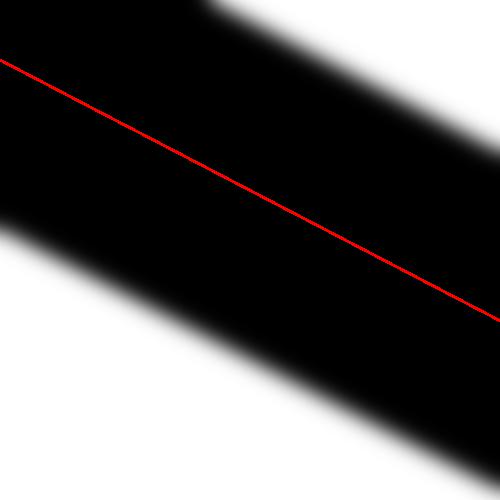
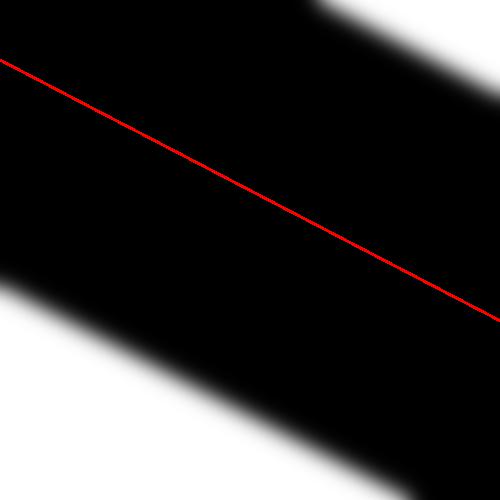
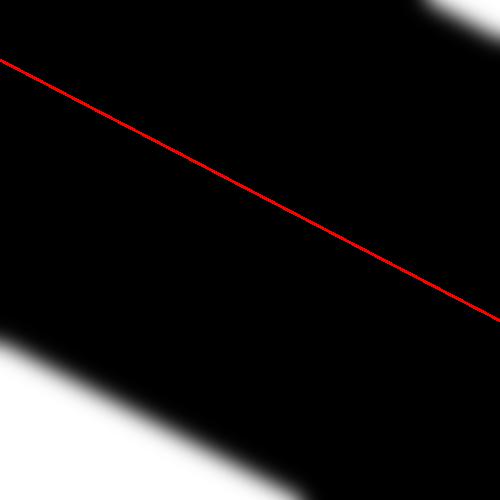

The above images show examples of 6 levels of masks. The red line defines the focus line which is calculated as the line between two user chosen points. The black areas represent the parts of the image that would not be affected by that level's gaussian blur where as the white areas represent the opposite. As a result, regions further away from the focus line will be blurred more times and this look more blurry and out of focus.
Results
And thats it! Combining all of those steps, we can create a convincing fake miniature effect. For each resulting image below, we first show the original image and then fake miniature version of the image.
Buildings
Boats
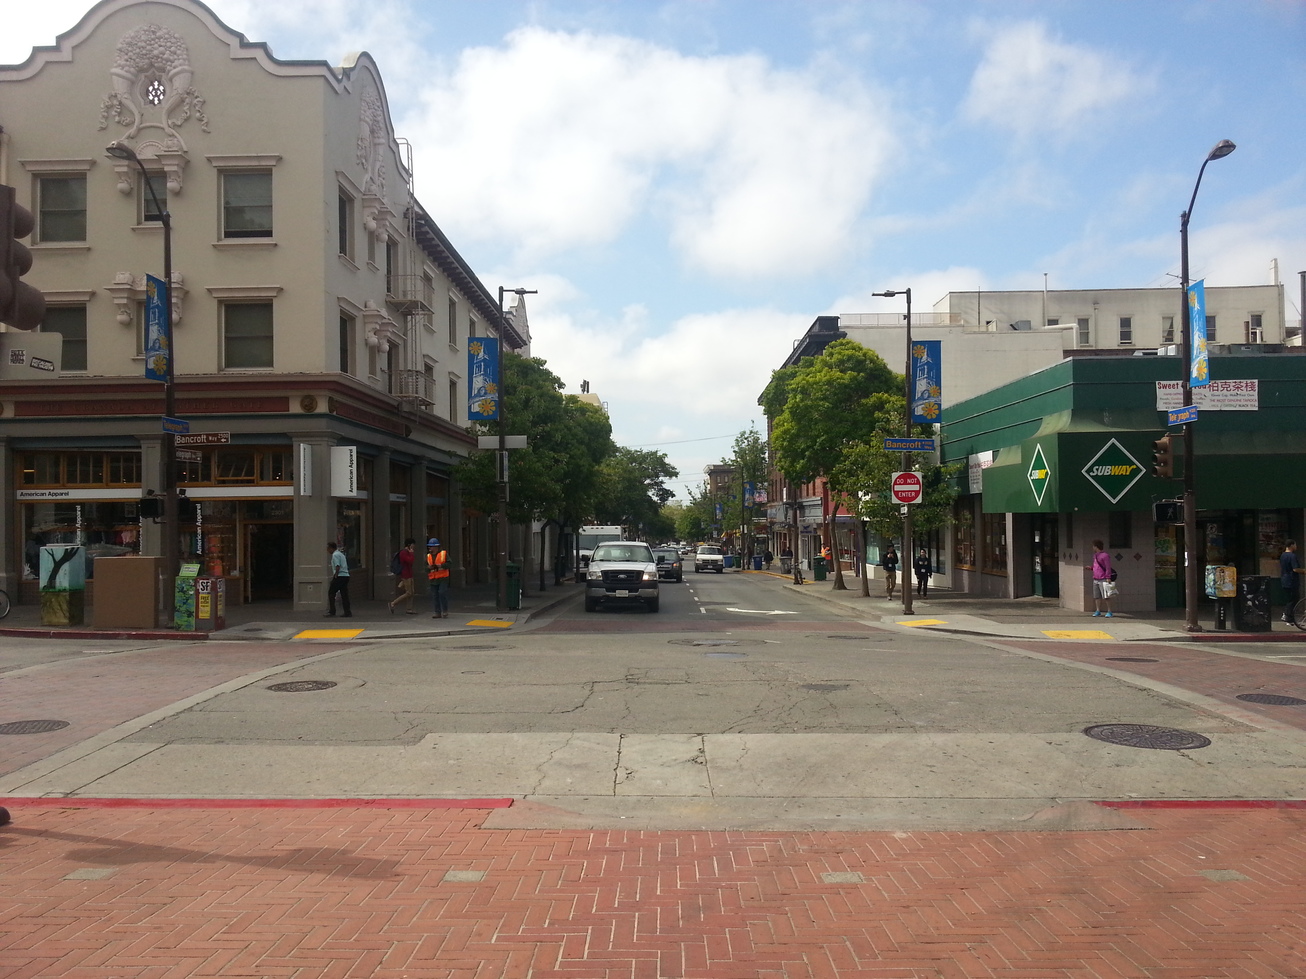
Telegraph
Sproul