Seam Carving
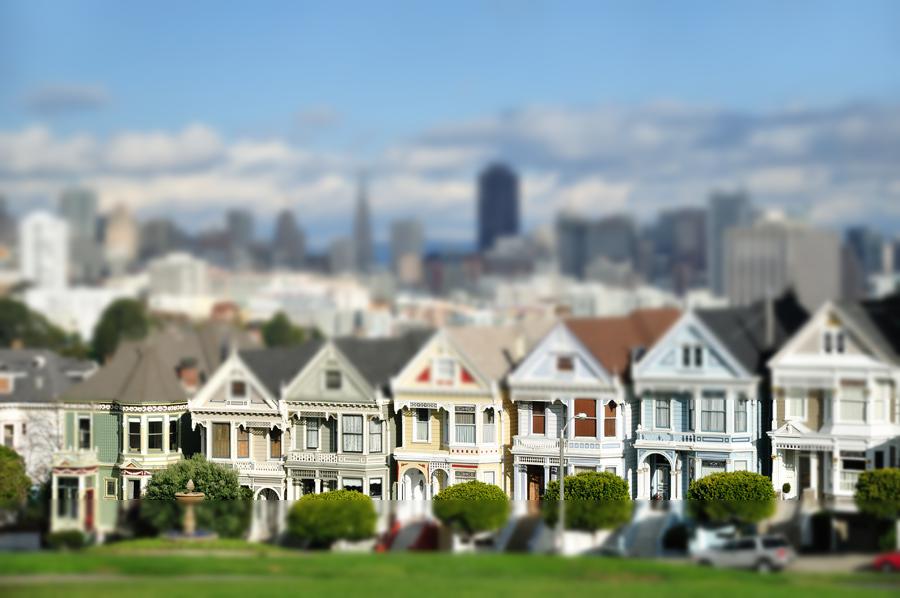
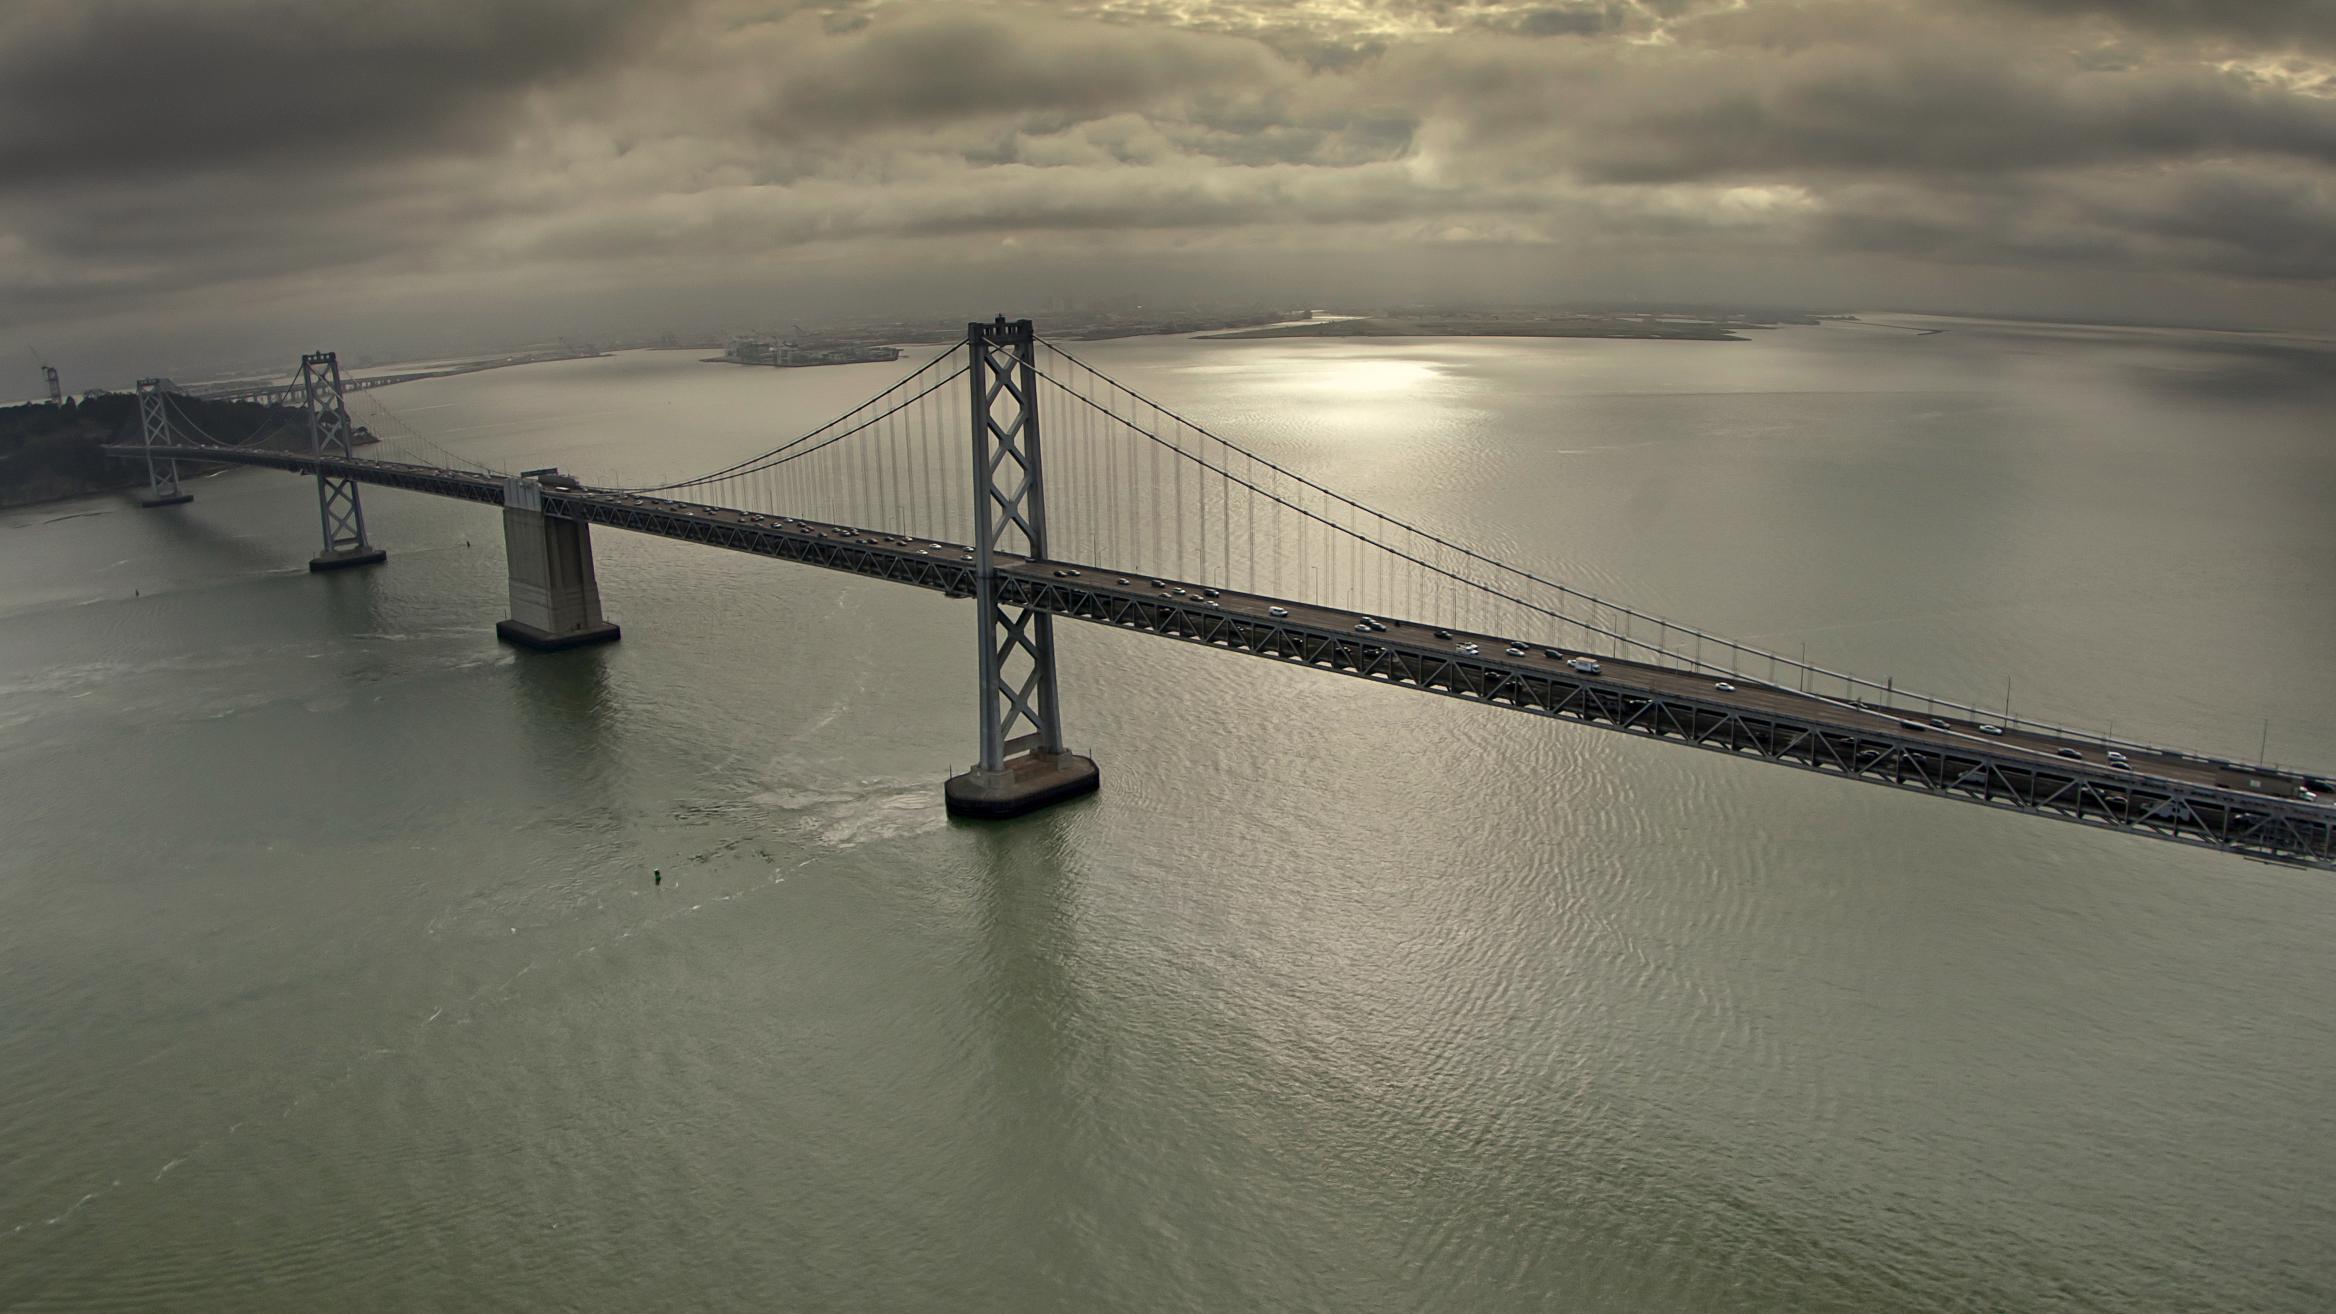
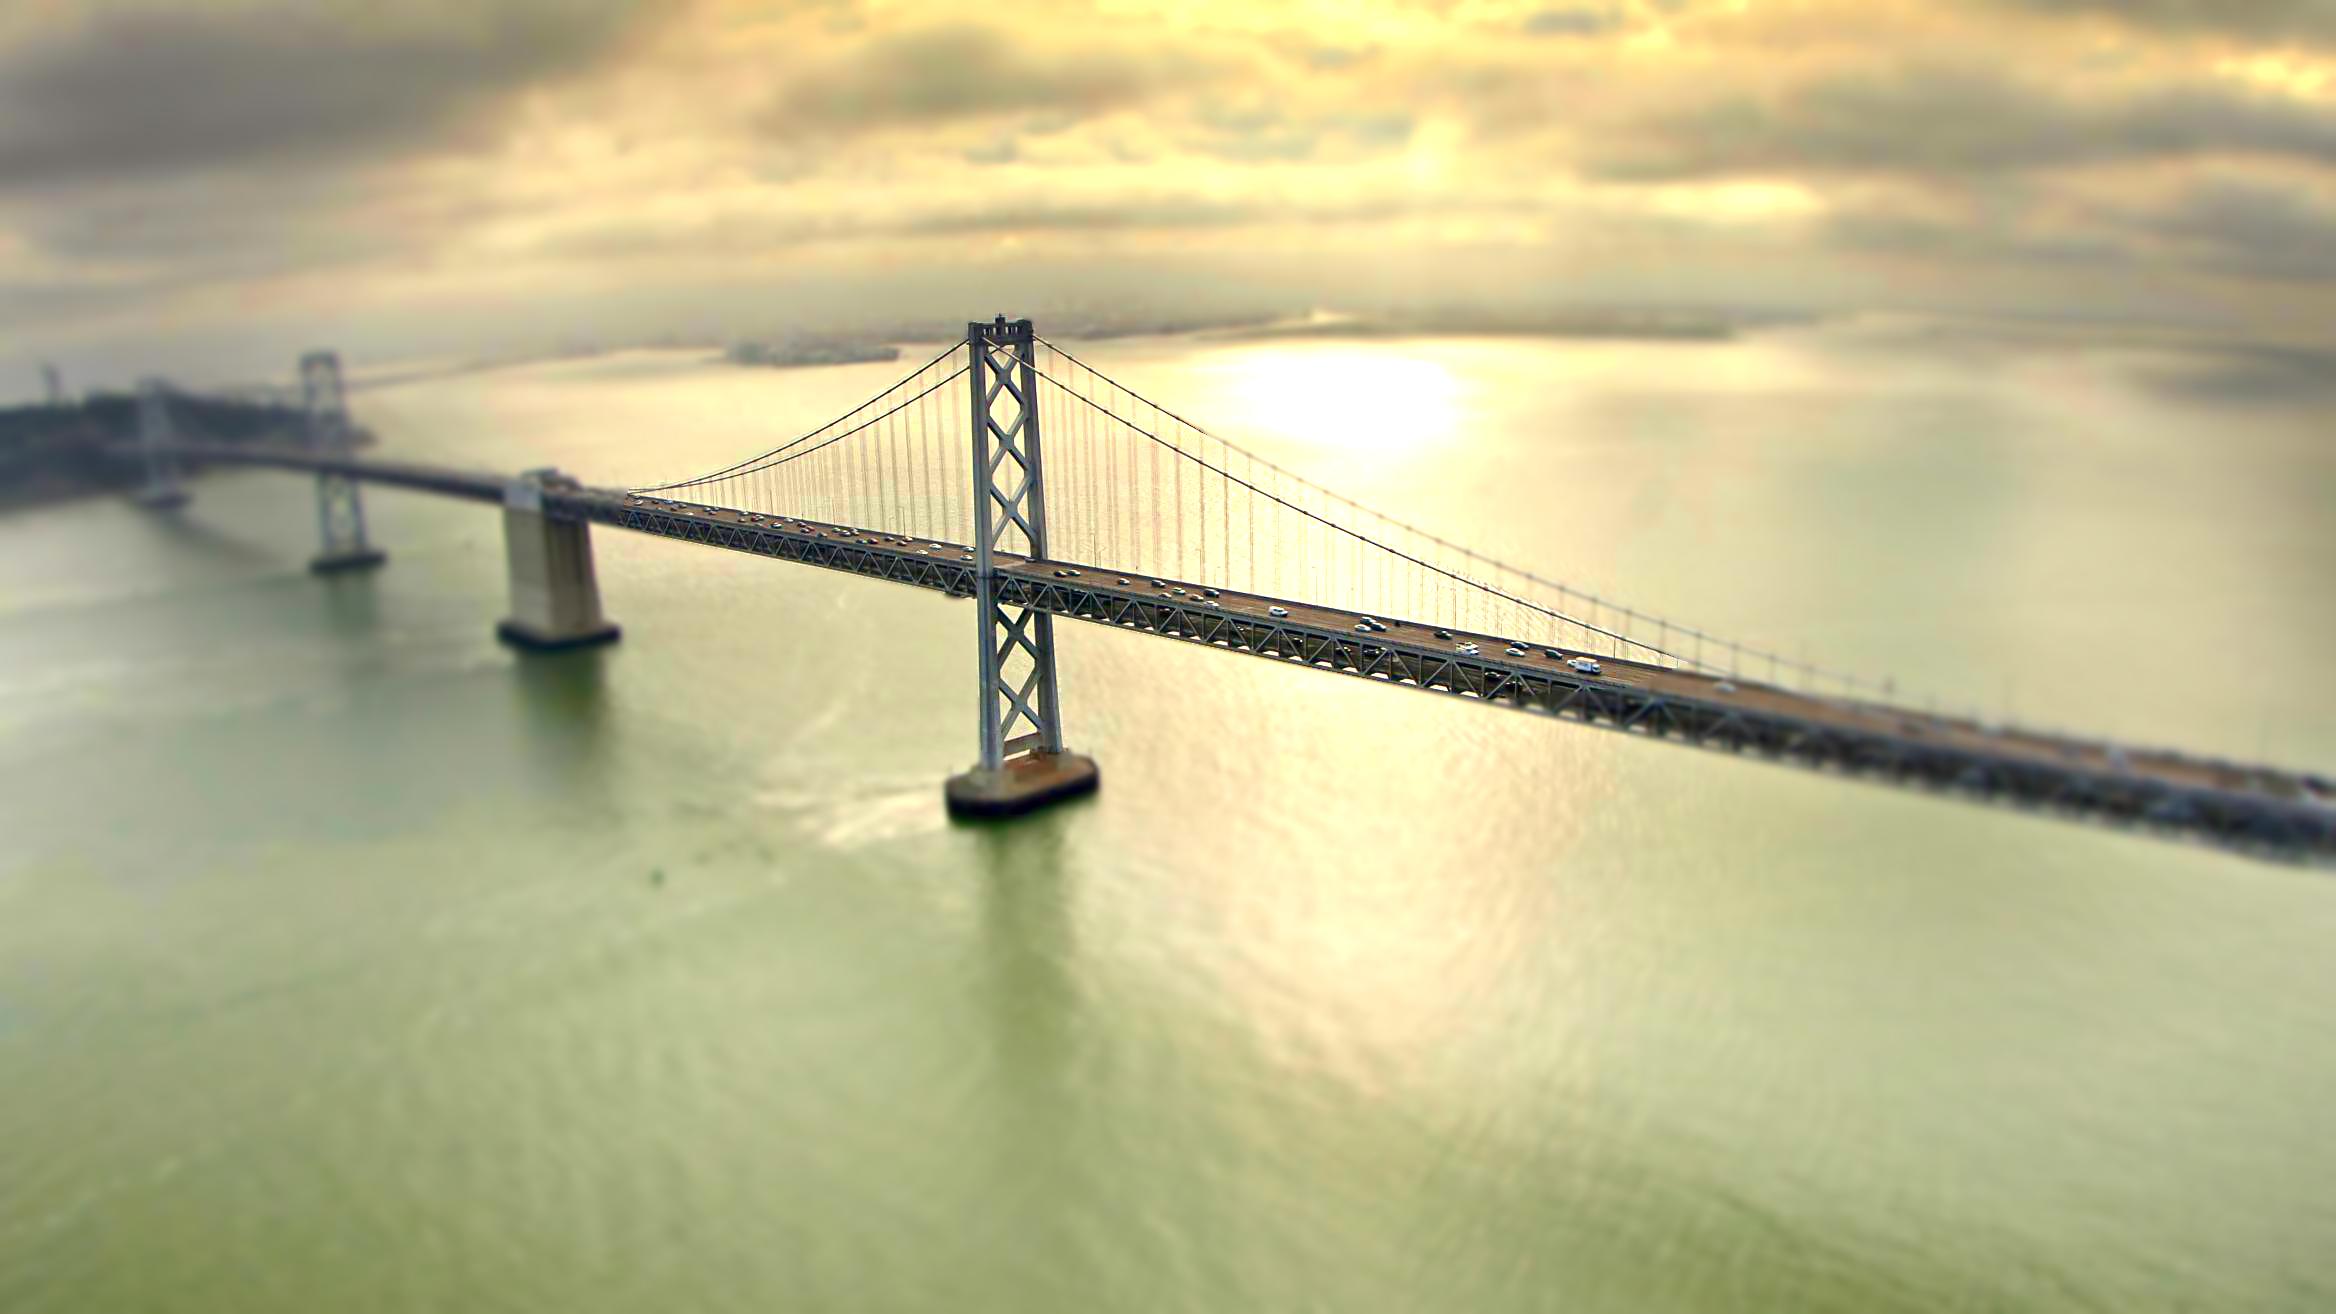
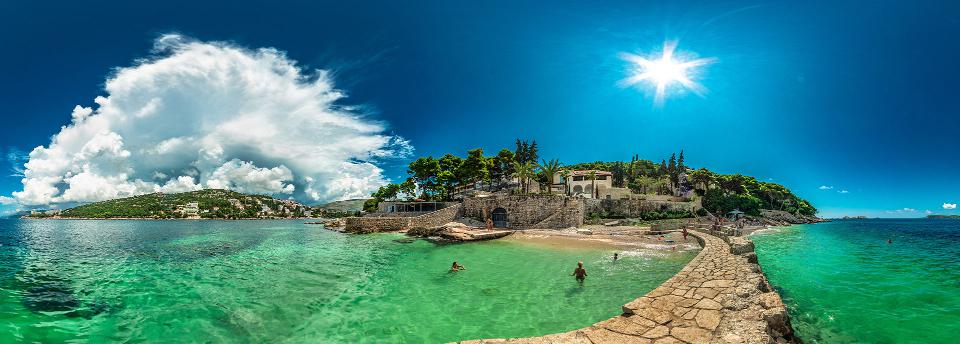
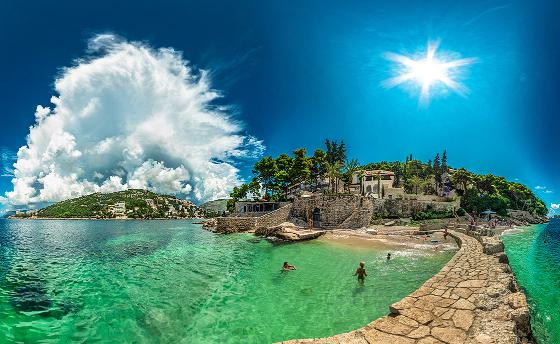
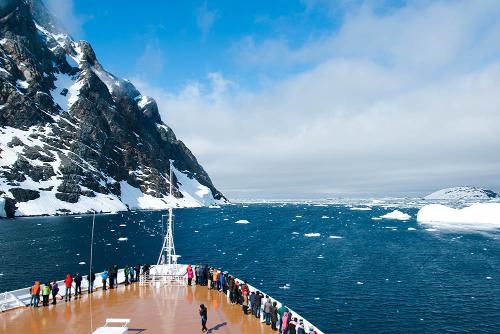
For this project I followed the algorithm detailed in Seam Carving for Content-Aware Image Resizing by Shai Avidan and Ariel Shamir. Below is the original image of one case where this worked particularly well.

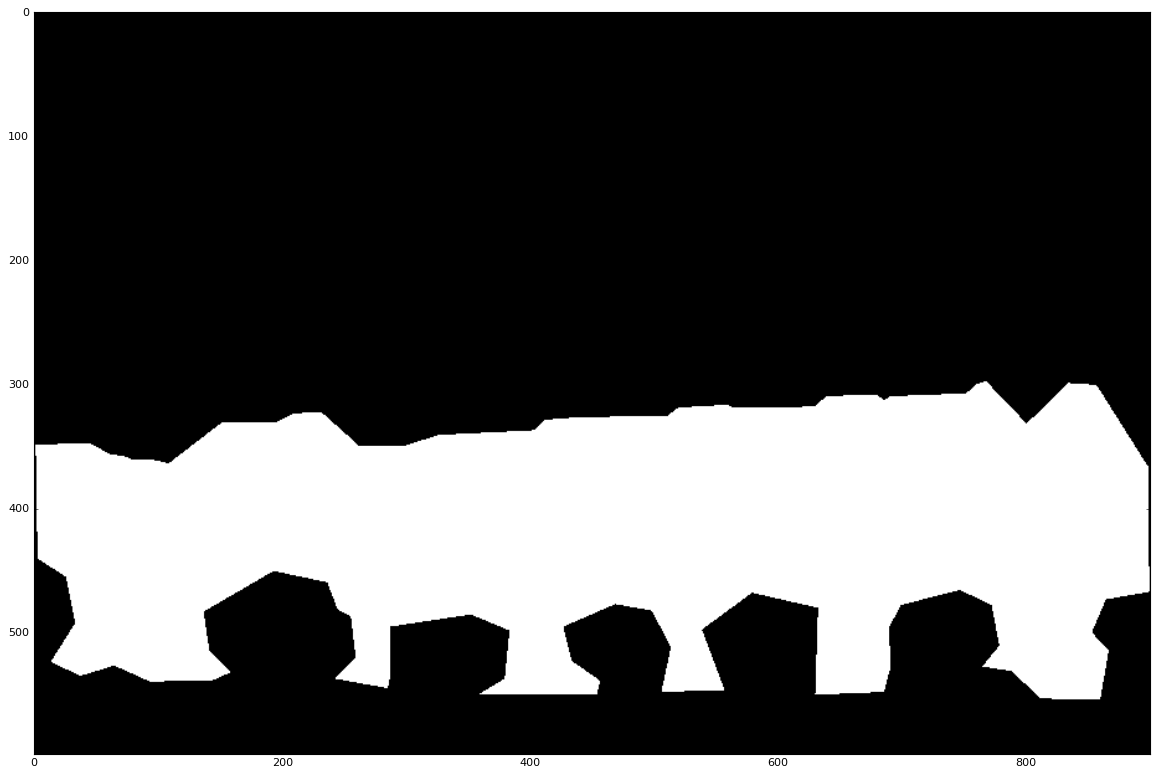
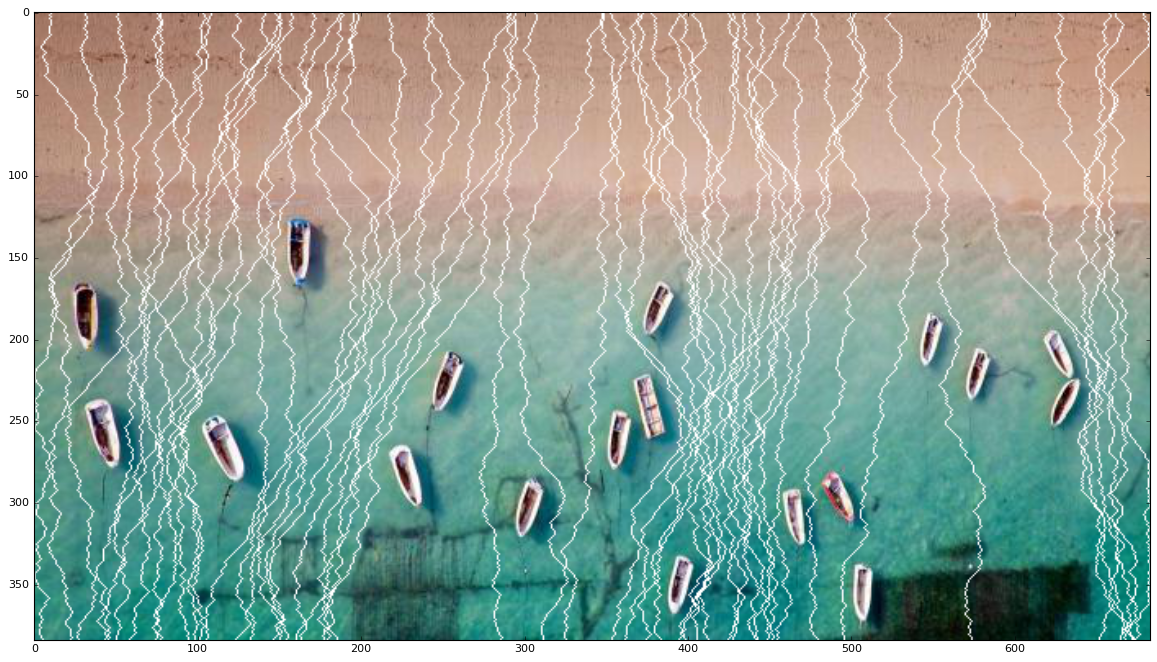
The first step was to figure out a suitable energy function that determines how "removeable" a certain pixel is. For this I used a laplacian operator as the energy function. The reasoning behind this is that our eyes are quick to notice large gradients, so these pixels should not be removed if possible. After this I followed the dynamic programming algorithm outlined in the paper to the cumulative energy for each seam.
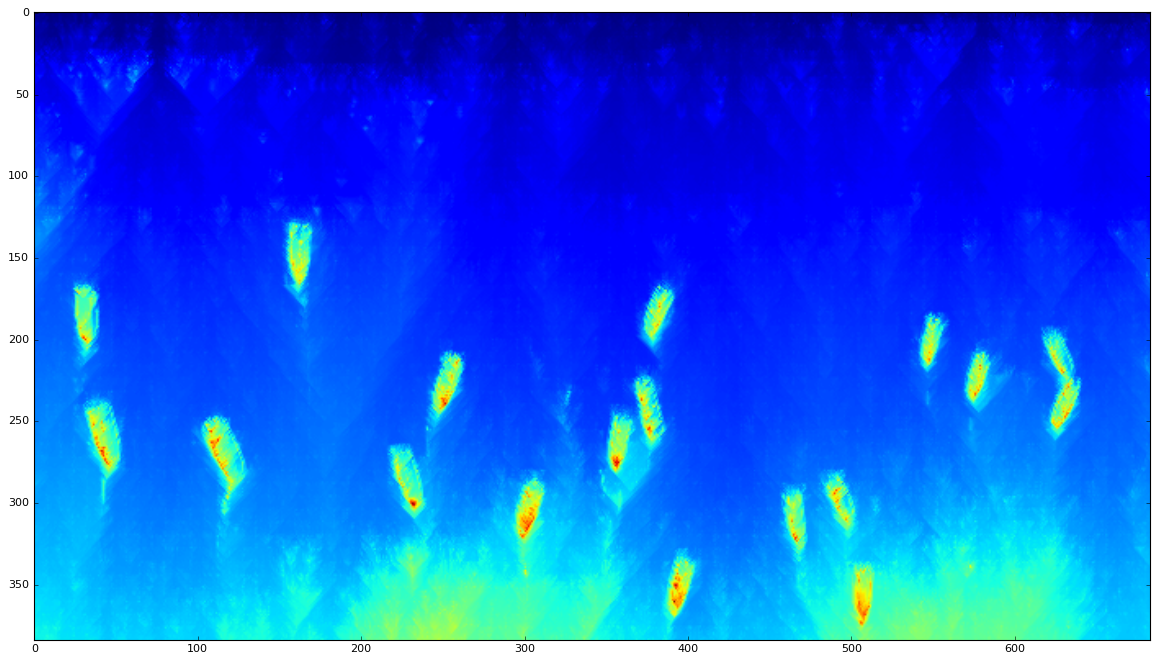
After calculating the optimal seam, I remove it from the image and repeat the process until the desired dimension is reached. To change both the x and y dimensions I remove vertical seams until the desired x dimension is reached then I transpose the image and repeat the process to reach the desirec y dimension. The first 50 seams for this image are shown below.
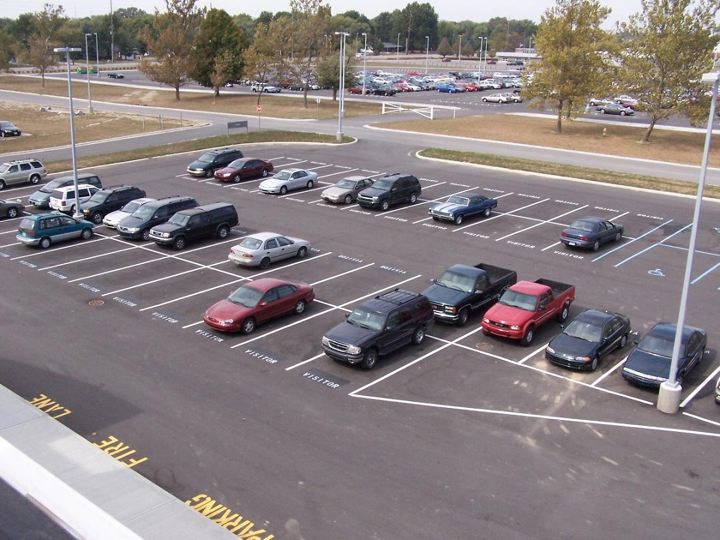
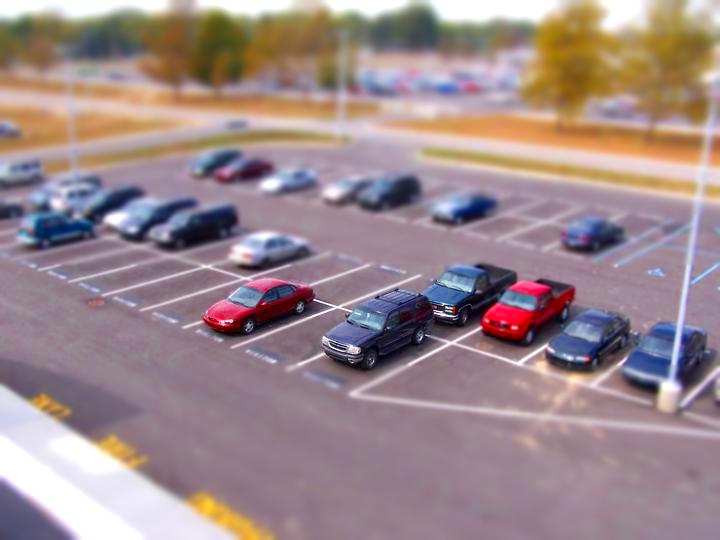
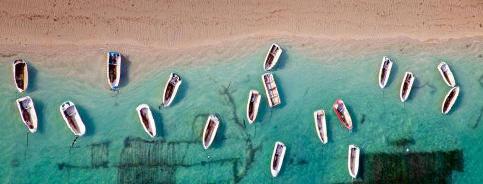
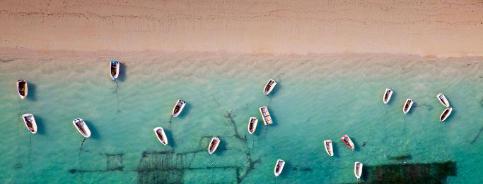
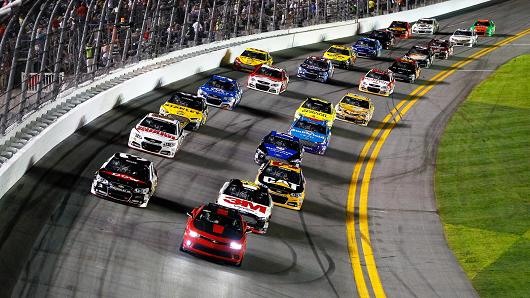
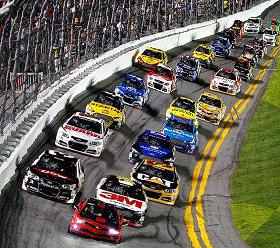
 The original image was 384x683 and the resized image is 184x483. Compared to the scaled version, it is clear
that this method preserves more detail. Rather than uniformly scaling the entire image, regions that are
unimportant are removed first. This results in the boats being the same size and closer together. Another
disadvantage of the scaled image is that it does not preserve the ratios of the boats, and they appear
compressed.
The original image was 384x683 and the resized image is 184x483. Compared to the scaled version, it is clear
that this method preserves more detail. Rather than uniformly scaling the entire image, regions that are
unimportant are removed first. This results in the boats being the same size and closer together. Another
disadvantage of the scaled image is that it does not preserve the ratios of the boats, and they appear
compressed.
| seam-carved | scaled |
 |
 |
Success Cases
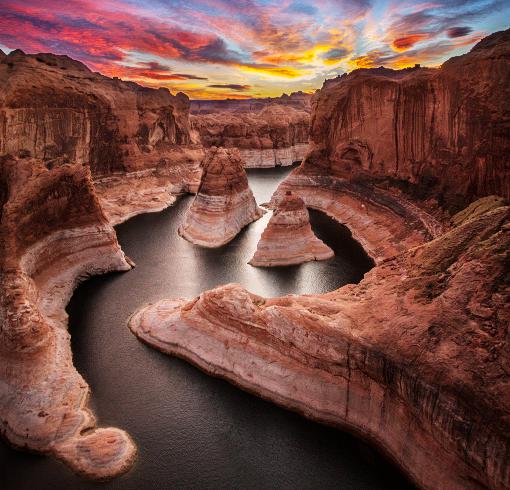
This method works very well for images that are sparse and images that do not contain too many straight lines.
| original | seam-carved |
 |
 |
 |
 |
 |
 |
 |
 |
 |
 |
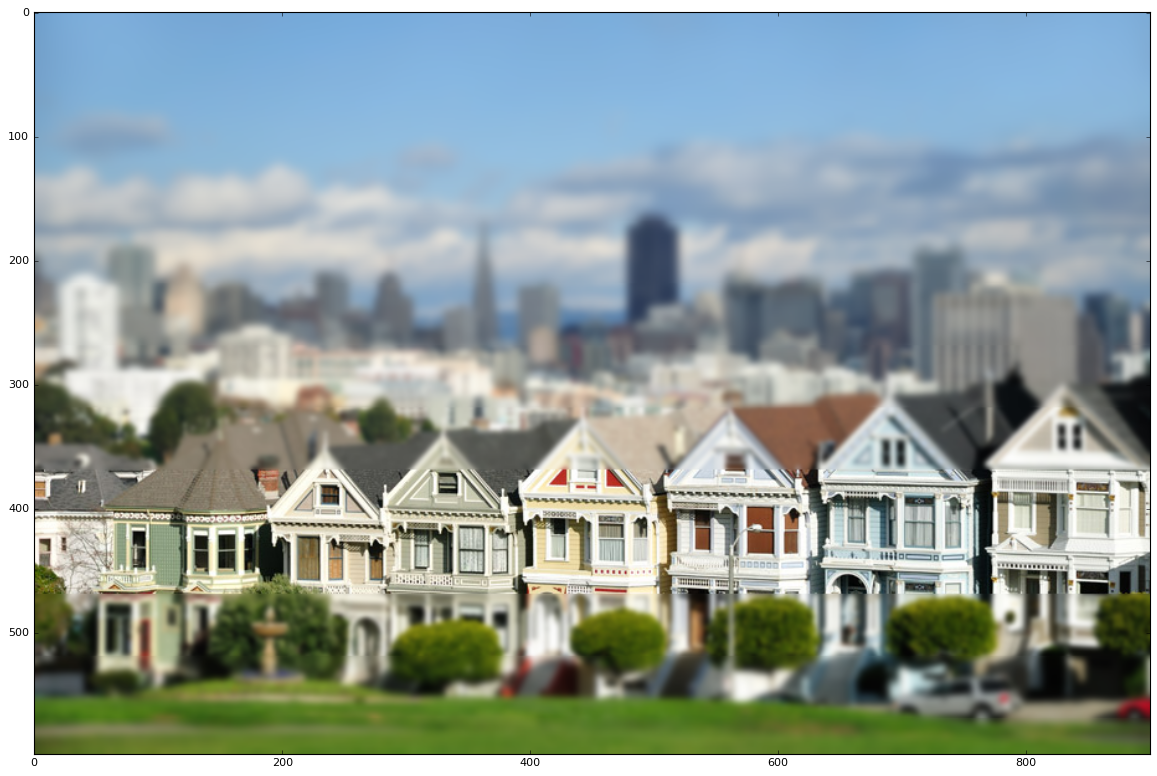
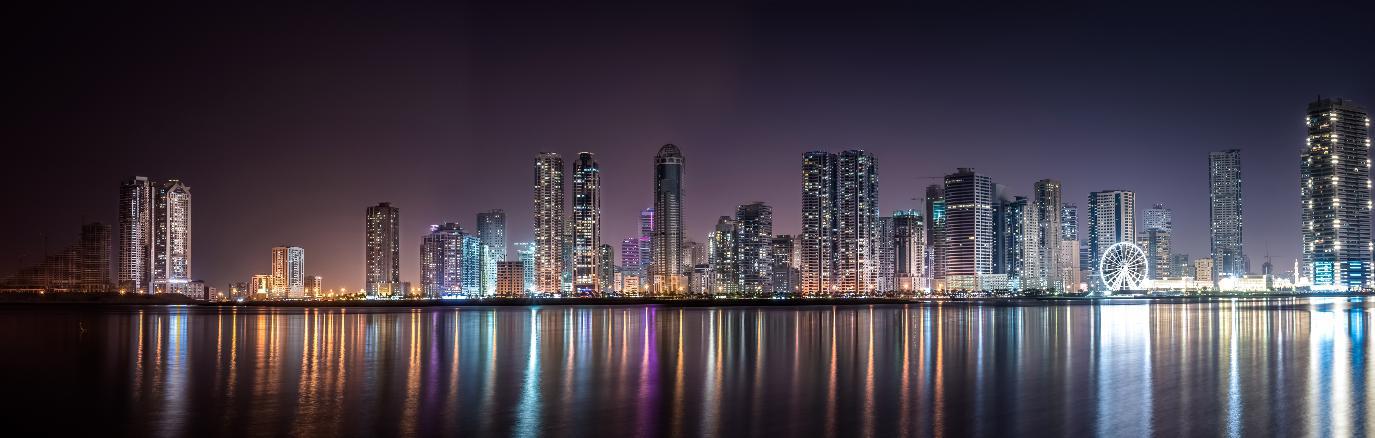
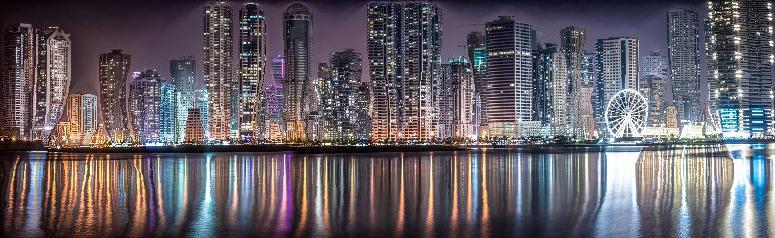
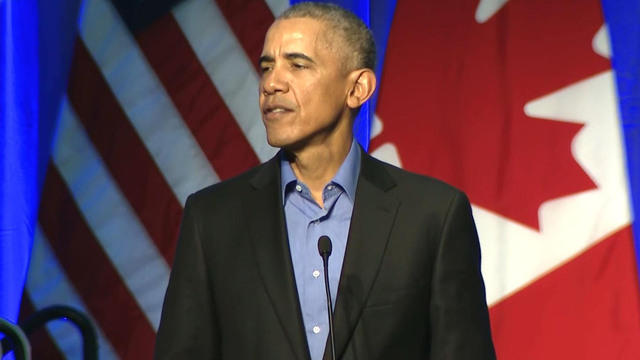
Failure Cases
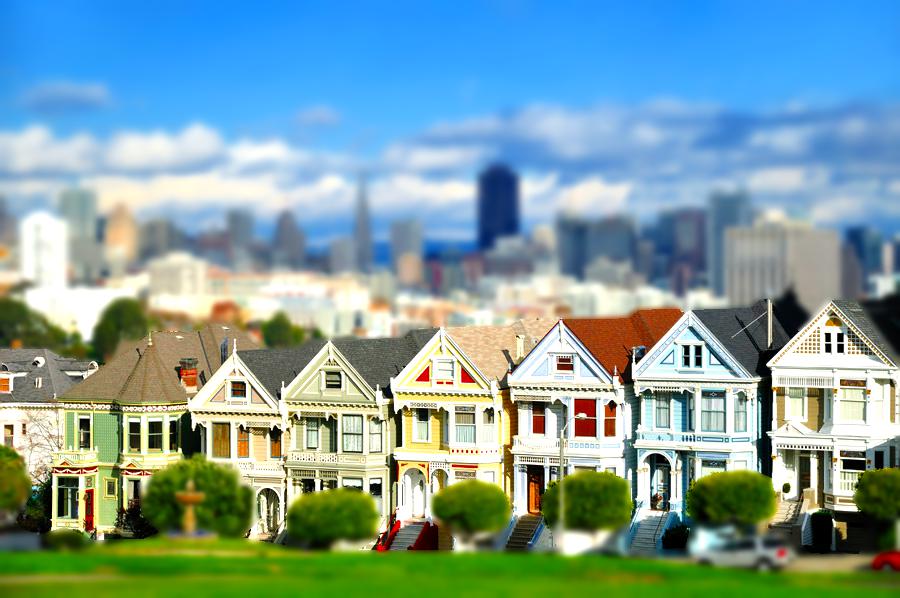
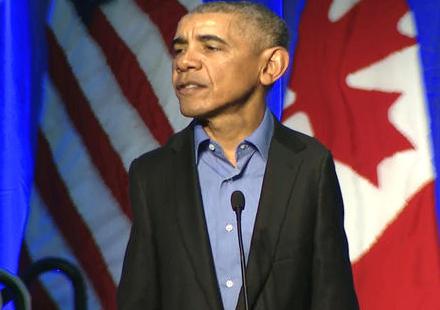
For the following images, this method resulted noticeable artifacting. These images tend to be very dense or contain long, straight lines that cannot be cut cleanly with a seam. In the Lego image, there are many vertical lines that make it very noticeable when seams cut diagonally across them. A similar effect occurs in the skyline image. The algorithm is biased toward removing the pixels from the empty spaces between the buildings. However, since there are so many empty spaces at the base of the buildings, the algorithm removes pixels more uniformly at the bottom of the buildings. This resultsin the the buildings warping and looking like noodles due to the uneven removal of pixels. The same thing occurs with the picture of Obama. Pixels are disproportionally removed form his body and the surrounding background, so his head looks too big.
| original | seam-carved |
 |
 |
 |
 |
 |
 |