Introduction
The final project for this class was to complete 2 projects from a list of prescdibed projects. I have chosen the Vertigo shot and Seam Carving projects.
Vertigo Shot
The vertigo shot, or "dolly zoom", is a classic cinematic shot that aims to zoom the background of a scene while keeping the subject at a constant size. This effect is produced by moving the camera physically closer to the subject, while also increasing the FOV of the camera. The result is that the subject takes up the same amount of space on the projective surface, but everything else in the scene has been zoomed out. To achieve this effect, my friend Alice and I went around campus with a Sony a230 digital camera and a tripod. To keep objects at the same size, first we got as close to the subject as possible while zoomed all the way out, and aligned the subject to the indicators on the viewfinder of the camera. We marked that spot on the ground, and then found the furthest location from the subject while being zoomed in all the way that had the subject lined up in the indicators in the same way. This gave us a line that we could walk on and take various shots from, varying the zoom to line up the subject on the indicators. We took 5 pictures of each subject and created an animation to illustrate the effect. Here are some examples.
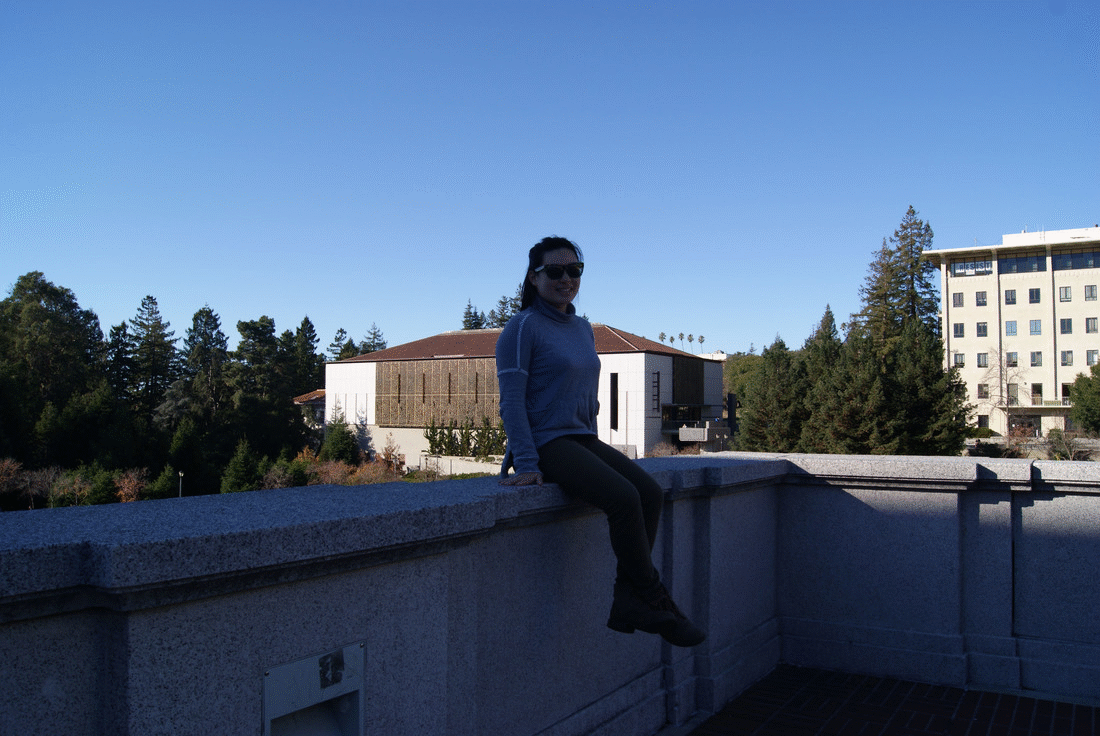
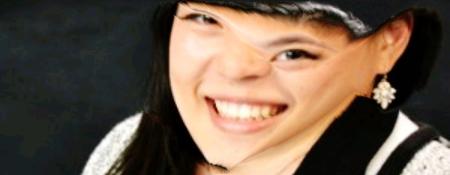
Alice
This is just a picture of Alice casually relaxing on a wall, as she is known to do. This was taken outside of Doe library.
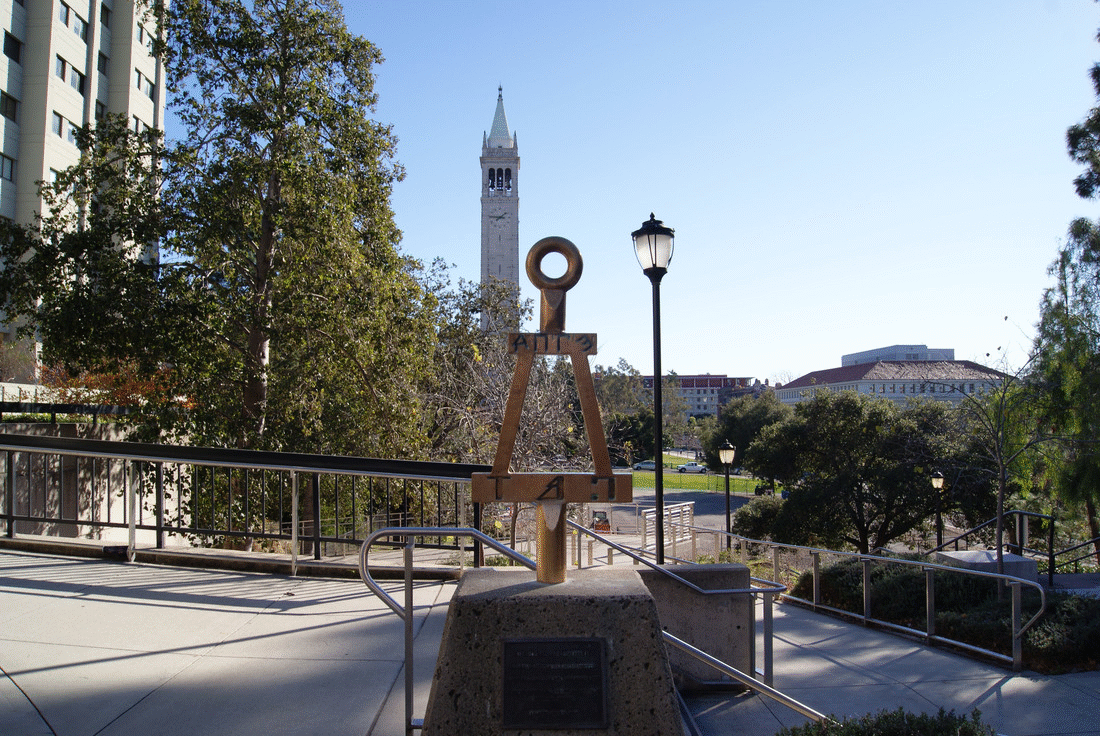
TBP Bent
The TBP Bent is a statue commemorating the Alpha chapter of Tau Beta Pi. It is near Sibley Auditorium.
Seam Carving
Seam carving is a technique to resize images in a way that makes the resizing aware of the content in the image. The issue with standard resizing is that if we just scale an image in one dimension, important objects in that dimension will get squished.
Original Image

Image resized vertically by 200 px. The scale of the mountains in the distance is not preserved.
We do this by calculating an energy function for each pixel in an imagine, and then finding lines in this energy map that have the minimal amount of energy. Energy should associate with details in the image. Generally, lines (or "seams") are selected in areas that have little detail, and thus should be resized away first.
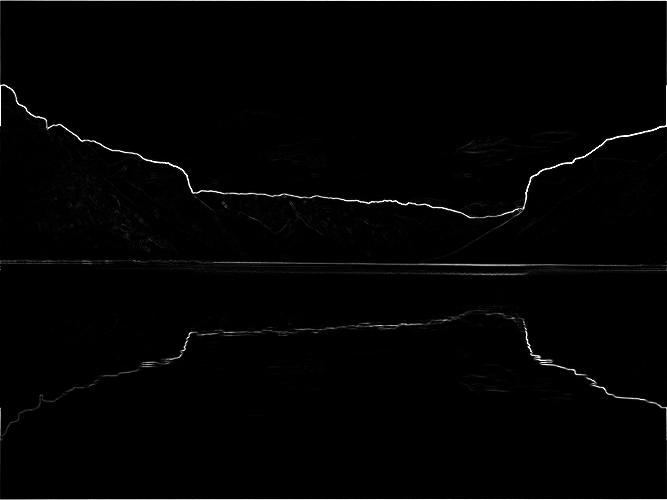
Energy function. Although difficult to see, there is some energy in the mountain range that will end up being a large seam deterrant.
The first seam to be removed from this image.
The energy function that we chose was to use the L2 norm of the derivative. This allowed for quick and pretty good results. The technique was applied to a series of images, as seen below.
Examples
Now we will show some examples of seam carving applied to images with quality results. Original images are on the left, carved images are on the right.
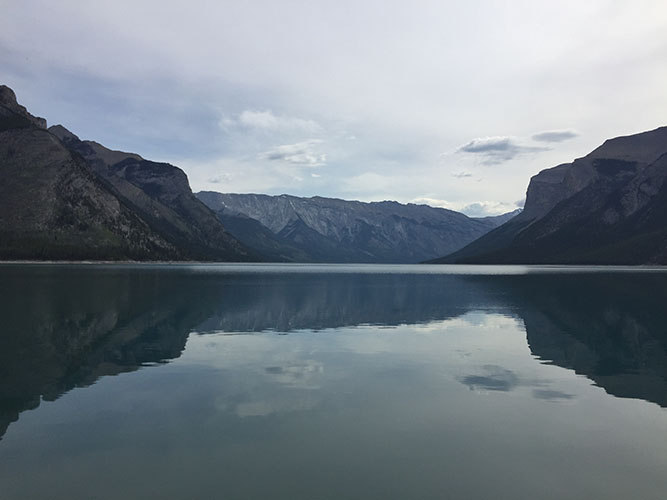
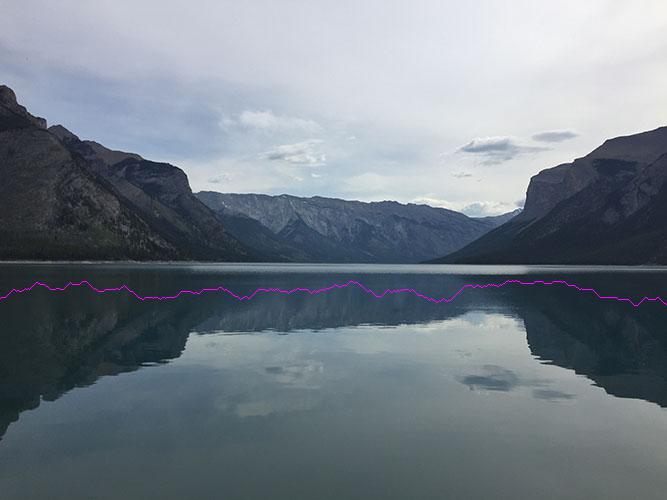
Lake Minnewanka
This photo was taken in Banff, Alberta, CA, outside of our campsite. I wanted to possibly make this my Facebook banner background without losing any of the details, so I shrunk it vertically with seam carving.
Lake Minnewanka
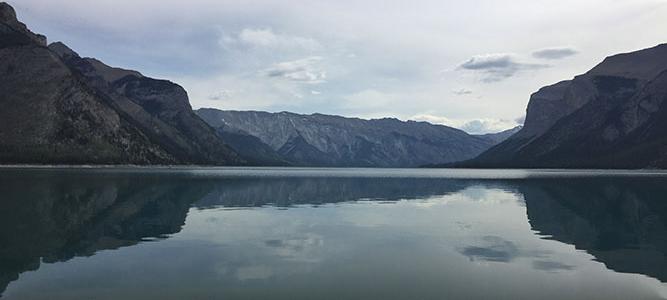
200 px removed vertically. The effect worked really well because there isnt a lot of detail in the very top and bottom of the picture, but seam carving would guarentee that any details in these areas would remain. The scale of the mountains is also maintained.
Lake Moraine
The photo on the left was taken by me this summer in Banff, Alberta, CA. It is in Lake Moraine, an iconic sight in Banff. I wanted to see how much of the iconic view would remain with some seam carving.
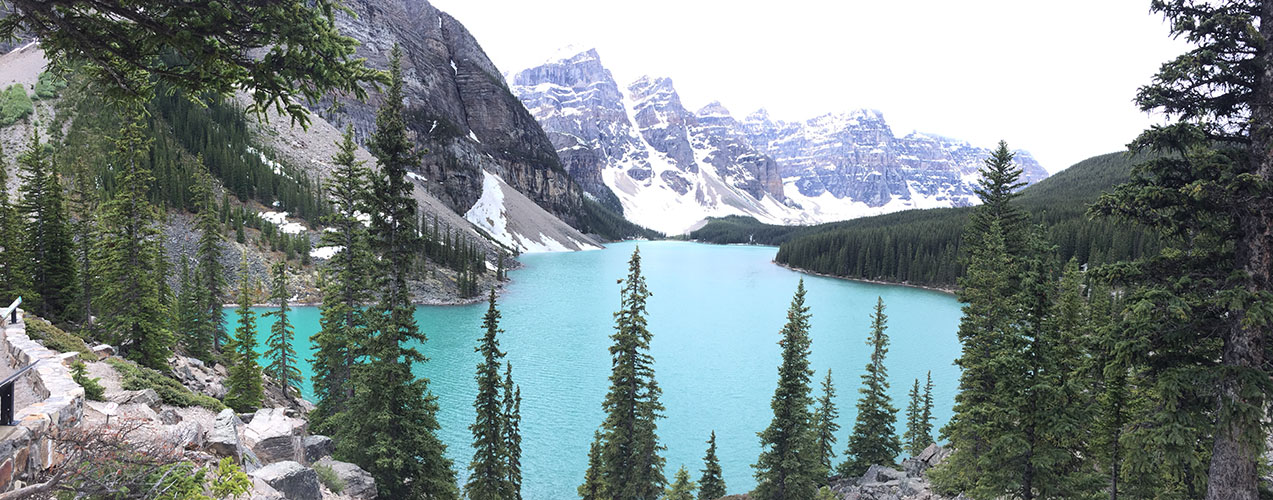
Lake Moraine
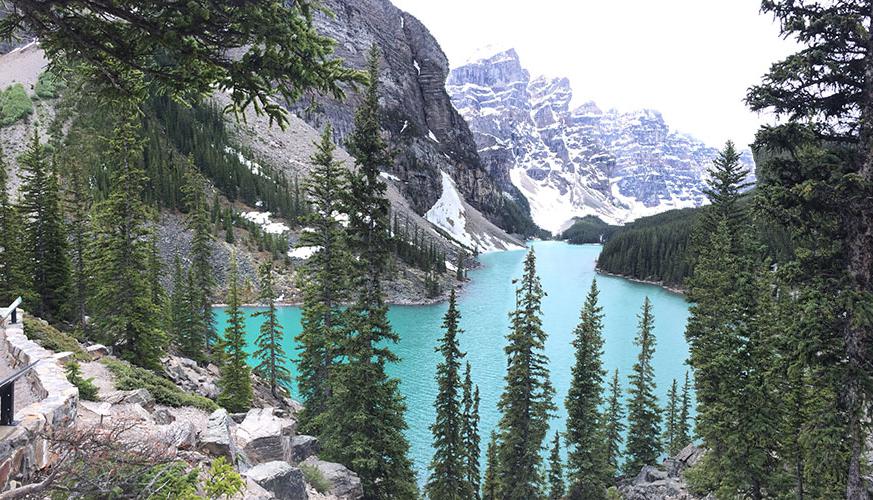
400 px removed horizontally. A much tighter view of Lake Moraine, with most of the details remaining. Some of the details in the peaks in the distance have been removed.
Golden Gate Bridge
This photo was taken from a Google Image Search of "Golden Gate Bridge". I tried to shrink the image horizontally by seam carving.
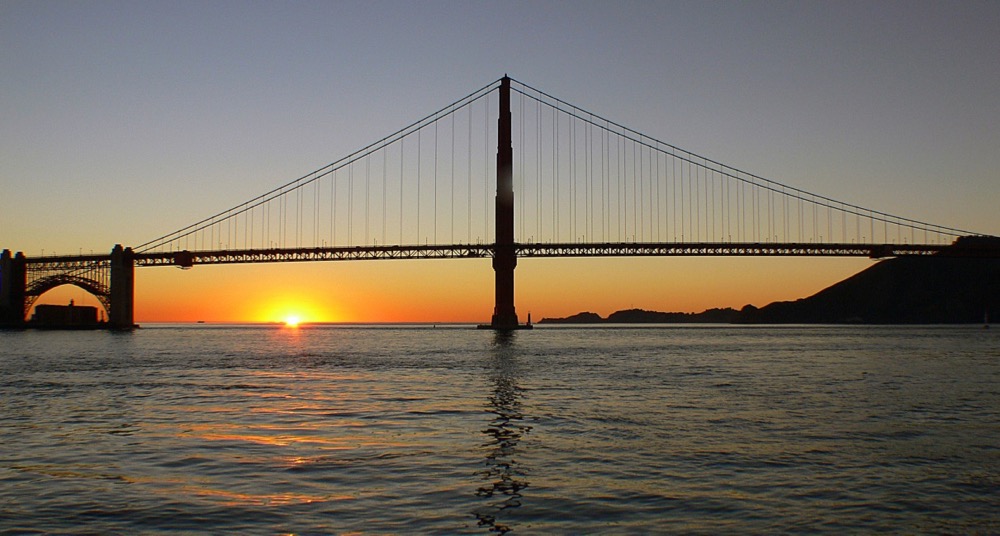
Golden Gate Bridge, SF
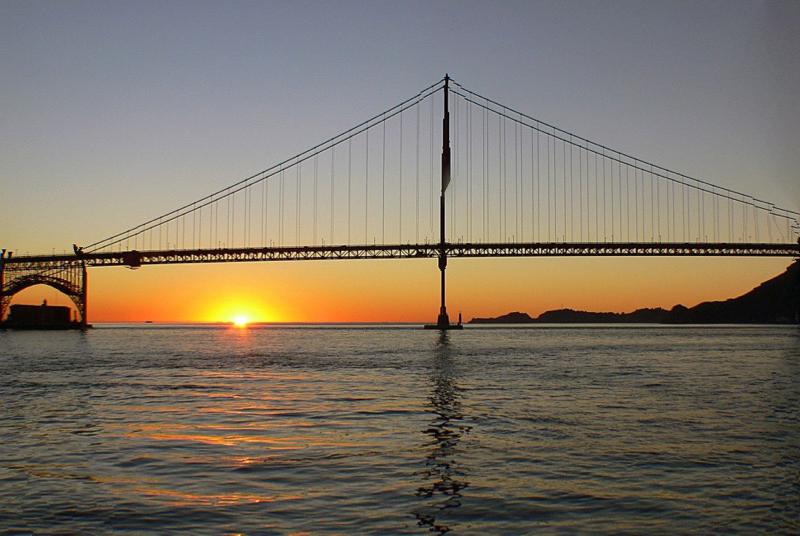
200 px removed horizontally. The effect wasnt great, because some of the seams it found were in the upright support of the bridge. An interesting result.
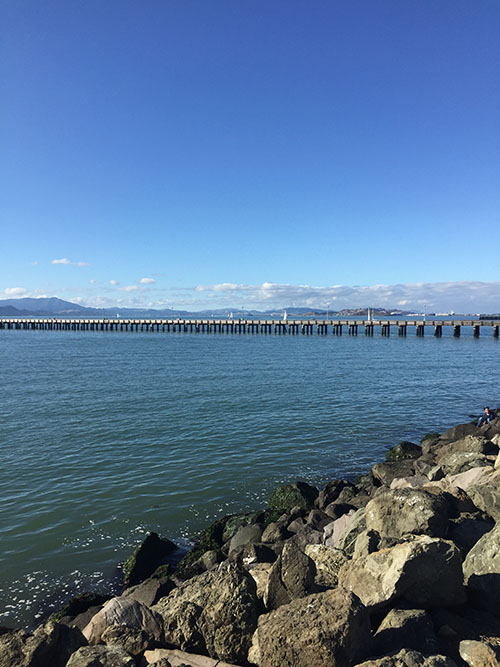
Berkeley Marina Pier
I took this photo at the Berkeley Marina. I made the classic mistake of making the image too tall by taking it in portrait mode on my phone. I tried to make the image more instagram friendly by shrinking it vertically.
Berkeley Marina Pier
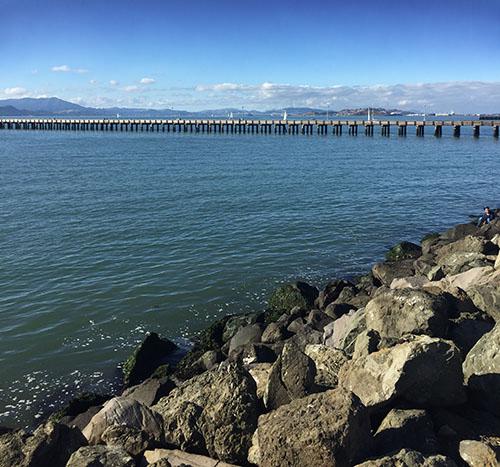
200 px removed vertically. I think the effect turned out really well for this one, because all of the detail remained in the image.
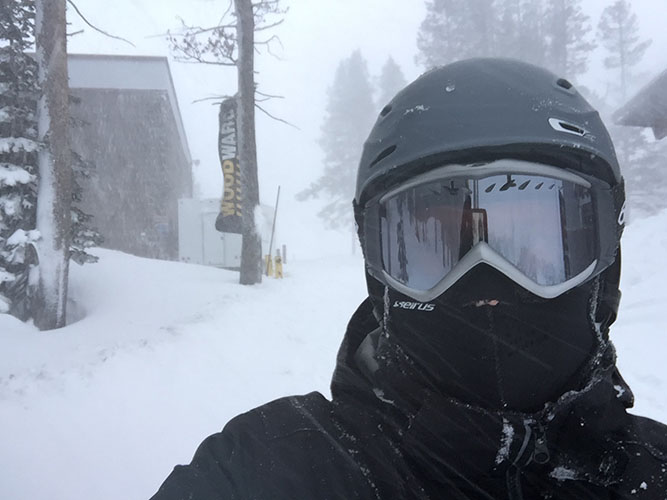
Snow Storm
Last winter was cold and had a lot of snow. This picture was taken outside of a ski resort, but I wanted it to be square aspect ratio while keeping all the detail, so I shrunk it horizontally.
Snow storm picture
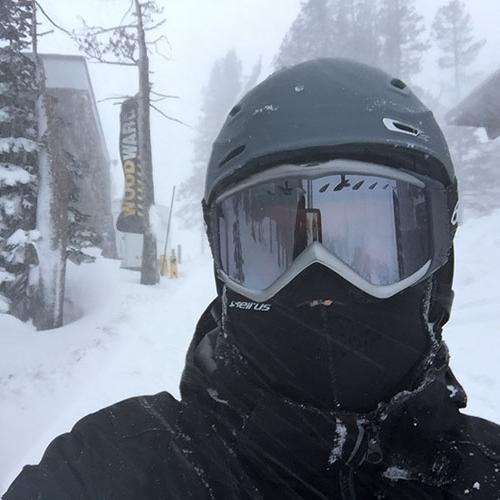
167 px removed horizontally. It worked really well on this image, it's one of my favorite results of the set.
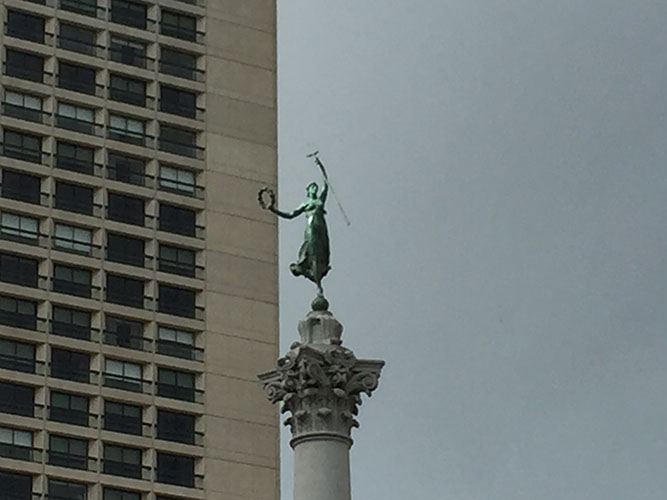
Statue
This was taken by me at Union Square in SF. My friends and I can never agree on who this statue is supposed to depict. After our final lecture, I decided to see if seam carving could improve the framing of this image by reducing the width by 1/3. This should put the statue near one of the "rule of thirds" boundaries.
Mystery statue
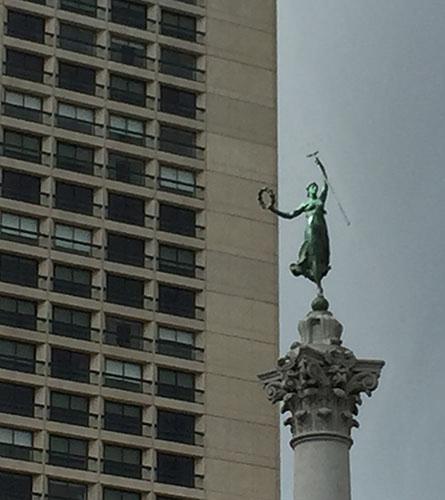
222 px removed horizontally. It actually worked pretty good! The composition of the shot is much better and all of the detail remained, while also preserving the gradient in the right part of the image.
Failures
Seam carving doesn't always produce good results. Lets see that in action.
Big C
I took this shot from the Big C at sunset. I really wanted this to be my facebook banner pic, so I tried to shrink it vertically using seam carving to keep all of the lovely details.
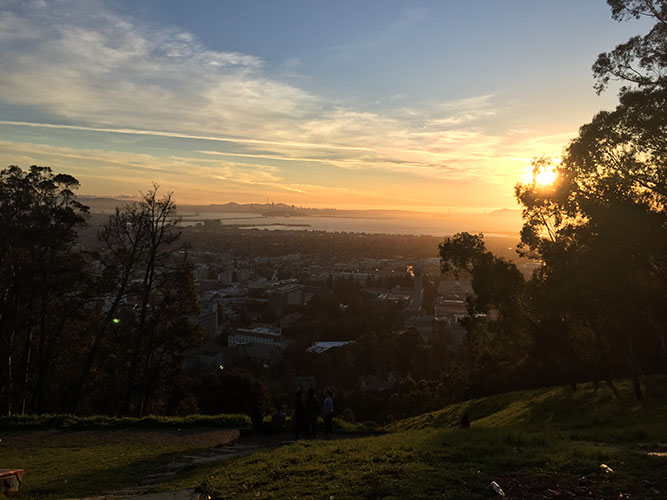
UC Berkeley, from the Big C
300 px removed vertically. The horizon line isn't maintained, so it looks like the world is getting sucked into a vortex. It honestly is a neat picture, but it isn't useable.
Alice Returns
Alice helped me with the vertigo shot. She is pretty short, so I decided to see if I could make her shorter. I took this beautiful picture of her and tried to shrink it vertically.

Alice
275 px removed vertically. This really didn't work out as planned. Features of her face are no longer aligned, so she starts to look more like a picasso painting or something.
Summary
The main points I learned in this project are: For vortex shot, getting the camera alignment correct really matters for the effect to work well. If the camera is not in line for even one shot, it's pretty obvious and creates an out of place frame in your animation. For seam carving, my biggest insight was actually in optimizations made in numpy. Images were taking around 1 minute to process, but with some fancy vectorization and numpy work, I was able to reduce it to about 10 seconds. I appreciate the irony in this being one of my final insights, because I believe it was one of the first pieces of advice offered by Prof. Efros at the start of Project 1.