bezos.jpgzuckerberg.jpg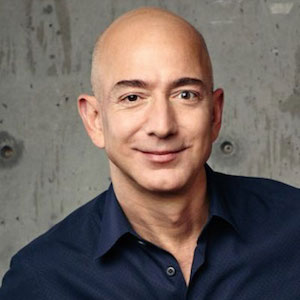
CS196-24 FA18 // David Xiong (cs194-26-abr)
The goal of this project was to explore techniques for morphing a face into another gradually - specifically, using affine transformation matrices. Using this technique, we can model and generate the average face
of an face dataset. We can also morph other images to be more similar to other ones, or to morph them to become caricatures.
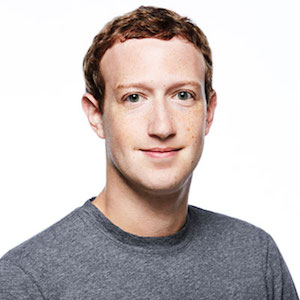
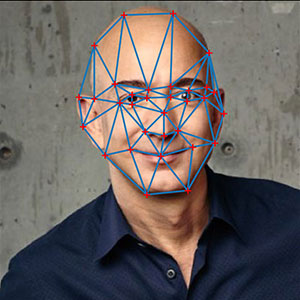
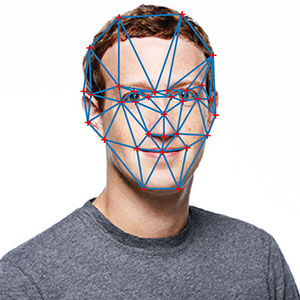
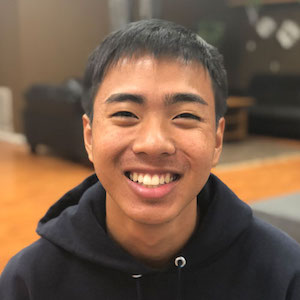
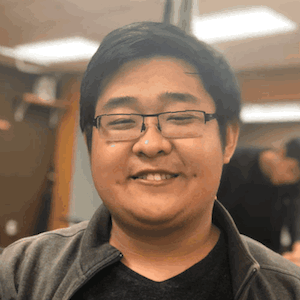
In this part, we set up the point mapping and triangulation data for the morphing process of each image. To illustrate my process, I'll be morphing an image of Jeff Bezos into Mark Zuckerberg.
bezos.jpg |
zuckerberg.jpg |
|---|---|
|
|
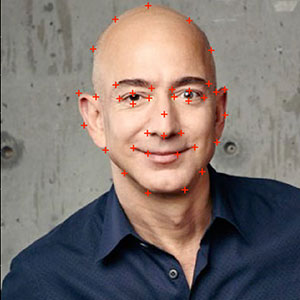
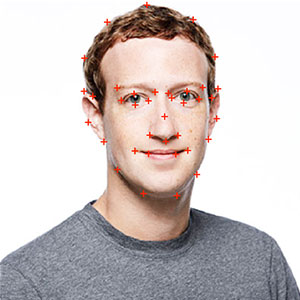
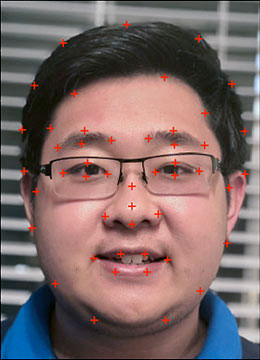
To set the corresponding points of each image, I used pyplot's ginput to record input data, and saved that to a .txt file so I didn't have to re-input the points every time I ran the script.
bezos points |
zuckerberg points |
|---|---|
 |
 |
We then find the average of all the corresponding points between the images, and set up a Delaunay Triangulation between them:
bezos triangulation |
zuckerberg triangulation |
|---|---|
 |
 |
Before we can start on the actual warping, let's try a small toy problem: finding the mid-way
point between the two faces.
In order to calculate the mid-way points, we calculate the average of all the corresponding points and the Delaunay Triangulation as we did in Part 0. We then calculate the affine transformation matrices to map the triangles from the averaged points' triangulation to the original ones - this lets us determine how our source pixels should be placed in the mid-way image. Finally, we average the colors together, and get our mid-way image:
| Bezos warped to mid-points | Mid-way | Zuckerberg warped to mid-points |
|---|---|---|
|
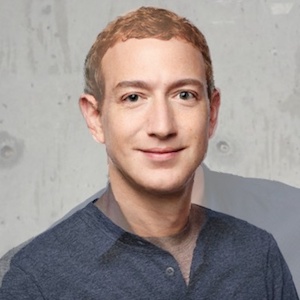 |
|
Now that we've nailed down our technique for creating the mid-way image, we use the same method for creating the frames of our morph sequence. Rather than calculating the strict mid-point, we weight
each frame by a factor of 0-1. Then, we warp and blend colors according to that factor for each frame. The resulting .gif from this process is an animation of the warp between the two source images.
Here are some more examples:
| David (me!) | Tim |
|---|---|
 |
 |
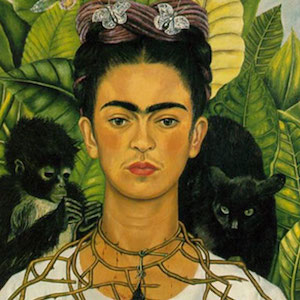
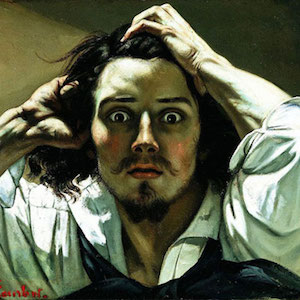
| Khalo | Courbet |
|---|---|
 |
 |
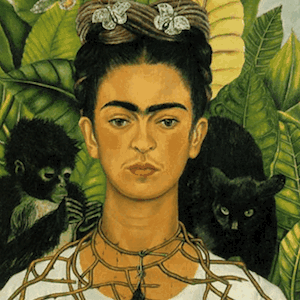
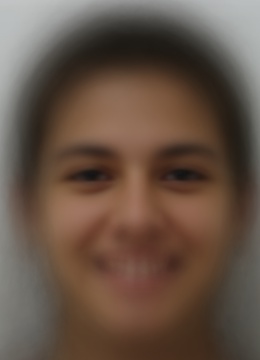
Mean Faceof a Population
For this part, I used the smiling frontal images from the FEI Face Database. This is the average face of the dataset:
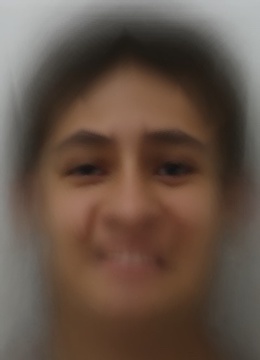
I then input corresponding points between this mean image and an image of my face, and warped them as each other:
| FEI Points | David Points |
|---|---|
 |
 |
| FEI as David | David as FEI |
|---|---|
 |
 |
Terrifying, isn't it?
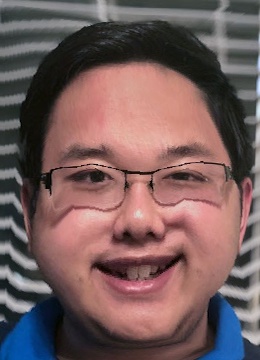
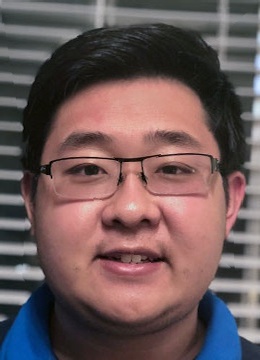
Something interesting to note is that we achieved the results shown in Part 3 by warping points closer to the average. If we instead warp away from the average, we're able to accentuate certain features, forming a caricature.
Here's an example (using the two sources from Part 3) of how features can be emphasized by varying a distortion factor d. Notice how the face becomes more angular (accentuated jawline) and the eyes become larger:
d=0.2 |
d=0.2 |
|---|---|
 |
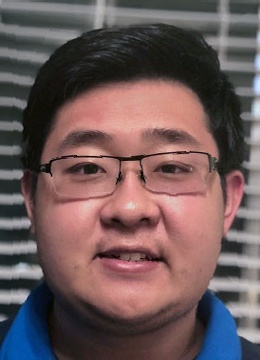 |
d=0.7 |
d=1.5 |
|---|---|
 |
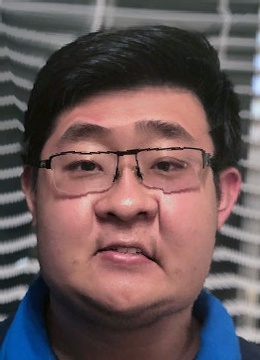 |
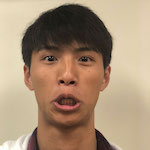
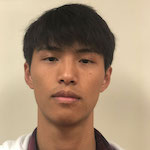
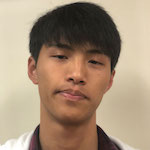
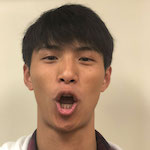
As an bells-and-whistles
extra, I wrote code to generate morphs between my friend Sean's many facial expressions.
Here's a preview of some of the source images:
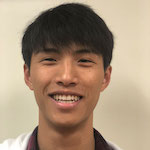 |
 |
 |
 |
 |
|---|
Because I was using the same subject for all the images in the sequence, I was able to define about 60 corresponding points for each image, which allowed for this morph to be the "most natural" of all the ones I have shown so far. Here is the final sequence as a .gif (hosted externally):
And, just for fun (or if the above .gif isn't loading), here's a video of a slower version of the morph (with more intermediate keyframes) set to music:
(Audio Credit: a slowed-down snippet of リサフランク420 / 現代のコンピュー by MACINTOSH PLUS)
Writeup by David Xiong, for CS194-26 FA18 Image Manipulation and Computational Photography