CS194-26:
Image Manipulation and Computational Photography
Grace Park
SID: 3032341209
cs194-26-acd
Project 5: Lightfield Camera
Overview
The purpose of this project was to use real lightfield data from the Stanford Light Field Archive (http://lightfield.stanford.edu/lfs.html) and create images with varying focus or depth.
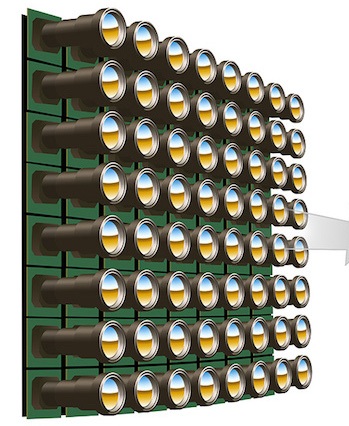
(source: https://uploadvr.com/so-what-exactly-is-a-light-field-volume/)
The pictures of the dataset is taken from a light field capture system with 17 x 17 grid of cameras. So on the dataset, there are total of 289 images that contain the values of (u,v), which are the position of the image taken.
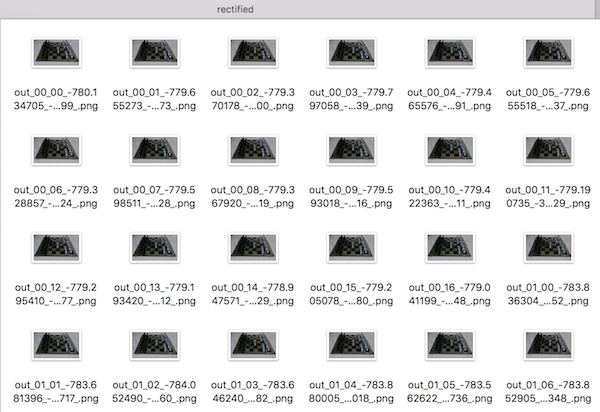
Above shows a sample of the dataset.
Part 1: Depth Refocusing
In this part, the images are aligned and averaged so the resulting image has a focus on different depths.
If the 289 images are averaged without any shifting, then the resulting image has a focus on the back, where there is most depth of field.
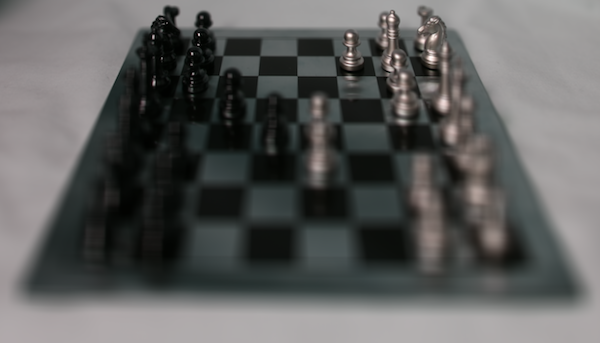
You can see that the back of the image is focused while the rest of the image is blurry on the top image. This is because from the different cameras in the grid, the back of the board looks very similar while the front of the board looks very different. That is why when you average the images, the back looks focused because they're similar between the 289 images while the front gets more and more blurry as your depth decreases.
Meanwhile, if you shift all of your images to align to the center image, you can change the focus of the image.
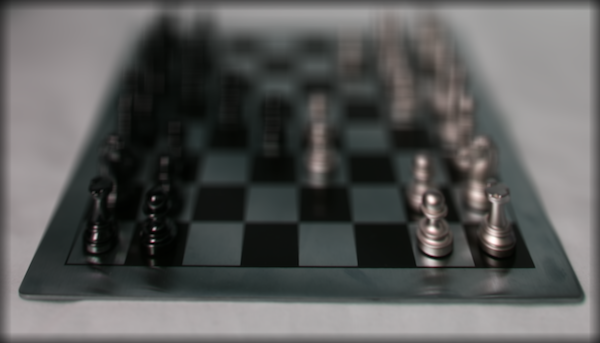
The above image is an example of when each of the images are shifted so that the front of the board is aligned between each images. Therefore, you can see that the front is focused while the back is blurry because the back of the board does not align between the pictures anymore.
Below is a gif of the varying focus of the dataset. Depending on how much you shift each images, you can get a resulting image with varying focus.
Part 2: Aperture Adjustment
In this part, the aperture of the image can vary depending on which images you decide to include when you're averaging. By varying the size of the aperture, you can determine how much light you collect for your image. Varying the size of the aperture also leads to which point of the object gets focused depending on its depth.
In this project, the effect of varying aperture is done by deciding which image to include when you're averaging. The wider the aperture is, the less image you need to include in your final image. For example, if I create a picture that has narrow aperture and focused on the center, I can do this by only averaging the pictures very close to the center. This results in a picture that is focused overall because the images next to each other look very similar and has no blurring when averaged.
On the other hand, in order to create an image with wide aperture, you can average more and more points, which results in a focused center but blurring elsewhere.
The result of varying aperture is shown on the bottom.
You can see that the image becomes more blurry except for the center of the image.
Summary
In this project, I learned about light field camera. The idea of taking the same object at the same time, but at different angles was interesting to me. Seeing how you can get varying depth and focus of the pictures by averaging the multiple image made me realize what light field cameras could do.
Last Edit: 10/30/2018