CS194-26: Image Manipulation and Computational Photography
Programming Project #6 Part 1: Image Warping and Mosaicing
Allyson Koo
Project Overview
This assignment involved creating panoramas/image mosaics out of a series of pictures taken of a scene from the same center of projection. In order to do this, it involved calculating homography matrices between different images in order to be able to warp one image to the same plane as the other, and then stitch them together into a panorama.
Implementation
Part 1: Shooting and Digitizing Pictures
This portion of the project involved taking two or more pictures that had some overlap and were projective transforms of each other. This can be accomplished by taking two pictures of different portions of a scene from different points of view. Example input images are shown with the mosaics produced below.
Part 2/3: Recover Homographies and Image Warping
The purpose of this portion of the project was to define correspondence points between two images by hand, and then calculate the homography matrix that represents the transformation between the two sets of points. Once the homography matrix is calculated, you can use this to transform all the points in one image to the same perspective as the other image. Once this is accomplished, you can now blend the two images together seamlessly to create a panorama style image. Examples shown below.
Part 4: Image rectification
The purpose of this portion of the project was to take images and make them frontal-parallel, using the homography and image warping techniques as described earlier. Since we are warping a single image in this case, for my second set of correspondence points I defined them by hand to be rectangles/squares in accordance with the pictures. Examples shown below.
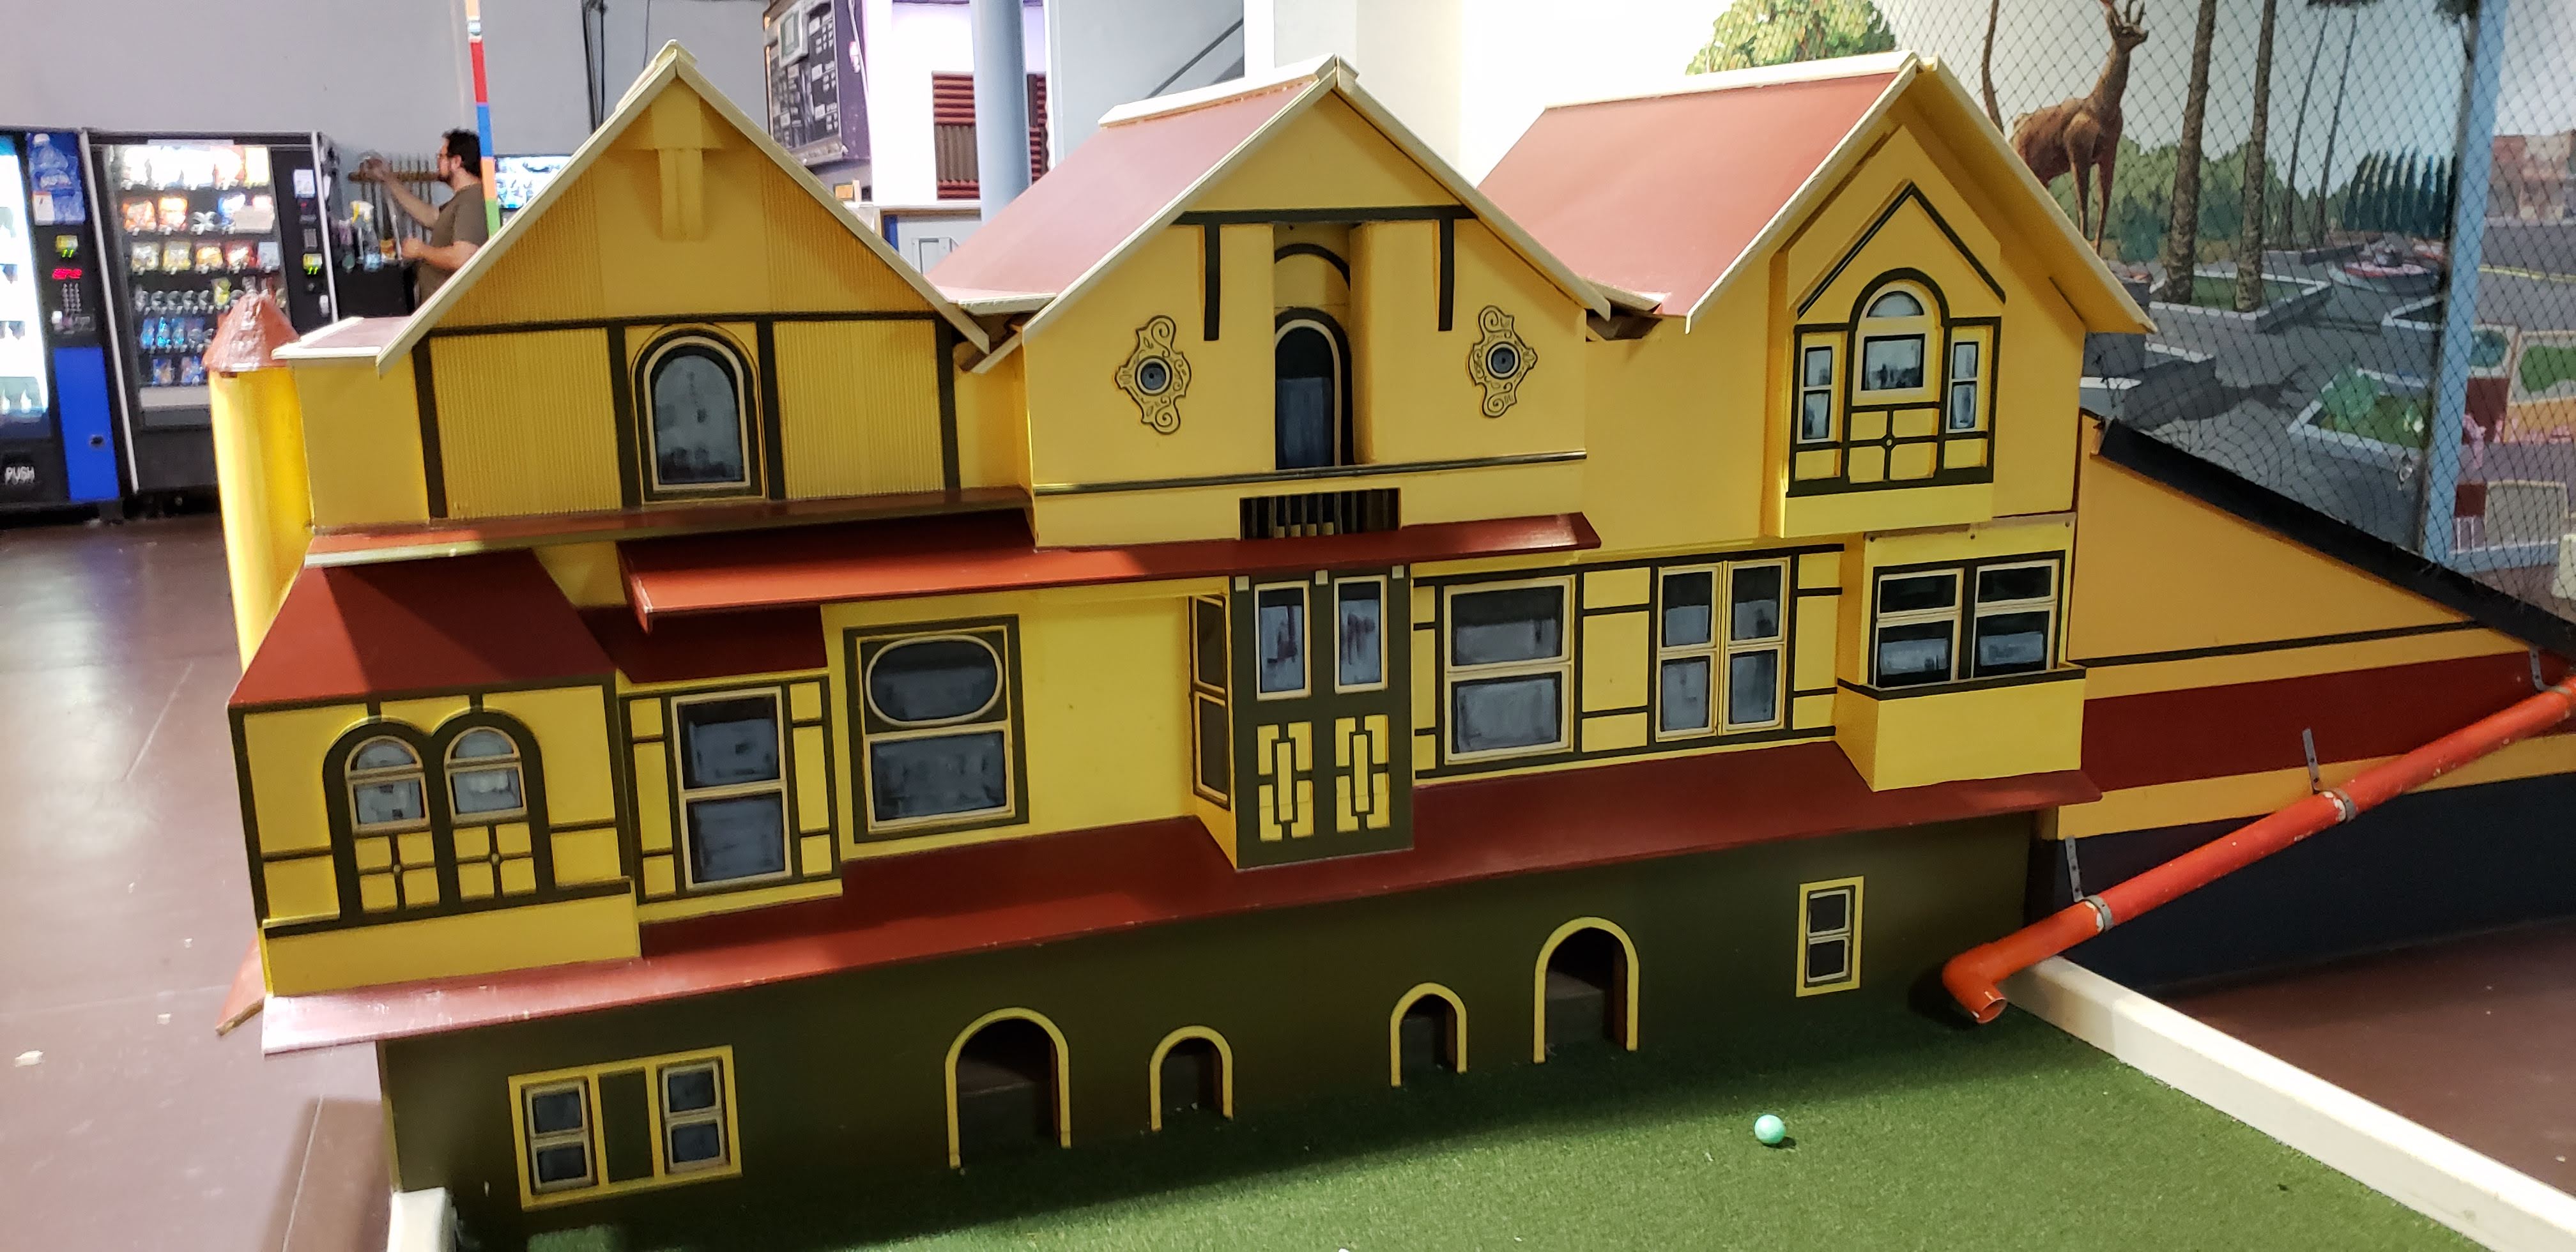 Original image: wooden house on a mini golf course
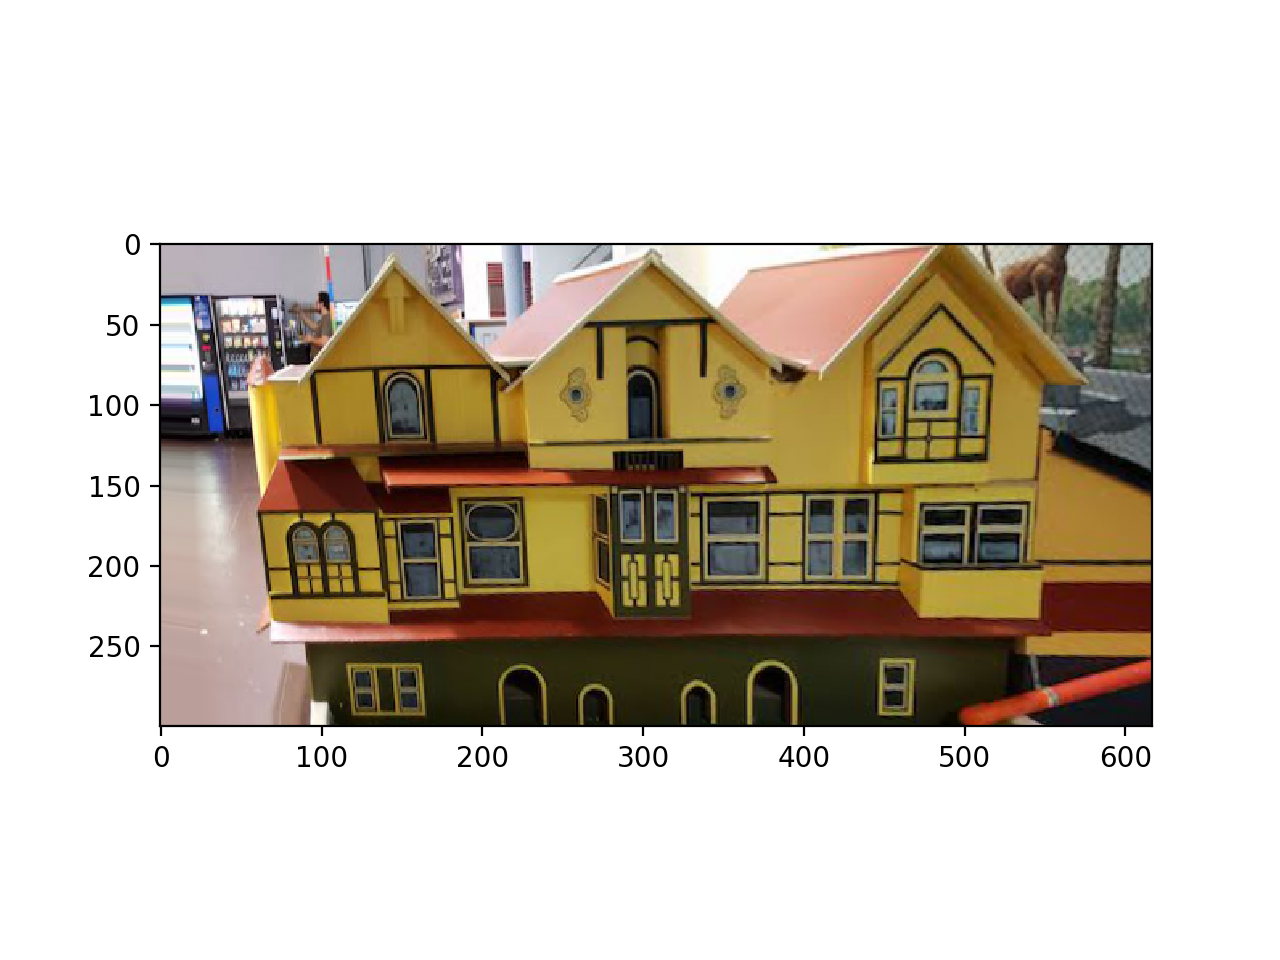 Rectified image
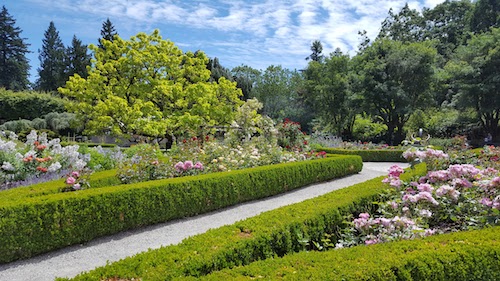 Original image: garden
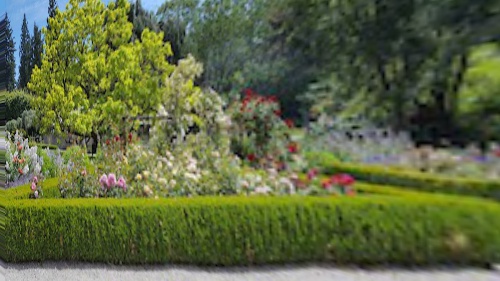 Rectified image
For the garden image, since the right side of the image had fewer pixels representing the necessary data, the right half of the rectified image is significantly blurrier than the left half as a result.
Part 5: Blending the Images into Mosaics
The purpose of this portion of the project was to combine the previous parts by blending the warped images together into a single panorama image. This was accomplished by warping one image into the perspective of another, and then copying the pixels over onto a final image that was four times the size of the original images. For the overlap region, different techniques were used to try to minimize the appearance of a seam between the two images.
Original input images:
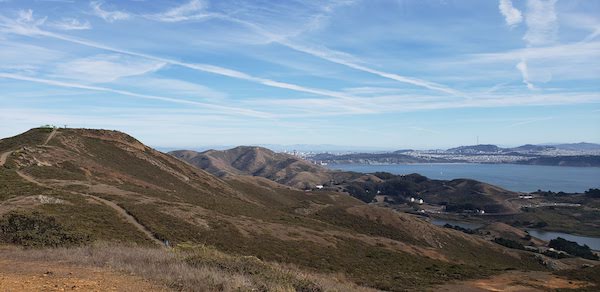 Original image: left half of view from Mt. Tam.
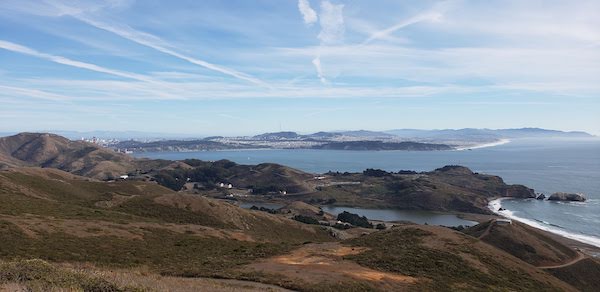 Original image: right half of view from Mt. Tam.
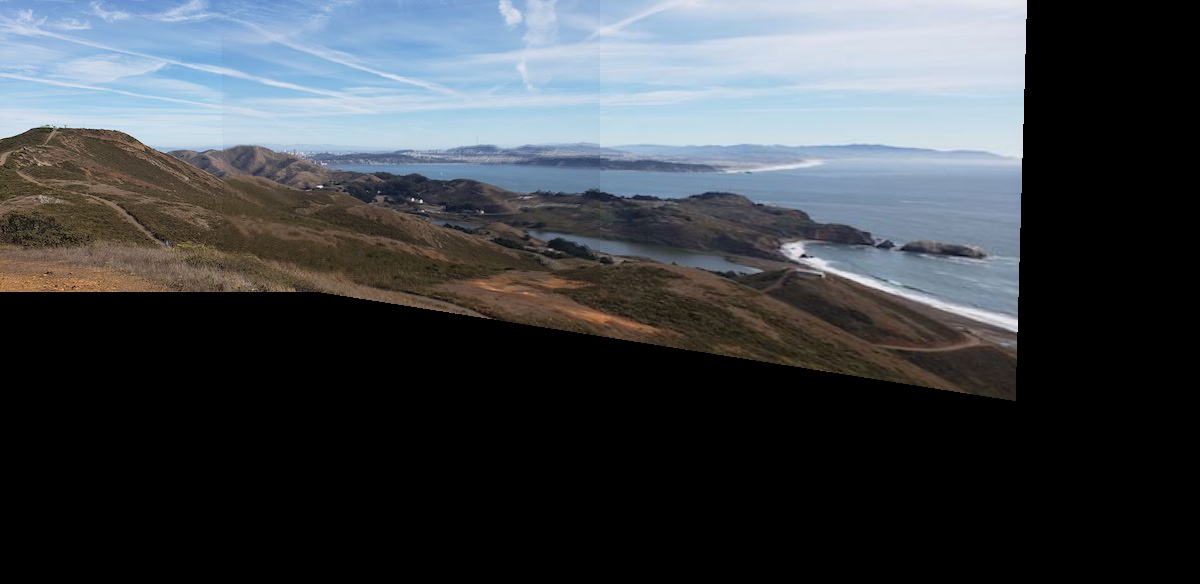 Combined images, using linear blending
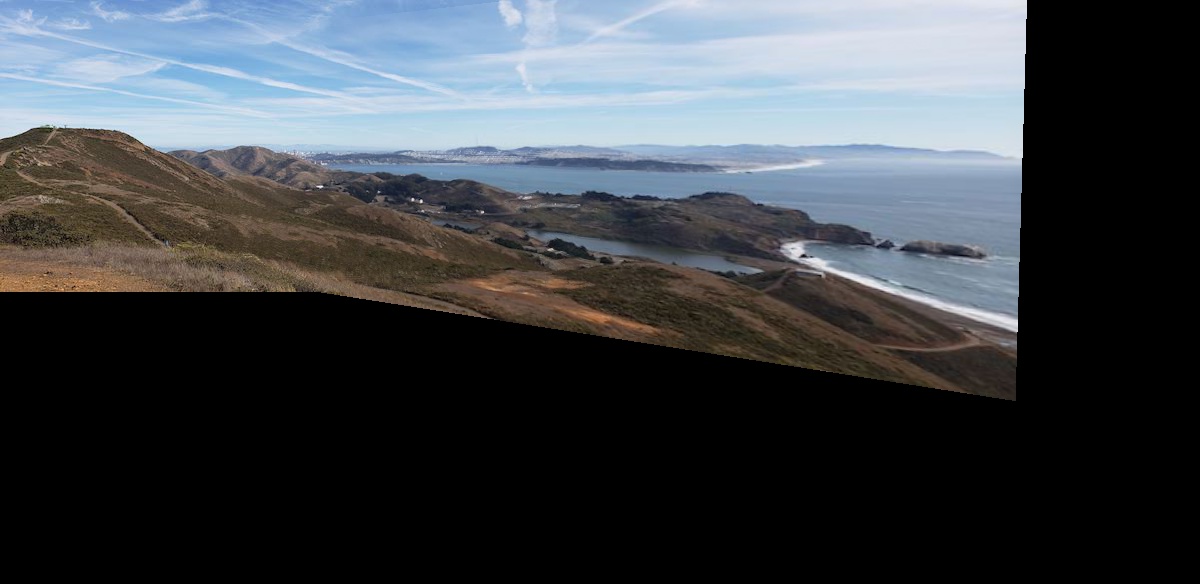 Combined images, using np.maximum for selecting pixels in overlap region
Example morphings of original faces into the average shape.
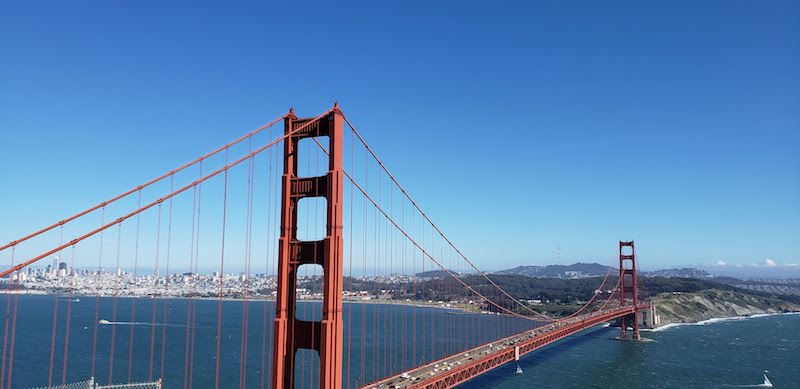 Original image: left half of view of Golden Gate Bridge
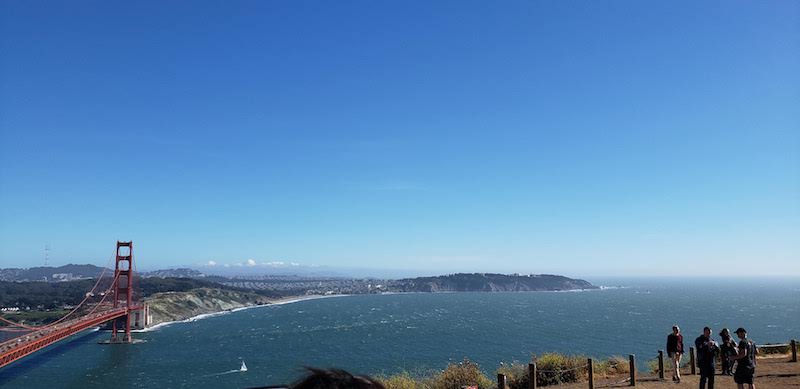 Original image: right half of view of Golden Gate Bridge
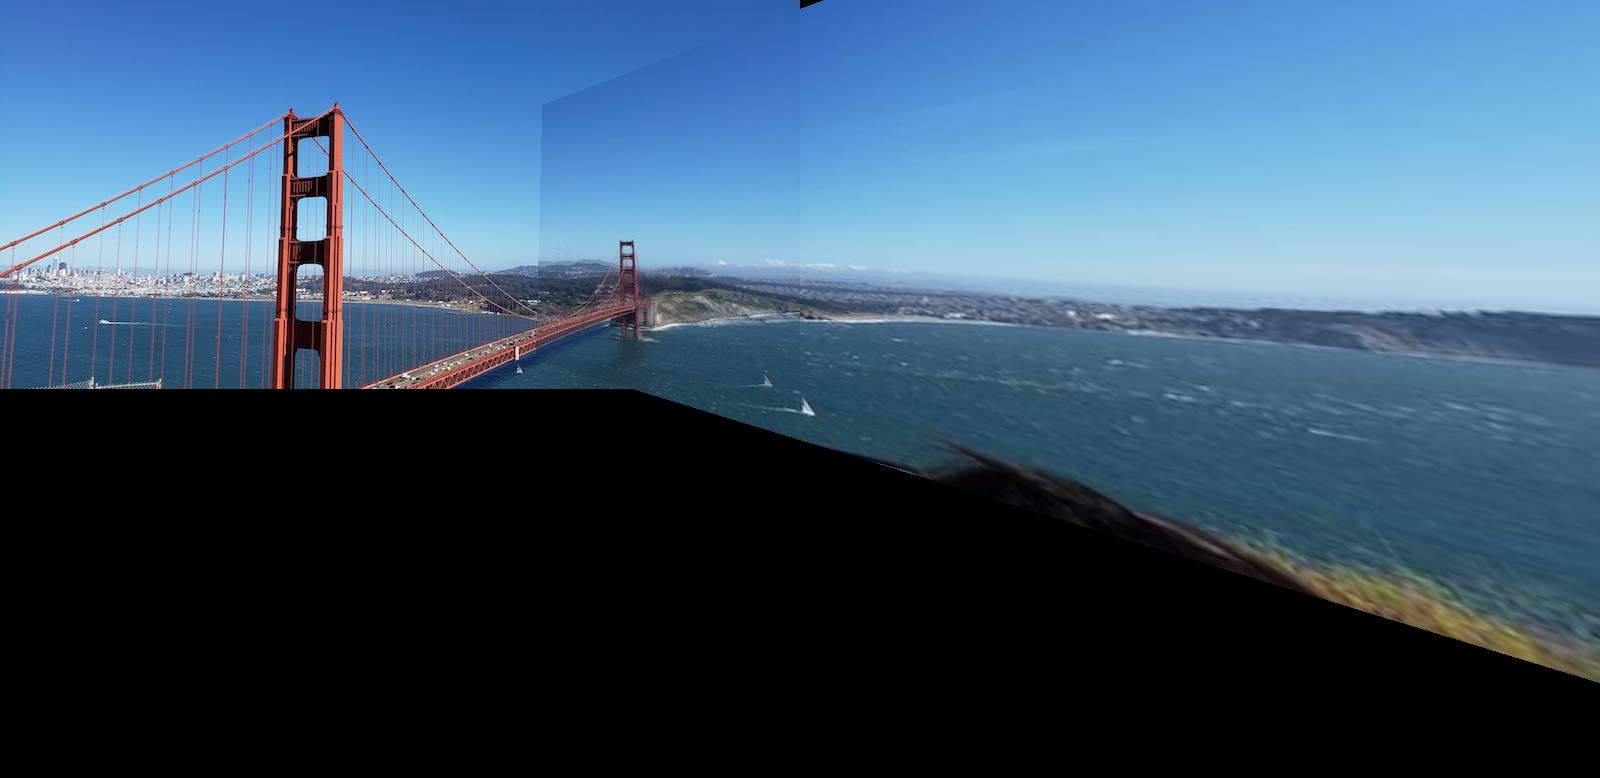 Combined image, using linear blending
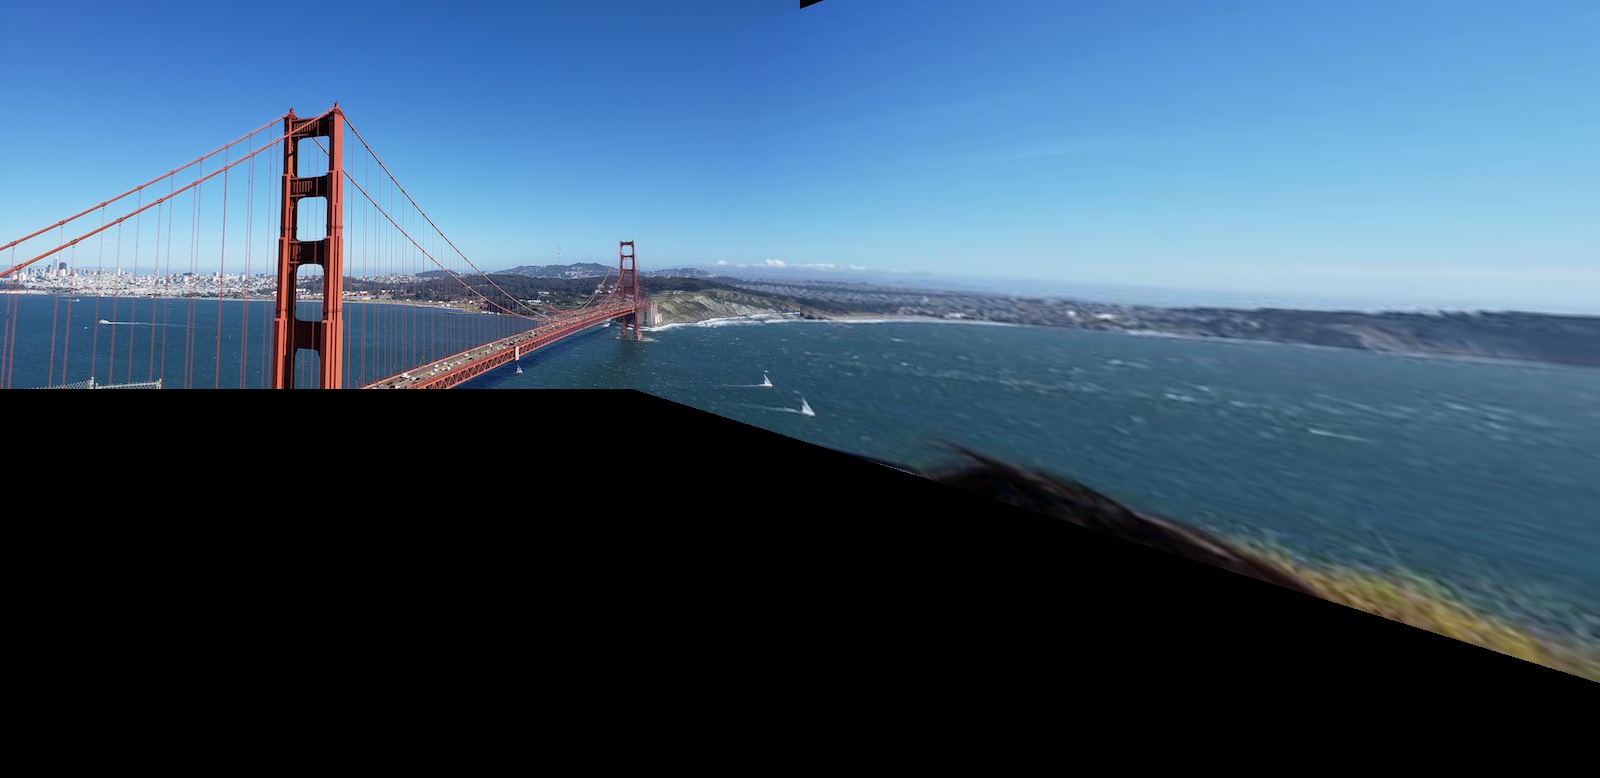 Combined image, using np.maximum for selecting points in overlap region.
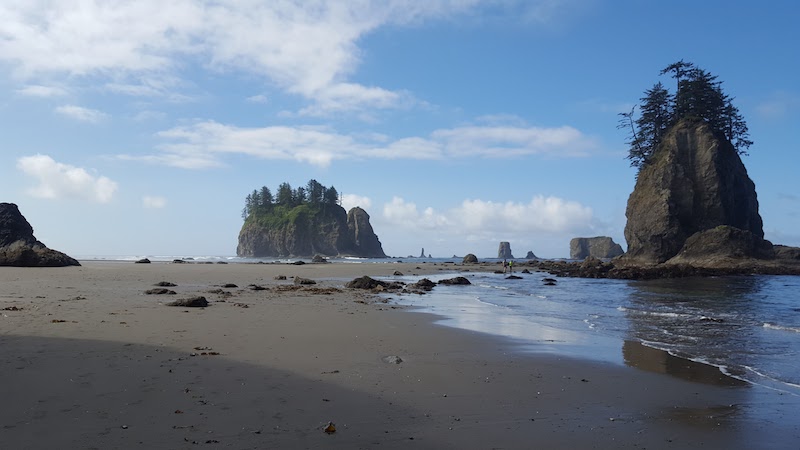 Original picture, left half of view of La Push beach in Washington
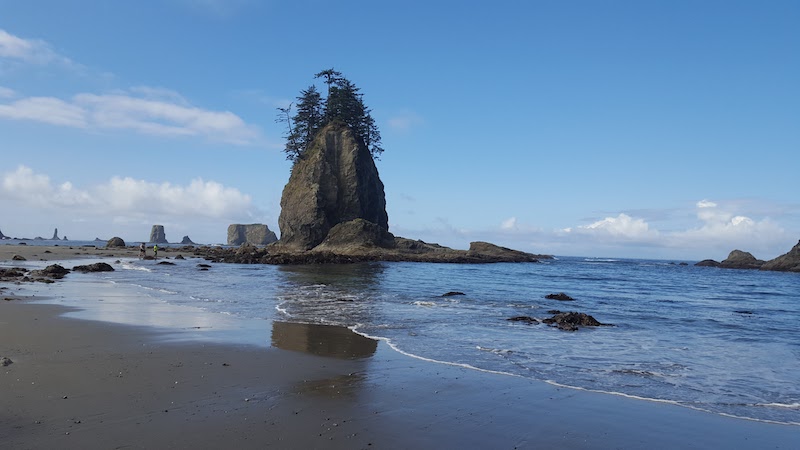 Original picture, view of right half of view of La Push beach in Washington
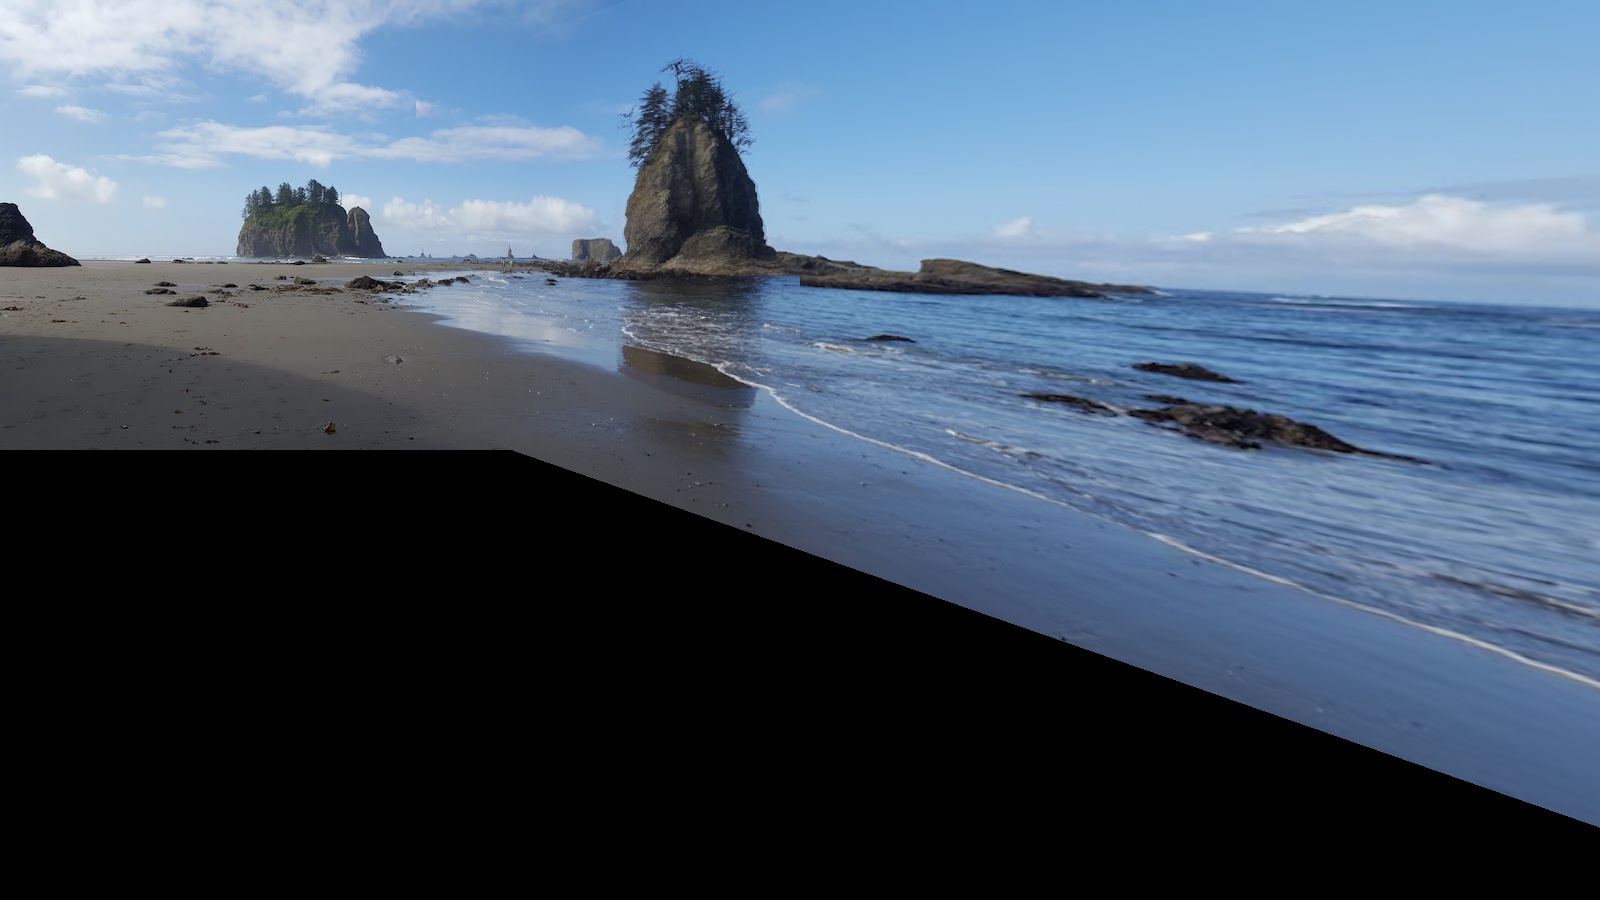 Combined image, using np.maximum to select pixels in overlap region.
What I Learned
I learned that you can do so many really cool image manipulations just by using homographies. I also thought it was cool to see how even though two images taken of the different portions of the same overall scene from slightly different angles may appear individually to be taken from the same perspective, but actually the objects in the image are warped slightly and is much more noticeable when trying to stitch the images together.
 Original image: wooden house on a mini golf course
  Original image: wooden house on a mini golf course
  Rectified image
  Original image: garden
  Rectified image
  Original image: left half of view from Mt. Tam.
  Original image: right half of view from Mt. Tam.
  Combined images, using linear blending
  Combined images, using np.maximum for selecting pixels in overlap region
  Original image: left half of view of Golden Gate Bridge
  Original image: right half of view of Golden Gate Bridge
  Combined image, using linear blending
  Combined image, using np.maximum for selecting points in overlap region.
  Original picture, left half of view of La Push beach in Washington
  Original picture, view of right half of view of La Push beach in Washington
  Combined image, using np.maximum to select pixels in overlap region.