Project Overview for Part A
Humans have a wide peripheral vision. Often times, the images we capture do not reflect our wide perspective due to camera limitations. In this project, we will be stitching together images to create mosaics that mimic our range of sight or perhaps even surpass it. These images will be taken from the same standing location, but will differ in that I turn the camera between each image. These images should still contain overlapping content, however, so we can stitch them together. In order to stitch these images together, we cannot simply use copy and paste as the images are taken from different perspectives. Instead, we must "warp" one of the images to the perspective of the other image. Then, we blend the warped first image and the unwarped second image together using linear feather blending.
Rectifying Images
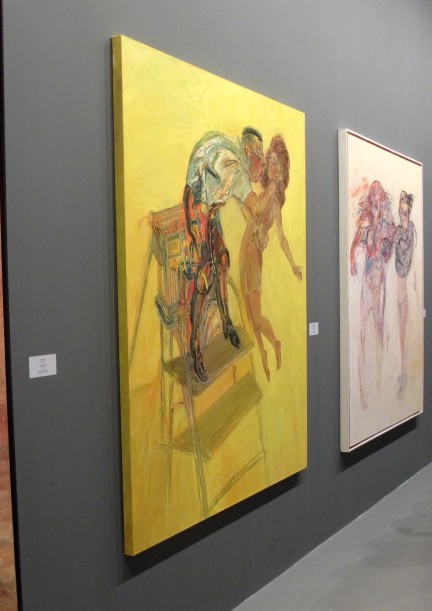
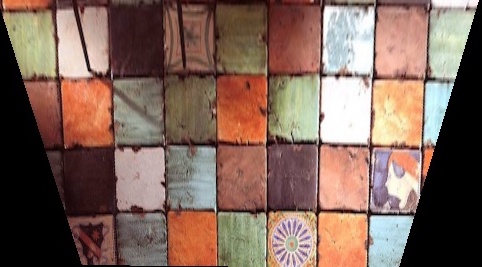
We will first rectify a single image and warp it so we see the content from a different perspective. We do this by defining corresponding points between key edges and where we would like these edges to go. For example, I have a painting here below:
I would like to view this painting head on. I can do this by finding the pixel locations at the corners of the painting and then finding corresponding points that I'd like these corners to warp to. In this case, I'd like the corners to warp to a nice even rectangle.
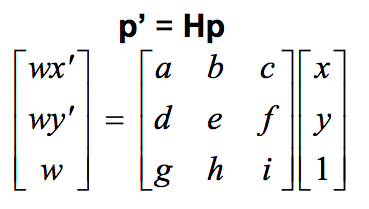
I then use these corresponding points to solve the Homography matrix, a matrix used to transform corresponding points from one image to another. To solve for it, we can set up a system of equations as shown below.
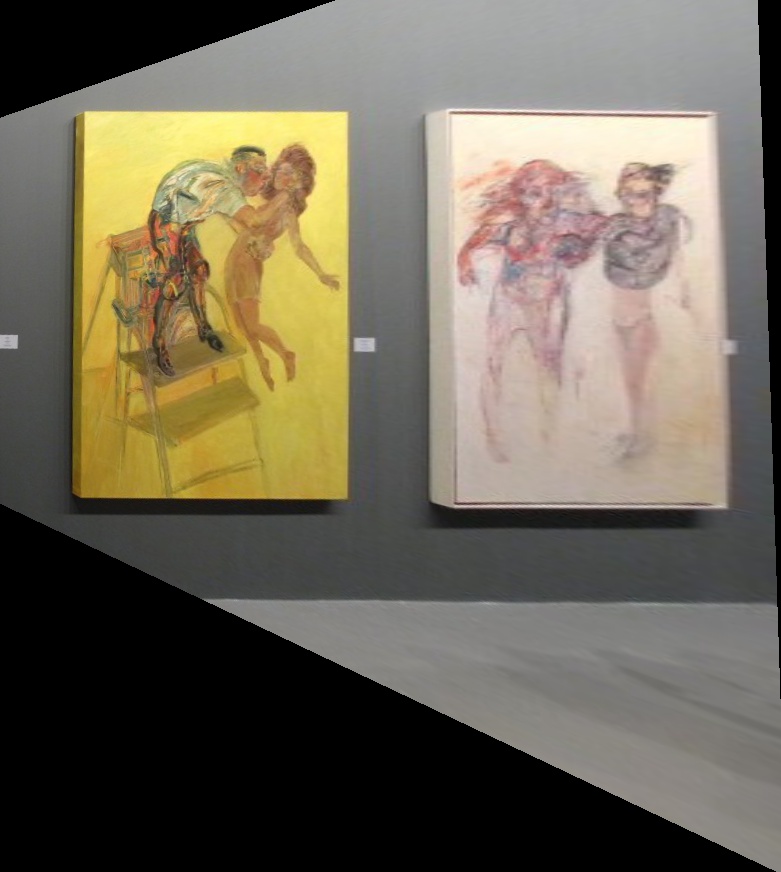
We can set the variable i to be 1 and are therefore left with 8 unknowns. Thus, in order to solve for this matrix, we need at least 4 corresponding points. I picked the corners of the painting for my corresponding points. Below I show my results once I have solved for this matrix and transformed the painting.
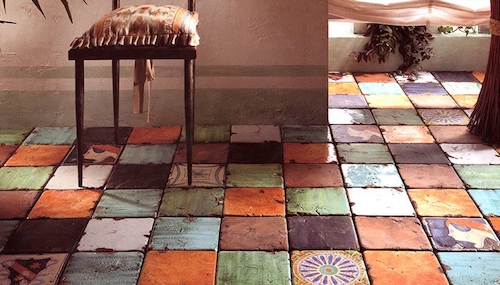
Here I demonstrate the same effect on wanting to see a floor headon:
Mosaic Image Blending
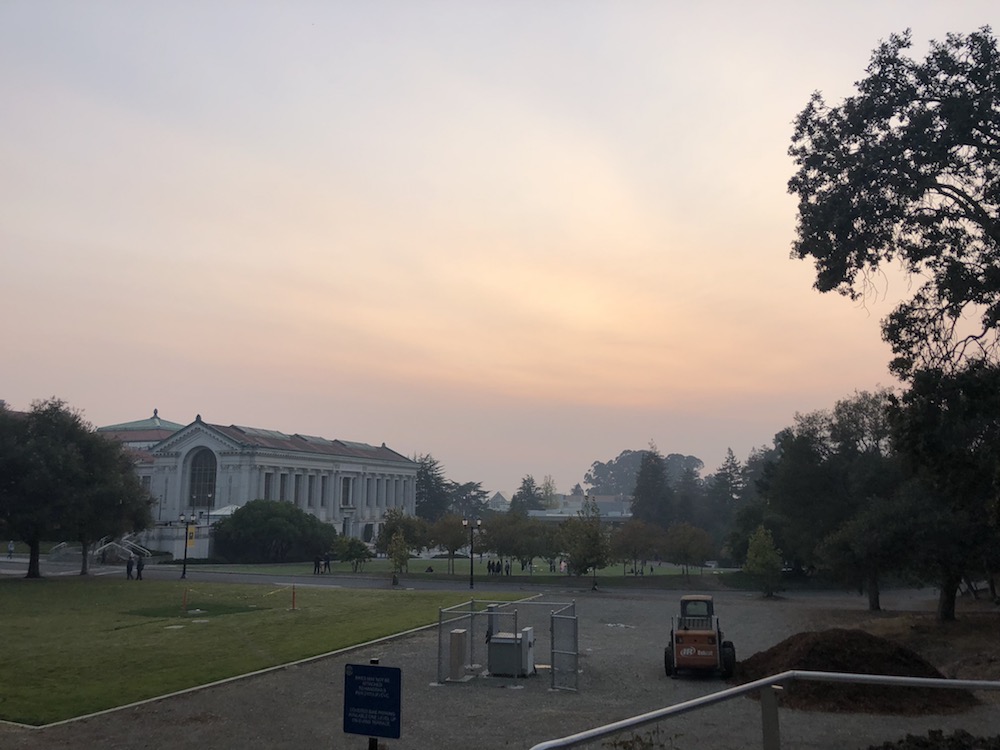
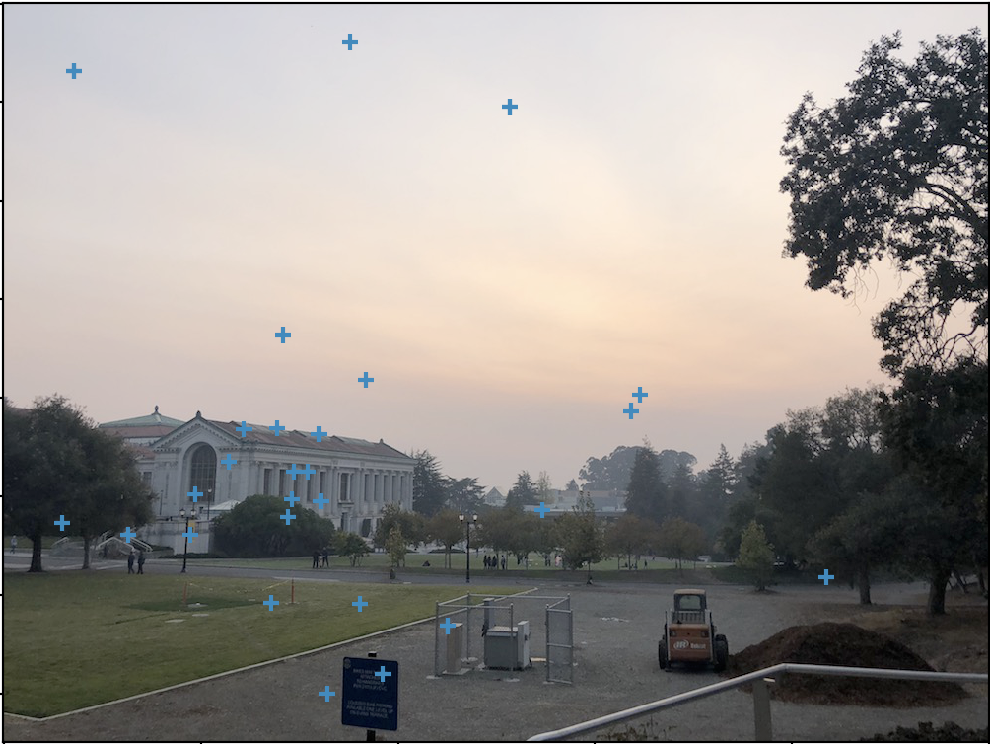
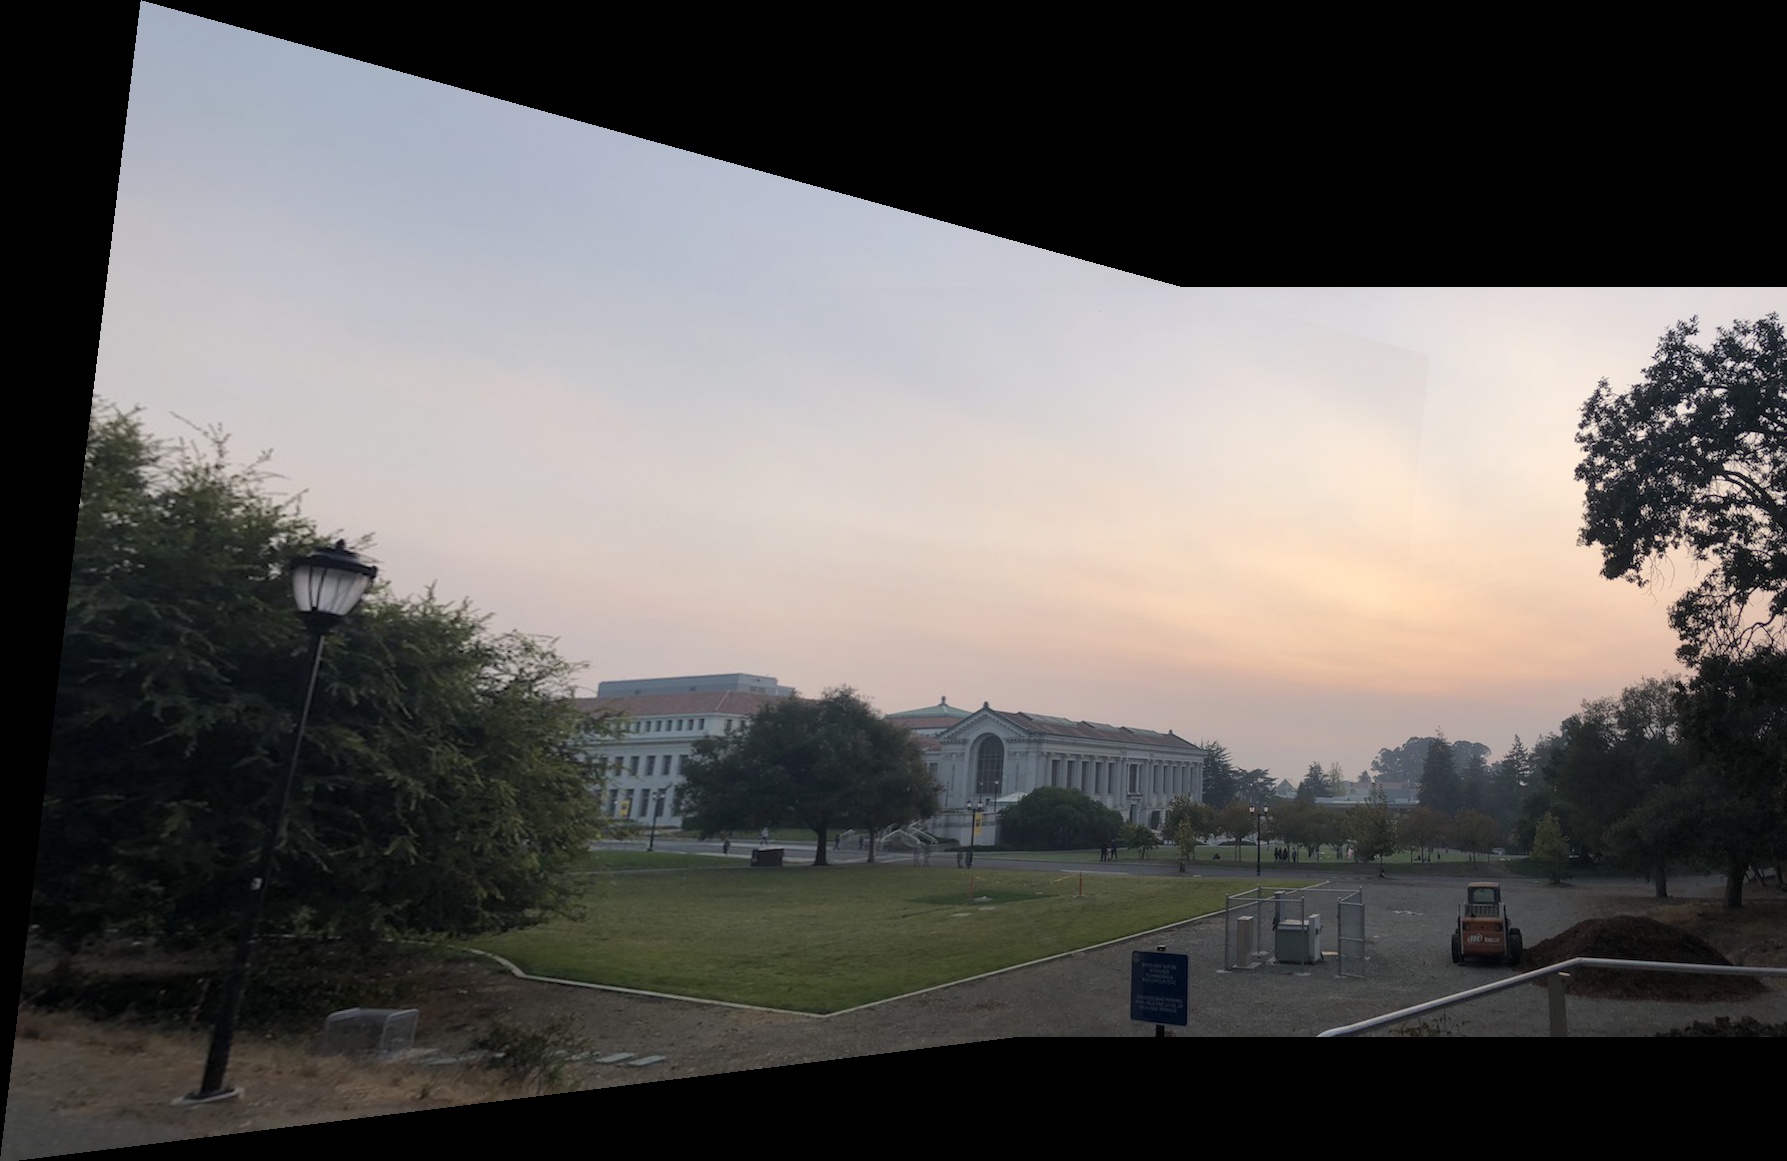
Now I will demonstrate how we can apply the above to creating a panorama. First, we take 2 photographs taken from the same position but from different perspectives as shown below with these images of the UC Berkeley campus.
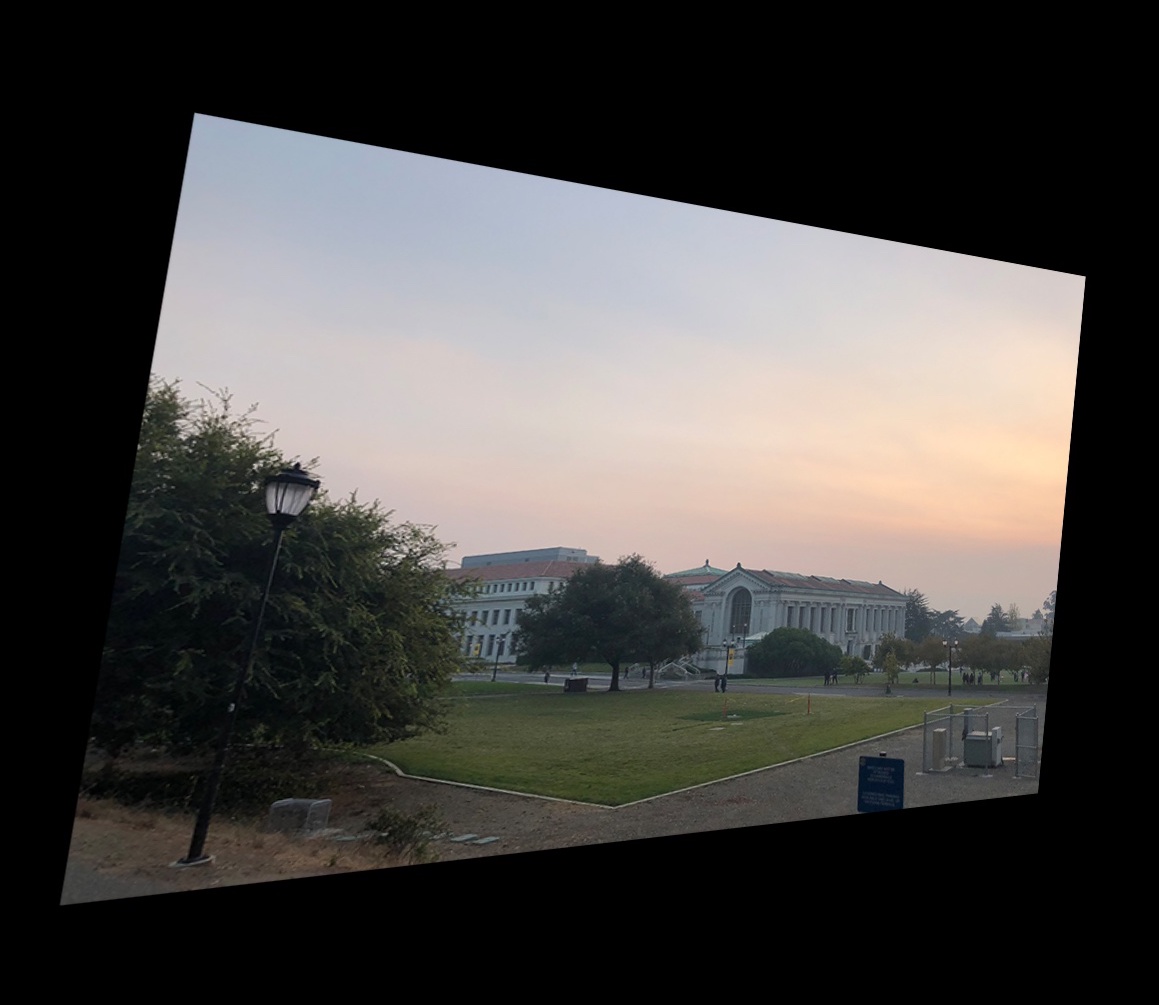
Now, we want to warp the first image to be in the perspective of the second image. We select corresponding points between the 2 images and then follow the rectify logic above to produce a warp:
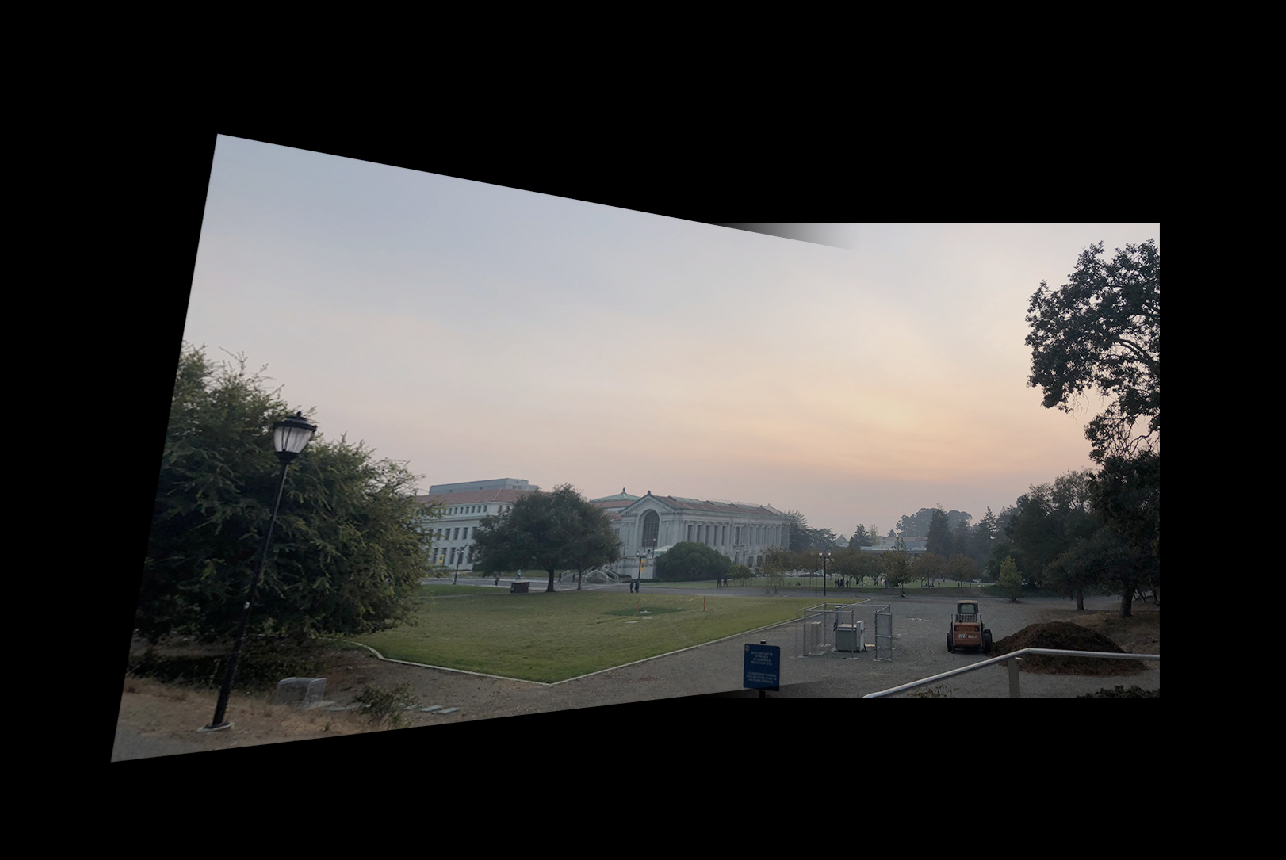
Finally, we blend the 2 images together using linear blending:
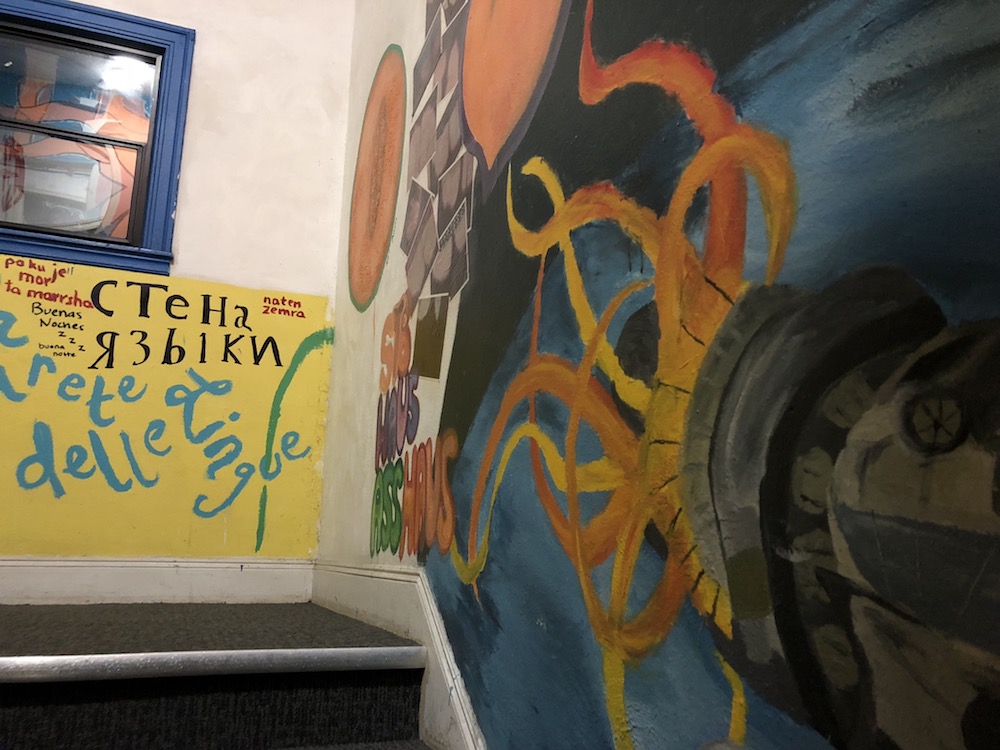
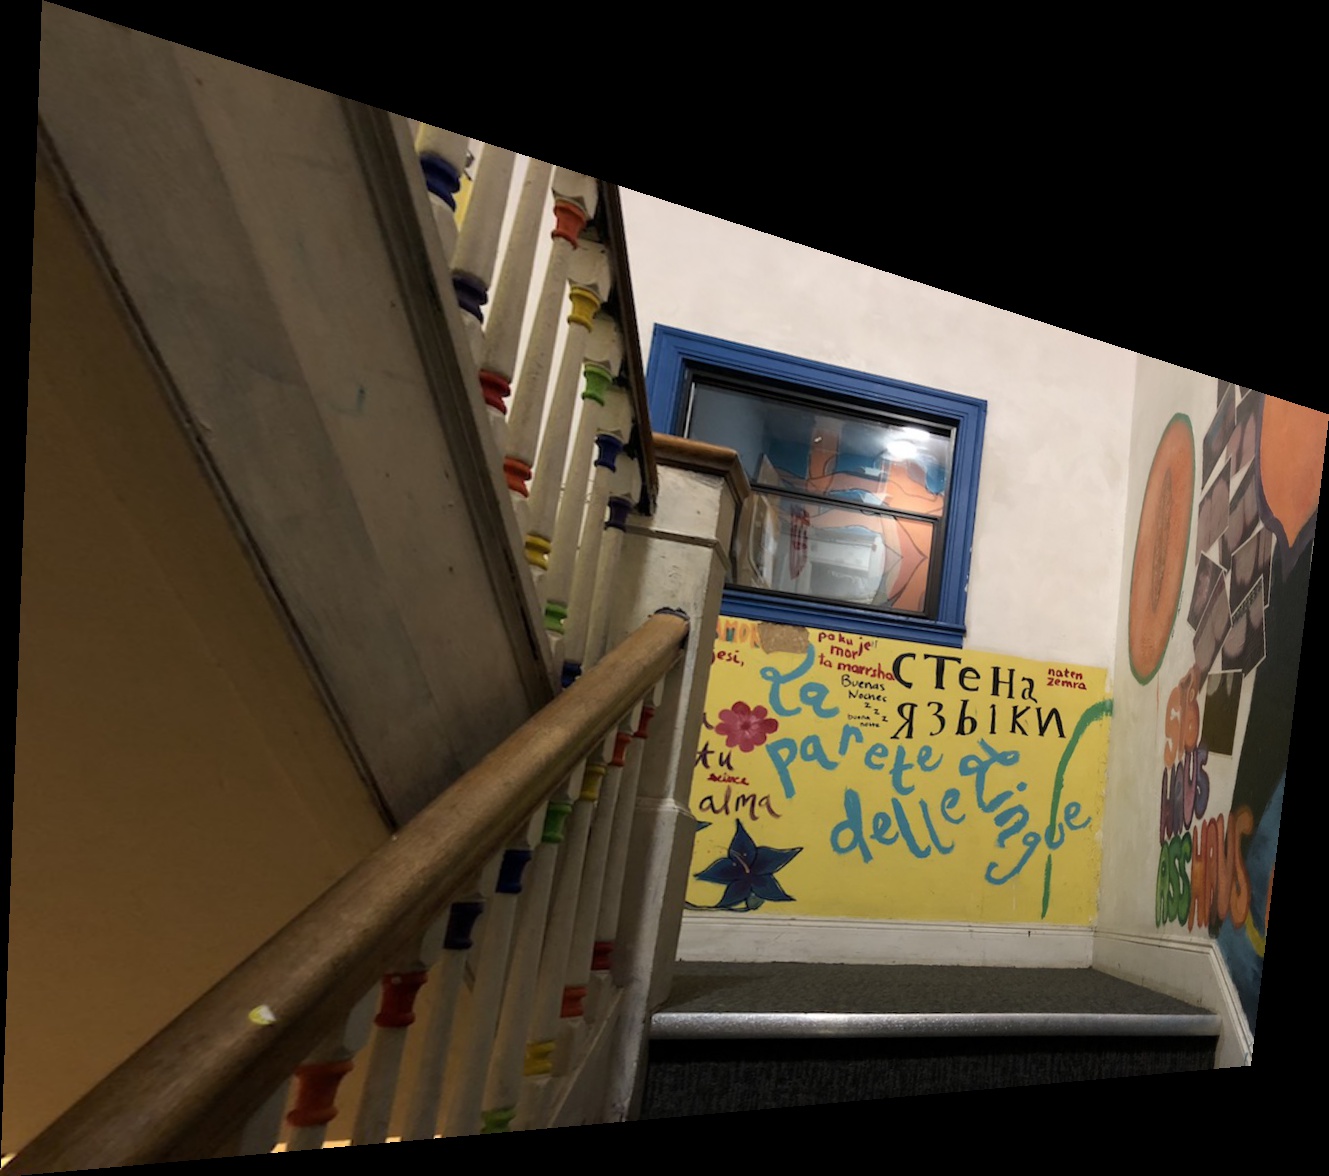
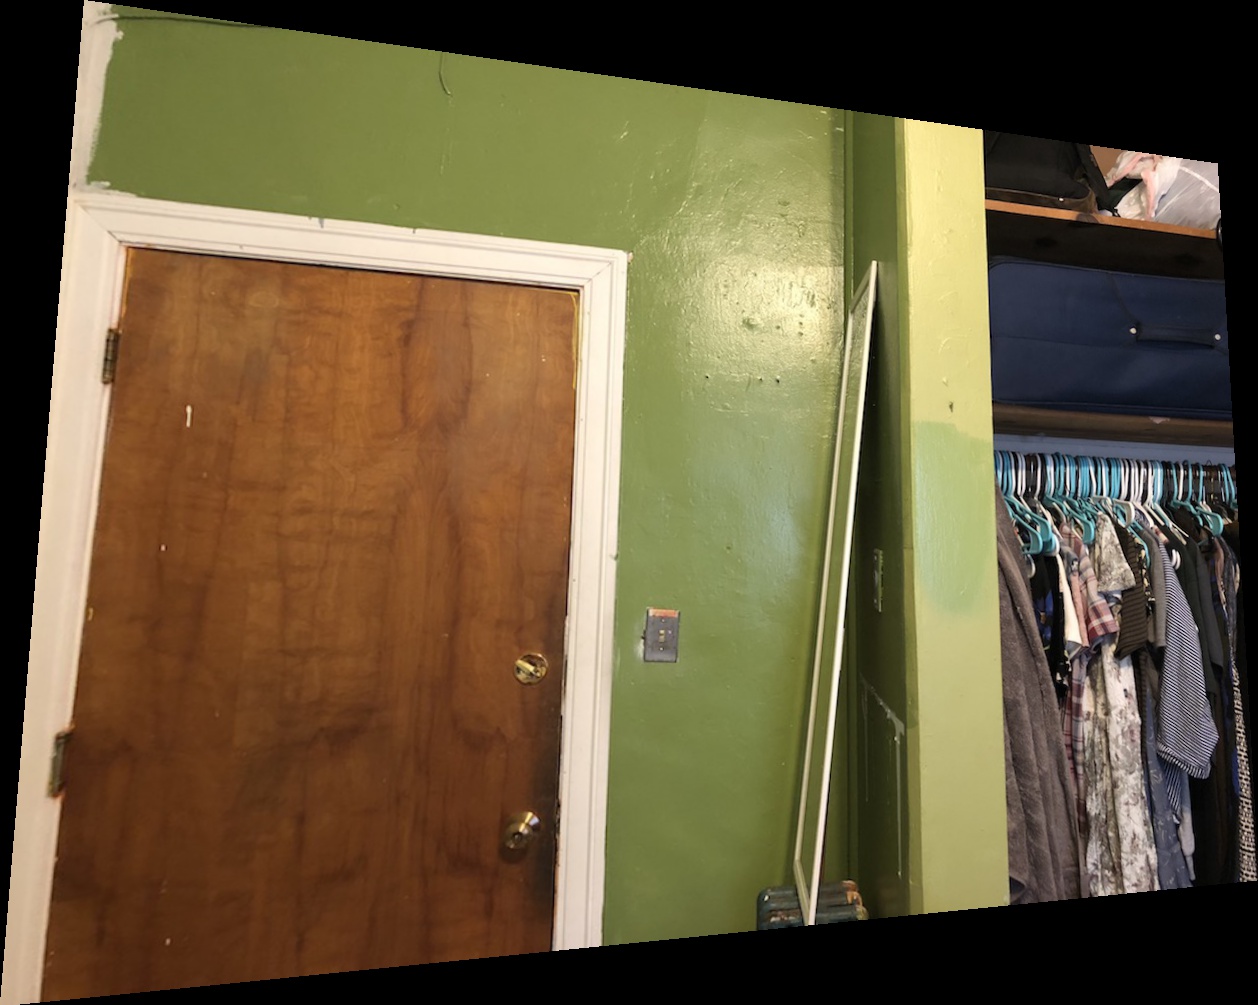
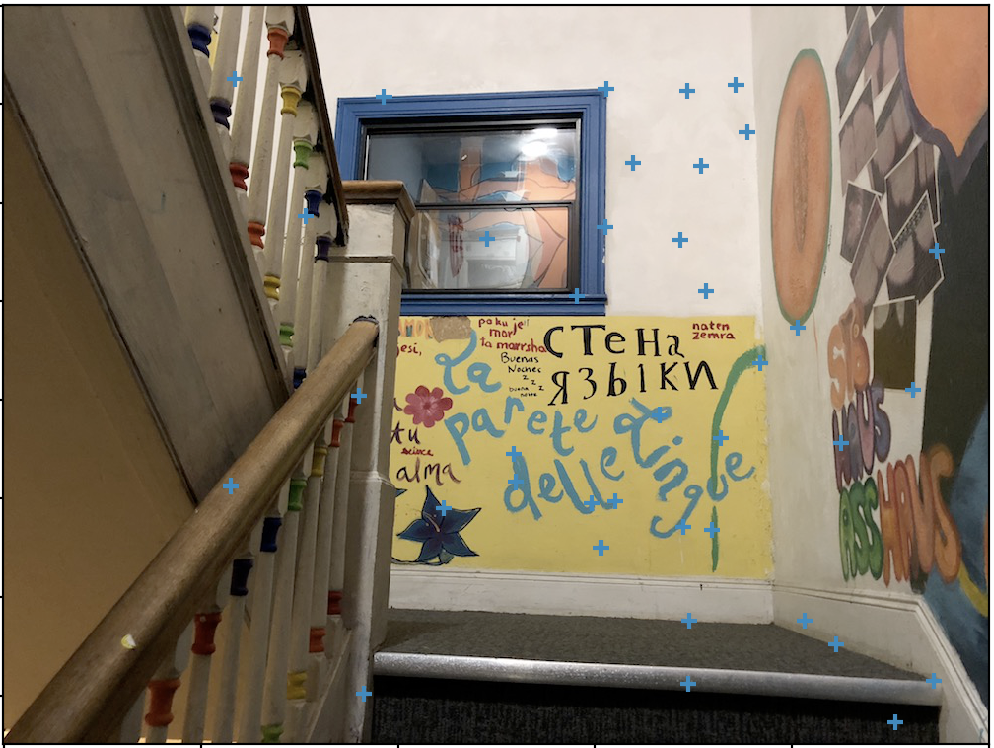
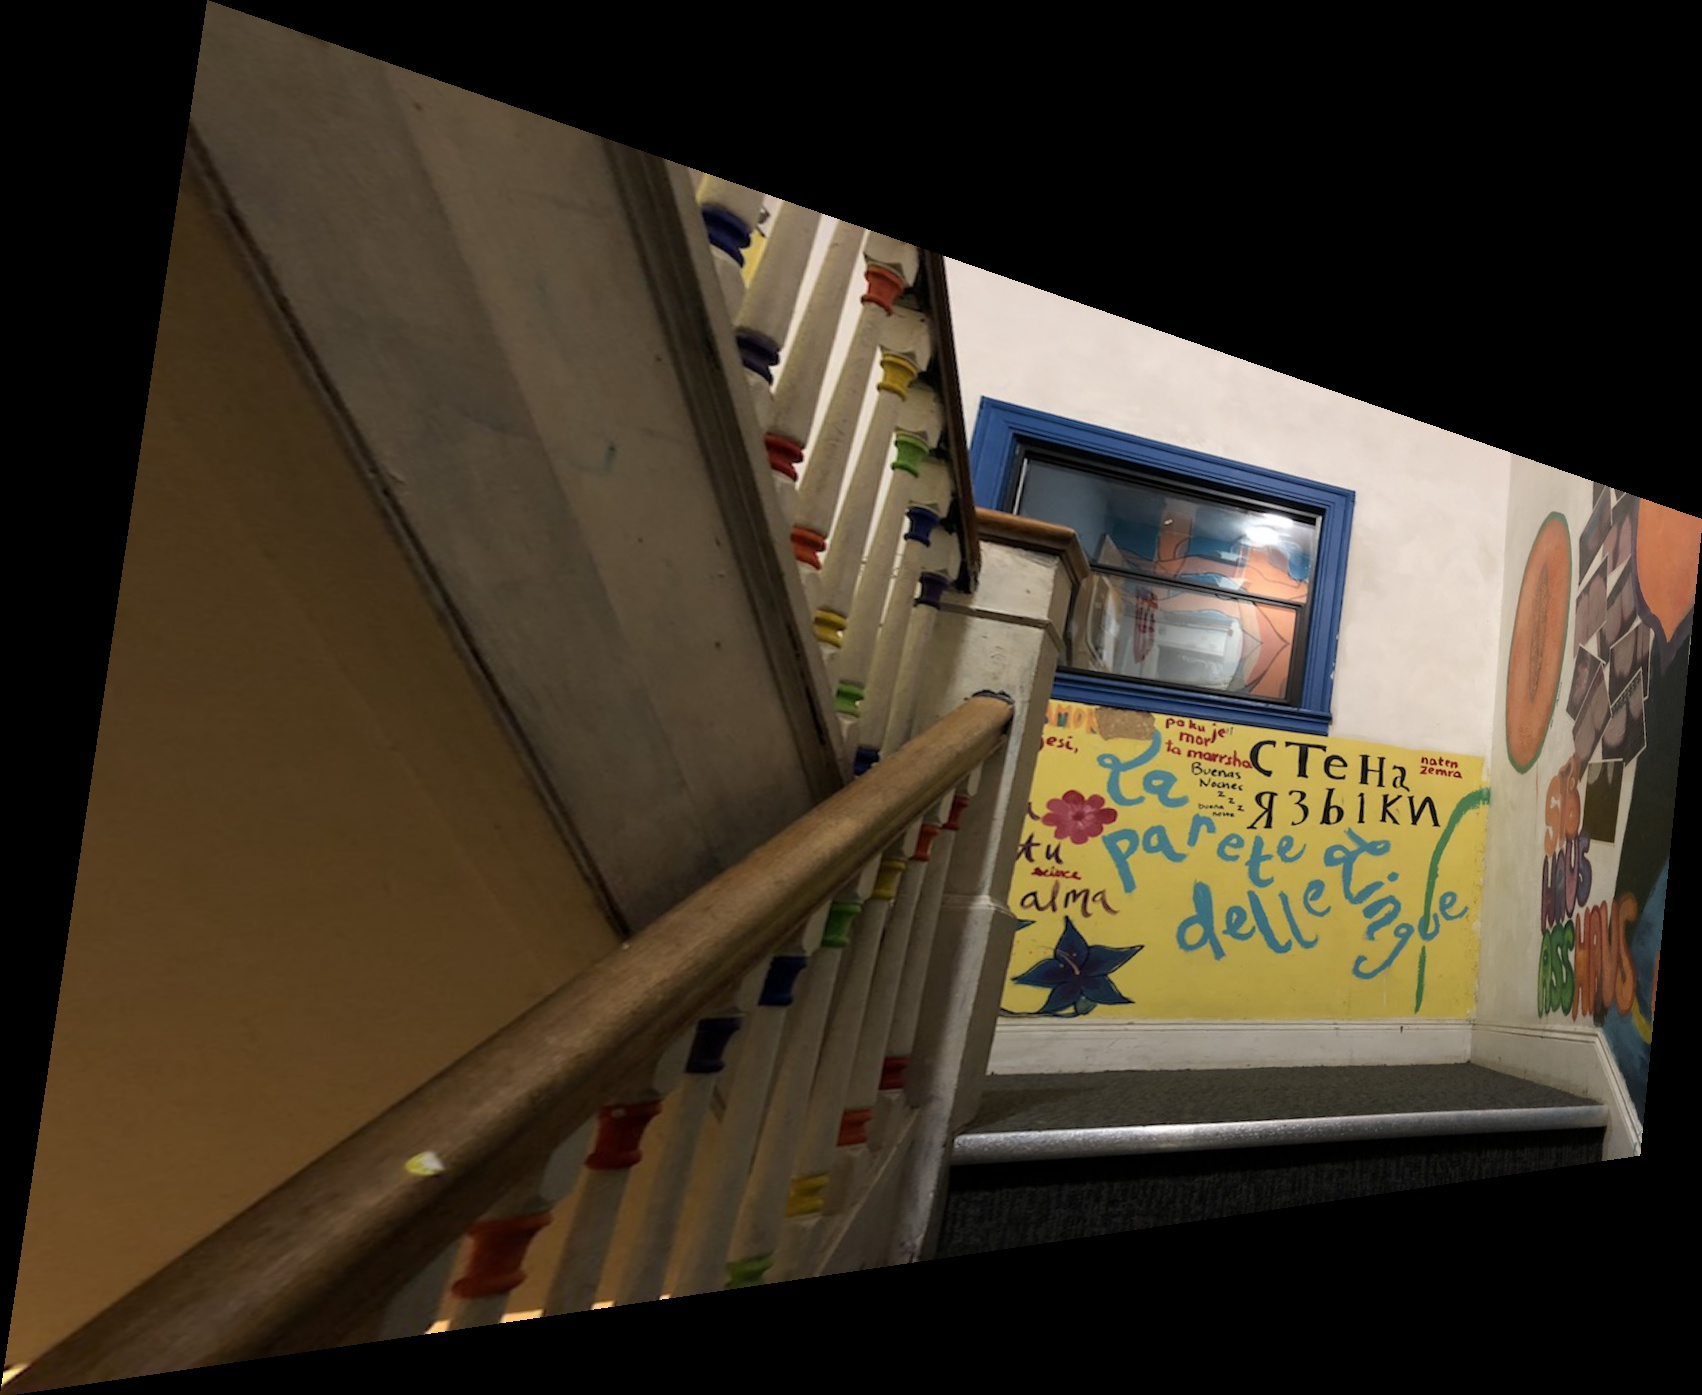
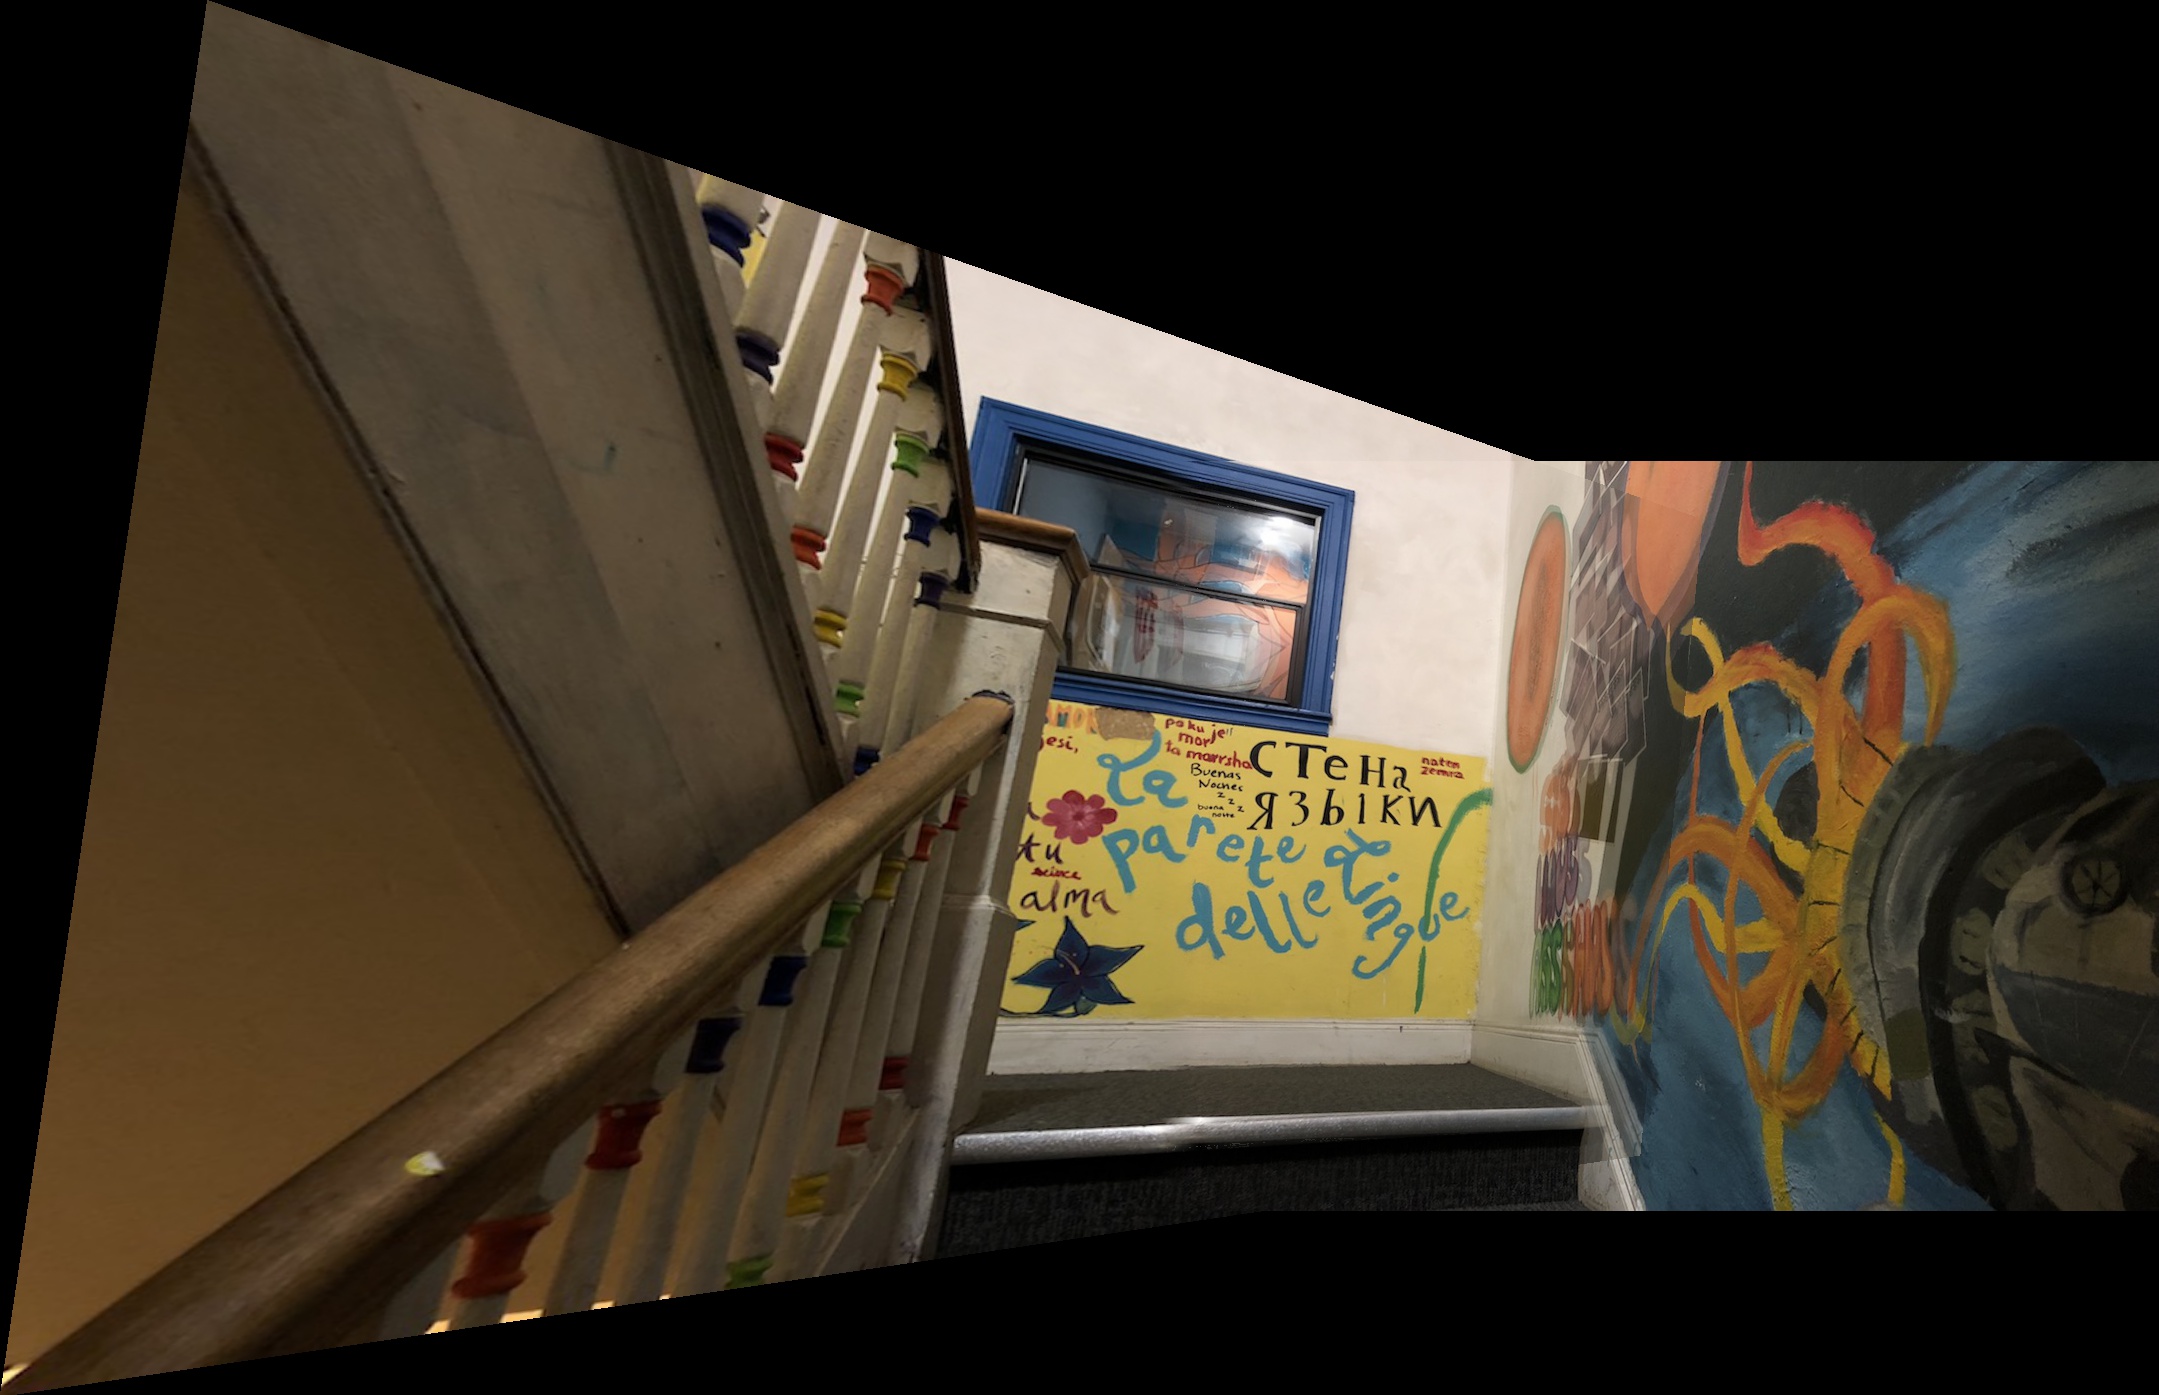
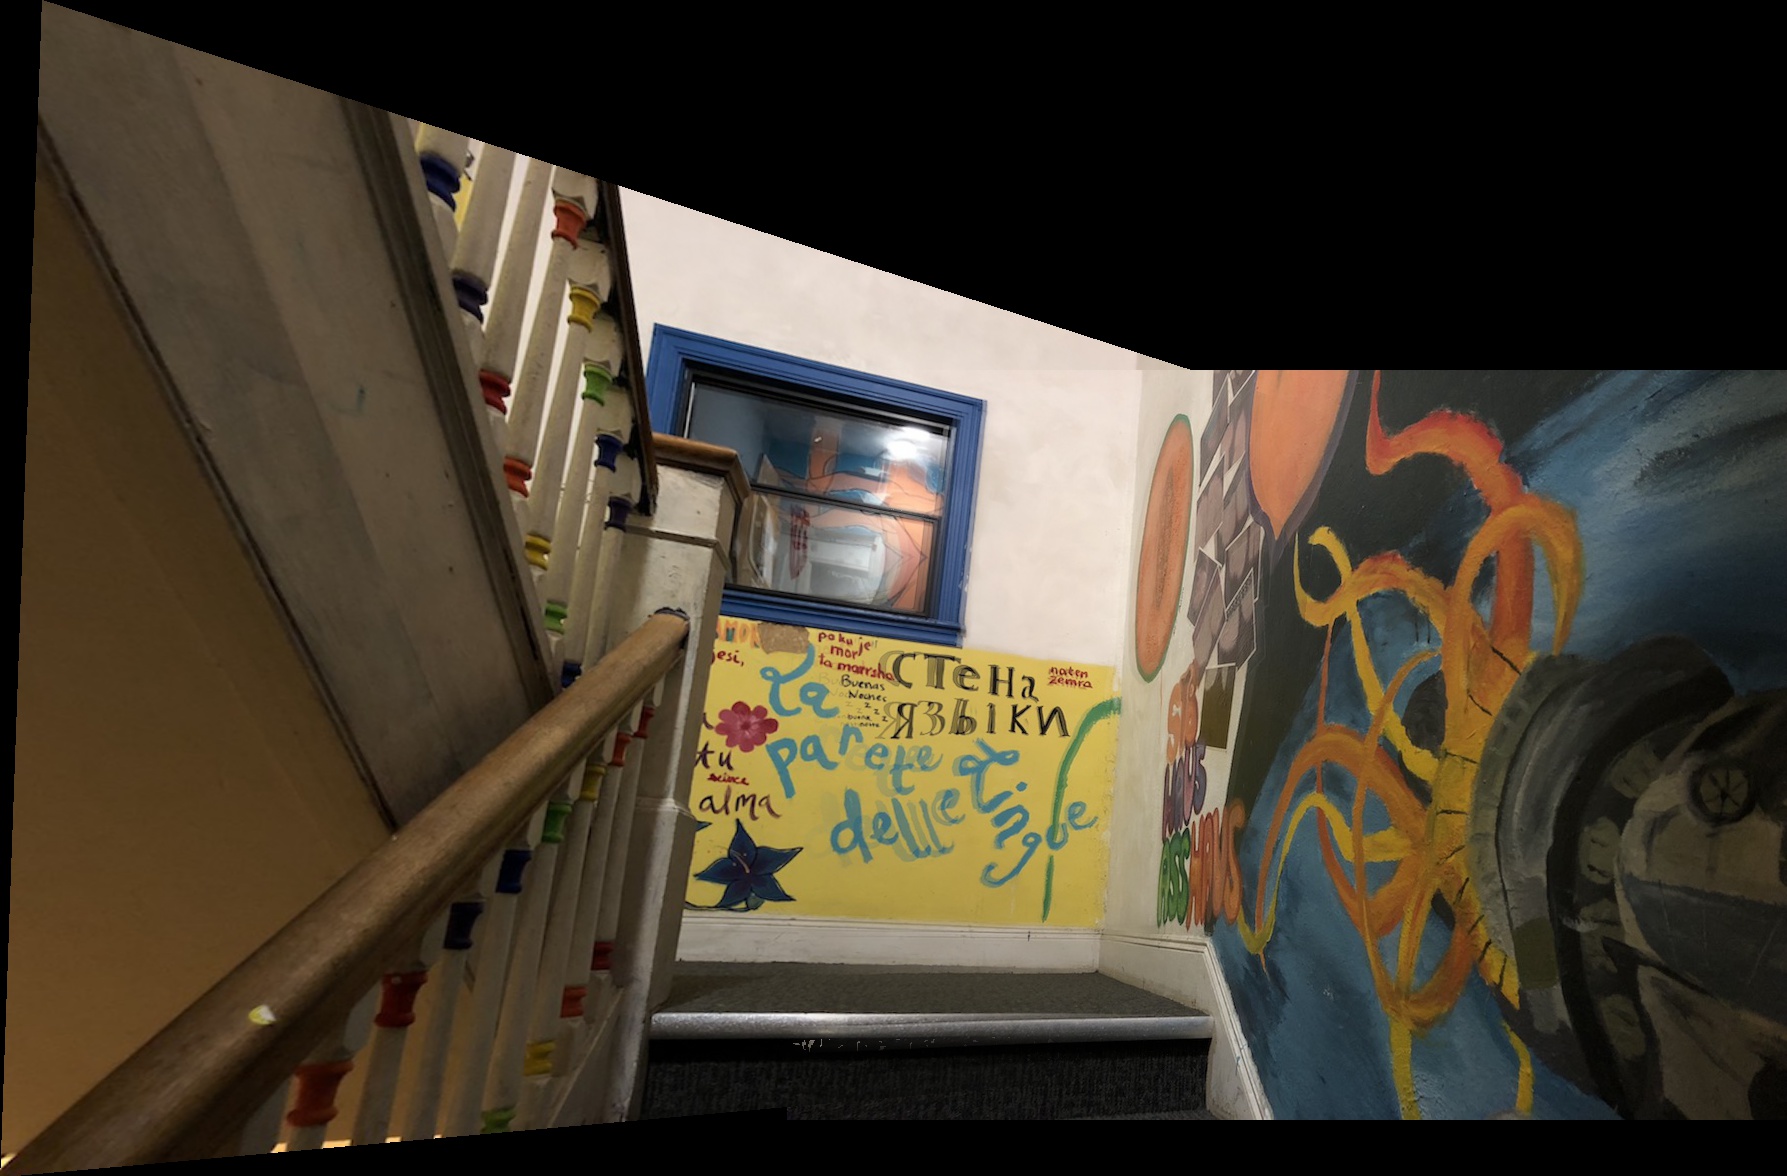
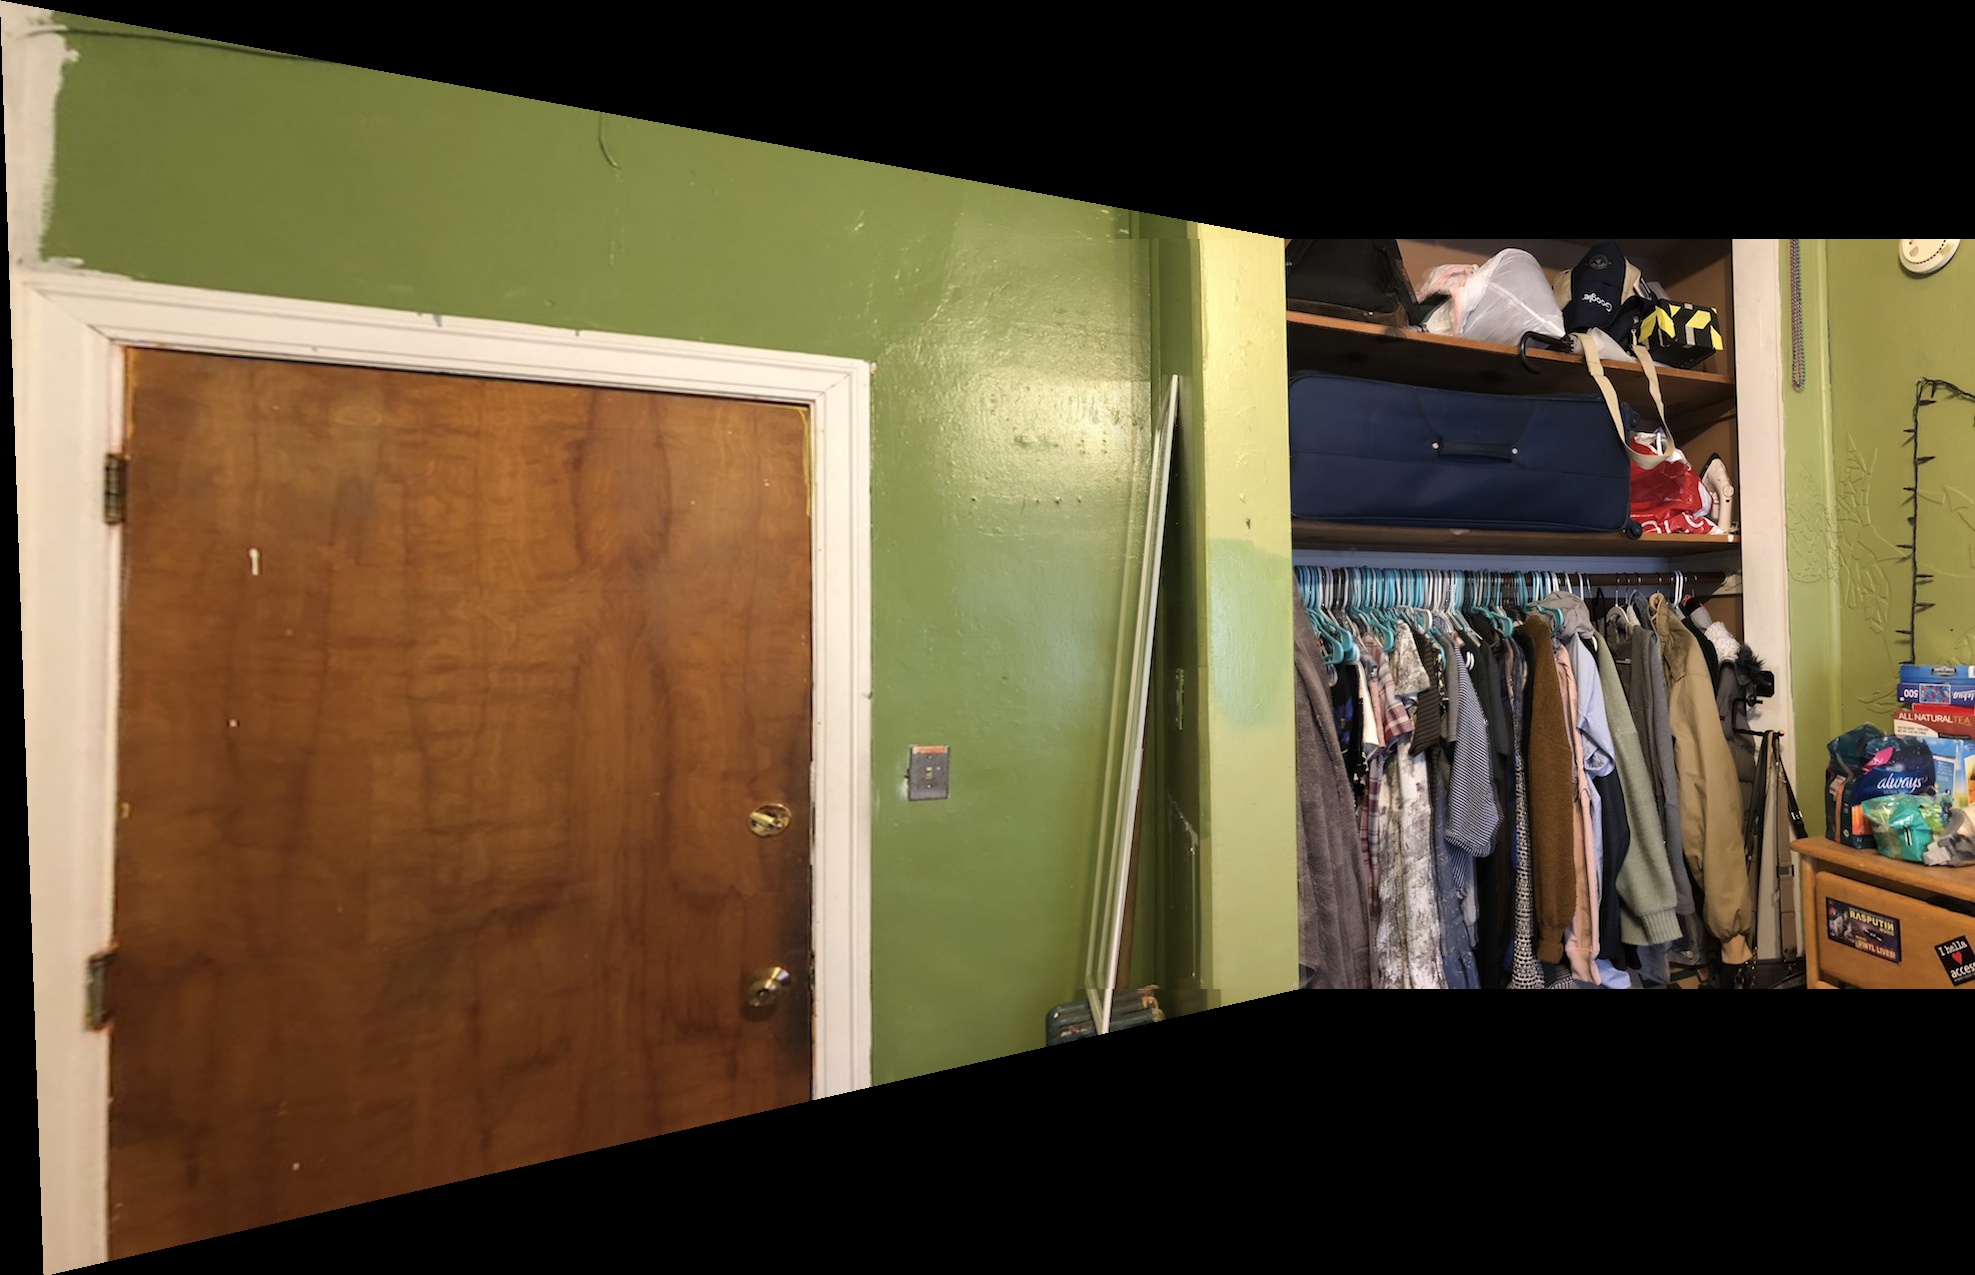
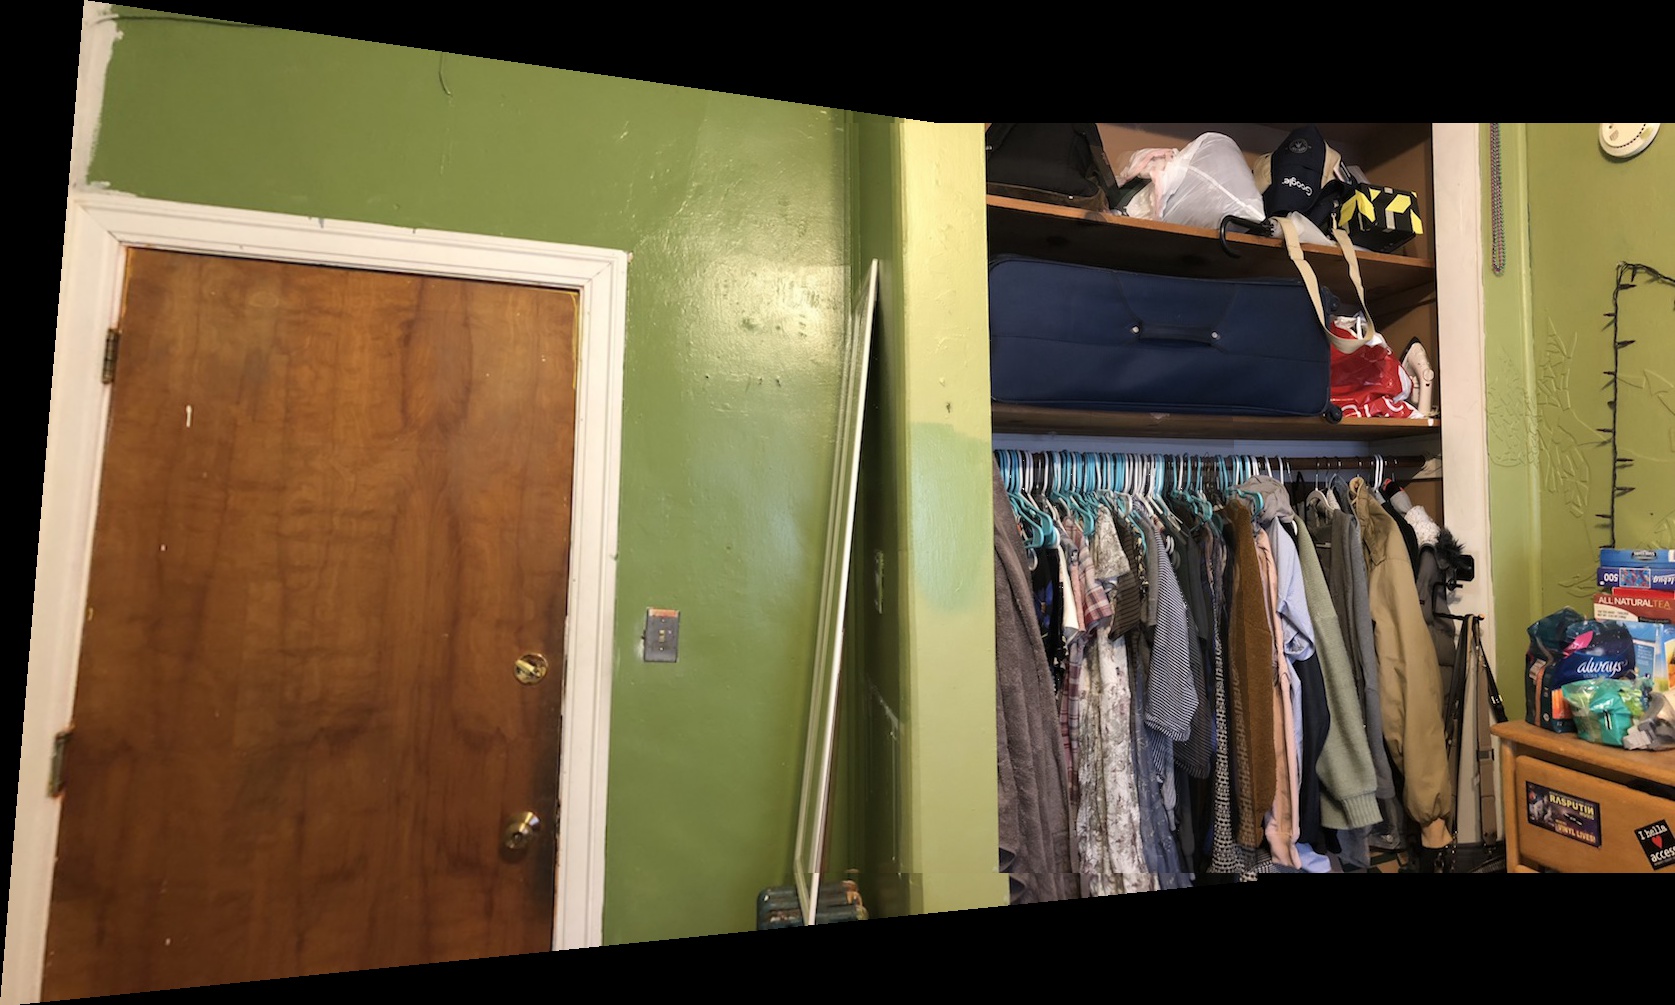
I repeat the process using pictures from my home:
Summary for Part A
All in all this part of the project was really cool! I am most proud of the mosaic I produced of the campus. I found out painfully how important it is to have good points of correspondence and how imprecision in these points is the largest source of error for bad blends / warps. In addition, it's pretty cool what linear algebra can do when applied to images. Lastly, iPhones change lighting dramatically between images so this was also quite annoying to deal with to make the panoramas blend nicely.
Project Overview for Part B
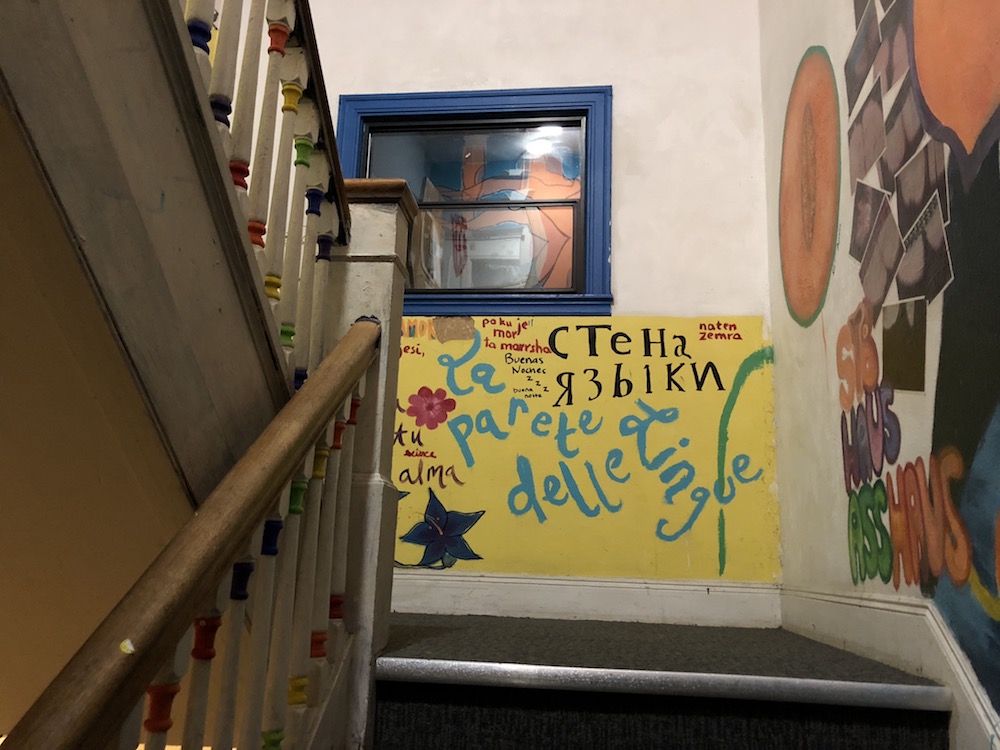
In this part of the project, we explore how we can save the time we spend painfully finding good points of correspondence. I explained above how it is these points that most often are the sources of error. Here we outline a way to automatically detect these points. We describe the steps using our photos of the university campus as well as the hallway above. The mosaic stitching will be the same process as in part A.
Harris Corner Detection
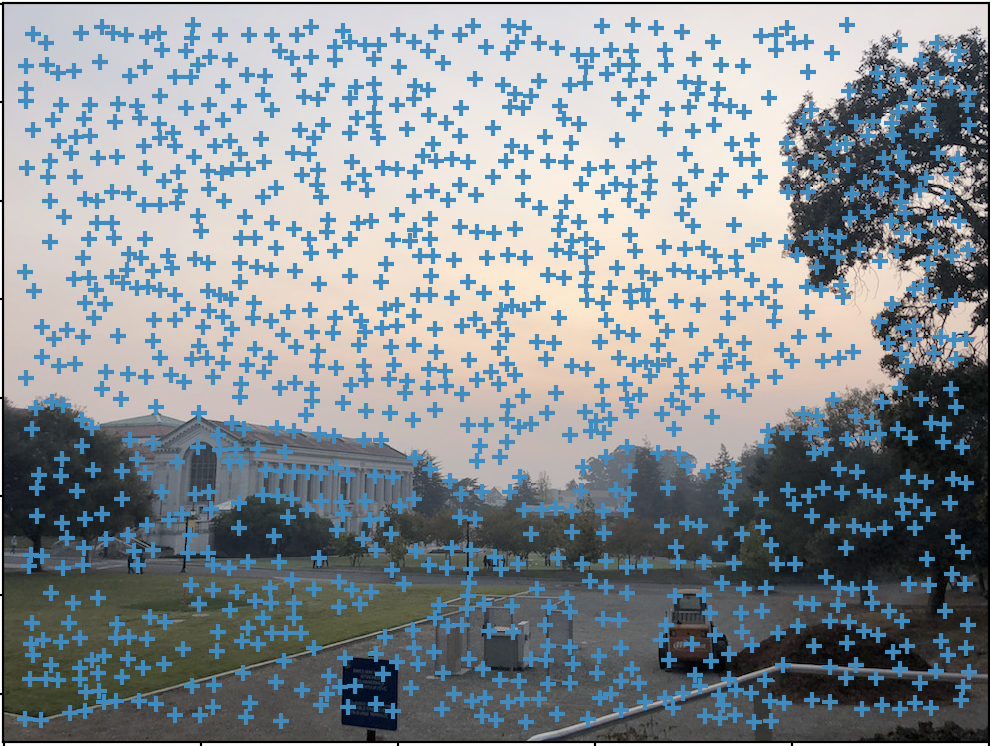
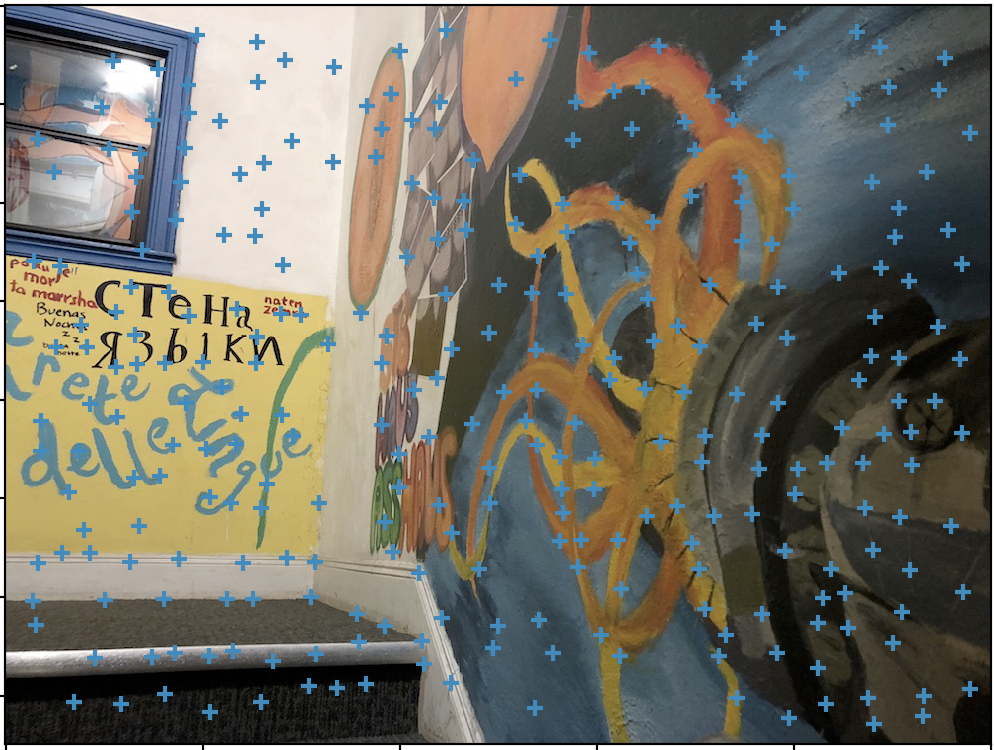
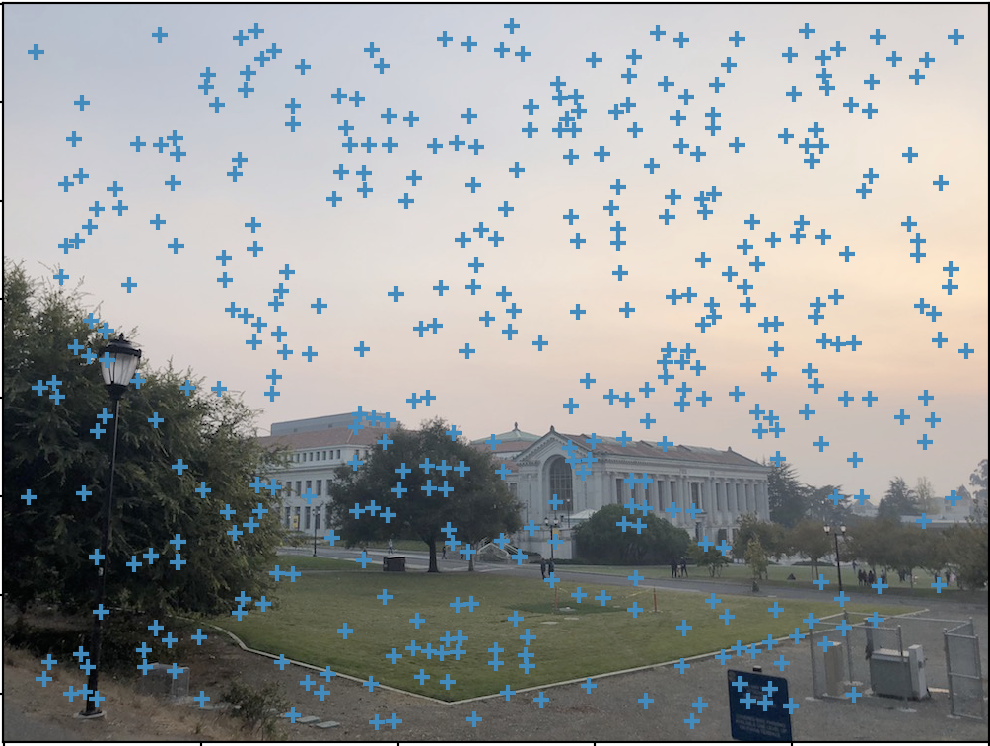
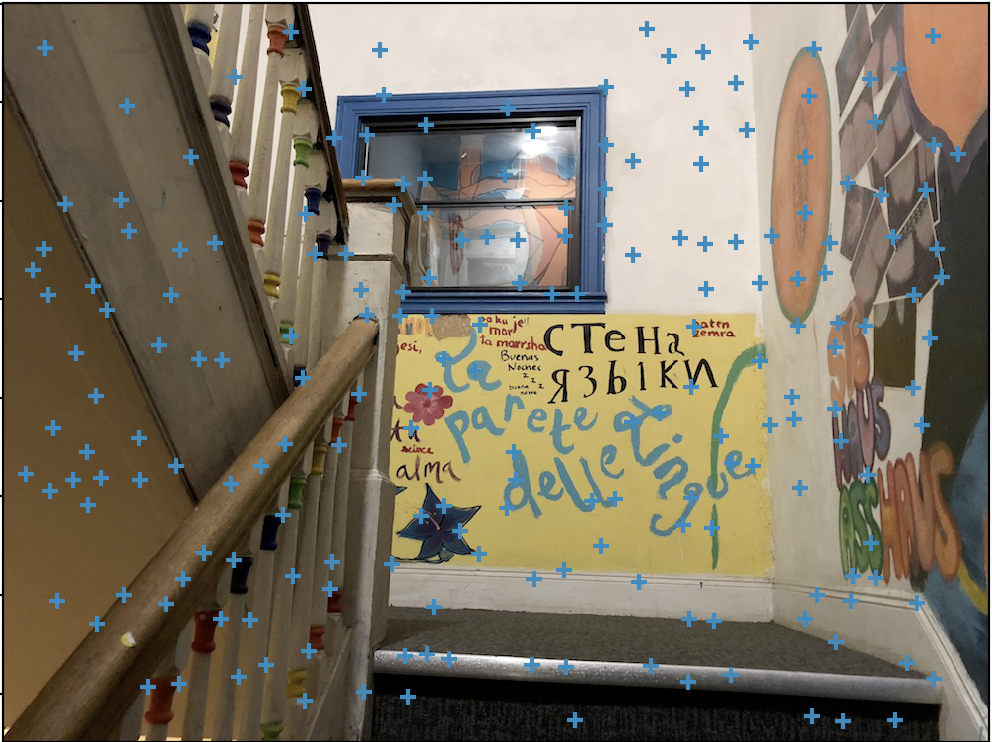
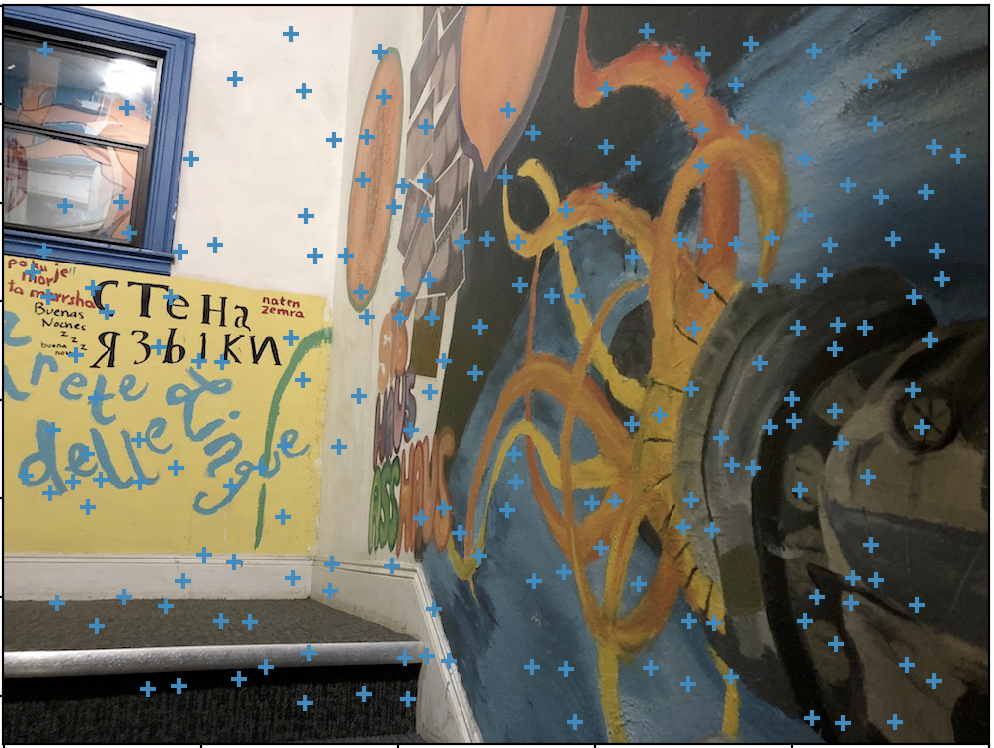
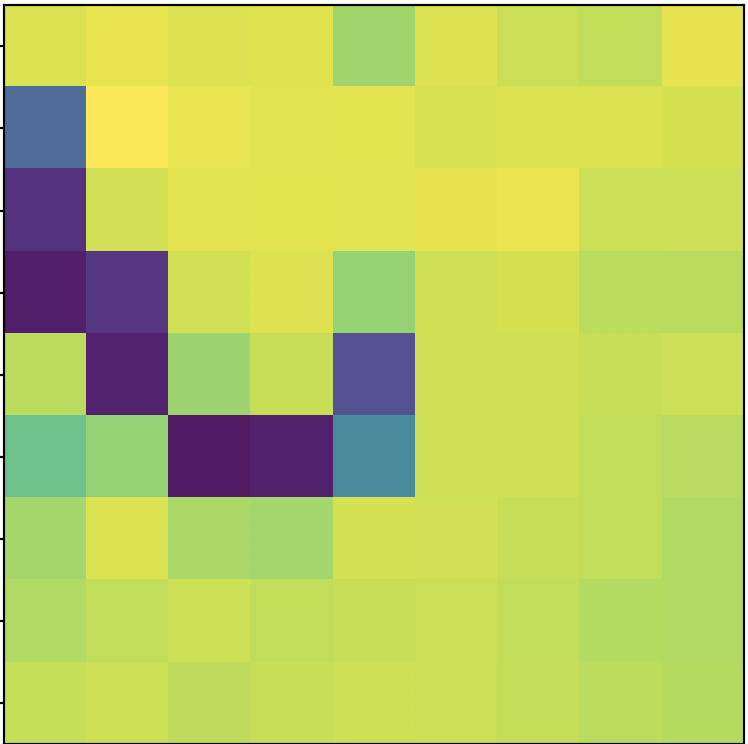
First we apply Harris Corner detection to find points of interest in the first place. In Harris Corner detection, a corner is defined as a point at a junction of 2 edges. These corners are the important features of an image and thus are good candidates for being chosen as a corresponding point. The following images reveal their harris corners:
Adaptive Non-Maximal Suppression
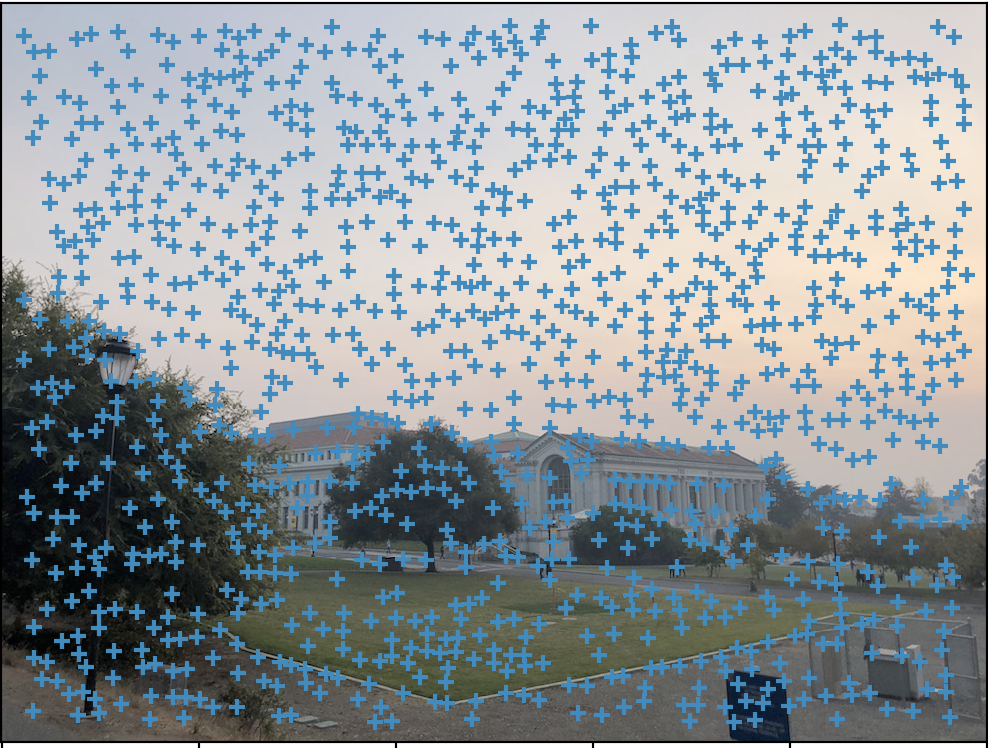
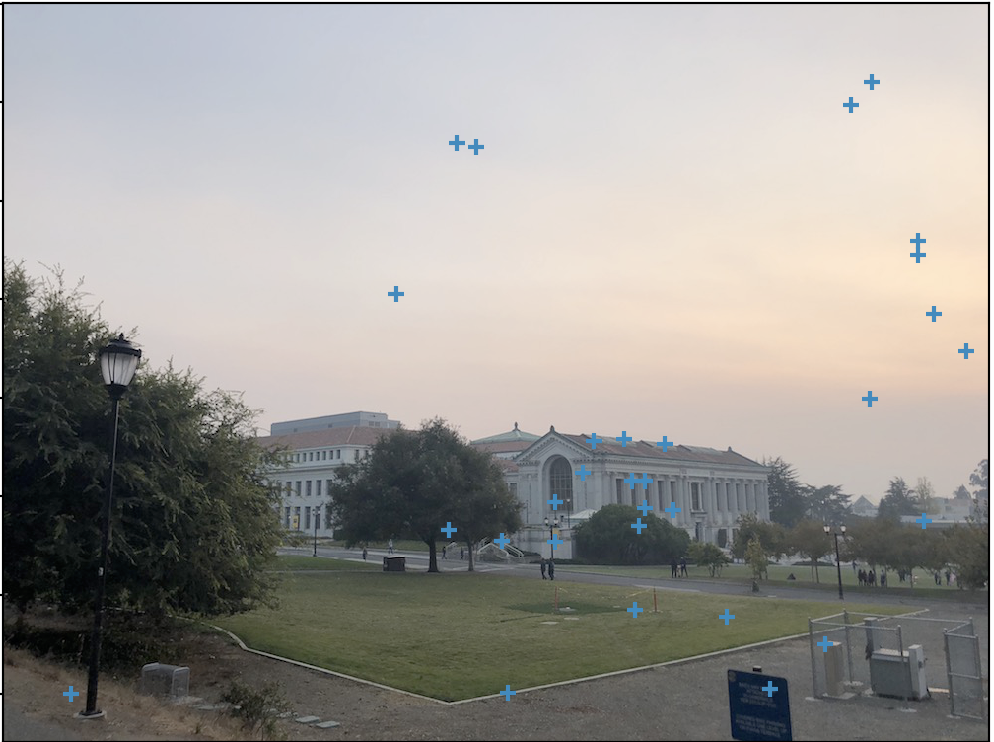
There's a LOT of points going on here, especially in the first set of images. Clearly we need to reduce the amount of points we'll be looking at for potential corresponding points. We can use the Adaptive Non-Maximal Suppression algorithm to reduce our number of points to just be of those that are the "most important". However, it also makes sure that the selected corners are evenly spread throughout the image. The basic idea for ANMS is to only keep the corners whose corner strength is the largest local maxima for the local radii. For each Harris point, we find the distance to the closest significantly stronger neighboring Harris point (in terms of their Harris score). We then order the points in descending order based on their radius distance and choose the top 400 points. This is better than just picking a threshold for the Harris score and limiting that way as this method specifically aims to pick strong points that are nicely distributed (rather than all clustered in a high score area). Here are the results after using ANMS:
Extracting Features & Feature Matching
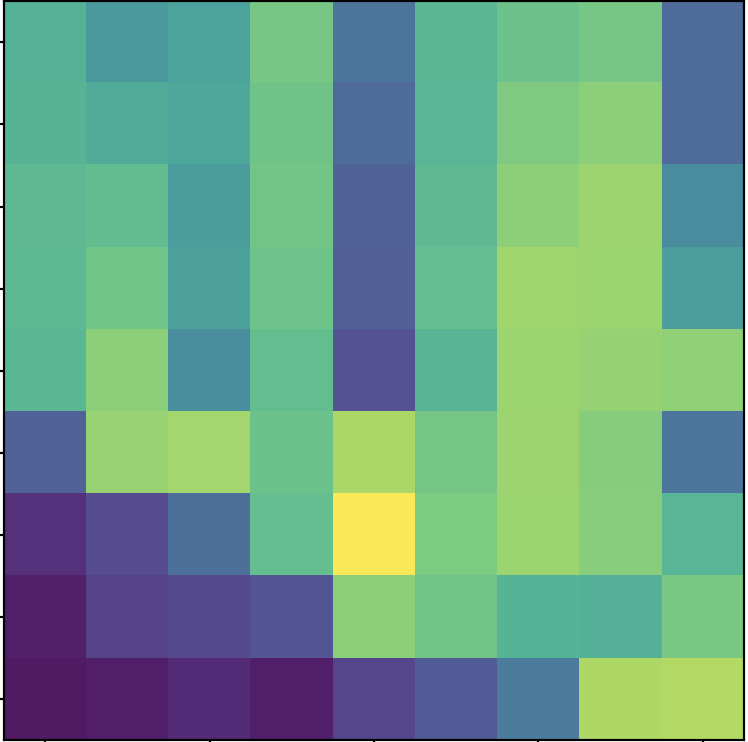
Now that we have a reduced number of points, we want to be able find corresponding points among them. First we extract "features" for comparison. We do this by creating a 40x40 pixel window around each point and subsampling from this window to create a 8x8 pixel "feature descriptor". We store this feature as a 64 dimensional vector for each point and bias/gain normalize them by subtracting the mean and dividing by the standard deviation. This will create an invariant "patch" for each point that summarizes what's going on at that point. Now we can compare the feature descriptors of the first image with every feature descriptor of the second by computing the SSD of each potential pair. To decide which pair of corresponding points we should "accept", we use Lowe thresholding. Basically for each feature descriptor in an image, we order the feature descriptors of the other image by their SSD in descending order. Then we check if the ratio between the first lowest and the second lowest is below a certain threshold. If it is, this means that the feature and its first lowest corresponding feature are much closer to each other than any other potential feature. Thus, we accept it as a pair. Examples of matching feature descriptors are shown below:
 Campus Feature Descriptor 1
|
 Campus Feature Descriptor 1
|
 Campus Feature Descriptor 2
|
 Campus Feature Descriptor 2
|
 Hallway Feature Descriptor 1
|
 Hallway Feature Descriptor 1
|
 Hallway Feature Descriptor 2
|
 Hallway Feature Descriptor 2
|
Here are the images with now just their corresponding points:
RANSAC
You may notice that some corresponding points shown above are still incorrect. For example, in the hallway picture, the points on the stairs in the left image should not be considered for a corresponding point as the stairs aren't even in the right image. We cannot blindly use all corresponding points if some of them are wrong. Thus we use RANSAC to find the best homography matrix that satisfies most of the corresponding points. We do this by choosing 4 points at random and computing the Homography matrix. Then, we compute the distance between the points in the second image and the result of applying the Homography matrix on their corresponding point in the first image. If this distance is less than 3px, I say this is an "inlier", a satisfied point. After running this for many, many iterations, I keep track of the Homography matrix with the most inliers. Whichever Homography matrix it is, I now compute the Homography matrix on all its inliers and this will my matrix used for warping.
Mosaic Results
Alright, now we can apply what we've done in Part A and reveal our mosaicing results!
Summary for Part B
I feel that the mosaics created by the automatic corner detection are superior to those I created manually. I believe this is because a detection algorithm is free of human bias. For example, I would try to select points that makes sense to me/ are easy to select (it can be hard for me to see the exact point of a fine-tuned detailed point). This human bias can lead to error or not evenly distributed corresponding points, something that is important for a nice warp. As a result, the manual mosaics are a little inexact in some areas whereas the automatic ones are more precise. All in all, this was a cool project and it amazes me how simple math can create something like this!
Side by Side Views of the Mosaics
 Automatic
|
 Manual
|
 Automatic
|
 Manual
|
 Automatic
|
 Manual
|