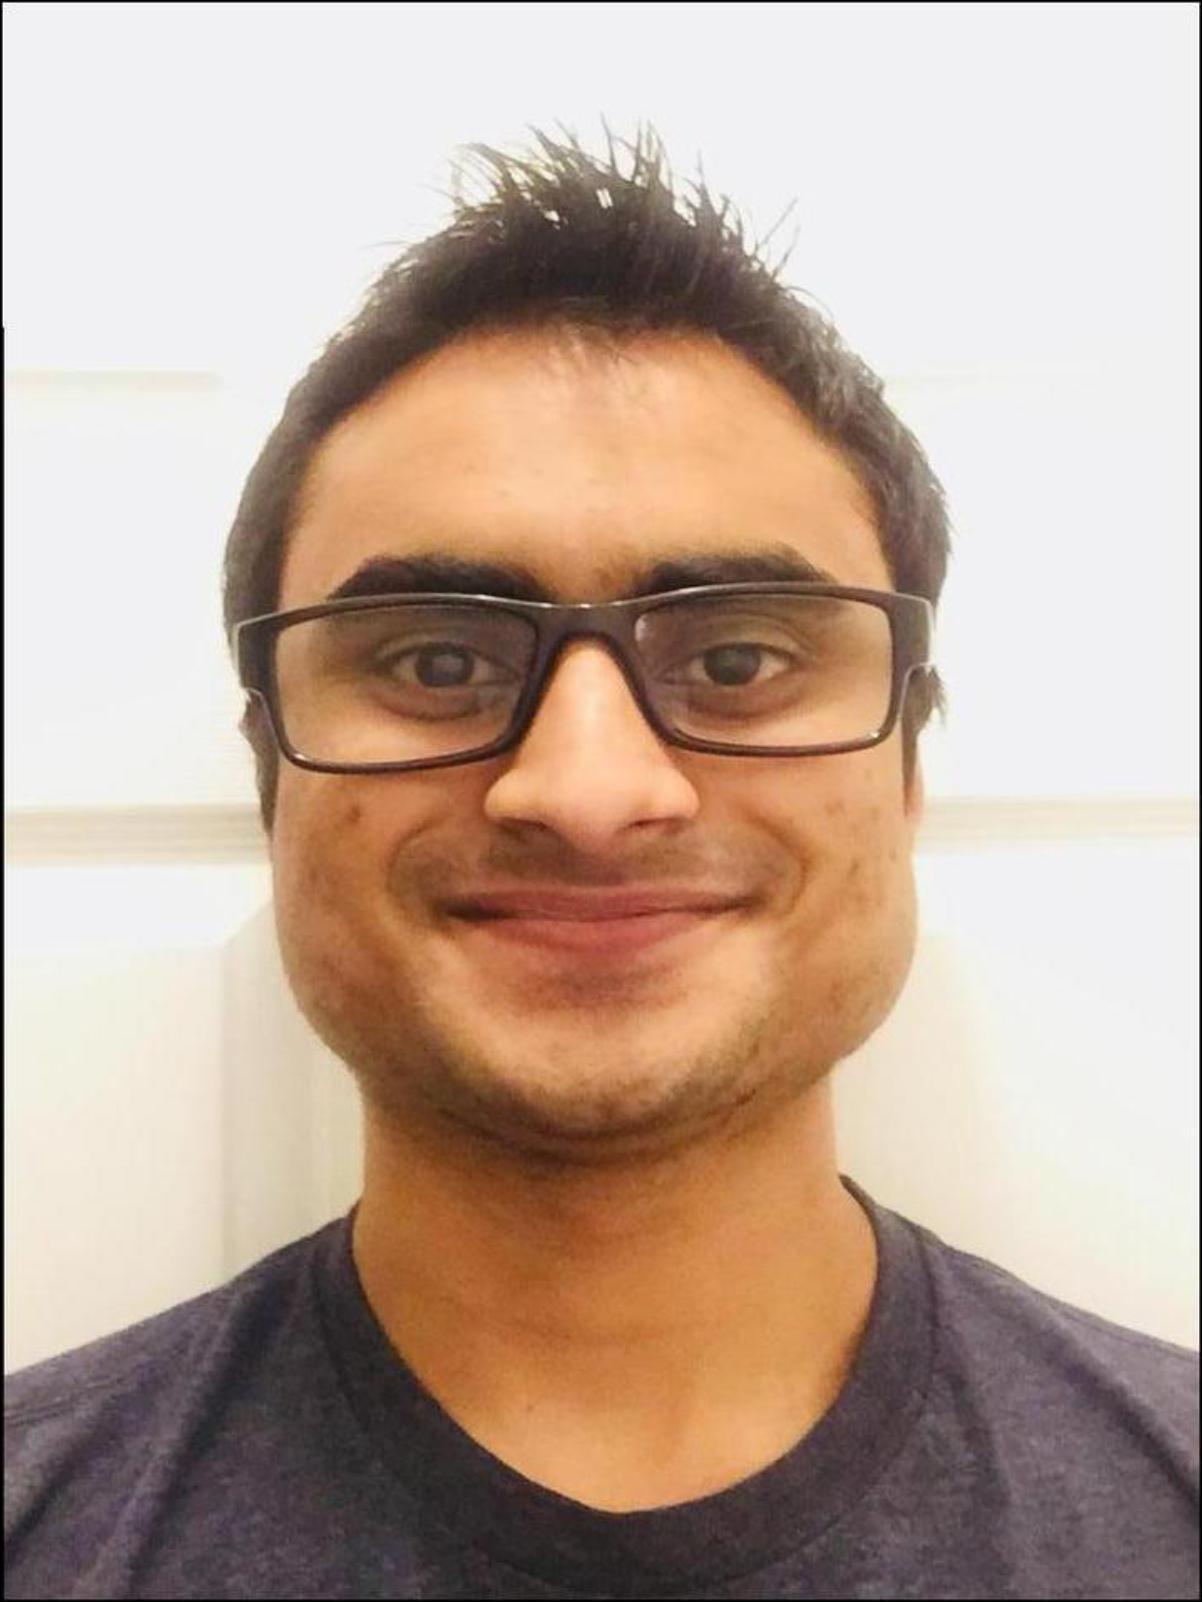
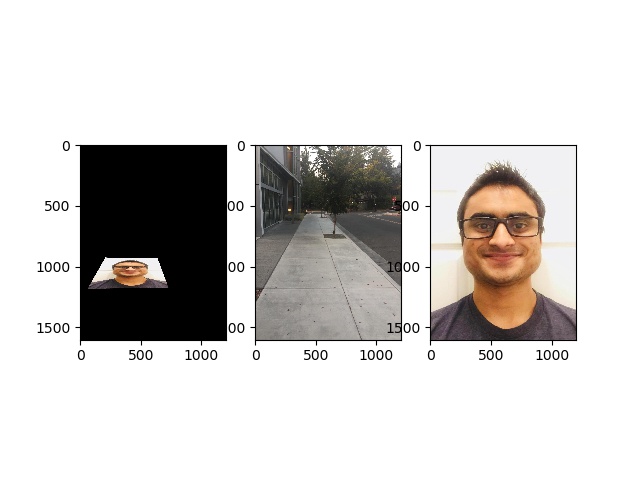
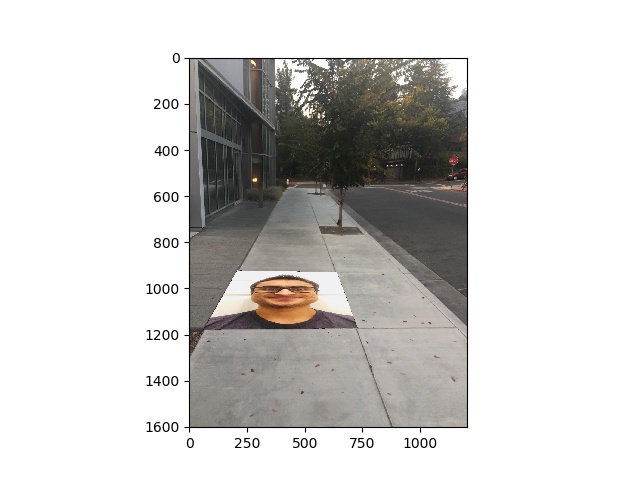
Face and sidewalk - 0
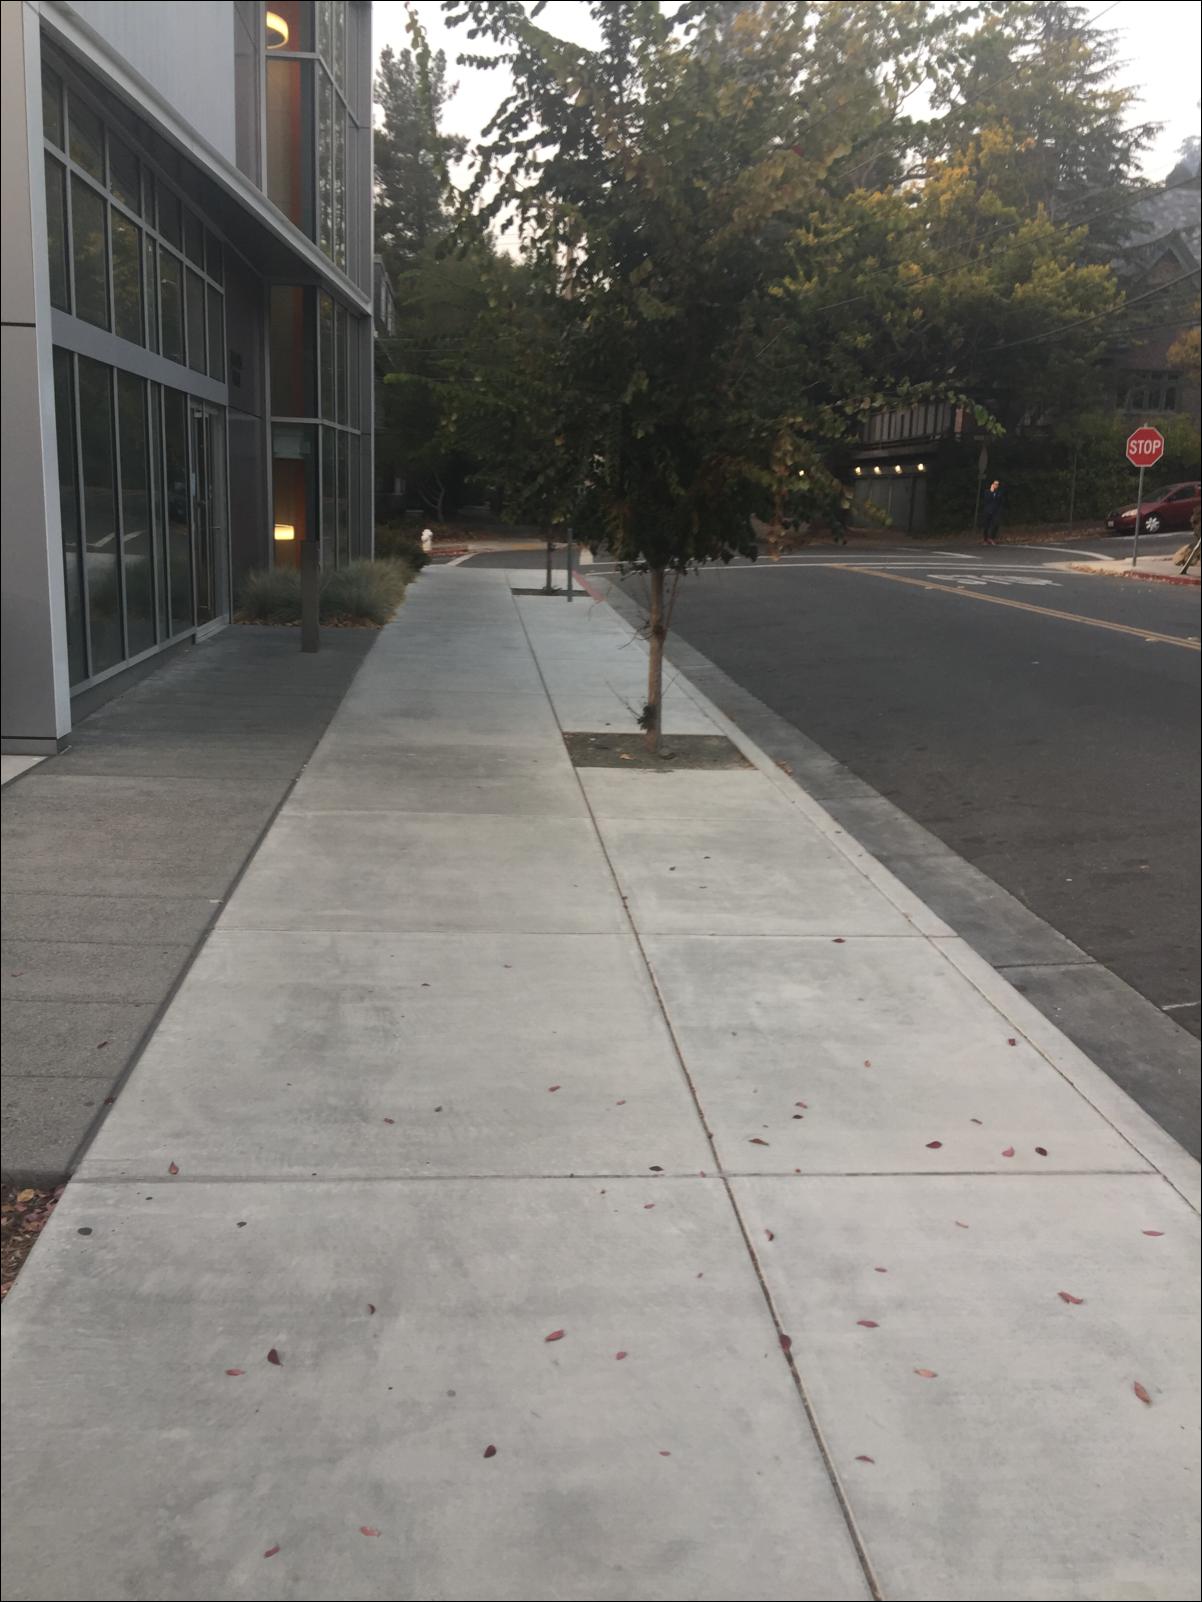
Face and sidewalk - 1
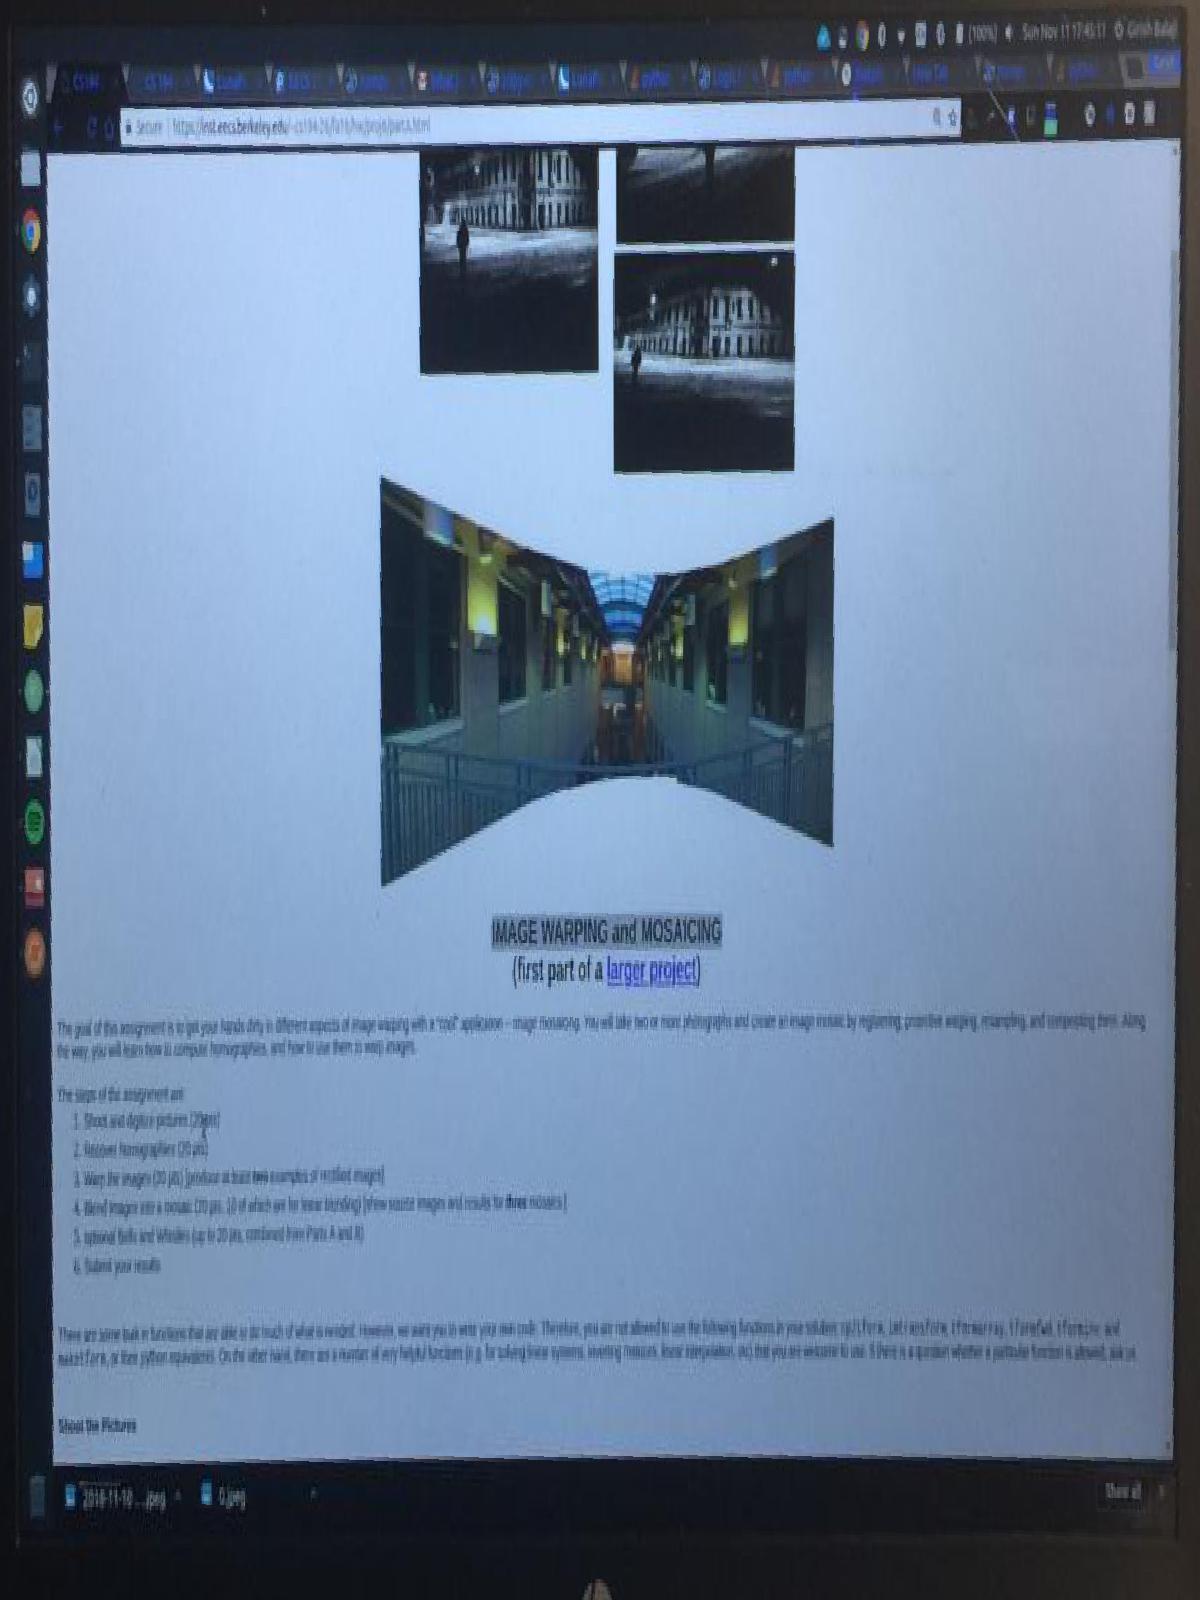
In this project we implemented automated image warping and mosaicing. We basically take two or more photographs and create and image mosaic by taking a specific affine transformation of each image so that they are perfectly lined up on top of each other.
I took a bunch of pictures and digitized them. Check them out.


  usage: main.py [-h] [-d DATA_DIR] [-f1 FILE_NUM_1] [-f2 FILE_NUM_2] [-n NUM] [-l LANDSCAPE]
        [{clean_iphone_data,multi_annotate,multi_merge,multi_view_corr,rectify,get_correspondence,get_direct_correspondence,view_correspondence,get_homography,test}]

  positional arguments:
    {clean_iphone_data,multi_annotate,multi_merge,multi_view_corr,rectify,get_correspondence,get_direct_correspondence,view_correspondence,get_homography,test}

  optional arguments:
    -h, --help            show this help message and exit
    -d DATA_DIR, --data_dir DATA_DIR
    -f1 FILE_NUM_1, --file_num_1 FILE_NUM_1
    -f2 FILE_NUM_2, --file_num_2 FILE_NUM_2
    -n NUM, --num NUM
    -l LANDSCAPE, --landscape LANDSCAPE

      The output is 'output/{file_name}.png'

    Merging Images:
      1. Load images to merge in iphone_data/{data_dir}
      2. python main.py clean_iphone_data -d {data_dir} -l {landscape?}
      3. Annotate each image to the points you want to match
        python main.py multi_annotate -d {data_dir} -n {number of images}
      4. Check if the correspondences were set accurately
        python main.py multi_view_corr -d {data_dir} -n {number of images}
      5. python main.py multi_merge -d {data_dir} -n {number of images}

    Image Rectification:
      1. Load image to rectify in iphone_data/{data_dir}
      2. python main.py clean_iphone_data -d {data_dir} -l {landscape?}
      3. Annotate each image to the points you want to match
        python main.py multi_annotate -d {data_dir} -n 1
      4. Check if the correspondences were set accurately
        python main.py multi_view_corr -d {data_dir} -n 1
      5. python main.py rectify -d {data_dir} -n 1
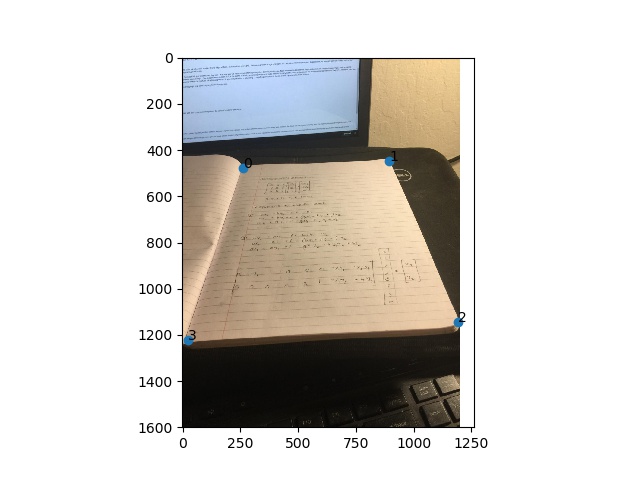
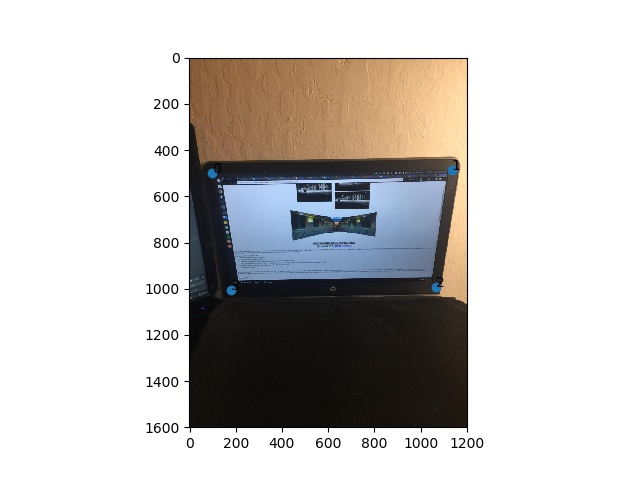
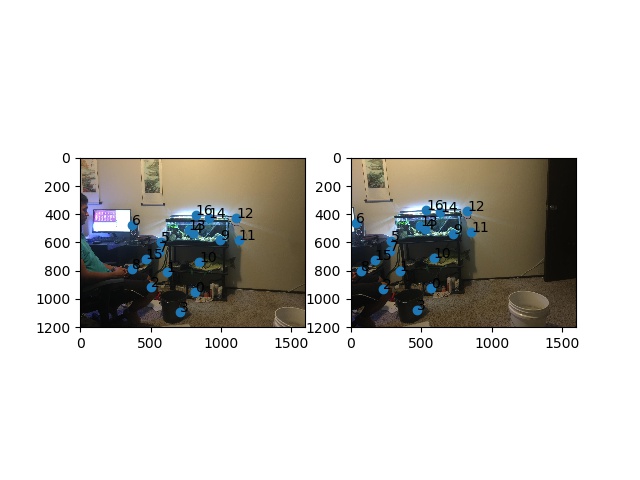
The point of this section is to recover the use the annotated points on our base image we're using as a reference and the annotated points on the extra images that we're going to transform onto the base image. In my images, I used the first one 0.jpeg in each series as the base image.
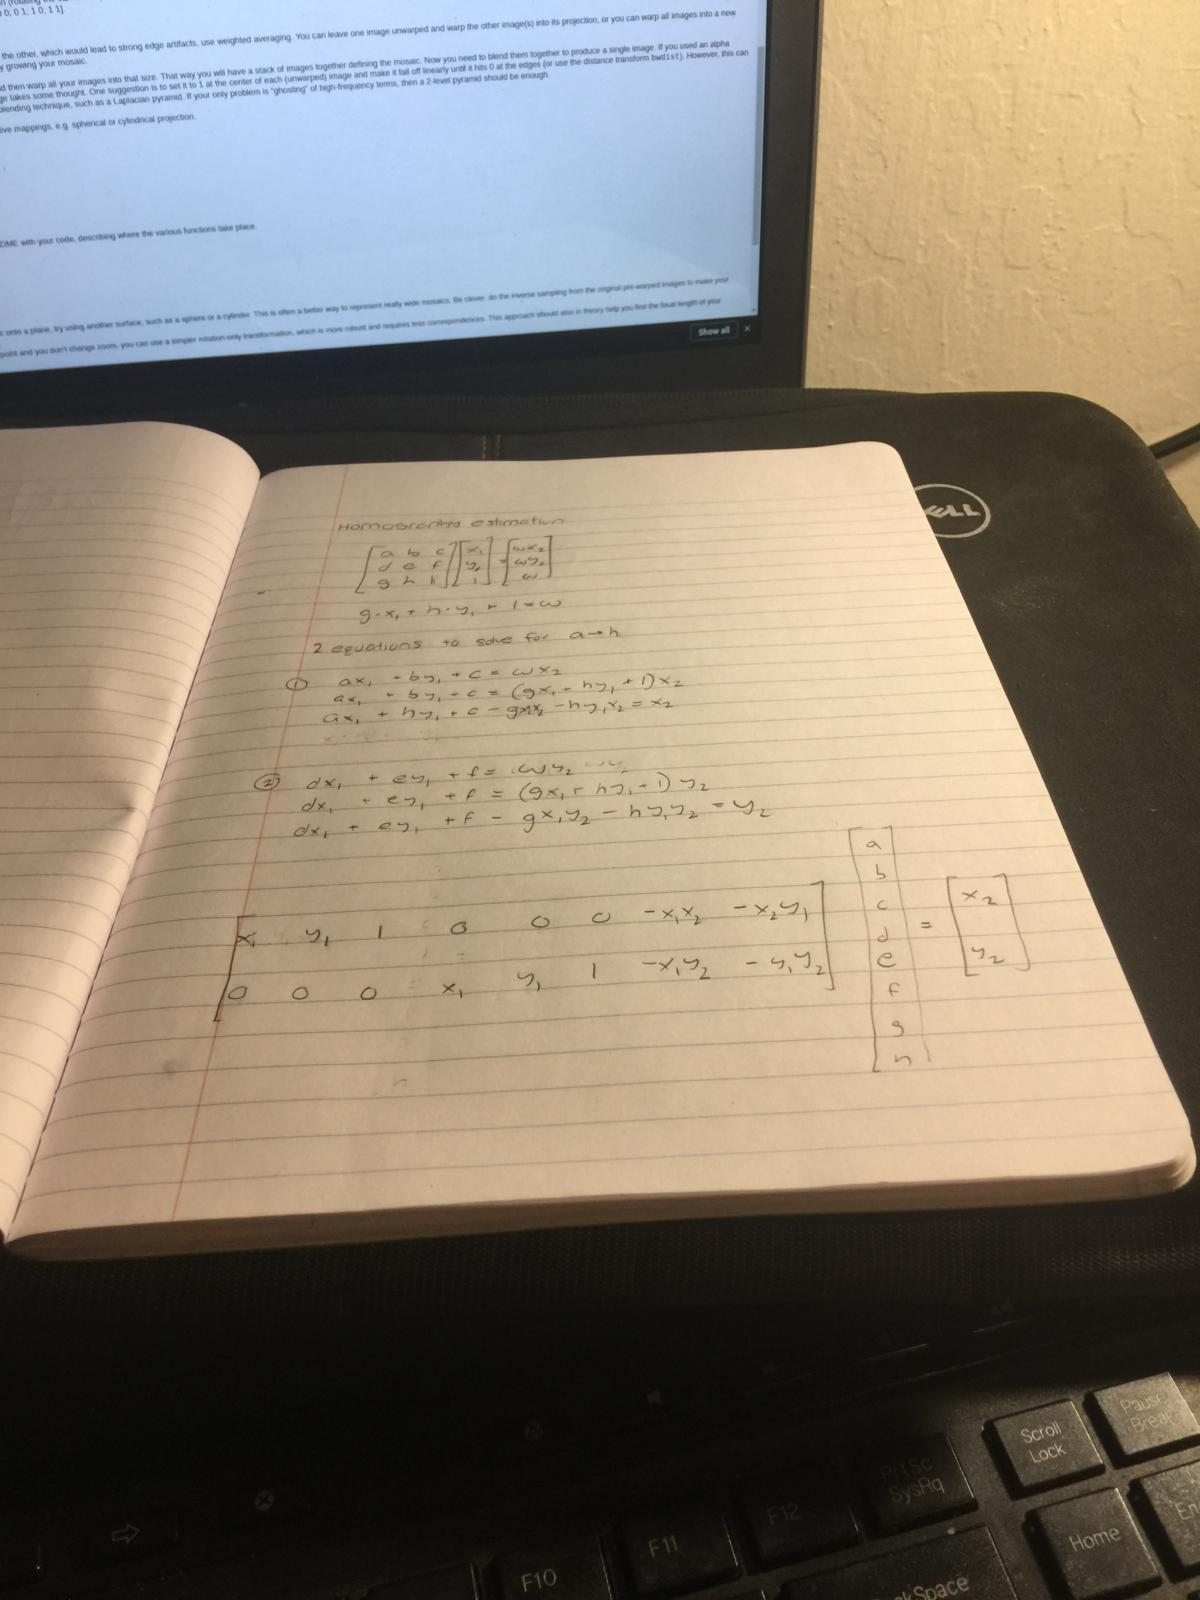
Here's the calculation for the homography. This paper below with the calcualations is actually a rectified image! Check it out before but look at the math below
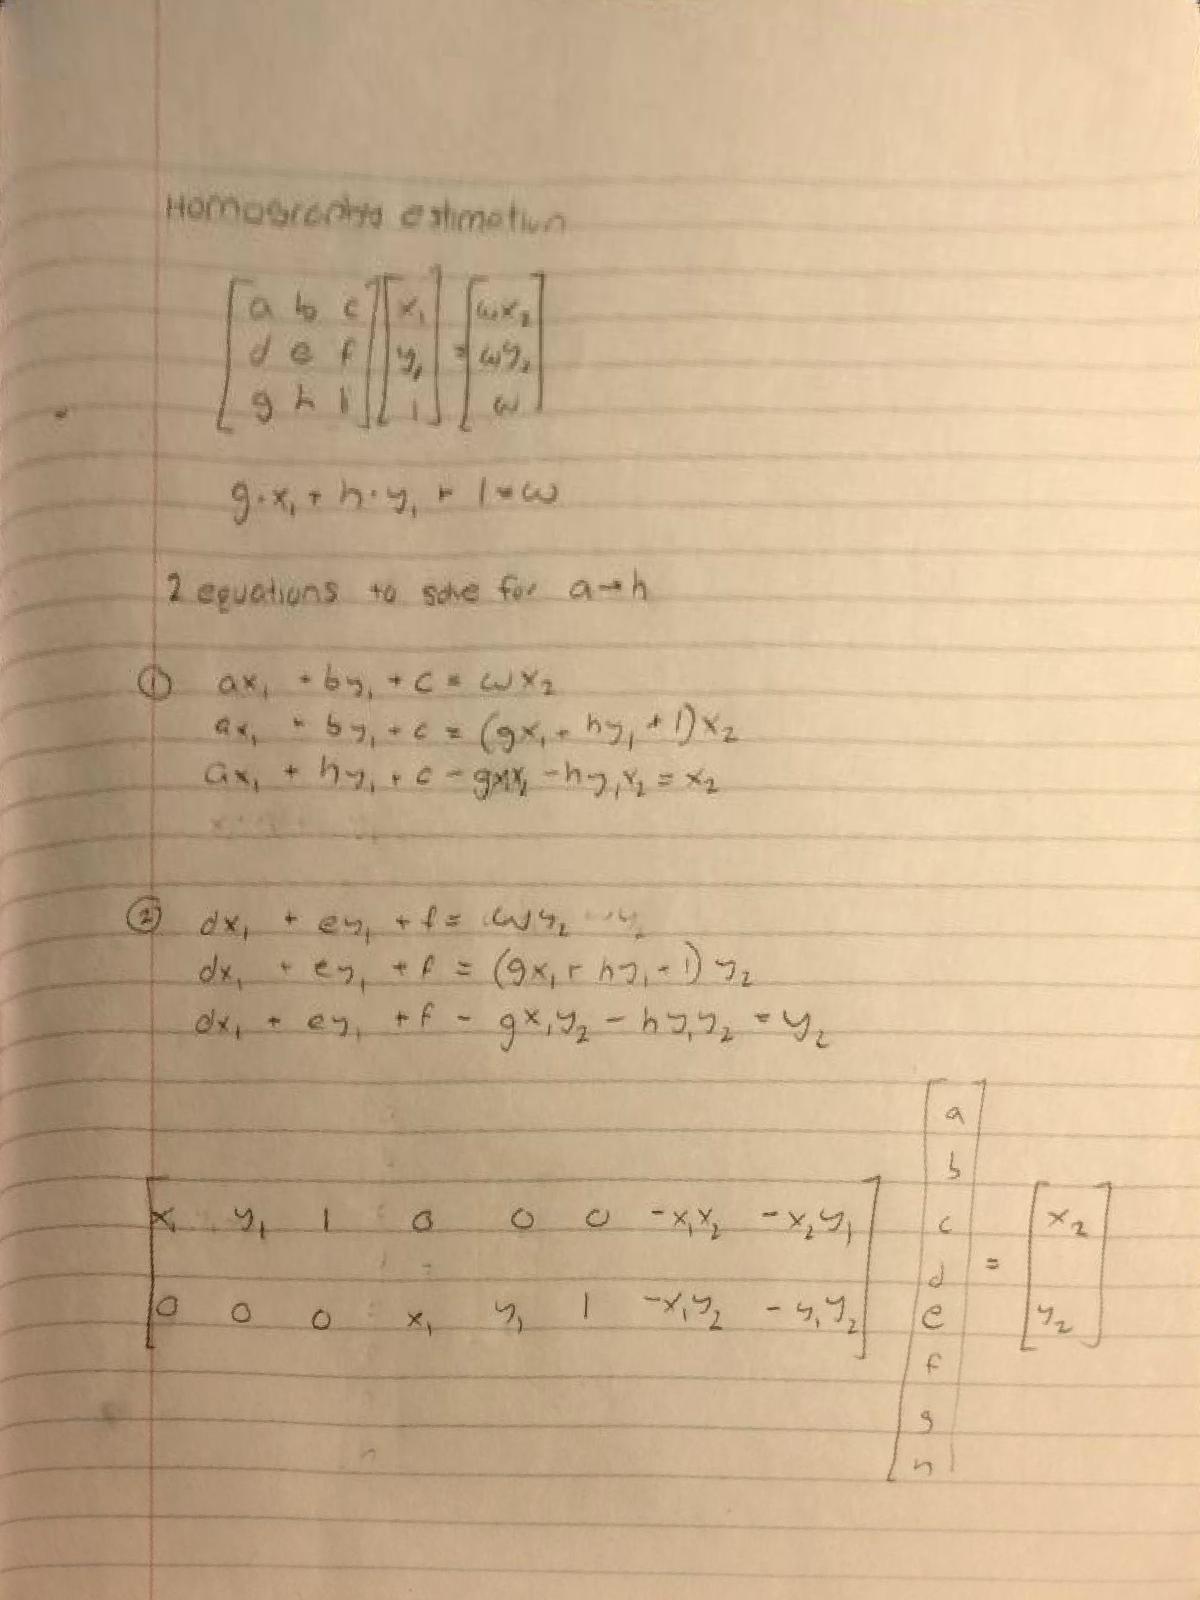
For each point mapping (x1, y1) and (x2, y2) we can get two equations to solve for the 8 variables in the homography transformation.
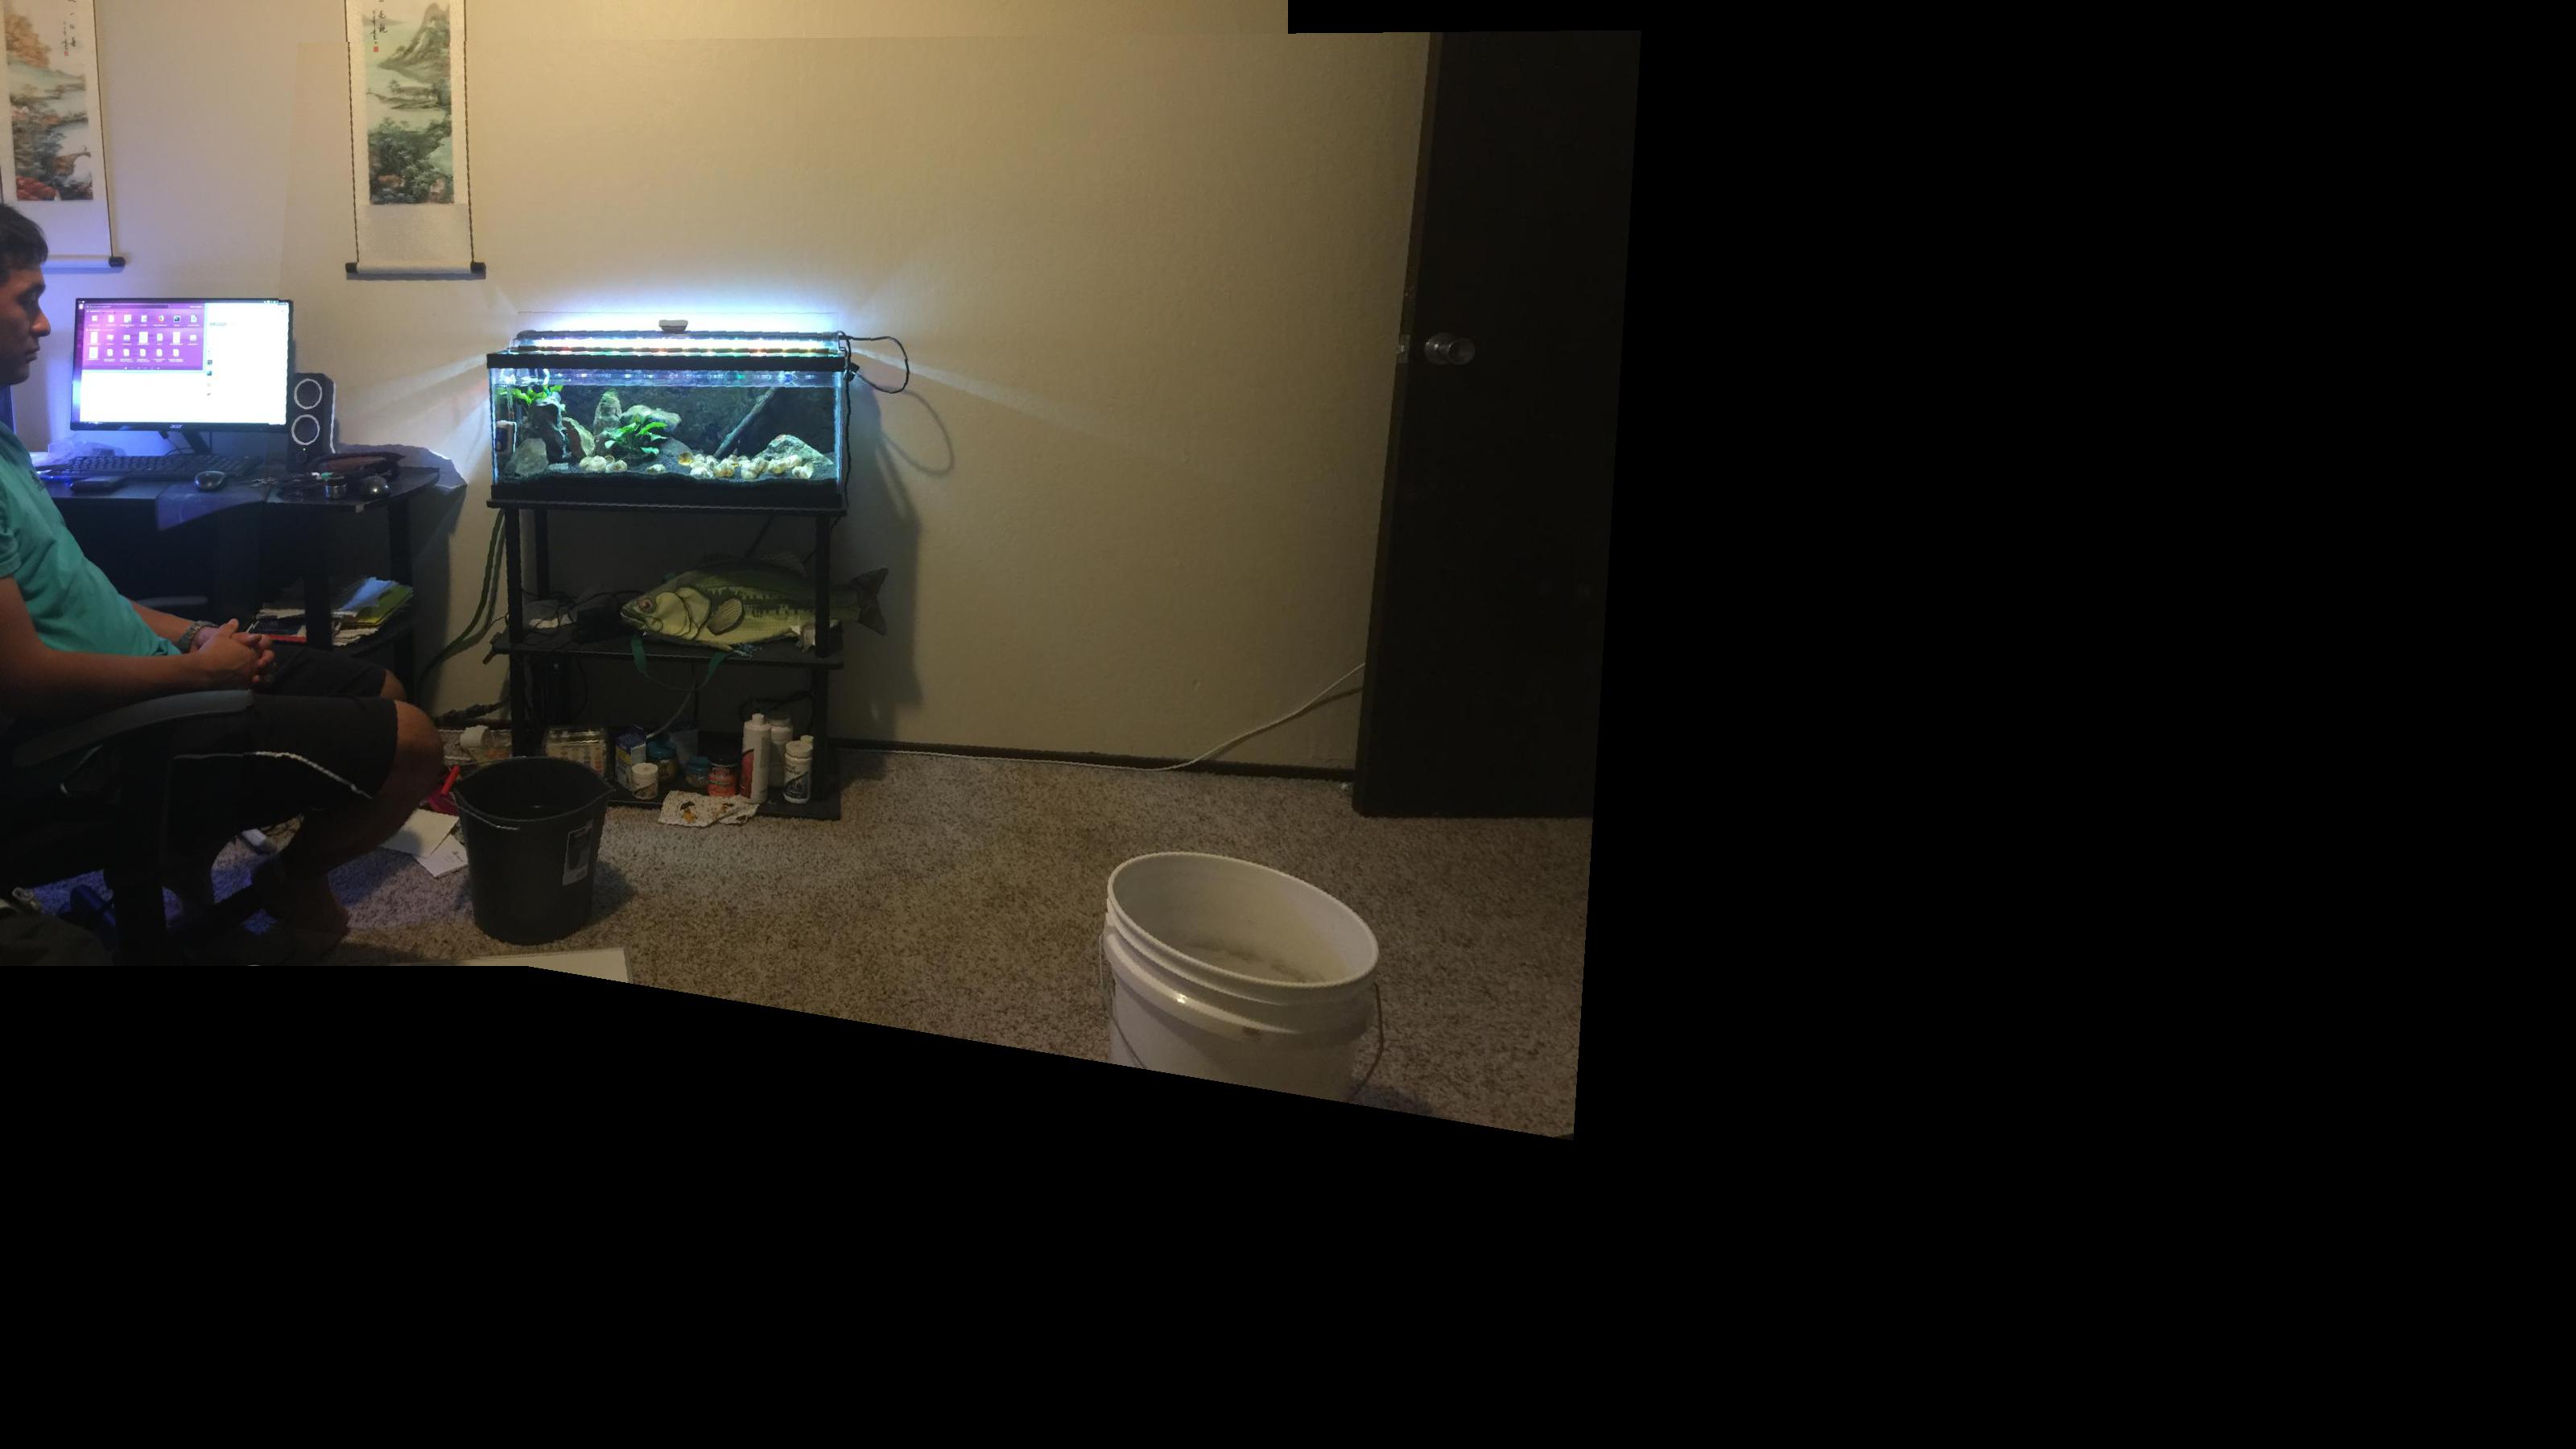
Once we get the mapping from the base image of annotated points to the corresponding points on image we're trying to transform onto the base image, we can complete the transformation and put the images to transform into the source image.
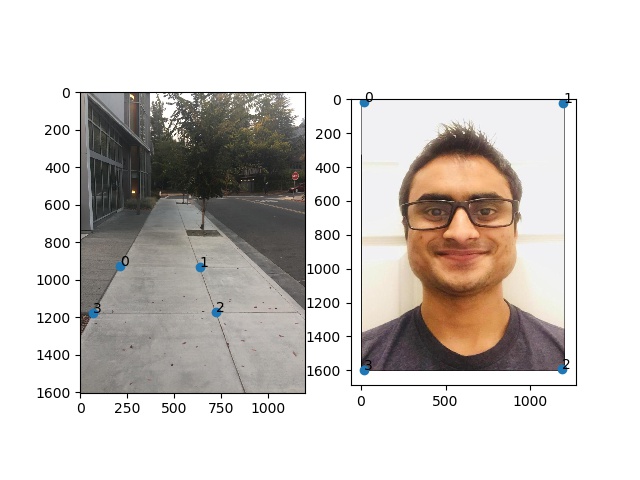
First thing I had to do is check that the homography works so I wrote a test function that can be run as follows: python -i main.py test -d {data_dir} -f1 0 -f2 1
I used the homography to transform my face into the sidewalk. Check it out
This is the same as the previous homography calculations except we're mapping the area we're trying to rectify to the four corners of the final image.
This is the same image I used to show the homography calculations!
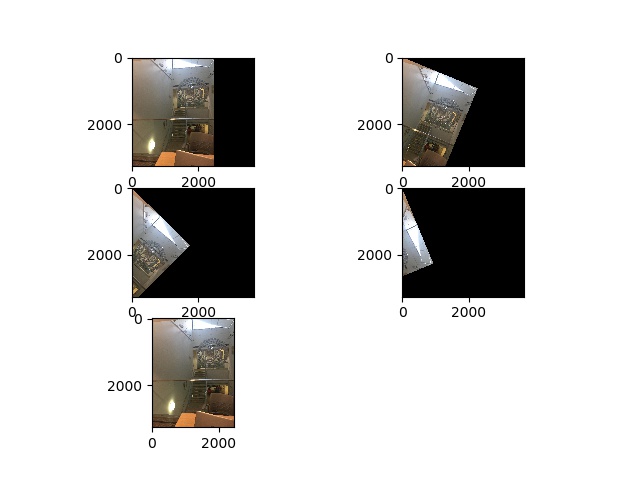
I detailed above the code to run so that we can create a mosaic. Here are a few examples.
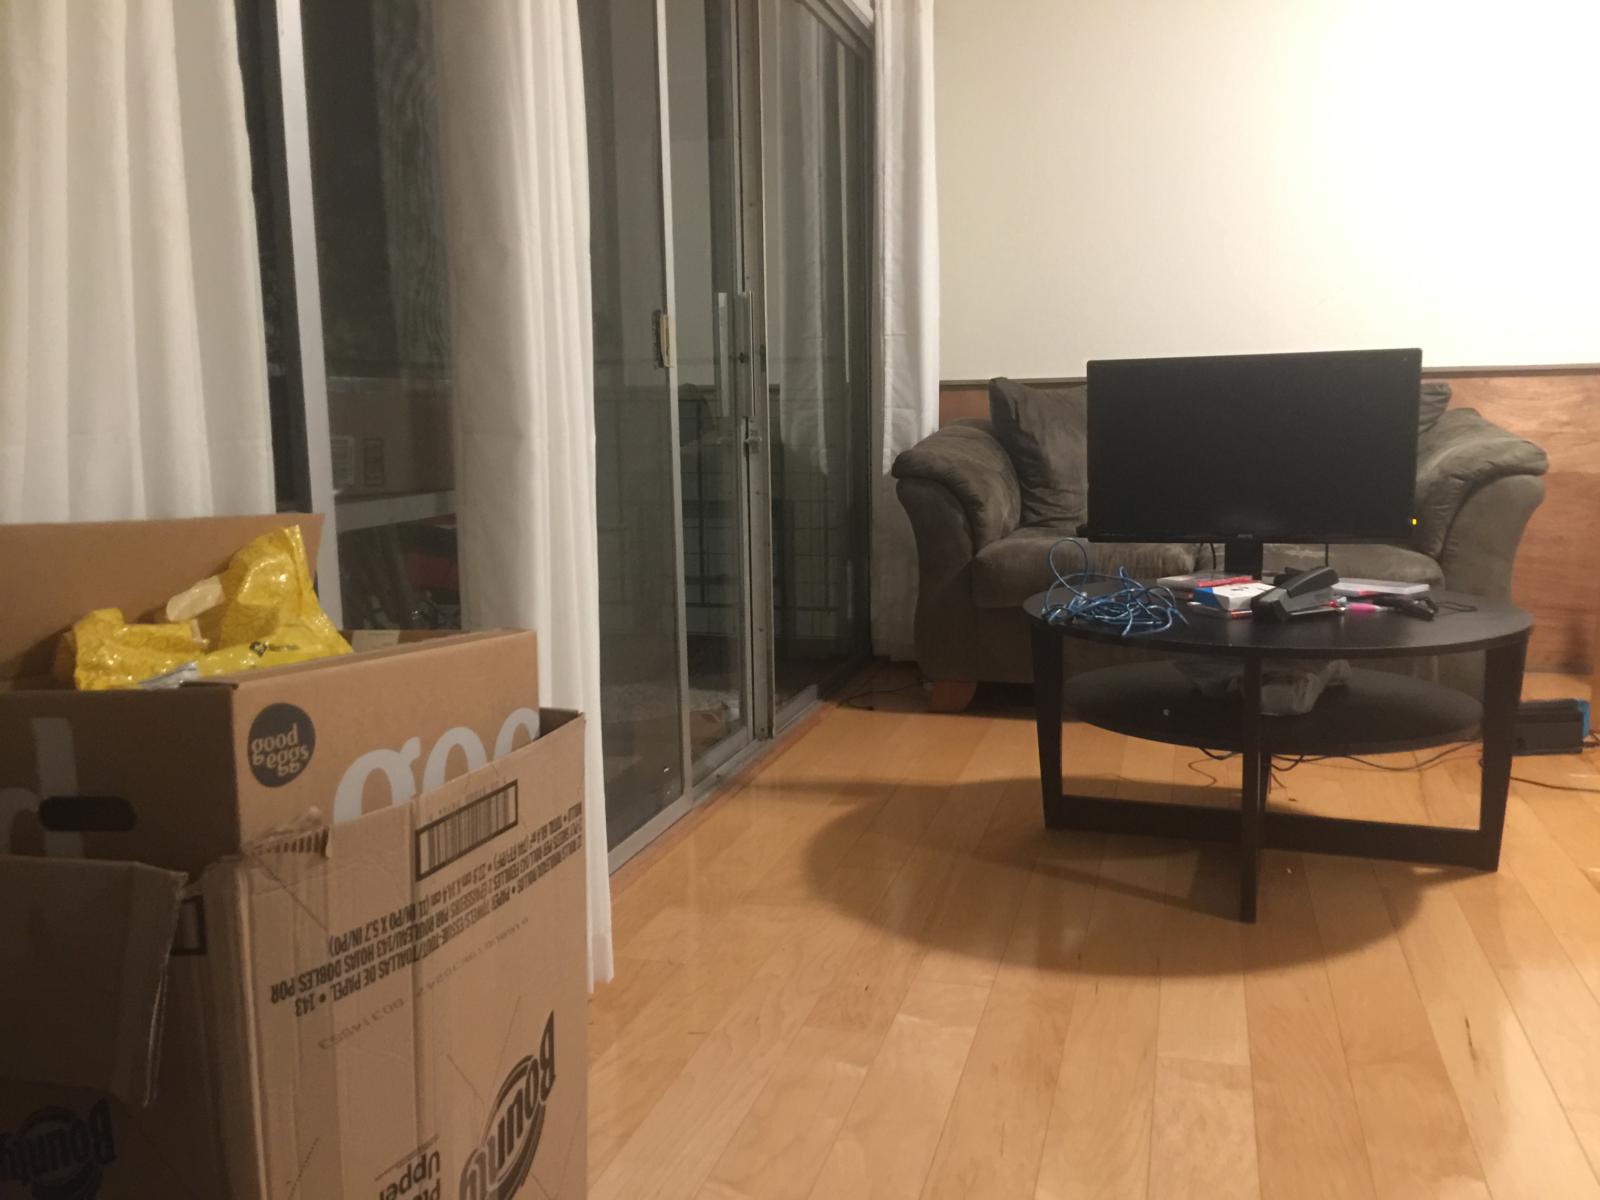
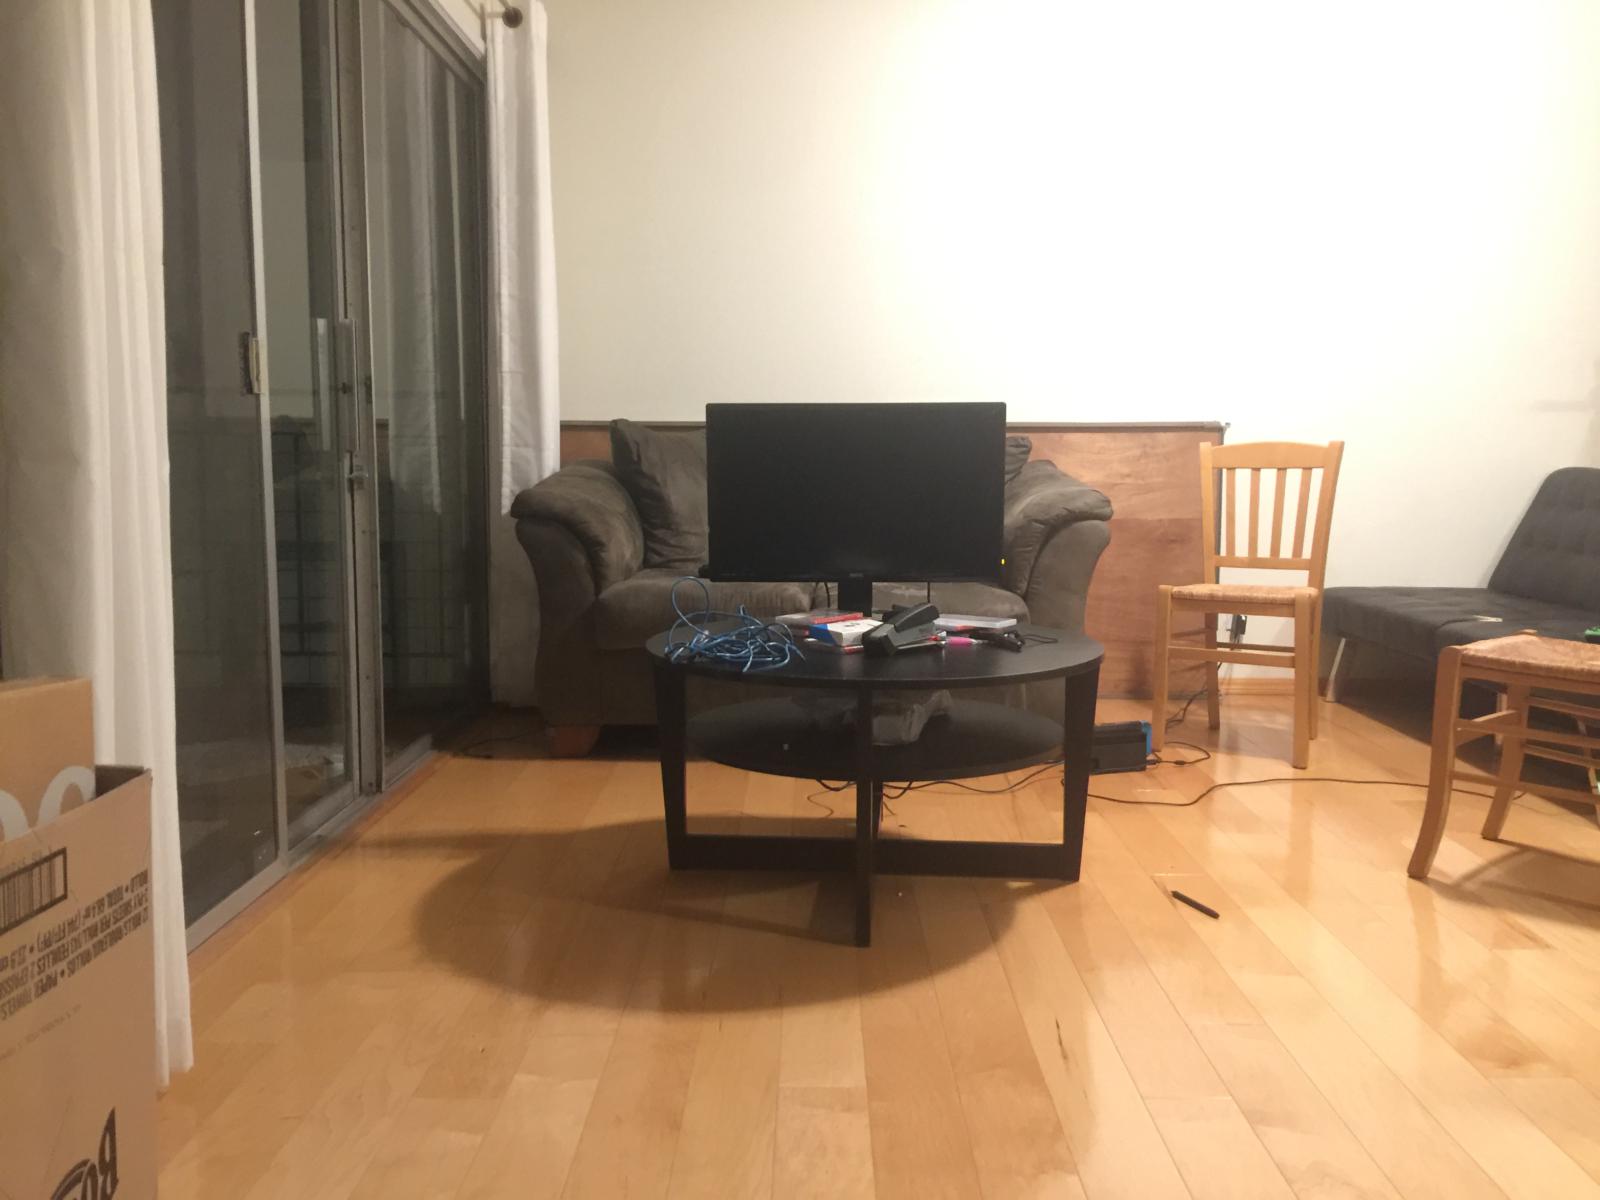
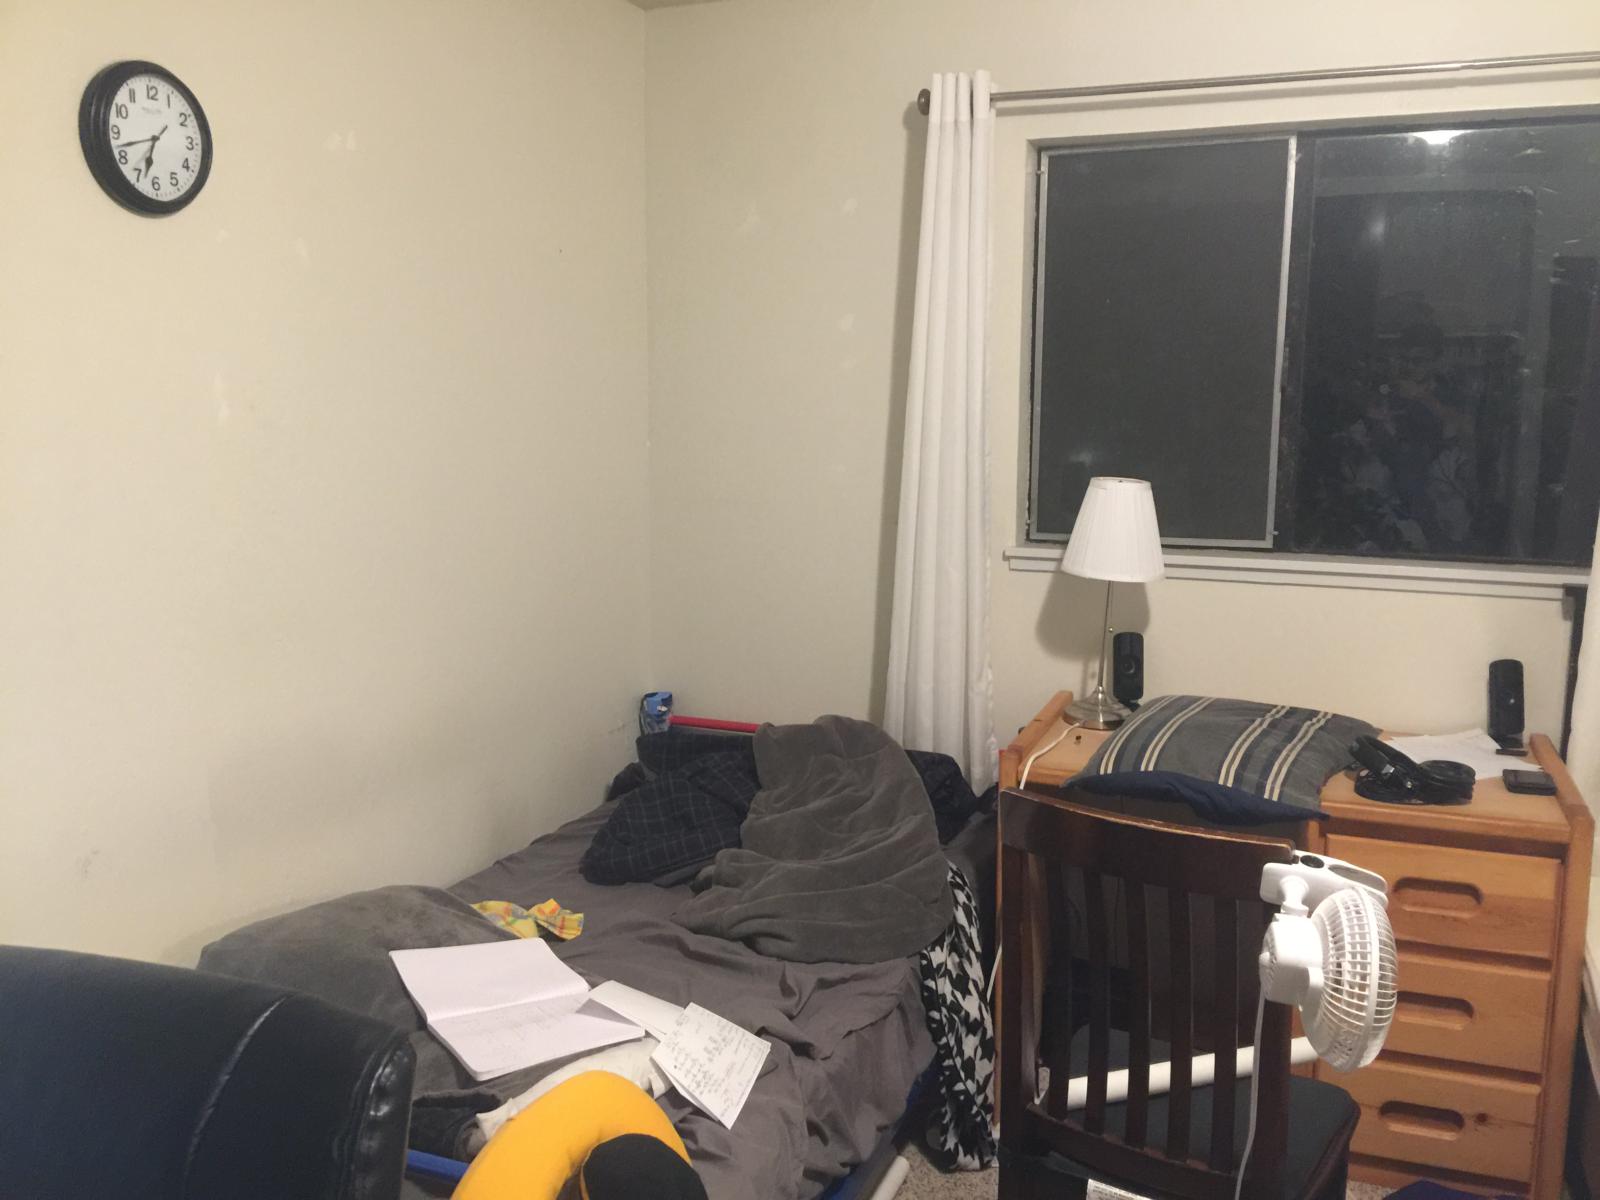
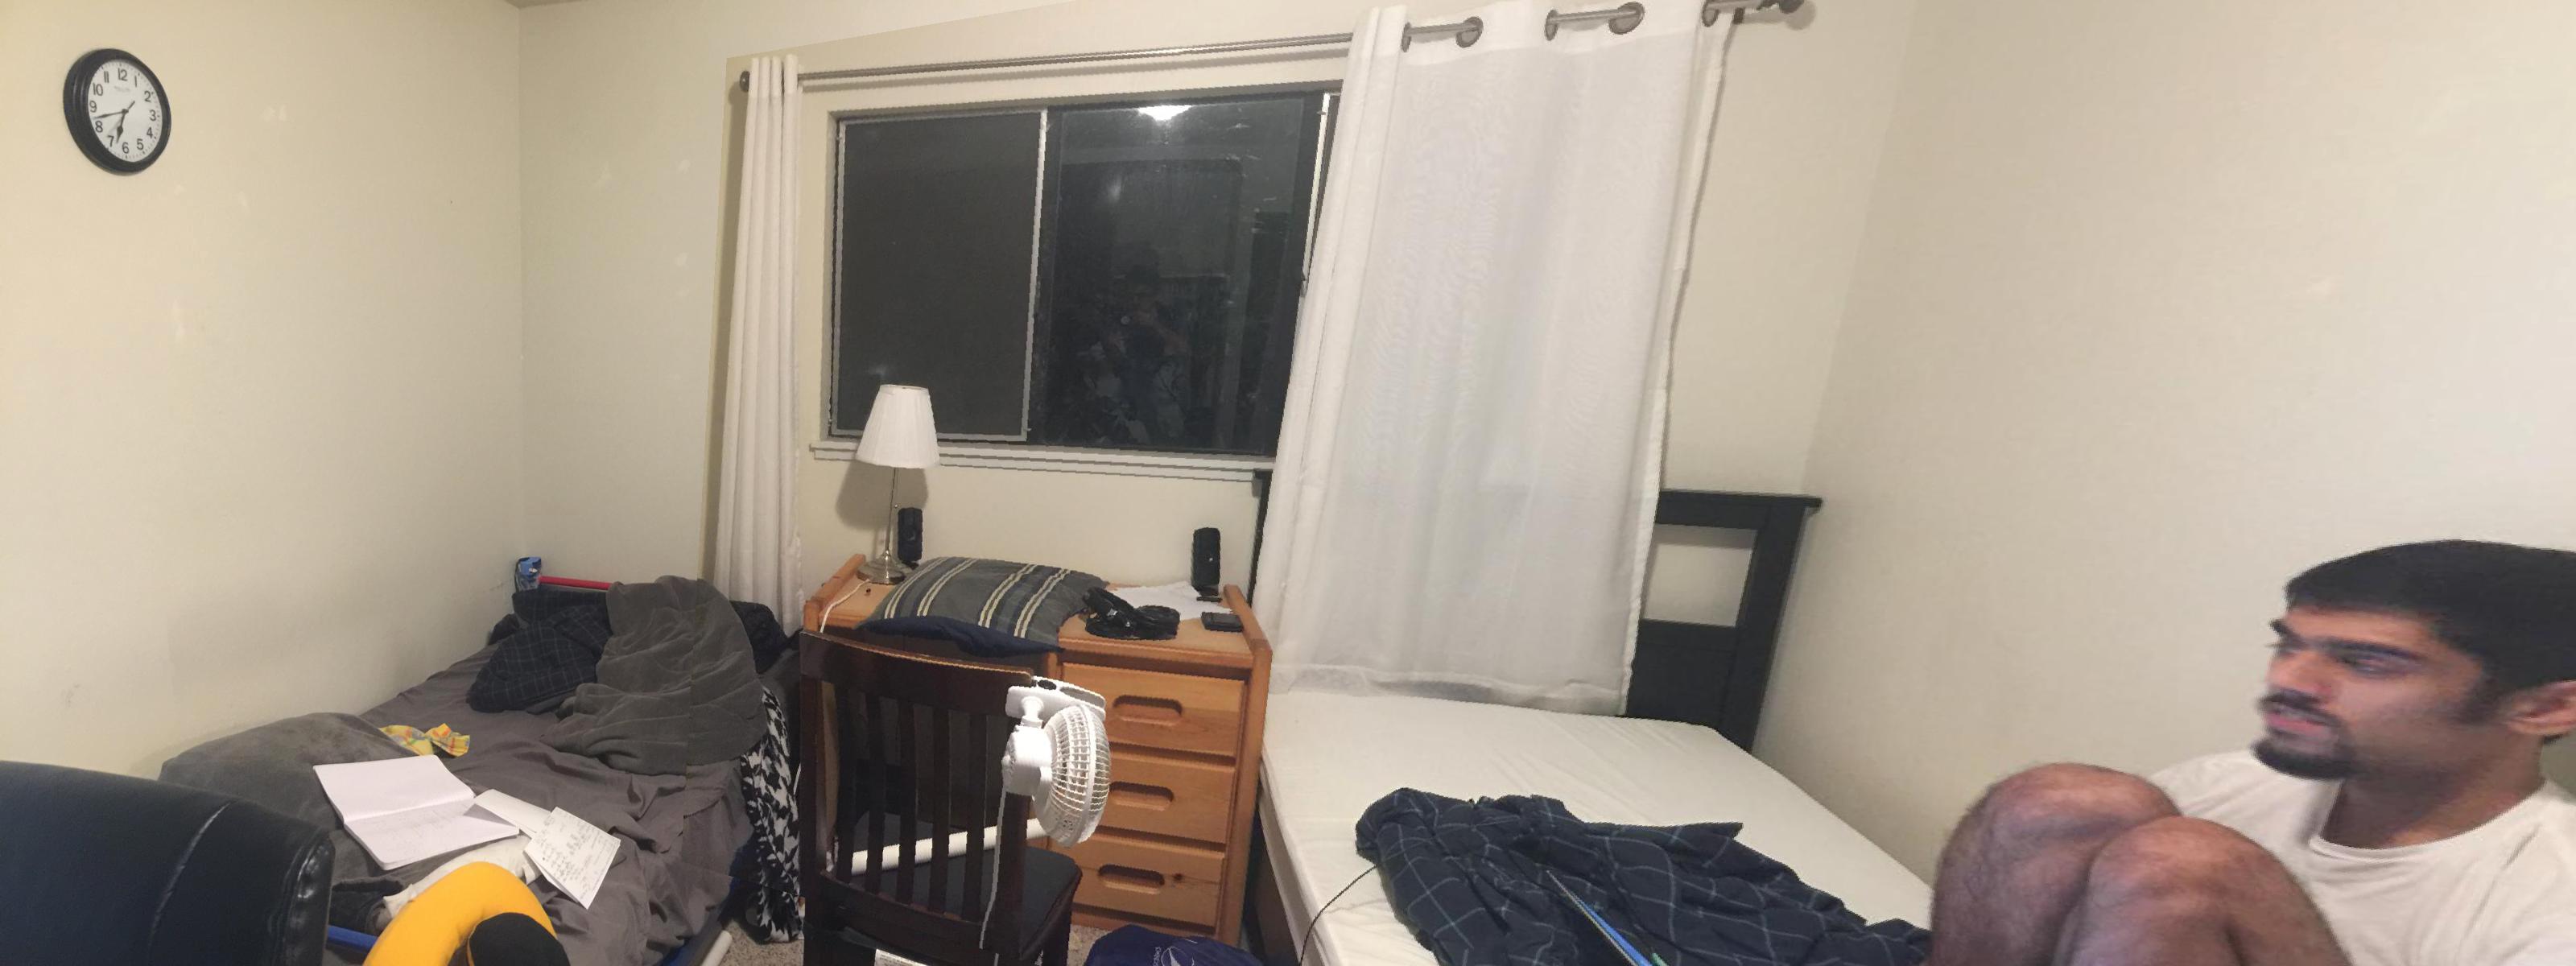
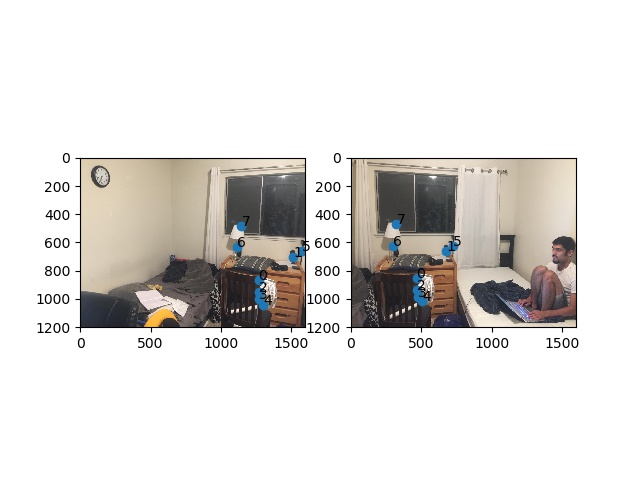
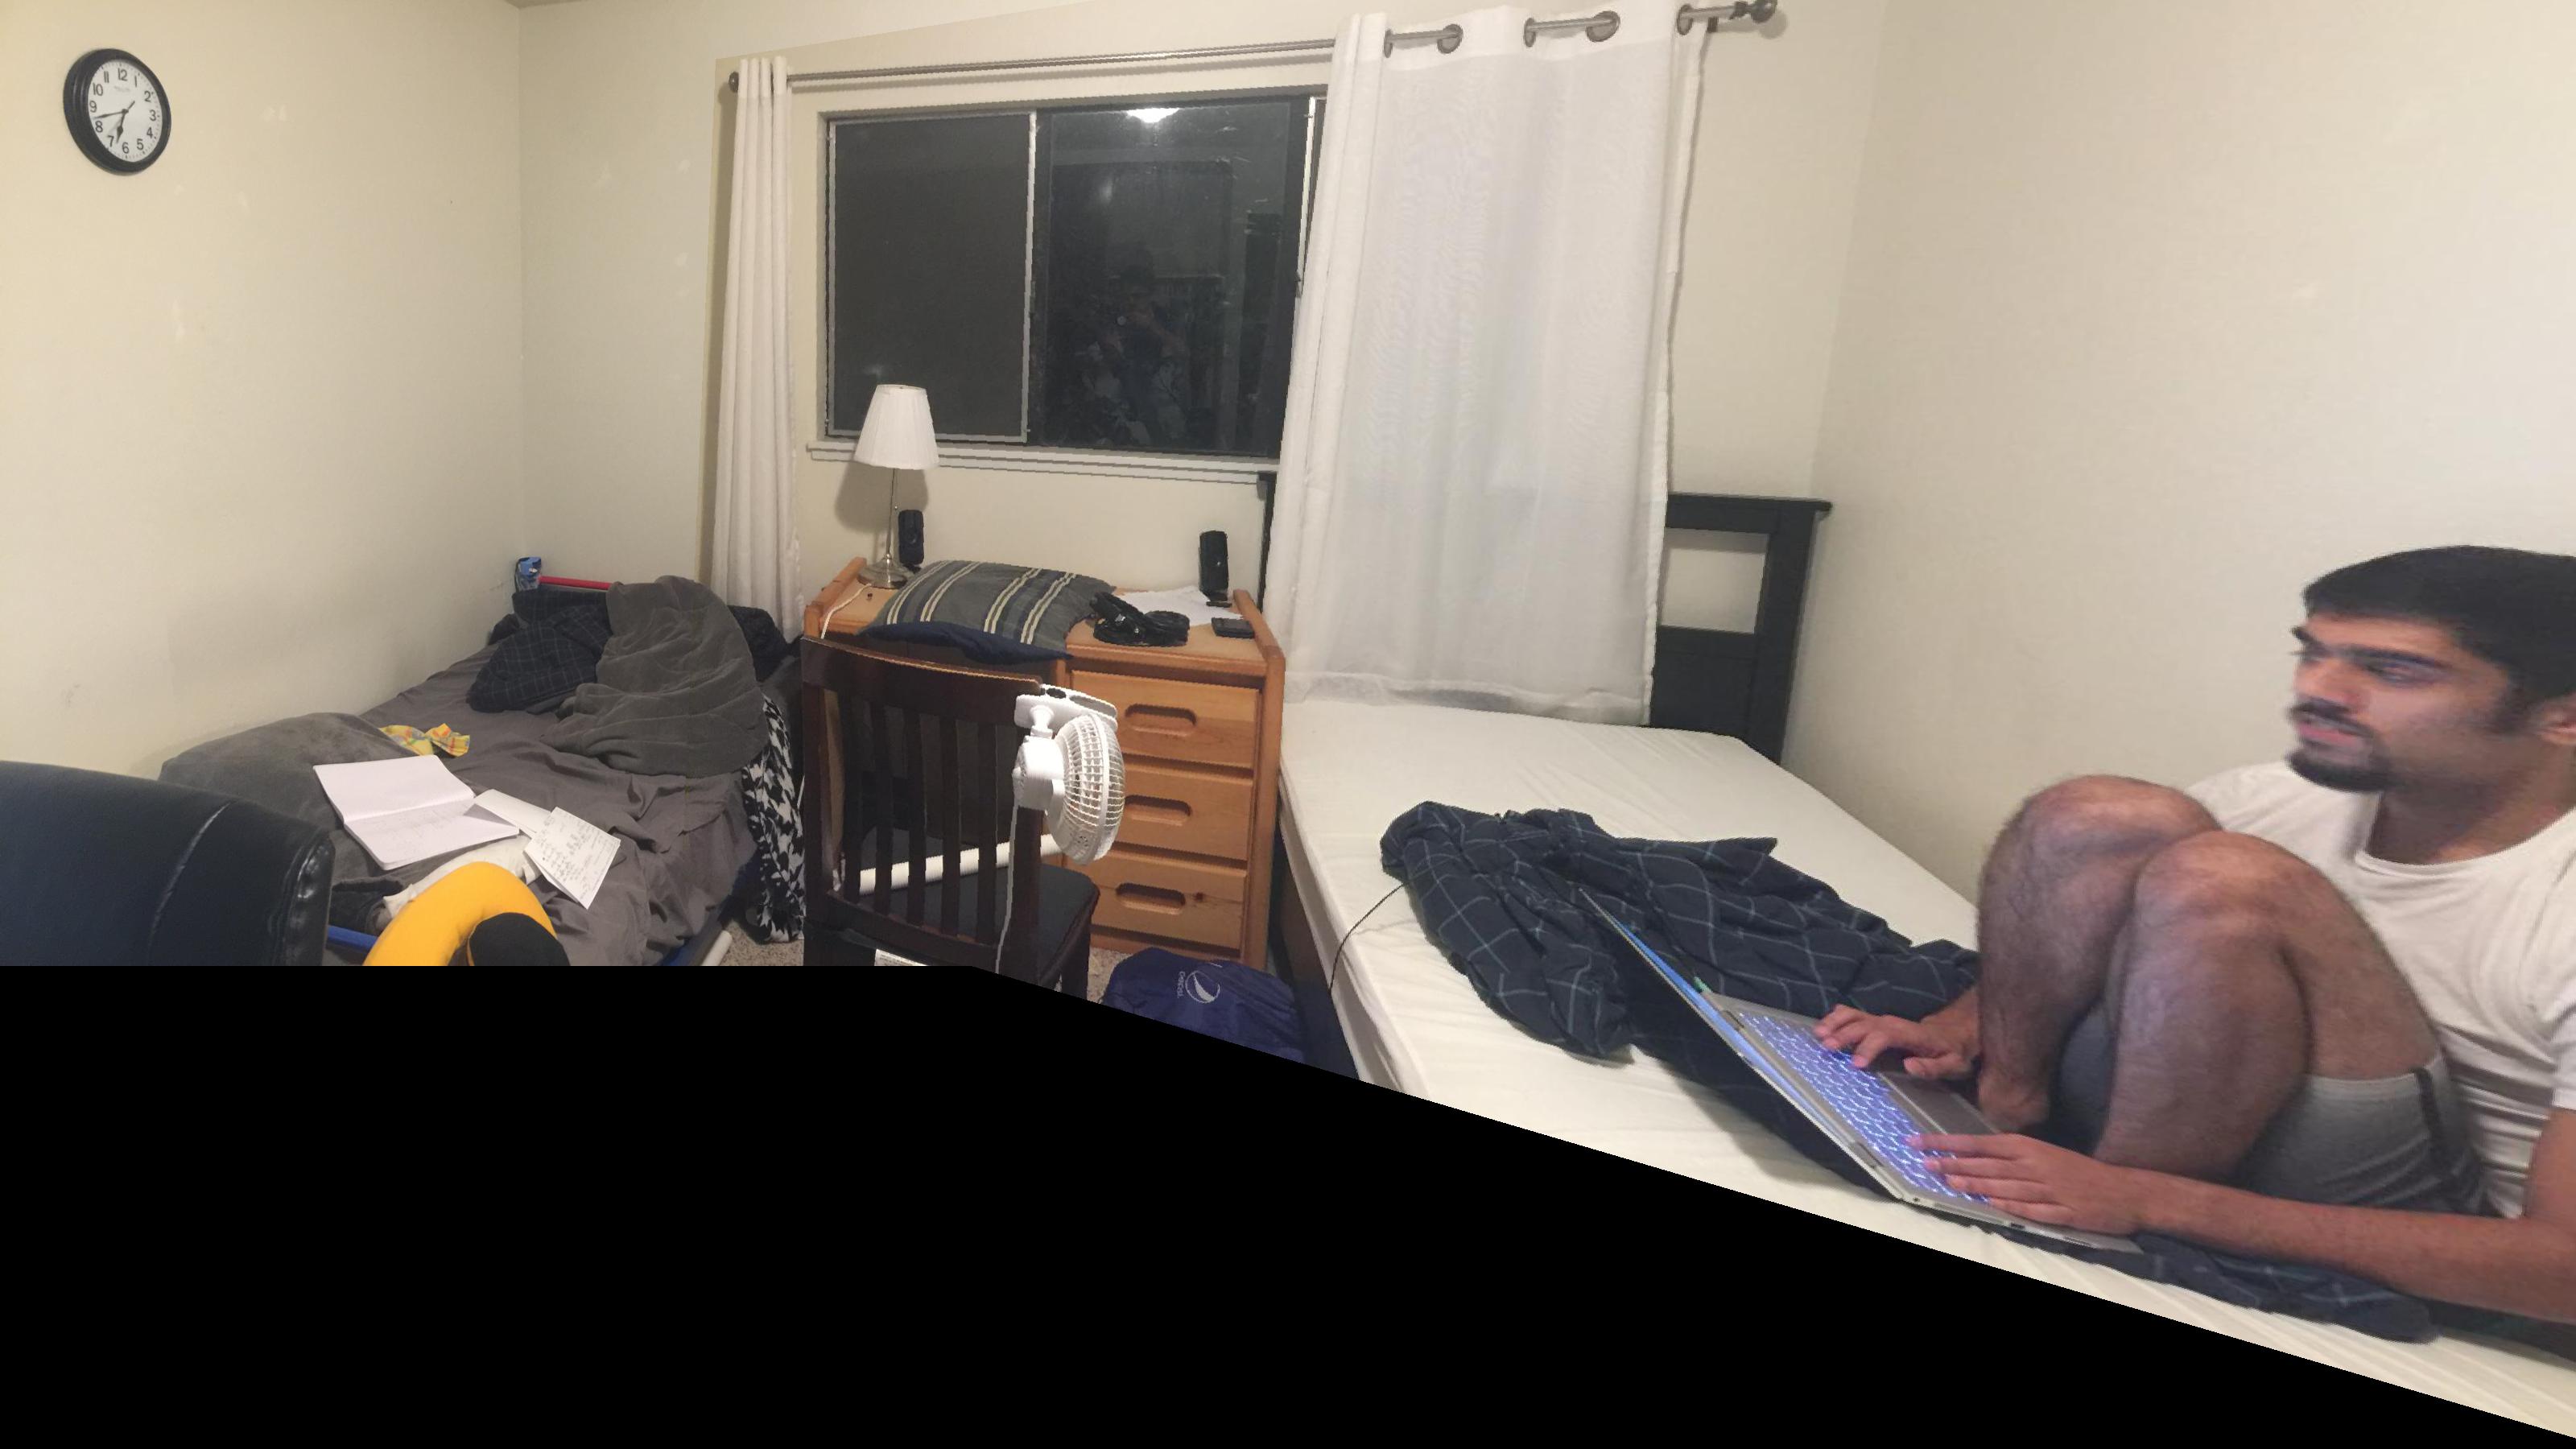
My roommate Dennis's Room
  usage: main.py [-h] [-d DATA_DIR] [-f1 FILE_NUM_1] [-f2 FILE_NUM_2] [-n NUM] [-l LANDSCAPE]
        [{clean_iphone_data,multi_annotate,multi_merge,multi_view_corr,rectify,get_correspondence,get_direct_correspondence,view_correspondence,get_homography,test}]

  positional arguments:
    {clean_iphone_data,multi_annotate,multi_merge,multi_view_corr,rectify,get_correspondence,get_direct_correspondence,view_correspondence,get_homography,test}

  optional arguments:
    -h, --help            show this help message and exit
    -d DATA_DIR, --data_dir DATA_DIR
    -f1 FILE_NUM_1, --file_num_1 FILE_NUM_1
    -f2 FILE_NUM_2, --file_num_2 FILE_NUM_2
    -n NUM, --num NUM
    -l LANDSCAPE, --landscape LANDSCAPE

      The output is 'output/{data_dir}_final_merged.jpeg'

    Automatically Merge Two Images:
      1. Create iphone_data/{data_dir}. Load images alphabetically to merge in iphone_data/{data_dir}
      2. python main.py clean_iphone_data -d {data_dir} -l {landscape?}
      3. Automatically annotate each image to the points you want to match
        python main.py auto_annotate -d {data_dir} -n 2
      4. Check if the ANMS worked and points were set
        python main.py auto_view_anms -d {data_dir} -n 2
      5. Match the points with the points you found
        python main.py auto_match_points -d {data_dir} -n 2
      6. Run ransac with all the points
        python main.py auto_ransac -d {data_dir} -n 2
      7. Output will be displayed and will be in output directory
Please note I detail the appriach here and all the images are ordered below
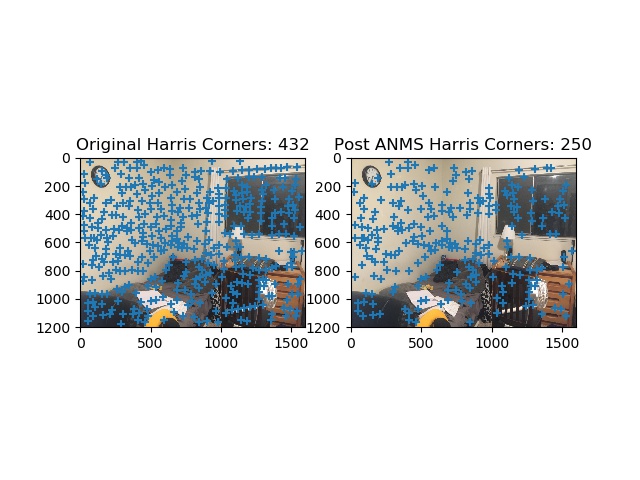
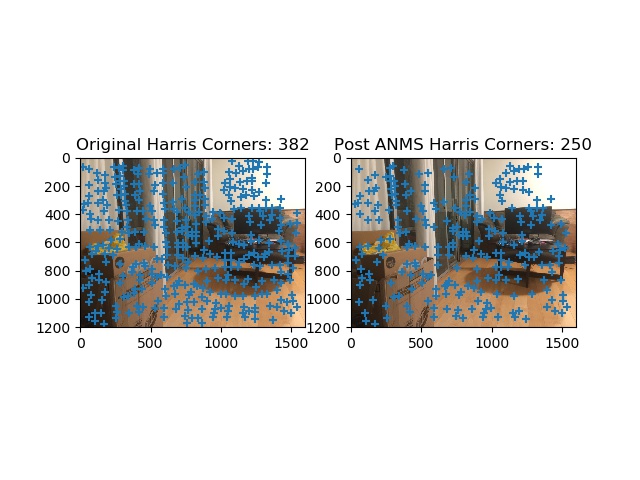
The first step to this process is to implement Harris Interest Point Detector. The code for sisngle level harris corner detection along with a matrix corresponding to the corner strength. We can specify a paramter of the minimum distance we'd like to see in betweeen points in the script provided to reduce the density.
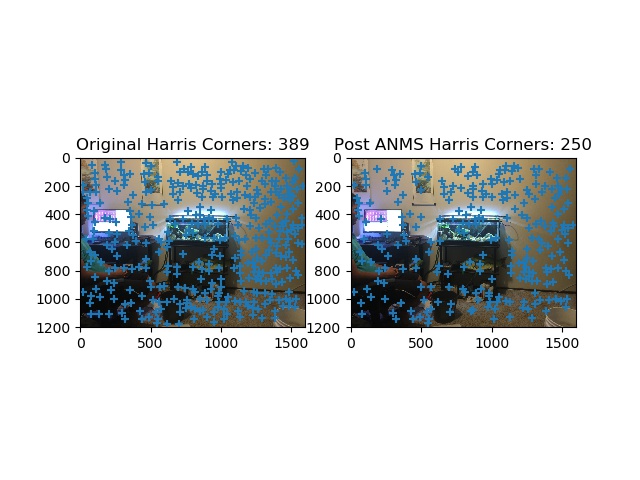
Adaptive non-maximal suppression. Because the harris detector returns way too many corners we need a way of reducing the number of corners in an innoative way so that the corners are distributed across the image. The ANMS procedure is as follows: we start with the strongest point (i.e. with the greatest corner like features). Then we set a starting radius to infinity and we need to obey the rule below (figure anms). This basically enforces that for all pairs of points Xi, Xj, the strength of Xi is less than some percent of Xj. This just says every neighbor should have a sufficiently larger strength. A good approach I used provided was to iterate though all points Xi, and for each Xi find all Xj that are at least some percent greater and then sort these Xi by the minimum distance found to the point that meets this requirement.
Anms Figure
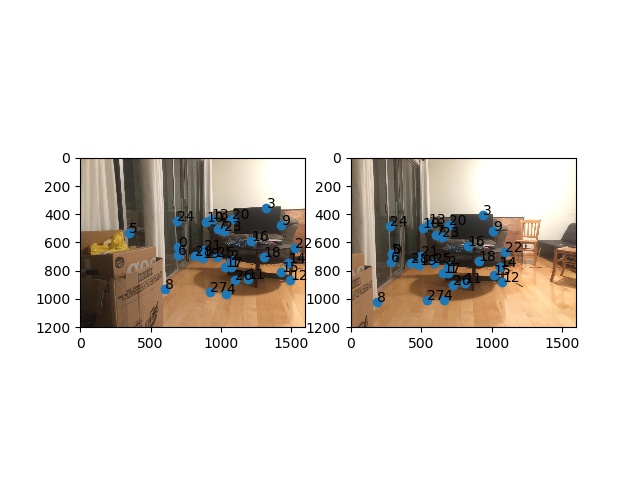
Sample Features from Each Images
To featurize each of these points for comparison we get each of the corners after ANMS is run and then we look at a window of +- 20 pixels to get a 40x40 sub image. Then we downsample the image to 8x8 so that we get a lower dimensional more generalizable feature space.
For matching basically, for each of the features f1, I look at all the other features f2 and find the two f21, f22 that are the closest distance (i.e. smallest SSD). Then if the ration between SSD(f1, f21) and SSD(f1, f22) is less than a particular thresholded value (perhaps 0.2) then we know that this best SSD match is the best by far and we can keep it as a match. Otherwise we just disregard the pairing. This way we end up with a few really solid pairings.
To implement RANSAC, we basically follow the steps below. On every iteration I have to find the two quadrilaterals each a projection from one of the two images to calculate the SSD necessary for this step. We basically reject any set of 4 that doesn't meet our standard of similarity so we only end up with the best homography.
Ransac Implementation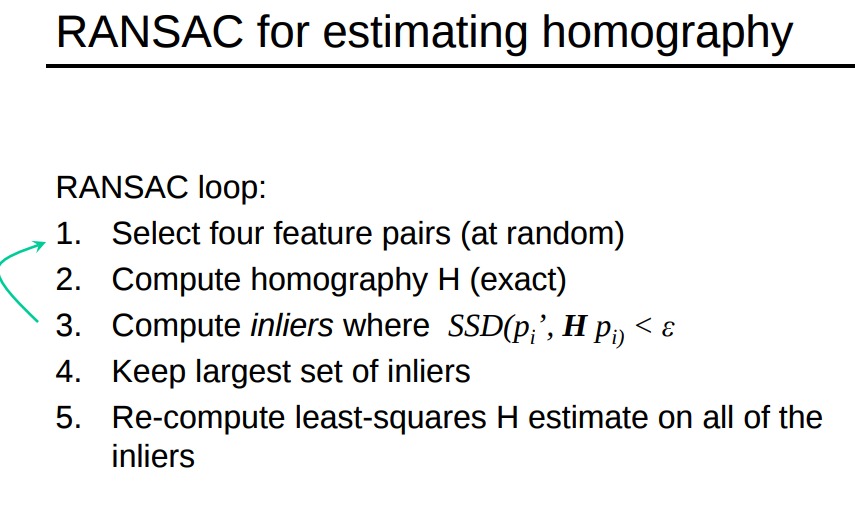


Harris and ANMS shown Dennis room
Harris and ANMS shown Dennis room

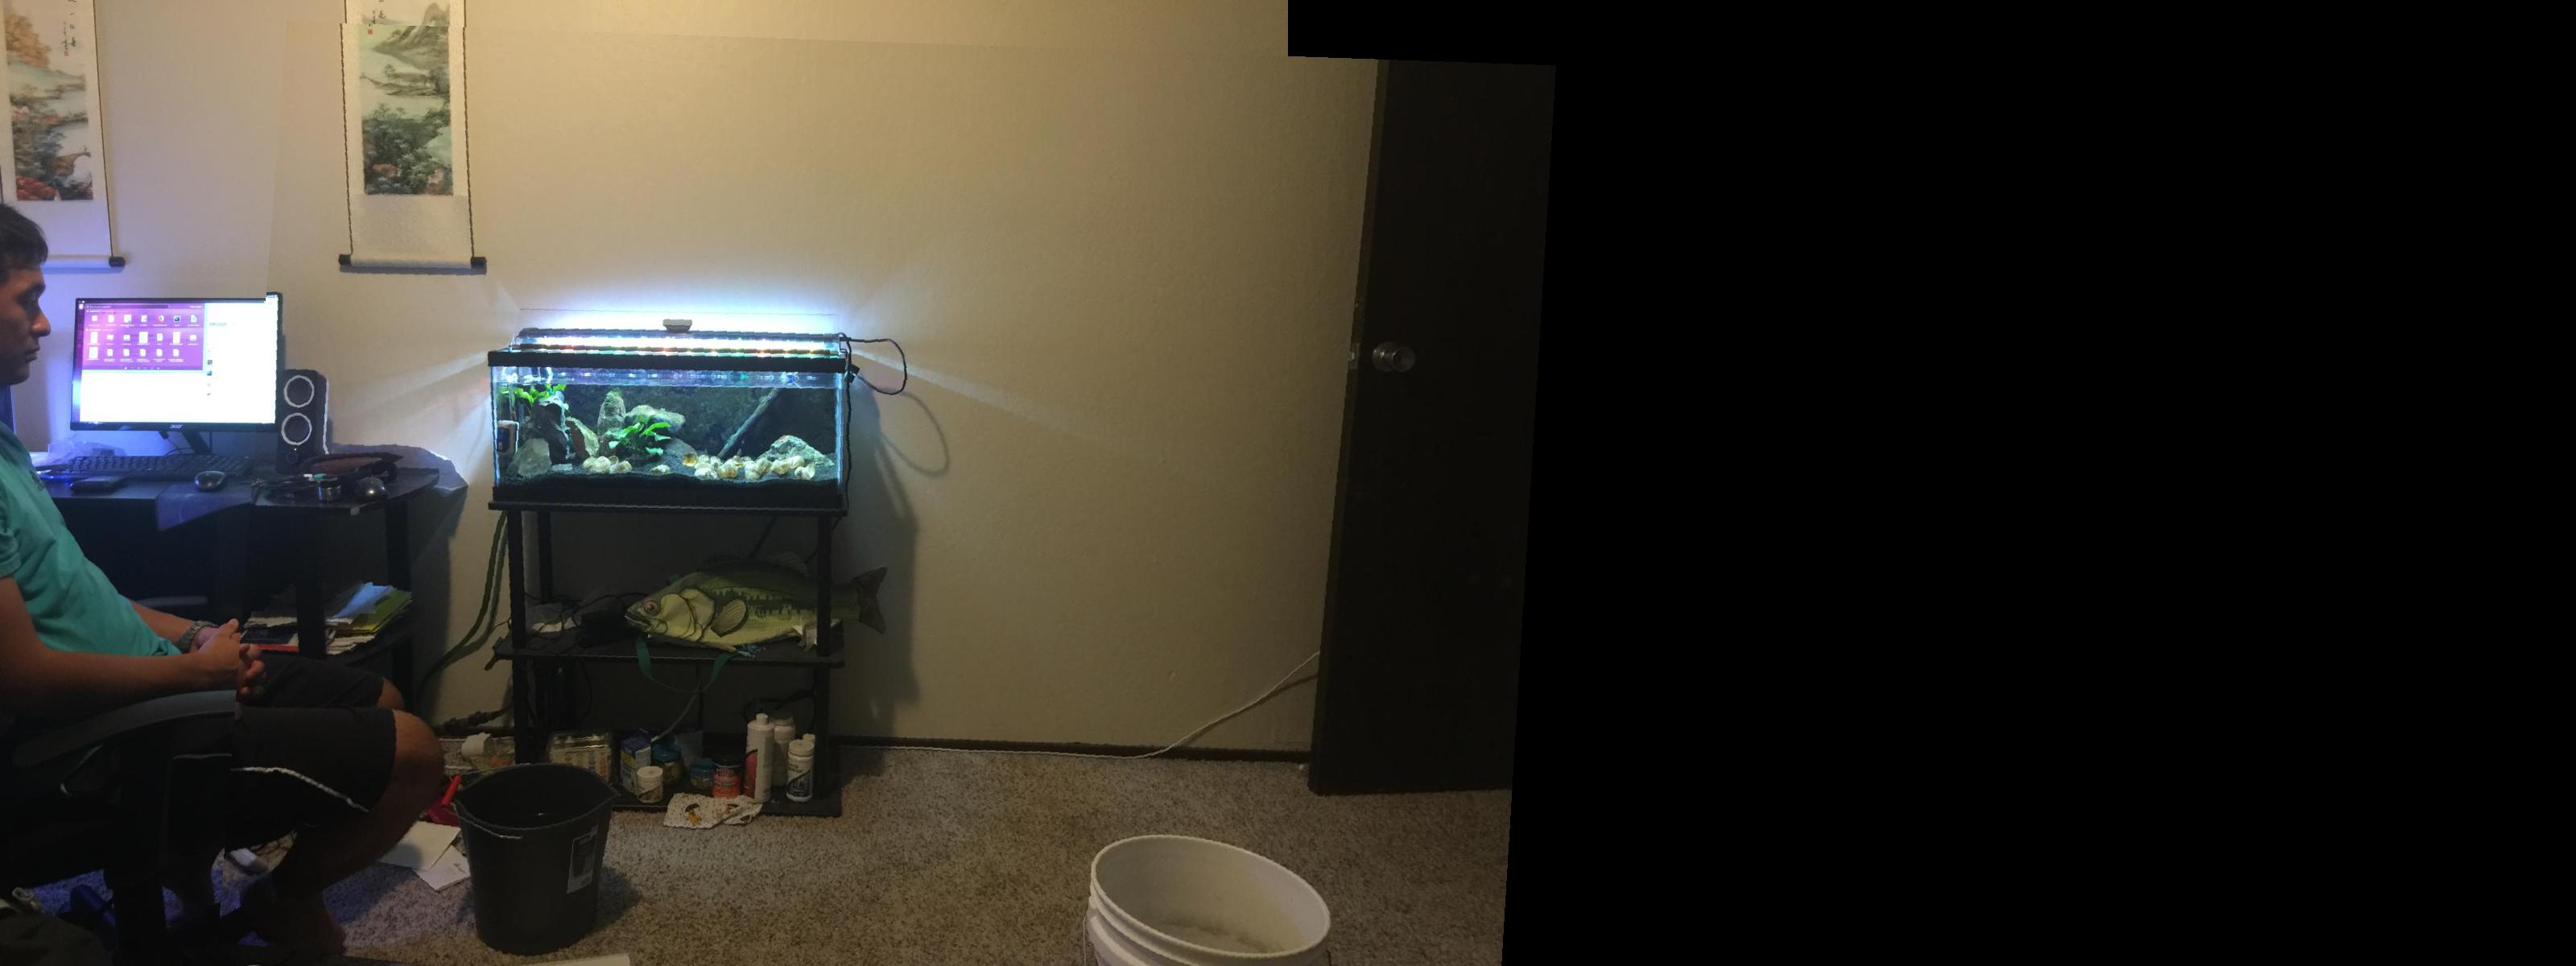
Final Merged Dennis Room

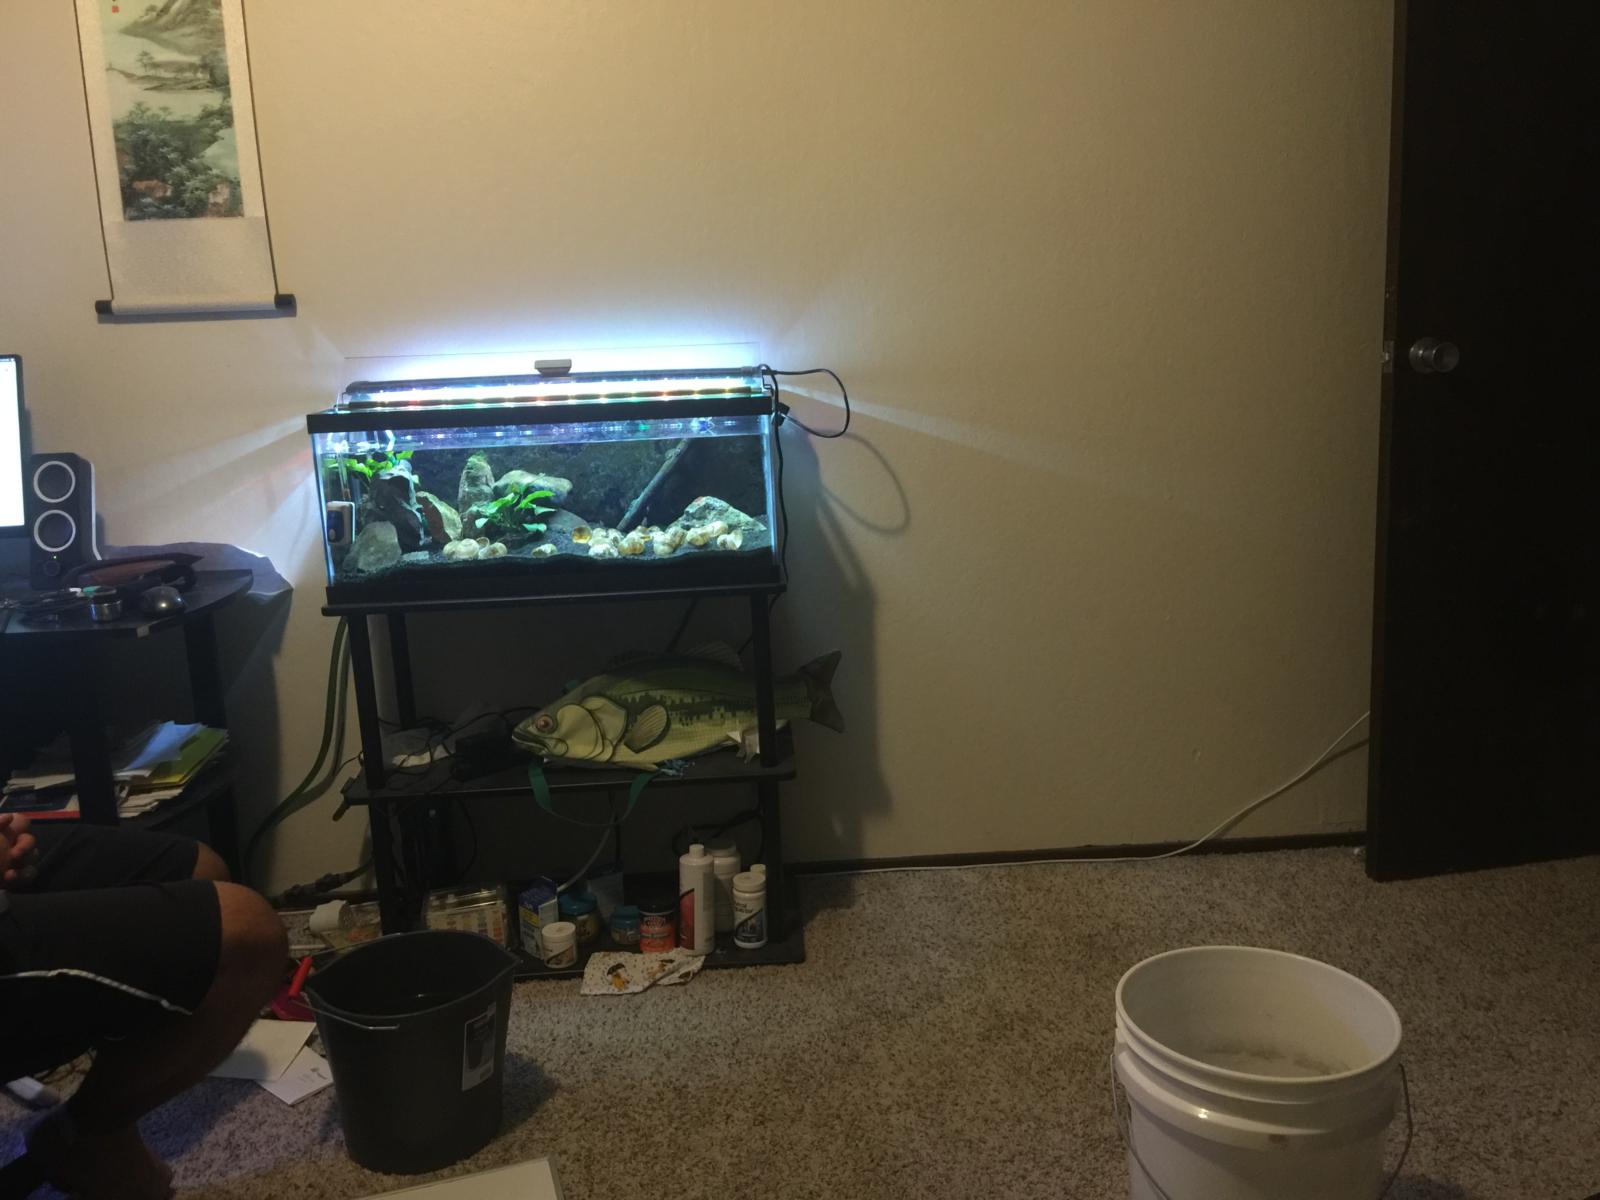
Harris and ANMS shown girish_room
Harris and ANMS shown girish_room

Final Merged girish_room


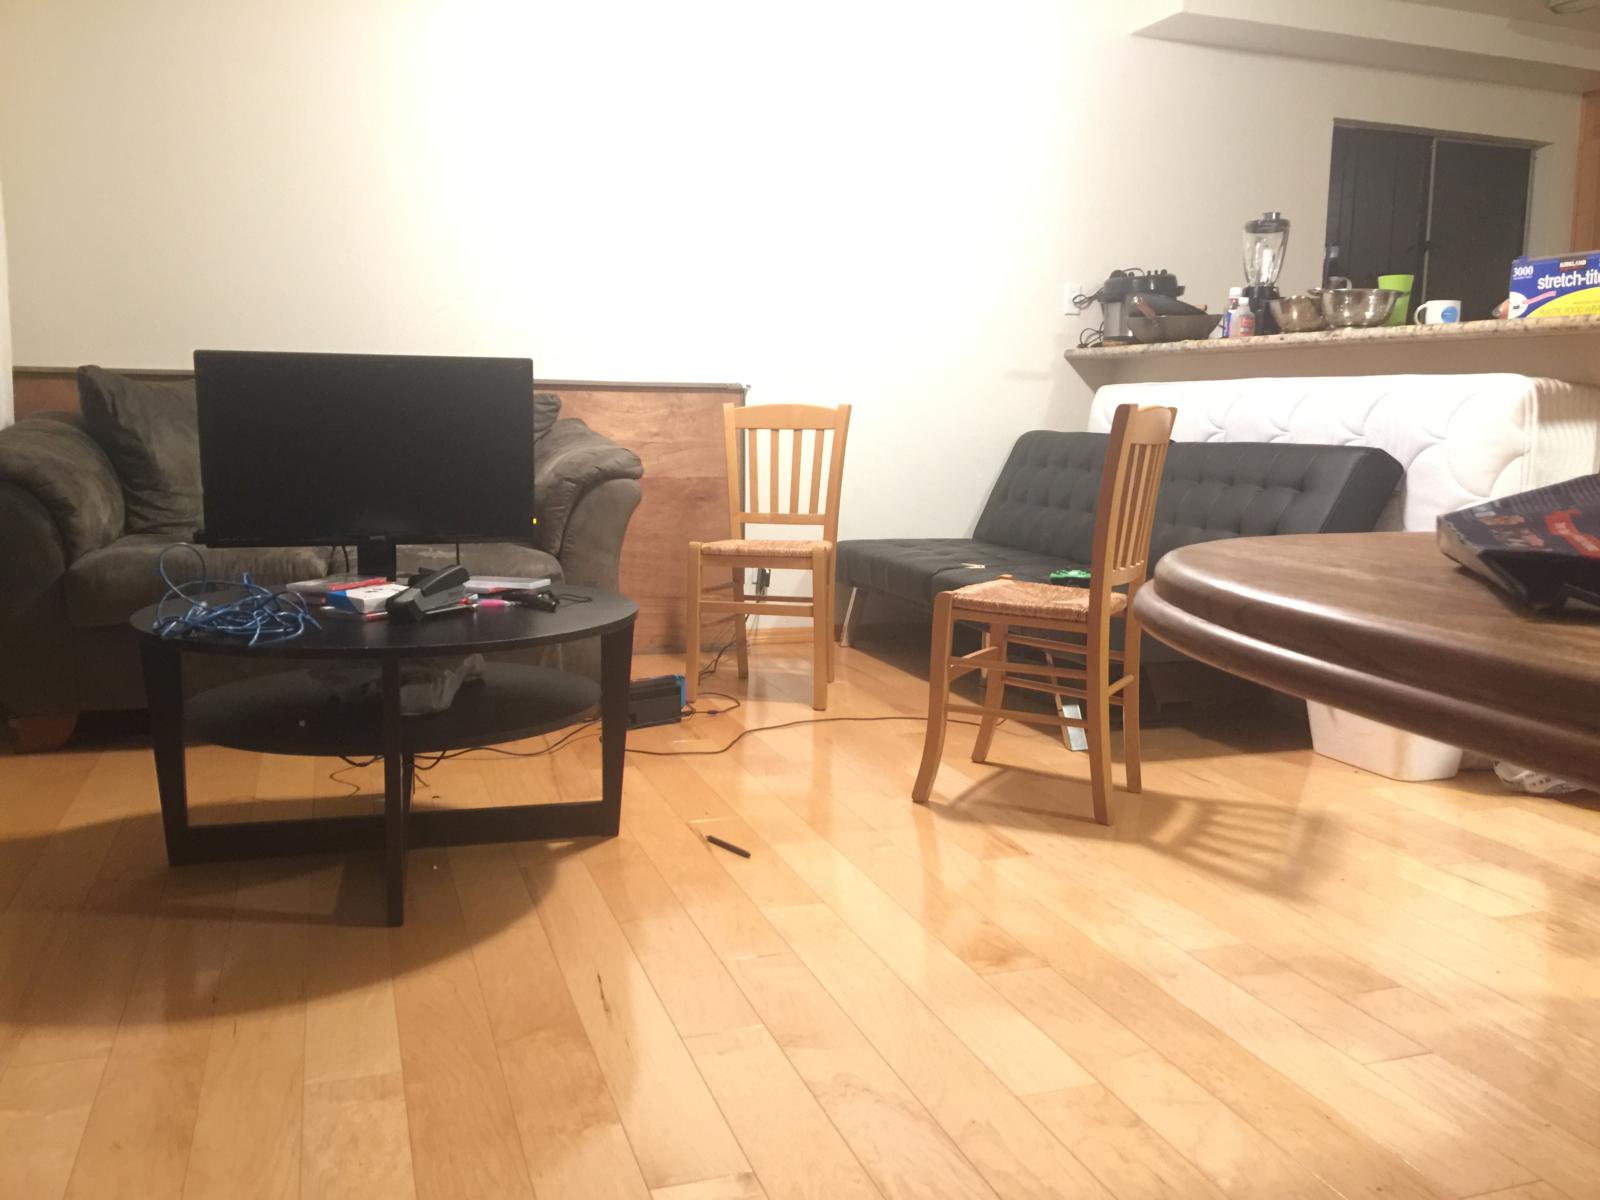
Harris and ANMS shown living_room2
Harris and ANMS shown living_room2

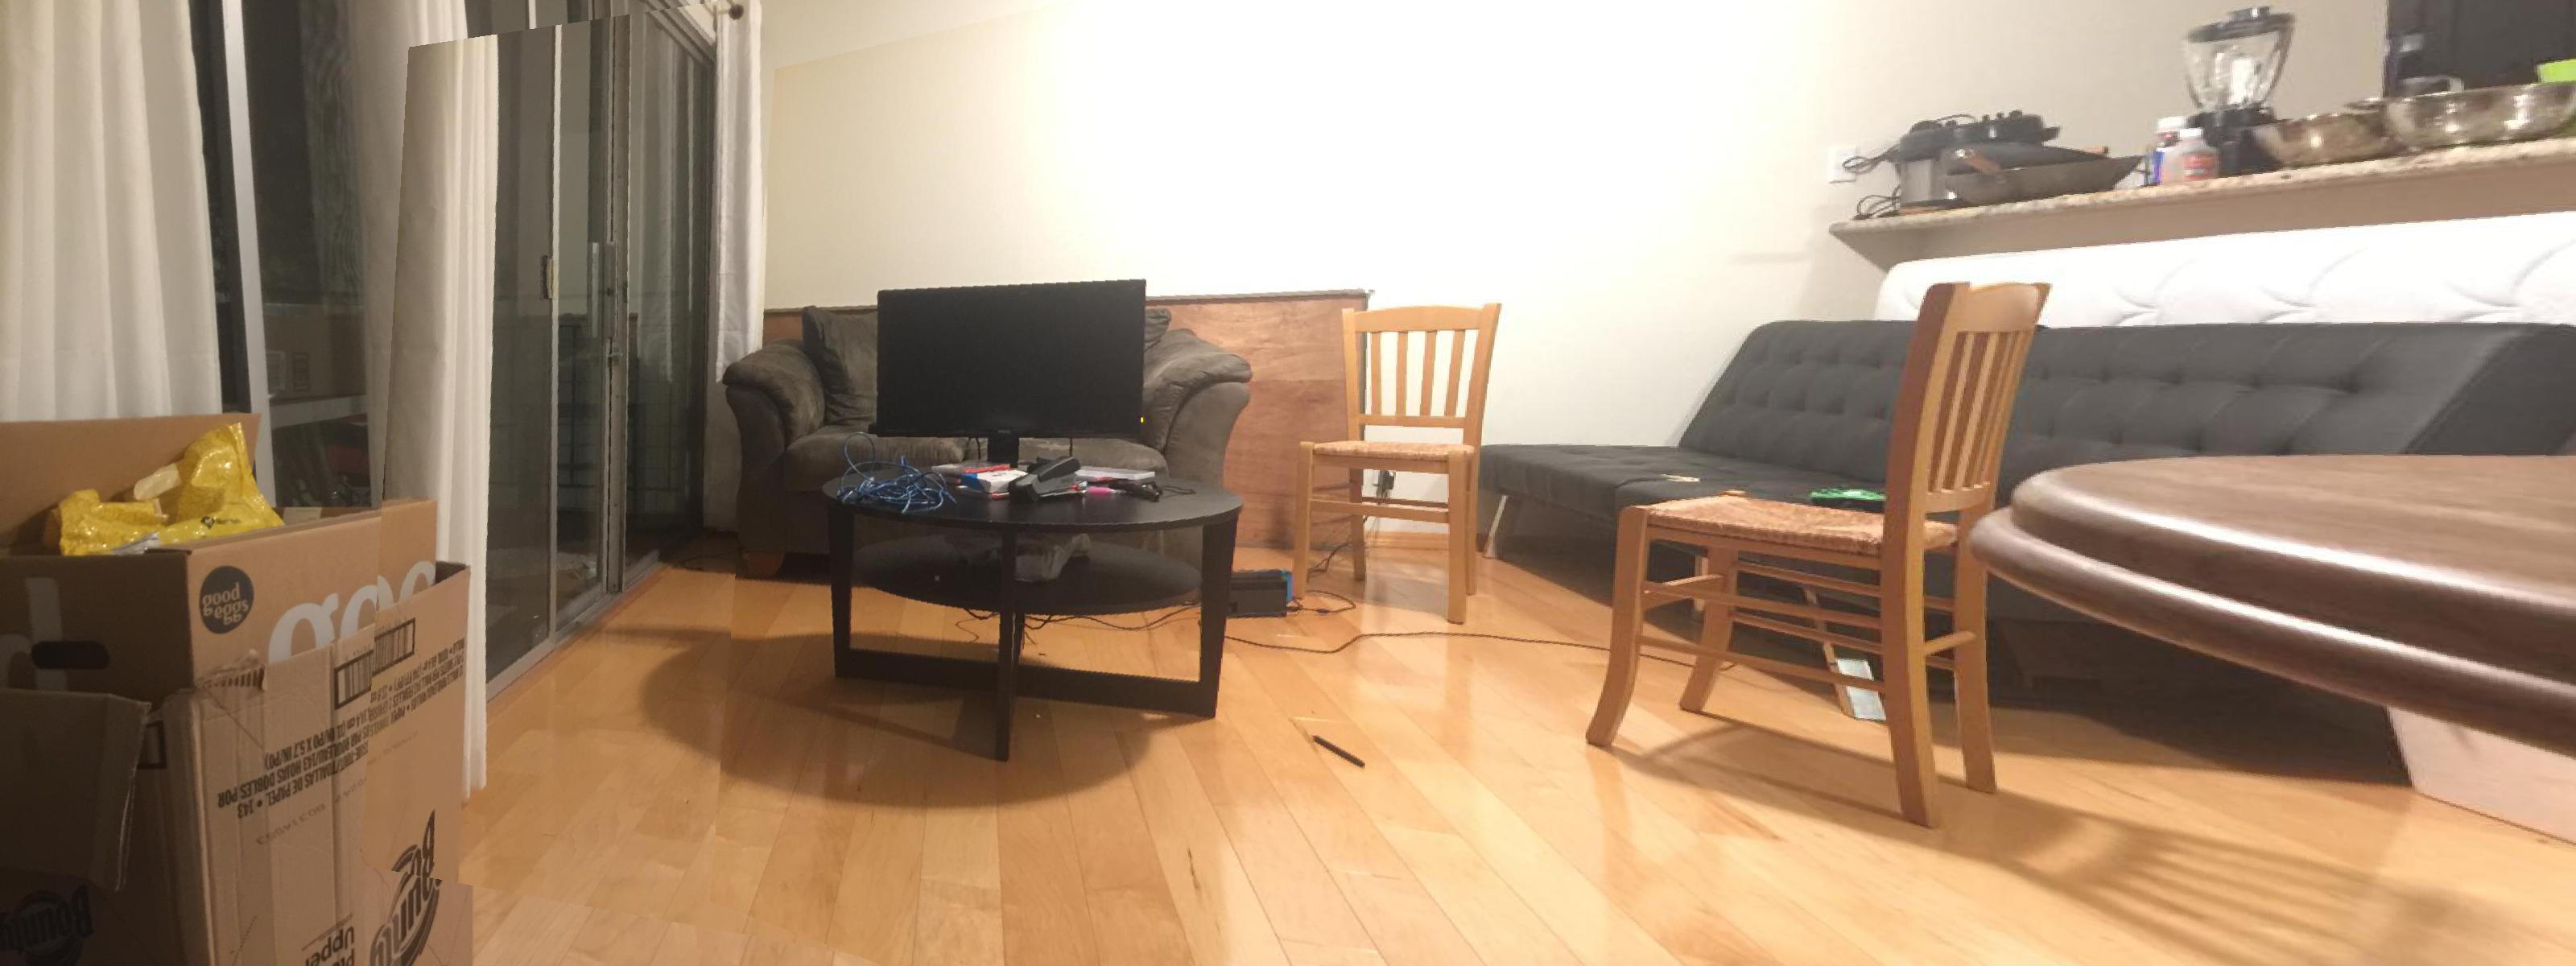
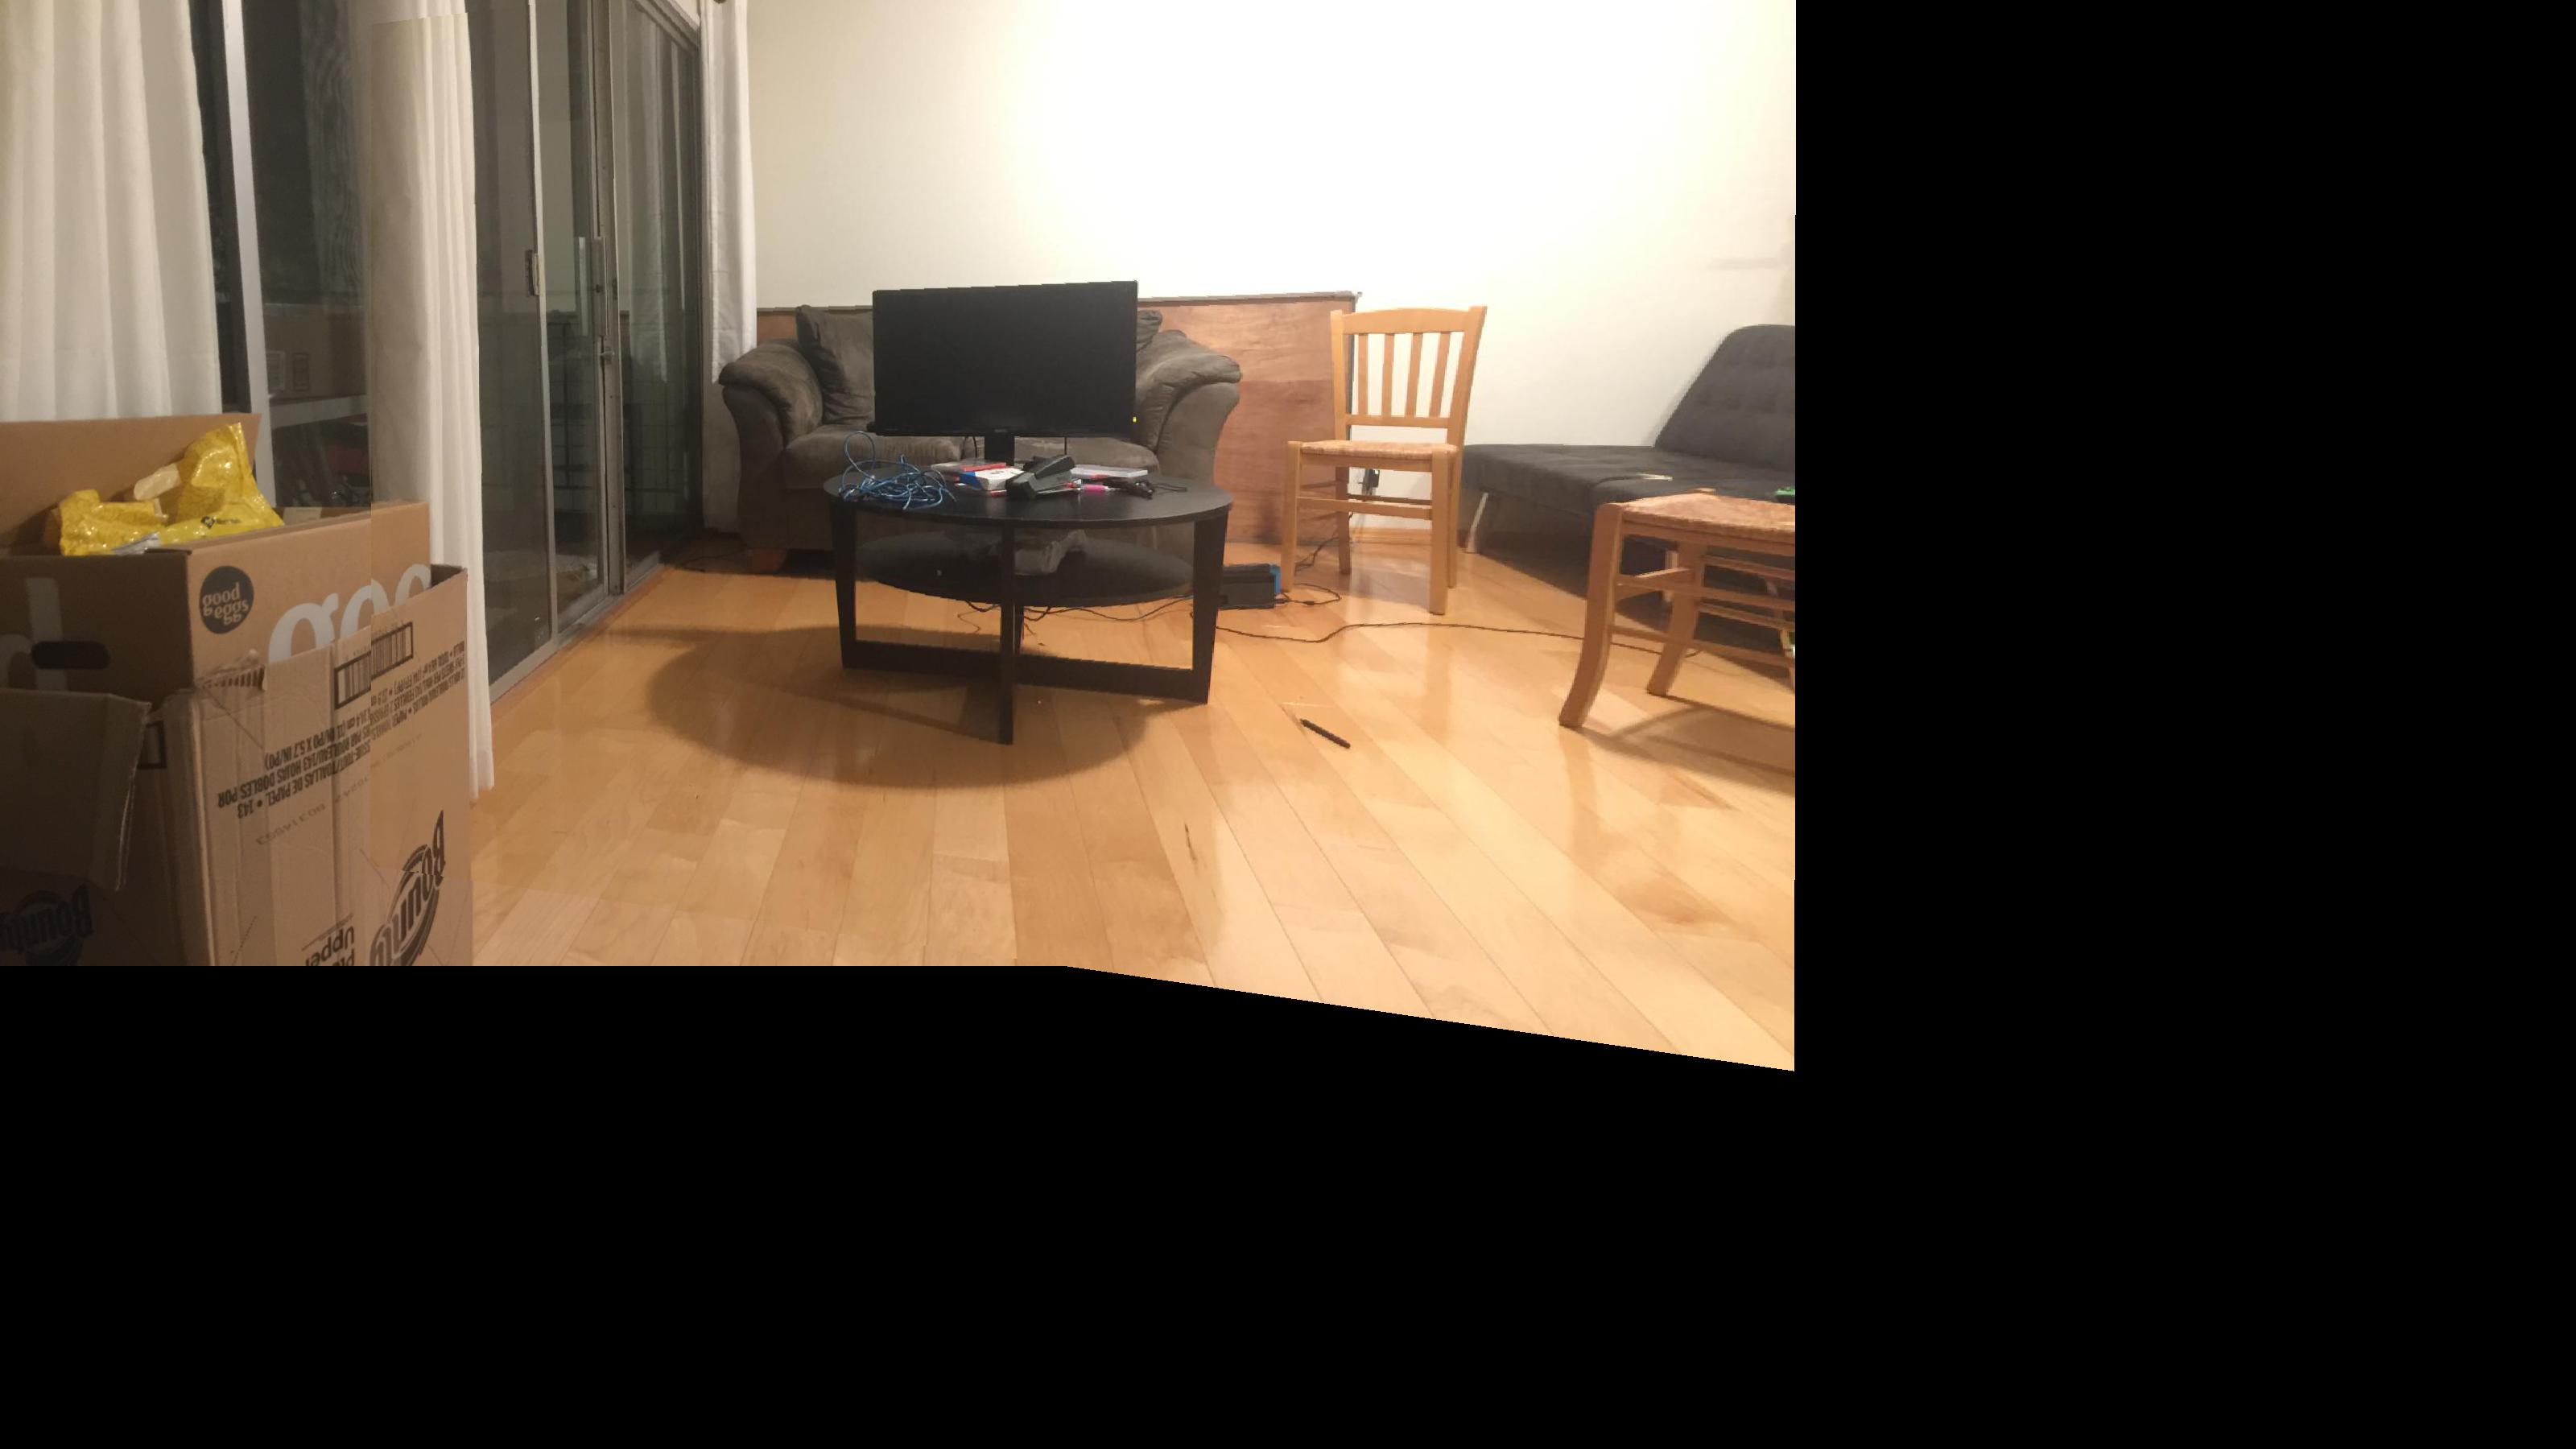
FINAL Merged living_room2
This project was pretty cool to be able to do feature matching automatically. I was particularly surprised at how accurate this turned out to be. Reading the paper was challenging and required Piazza a bit to decipher our simplified approach but it was an interesting learning experience. Coolest thing was RANSAC--I was fascinated by the approach to use data with outliers with rejection sampling.