

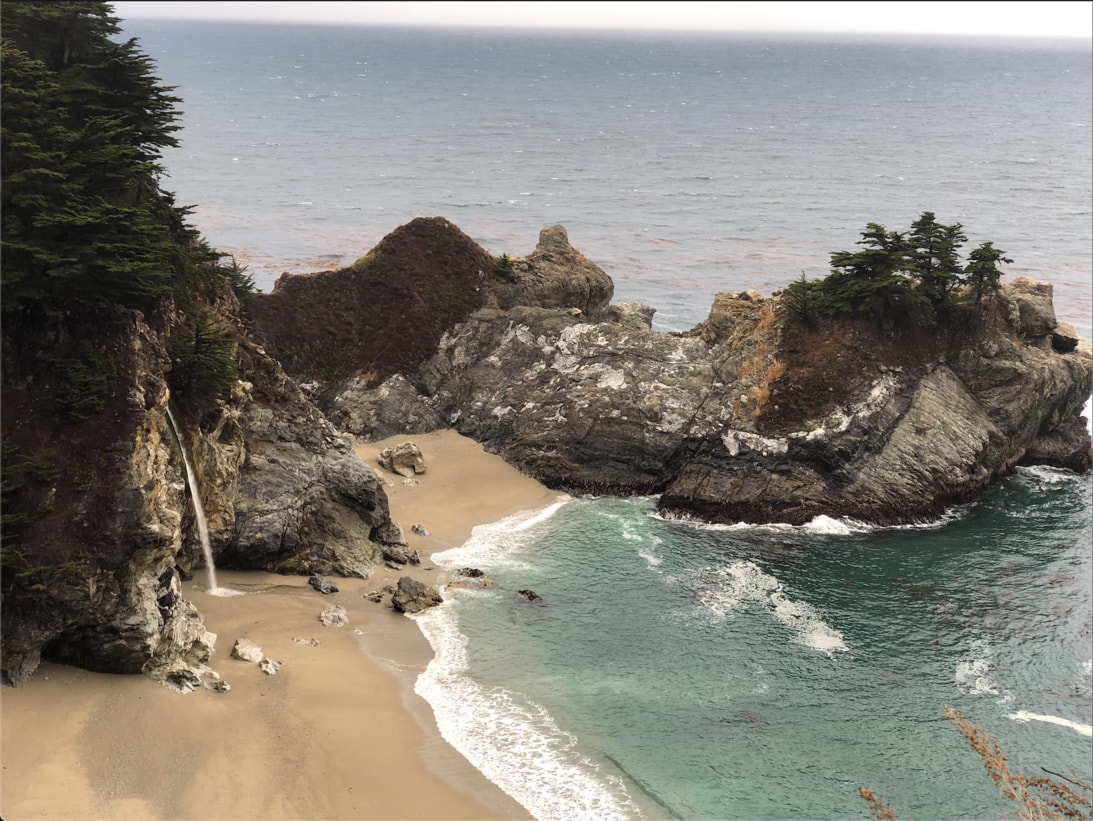
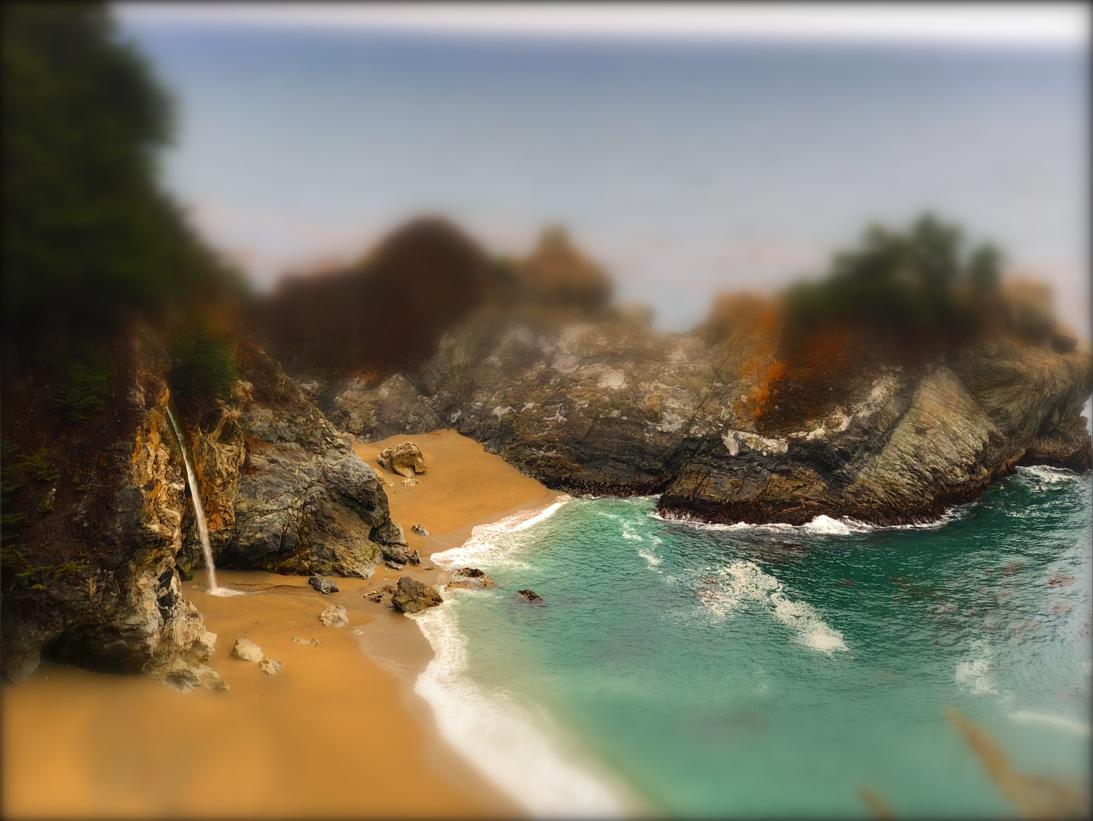
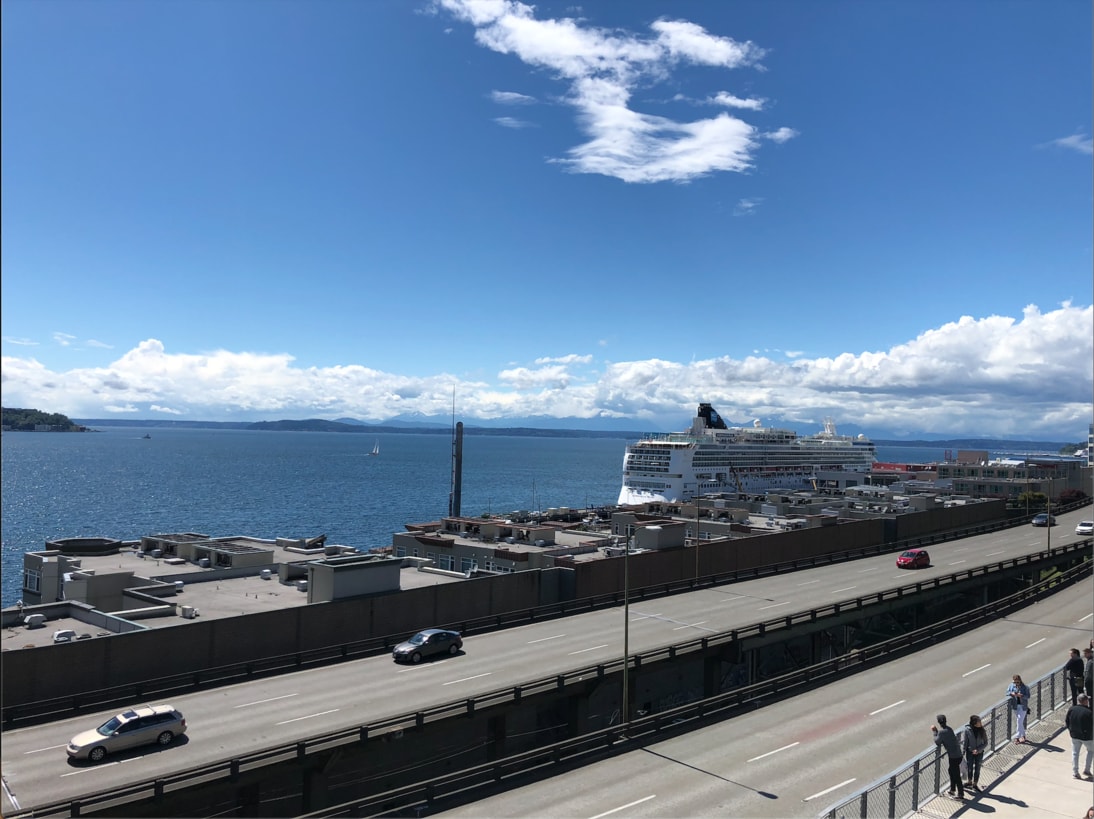
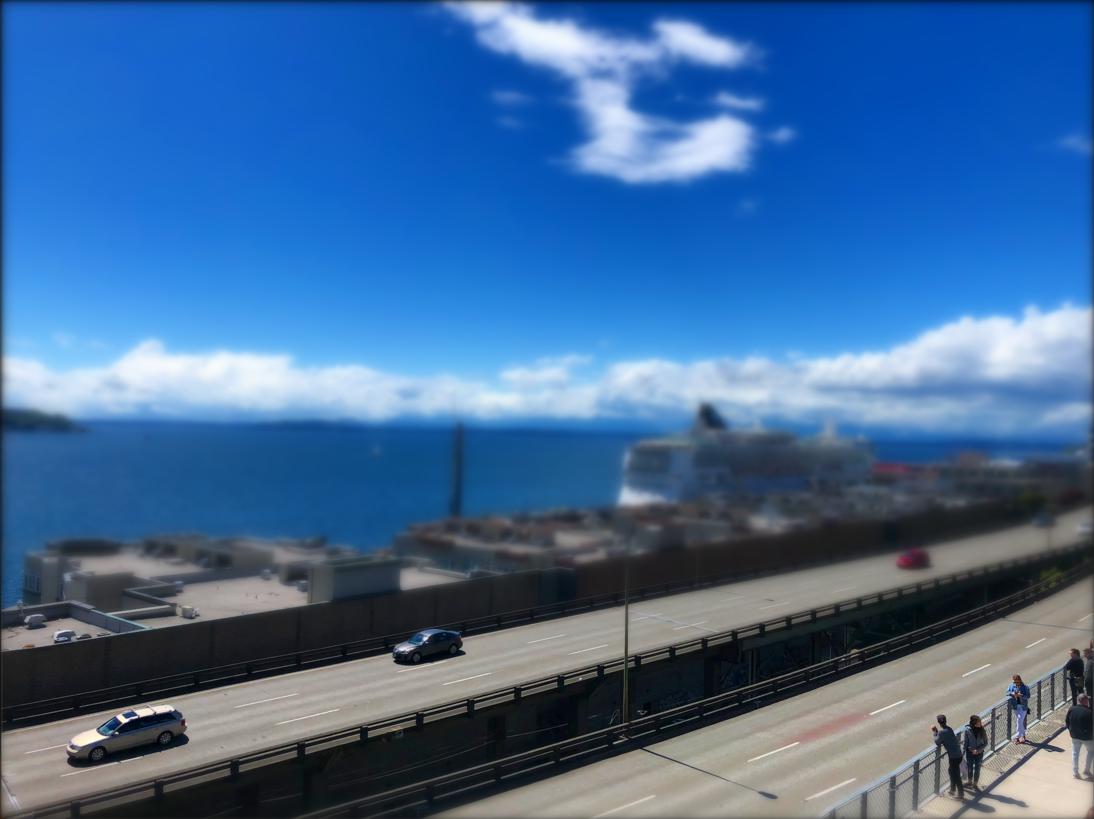
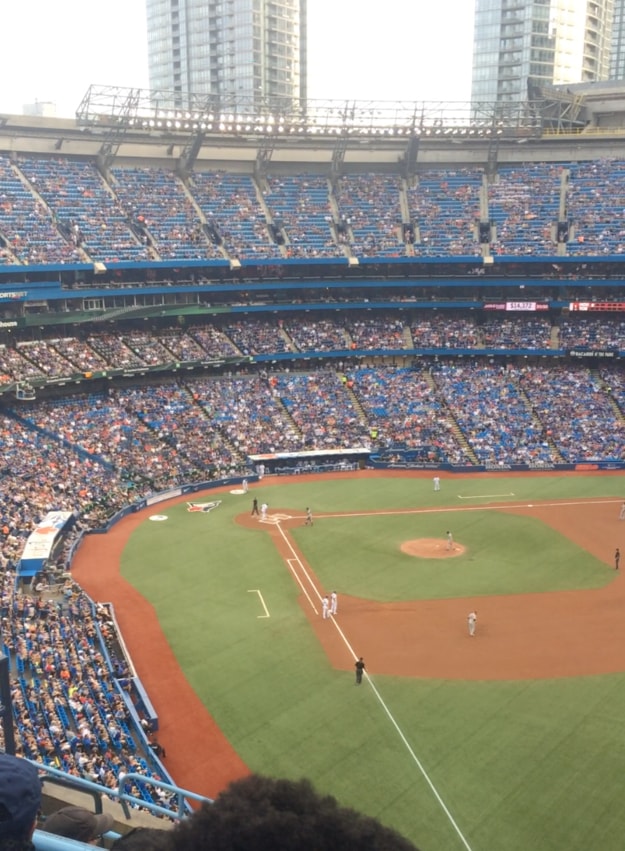
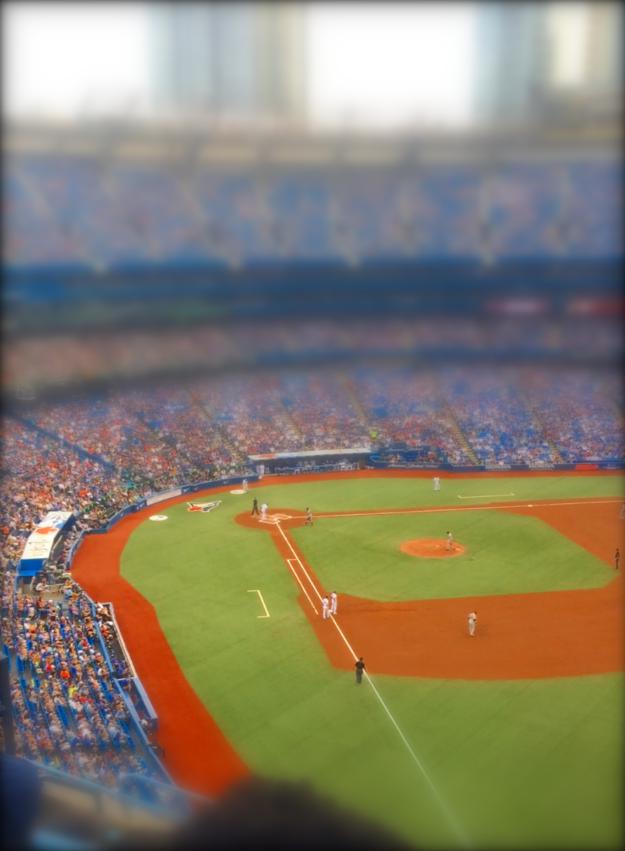
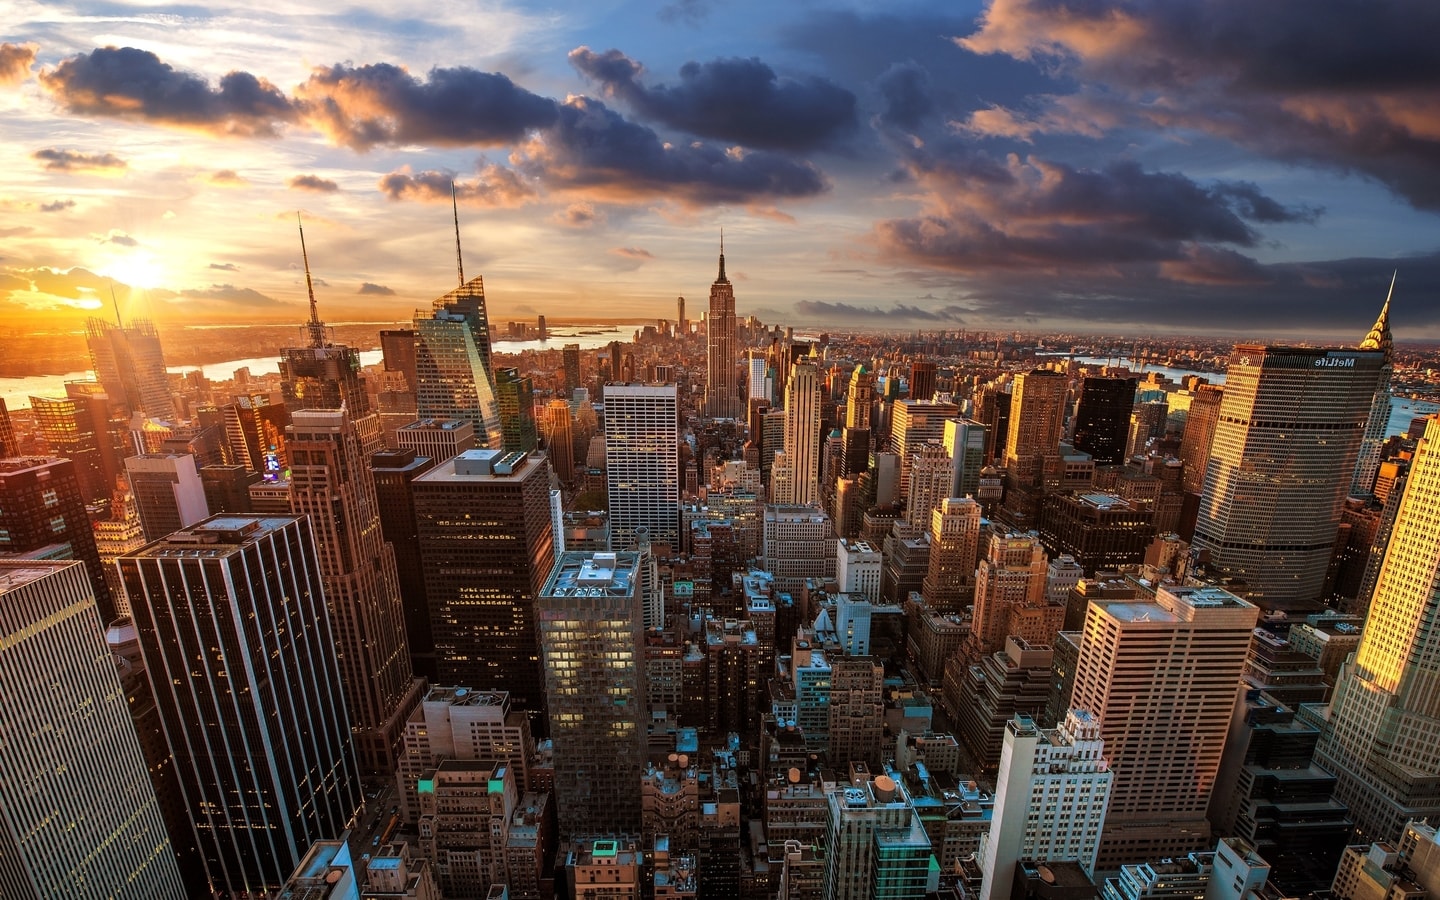
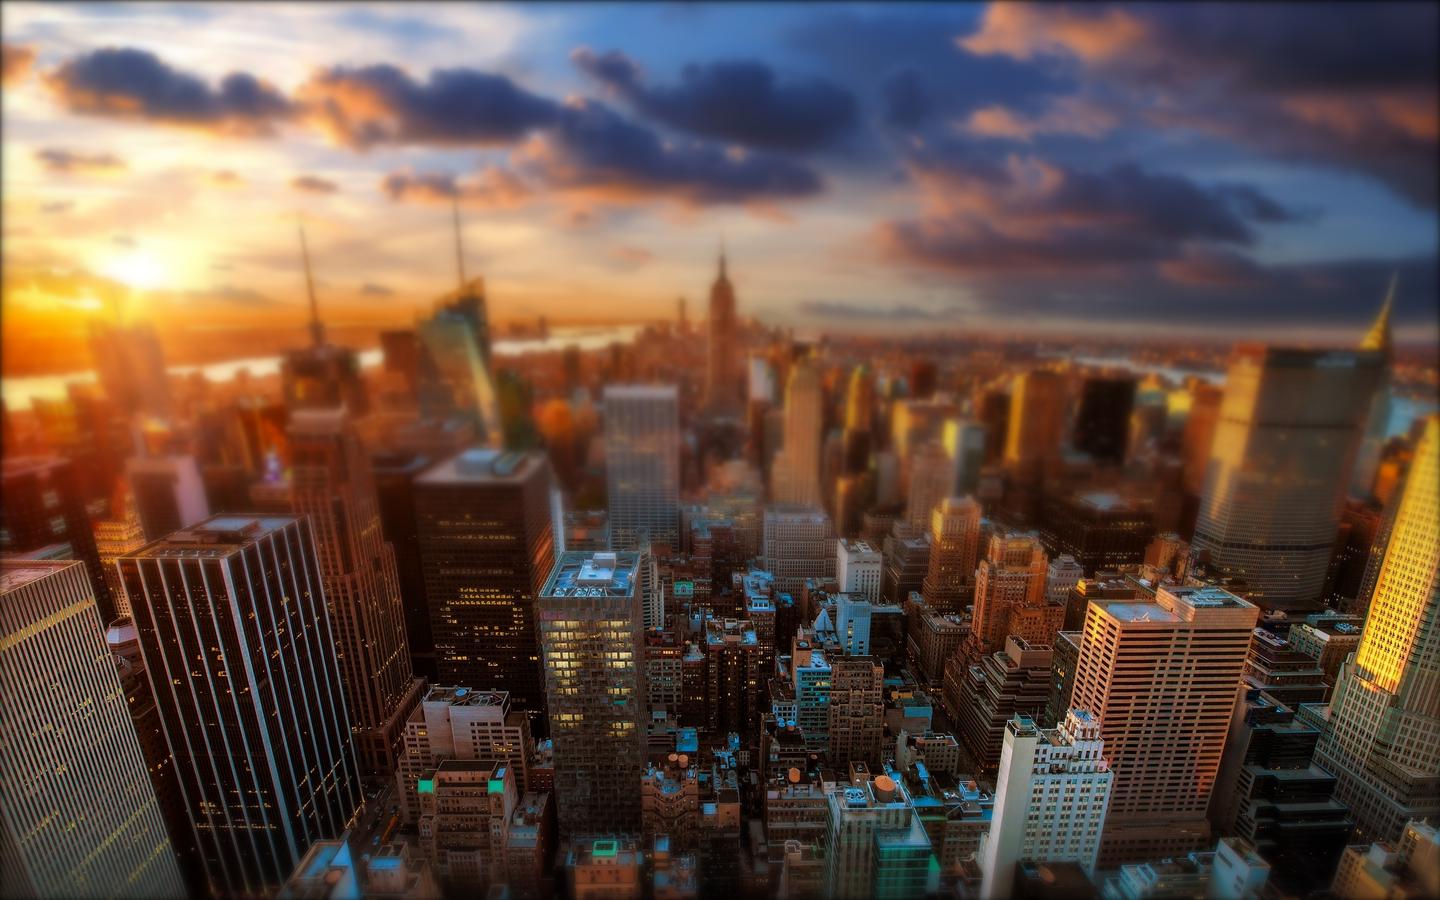
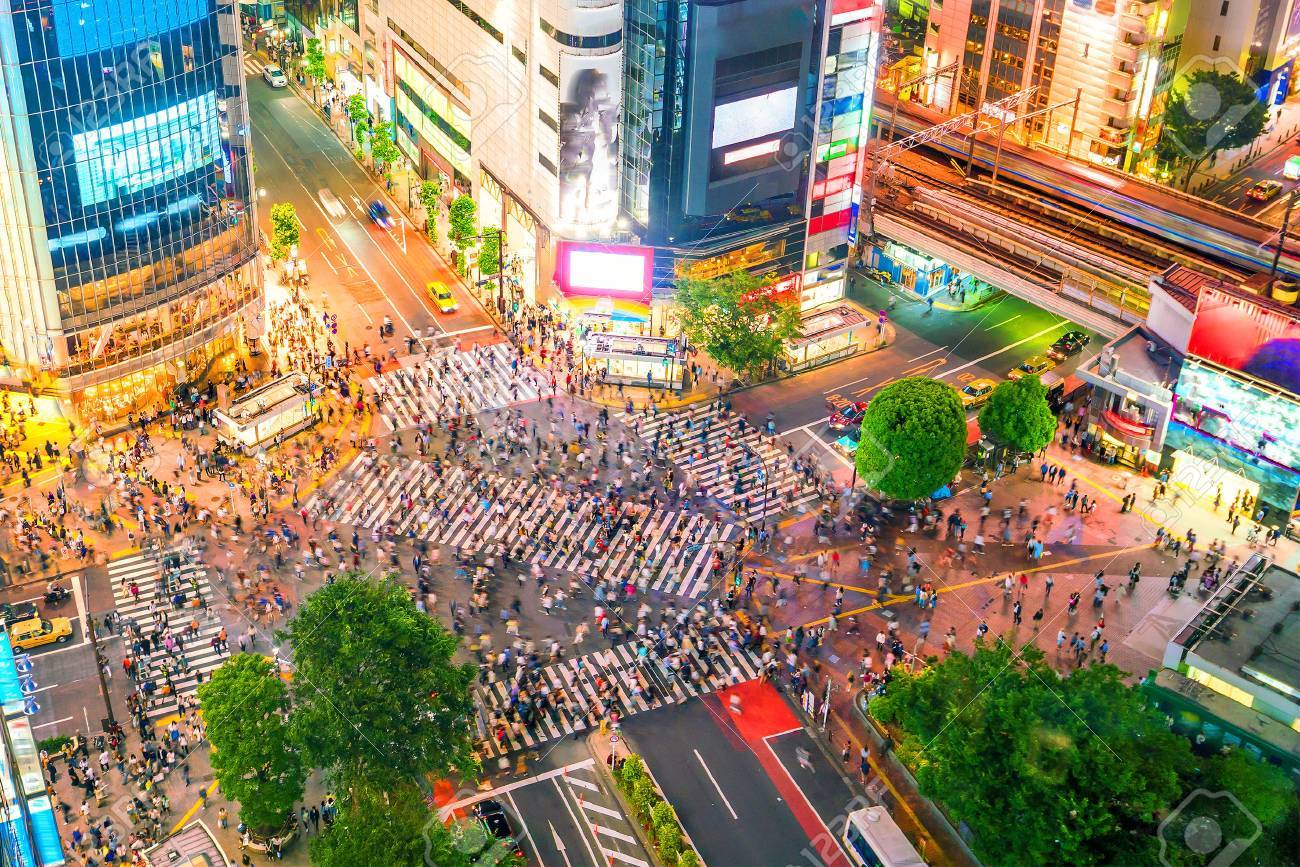
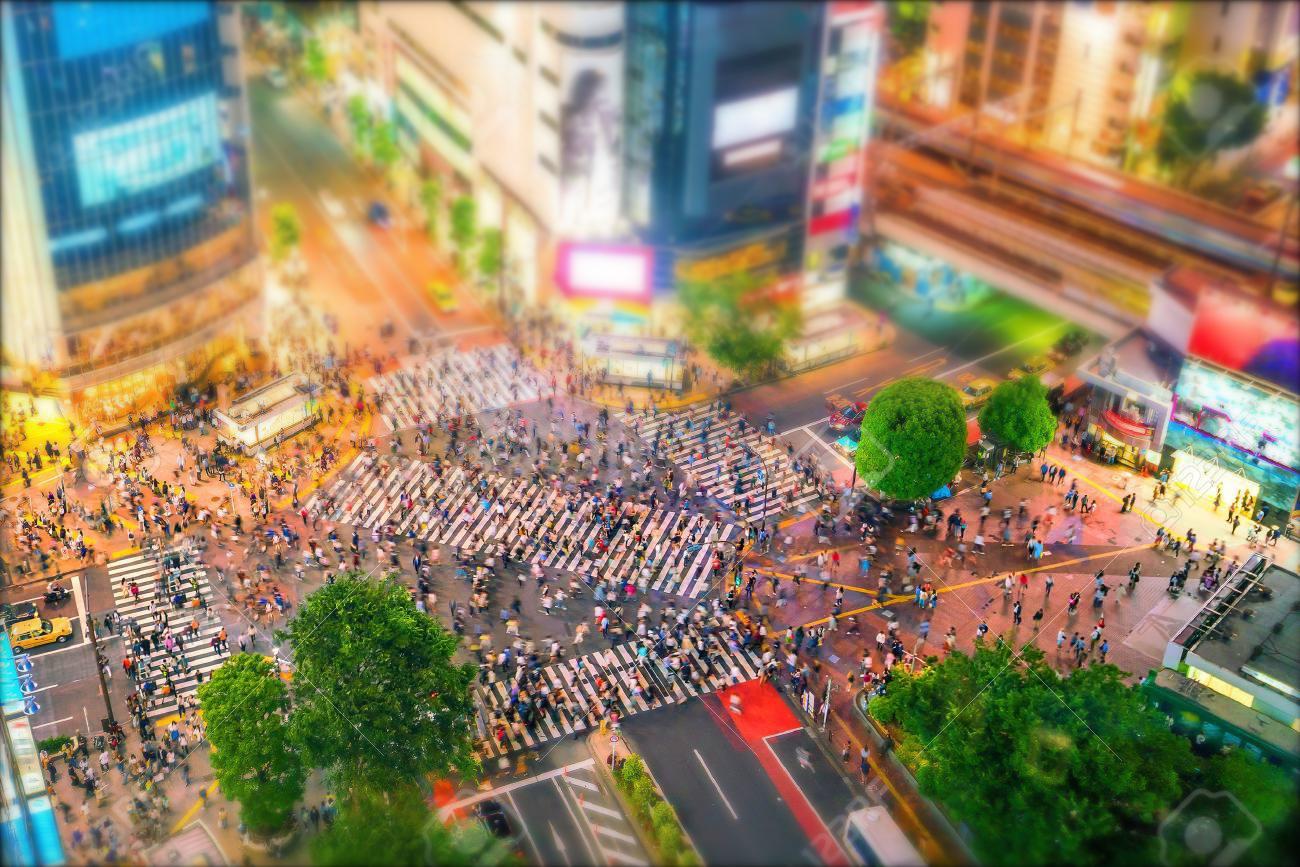
The purpose of this first part of the project is to mimic photos of miniature objects (aka tilt shift photography). This can be replicated by taking a photo that is angled downwards and selecting an area of focus. From there, you blur the portion of the image not in the focus area and maintain the resolution of the area in focus. This technique tricks the eye into thinking that it is looking at a small object and only able to focus on a specific field of view, leaving everything else blurry. The effect is enhanced also by increasing the saturation of the image.
This section includes 2 images I found online and 3 of my own images. To start off, I selected images that have large field of views and also a downward perspective. Then, I selected a line of focus for each image and defined the depth of focus to create a mask. Basically, I made a mask that is centered on the line of focus and 2x the depth of focus in height (the mask spans the entire width). The masked area is for the focused portion of the image while the inverse mask is for the blurred portion of the image. To ensure a smooth blending of the two, I applied a gaussian with a kernel of 20 to the mask so that the edge is smooth. Then, to finish off the focused portion, I multiplied the original image with the mask. And for the blurred portion, I first applied a gaussian blur to the original image then multiply it with the inverse mask. Now I sum these two together to form my final image. This is repeated over a few iterations (4 in my case) with growing depth of fields such that the blur is gradient outwards. Below, I demonstrate the growing window and focused/blurred portions of the images that will eventually be summed together to form the final output. To make the images more "fake" and convincing, I increased the saturation of the images by converting it from RGB to HSV and scaling the saturation value before converting it back to RGB for processing. You can see in the images below that with the growing window, the blur is increased.
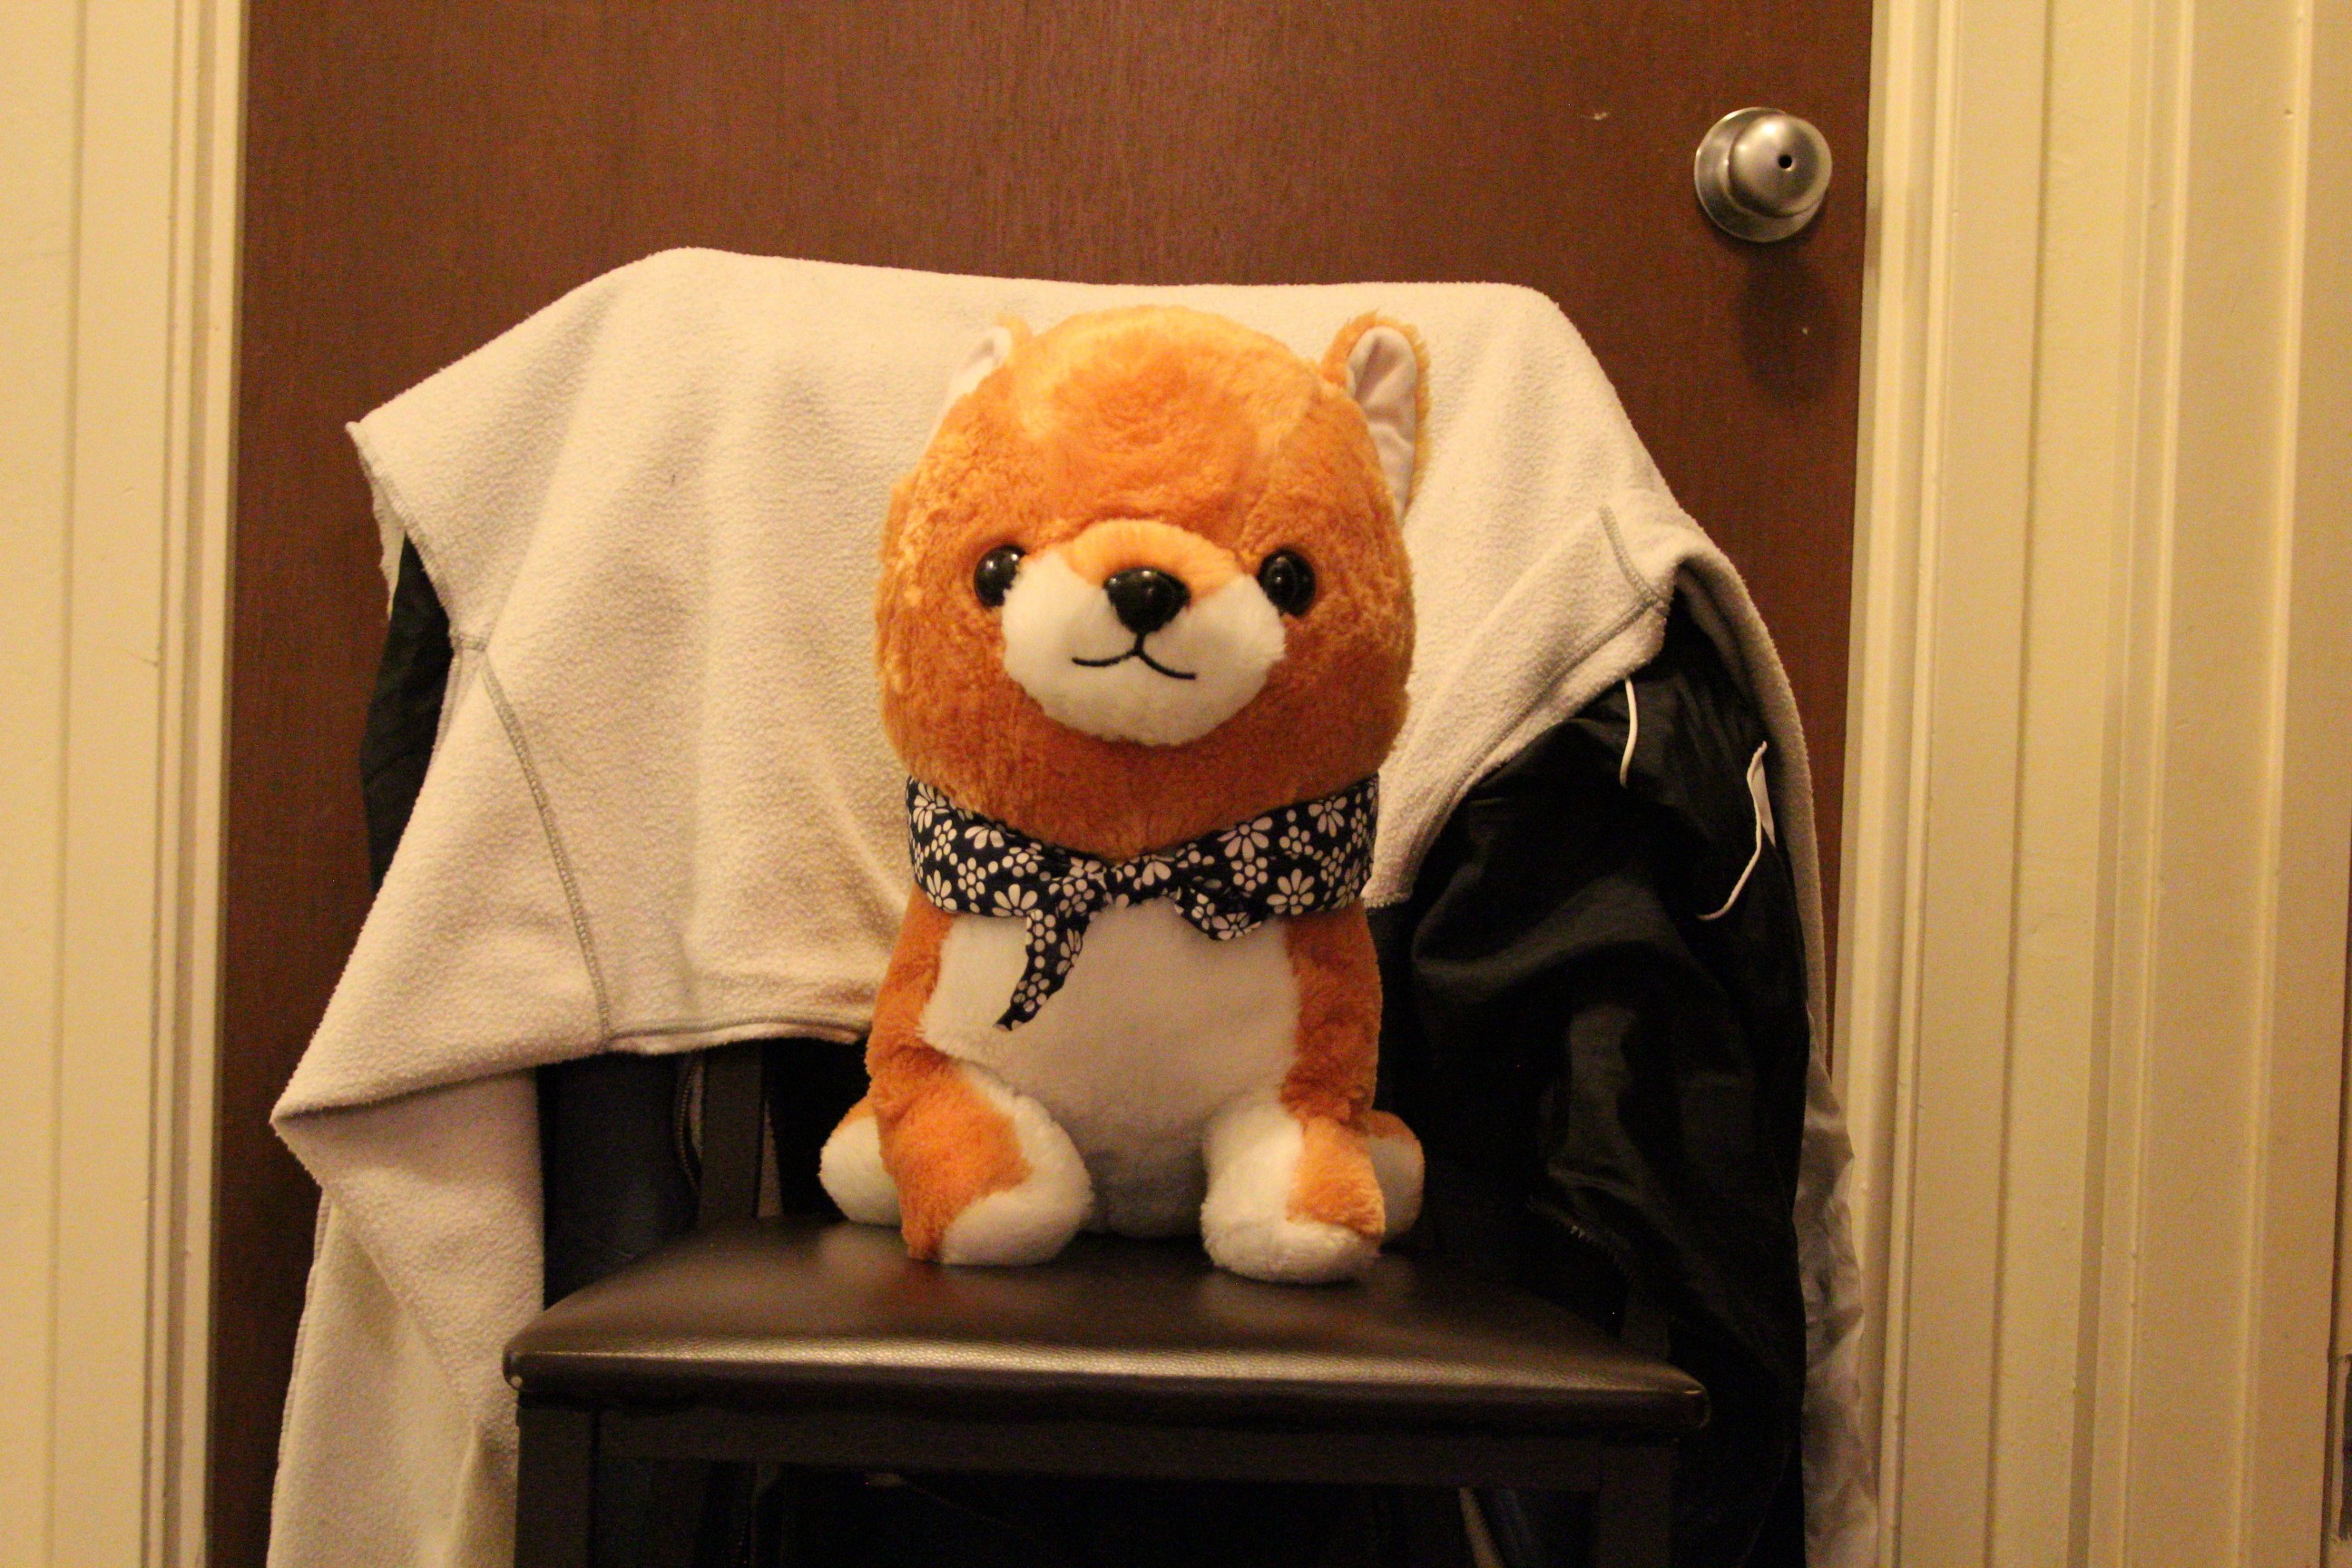
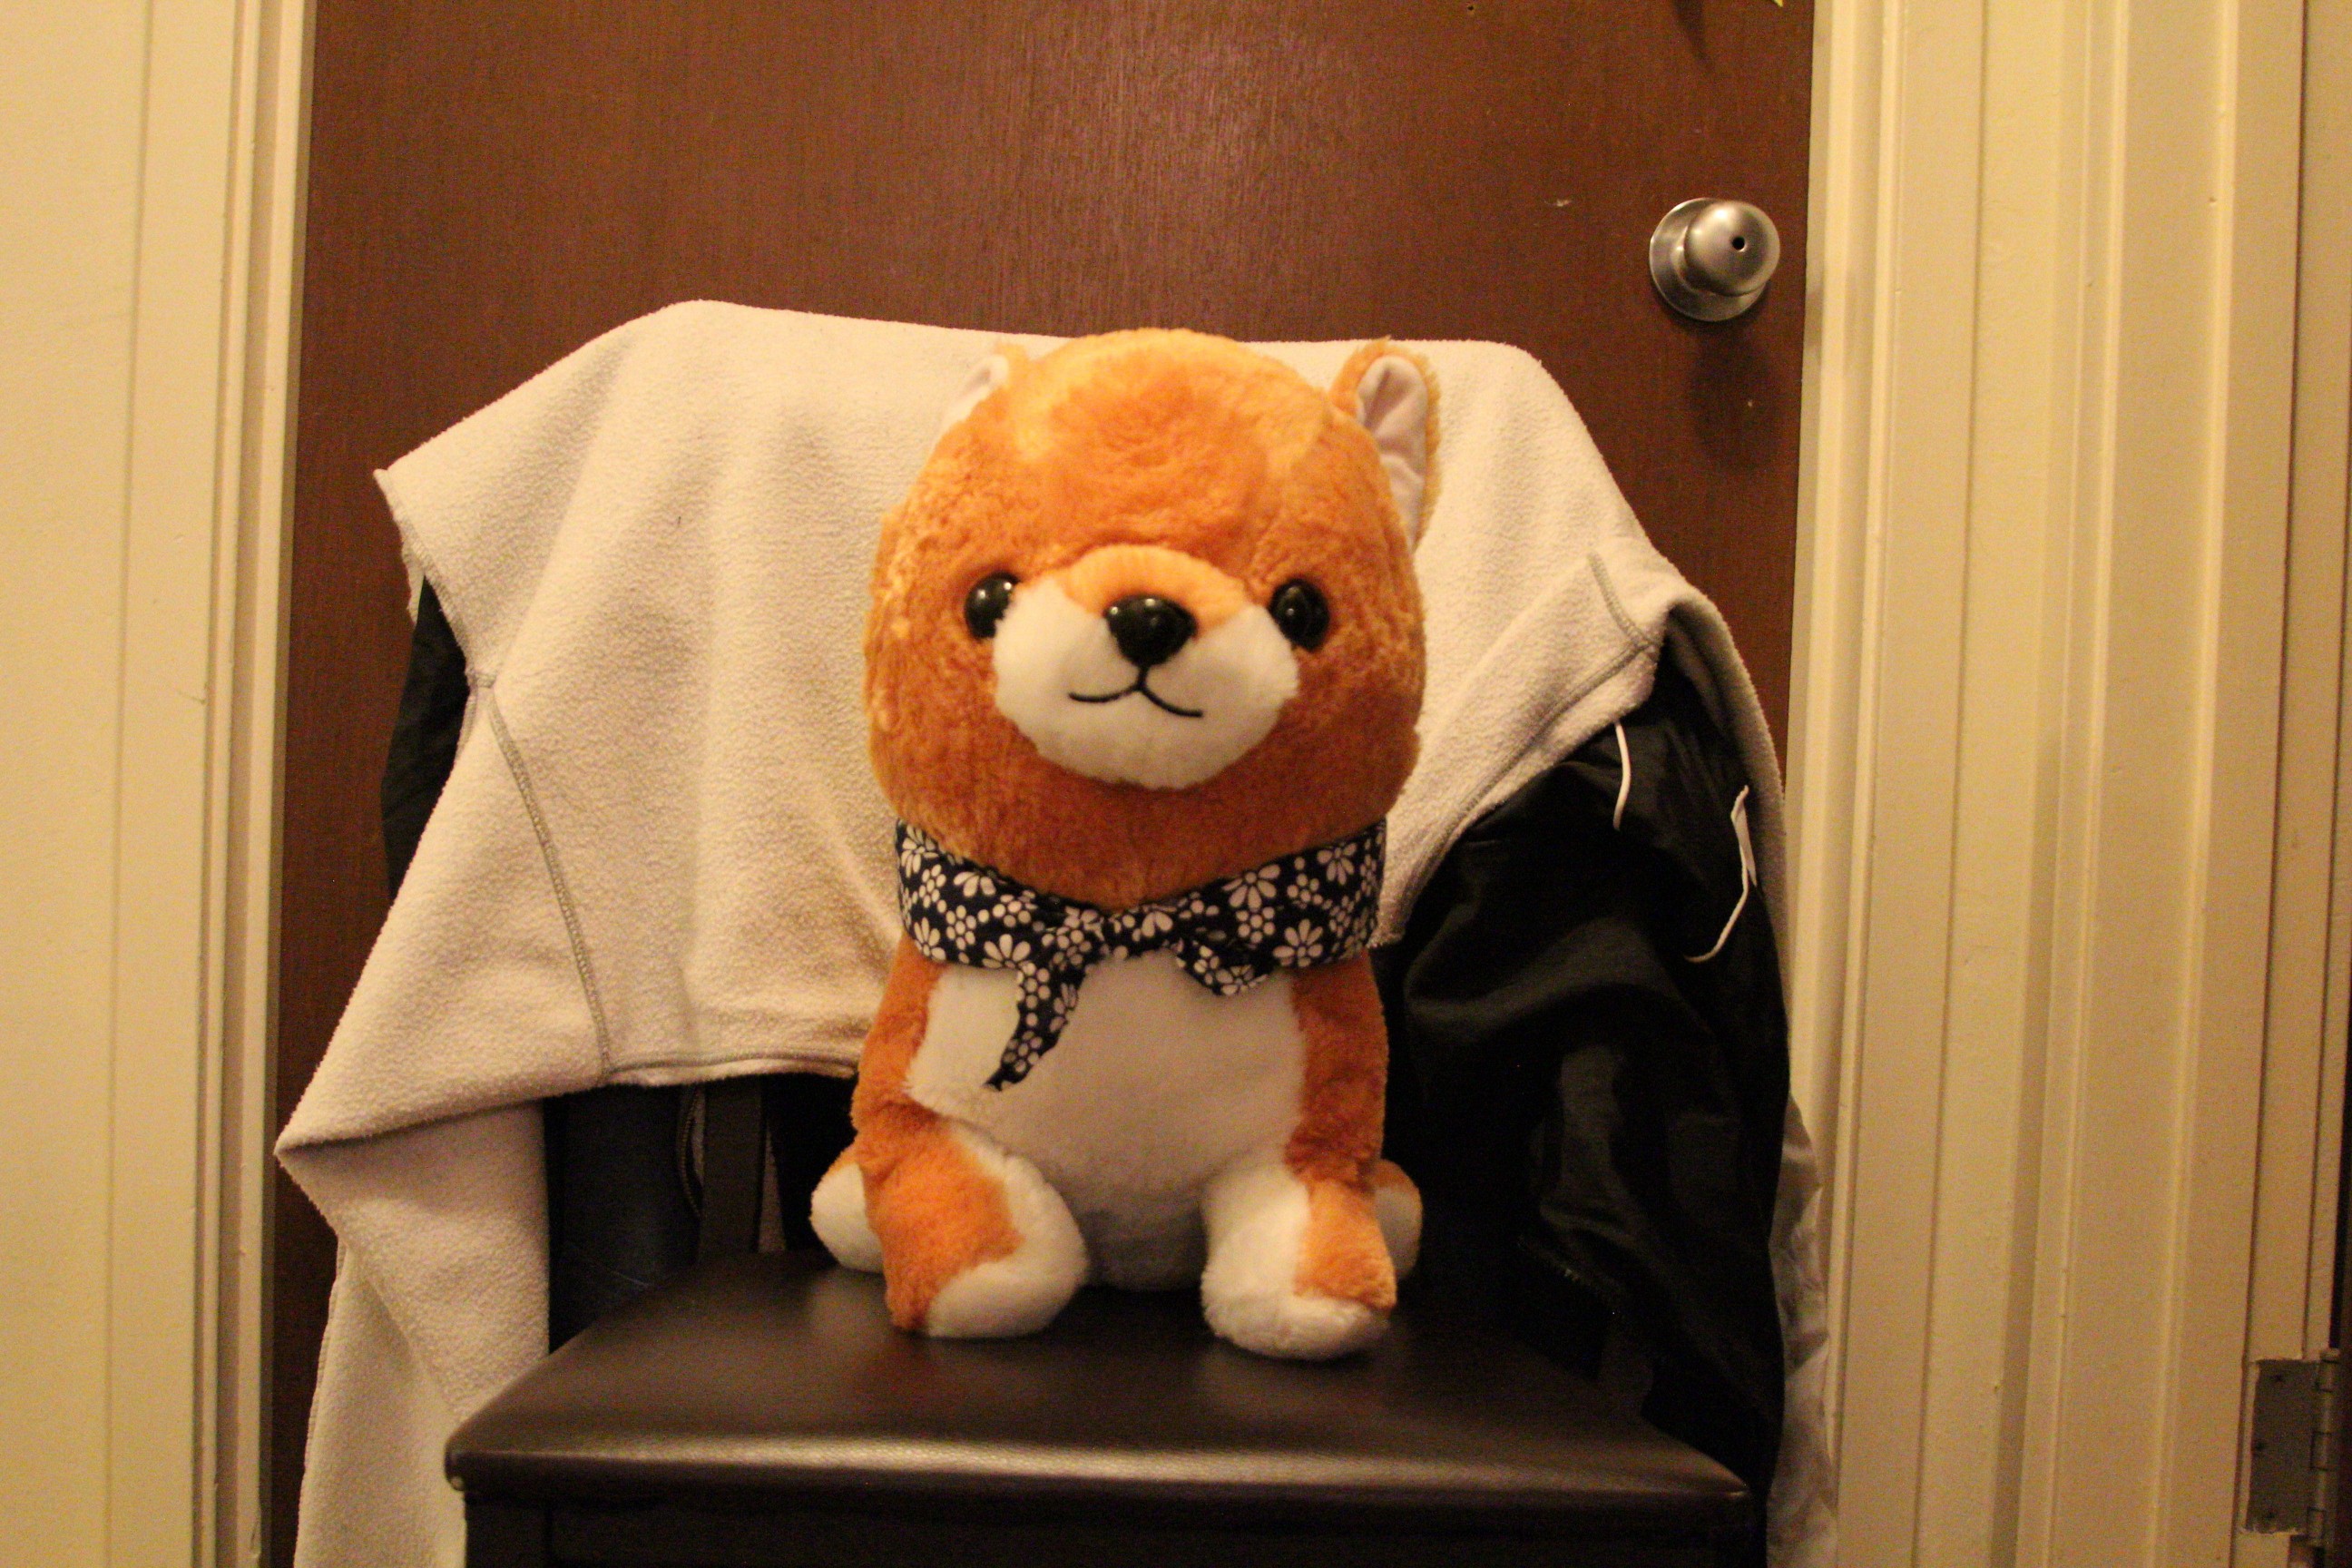
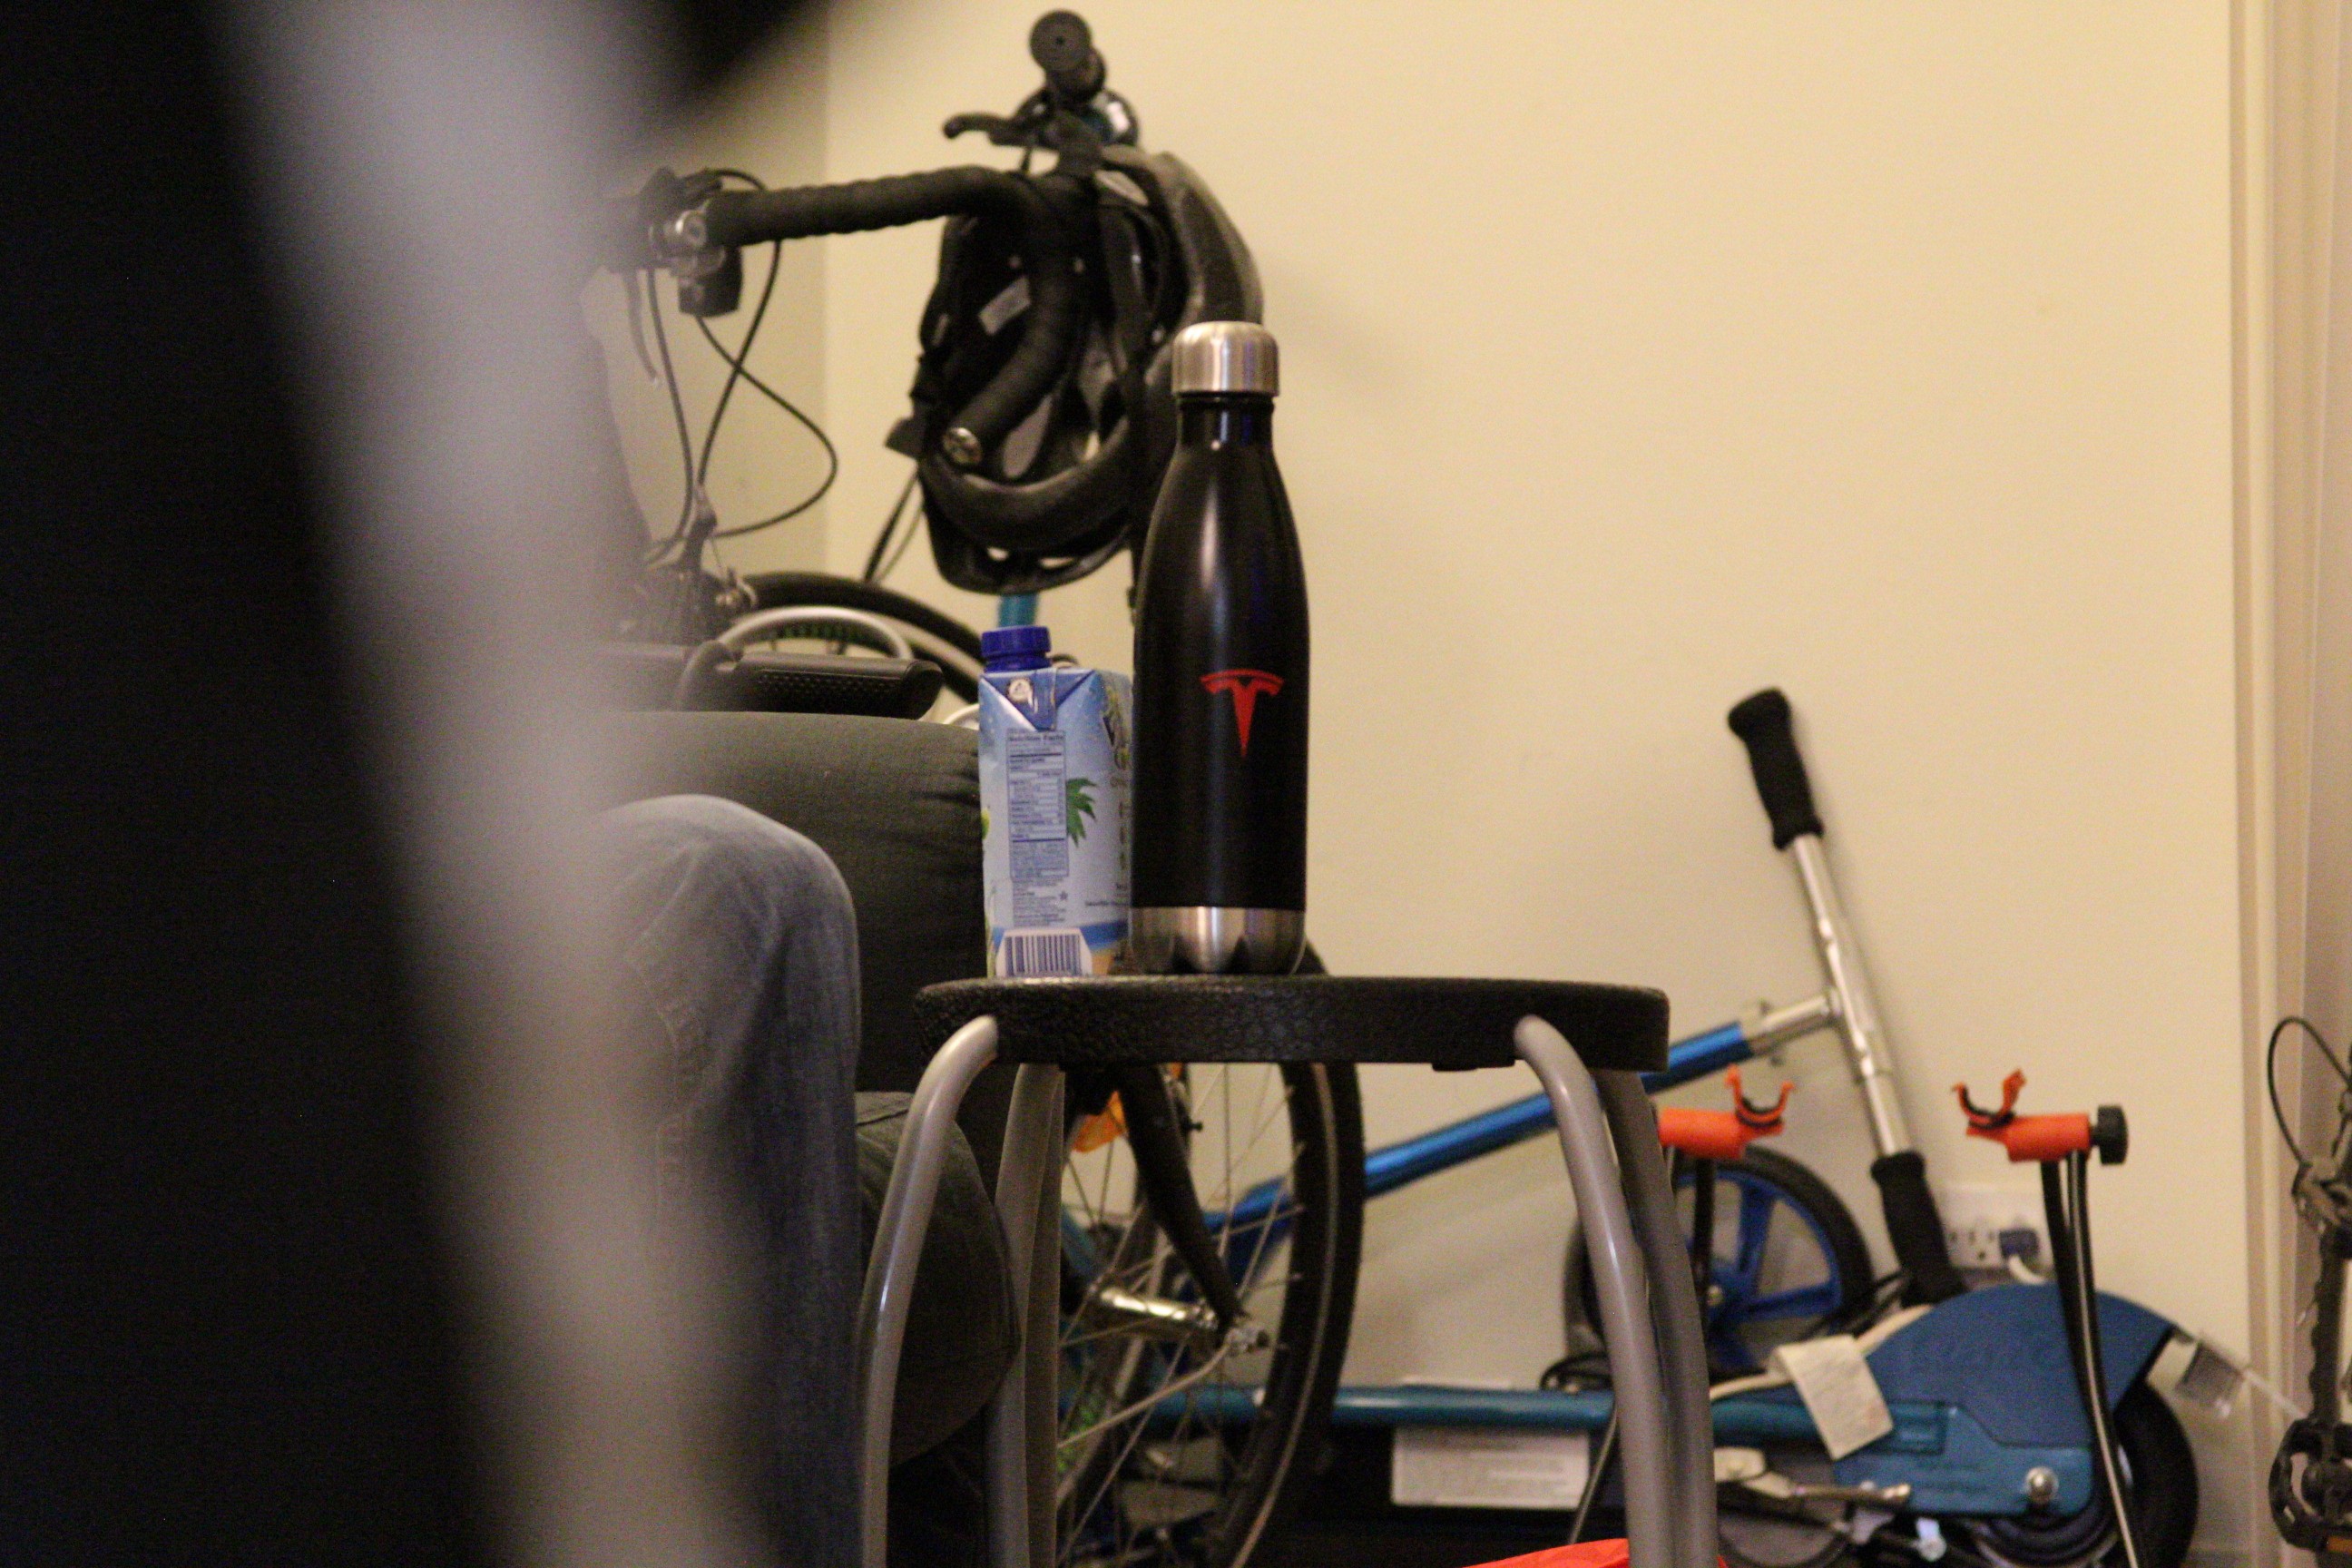
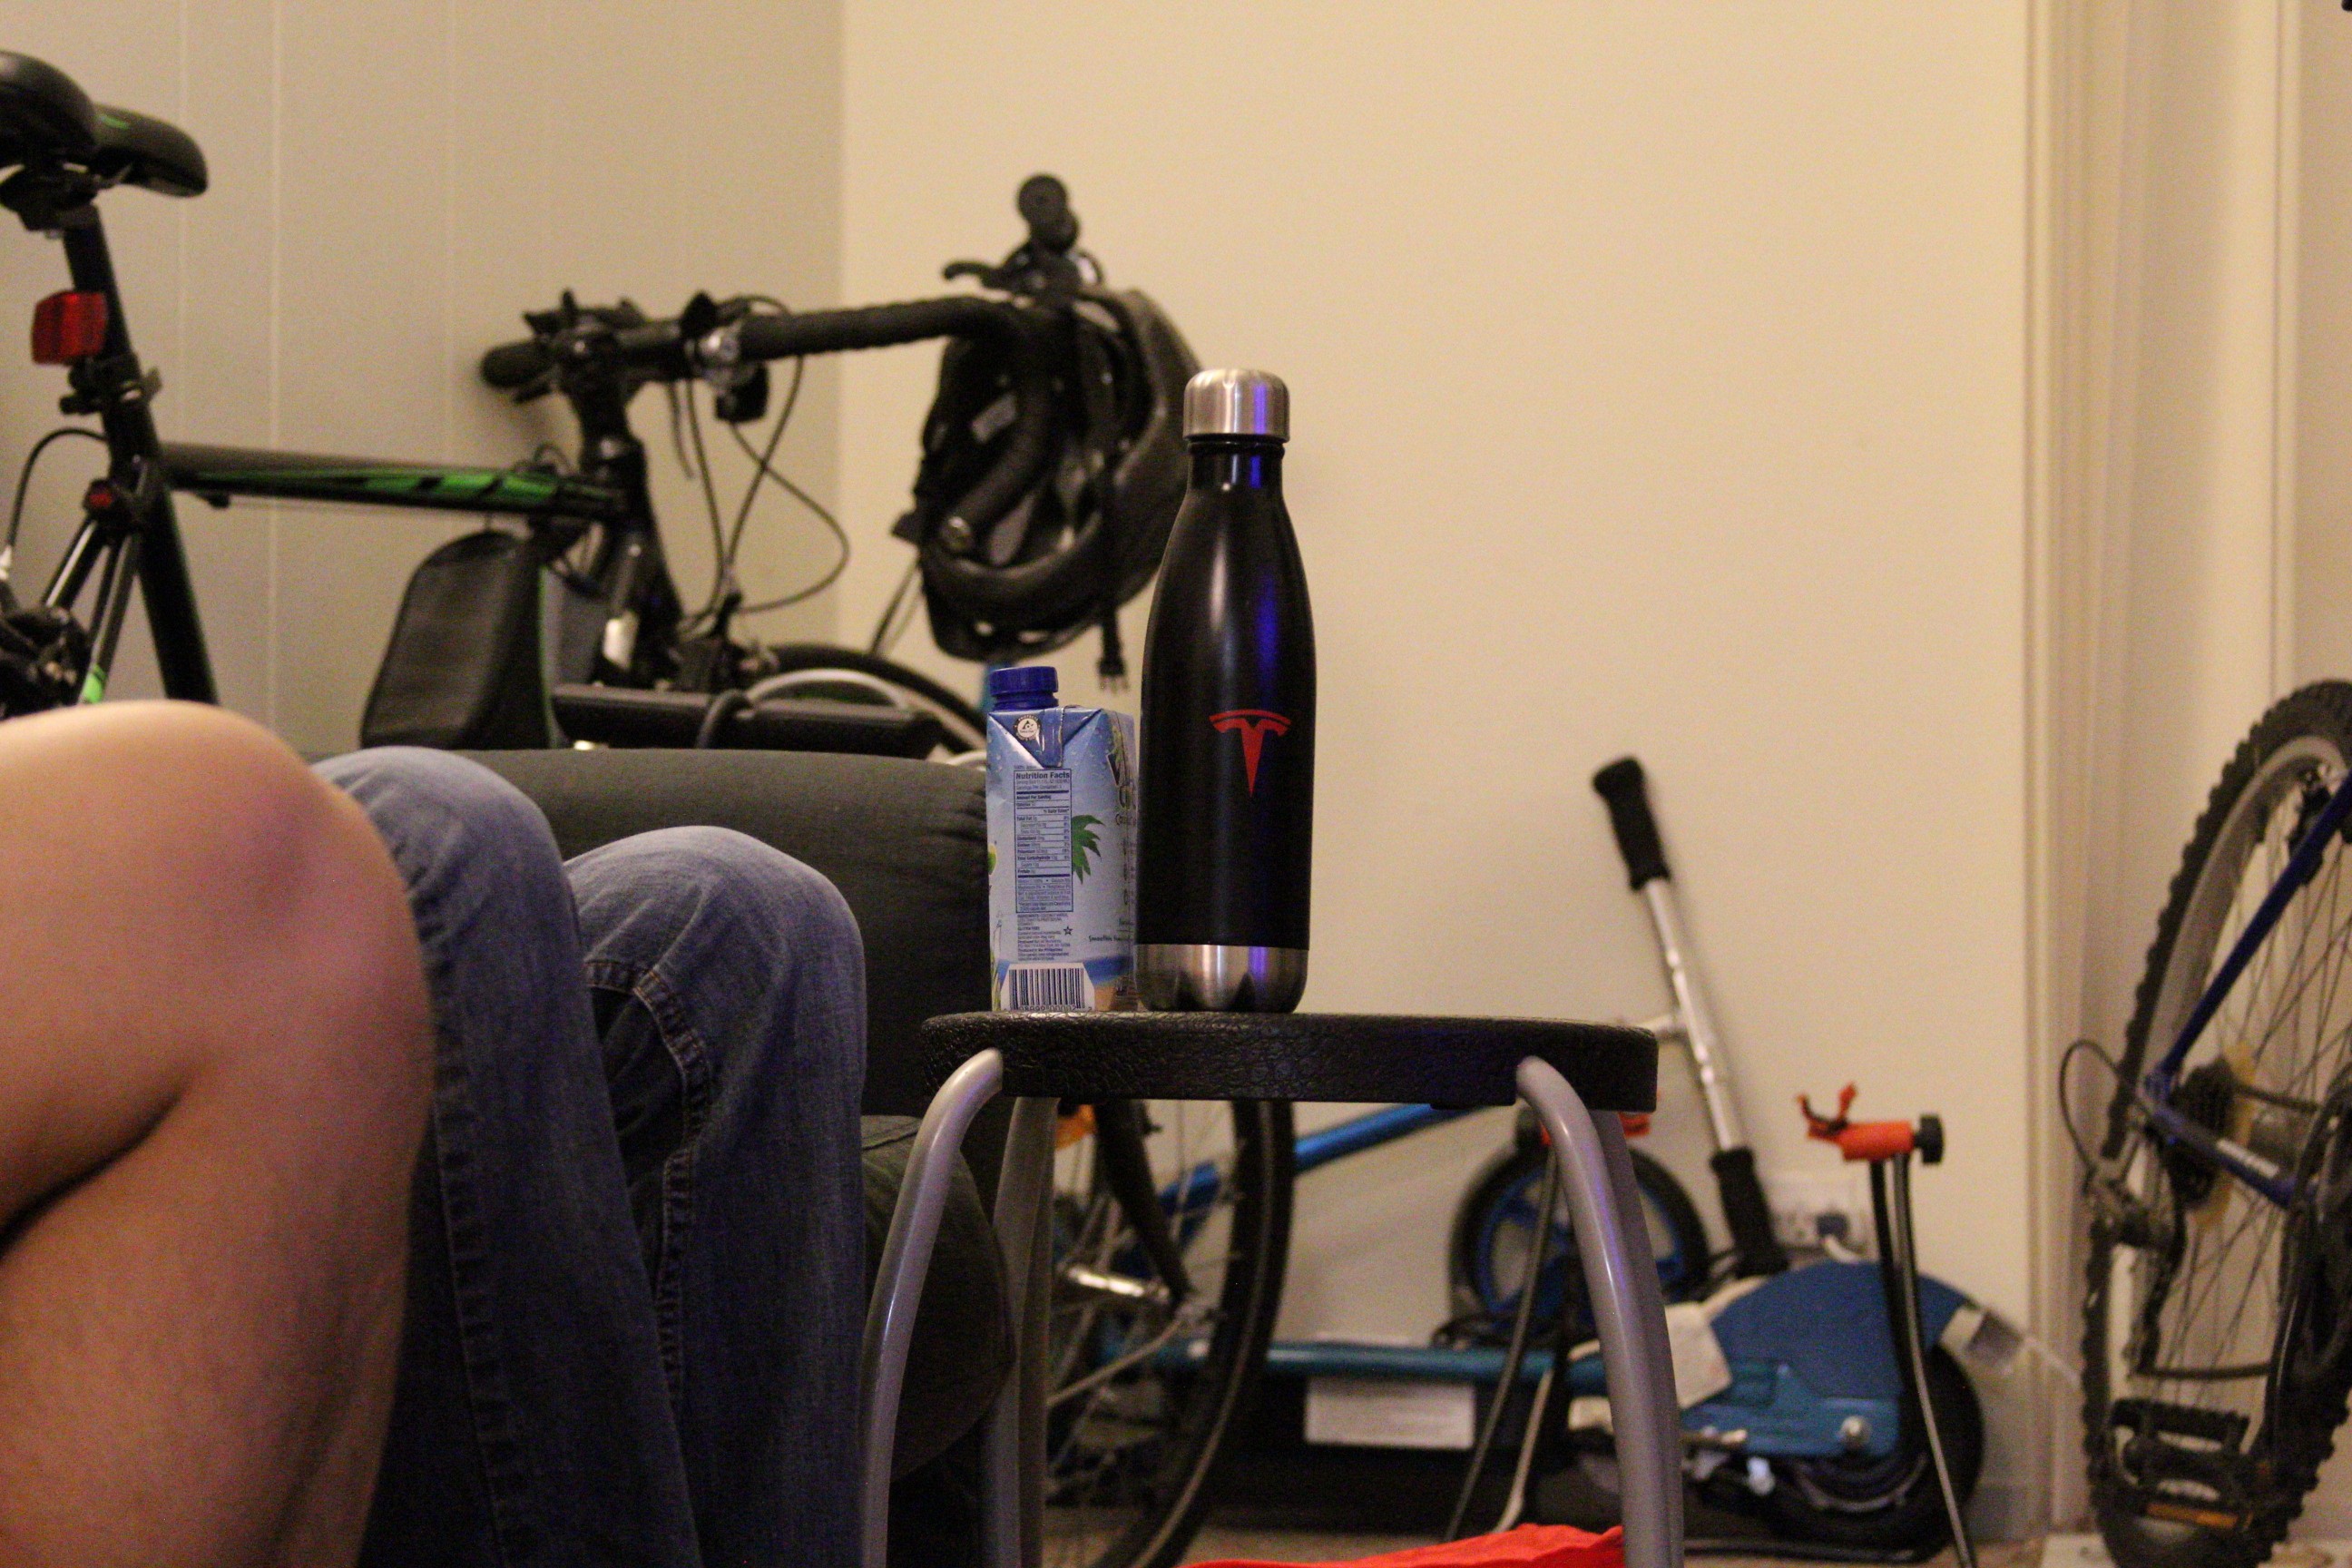
The purpose of this second part of the project is to explore the vertigo shot, a process in which the object at focus maintains the same dimensions while the field of view changes. Overtime, while the camera is changing zoom and depth, the perspective at which the object is viewed will keep changing and warp.
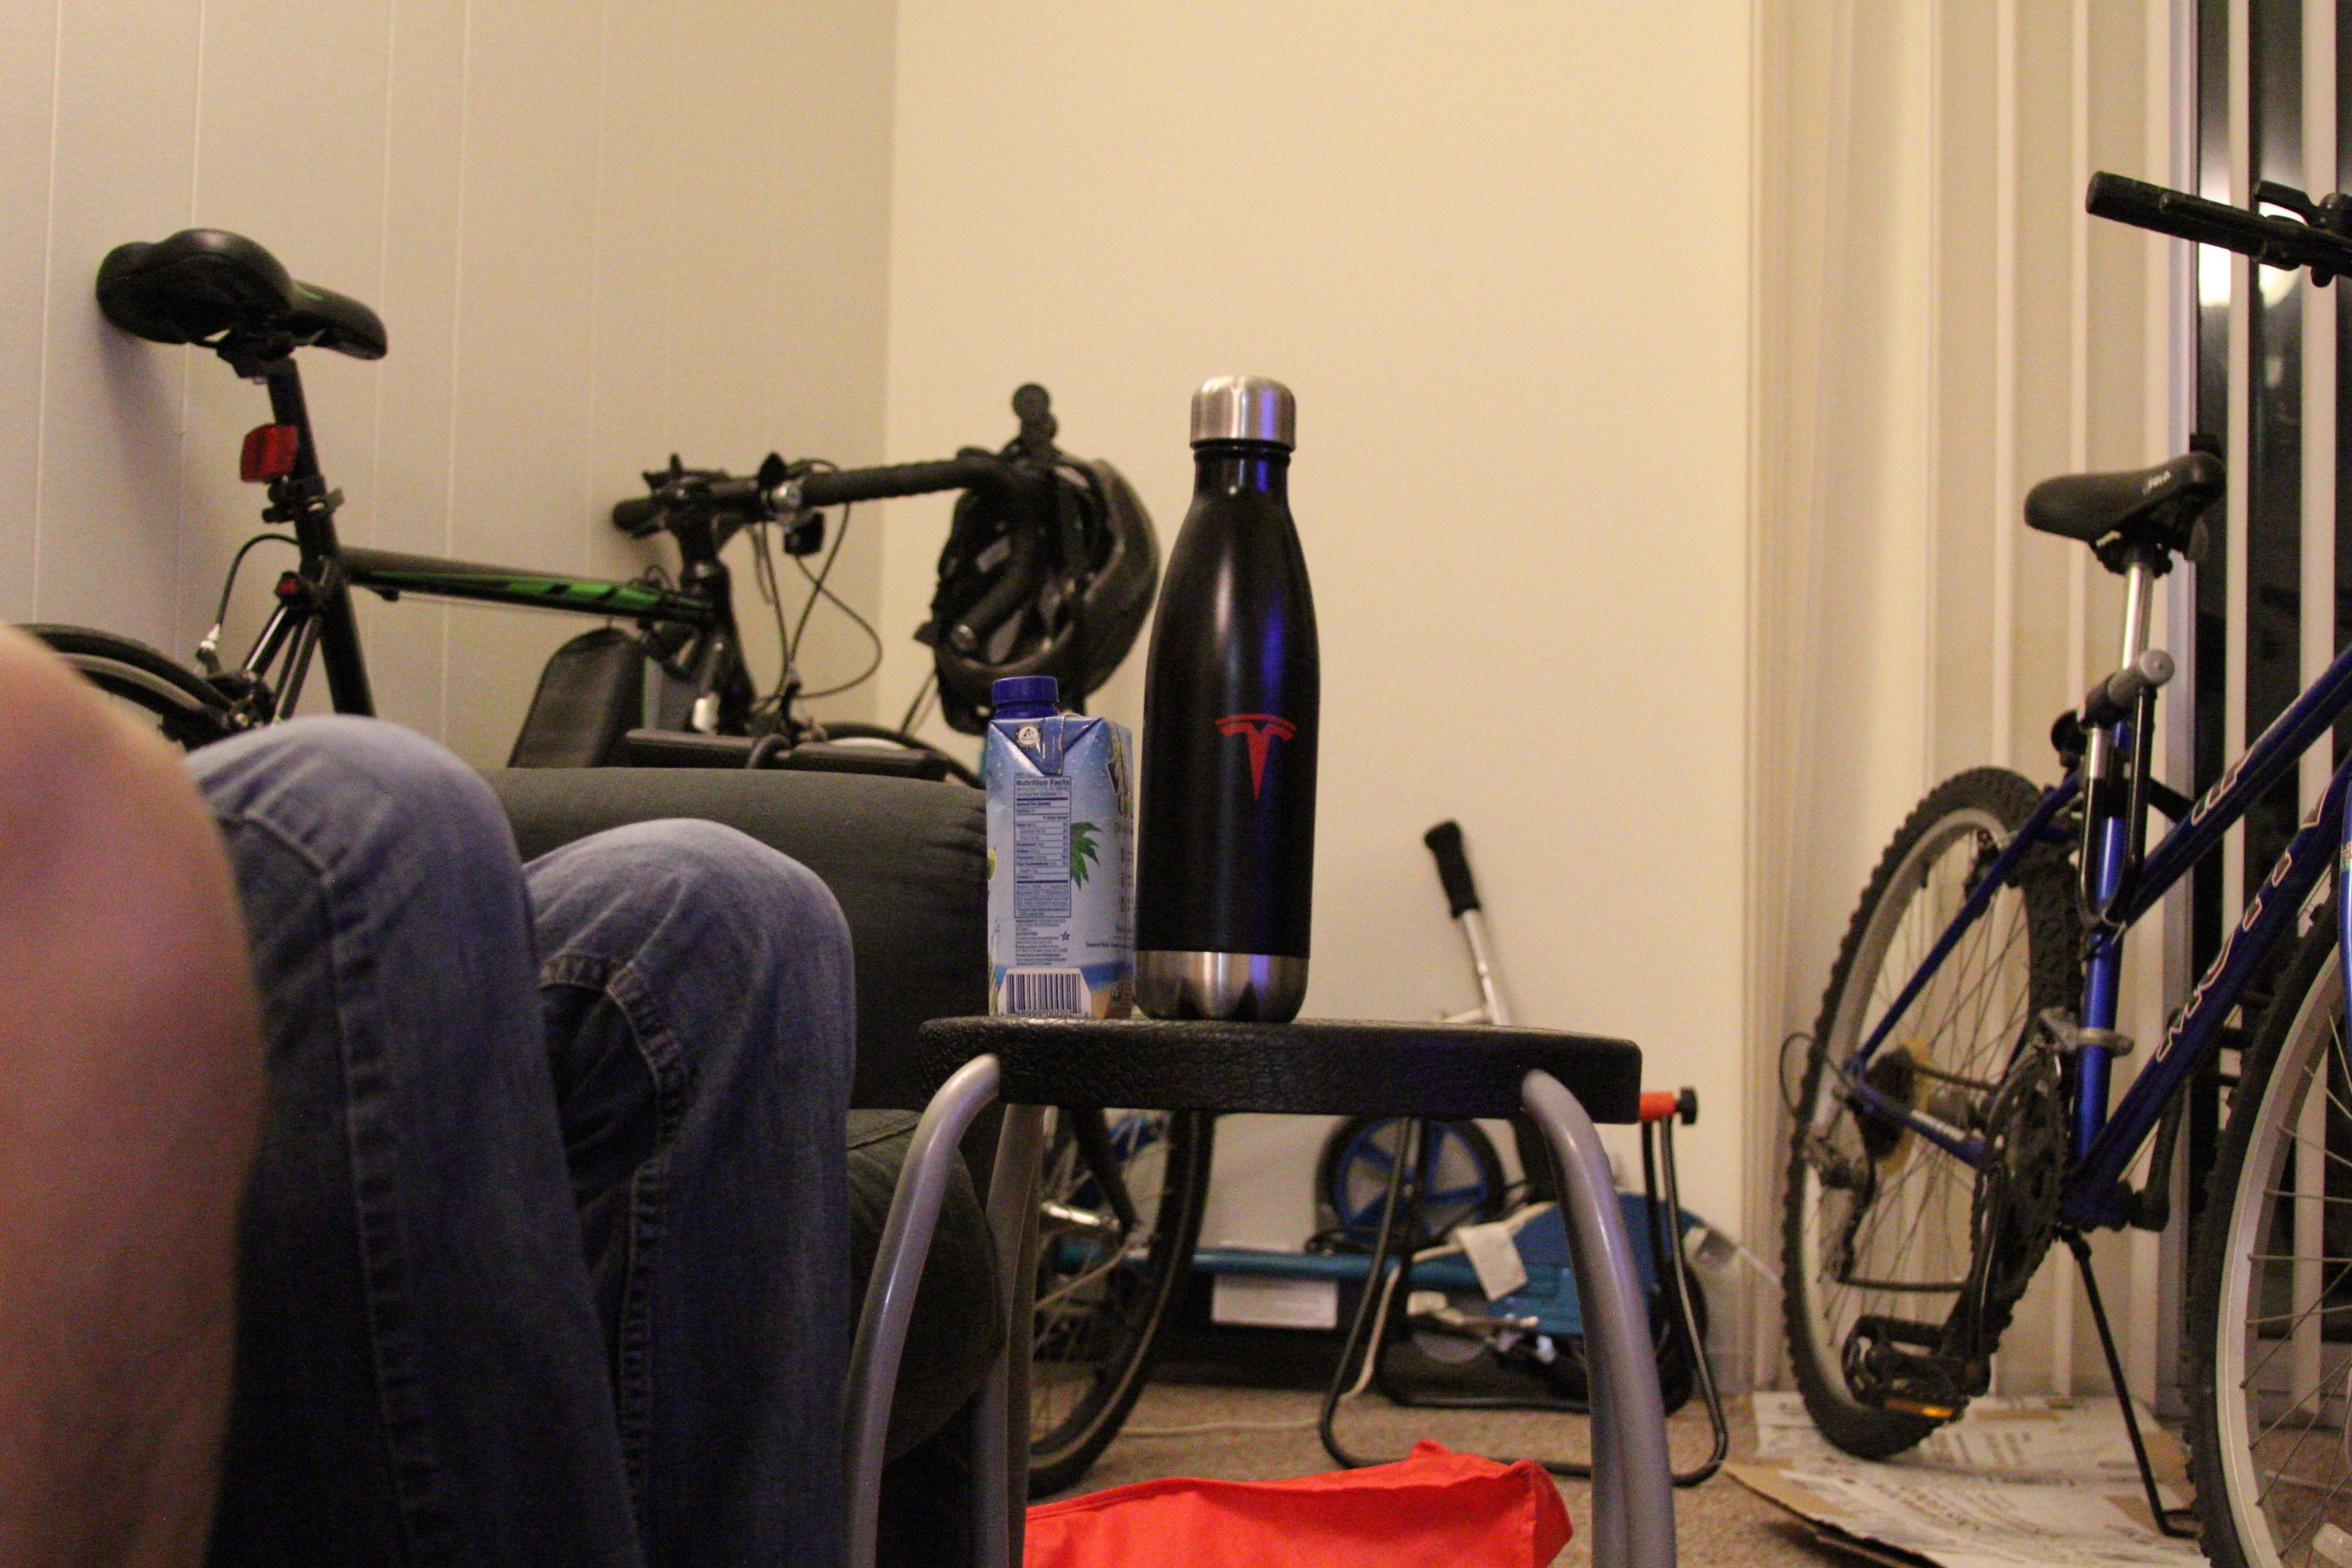
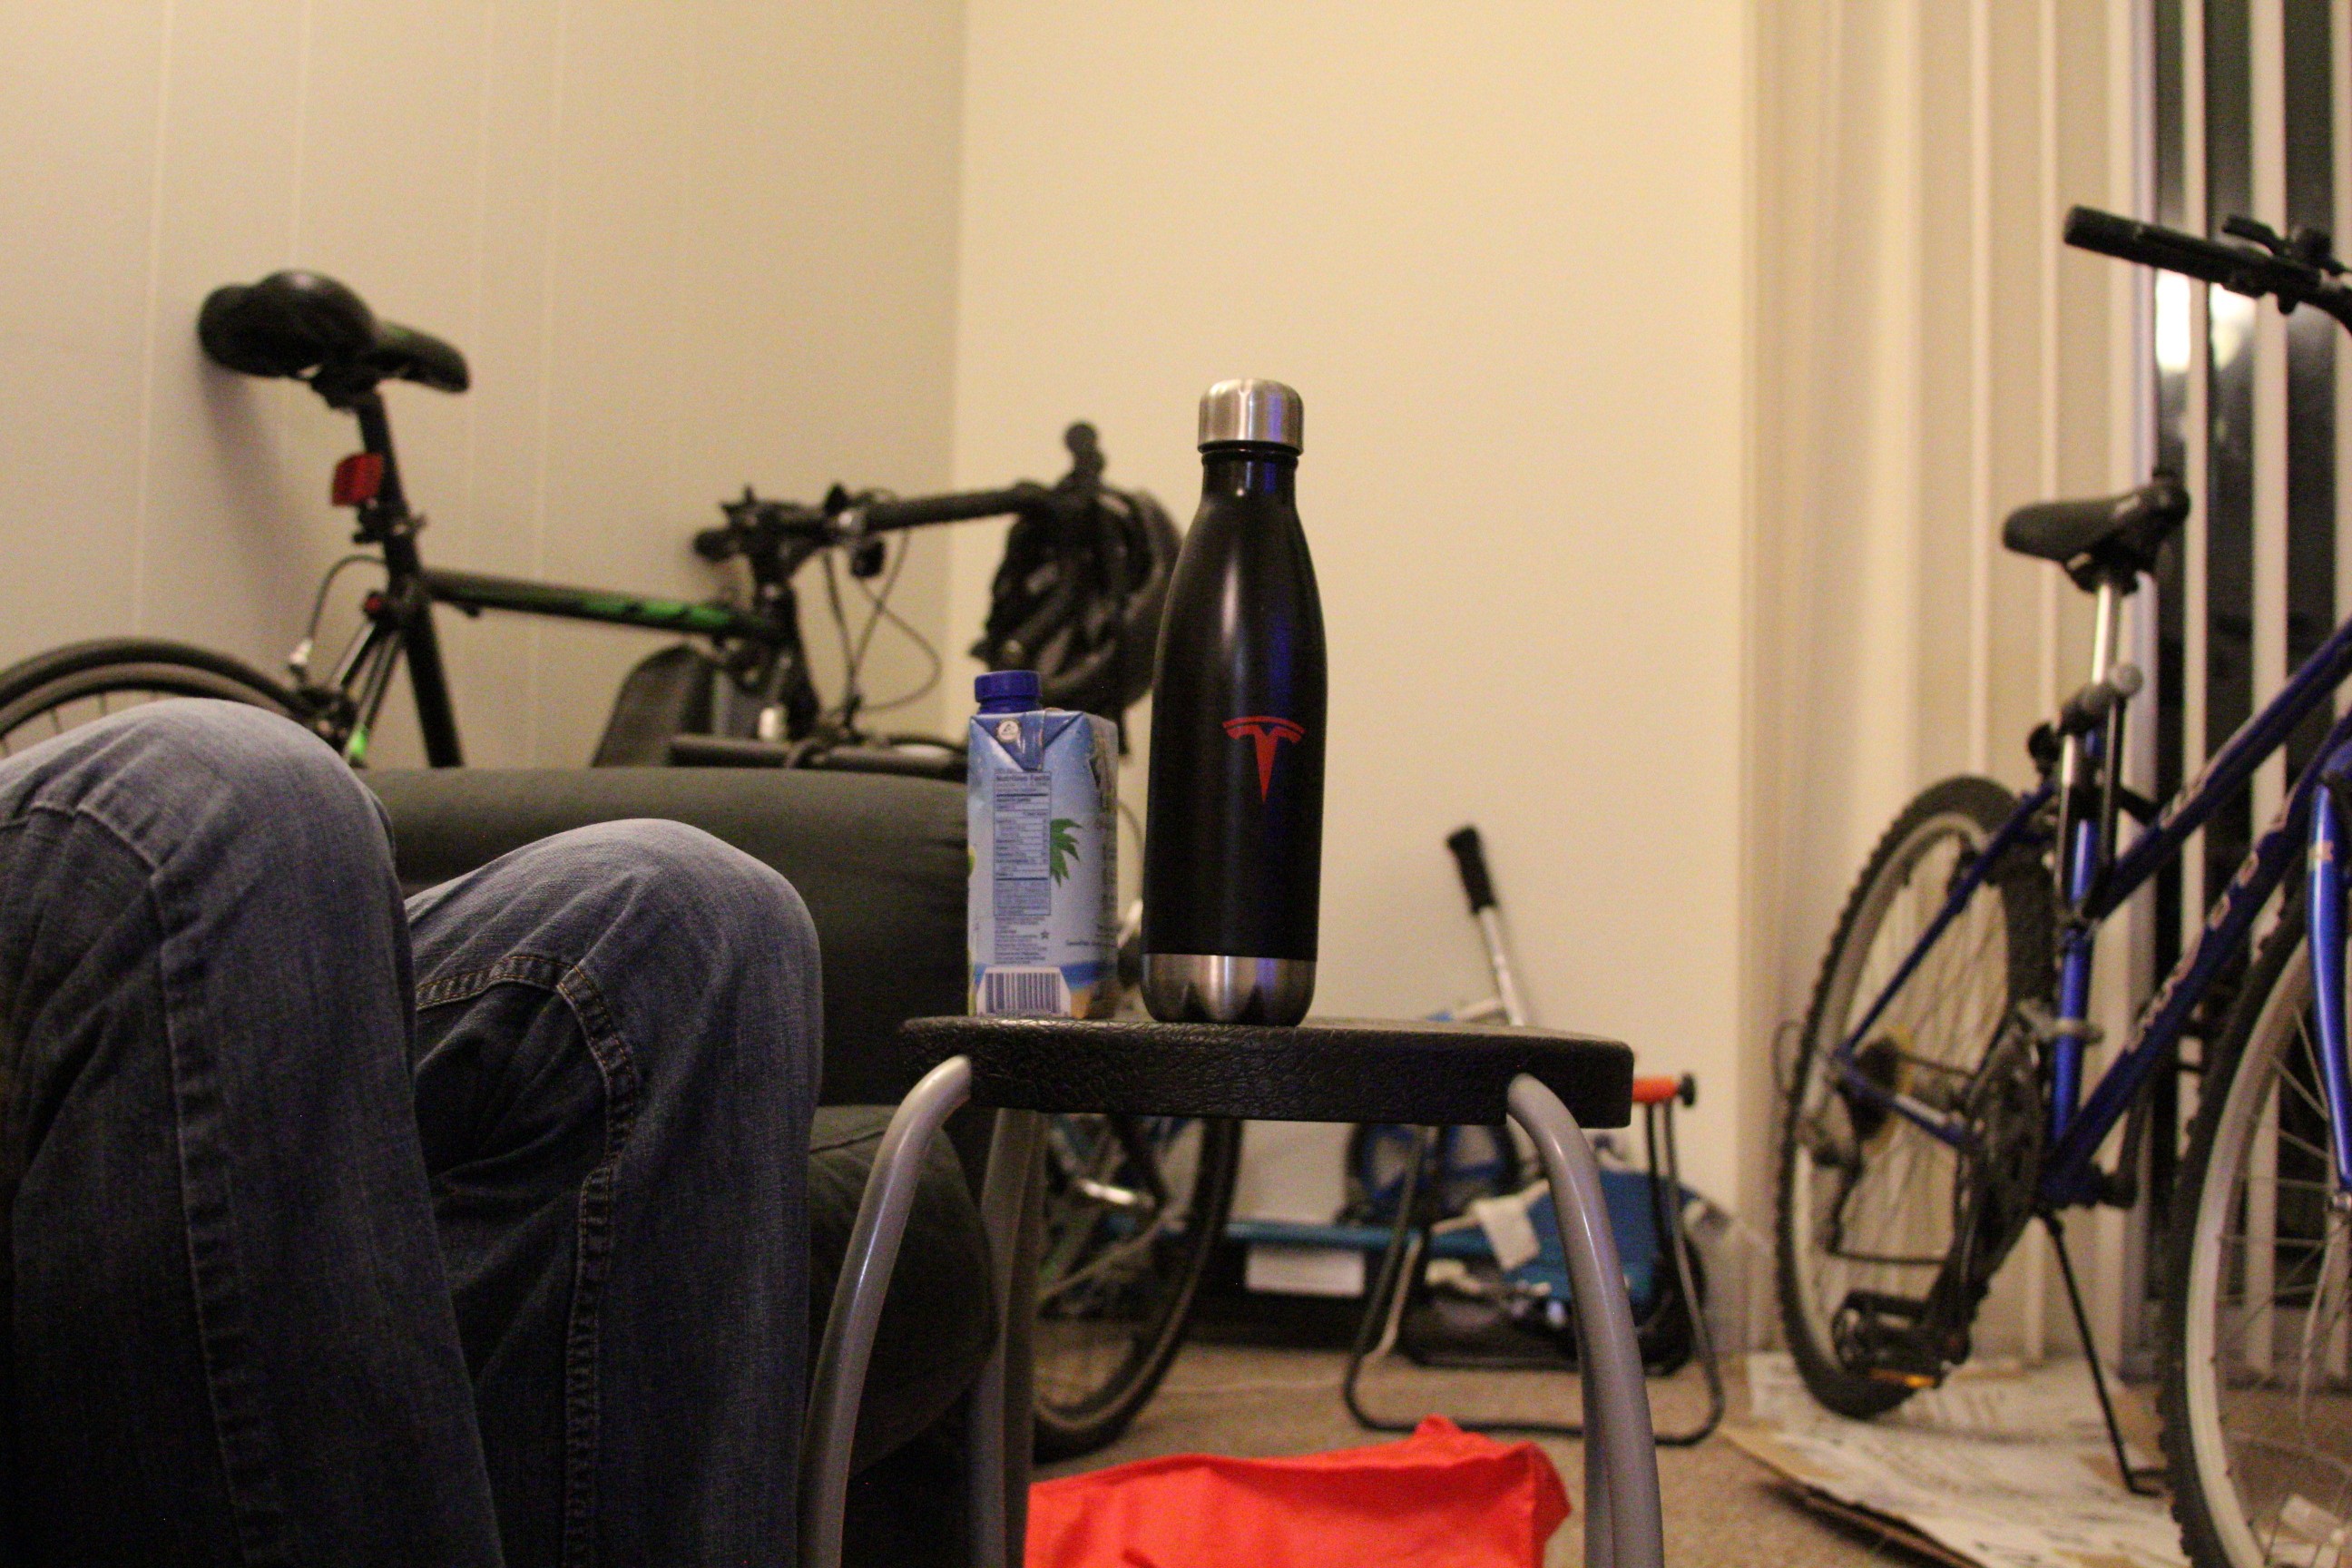
The process of taking these images was a bit complicated since I had to make sure my object stayed at the same relative location of the photo. It helped to place the camera on a dolly-esque thing, which in my case was just a stool that I kept shifting forward. I originally considered using a rolling chair or a skateboard, but the stool worked just fine. I think the most complicated part was trying my best to keep my object in the same spot without too much shifting (angularly and laterally), but that is very difficult because any slight change can affect its output. Additionally, I found that as you moved closer with the camera and object at constant heights, the height at which the object sits in the screen moves higher and so I had to manipulate my camera to account for this change. One of the worst challenges was that a friend accidentally moved the water bottle I was taking an image of and I was quite devastated.
I chose to take pictures of objects that are around a foot in size, so not too small nor too large. Additionally, my images had something in the background so it would be more obvious that the field of view was changing. For the first image, I took it in a hallway while the second one was taken in my living room. Both locations are longer than they are wide.
Camera: Canon EOS 60D on manual zoom and focusI took around 6 to 8 shots for each image and composed them into a gif. I tried my best to maintain the height and space out the distance at which I took the picture. The first image in the sequence is at a far distances with max zoom inwards while the last image is at the closest distance with the max zoom outwards. You can see in both images the surroundings such as the door frame and bikes all changing in size or leaving/entering the frame. The angle at which you see the object as well as parallel lines warp depending on how far away you are.


In these last two projects, I learned that how an image is processed and composed can really affect the viewer's perception of the scene at hand. It was really time consuming to pick the right photos and these effects also take some time to implement. But I did enjoy how the comparisons of the images really showed the different effects. For example with the fake miniature, depending on where you put the line of focus, the part that looked "miniature" really changed. For example, for the image of Big Sur (the beach shot with the waterfall), I had a lot of liberty choosing if the focus line would be at the waterfall of of the large boulder island rock to the right. Also, for the vertigo shot, you can really see how the distance you stand away from an object changes the perception of its dimensions and shape. As a random aside, I found that for the fake miniatures, it helps to not shots of objects close up especially humans since they make the fake miniature shot less convincing.