CS194-26 Project 7A: Seam Carving
Josh Zeitsoff, cs194-26-abi
Overview
Seam Carving is a method of Content Aware Image Resizing. When we want to downsize or upsize an image, one option
we have is to simply add or delete from the borders of the image. However, this will result in an output image that does not match
the content and ratios of the original image. Seam Carving aims to remove parts of the image to preserve the original content.
We do this by defining an energy function for each pixel. I chose the dual gradient energy function:
Energy of pixel (x, y) = x_gradient + y_gradient
x_gradient = Rx (x, y)2 + Gx (x, y)2 + Bx (x, y)2
y_gradient = Ry (x, y)2 + Gy (x, y)2 + By (x, y)2
Rx(x, y), Gx(x, y), Bx(x, y) represent the absolute
difference in red, green, and blue pixel values between pixel (x + 1, y) and pixel (x - 1, y) . Likewise, but in the y direction for Ry(x, y), Gy(x, y), By(x, y) The idea is to find the gradients of pixels (since this is what our eyes notice the most) and use this to represent the energy of a pixel. We then remove the minimum energy vertical seam in the image.
Example of Vertical Seam Carving
We define a vertical seam such that each row has only 1 pixel in the seam, and if pixel (x, y) is in the seam, the only possible pixels from row y - 1 are pixels (x - 1, y - 1), (x, y - 1), (x + 1, y - 1)
For vertical seam carving, the first step involved calculating energies. I used the dual gradient energy function as described above. Once I had an array where each (x, y) represented the energy of pixel (x, y) , it became a dynamic programming exercise to find the minimum vertical seam.
To find our vertical seam, we want to find the minimum energy cost seam from the top of our image to the bottom of our image.
We start by finding M(x, y) for each pixel, which we define to be :
M(x, y) = energy(x, y) + min( M(x - 1, y - 1), M(x, y - 1), M(x + 1, y - 1))
For each pixel (x, y) we want the minimum of the 3 seams above it, and add this to our own energy value to get the minimum cost seam ending at ourselves.
Once we have computed all of these seams, we still need to find and reconstruct the smallest seam. Starting at the bottom of the image, we find the (x, y) with the smallest M(x, y) value. This represents the last pixel of the minimum vertical seam. To retrace the actual seam, we continuously pick min( M(x - 1, y - 1), M(x, y - 1), M(x + 1, y - 1)) as we go up the image.
The gif below shows how removing the first 5 vertical seams from this image looks.

Example of Horizontal Seam Carving
Since I wrote my original code for vertical seam carving, horizontal seam carving just required transposing the image,
performing a vertical seam carve, then transposing it back into the original orientation. In this gif, you can see the results
of carving out 5 horizontal seams.

Seam Carving Examples
Each example below features the original image, and then the carved image. To better show the results of seam carving, I left each image in its orginal dimensions.
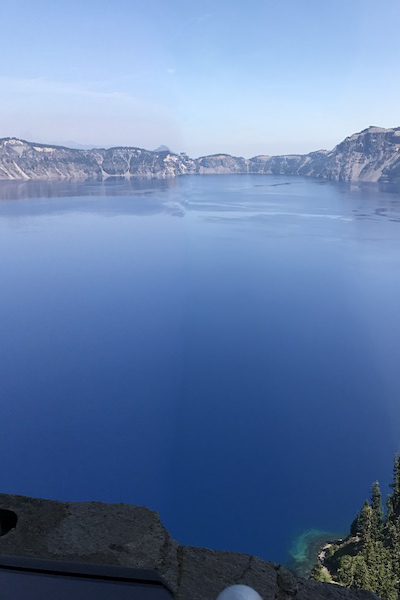
For this image, I resized an image of Crater Lake to remove 400 vertical seams. I think this worked excellent, as the
only indication of resizing is the rock railing at the bottom of the image.
Crater Lake 600x800
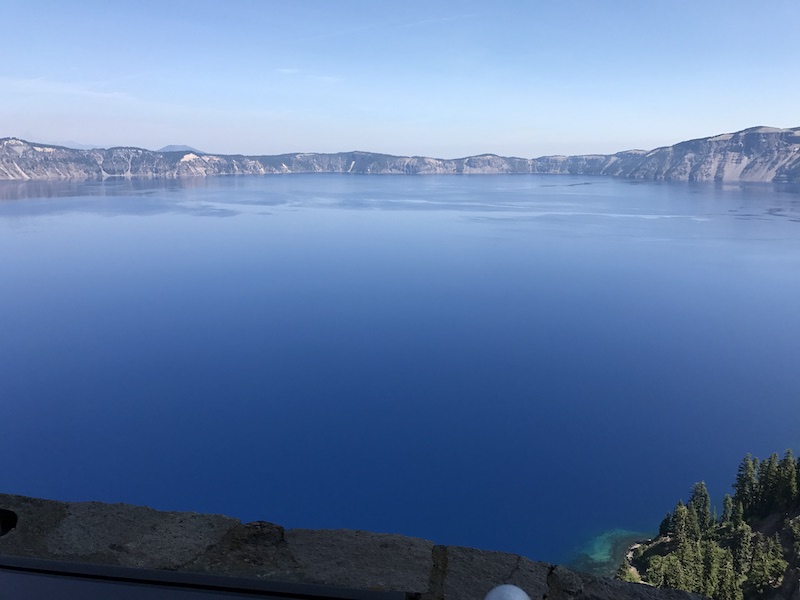
Carved Crater Lake 600x400
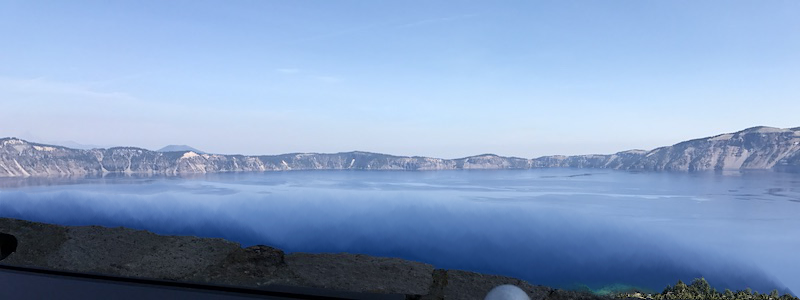
For this image, I resized an image of Crater Lake to remove 300 horizontal seams. Because the seams end up being chosen from the lake, a sense of depth is lost, but I think the image still retains its original content of a rock railing overlooking Crater Lake.
Crater Lake 600x800
Carved Crater Lake 300x800
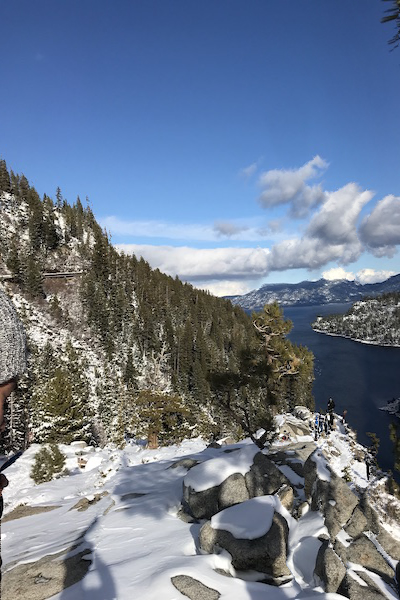
For this image, I resized an image of Emerald Bay to remove 400 vertical seams. As you can see, it picks most of the seams from the bay, yet retains the overall content of an inlet with 2 mountains on either side and the viewpoint from atop a rocky hill.
Emerald Bay 600x800
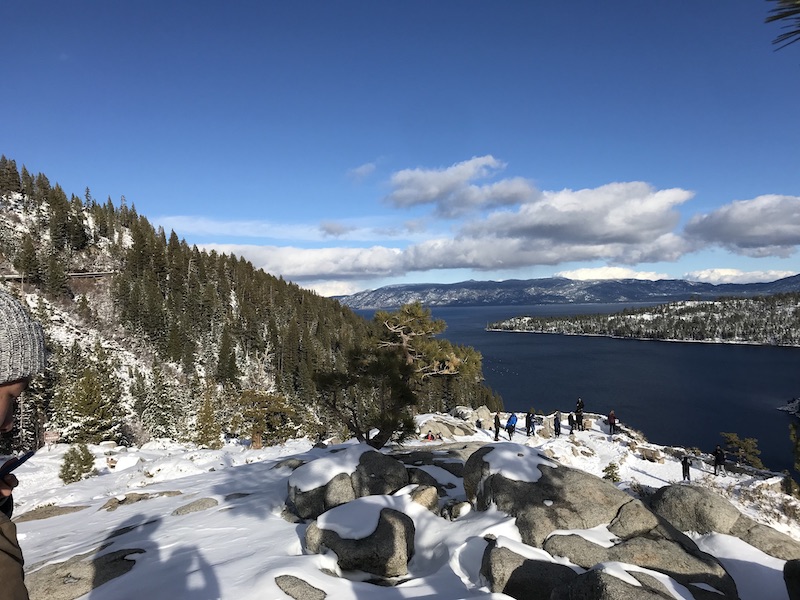
Carved Emerald Bay 600x400
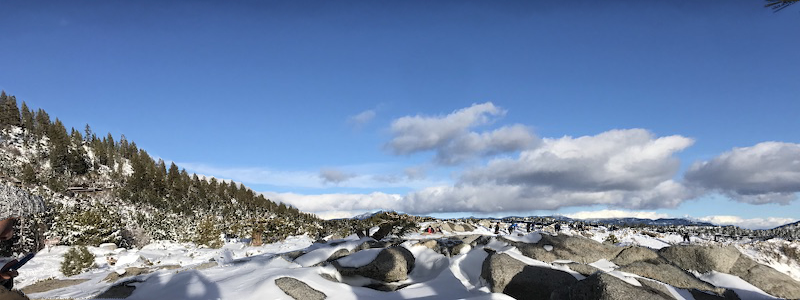
For this image, I resized an image of Emerald Bay to remove 300 horizontal seams. Since our algorithm wants to minimize gradient changes, it removes parts of the image where the gradients are small, namely the lake. However, I feel like this image is perfectly plausible on its own, as we've removed half of the image, yet the mountain, rocky hill, and clouds remain.
Emerald Bay 600x800
Carved Emerald Bay 600x400
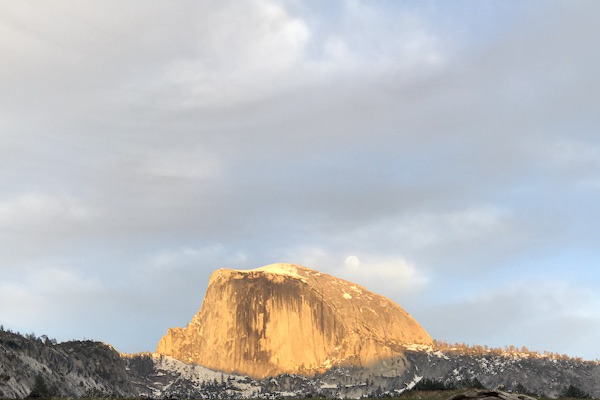
For this image, I resized an image of Half Dome to remove 200 vertical seams. I had a feeling this image would work, since the image featured a strong focal point (Half Dome) with mostly filler on the sides, which we would not notice if it was removed.
Half Dome 800x600
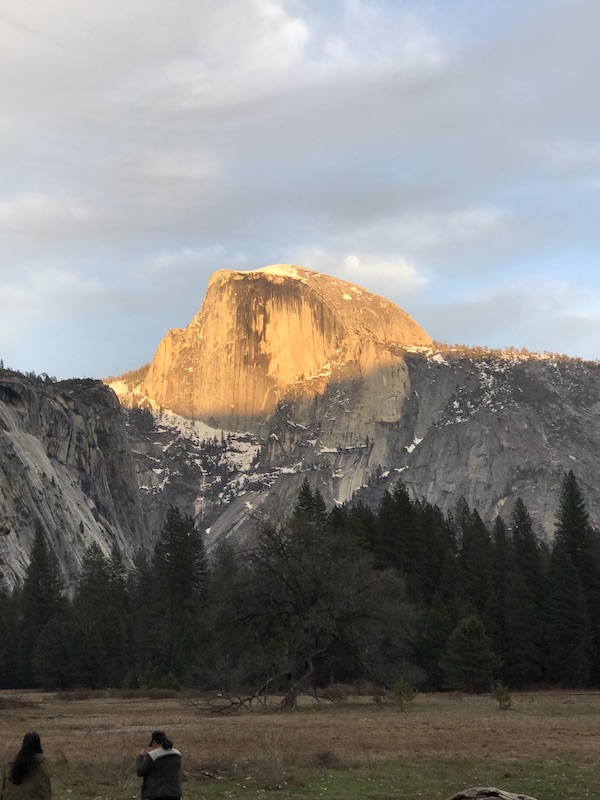
Half Dome 800x400
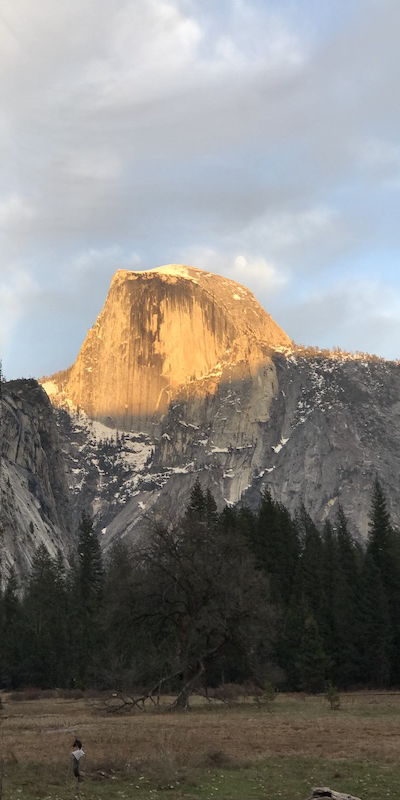
For this image, I resized an image of Half Dome to remove 400 horizontal seams. You can see that most of the removed seams come from the greenery below the mountain, resulting in an image that retains its original content.
Half Dome 800x600
Half Dome 400x600
For this image, I resized an image of a beach in Boracay to remove 200 vertical seams. Apart from the umbrella losing some of its side, the image overall retains its major points - a beach, sand, ocean, and a beach umbrella. Even though the umbrella becomes slightly misshapen, the shadow on the ground still reflects its shape. (image from wikivoyage)
Boracay 400x600

Boracay 400x400

For this image, I resized an image of Manhattanhenge in New York City by removing 300 vertical seams. This works very well, similar to why Half Dome worked. It features a strong focal point, the sun, with filler around it that the eye will not notice if it is removed. (image from Bailiwick Express)
Manhattanhenge 444x800
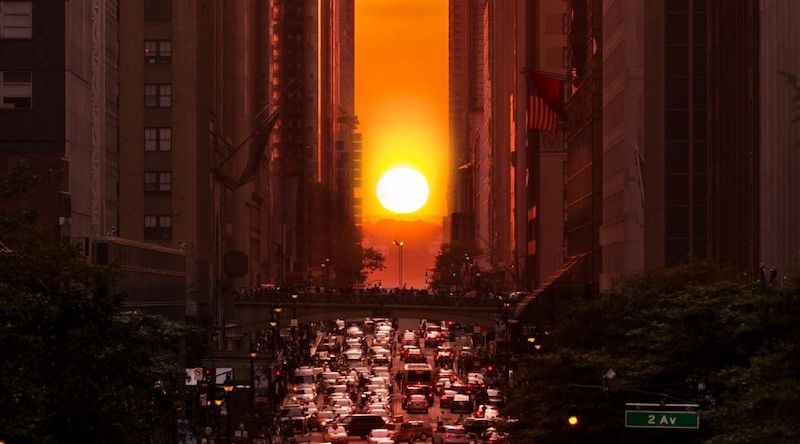
Manhattanhenge 444x500

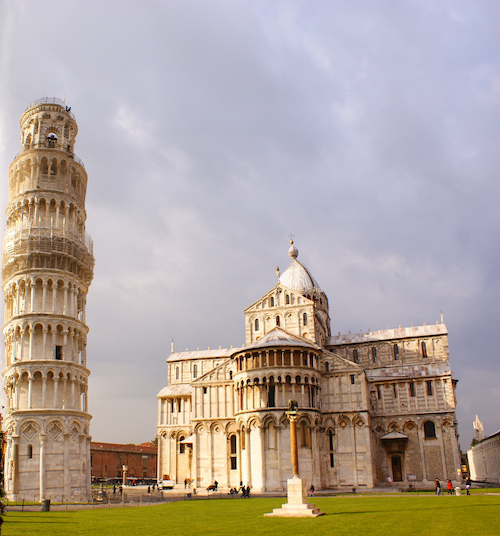
For this image, I resized an image of the Leaning Tower of Pisa in Italy by removing 300 vertical seams. This image works really well, since there are 2 strong focal points with lots of detail, causing them to have high gradients. Thus, the seam carving algorithm focuses on removing parts of the image between the Leaning Tower of Pisa and the Baptistry, leaving an output image that retains the 2 most important parts of the input image. (image from wiki commons)
Pisa 536x800
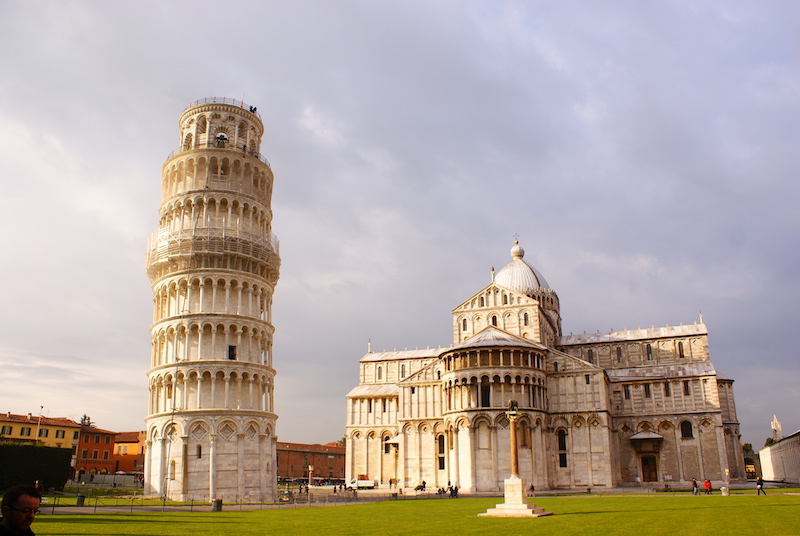
Pisa 536x500
These images worked well for a few reasons. In the case of Half Dome, it featured a strong focal point with lots of extraneous scenery that, if the scenery were to be removed, it would still retain the overall content of the image. In the case of the Crater Lake, Emerald Bay, Manhattanhenge, and Pisa images, they featured several strong focal points (mountains, lake, hills, clouds, sun, towers) that helped to describe the image overall, even with some components missing. For Crater Lake and Emerald Bay, we saw that removing horizontal seams mostly removes seams from the lake itself, allowing the big picture to remain the same. When removing horizonal seams, we saw that the image changes with the lack of a strong focal point (the lake), though other image markers such as mountains, clouds, railings, and hills serve to retain the overall content of the image. I think these images are successful since we are removing large portions of our images (25-50%) yet each carved image is clearly identifiable as a resize of an original image.
Some examples that don't work
These examples all feature people, which is something that I found to not work well with seam carving. For one, removing even a few seams from a person's face causes distortions that are clearly visible to the human eye, whereas removing a few seams from a mountain is often indistinguishable. In addition, some of them feature a color (orange) that could produce minimum seams due to it having a small gradient between pixels. However, our eyes are more attracted to a bright color like orange than more subdued colors like white or gray, so removing seams that involve orange pixels are also very apparent to the human eye. My energy function also was calculated soley with gradients, and I did not add any improvements to recognize and preserve faces.
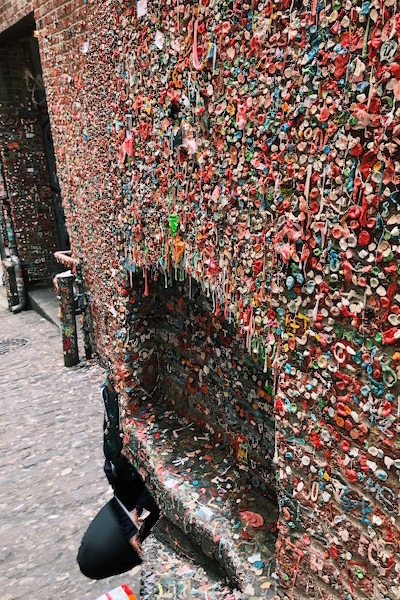
In this image, I removed 400 vertical seams from an image of me in front of the gum wall in Seattle. I expected this to mostly remove the gum wall around me, but instead it removed me. I suspect this is due to the gradient of pixels in the gum wall being very high, since there are different colors of gum next to each other. Thus, I ended up being on the seams with the smallest gradients.
Gum Wall 600x800
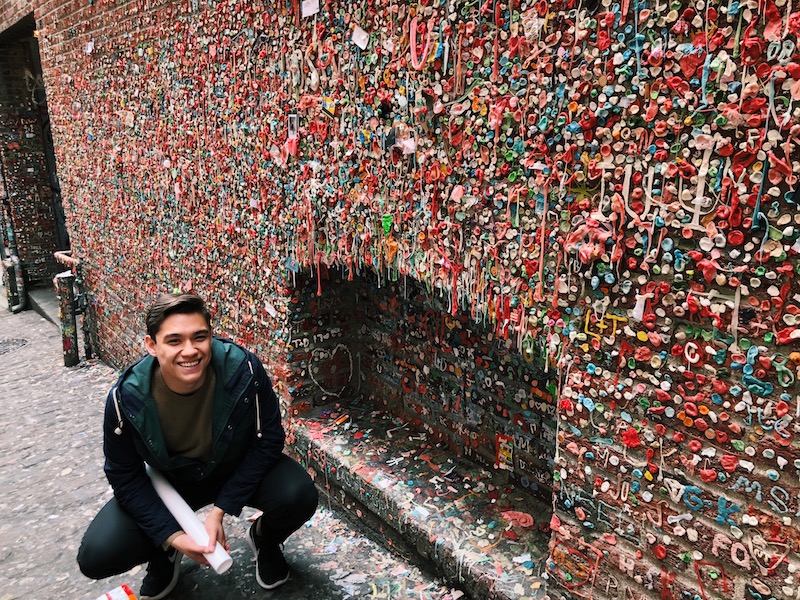
Gumwall 600x400
In this image, I removed 200 vertical seams from an image of me on a ferry. This seam carving example ended up removing a few seams from my face, but it is enough that my facial dimensions are slightly off. I think this is because it wants to remove seams from my sweater, but that ends up also removing some seams from my face in the process.
Josh Ferry 600x800

Josh Ferry 600x600

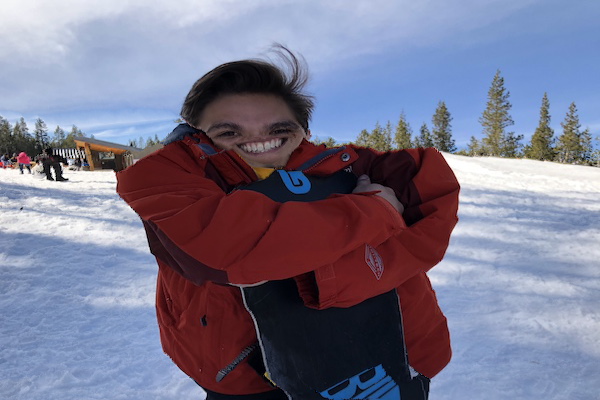
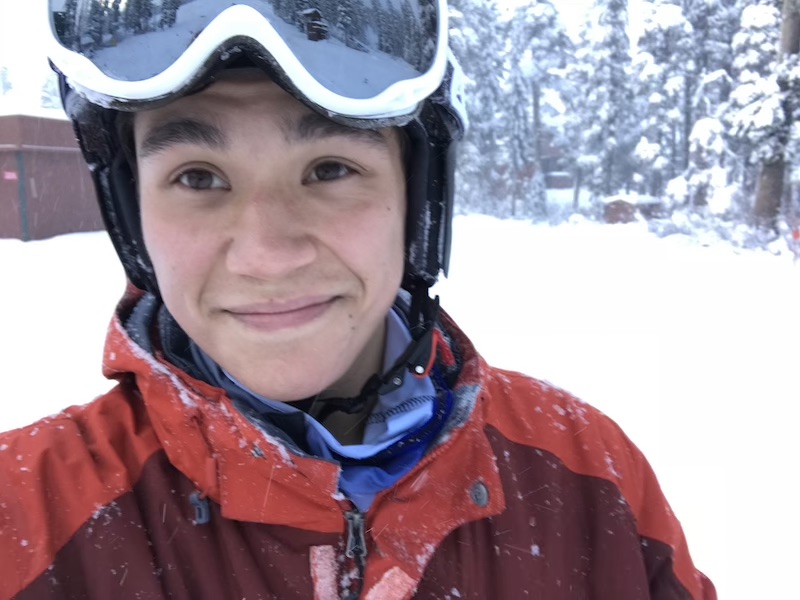
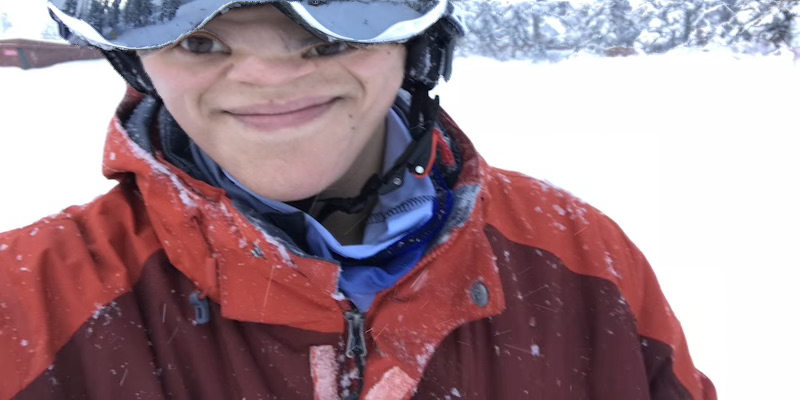
In this image, I removed 400 horizontal seams from an image of me with a snowboard. I wouldn't have expected it to remove seams from my face, but I could theorize a few reasons why. It could be that there were several low energy seams that originated in the scenery but went through my face, and so even though my face is detail to us, it became a casualty of being on the path of minimum energy. I could also see it having relatively low gradients between my eyes and mouth, since the color of my skin is relatively the same there, and thus it was put on the minimum energy path.
Josh Snowboard 800x600
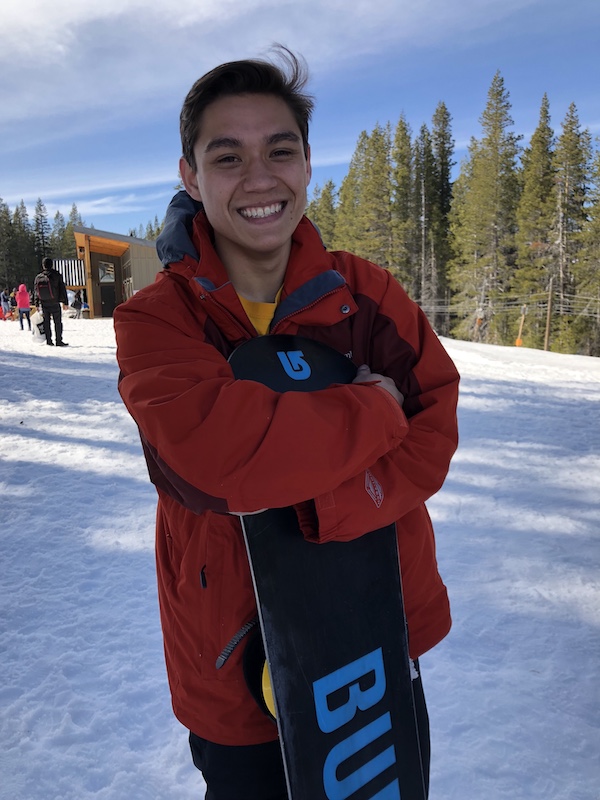
Josh Snowboard 400x600
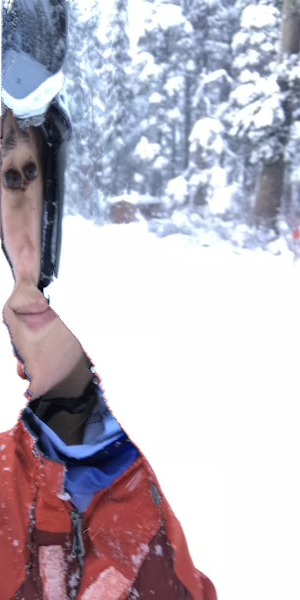
In this image, I removed 200 vertical seams from an image of me with a snowboard. You can see that the seams removed mostly came from my jacket sleeves and jacket torso. I suspect this is because there is a fair amount of detail to the edges of the photo in the trees and building behind me, so most minimum energy paths should go roughly down the middle of the image. This happens to be where I am standing, so most of my jacket ends up being on the minimum energy path.
Josh Snowboard 800x600
Josh Snowboard 800x400

Here, I removed 500 vertical seams from an image of me in the snow. I did expect that more of the seams would run through the right side of the image and less through my face. However, I suppose there is more of a change in pixel values there, resulting in stronger gradients, whereas my face is only defined by a few changes in pixel values (goggles to eyebrows to skin to eyes to cheek etc.) Thus, though they are strong gradients to us, my face is for the most part the same pixel values and ends up being on the minimum energy path.
Josh Snow 600x800
Josh Snow 600x300
Here, I removed 200 vertical seams from an image of me in the snow. I did not original expect seams to be removed from my face, but I could see how the bridge of my nose does not feature very strong gradients.
Josh Snow 600x800
Josh Snow 400x800
Most of my failure images involve people (me) as the focal point. They fail for several reasons. One is that any seam removal that takes pixels from a person is very clear to the human eye, compared to seam removals that take pixels from scenery (such as mountains or lakes) that are harder to notice. In addition, seam removals that remove distinct colors (orange) versus non-distinct colors (white. gray) are also more apparent to the human eye. Finally, we are tuned to notice facial dimensions, so any faces that are disproportionate are noticeable, even if they are only slightly modified.
What I learned about seam carving
Seam carving is super cool. I learned what kinds of photos seam carving works best on - those with a few focal points and scenery around these focal points. This allows seam carving to remove seams from the scenery, yet retain the overall important parts of the image through these focal points. It also works best with focal points that have lots of gradients, and background scenery with low gradients.
CS194-26 Project 7B: Vertigo Shot
Josh Zeitsoff, cs194-26-abi
Overview
For this project, we are trying to simulate the Dolly Zoom, made popular by Alfred Hitchcock's movie Vertigo. Our desired effect is to keep the subject the same size while changing the size of the background. We achieve this by physically moving the camera away from the subject while zooming in, or physically moving the camera towards the subject while zooming out.
Example 1
Thresh 2.1

Thresh 2.2

Thresh 2.3

Thresh 2.4

Example 2
Wine 2.1

Wine 2.2

Wine 2.3

Wine 2.4

Bells and Whistles 1: Moving Subject
For each of these, I moved the subject away or towards the camera as I moved the camera away or toward
Moving subject away from camera
Moving subject towards camera
Moving subject towards camera
Bells and Whistles 2: Gifs
Thresh 2 Gif
Wine 1 Gif
Project Info
Camera : Nikon D7100, 17mm-50mm zoom, with auto focus on.
Locations: Hallway outside of my apartment, and my desk.
Difficulties : Keeping the camera flat for the outside scenes was hard, so I tried using a rolling chair to simulate a dolly. It was also difficult to keep the same proportions for the shots - you can see that some of them the subject becomes slightly larger or smaller, as I had to manually adjust the zoom to keep the subject the same size.