Lakshya Jain - CS 194 Final Project: Seam Carving and Fake Miniatures (CS194-26-acc)

Seam Carving

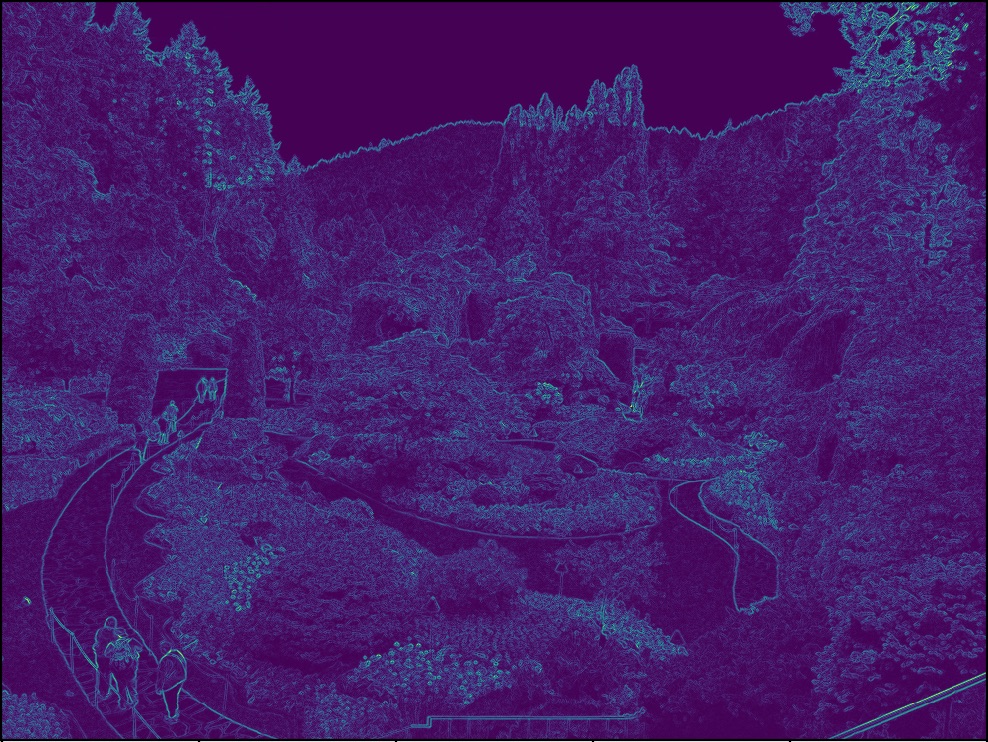
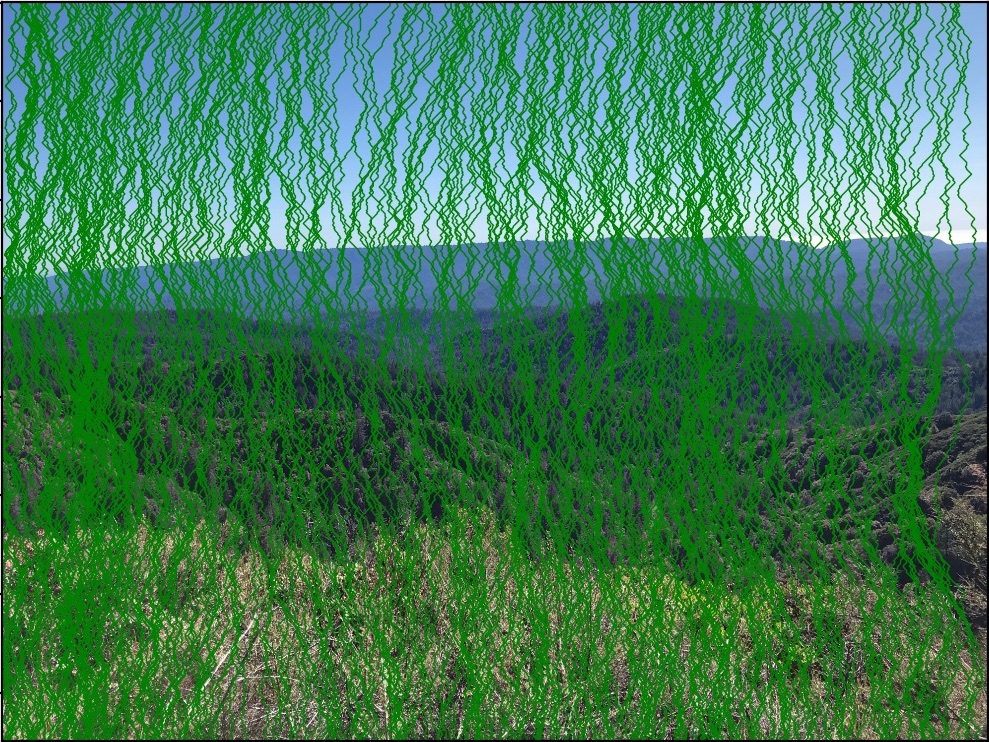
In Seam Carving, we attempt to find a "seam" along the image of lowest energy and remove it to shrink the image by 1 pixel in a certain dimension while keeping as much of the original image structure as possible. The energy function that I used was computed in the following manner: for each color channel, sum the absolute value of the image gradient along the x axis and the absolute value of the image gradient along the y axis (the same energy function used in section 3 of the Aidan and Shamir paper linked in the project spec). Then, average this value for all color channels. This gave us some nice energy functions that showed where pixels of value were concentrated along the image; after all, if we want to remove pixels, we should probably remove those along the seam that has the lowest overall change along it.

garden image garden energy

Following this, I computed the seams of lowest energy to remove from the image. This was done through a dynamic programming algorithm in which I began at the very top row and computed the minimum energy "seam" ending at each pixel of the row. Then, I went down to the next row and computed the minimum energy "seam" ending at each pixel of that row through the following method: val[i,j] = energy[i, j] + min(val[i-1, j-1], val[i-1, j], val[i-1, j+1]). I did this procedure for every row. In this sense, pixel energy values add up as you go down the rows, giving you the overall seam intensity. Then, at the bottom row, I took the pixel with the minimum seam value and backtracked from there to find the minimum seam. I then removed this seam. This algorithm was repeated for however many seams I wanted to remove (for speed, I resized each image to be 1000 x 750 in dimension). Often times, we see the sky getting eliminated in nature shots because of the low gradient change. This algorithm performed vertical seam carving; to do horizontal seam carving, I simply transposed the image, performed vertical seam carving, and then transposed it back.

garden seams garden seams

Here are the results. 300 seams were cut out for each image.

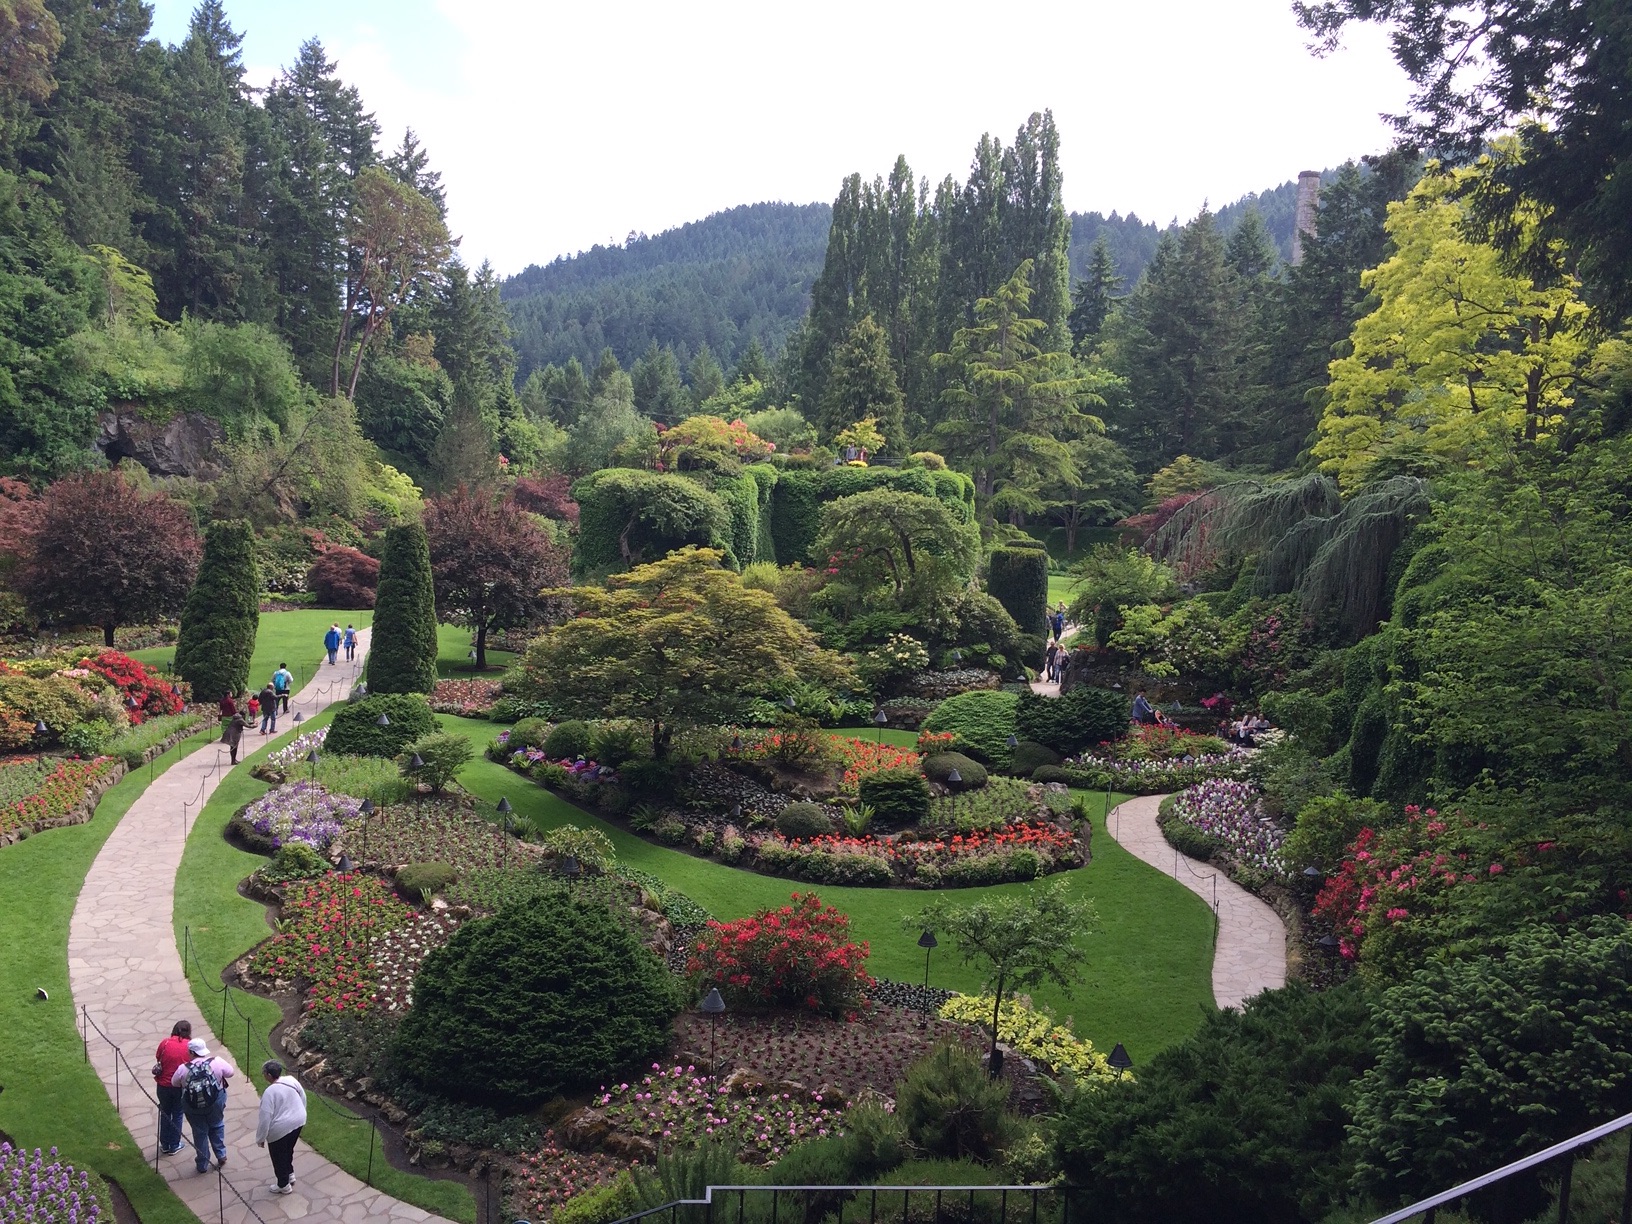
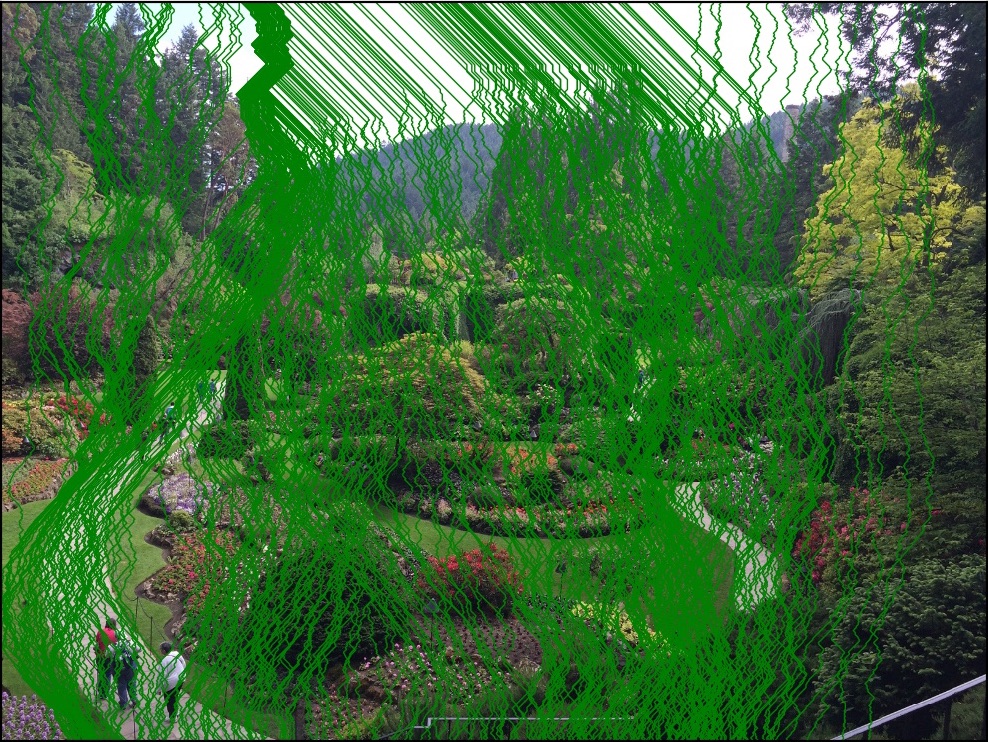
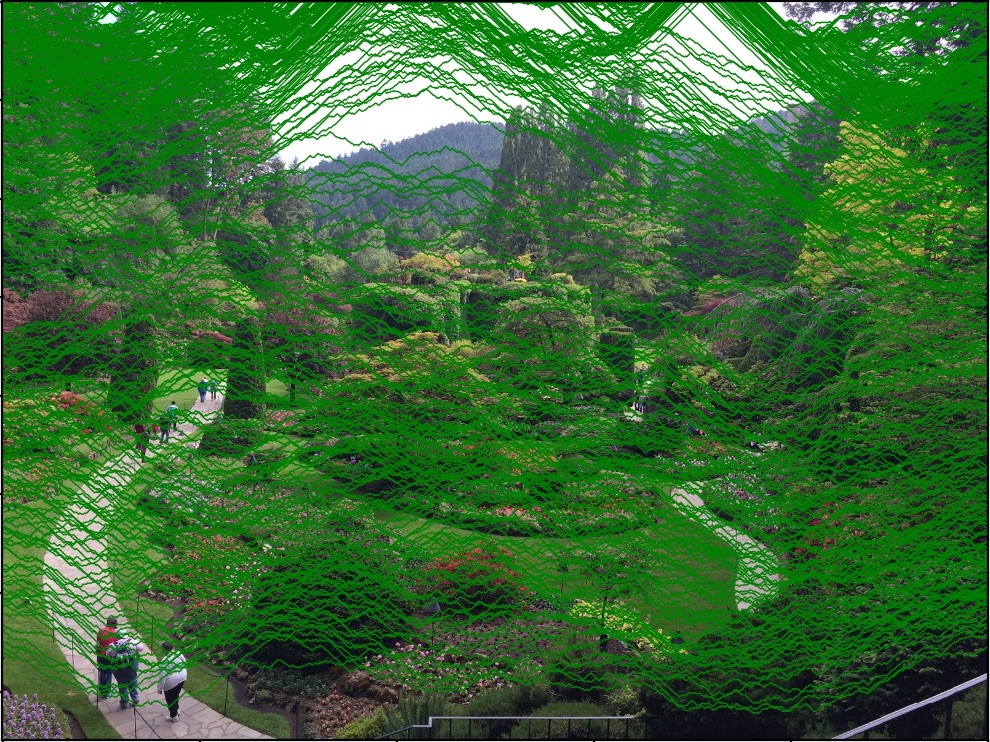
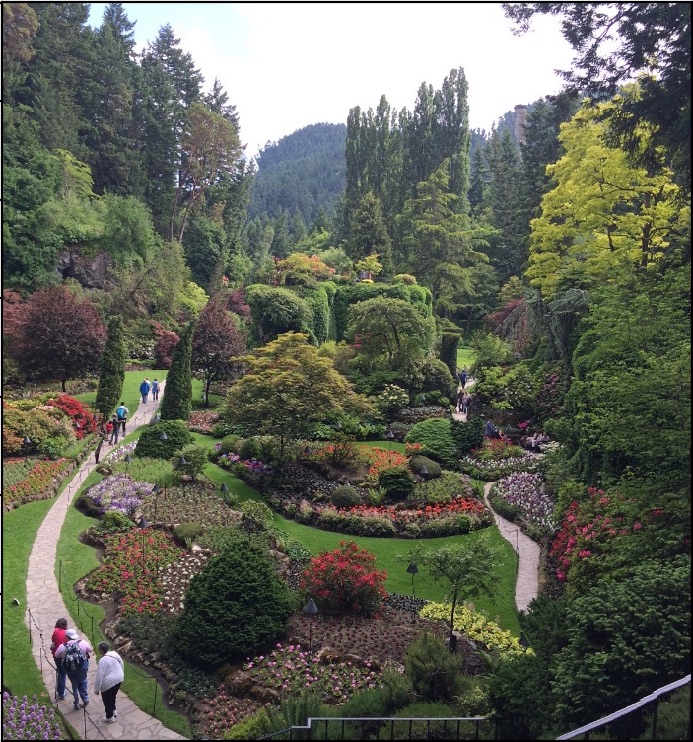
This is a shot I took at Butchart Gardens in Victoria, BC. This, along with the Carmel image later on, is my absolute favorite.

garden image garden seams garden vertical carve

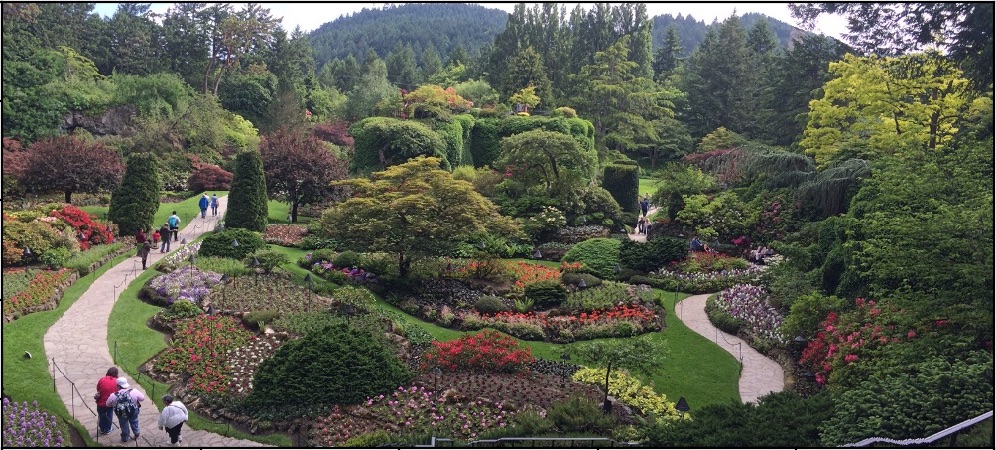
I like its horizontal carving almost as much, if I'm being honest.

garden image garden seams garden horizontal carve

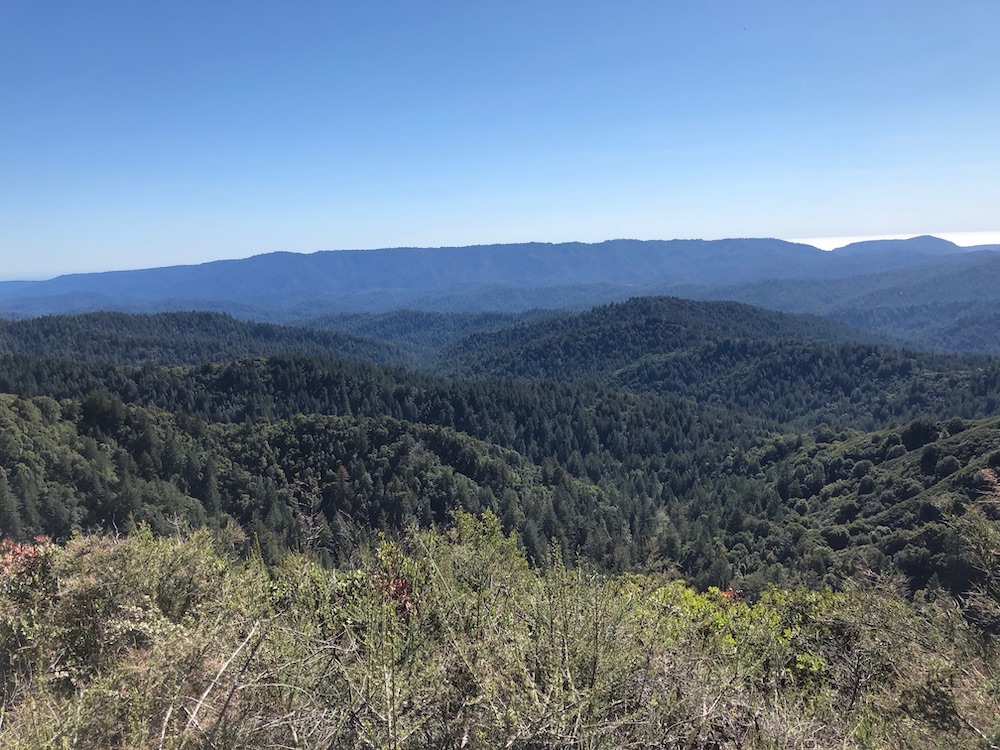
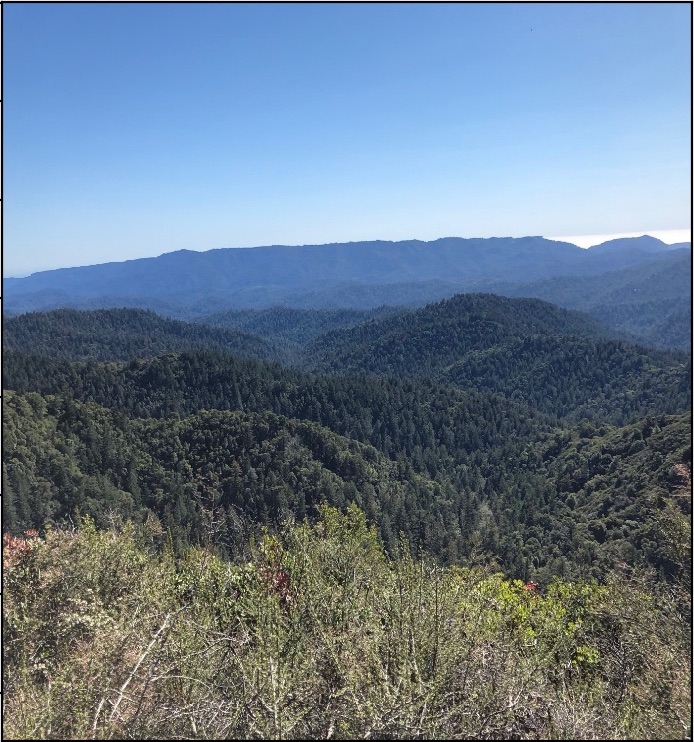
Here, I was at Castle Rock Park in California.

hills image hills seams hills vertical carve

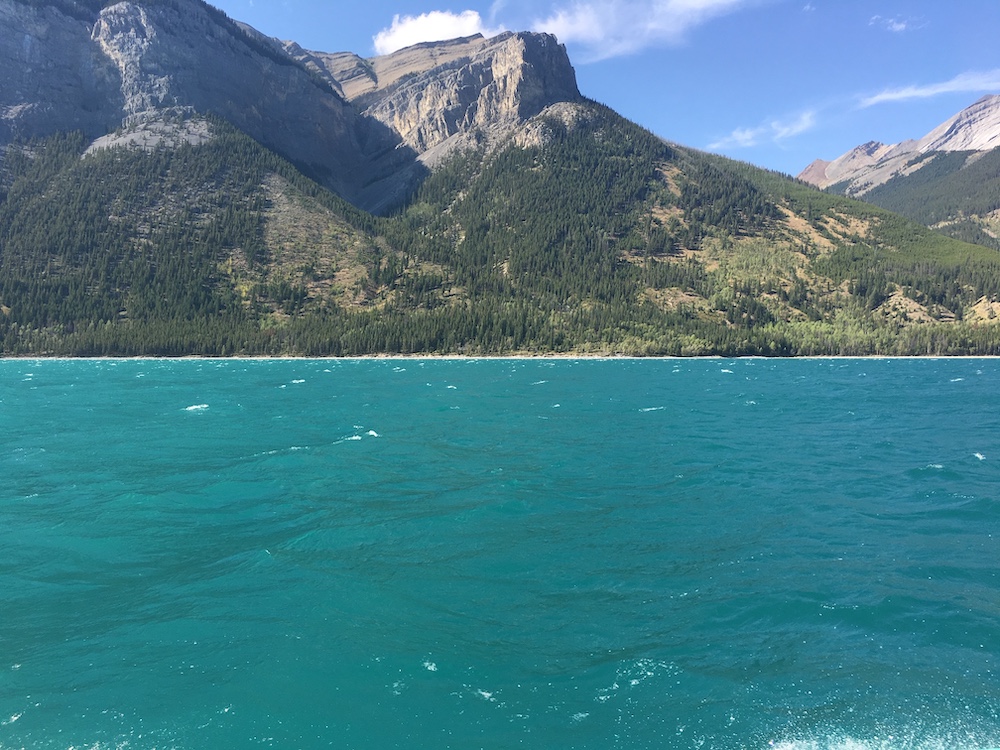
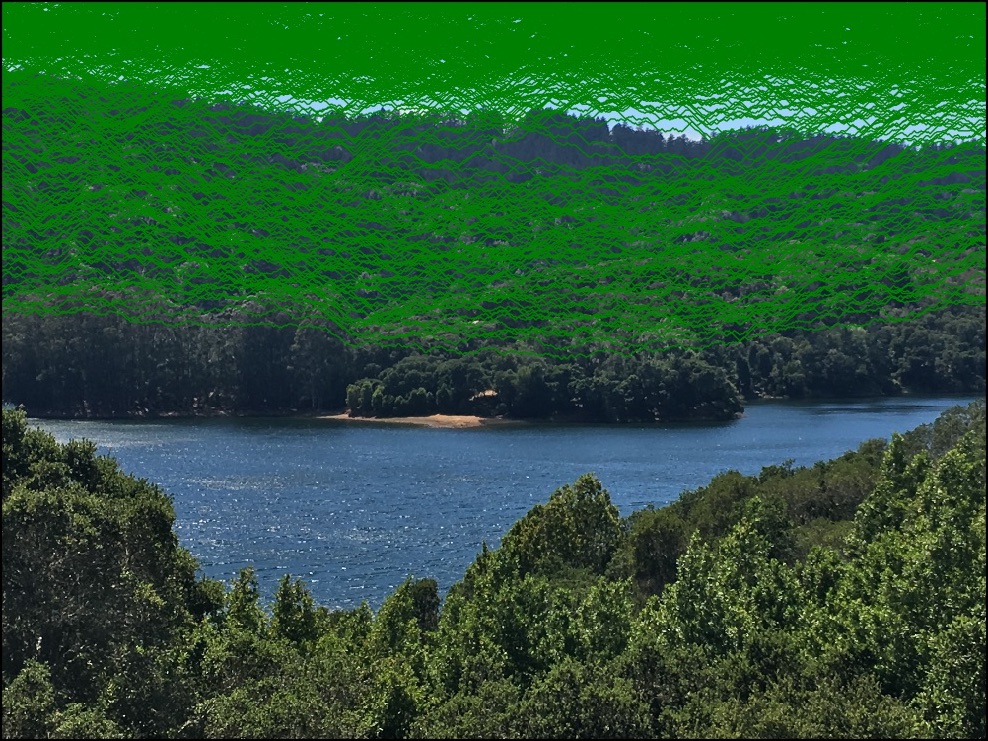
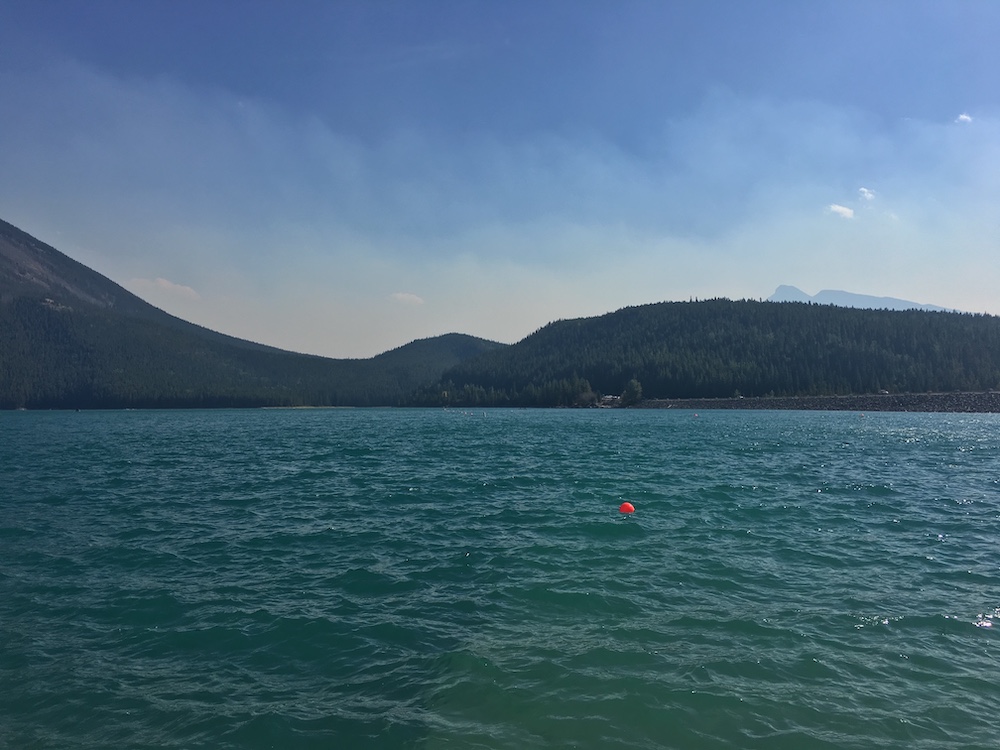
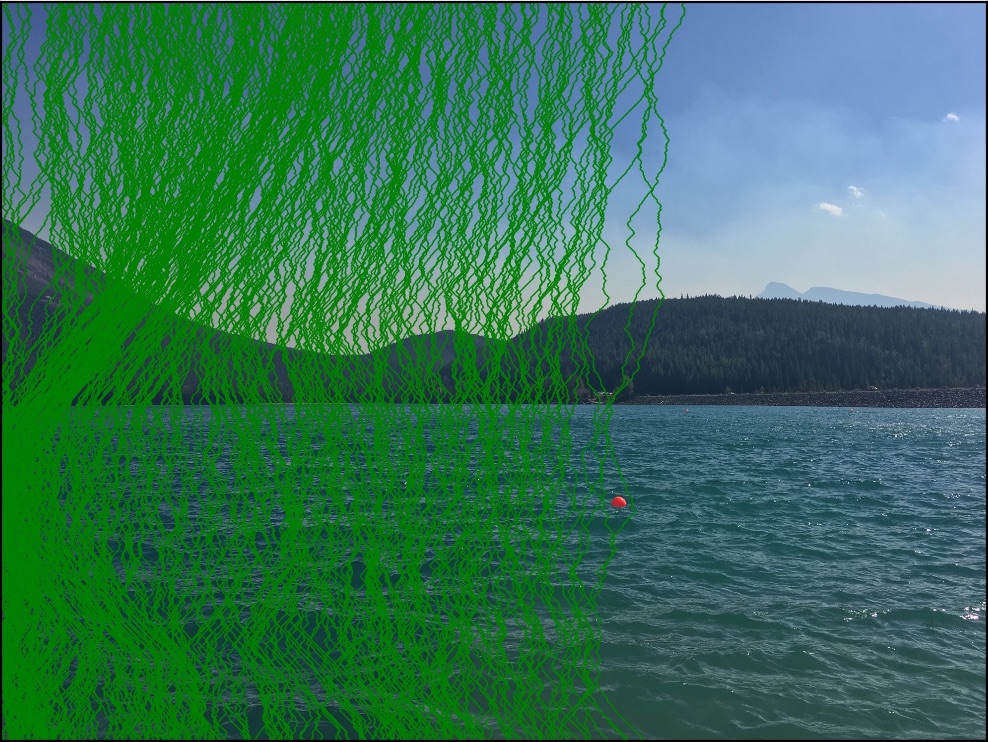
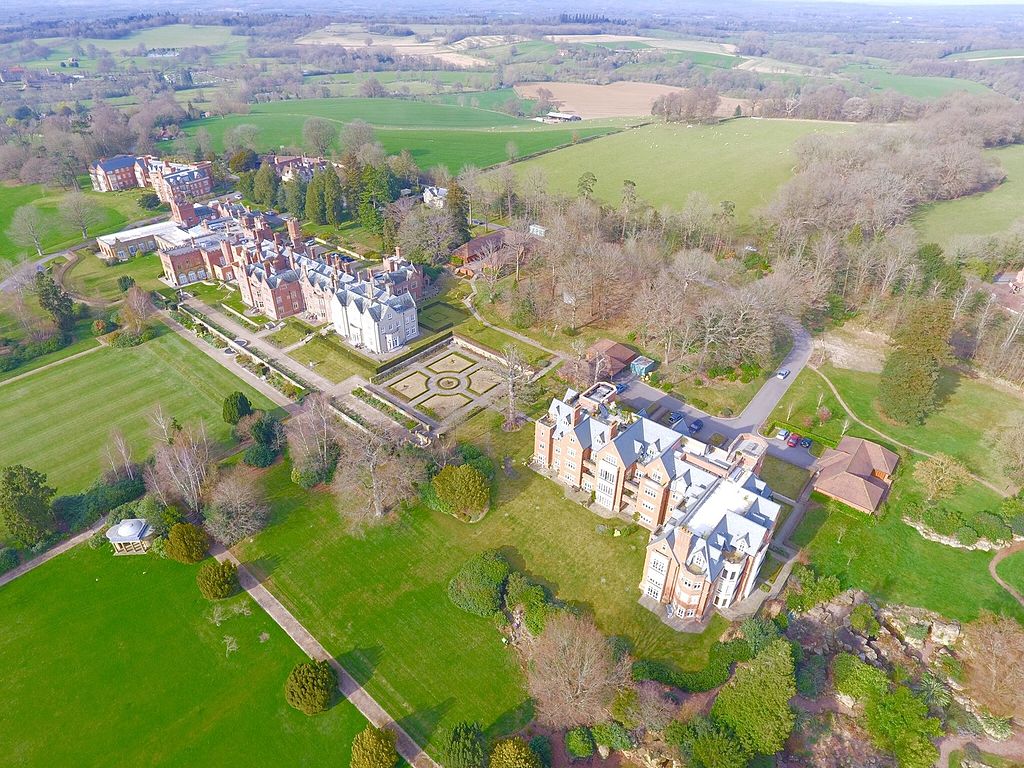
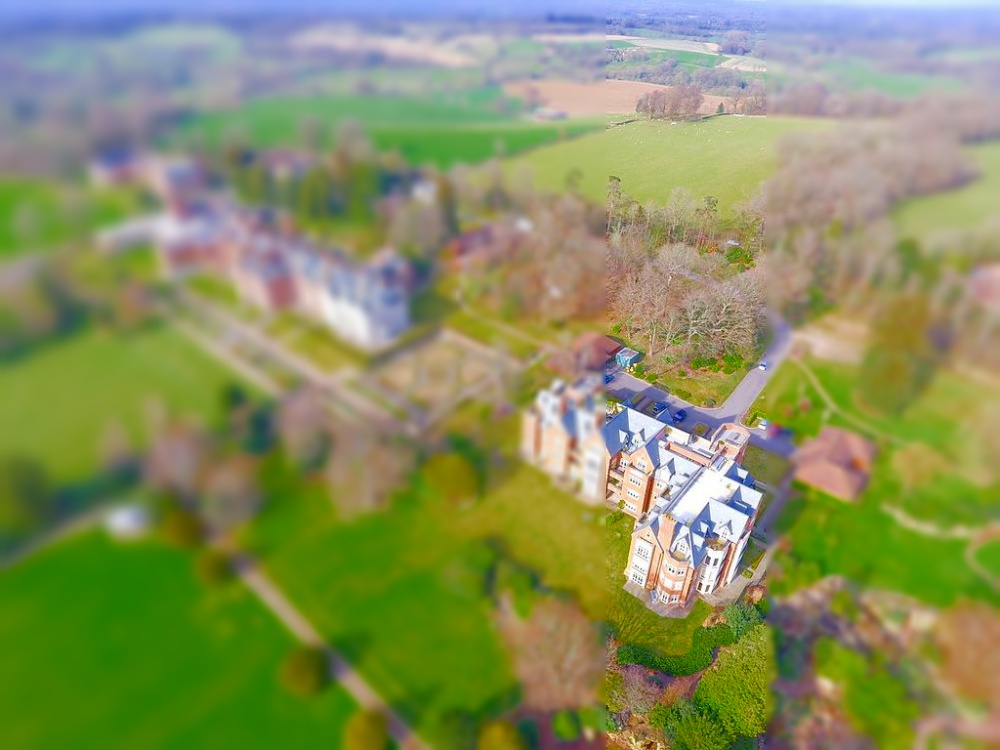
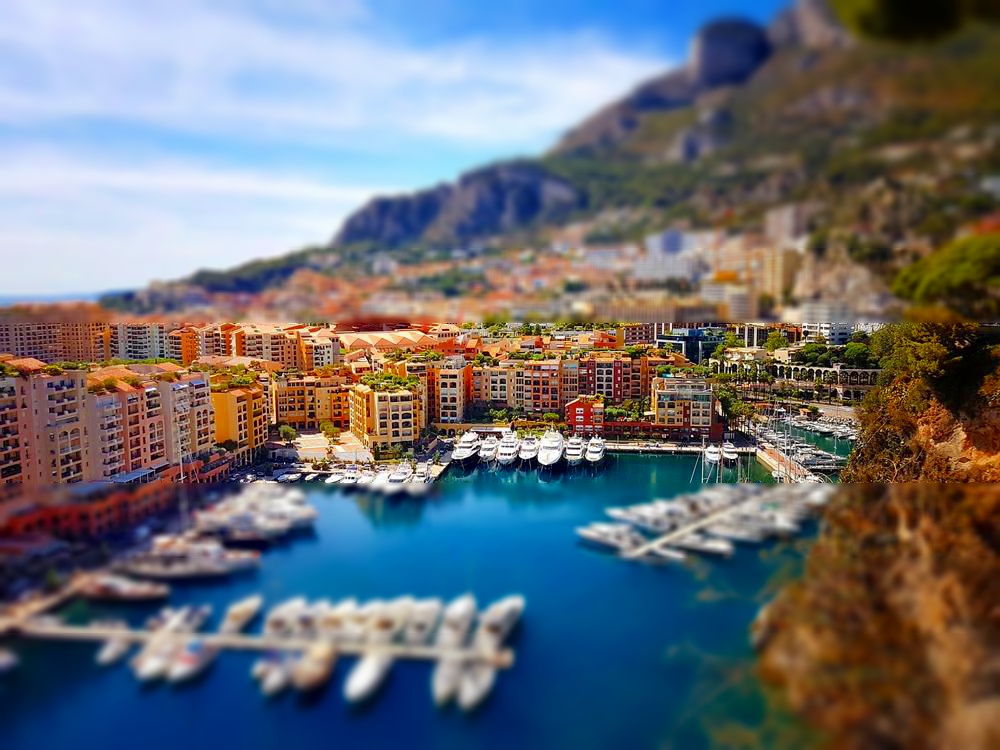
The image below was taken at Lake Minnewanka, AB, in Canada

lake image lake seams lake vertical carve

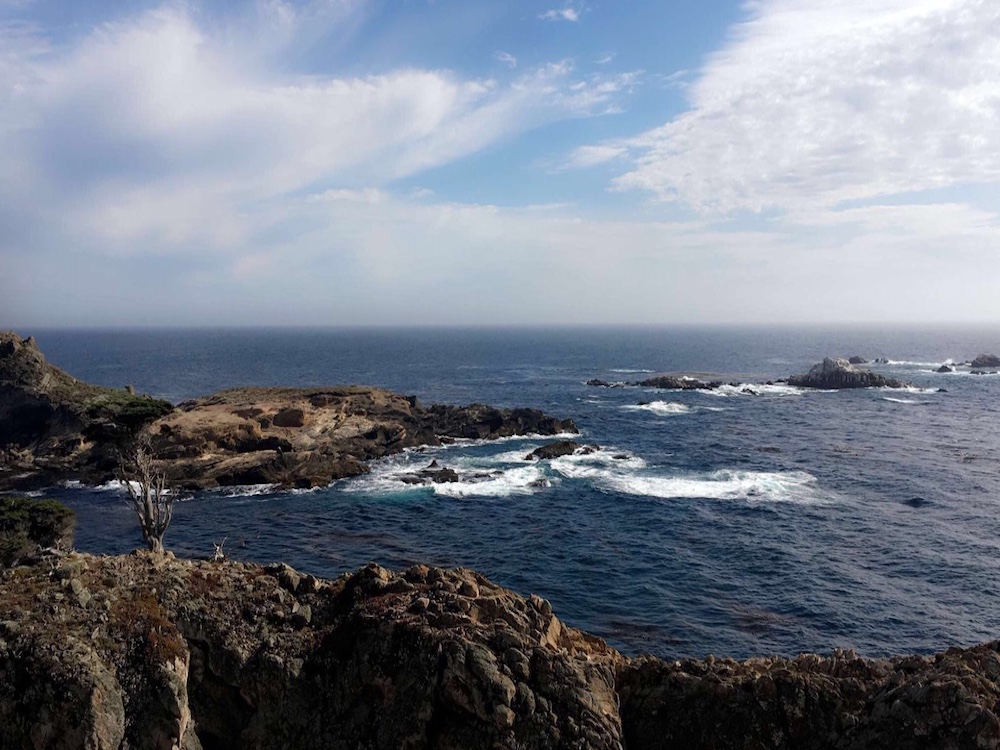
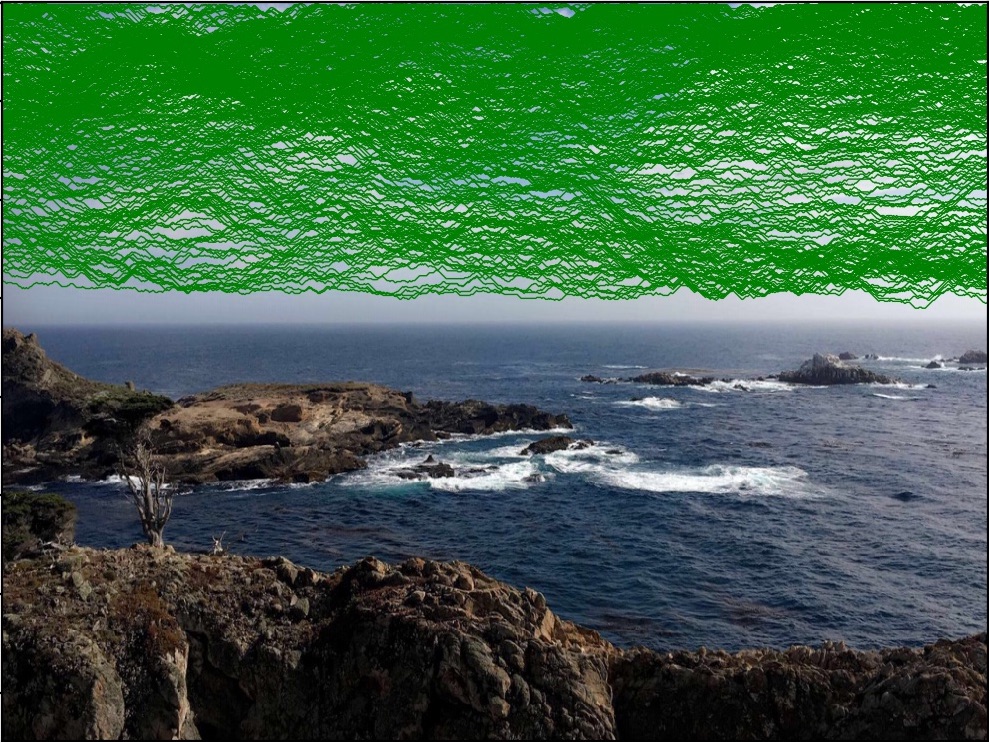
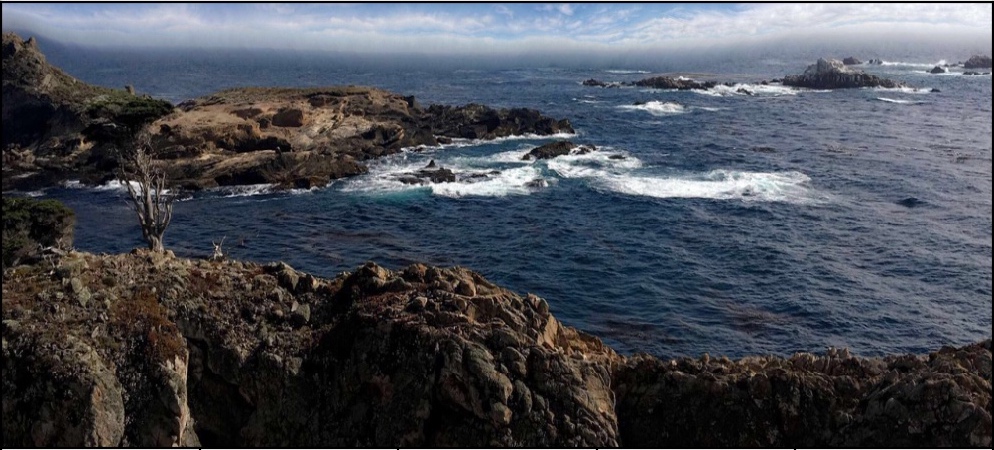
This image was taken by me at Carmel, CA. This is possibly my favorite shot.

carmel image carmel seams carmel horizontal carve

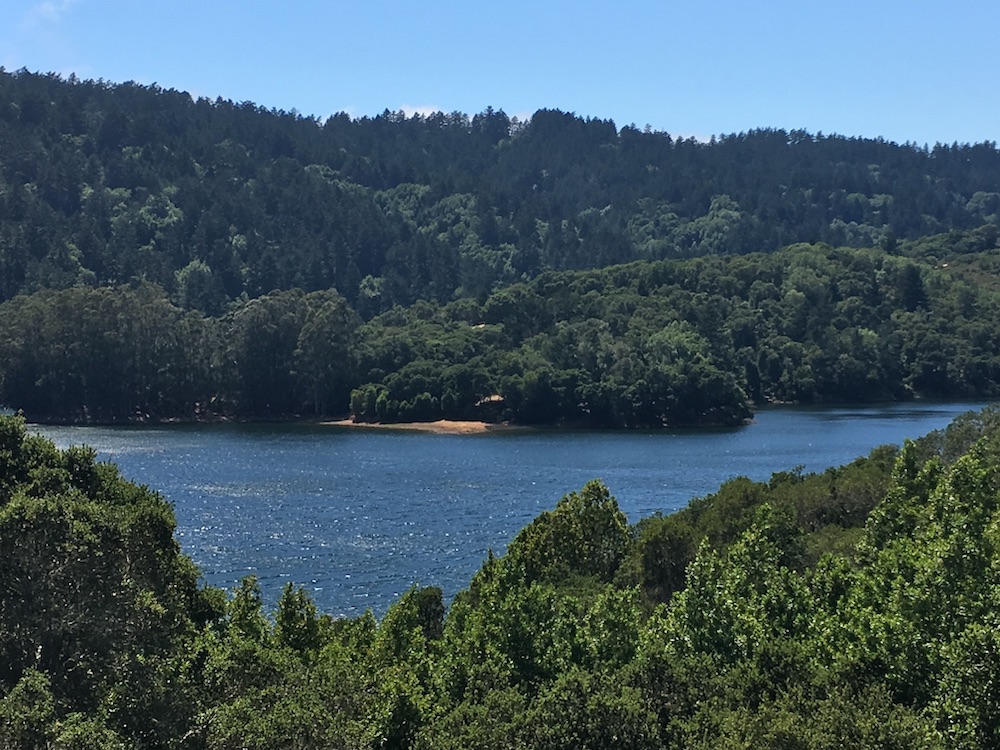
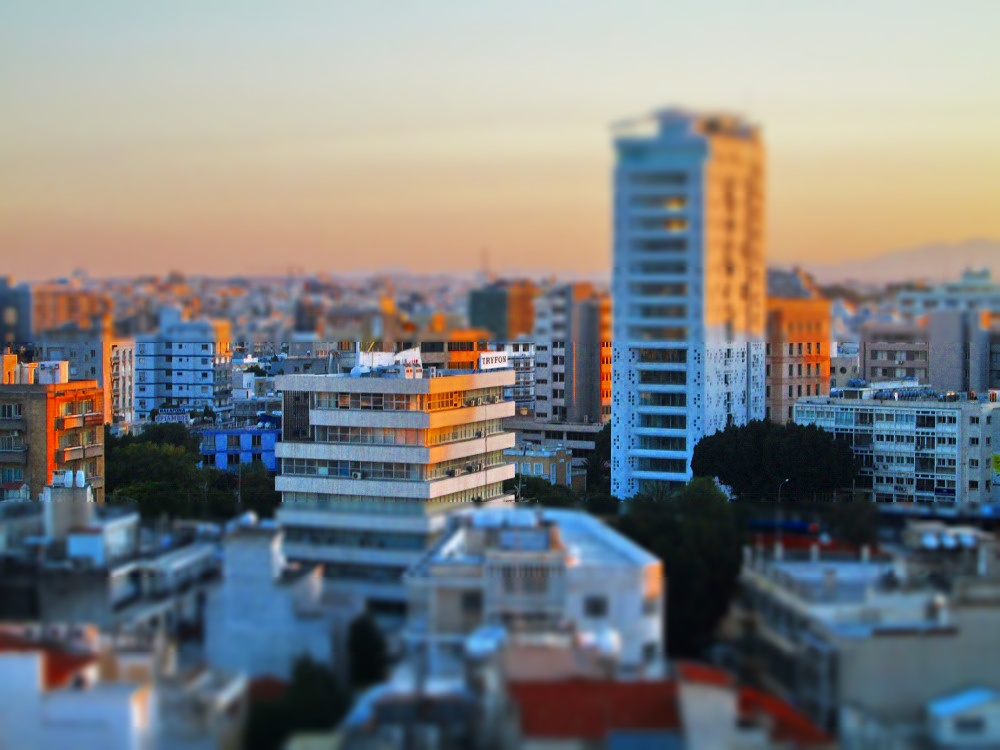
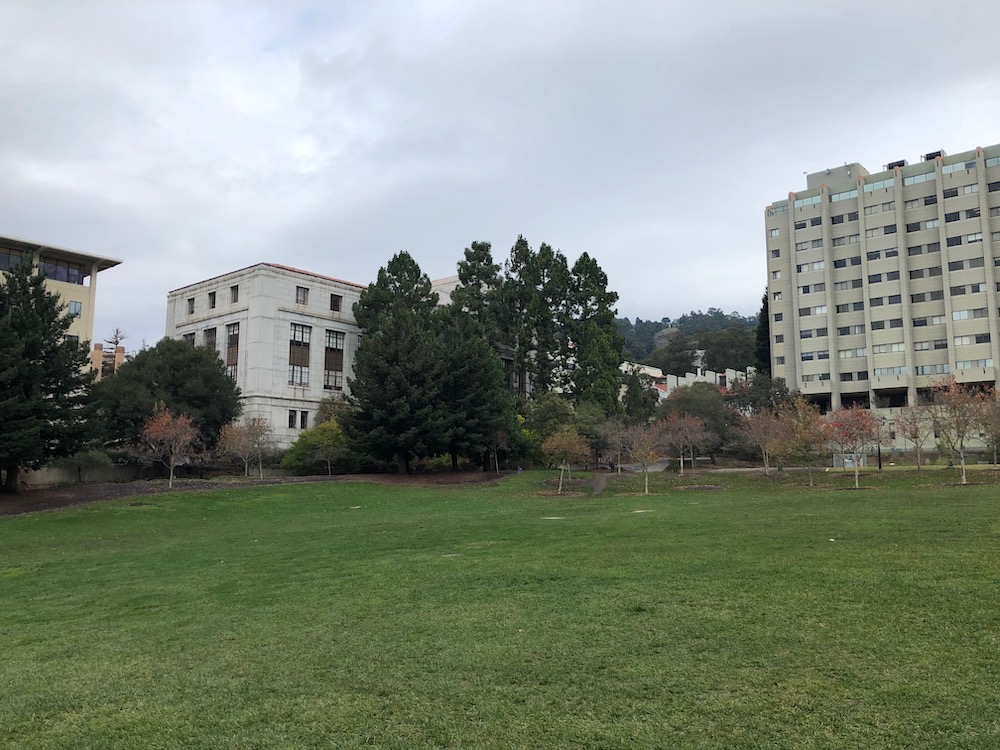
This image is of Crystal Springs Park in Belmont, California

crystal_springs image crystal_springs seams crystal_springs horizontal carve

I actually liked the vertical seam carving of this image almost as much.

crystal_springs image crystal_springs seams crystal_springs vertical carve

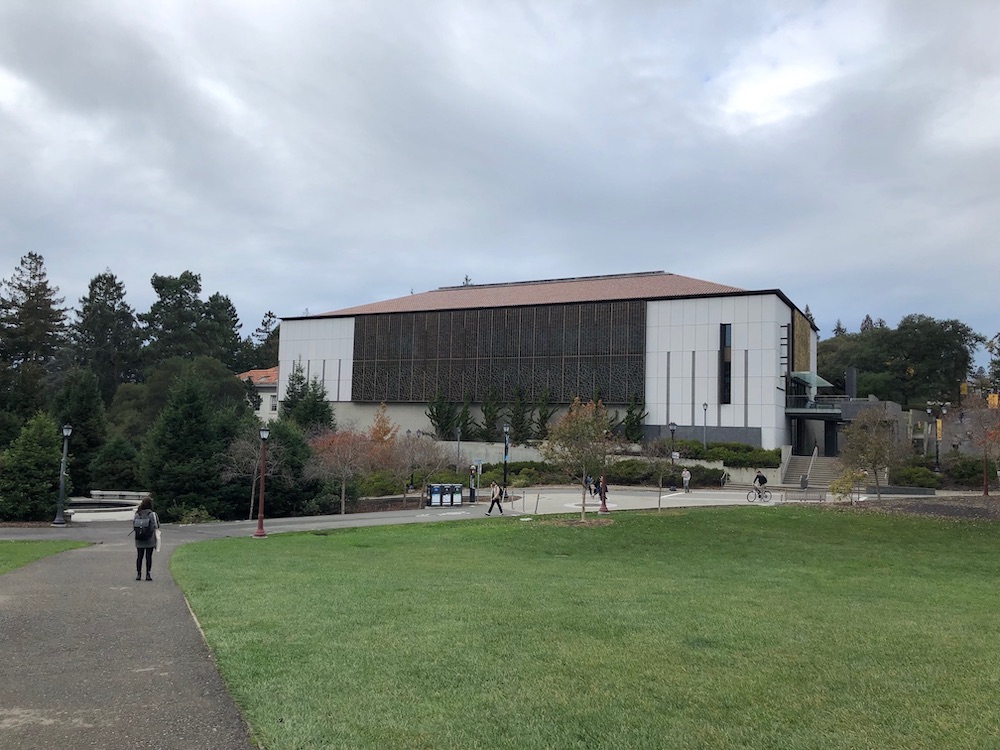
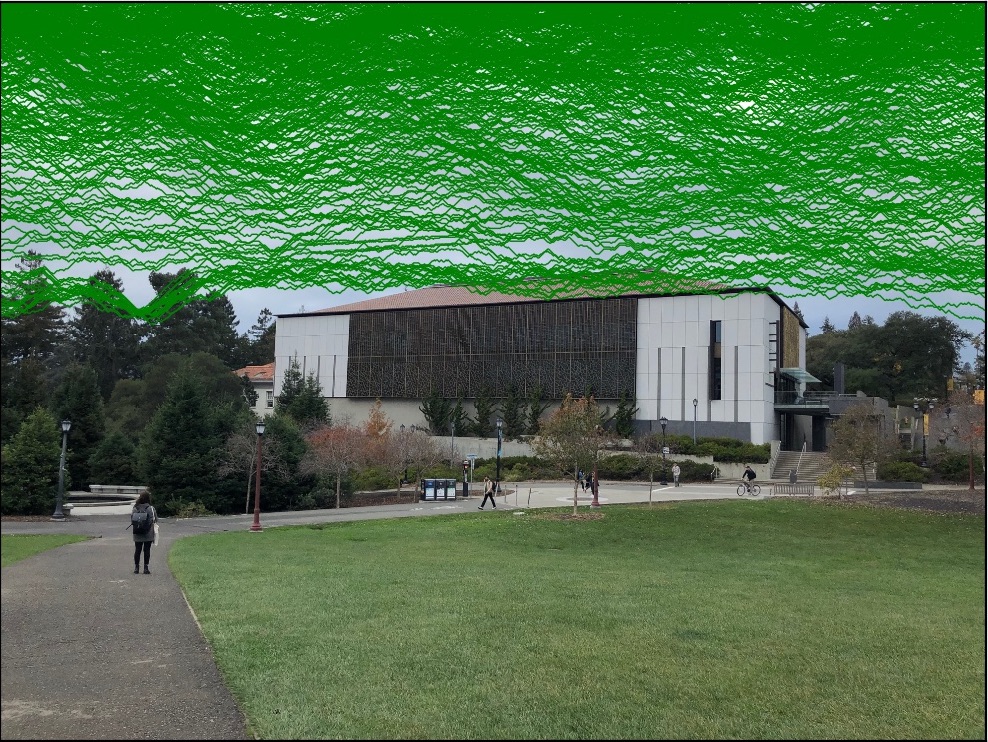
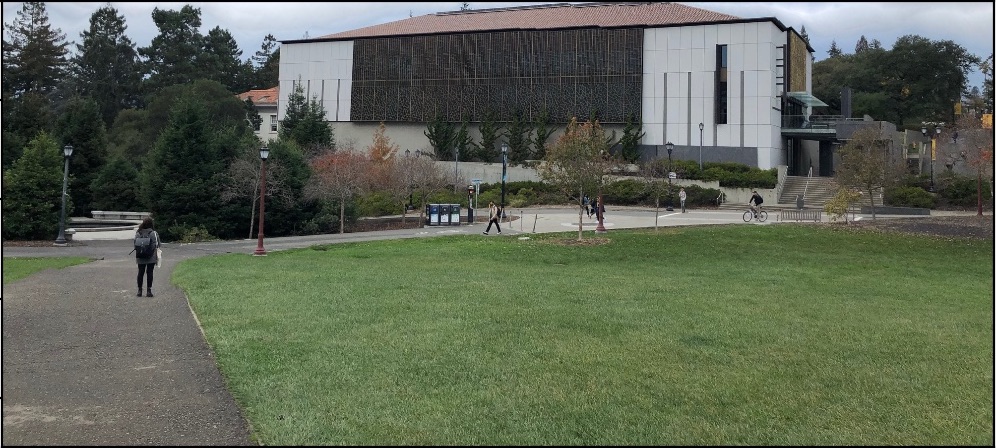
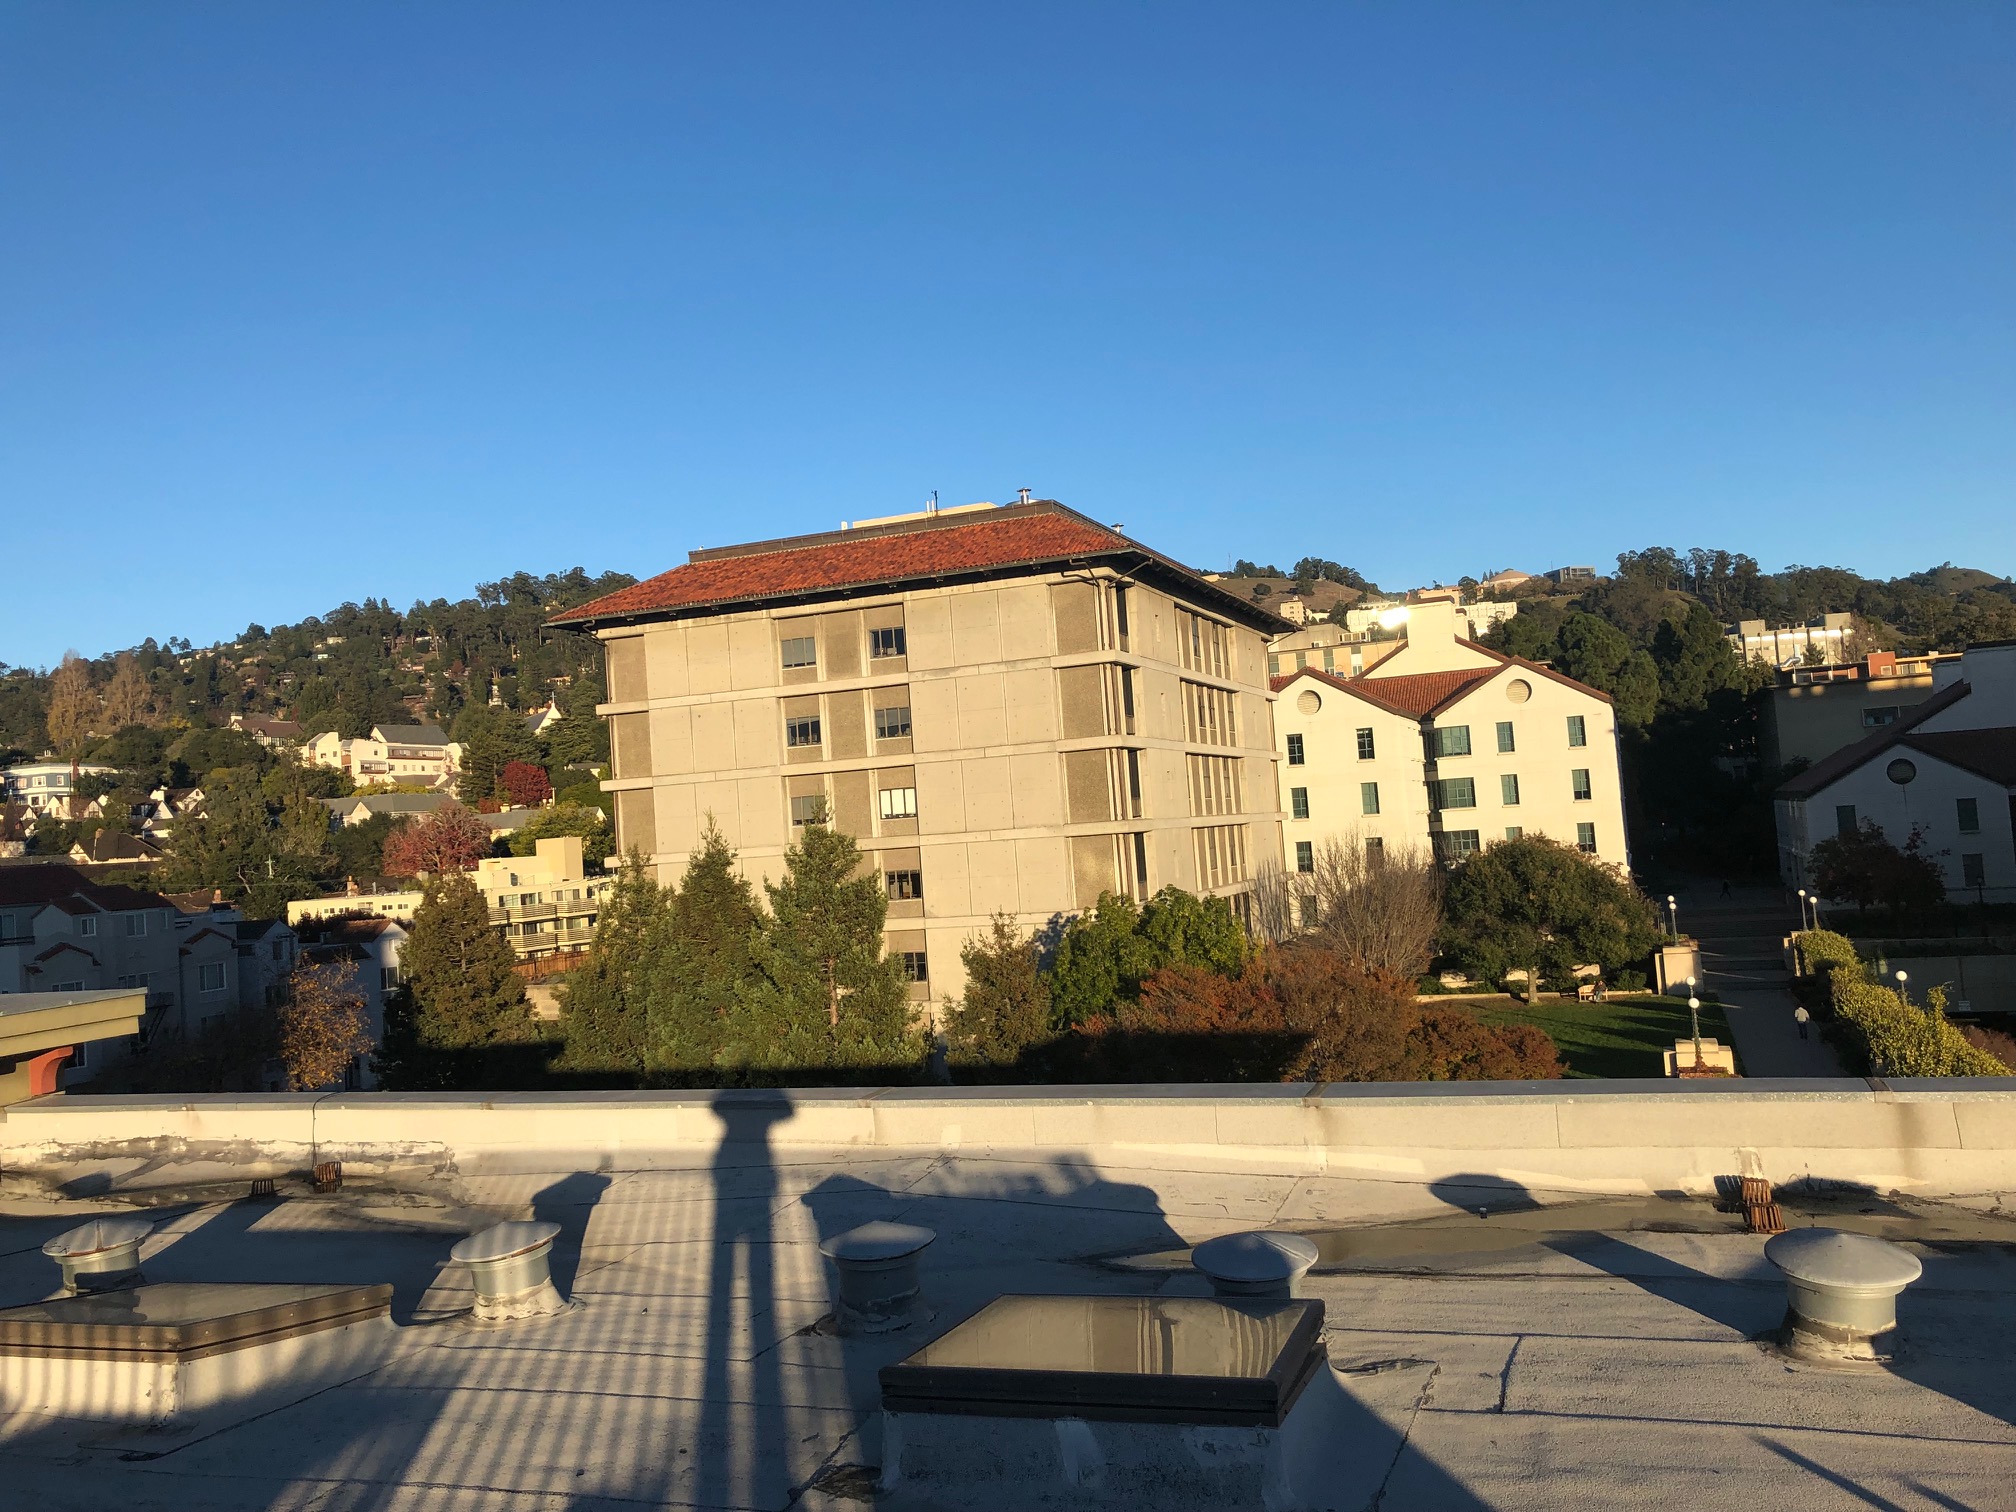
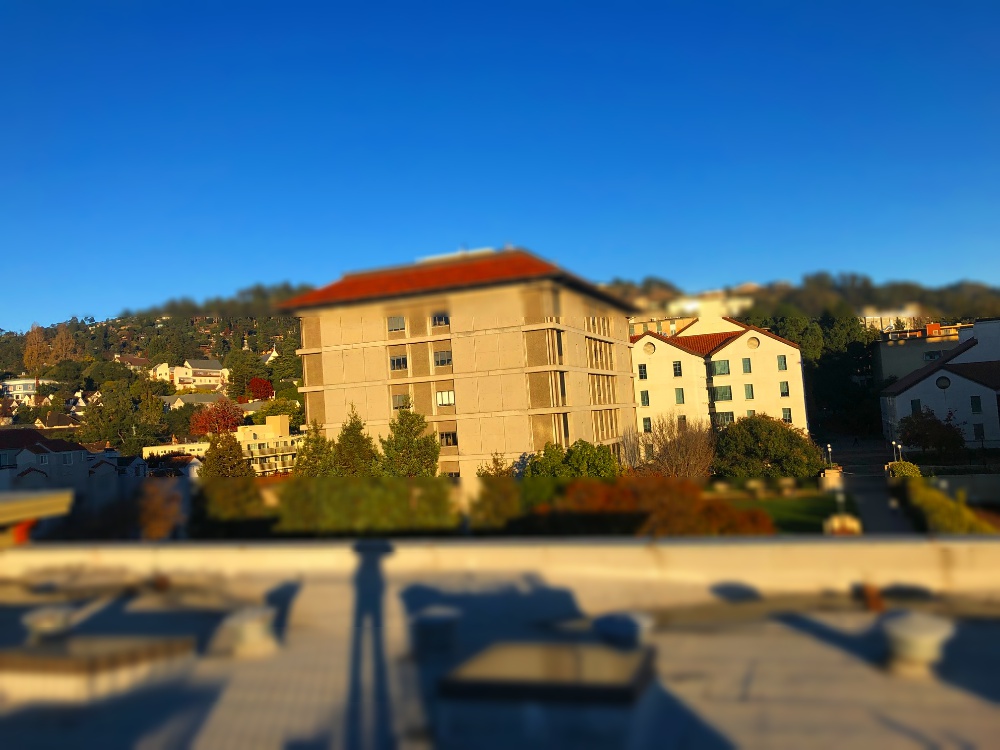
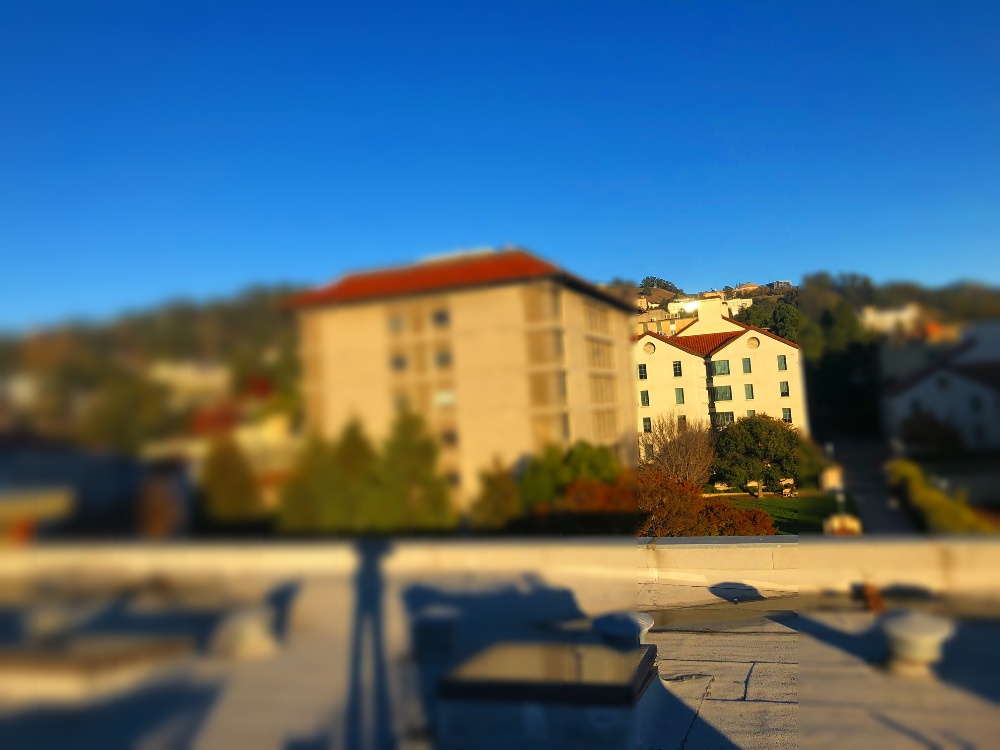
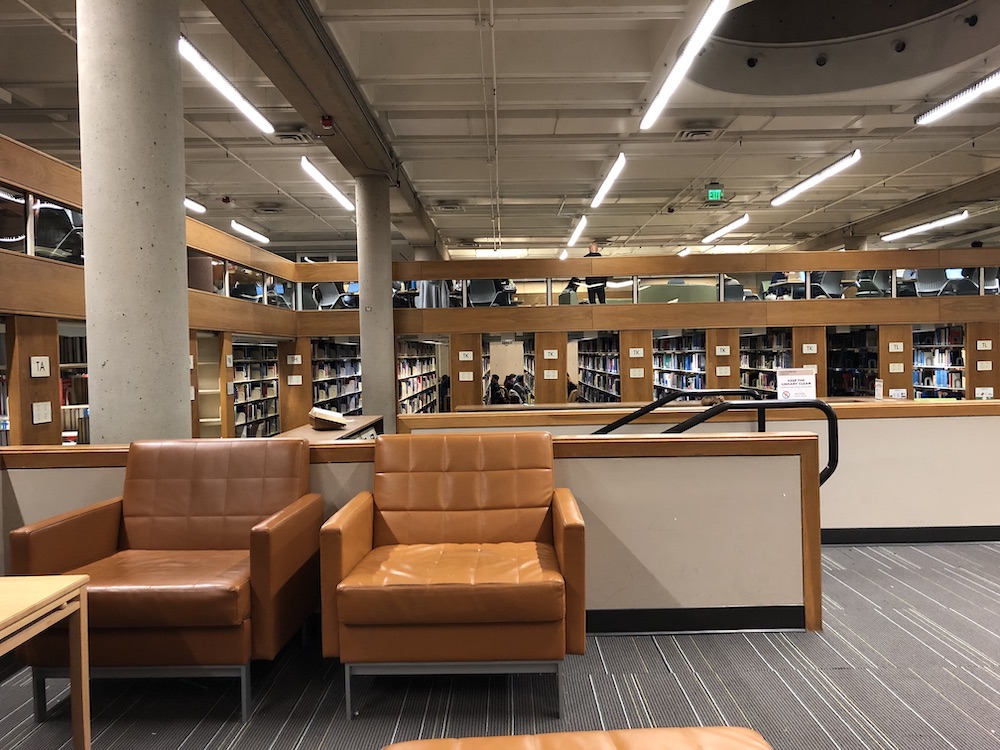
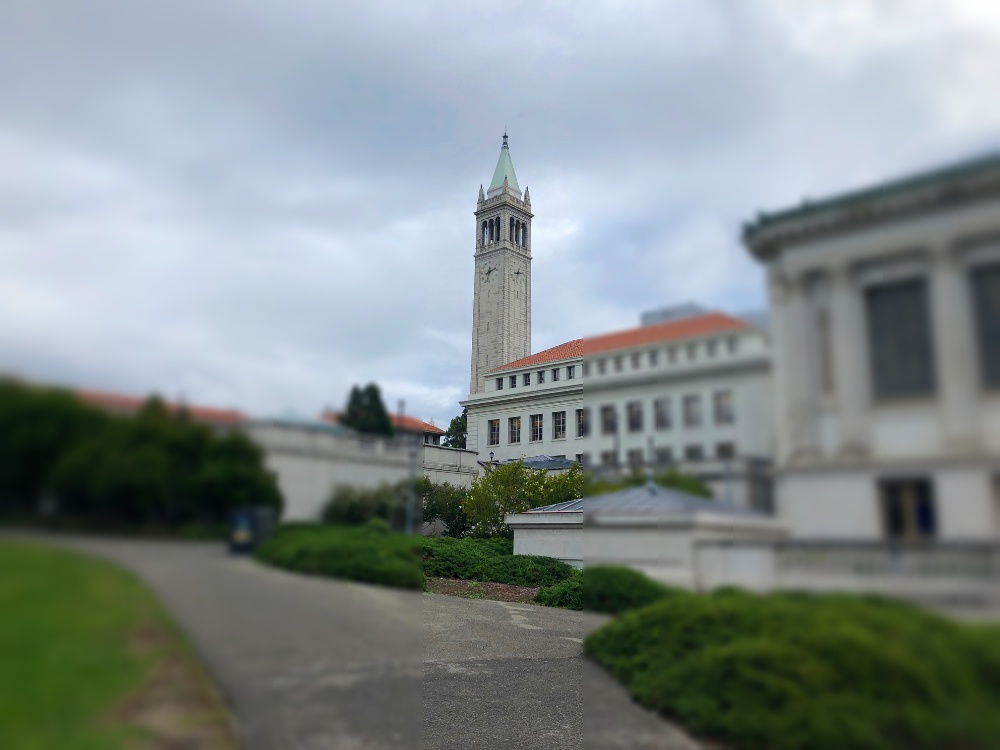
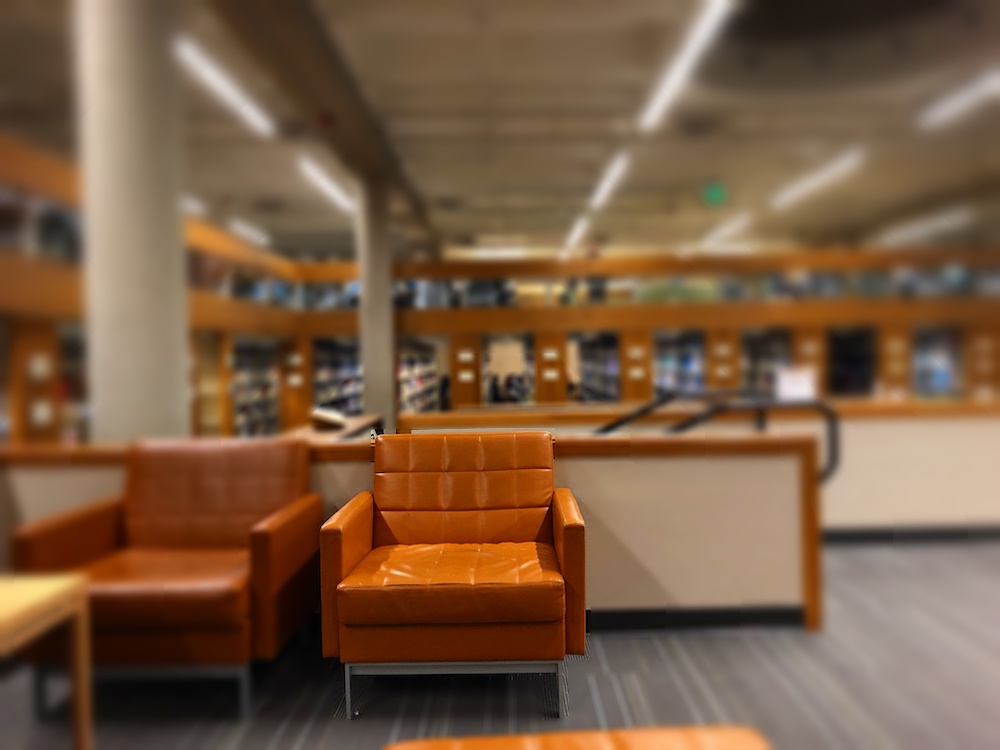
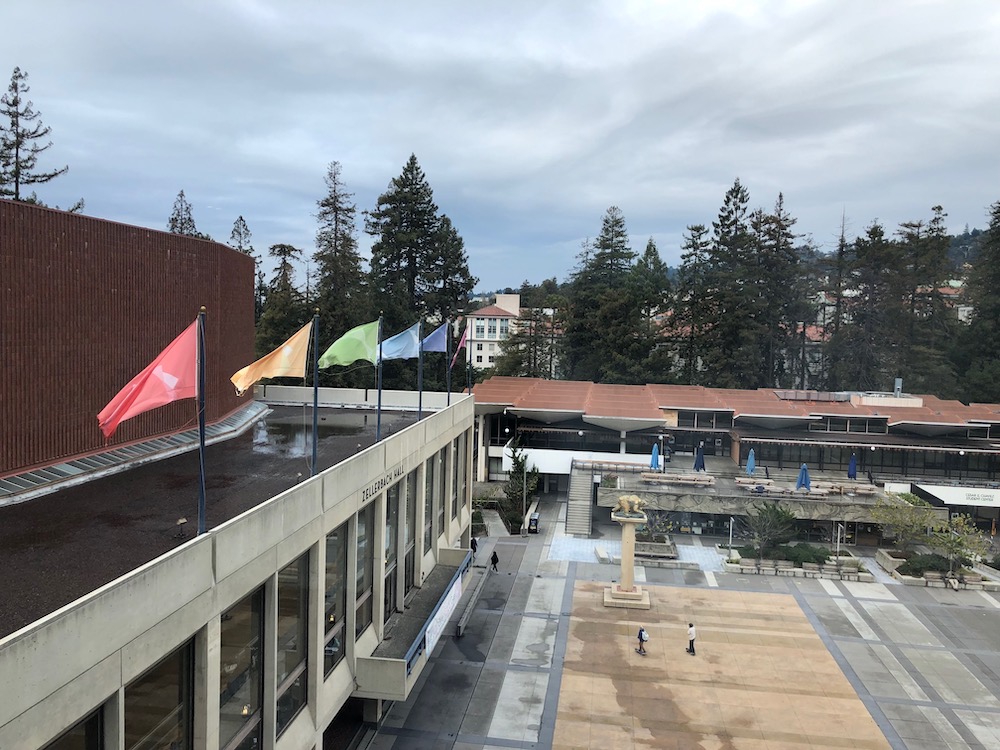
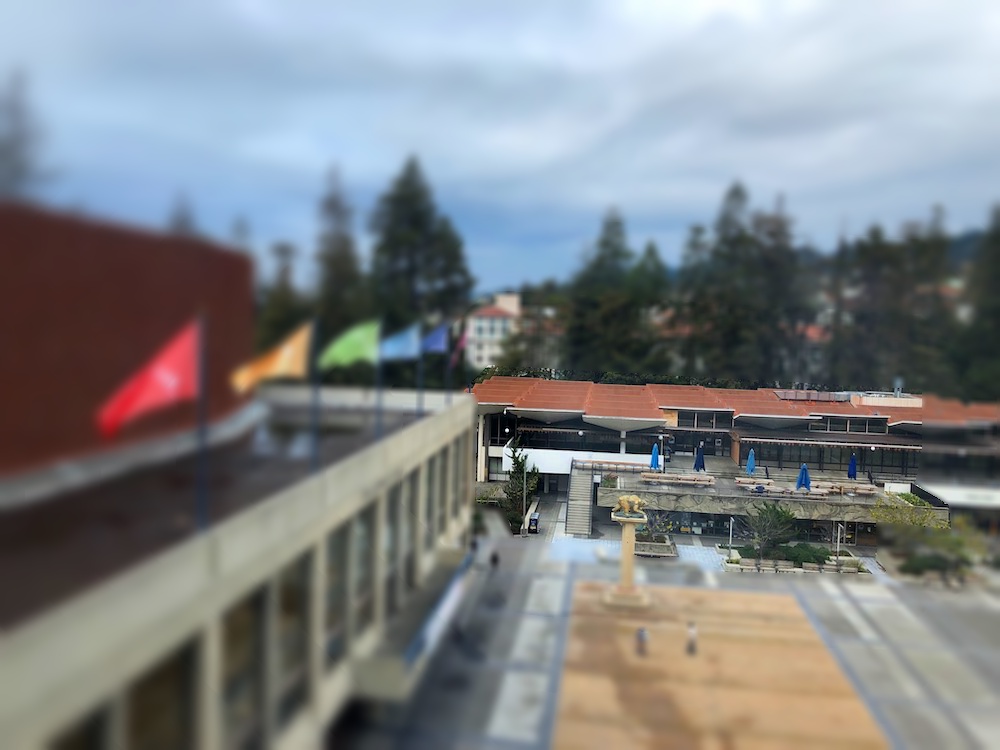
This image is of the east asian library on campus.

east_asian image east_asian seams east_asian horizontal carve

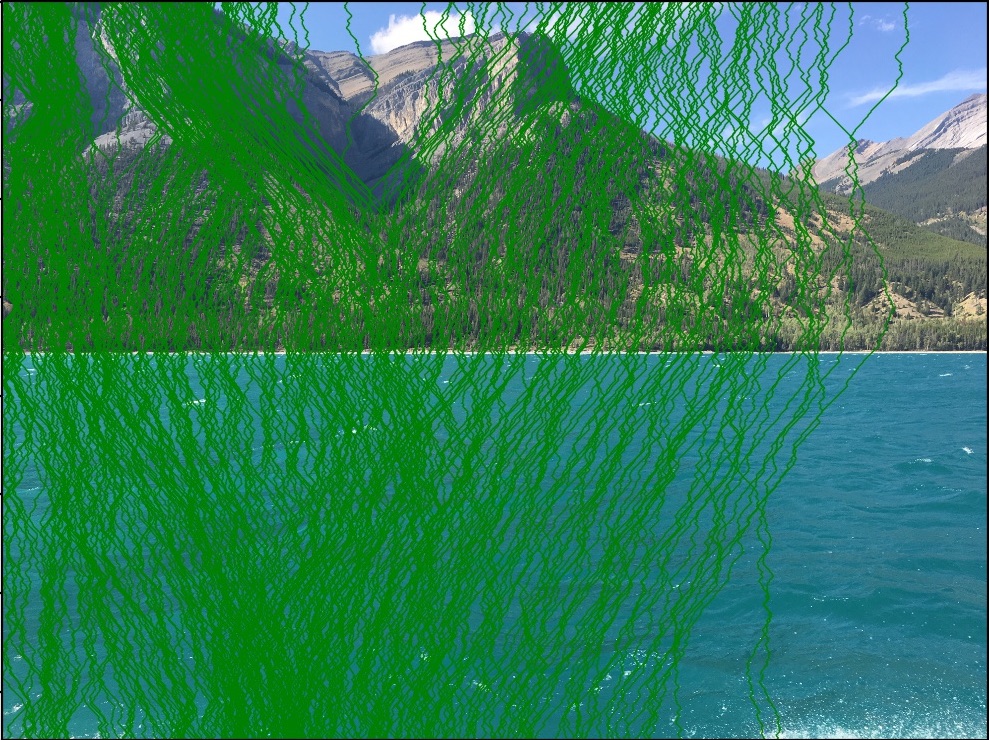
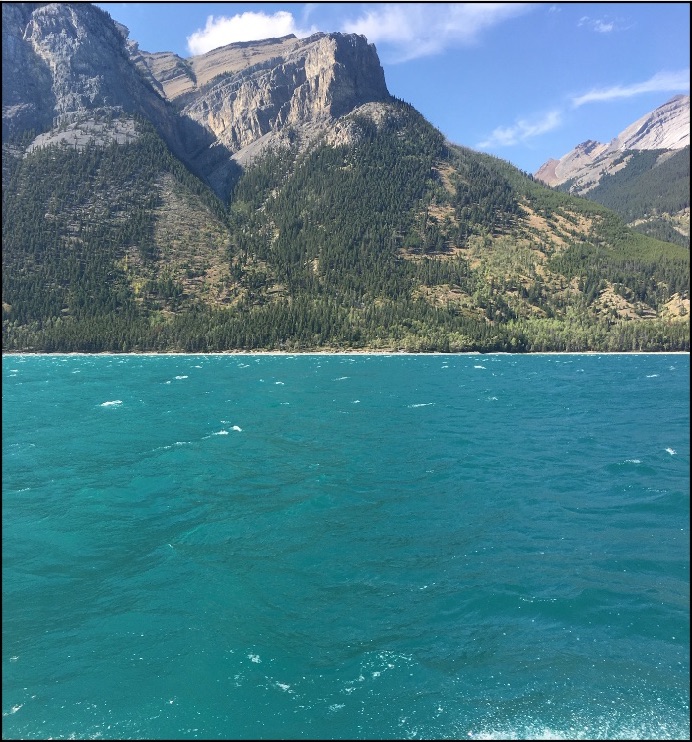
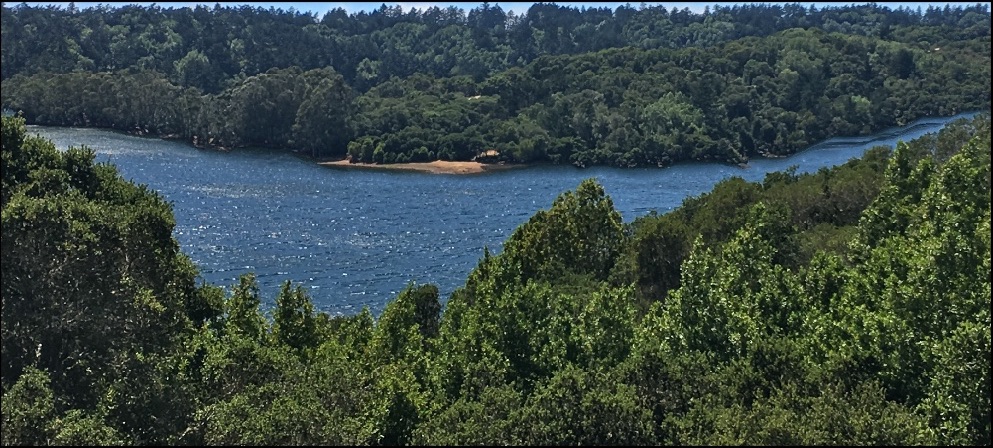
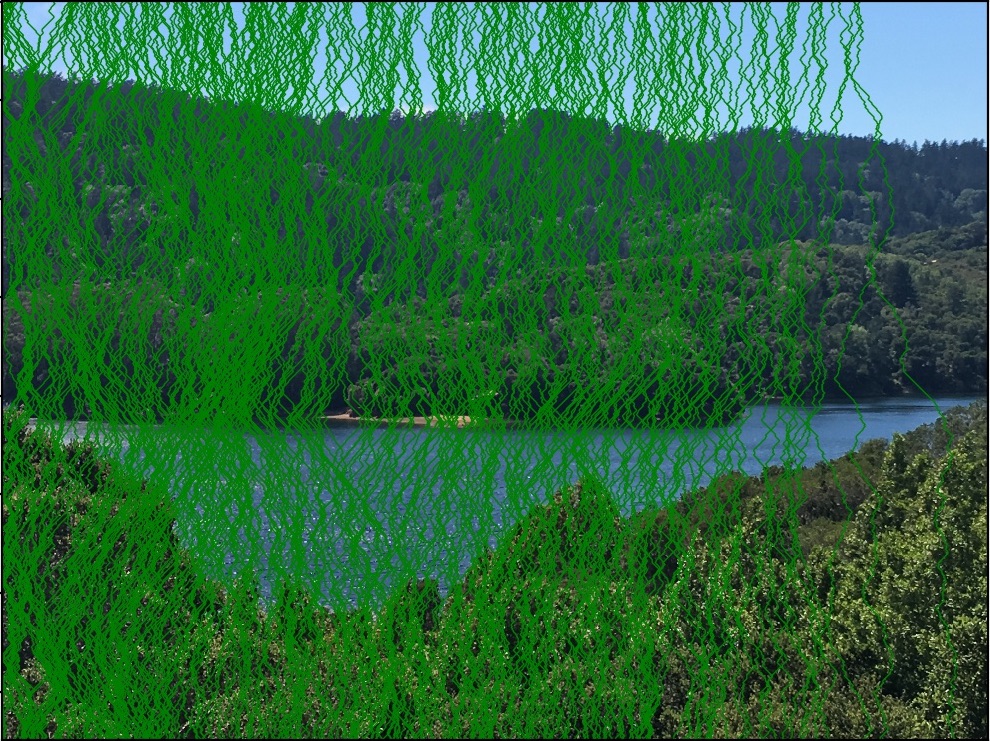
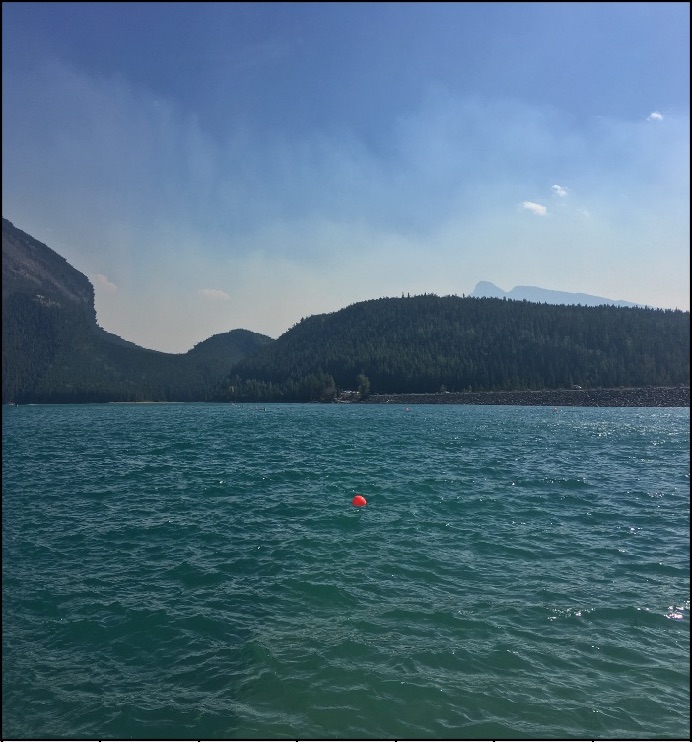
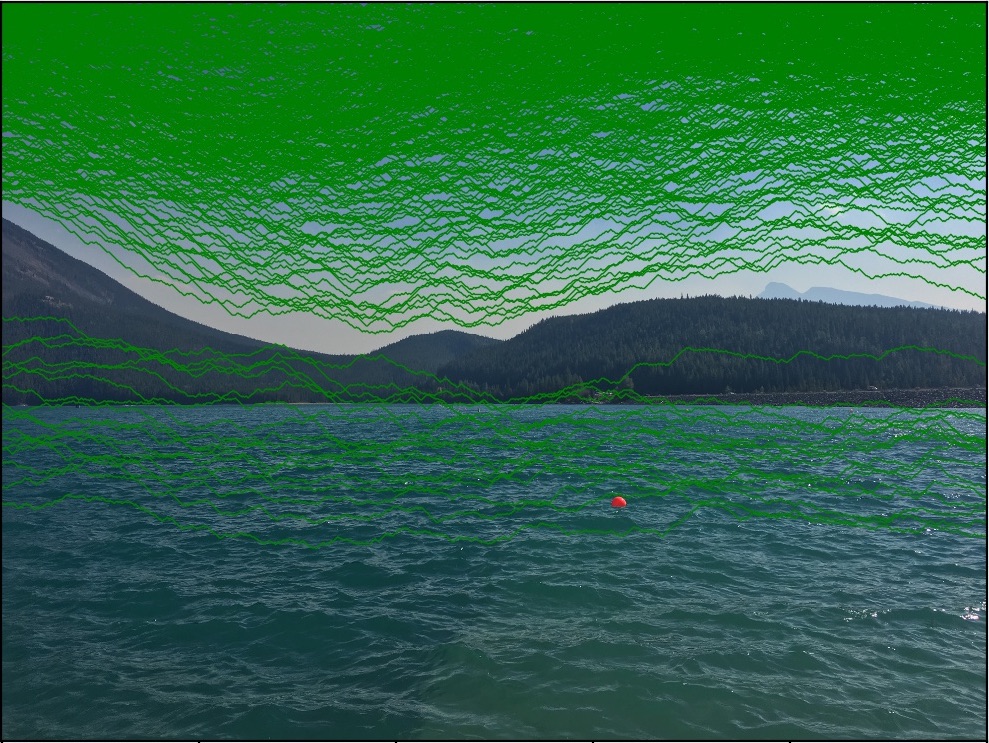
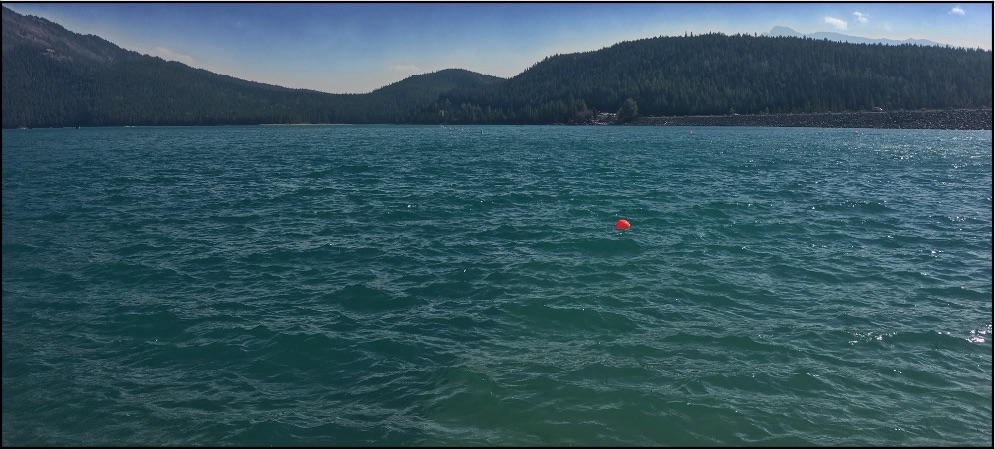
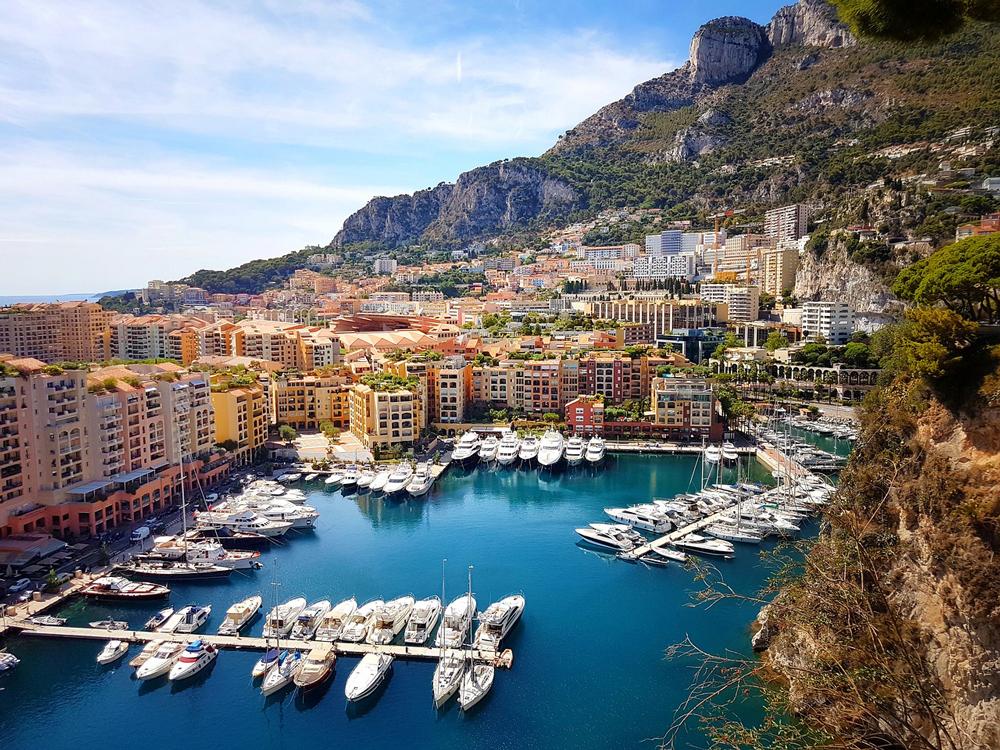
And finally, here is another photo I took while on a boat ride out in Lake Minnewanka, AB, in Canada last year.

minnewanka image minnewanka seams minnewanka vertical carve

And here is its horizontal carving (which I actually prefer, in this case).

minnewanka image minnewanka seams minnewanka horizontal carve

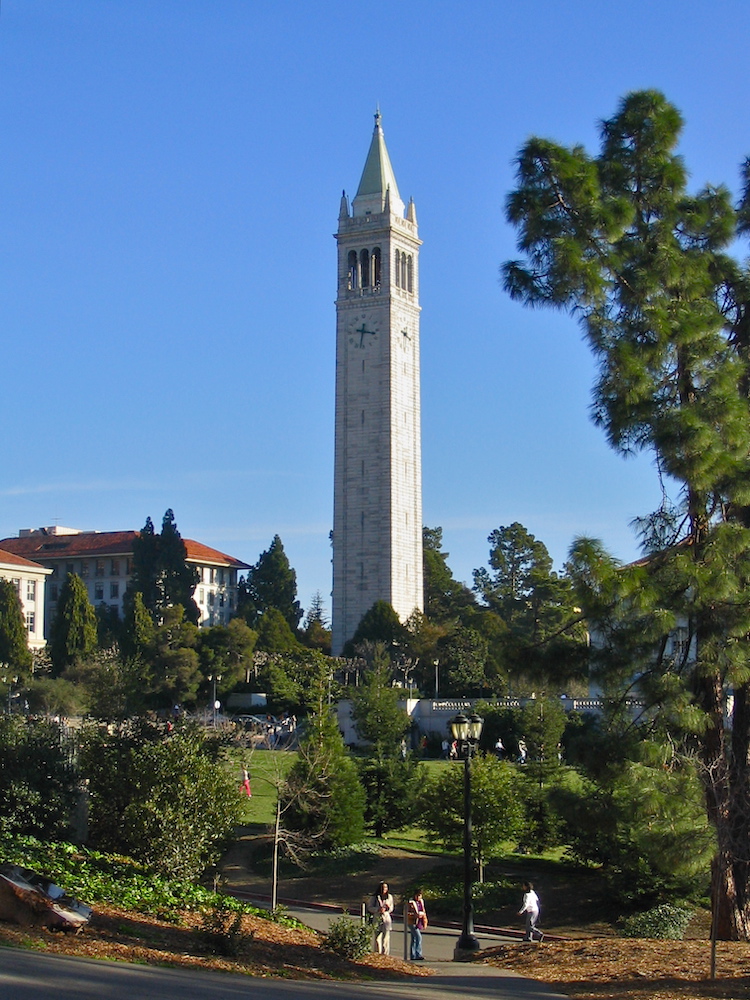
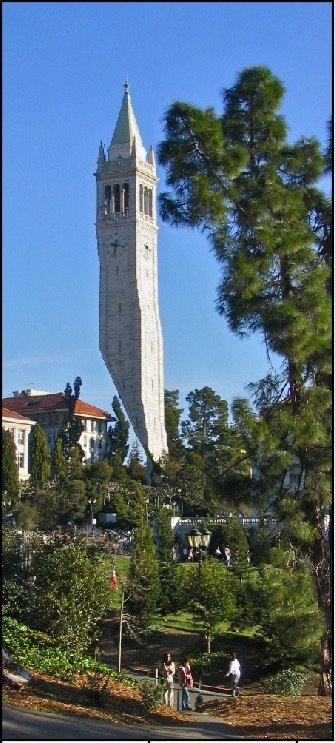
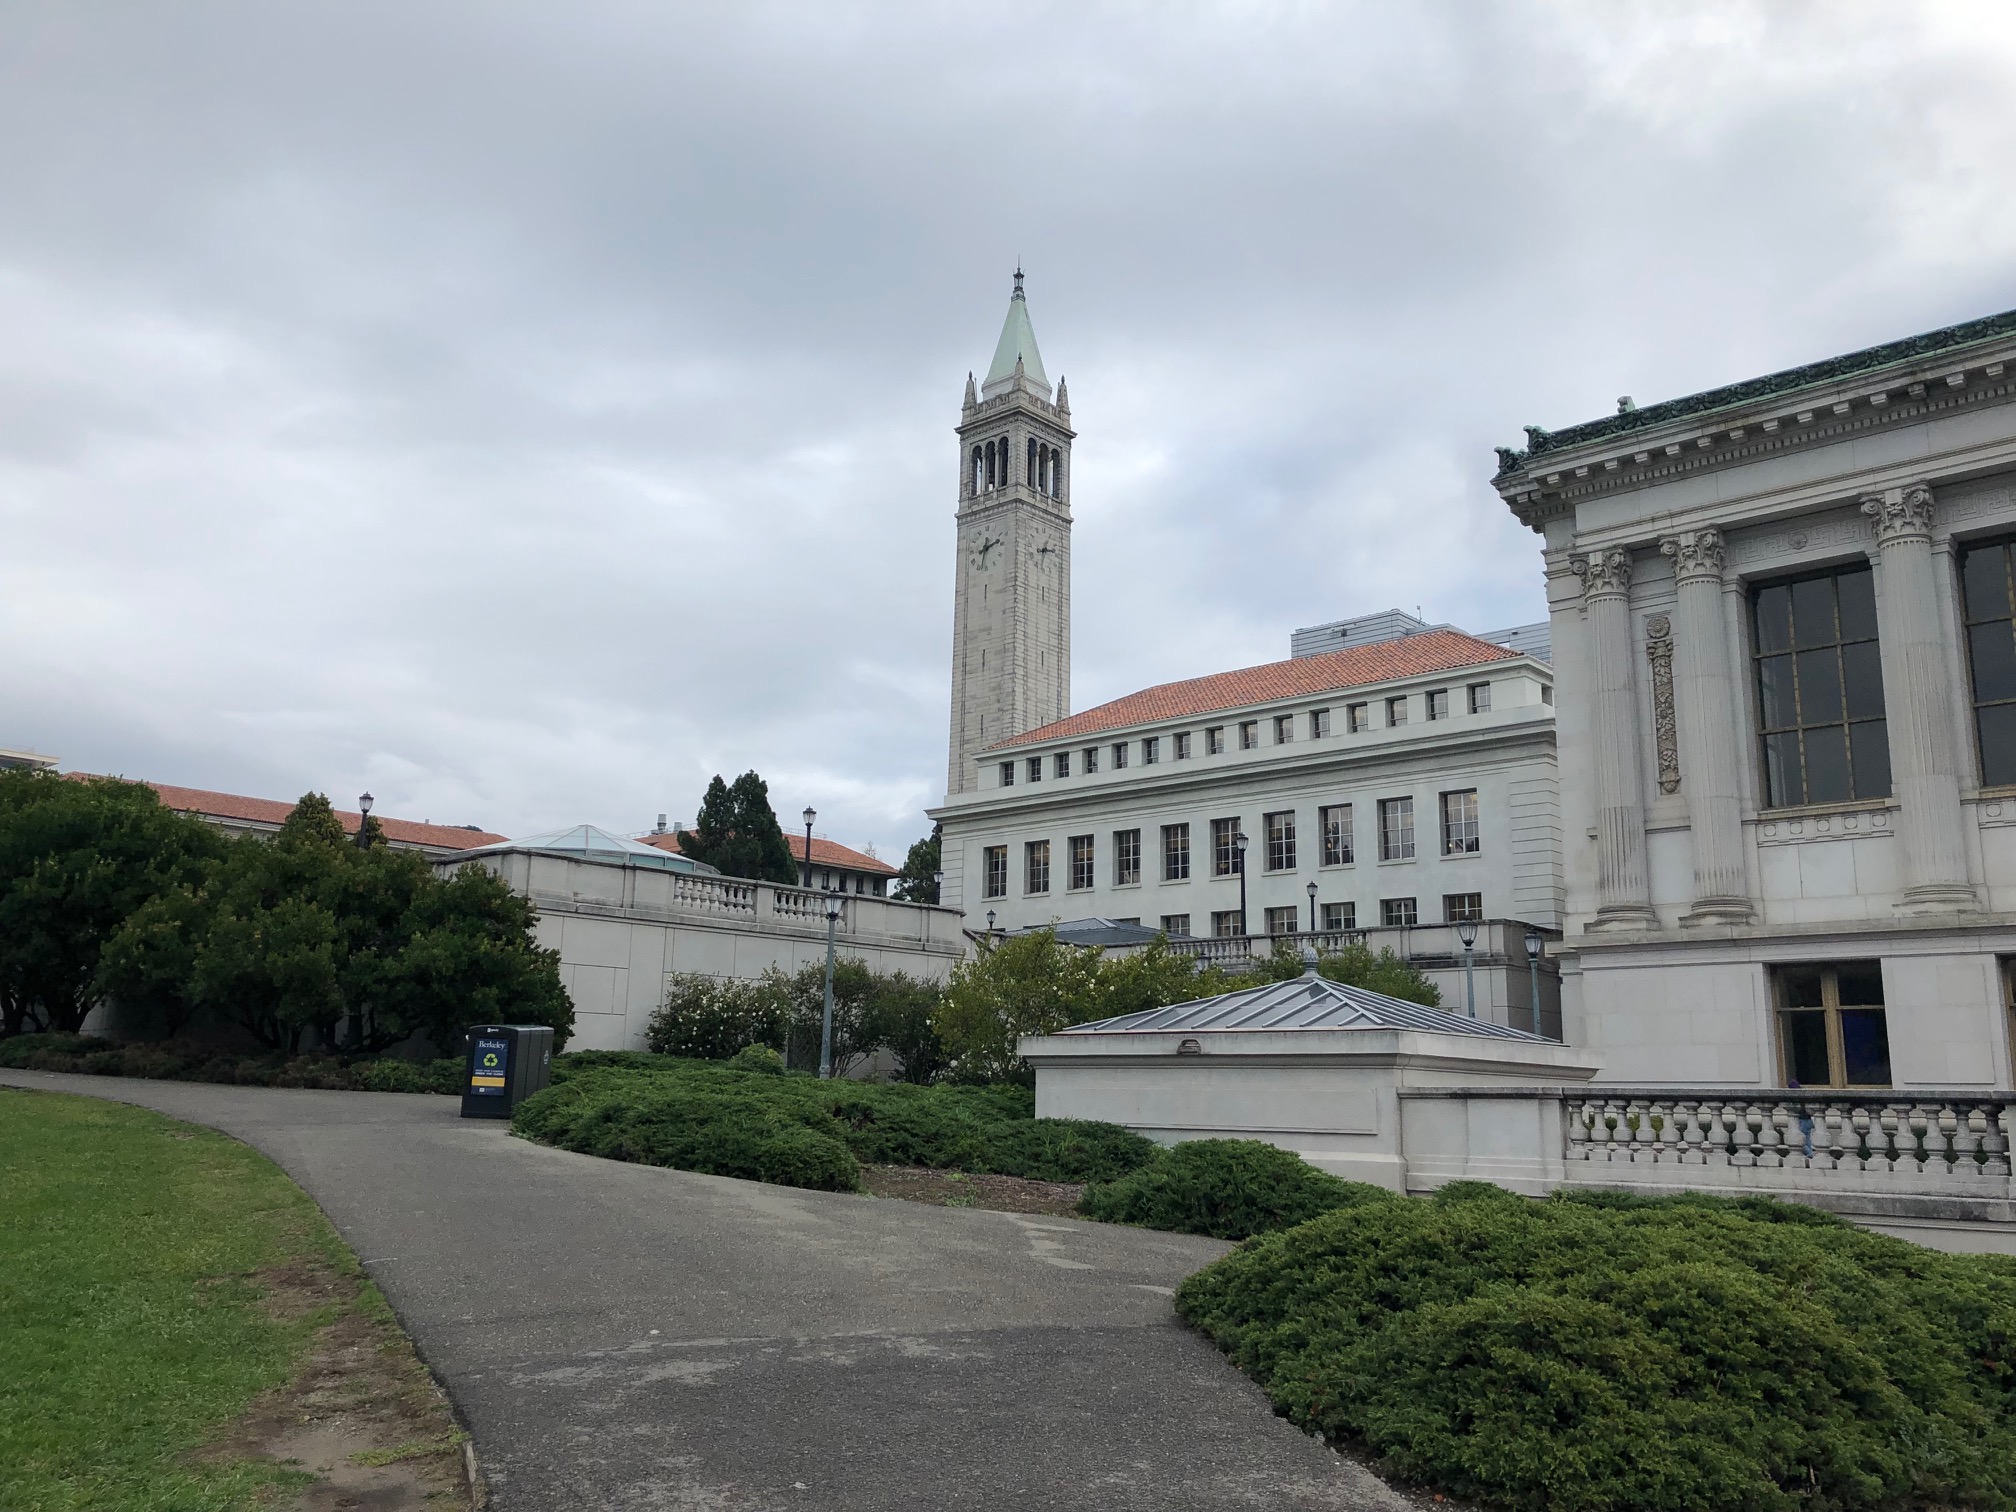
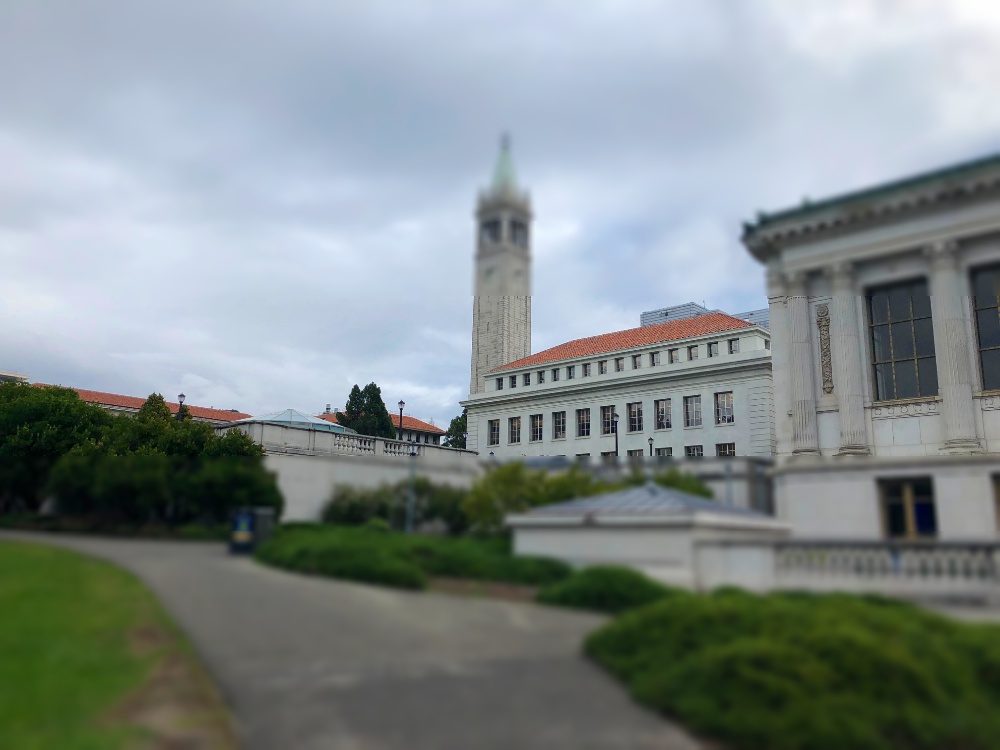
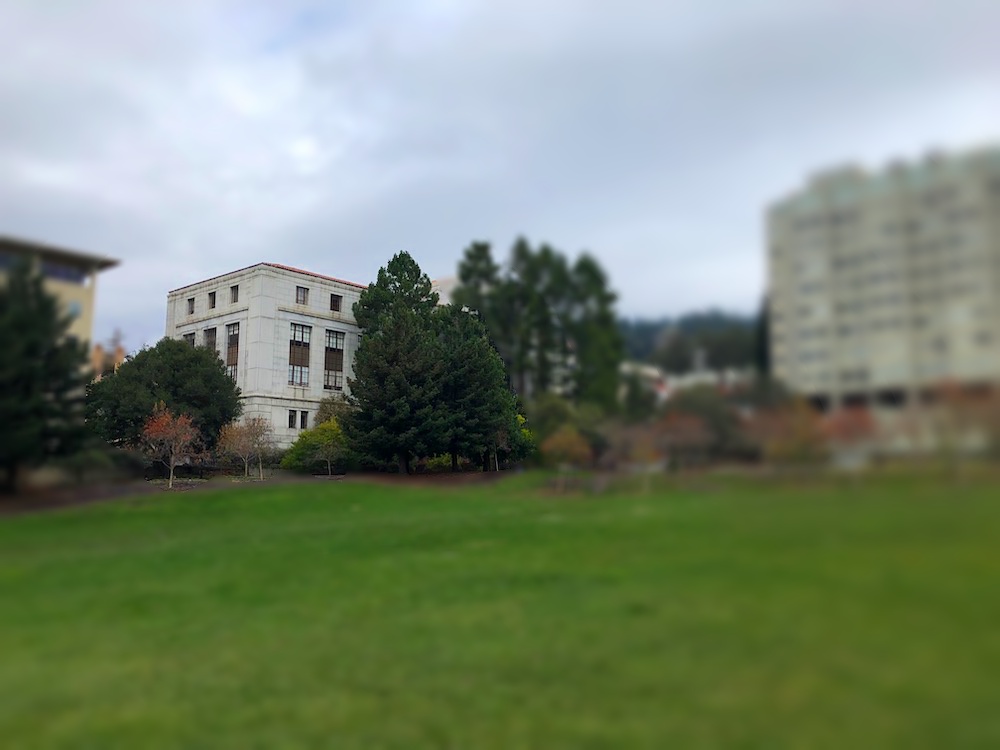
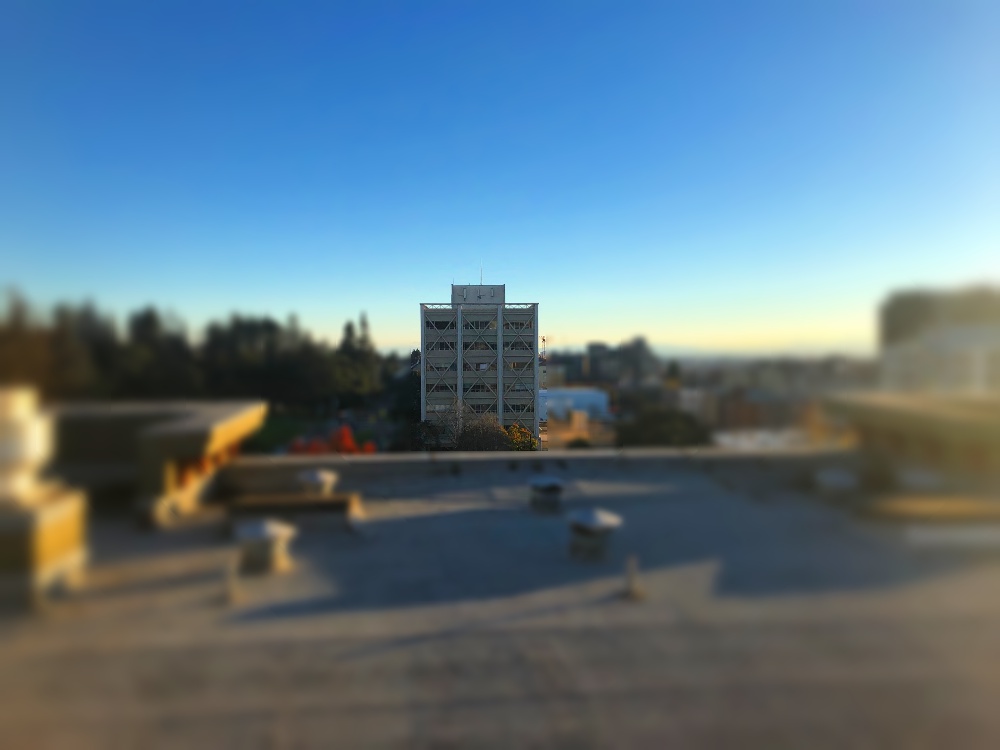
Of course, this did not always work well. In images with very little free space and lots of people, this algorithm often tended to break, cutting out parts of people's body. Similarly, in structures that did not have much "free space" like lots of sky, the algorithm tended to cut out important parts of images, like the image below where the Campanile gets a bite taken out of it.

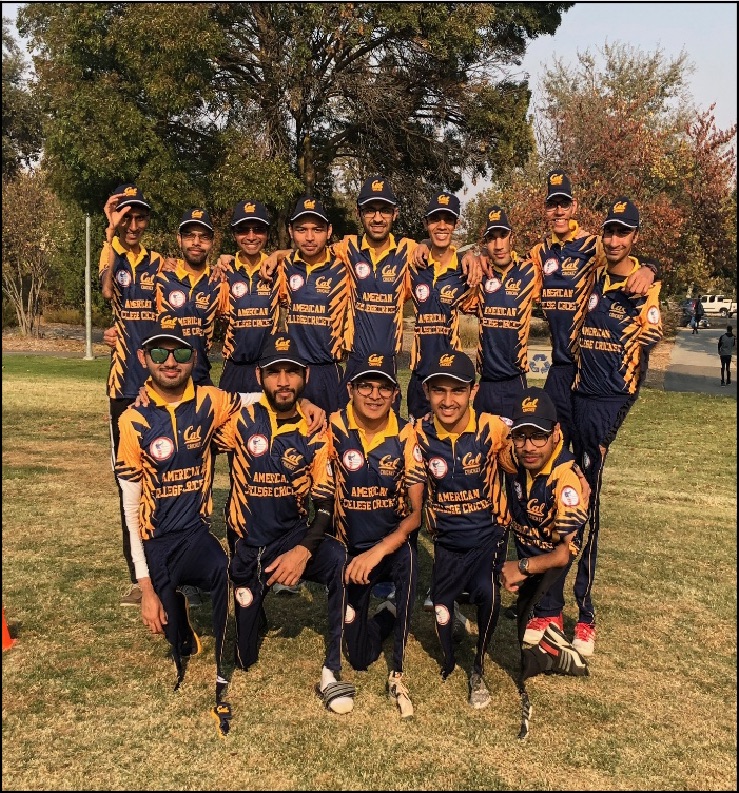
Here's a photo of my cricket team. Suffice to say it did not work out very well. Everyone's legs vanished (don't skip leg day).

team image team failure

This is a picture of the campanile, taken from Wikipedia.

wiki campanile image campanile seams

All in all, I greatly enjoyed this project. I felt like I learned a lot about the parts of images you can take out while still keeping the details of the structure intact. My favorite part was seeing the seams overlaid on the image and then looking at how the image shrunk.

Fake Miniatures

In this project, I create Tilt Shift images, where I blur out portions of an image while keeping a certain part in focus. This creates an effect that makes the objects in focus resemble "miniatures". For this project, I had the user select a vertical or horizontal "focus line" and then took 80 pixels on either side of the focus line and created a mask. I then blurred the rest of the image, used scipy.dilation to increase the mask size, increased the sigma by 0.25, and blurred the entire image again. This had the effect of having a heavier blur on items farther away from the region in focus. My starting sigma for blur was 3, and I increased the mask size by 10 pixels on each side of the mask each time. I also converted to HSV, increased saturation by 50%, and then converted back to RGB to allow colors to "pop" a bit more. I also did bells and whistles (irregular masking) for this portion of the project, which greatly improved the output result quality; in fact, I really feel like that portion allowed me to appreciate the effect a lot more.

Initially, the most intuitive thing to do is just to have a focus line (vertical or horizontal) and create a mask according to the focus line. However, this clearly didn't yield very good results; the effect was noticeable, and it was still pretty cool, but I was also leaving in focus objects that I didn't really want to expose, and blurring parts of objects that I wanted to entirely focus on. Below are the images and then their results of horizontal and vertical blurring, in that order from left to right (all images were taken by me except for the first three, which were lifted from the Wikipedia on Nicosia, Cyprus, the Wikipedia on the Swaylands estate in Kent, and a CityWealth article on Monaco's Law Revolution).

cyprus_wiki image cyprus_wiki image cyprus_wiki vertical blur

Swaylands_aerial_shot image swaylands_aerial_shot image swaylands_aerial_shot vertical blur

monaco_citywealth image monaco_citywealth image monaco_citywealth vertical blur

barker image barker image barker vertical blur

glade image glade image glade vertical blur

sofa image sofa image sofa vertical blur

campanile image campanile image campanile vertical blur

From here, it was clear that the next thing needed was to create irregular masks to expose only a certain portion of each image. Below are the initial images, their mask, and the output image/miniature created (again, all images taken by me except the Cyprus image, the Swaylands image, and the Monaco image, which I already identified in the previous section).

barker image barker mask barker irregular

Swaylands_aerial_shot image Swaylands_aerial_shot mask Swaylands_aerial_shot irregular

cyprus_wiki image cyprus_wiki mask cyprus_wiki irregular

monaco image monaco mask monaco irregular

glade image glade mask glade irregular

sofa image sofa mask sofa irregular

public_health image public_health mask public_health irregular

slc image slc mask slc irregular

campanile image campanile mask campanile irregular

I learned a great deal from this project as well. I found it really cool to see how you could create the illusion of miniature objects by varying the parts that an image was focused on and blurred on, and I also found it cool to see how I could vary the blur with the distance from the object in focus.