Project 1: Fake Miniatures
Overview
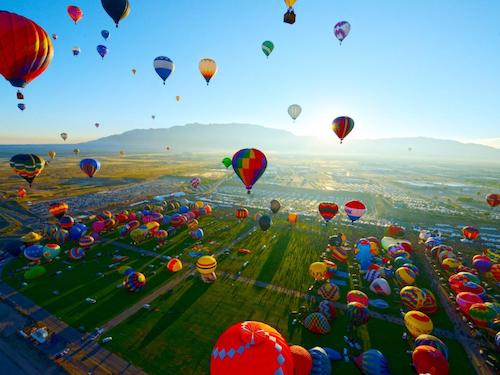
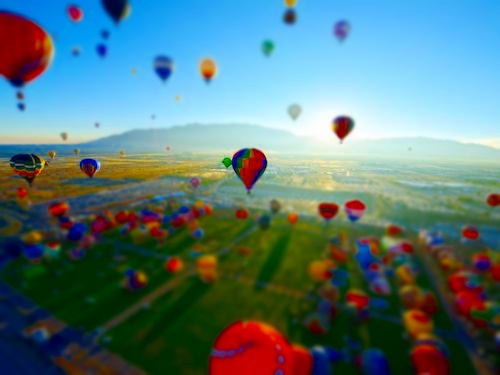
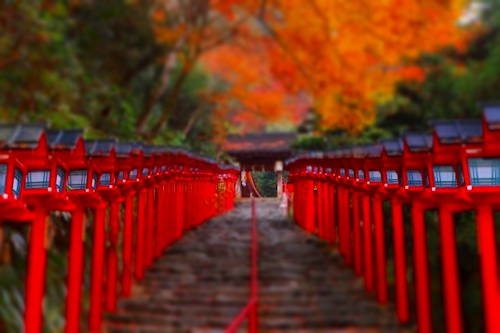
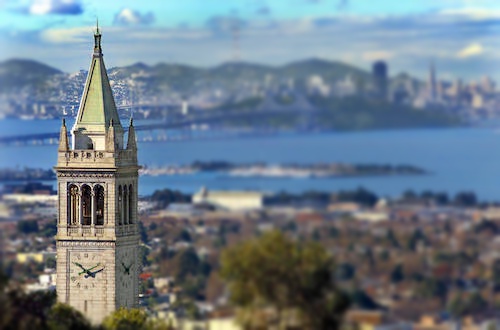
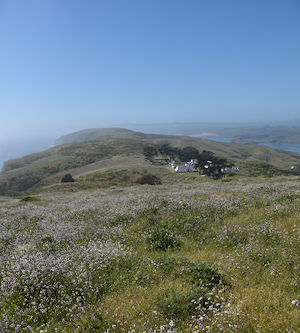
In this project, we aim to generate fake tilt-shift images by selecting a focus line on the image, generating a fake depth of field surrounding the focus plane, and increasingly blurring the image around the plane to immulate a depth of field effect.
Details
To implement this, we would take in several points from the user and average the y-coordinates for a horizontal focus line. From this horizontal focus line, we sample 10 pixels above and below for a rectangular image mask such as the one below. To generate a vertical focus line instead, simply average the x-coordinates instead. Alternatively, see the bells and whistles below for a more customizable region of focus.

We can then apply a gaussian blur to the image, and use the gaussian blurred mask to select the appropriate pixels from either the original image or the blurred image. To simulate the depth of field effect, we can continue this process by repeatedly applying the gaussian blur to the already blurred image, and repeating this process with the mask scaled using dilate. Finally, we increase the saturation of the resulting image by 1.5 by converting the image to HSV and scaling up the saturation.
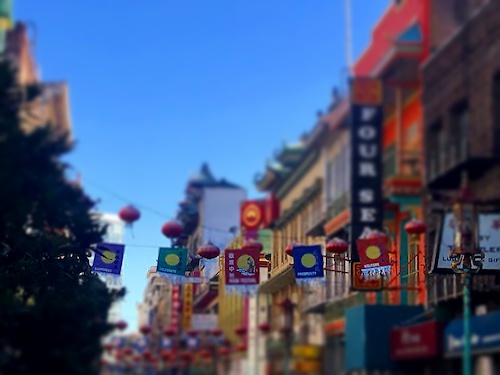
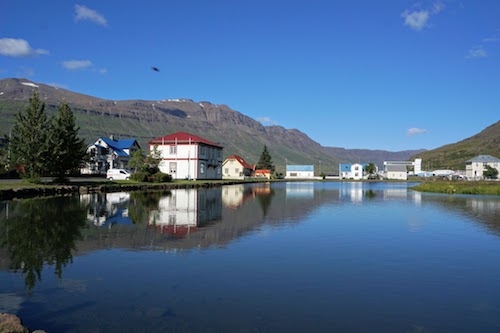
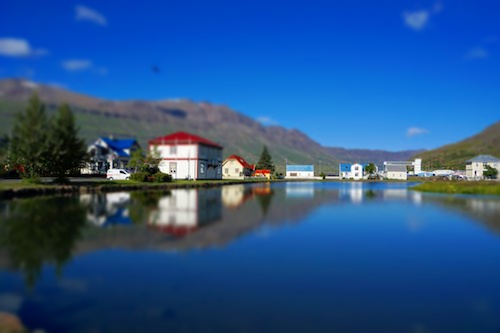
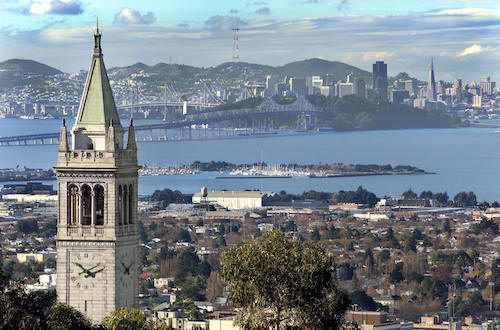
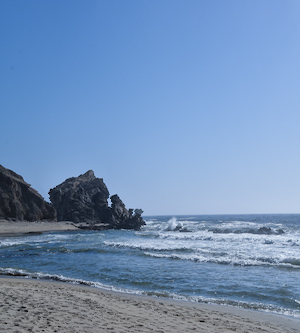
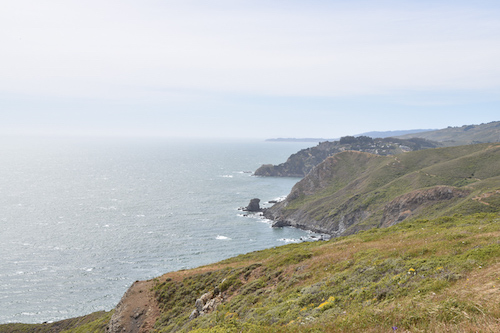
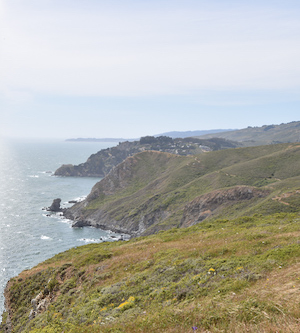
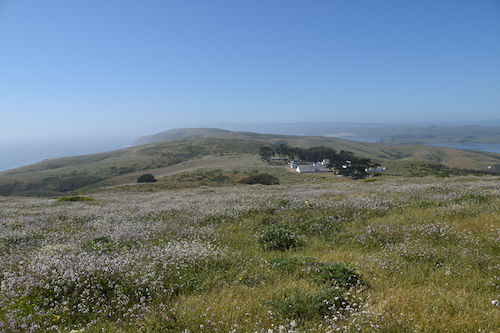
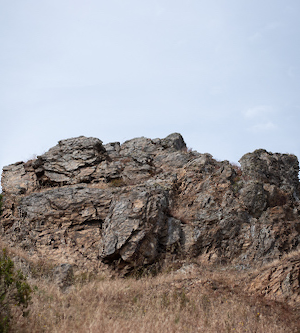
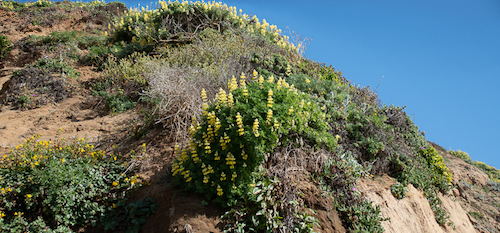
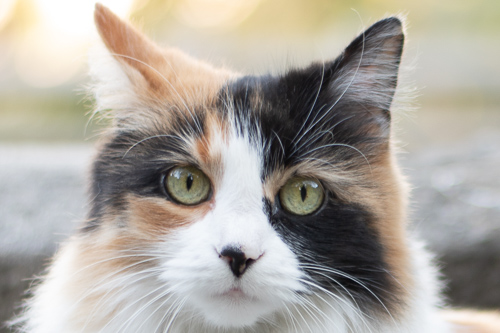
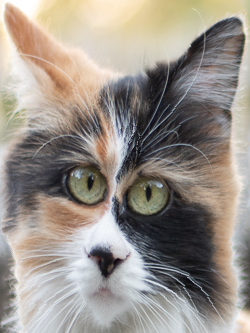
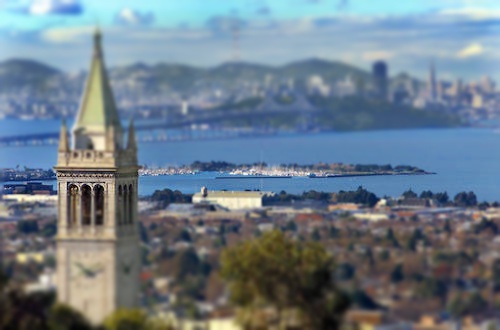
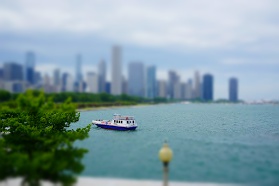
Examples from the Internet
Examples from my Camera
Bells and Whistles
Use object masks to define complex DOF regions
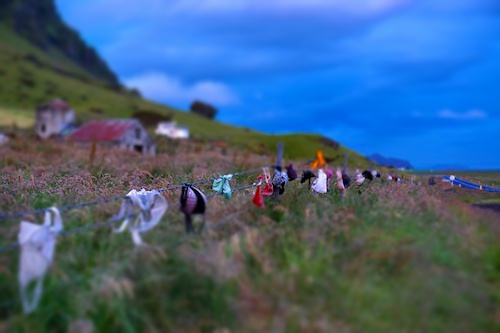
Using a focus line did not work as well for some images, where the depth of field was more complicated. Some examples where a focus line failed are shown below. Thus, for some images, we can apply an irregular mask instead of a focus line to yield better results. I applied similar process of applying multiple gaussian blurs using the mask, dilating the mask to increase its size with each iteration.


Below are the same images as before but with fake miniatures generated now using the irregular masks shown above.
Project 2: Vertigo Zoom/Dolly Zoom
Overview
In this project we tried to recreate the dollyzoom effect through a digital camera and hand held photography.
Details
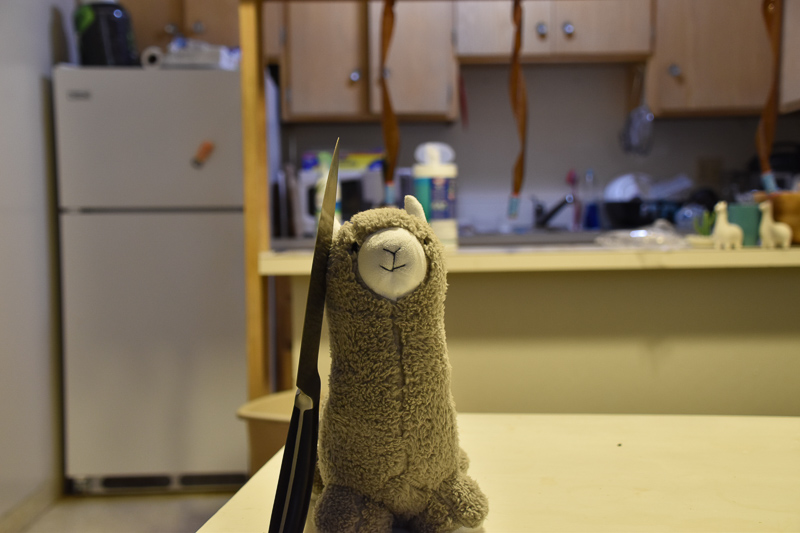
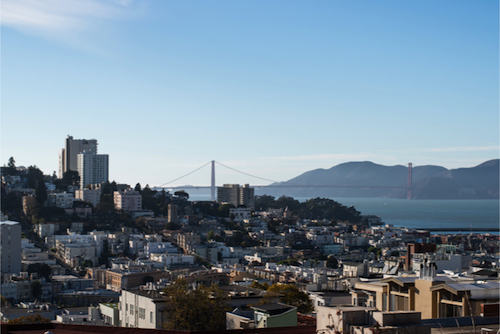
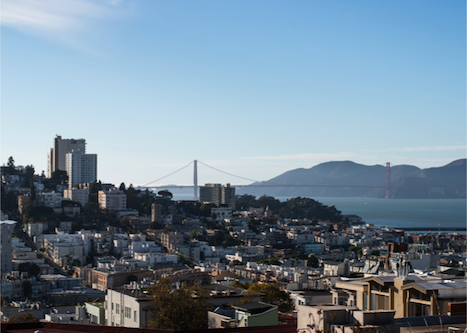
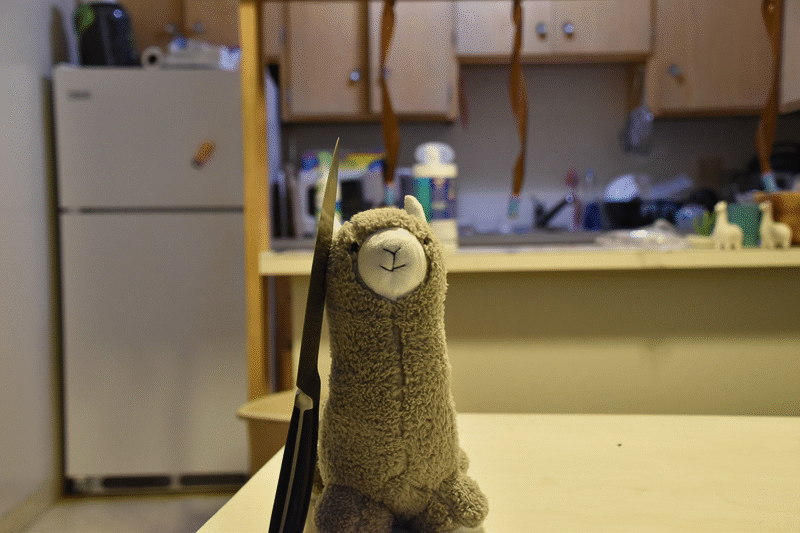
To implement this, I found a feature on the object I'm centering (the murderous llama or the traffic cone) and I put my camera on the lowest zoom and matched one of the focusing squares to fit the feature. For the cone I made it so that the center focusing square lines up with the top of the cone. For the llama I made it so that the center focusing square neatly contains it's mouth. Then I would take a step back and zoom in until the features matched my zoom square and repeated for the desired times. Below you can see some examples of the different zooms. I took about 15 pictures for each one so it better stitches in a video. For the pictures I only included 4 of them. I used my Nikon D5600 with a 18-300mm telescope lens to take these pictures.
Difficulties
The difficulties lied in trying to recreate the exact same shot everytime with the only difference being an orthogonal translation back and a change in focal length so that the subject remains the same size. With a dolly and a film camera this would be trivial but with a photocamera and moving my feet i often found that i did not move exactly the same each time or i would rotate it slightly or pan it slightly. Also using my method of aligning the subject using the focusing squares made it kind of inexact and the shaking of my hand would affect it.
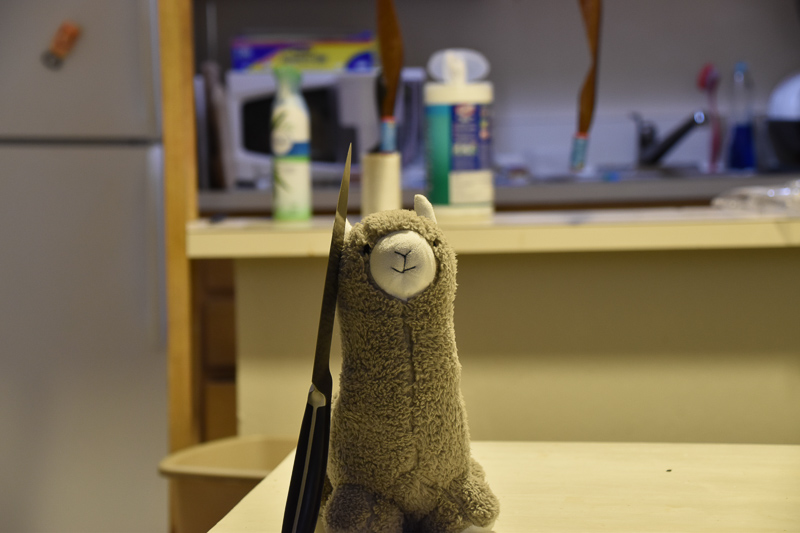
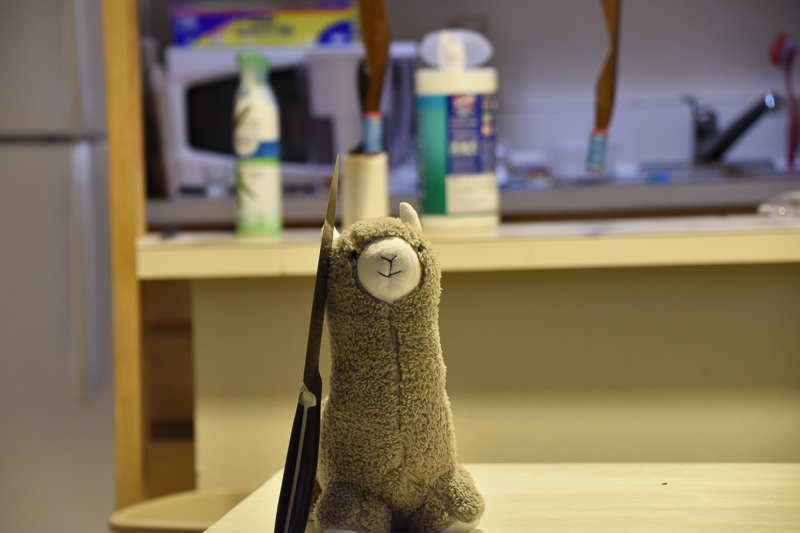
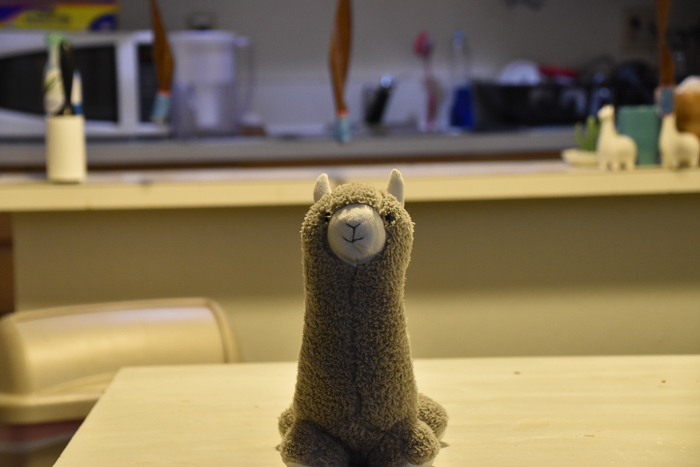
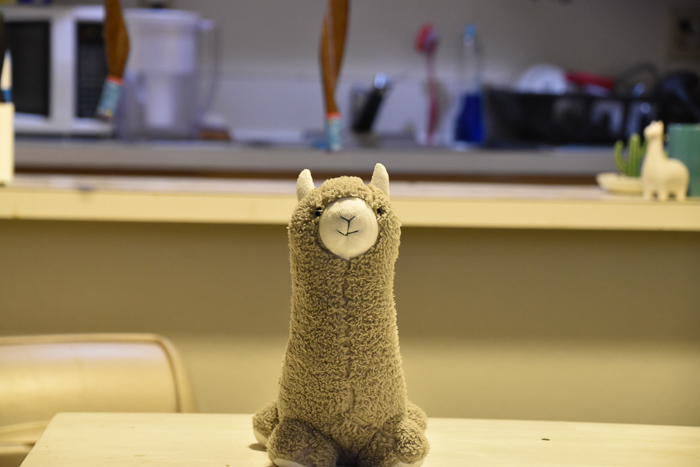
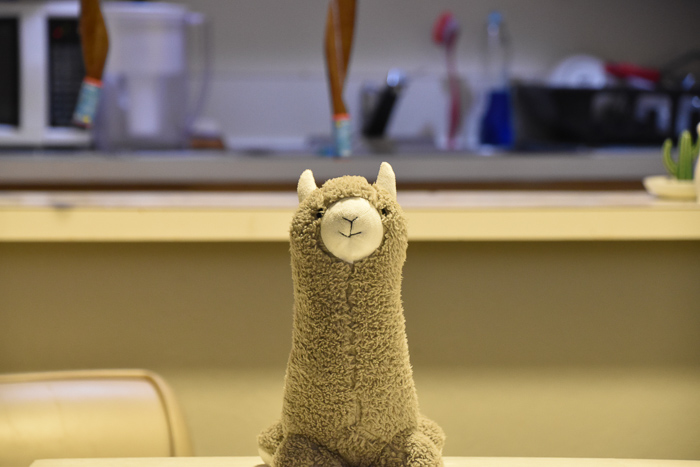
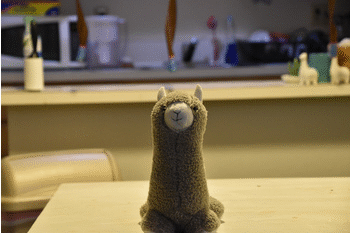
Murderous Llama (read left to right, up to down to see the dollyout zoom-in)
I picked this because it resembles the horror movie shot of seeing the subject. Here the subject is the cute llama but he his armed with a kitchen knife.
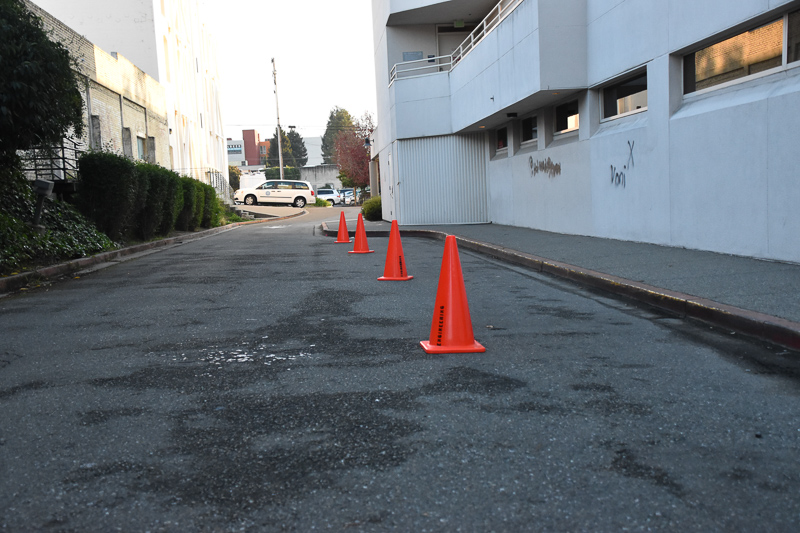
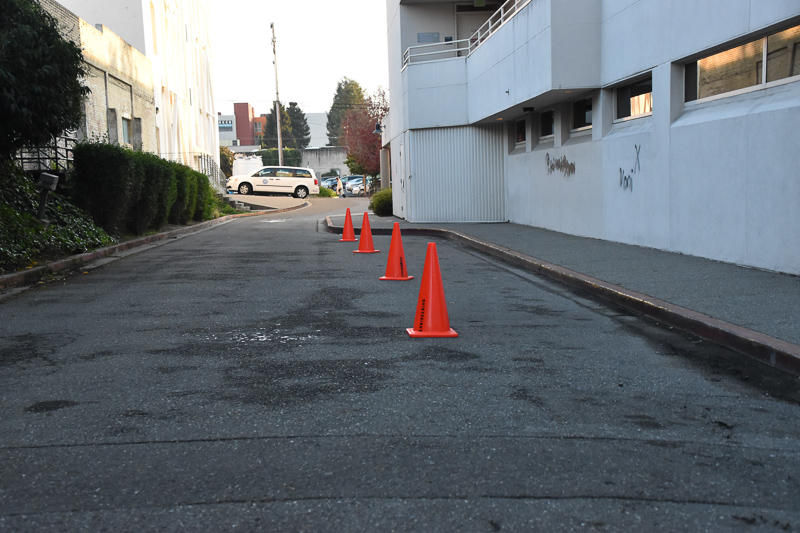
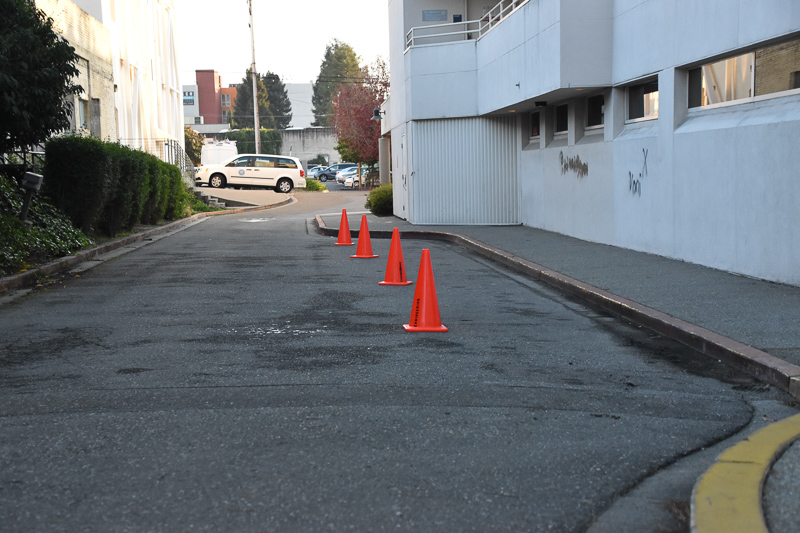
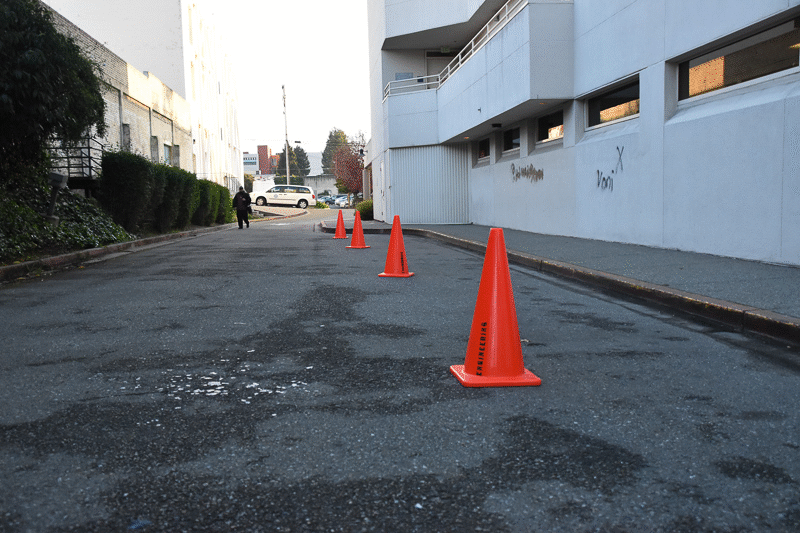
Traffic Cones, note the second one is the subject (read left to right, up to down to see the dollyout zoom-in)
I picked this because the different traffic cones provide an excellent reference to see how this dollyzoom affects the foreground and the background. I focused on the second cone closest to the viewer so that you can get a perspective to how the foreground and the background shift.
Bells and Whistles
Animated Gif
I stiched together all my images to make a GIF. There are about 15 images for each. Please note for the cones, the second cone is the subject.
Different combinations of moving the subject and camera
I also moved the Llama instead of moving me. I did the same zooming method to ensure that the size of the llama remains the same. Now the llama is no longer murderous. Moving the llama instead of moving me makes the background look like a similar effect but the foreground has a different effect and you can tell that the llama changes in proportion to the table.
Project 3: Seam Carving
Overview
In this project we implemented image resizing via seam carving.
Details
To implement this, for each seam to remove I first calculated a table of the energies of each pixel of the image. The energy of a given pixel was the squared error of the two pixels to the right and left of it summed with the squared error of the two pixels below and above it. If it was an edge pixel, the next one would wrap around. Then I used the DP algorithm to find the seam with the lowest energy. Afterwards I copy over the image that's not part of the seam and repeat this process until the desired amount of seams are removed. I tried removing different amounts of seams to see what they look like the comparisons are below (all pictures taken by me, Jack):
One Pics with a few seams removed (~50) Original Above for comparison
Five Pics with a lot of seams removed (~200) Original Above for comparison
Here is one pic with horizontal seams removed (~200)
Here are two pictures where this fails
These fail because the subjects are regular and predictable so eventually when seams are taken too much from the subject, we immediately realize something went wrong.
Takeaways
This project was very interesting because of how well it works on nature shots. I genuinely cannot tell which one was the original and which one was seam-resized. This method while seemingly easy and deterministic, works so well you would assume it was data driven and far more complex. It is cool how simply removing low energy seams can lead to nice-looking resizing.