CS194-26 Final
Project
Hersh Sanghvi | cs194-26-add
Fake Miniatures
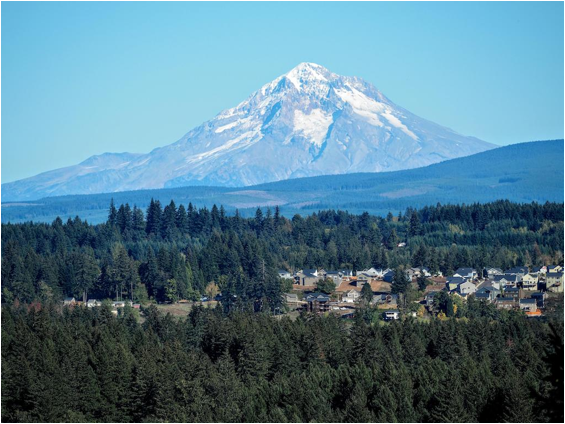
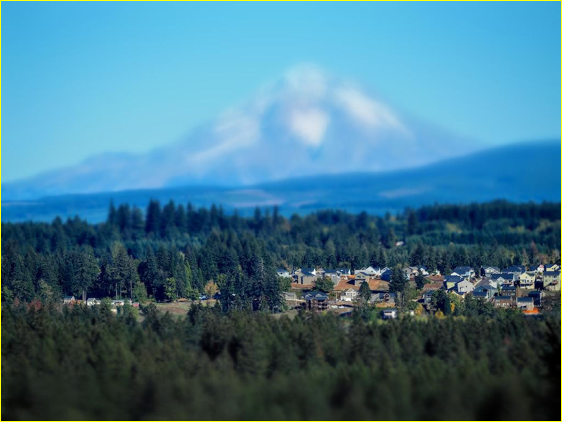
In this project, we aim to create a
fake tilt-shift effect by blurring areas of the image that are far away from a plane
of focus specified by the user. This plane of focus is defined by two user
defined points which are then converted into a rectangle that spans either the
entire width or height of the image, depending on the orientation of the
points.
I achieved this by dividing the
image into patches, and applying a blur to each patch based on its distance to
a polygon that is supposed to be in focus. This has the potential to create a
very patchy effect in the image, so I fixed this by setting a step size for iterating
through the image to be half the patch size. This creates an averaging effect
and eliminates the patchy look. In addition, I added saturation by converting
to the HSV colorspace and multiplying the saturation
by 1.3.
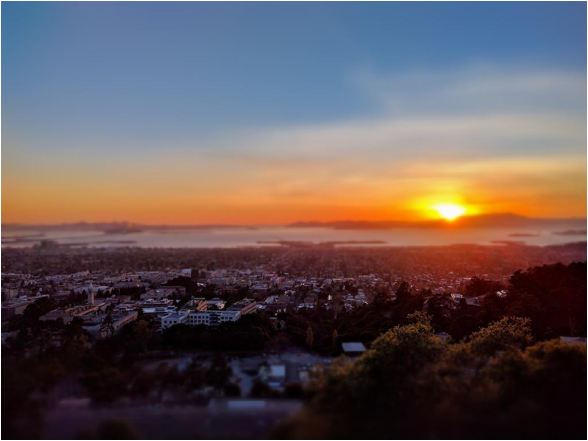
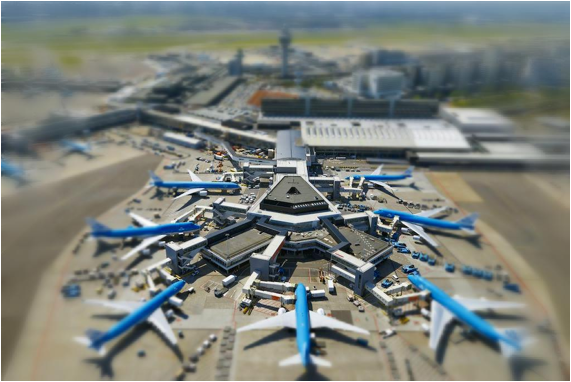
Take a look at the results:
(source: u/indieaz on reddit)


(source: Alamy)

(source:
myself)
(source:
myself)
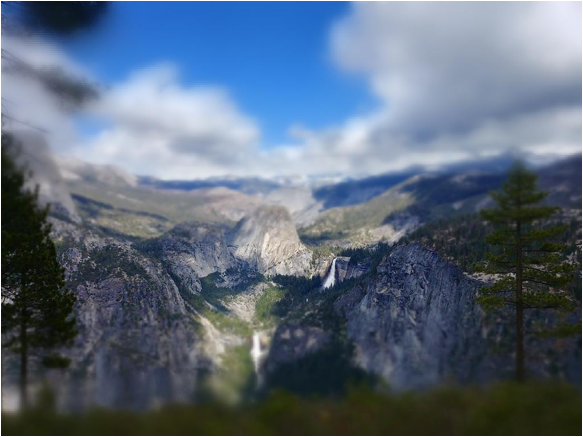
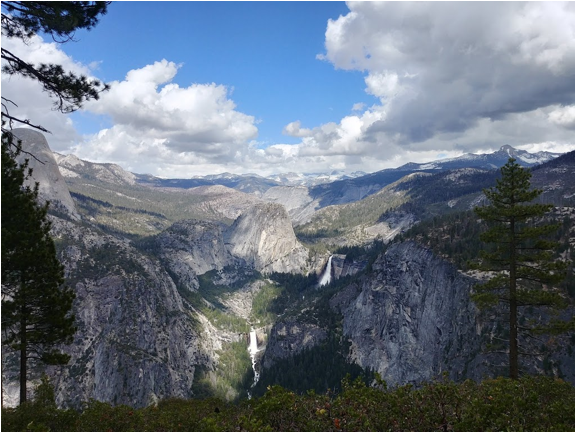
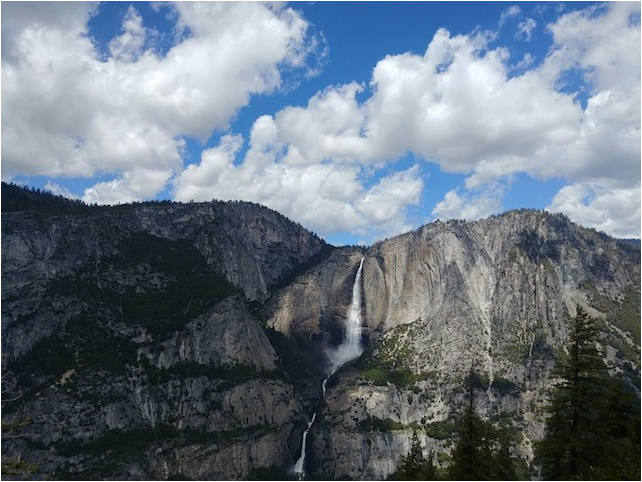
Defining more complex DOF regions
Sometimes it is not sufficient to
simply define a rectangular region. This is seen particularly poignantly in the Yosemite image above,
where the trees in the foreground are considered in focus, but they really
shouldn’t be because they are vastly closer than the actual object of focus.
Therefore, I allow users to specify a polygon of focus instead of simply a
rectangle.
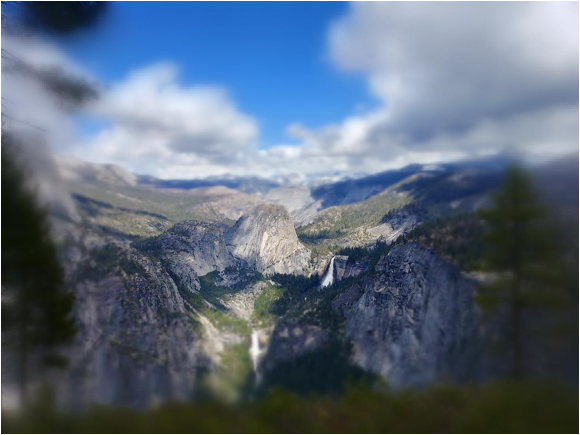
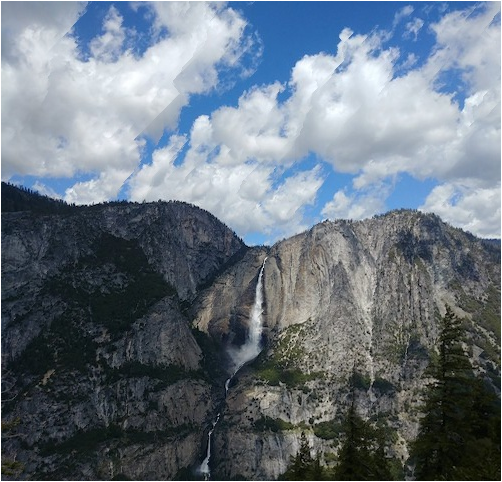
Notice how the trees are now out of
focus, providing a much better effect!
In addition, these complex regions
can be used to create a cool “vignette” type effect:
This project was super cool, since I
had seen tilt shift effects before made by using a very narrow depth of field
lens and thought this effect was very cool. It was interesting to see how this
effect could be achieved by very simple comp photo code.
Seam Carving
In this project, we aim to resize
images in a content-aware manner, to make them smaller while preserving the
salient features of the image. This is done by specifying an
energy function over the image, and then removing continuous seams that
minimize the total energy used over the seam. To do this, we use the pretty
straightforward Bellman-Ford algorithm, which is a dynamic programming
technique. Normally, the gradient function is used for the energy. However,
this can be susceptible to noise, so I decided to use the Sobel
derivative function, which can also smooth out the image a little to eliminate
noise. Here are the results of where this worked:
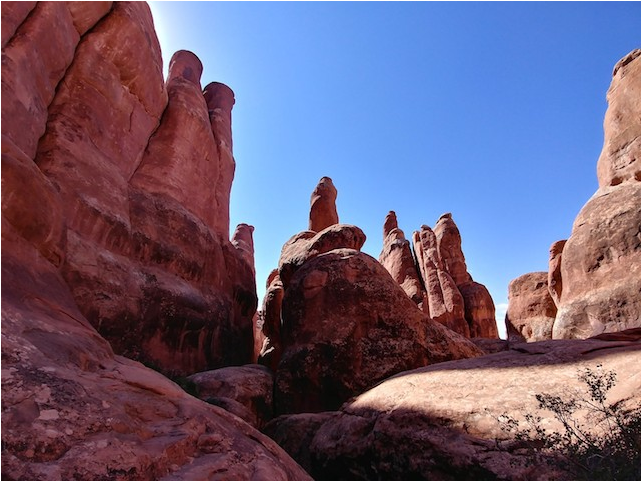

The Fiery Furnace @ Arches National
Park
Upper and Lower Yosemite Falls
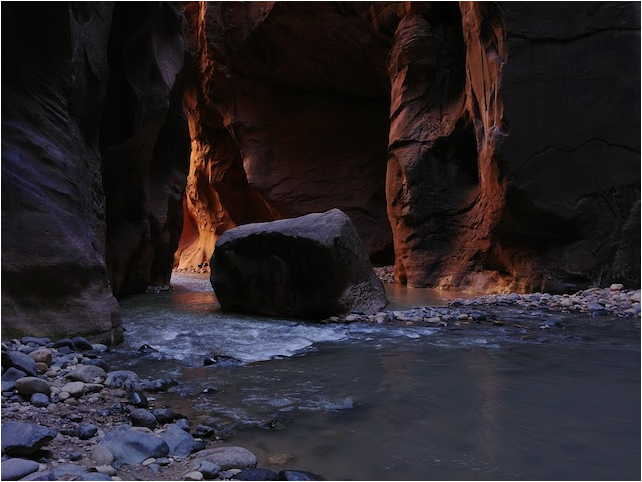
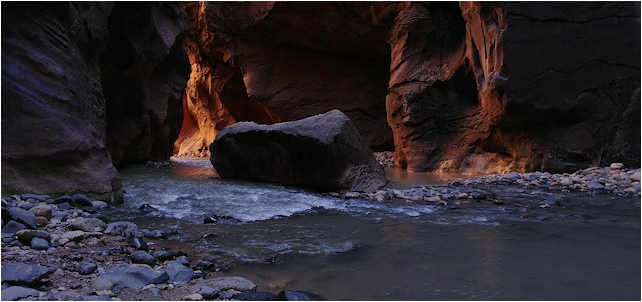
The Narrows at Zion National Park
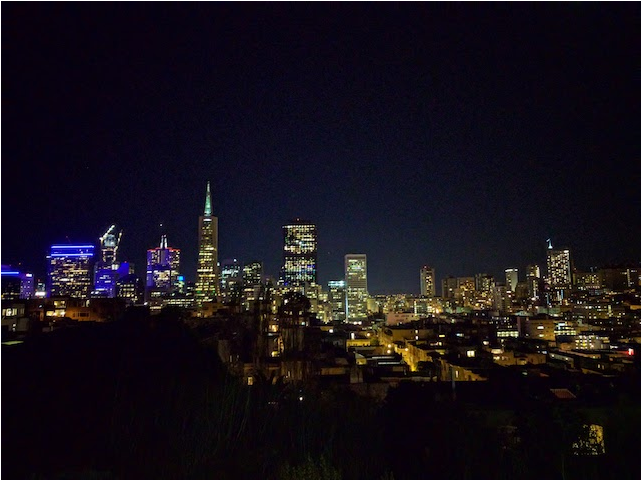
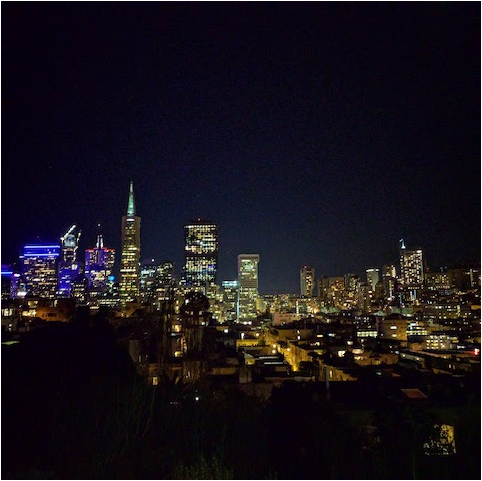
San Francisco skyline
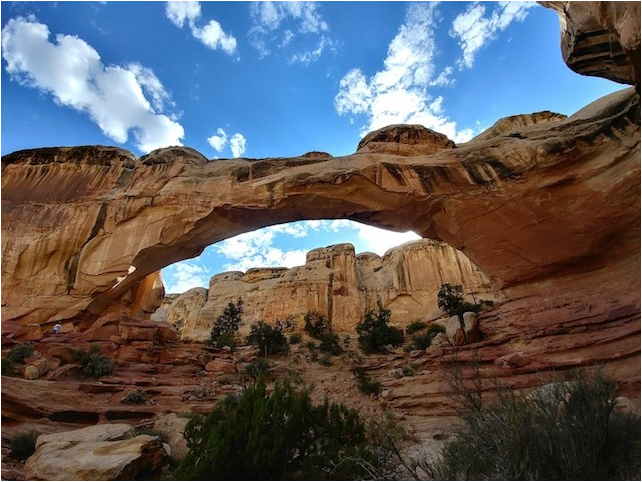
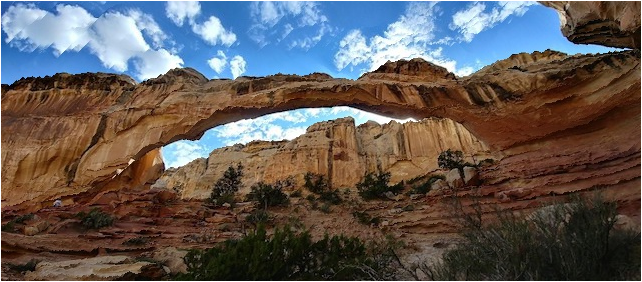
Landscape Arch @ Arches National
Park
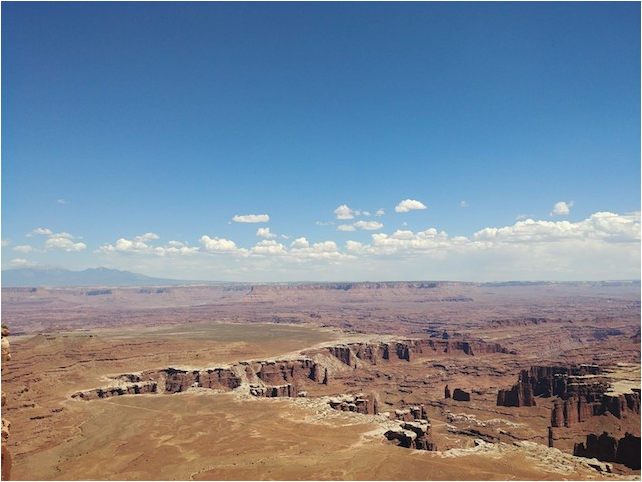
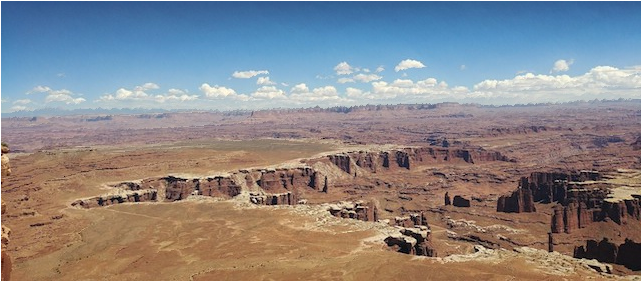
Canyonlands National Park
Failure Cases
Sometimes, the energy function
doesn’t work very well. This is often the case for pictures that have a large
amount of semantic information, such as faces, or rigid structures, such as
diagonal pathways that are not x or y aligned (the San Francisco one above
worked fine since the buildings were vertically aligned).
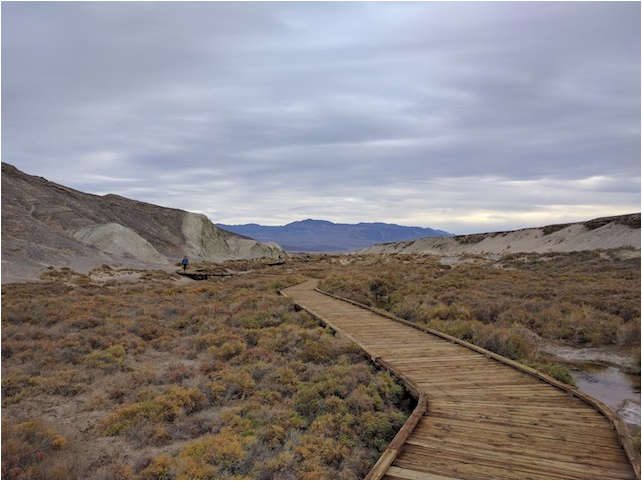
Since the pathway is not aligned to
the x or y axes, we get jagged artifacts due to the compression. We also get
similar artifacts in the sky. This could be solved by somehow modifying the
energy function to preserve semantic object information.
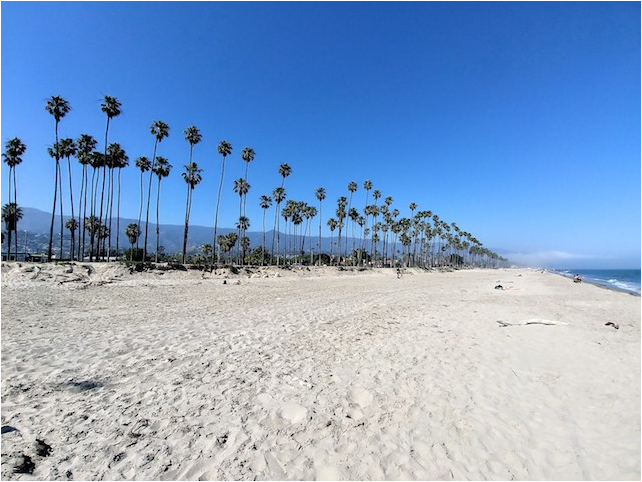
This is also a failure case,
although a more subtle one at that. Ideally, it would have
cropped equal parts of the sky and beach, but the sky contains much less
information than the sand, which also does not contain a lot of information.
Thus, the beach is mostly kept intact while the trees are sliced in a somewhat
jagged matter and completely getting rid of the sky.

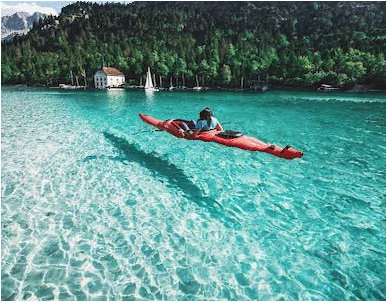
As we can see, because the water
contains a lot of information, the seam carving instead goes through the rigid
structure of the kayak, creating a wavy, water-like effect, which of course
ruins the image of the kayak.
I learned a lot doing these
projects! It was cool to think about how the various energy functions would
affect the seam carving, and how the dynamic programming approach selected the “optimal”
seam.