Facial Keypoint Detection with Neural Networks
By Jay Shenoy
Part 1: Nose Tip Detection
The first part of this project was to implement a convolutional neural network to detect a single facial keypoint, that corresponding to the tip of the nose. To do this, I first loaded images from the IMM Face Database in grayscale, normalized the pixel intensities to lie in the range [-0.5, 0.5], and resized the images to be of resolution 80x60. A few images from the dataset along with their ground-truth nose tip keypoints are shown below.
|
|
|
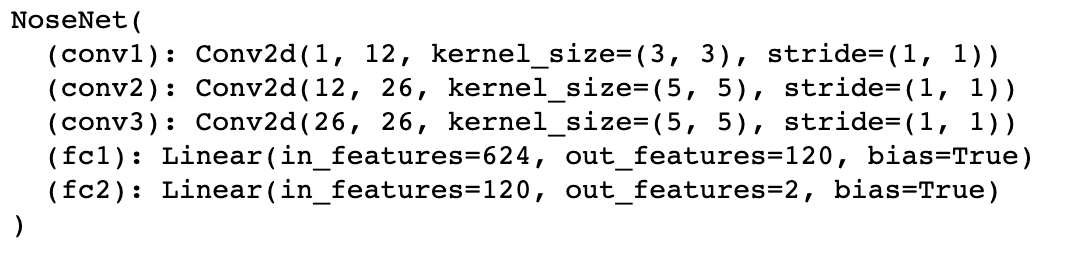
The neural network I used had the following architecture:
|
There were 3 convolutional layers, containing twelve 3x3 filters, twenty-six 5x5 filters, and twenty-six 5x5 filters respectively. These were followed by two fully-connected layers.
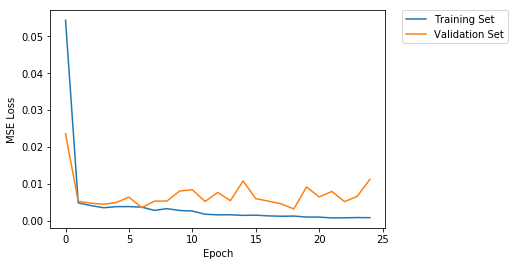
The network was trained with a learning rate of 1e-3 for 25 epochs, using the Adam algorithm. The batch size was set to 8. The training and validation losses are shown below.
|
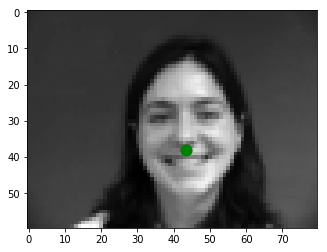
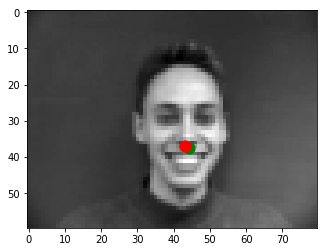
The detector works reasonably well. Below are two images where the network predicts fairly accurate nose tip keypoints. The green points are the ground-truth annotations, while the red points are the keypoints predicted by the model.
|
|
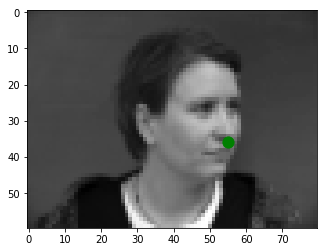
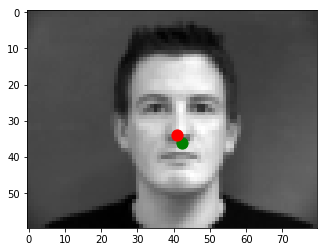
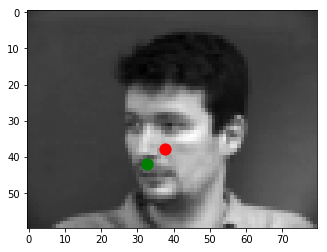
However, the model does not work well in all cases. Below, you can see two instances where the ground-truth (green) keypoints differ significantly from the predicted (red) keypoints. The reason that the network fails here is because there are very few images in the training set in which the subjects are looking off to the side - in most of the images, the subjects are looking at the camera straight-on. As such, the network is unable to properly learn how to detect the nose tip in these side-profile images.
|

|
Part 2: Full Facial Keypoints Detection
Next, I trained another neural network to detect all 58 facial keypoints present in the IMM Face Database. To prevent the model from overfitting, I performed data augmentation by applying a series of rotations (between -15 and 15 degrees) and translations (-10 to 10 pixels in both dimensions) on all the images to artificially increase the size of the dataset and help the network generalize to unseen examples. Some images from the augmented dataset, along with their ground-truth keypoint annotations, are shown below.
|
|
|
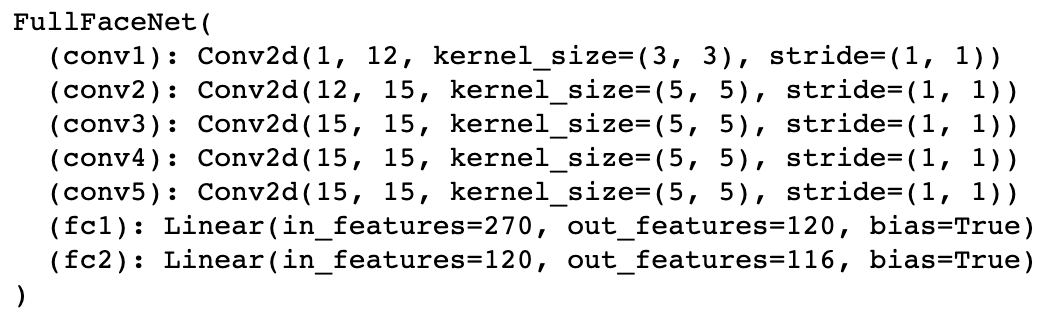
The architecture of this new network was slightly more complicated than that of part 1, containing 5 convolutional layers and 2 fully-connected layers. The specifics of the CNN architecture are shown below.
|
The output of this network was 116-dimensional, representing two coordinates for each of the 58 predicted keypoints. During training, the learning rate was set to 1e-3, and the model was trained for 10 epochs. The batch size was set to 8. The training and validation losses over time are plotted below.
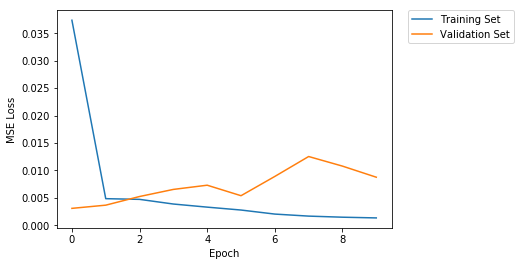
|
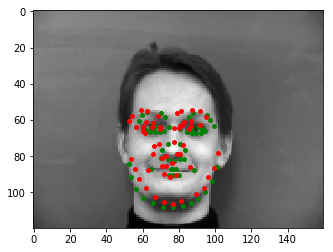
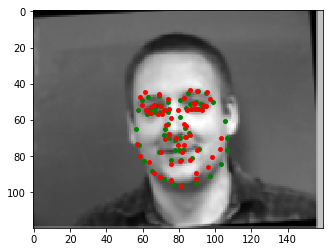
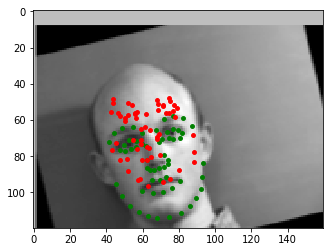
Due to the limited size of the dataset, the network is fairly mediocre at detecting all the keypoints. Below are 2 success and 2 failure cases.
|
|
|
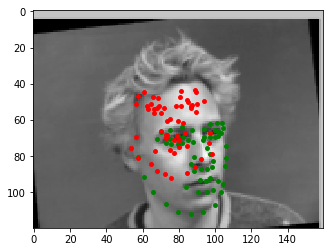
|
The network most likely fails for the last 2 images because they contain faces that have been shifted and translated far too much. In the second failure case, the subject is looking off to the side, which is a situation that isn't represented enough in the training set. For these reasons, the network predicts keypoints that are actually quite similar to one another, signalling that it's probably overfitting to the training data. A good fix would be to train with more data so that the model can generalize better.
The filters learned by the first and second convolutional layers are visualized below. As you can see, the first layer had 3x3 filters while the second had 5x5 filters.

|
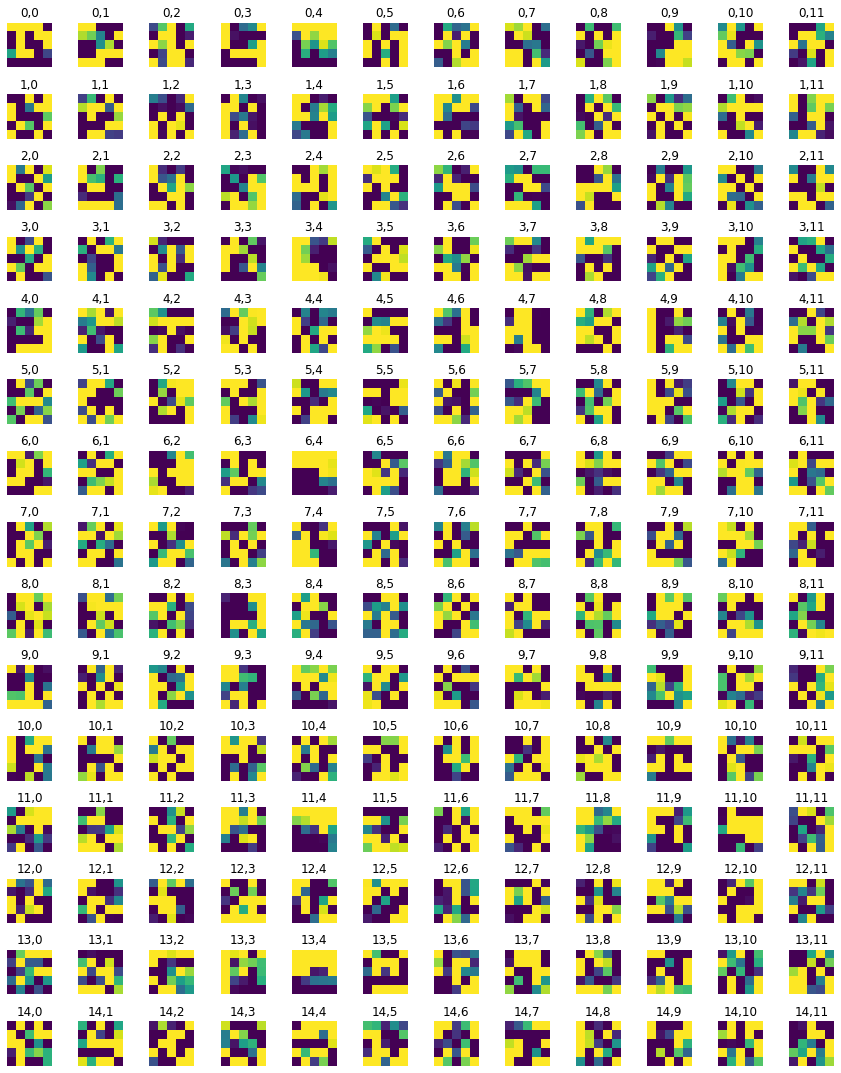
|
Part 3: Train with Larger Dataset
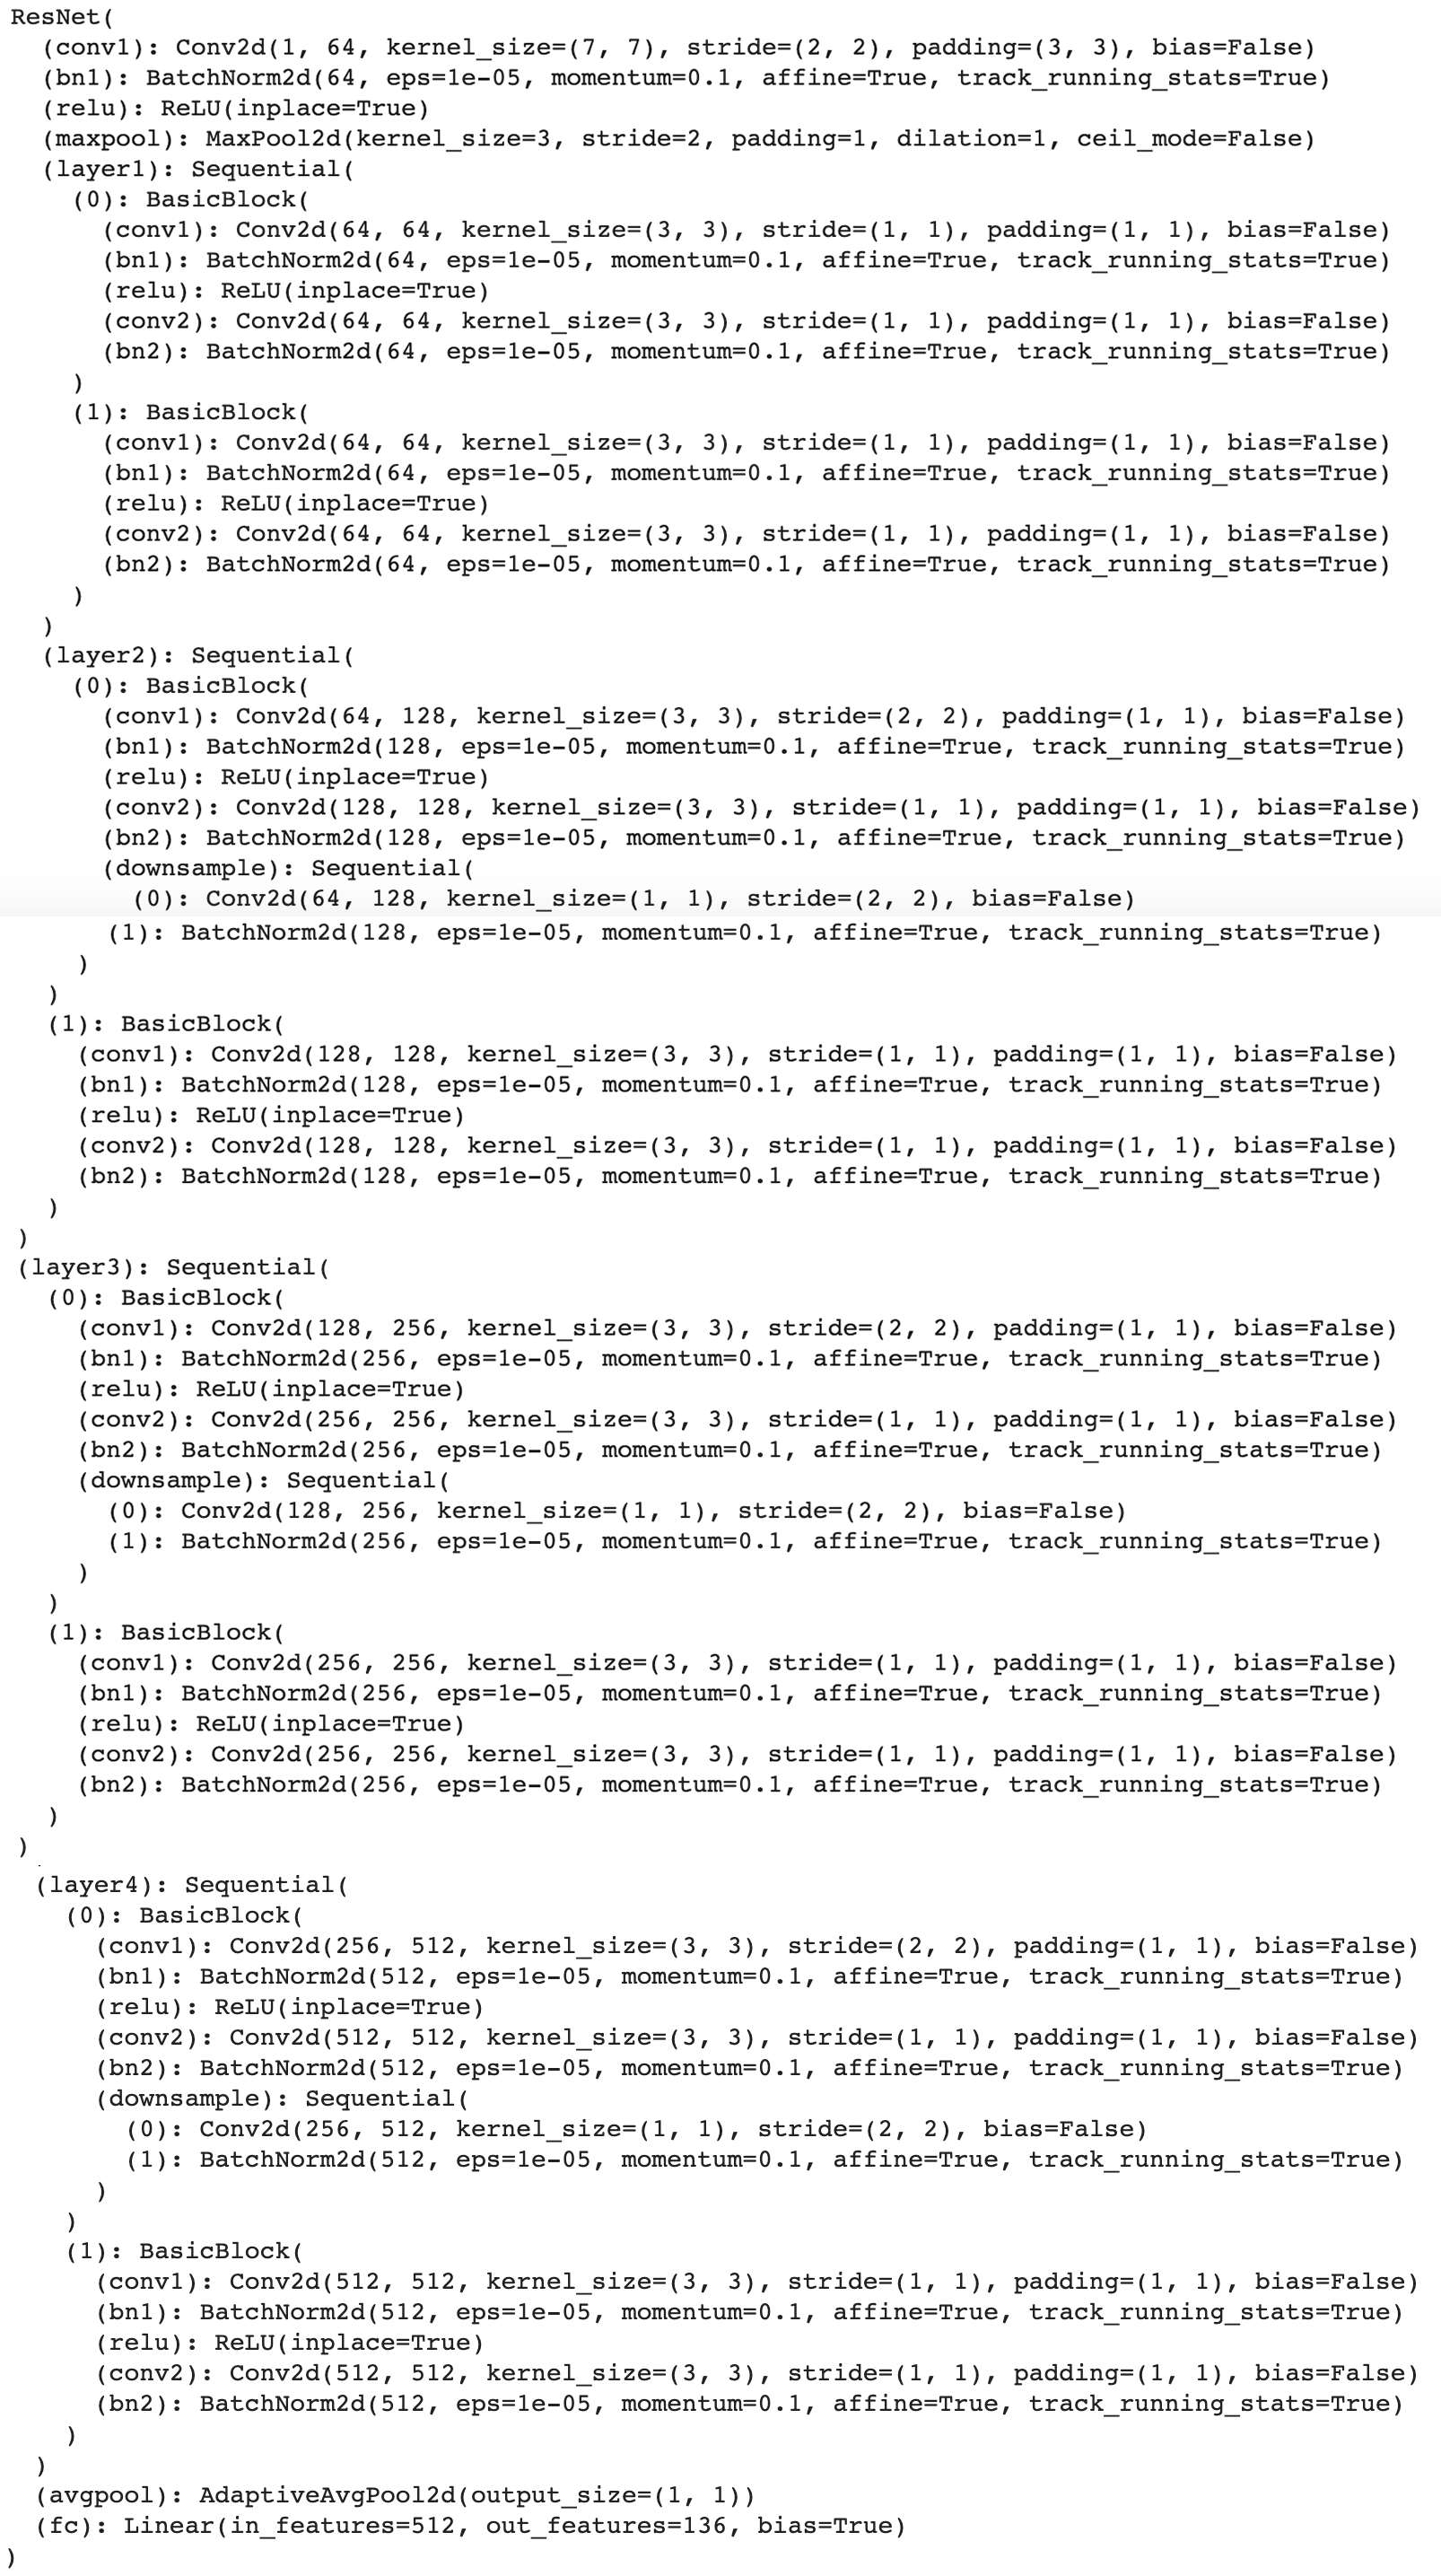
To alleviate some of the problems with the last part, I trained a third model with a much larger dataset consisting of 6666 images annotated with 68 facial keypoints. These images were cropped to just include a specific face within the image, converted to grayscale, and stretched out to resolution 224x224. Once again, I performed data augmentation to create random variants of the images with rotations (between -15 and 15 degrees) and translations (-10 to 10 pixels in both dimensions). This time, I used the standard ResNet18 model provided by PyTorch, initializing the weights to pretrained values. The first layer of the CNN was modified to accept only one channel (grayscale), and the output layer was changed to be 136-dimensional. The specifics of the CNN architecture are shown below.
|
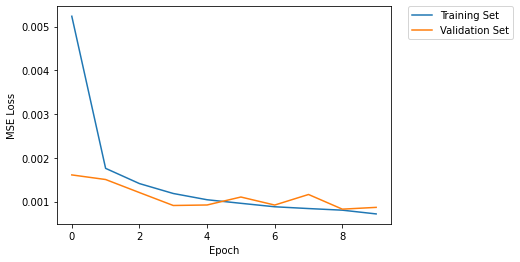
The CNN was trained for 10 epochs with a learning rate of 1e-3 using the Adam algorithm and a batch size of 8. The dataset was further split into a training set (90% of the data) and a validation set (10%) to track the loss over time. The training and validation losses are plotted below.
|
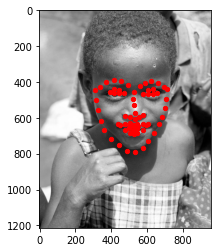
This network performed much better than the one in the previous part. Below are some visualizations of the network's predicted keypoints on test set data (which did not have ground-truth annotations).
|
|
|
|
|

|
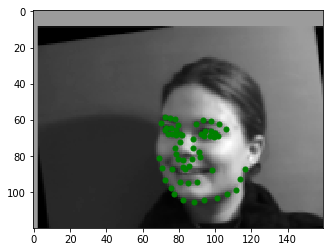
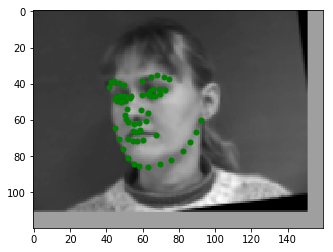
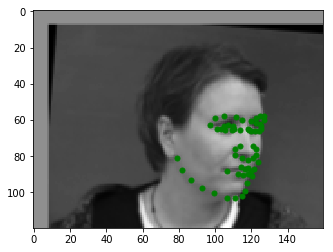
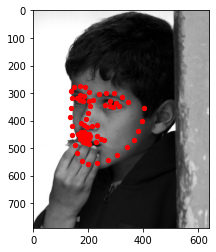
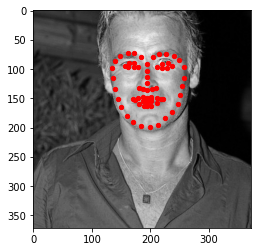
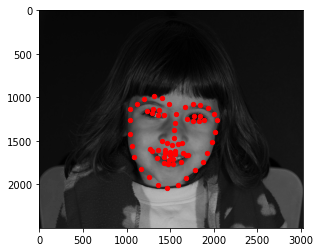
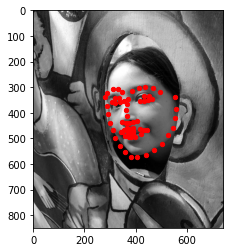
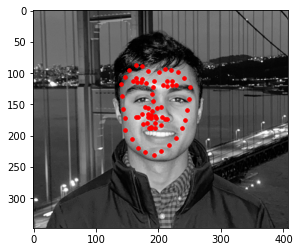
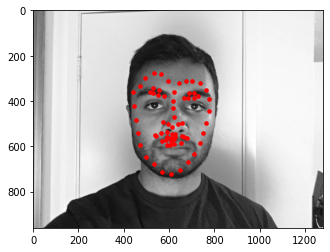
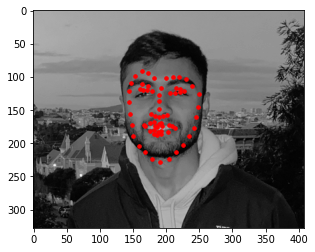
Finally, I tried running the model on 3 photos of myself, as shown below.

|
|

|
|

|
|
The model annotated image 3 quite well, annotated image 2 with some error for the mouth and eyebrow keypoints, and annotated image 1 poorly. The nose and mouth keypoints for image 3 were predicted quite well, but there was a little bit of error for the keypoints corresponding to my right eye and eyebrow. In image 2, the bottom contour of my face was annotated well, but there was more error in the annotations for my mouth, eyebrows, and eyes, which were shifted up. The predicted keypoints for image 1 were quite poor, as the outer contour looked shrunken-in, and most of the keypoints appearing translated up and to the left. The errors in these 3 images were probably due to a lack of training data coming from the same domain (environmental/sensor conditions) as my photographs. The keypoints for images 2 and 3 were still reasonable, but the ones for image 1 were significantly off.