Overview
Instead of manually selecting points, we can use a neural network to predict keypoints on a face, given a sufficient volume of accurate data, some time, and some clever architecture. The keypoints for parts 1 and 2 concern the Danes dataset and part 3 dives into a much larger set of faces found 'in the wild'.
Part 1: Nosenet
Dataloading
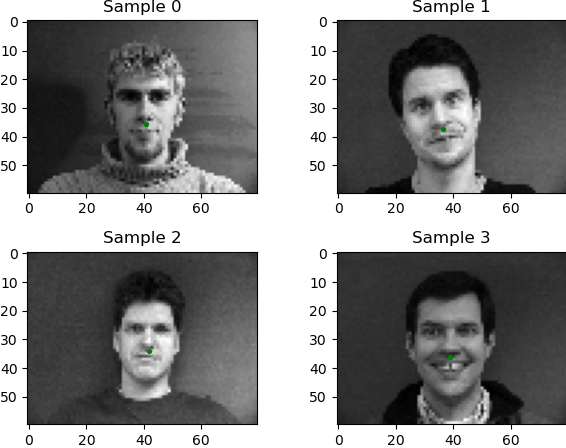
For the dataloader, I followed the pytorch tutorial and starter code closely. I wrote a regex pattern to only use person indices 1-32 as the training data and indices 33-40 as the test data. I applied transformations to resize, normalize, and convert the image/array of landmarks to PyTorch tensors. Here are some images with their nose landmark:
|
|
The CNN
For the CNN, I followed the tutorial and spec to make a neural net with 4 convolutional layers. I experimented with varying the layers and kernel sizes, strides, and padding but eventually found that 1->24 channels until the end with a kernel size of 3 and padding = stide = dilation = 1 was the best model. I used a helper function to determine the final size of the convolutional->relu->maxpool layers to get the number of in_features for my first fully connected layer, then eventually output two features (the nose x,y landmark).
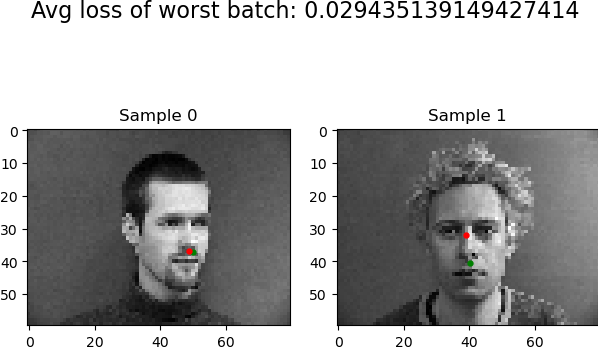
The loss function and optimizer were just MSELoss and Adam. I used a learning rate of .001 as in the spec and trained the net for 25 epochs. I experimented with several different mini batch sizes (64, 32, 16) but the best were 8 for the training set and 4 for the validation set. Here are the best and the worst validation samples:

|
|
|
The success cases seem to be front facing images and the failure cases are both looking away. I checked the other batches to see if this was a pattern, and it turns out it was! Testing images that are turning away tend to have the worst results, which makes sense since there's fewer turned away nosepoints to learn in the training set. One way to improve this could be data augmentation to increase the variety of training images, which is used in the next part (or more data, as in part 3!)
Part 2: Facenet
Dataloading
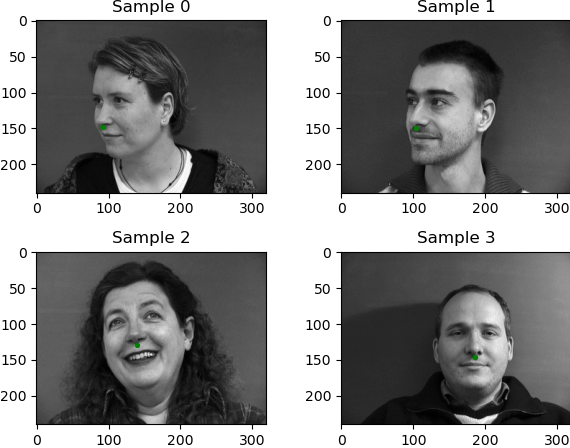
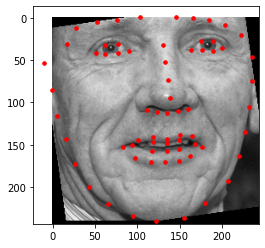
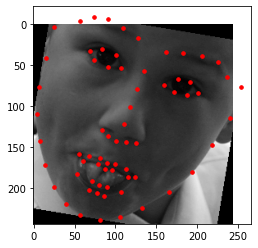
For the dataloader, I used the exact same custom dataset class as part 1. I also added more transforms to the training set for data augmentation. The order was: resize to 180 rows x 240 cols, grayscale (normalize) the image, randomly rotate -10 to 10 degrees, randomly shift rows/columns -10 to 10 (all of these transformations have a p = .3), and then finally change the data to tensors.
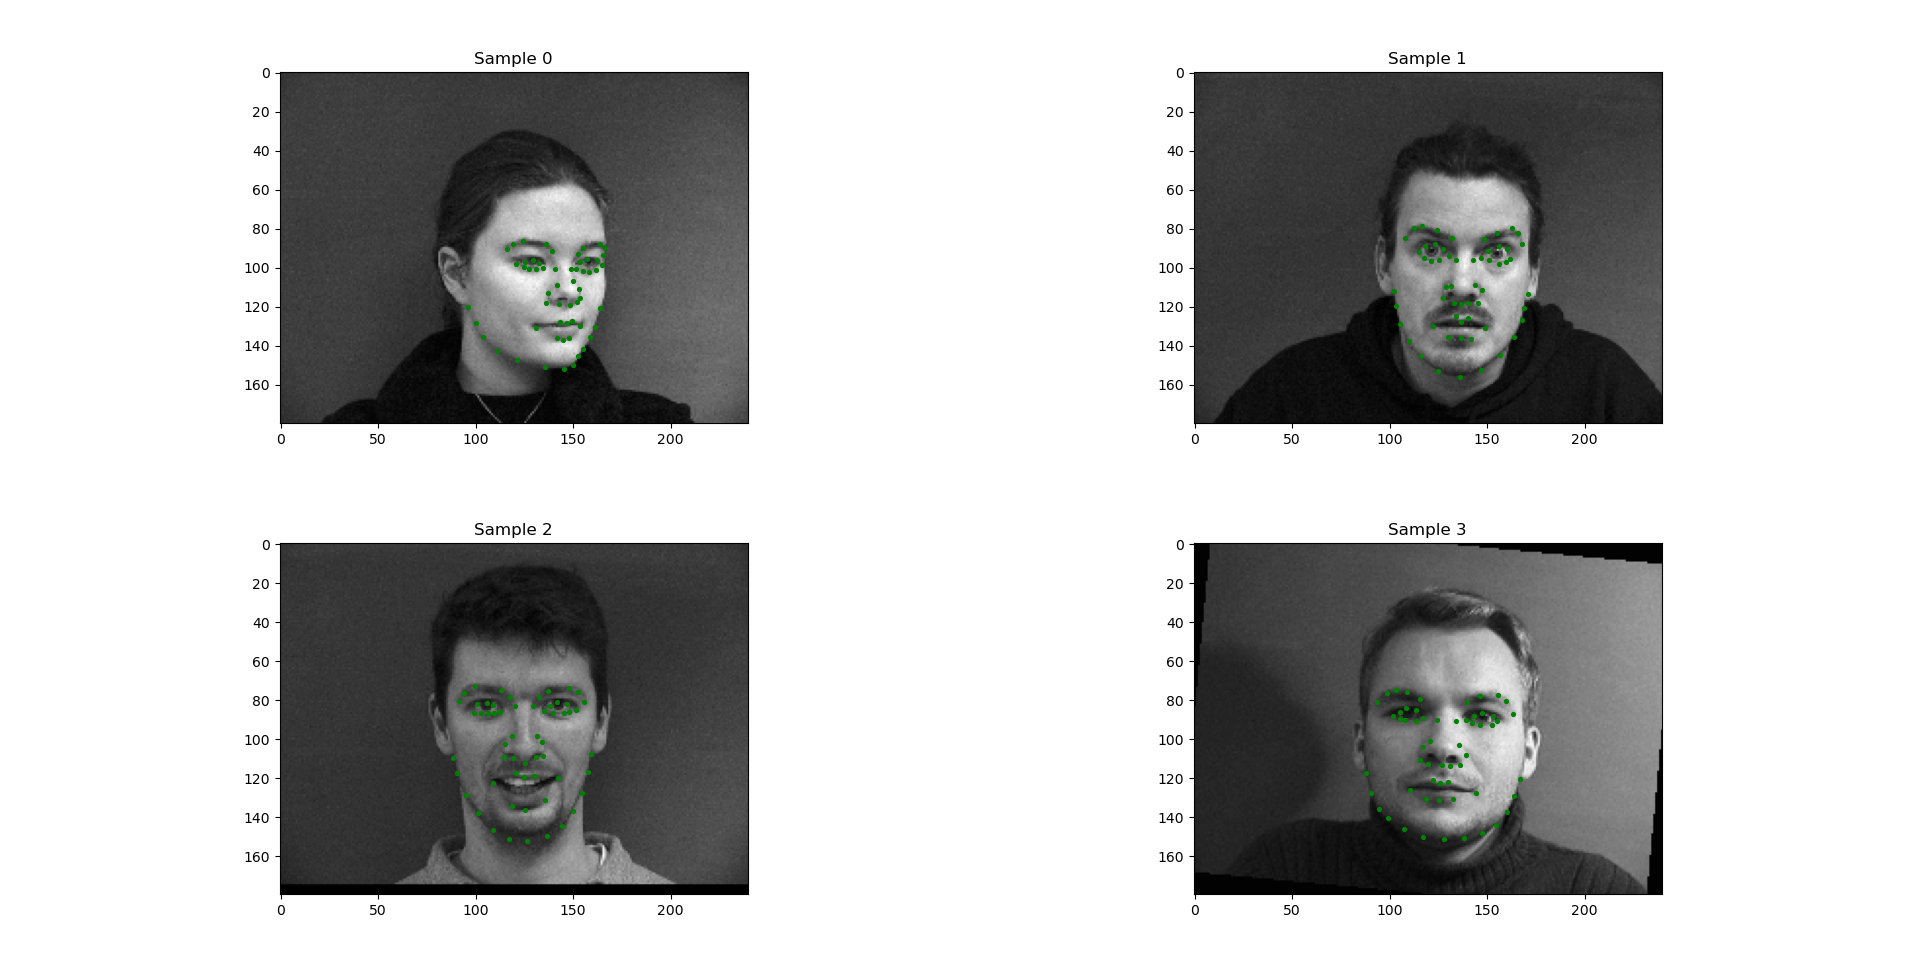
|
The CNN
For the CNN, I followed the tutorial and spec to make a neural net with 5 convolutional layers. I tried 6 at first, but this reduced the size of the image to almost nothing. I kept the same conv2d->relu->maxpool setup as before, just with more layers. I changed the batch size to 8 for the training set, kept validation batch size 4, and kept the learning rate. I experimented with varying the layers and kernel sizes, strides, and padding but eventually found that 1->12 channels until the end with a kernel size of 3 and padding = stide = dilation = 1 was the best model. I had more channels to start with, but visualizing 32 ins/outs got to be impossible, so I scaled them down for the sake of being able to visualize the filters. This time, the final fully connected layer outputs 116 points to account for all facial landmarks.
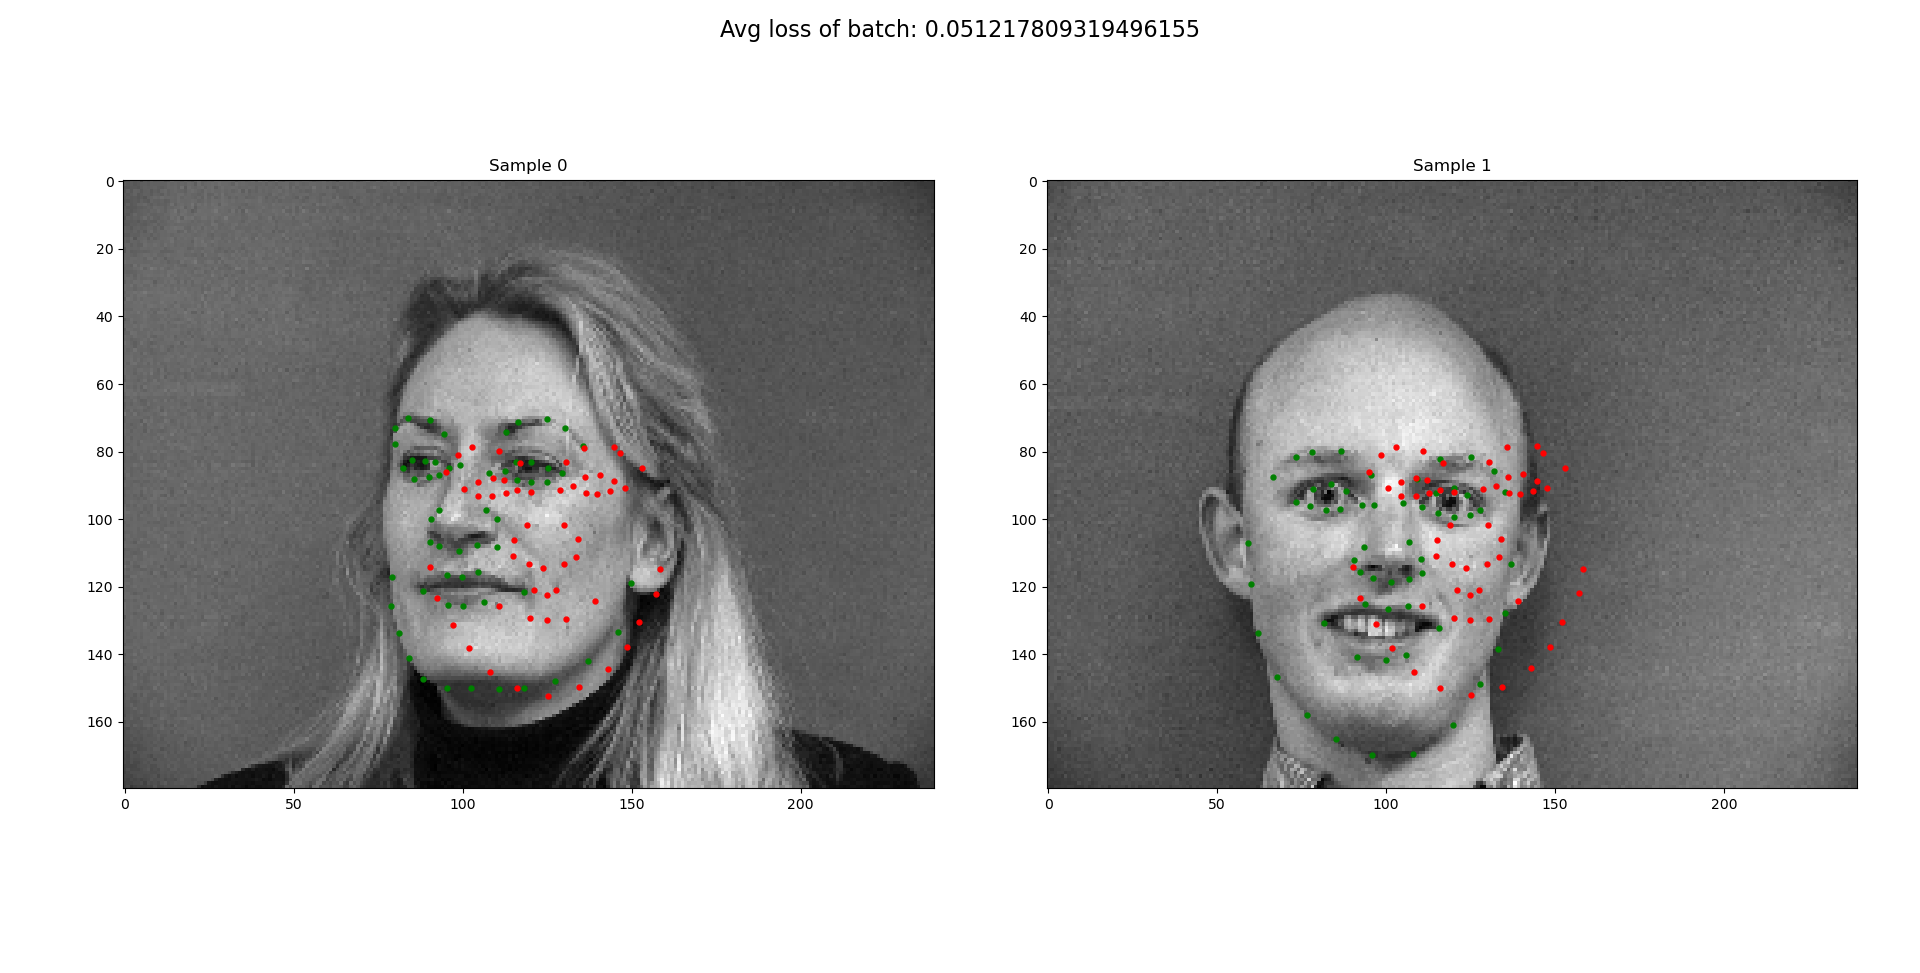
The loss function and optimizer were just MSELoss and Adam. I used a learning rate of .001 as in the spec and trained the net for 25 epochs. Here are the best and the worst results:
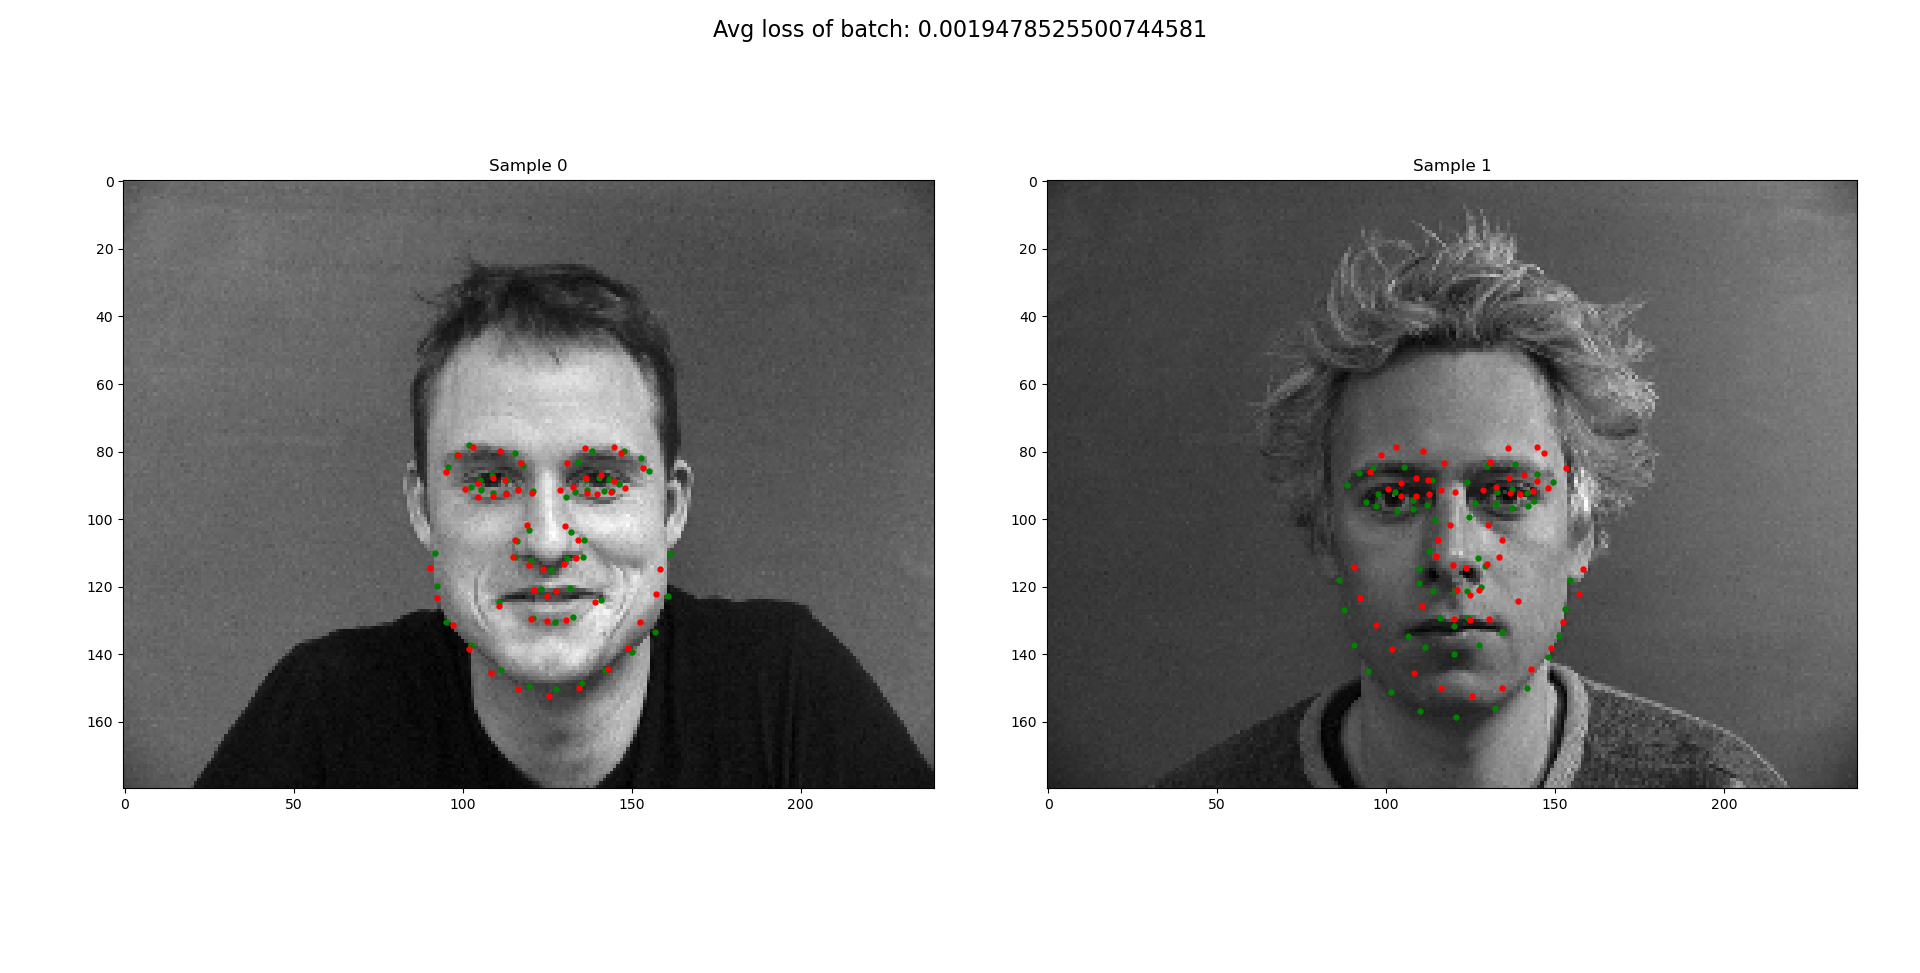
|
|
|
It seems like data augmentation was not quite enough to get the net to correctly detect faces looking away or shifted to the side. The faces looking away from the camera were 1/6 of the images per subject, so I had hoped if I made the probability of rotation or shifting to be a little more than 1/6th, then I might be able to catch those faces.
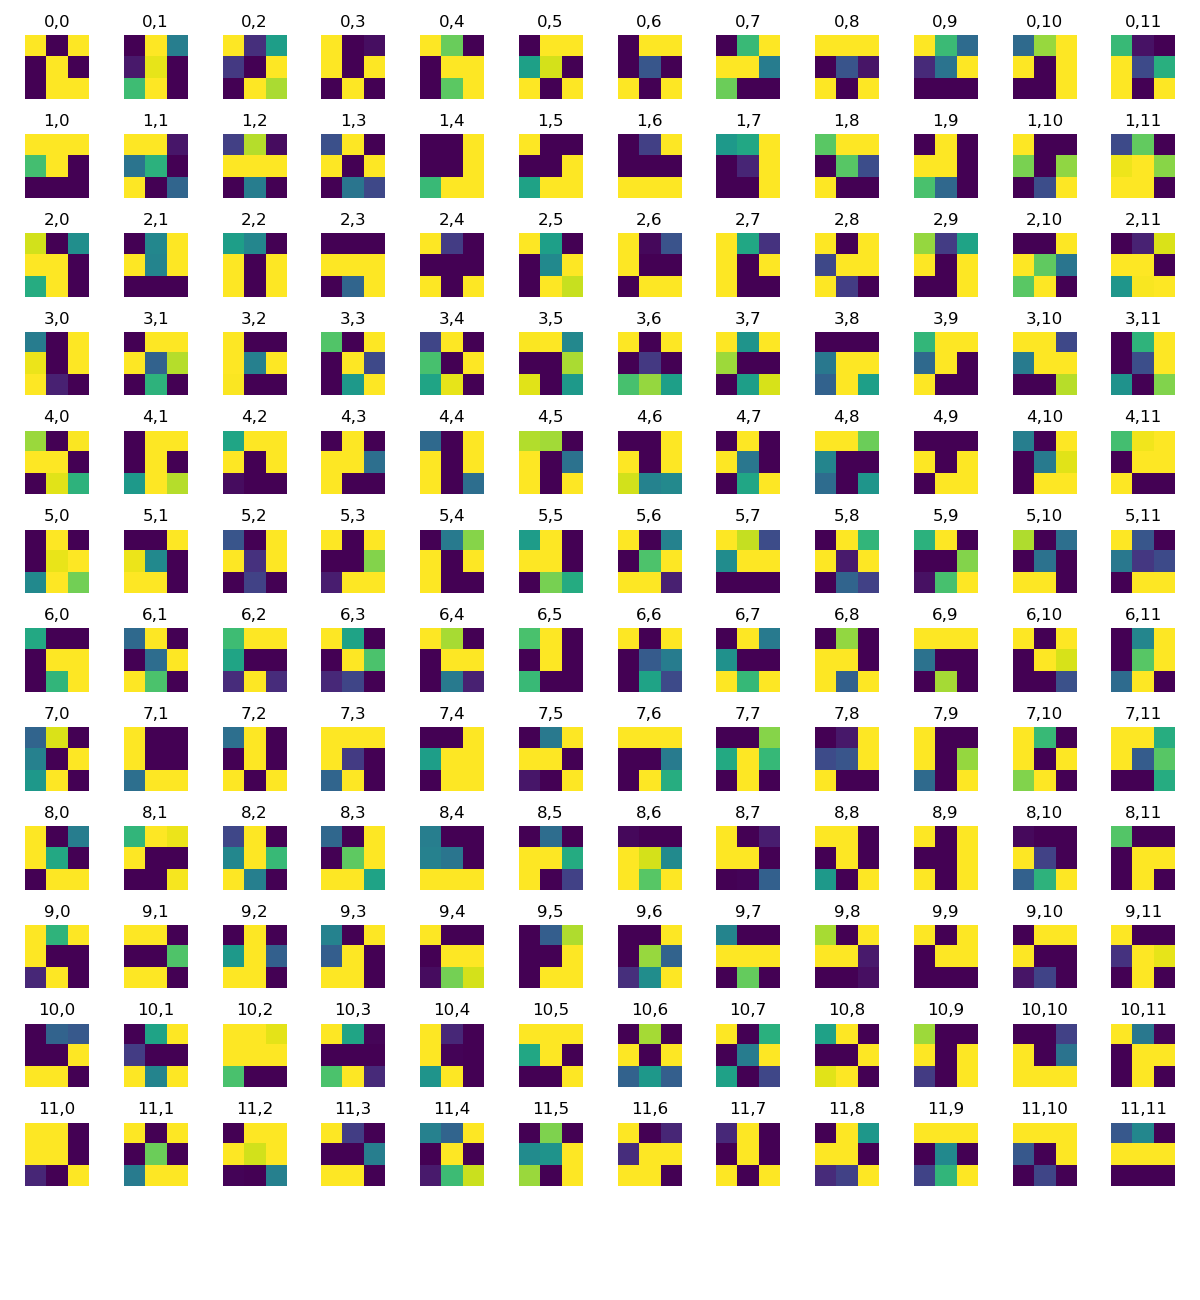
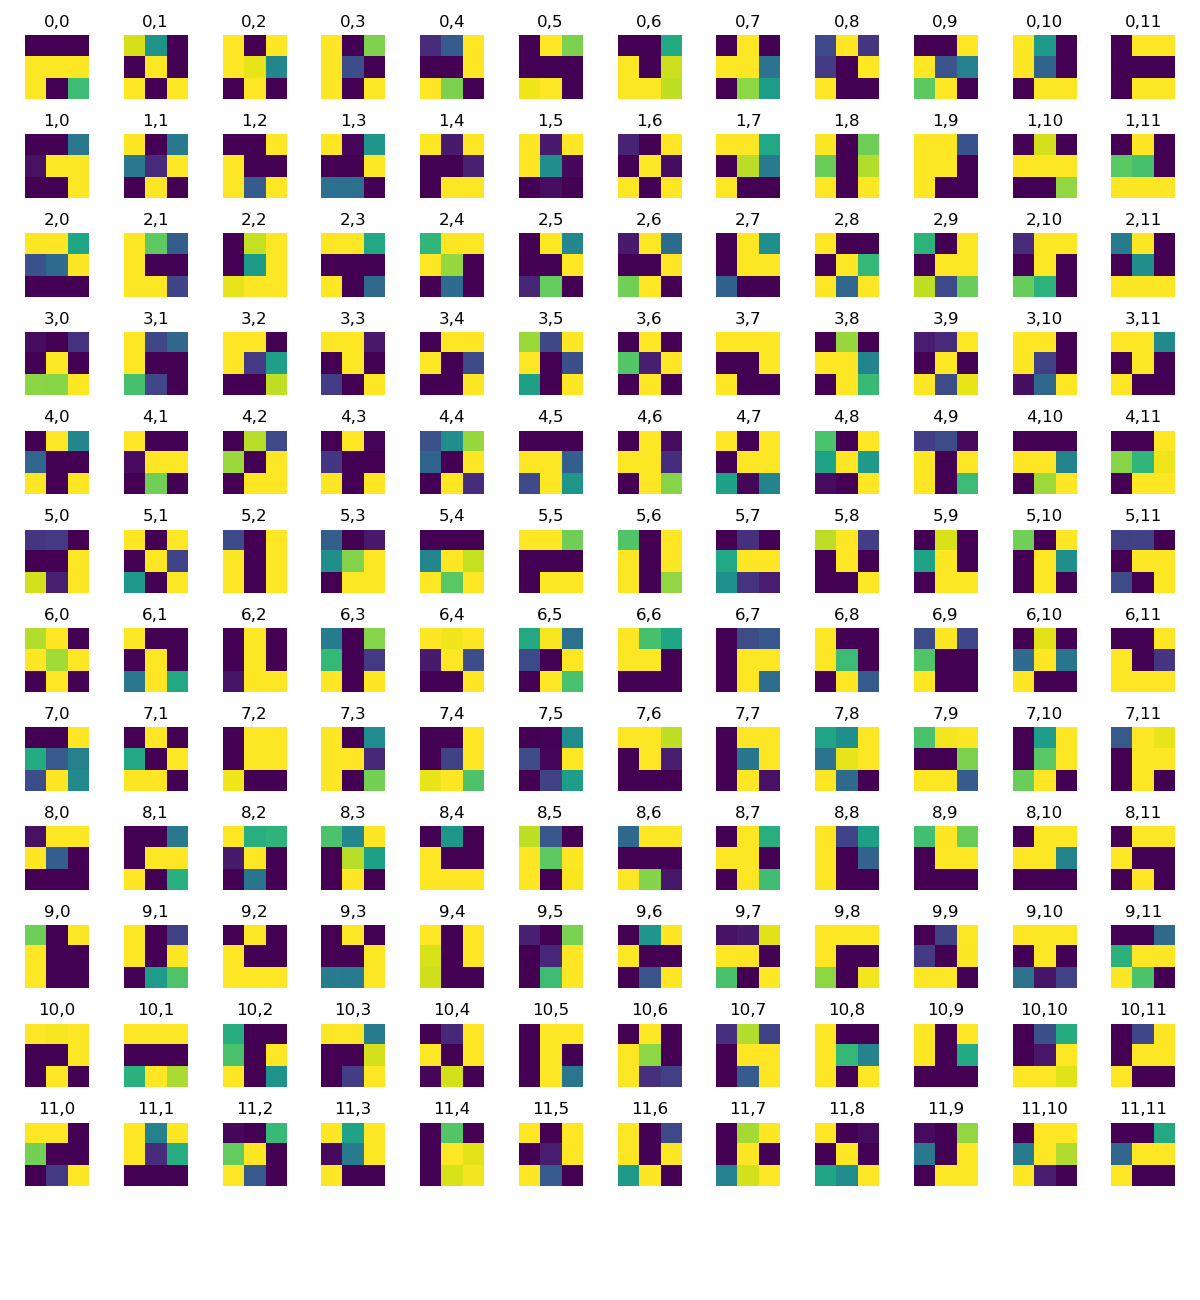
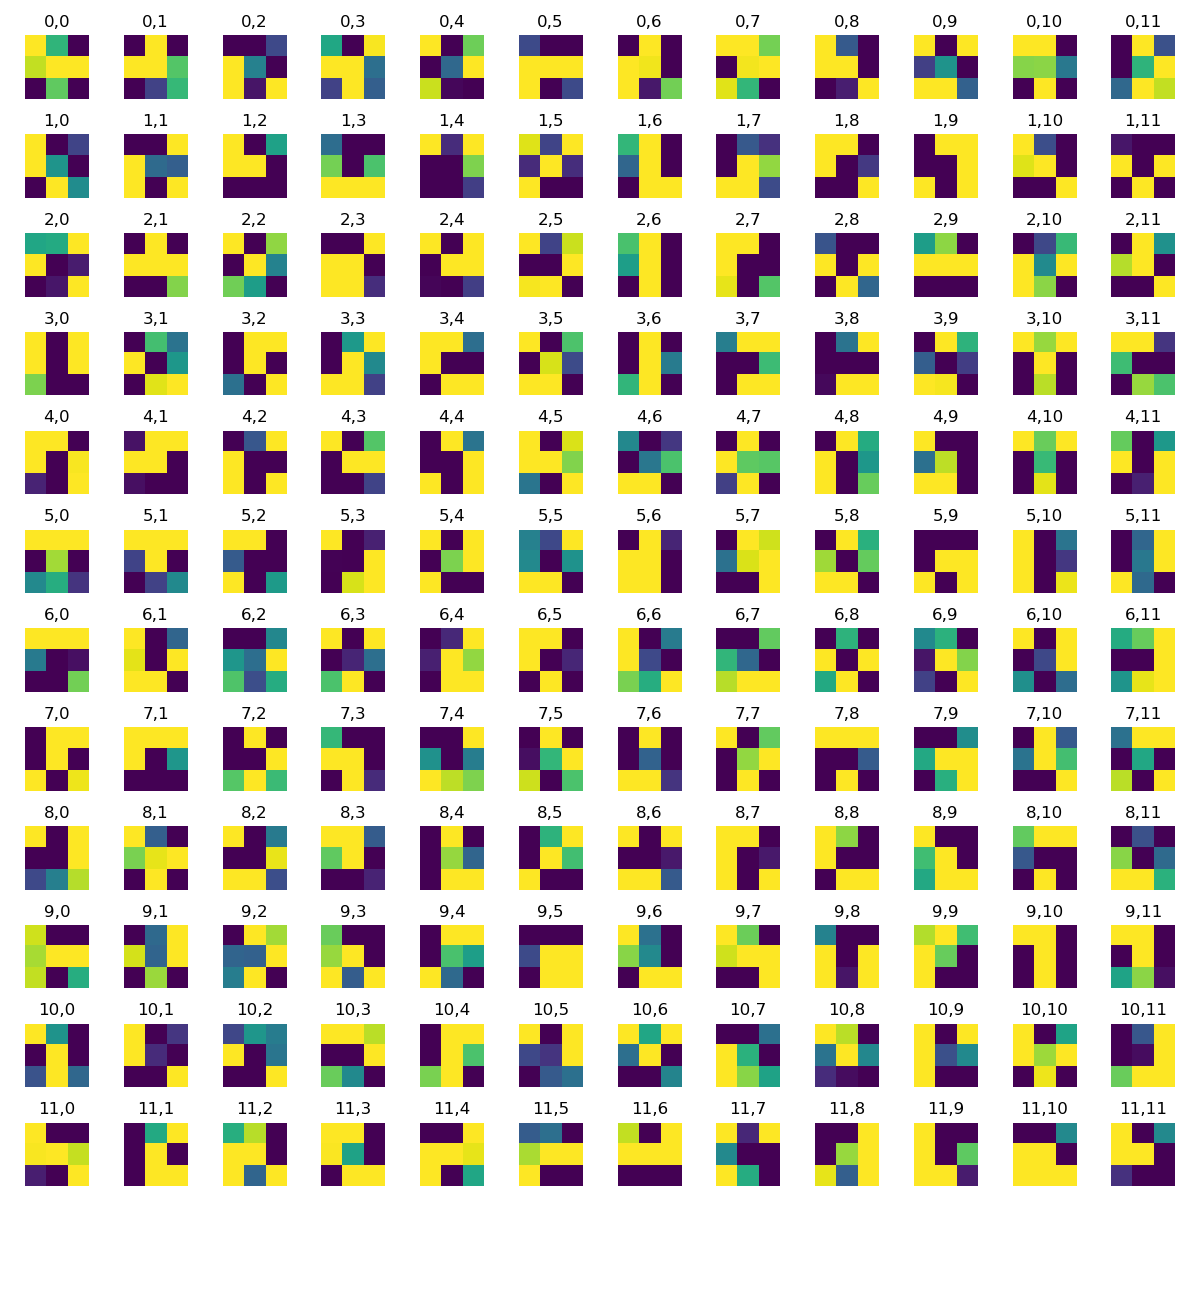
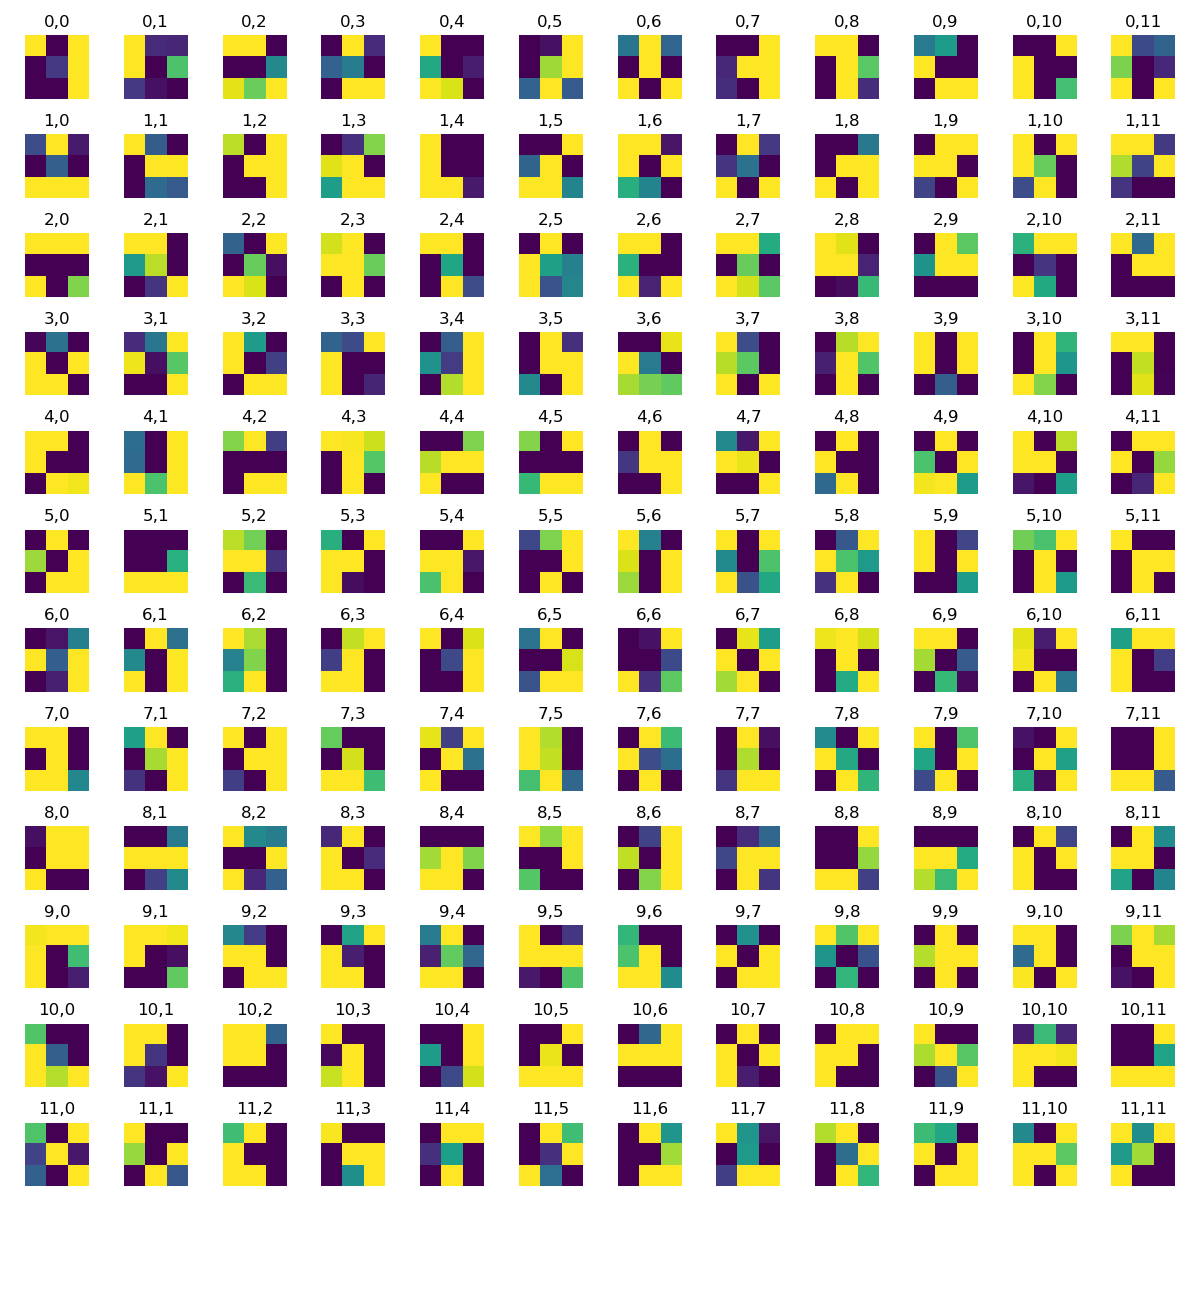
The filters (reduced from 32/32 to 12/12 channels). They are all 3x3 and represent some feature in the image to detect and give weights to. This is how the net is eventually able to whittle down an image to positions that best correspond to eyes, ears, noses, etc. Although, with the kernels so small, I'm not sure what they're supposed to be detecting.

|
|
|
|
|
Part 3: The Final Test
Dataloading
For the dataloader, I used a modified dataset from part 1 and 2. I used the same transforms, with the exception of resizing to 244x244 and adding a bbox crop transformation. The way that made the most sense was to crop to the bbox first, resize the image and do all of the other transformations. I first trained the net using a 60/40 split with the validation set. My results as seen in the Kaggle competition didn't do so well with this model (~300!), so I decided to give everything to the training set, but use more data augmentation to make sure the faces were shifted/rotated just slightly to get as many different positions/angles that I could.
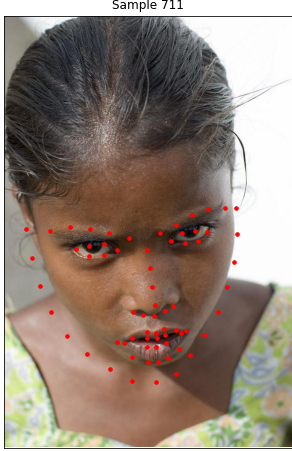
Here are some initial samples:
|
|

|
You can see that for some of these, the bounding box was lost to some of the points. I tried to rectify this by using the top/left corner of the bounding box as being the greater of 0 and the given value and the bottom right corner of the box as being the x max and y max of the keypoints, but this again, did not have the best results and it also made recreating the original height and width of a bounding box somewhat difficult during the prediction step. So, I ended up not making any changes to the bottom right corner but did snap to (0,0) if a given top/left was negative.
The CNN
For the CNN, I used resnet18 from the pytorch models package. I modified the first layer to have an in channel of 1, kernel size 7, stride 2, and padding 3. The final fully connected layer was also modified to output 136 features for the landmarks. I experimented with a lot of hyperparamters, but I ultimately found that a learning rate of .001 and a batch size of 4 were the most reasonable way to get good results. The average epoch took about 7 minutes to get through and I trained the net for 100 epochs. The best loss I could get to on Kaggle was 7.53984. I started out in the 300s, then I realized I was rescaling my landmarks by the original height/width rather than the bbox height/width I had cropped to. I tried to make it more efficient by loading everything into ram per a very helpful piazza post, but by then google colab had cut me off of their GPU service, so I'm sticking with my slow but somewhat accurate net. :)
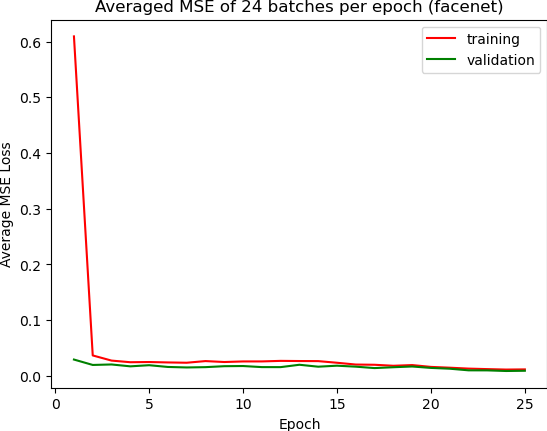
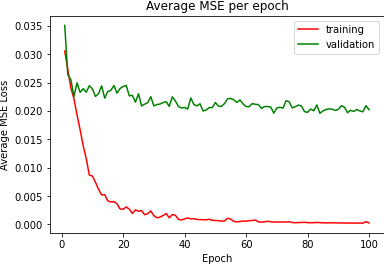
I was admittedly limited by time in choosing how long I could let my model train, but I did want to pick one where the eventually stabilized after a period of steady decrease. I tried to avoid overfitting by making sure I had augmented my training data by rotating/shifting the images to make sure the net would 'see' a variety of face positions. I was able to get the training and validation loss to about .002 and then I moved on to train with all of the training data.
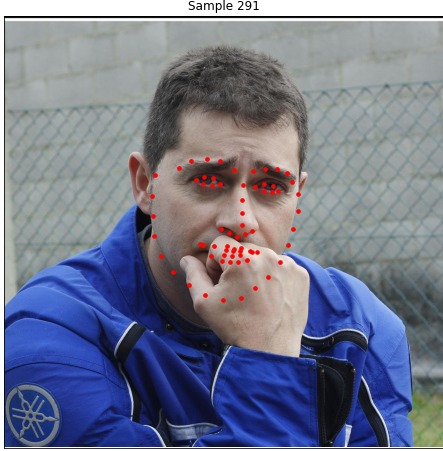
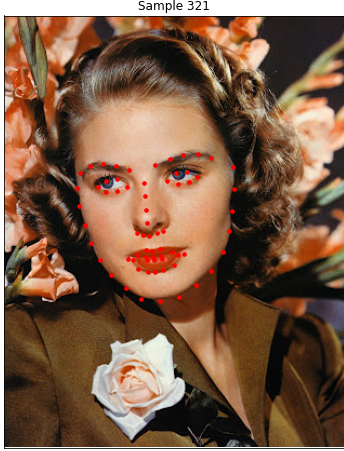
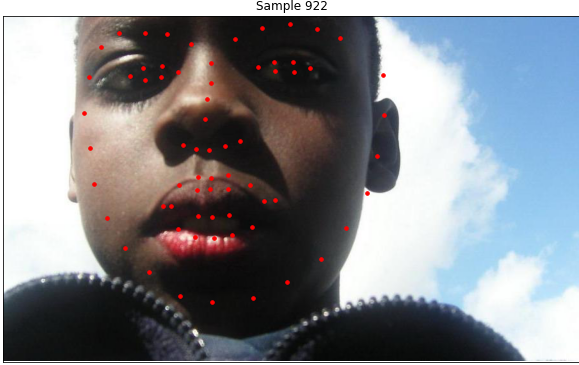
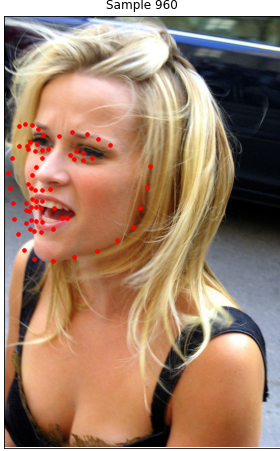
Here are some nice predictions on the test data:
|
|
|
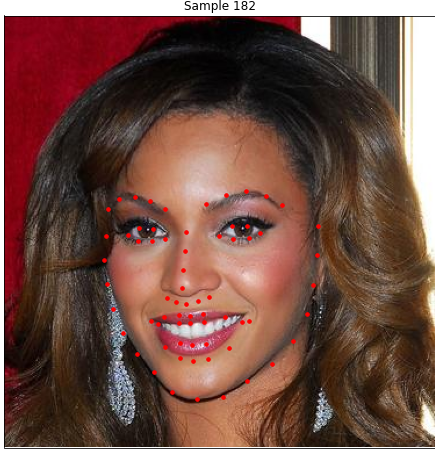
|
I generated these images at random, so it was a little difficult to find particularly good/bad examples, but here are some noteworthy failure cases:
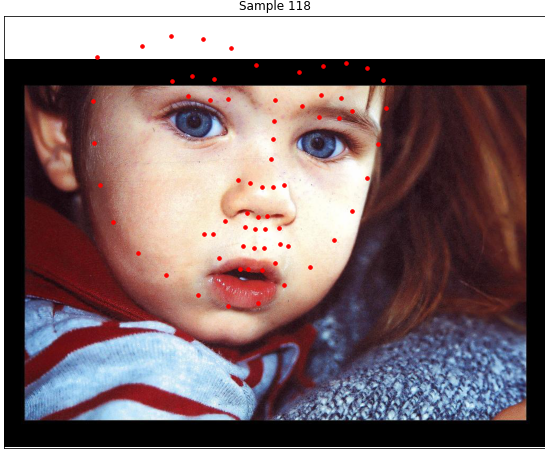
|
|
|
|
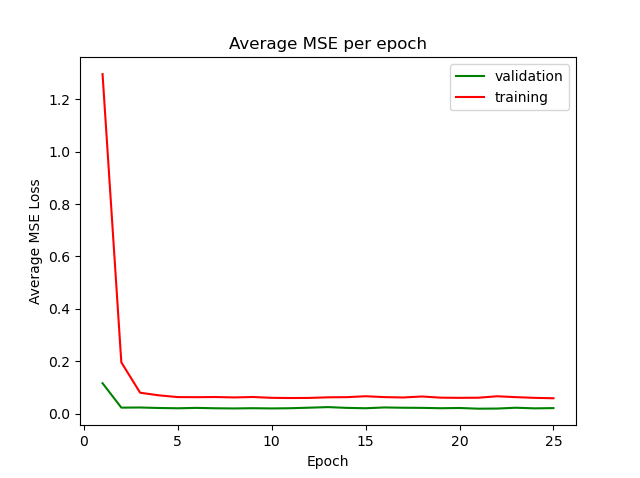
And here is the plot for training/validation losses
|
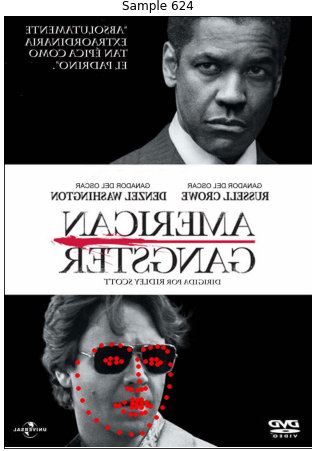
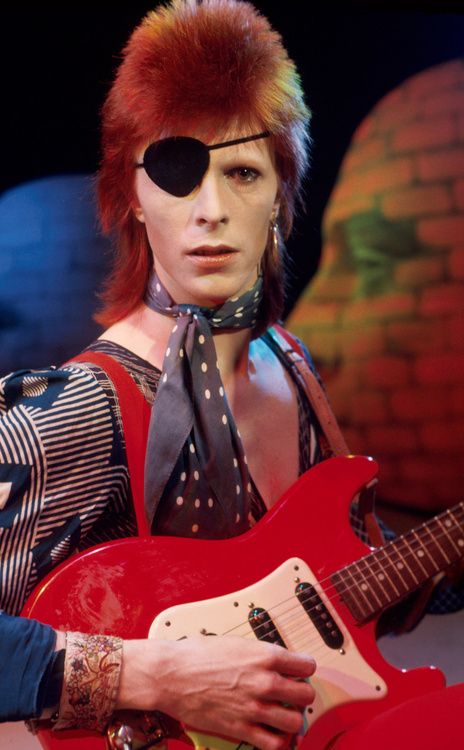
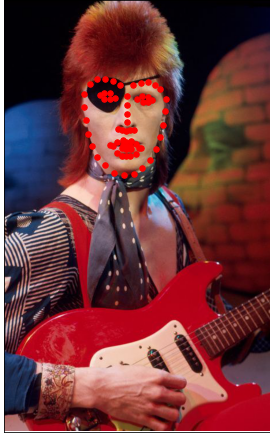
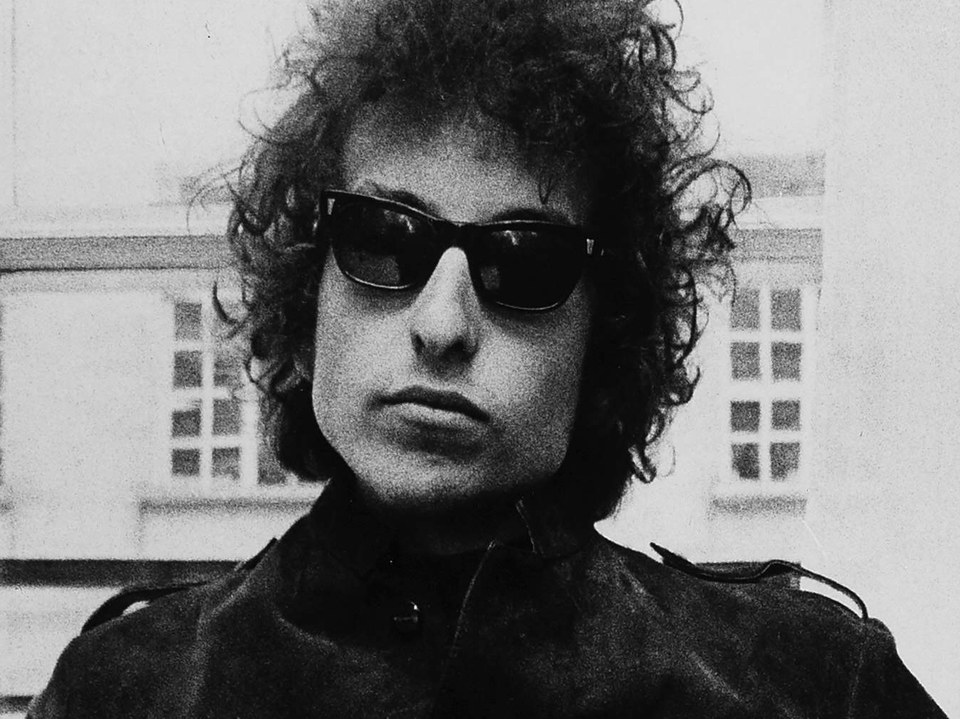
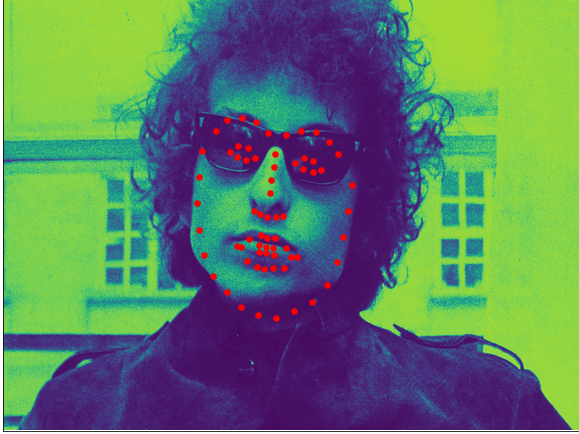
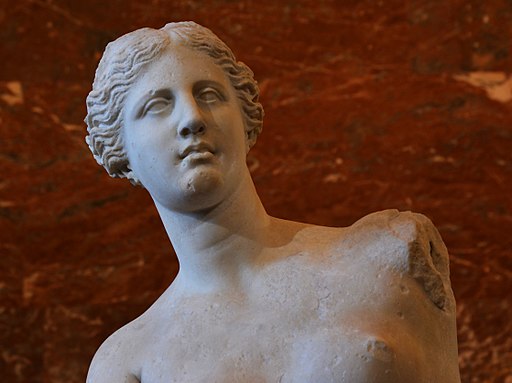
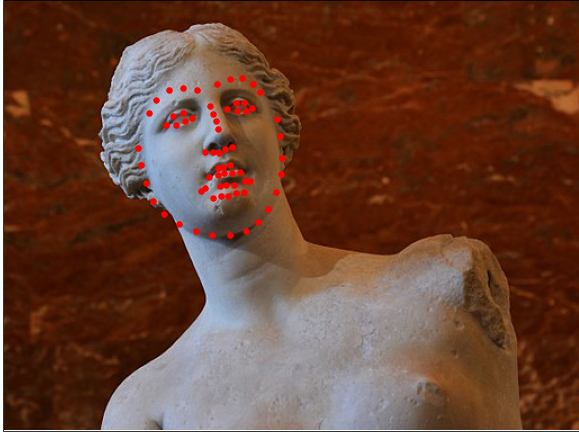
Finally, here is part 3 on my 'own' images. I thought it might be fun to try to fool the net with sunglasses, and eyepatch, or even a non-human face but it seemed to predict points pretty well! Dylan and Bowie probably have the worst detection around the mouth/jawline area, but the Venus statue is an all around success :)
|
|
|
|
|
|
One final observation-- most of these faces ended up looking a little bit like hearts! But in some of the original images sampled from the dataset, you can see that not all of the faces have eyebrows that happen to curve/have a sharp jawline that makes a heart shape. It's interesting how this net is much much better than the average face of the Danes dataset from project 3, but it still tends towards some feature of all the faces that ended up being the most common.
Citation for Danes dataset
M. B. Stegmann, B. K. Ersbøll, and R. Larsen. FAME – a flexible appearance modellingenvironment. IEEE Trans. on Medical Imaging, 22(10):1319–1331, 2003
@ARTICLE{Stegmann2003tmi,
author = "M. B. Stegmann and B. K. Ersb{\o}ll and R. Larsen",
title = "{FAME} -- A Flexible Appearance Modelling Environment",
year = "2003",
pages = "1319-1331",
journal = "IEEE Trans. on Medical Imaging",
volume = "22",
number = "10",
publisher = "IEEE"
Pytorch and machine learning related resources:
I have a lot more experience working with MATLAB than I do with Python (thanks, community college) and I have next to no experience with machine learning or neural networks. I had to rely heavily on following tutorials in this project. While I made sure that I understood what I was reading before I tried to work with it and incorporate it into this project, to say I wrote 100% of this project from scratch without any influence from examples or tutorials online is not true.
So, I commented what and where I got a code block from. I also commented what it was doing, and why I was using it, because I don't want to blindly use something I don't understand, even if I'm repurposing it from a tutorial. I am also citing everything I used here in one place, as well as in the docstring of whatever function I used it in, and in my readme.
With all that said, I did of course also use slides from lecture, took notes, read the Szeliski text, and the other resources linked on the project page.
But I am objectively not familiar enough with neural nets to make one from scratch. I know that it's my responsibility to learn this myself, and using tutorials supplemented with course materials was the more efficient way I could think to do that. So here are all of my sources, grouped by what I learned from them and where/how I used them:
Concepts:
https://arxiv.org/pdf/1705.05502.pdf
https://stackoverflow.com/questions/42883547/intuitive-understanding-of-1d-2d-and-3d-convolutions-in-convolutional-neural-n
Learning PyTorch:
https://cs230.stanford.edu/blog/pytorch/
https://pytorch.org/tutorials/beginner/ptcheat.html
https://pytorch.org/tutorials/beginner/pytorch_with_examples.html
This entire tutorial:
https://pytorch.org/tutorials/beginner/deep_learning_60min_blitz.html
This book:
https://pytorch.org/assets/deep-learning/Deep-Learning-with-PyTorch.pdf
Saving plotting nosepoints:
https://stackoverflow.com/questions/8218608/scipy-savefig-without-frames-axes-only-content
Help with transformations/preprocessing design:
https://pytorch.org/docs/stable/_modules/torchvision/transforms/transforms.html
Help with writing a custom dataloader:
https://pytorch.org/tutorials/beginner/data_loading_tutorial.html
https://pytorch.org/tutorials/recipes/recipes/custom_dataset_transforms_loader.html
Help with creating a workflow and organizing my project:
https://towardsdatascience.com/facial-keypoint-detection-using-cnn-pytorch-2f7099bf0347
Understanding loss:
https://discuss.pytorch.org/t/interpreting-loss-value/17665
Fine tuning batch size, epochs, and learning rate for part 3:
https://openreview.net/pdf?id=BJx1SsAcYQvalidat
Visualizing filters for part 2:
https://colab.research.google.com/github/Niranjankumar-c/DeepLearning-PadhAI/blob/master/DeepLearning_Materials/6_VisualizationCNN_Pytorch/CNNVisualisation.ipynb