Andrew Vo
UC Berkeley COMPSCI 194-26, Fall 2020
Learn moreThe goal of this project is to use convolutional neural networks (CNNs) to detect facial keypoints in images. We will first attempt to detect the nose tip keypoint on a set of images, move on to detecting 58 facial keypoints on the same dataset, and finally detecting the facial keypoints on a larger dataset with ResNet, a pretrained CNN model. For all parts of the project, I will be using PyTorch as the deep learning framework and Google Colab as a Jupyter notebook environment to develop the deep learning application.
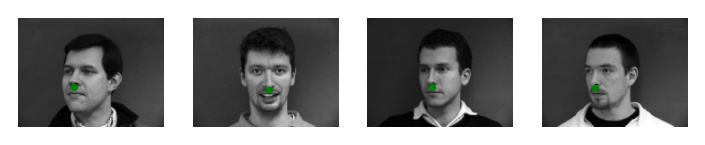
The image dataset I will be using for this project is the IMM Face Dataset. This dataset contains 240 images of 40 people where each person has 6 different pictures of themselves and each image contains 58 labeled facial keypoints. To train the convolutional neural network to detect the nose tip, I first had to load in the images and its correct nose tip keypoint. Some examples are shown below where the green dot labels the nose tip.
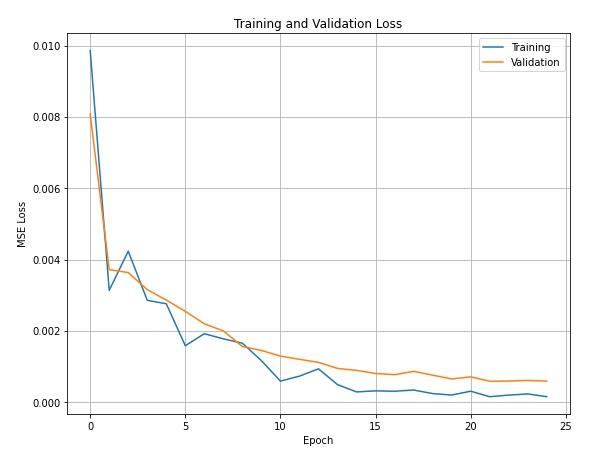
I first separated the image dataset into a training set of 192 images and a validation set of 48 images. Each image was converted to grayscale, had pixel values set into the range -0.5 to 0.5, and finally resized to be 80x60. The purpose of this step is to normalize the image input and help the model converge faster. Next, I implemented a convolutional network with 3 convolutional layers and 2 fully connected layers. Each convolutional layer is followed with a Rectilinear Unit (ReLU) as non-linearity and a 2x2 max-pooling layer. To perform the training, I defined the loss function to be a mean squared error loss (MSELoss) and used an Adam optimizer with a learning rate of 0.001. I trained the data for 25 epochs with a batch size of 4. Here is a plot of the training loss and validation loss colored in blue and orange, respectively. We can see that the MSE loss converges to approximately 0.001.
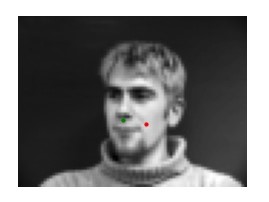
Let's see how well the CNN predicted the nose tip. Below are some sampled images with the ground truth nose tip versus my CNN's predicted nose tip. The red dot is the predicted point and the green dot is the correct point. We can see that the points are relatively close to each other and the CNN did a good job of predicting the location of the nose tip.

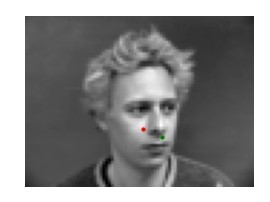
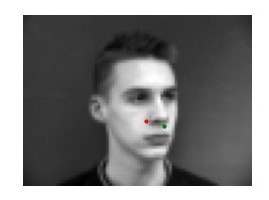
Although the CNN did well for a set of the images, there were some images that it did not do well on. Shown below are some examples. I believe that the CNN did not predict these nose keypoints accurately because the head and face positioning eliminated some of the features the CNN used to predict where the nose tip was.
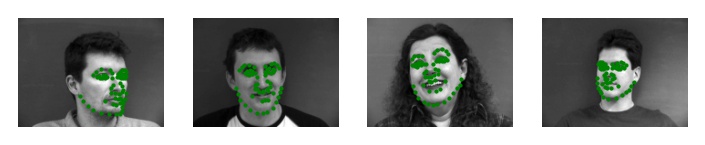
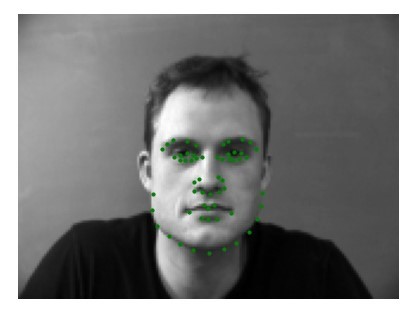
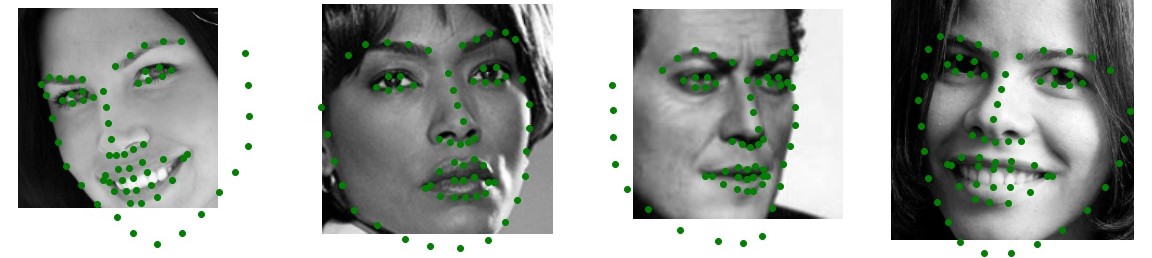
In this part, we will use a similar approach used in the previous part to detect all 58 facial keypoints of an input image. This time, we will resize the input images in the dataset to 240x180. In addition to this, since our dataset is relatively small with only 240 images, we will use data augmentation to artificially increase the size of our training set. Data augmentation consists of modifying existing training data such that it creates "new" input images and deters our CNN from overfitting on our training data. These modifications include flipping the input images, rotating the image within a set degree range, or shifting the image in a direction for a set range of pixels. Each image in the dataset is randomly applied with a subset of these modifications and included in the dataset. Shown below are some examples with their correctly labeled facial keypoints.
The architecture of my CNN is described in the table below. During training, I used mean squared error as my loss function and an Adam optimizer as in the previous part with a learning rate of 0.001. I also ran the training for 20 epochs in total with a batch size of 4.
| Layer | Layer Type | Feature Maps | Kernel/Filter | Input/Feature Size | Activation Function |
|---|---|---|---|---|---|
| 0 | Image | - | - | 240x180 | - |
| 1 | Convolution | 6 | 3x3 | 238x178 | ReLU |
| 2 | Max Pool | 6 | 2x2 | 119x89 | - |
| 3 | Convolution | 12 | 3x3 | 117x87 | ReLU |
| 4 | Max Pool | 12 | 2x2 | 58x43 | - |
| 5 | Convolution | 18 | 3x3 | 56x41 | ReLU |
| 6 | Max Pool | 18 | 2x2 | 28x20 | - |
| 7 | Convolution | 24 | 3x3 | 26x18 | ReLU |
| 8 | Convolution | 32 | 3x3 | 24x16 | ReLU |
| 9 | Fully Connected | - | - | 150 | ReLU |
| 10 | Fully Connected | - | - | 116 | - |
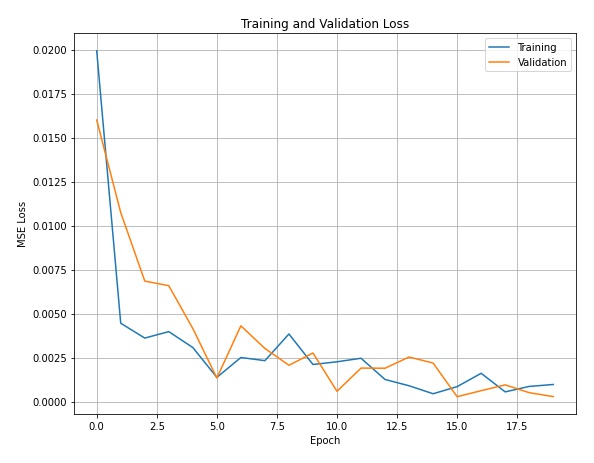
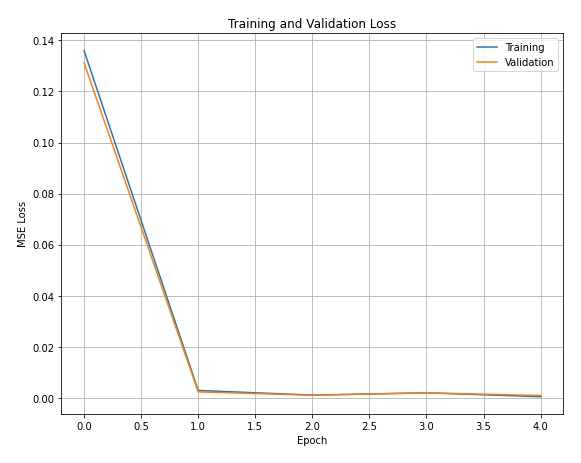
The plot below shows the training loss and validation loss colored in blue and orange calculated during training.
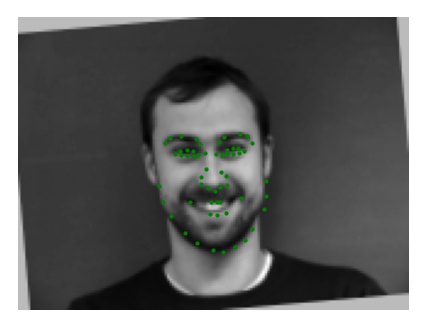
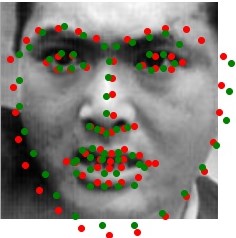
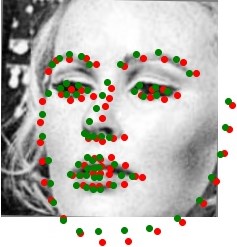
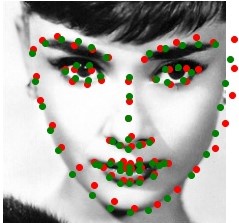
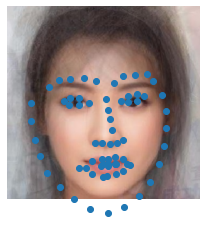
After training, I tested the CNN to see if the model would predict the facial keypoints well on a few select images from the dataset. Some examples are shown below. We can see that the predicted points (colored red) are relatively close to the correct points (colored green).

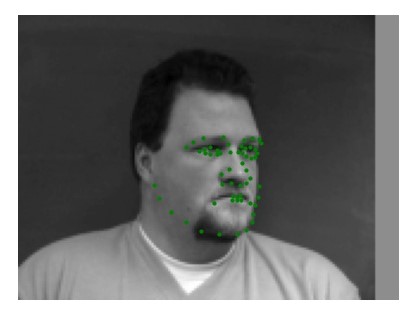
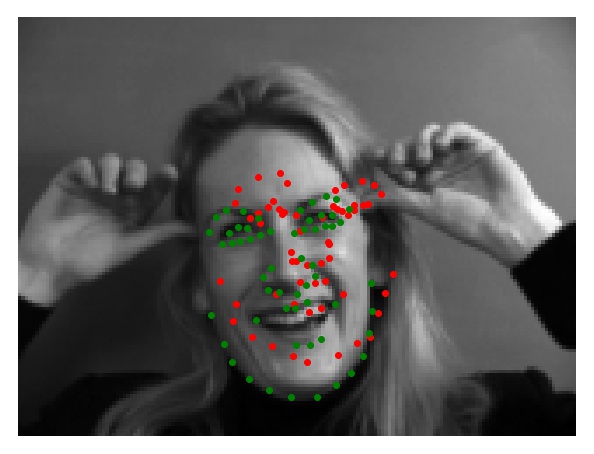
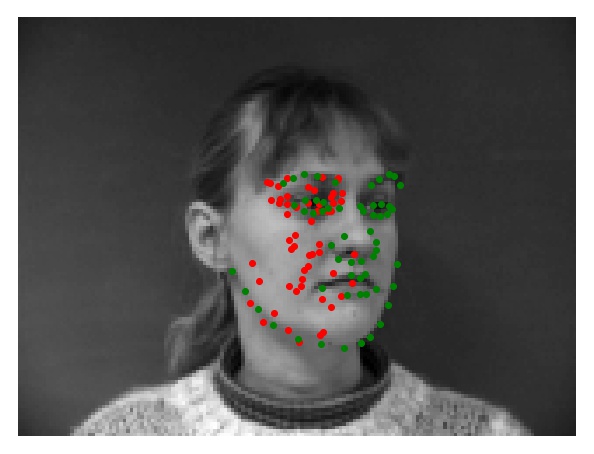
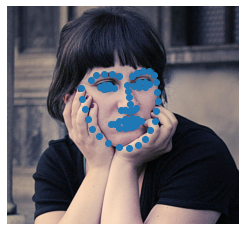
However, there are also some images where the model did not do well on. I suspect that in the first case, the hands in the image add extraneous information into the model which caused it to predict points that are far off from the correct points. In the second case, the face position may have removed some of the features the model used to predict where the keypoints should be placed.
We can also visualize the filters that were developed after we completed the training process. Below are some selected filters from each convolutional layer.


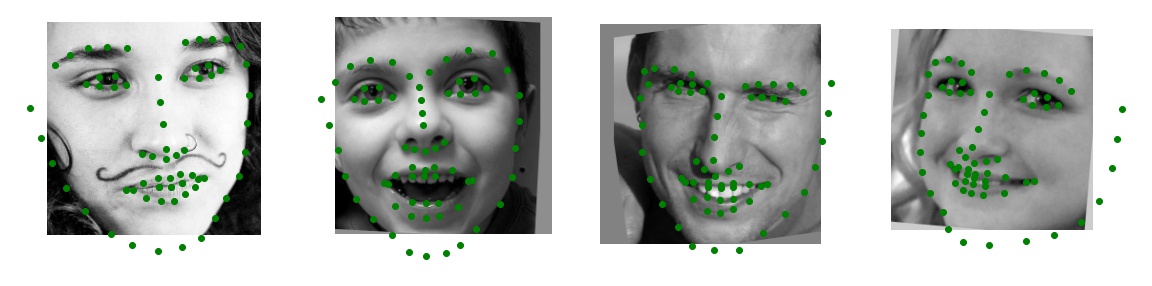
Now it's time for the big guns. We will now use the Faces in the Wild image dataset from iBUG which contains 6666 images of varying image sizes, and each image has 68 annotated facial keypoints. As in the previous part, I will use data augmentation to artificially increase the size of the training set. Here are some sampled images from the dataloader with their respective ground truth keypoints.
Instead of creating my own convolutional neural network, I will use a pre-trained CNN called ResNet50 to predict the facial keypoints. ResNet50 contains over 50 layers in its architecture (too many to list out in a table). To make this model work for the image dataset, I modified ResNet50's first convolutional layer such that it takes in single-channel images. In addition to this, I also changed the last fully connected layer to output 136 channels corresponding to the 68 keypoints for each face. During the training process, I once again used mean squared error as my loss function and an Adam optimizer. This time, I used a learning rate of 0.0001 and ran the training with a batch size of 6 for 5 epochs because training on the dataset took a long time. We can visualize the training and validation error plot below.
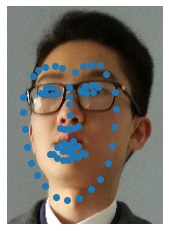
We can also see how well the model performed on the image set. Below are some examples of the model's predictions on sample validation images with their respective ground truth keypoints and test images with just the predictions itself.

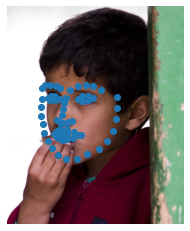
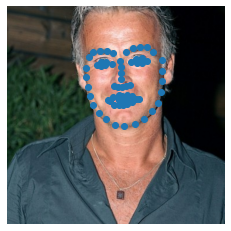
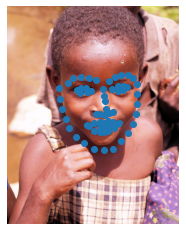
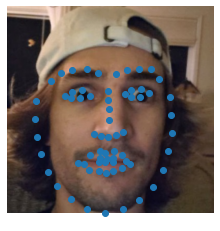
Let's also see how well the model can predict facial keypoints on images from my own collection. As shown below, the predicted keypoints on my face appear to be longer than average because the mouth keypoints are under the actual mouth position. Despite this, the model performs well on the other two images and the keypoints line up well with the actual faces.
Finally, to instill some competitive spirit in this project, there is a Kaggle competition for users to submit their model's predictions on a test set of the images and see whose model performs the best. After submitting my results, I received a mean absolute error of 11.97881 which means my model performed relatively well.
Overall, I had an enjoyable time working on this project and had fun seeing the model predict the keypoints on various images. I had many challenges with trying to understand how convolutional neural networks worked and calculating the appropriate architecture to produce my desired results, but I learned a lot from these challenges and I am excited to see how else neural networks/machine learning can be applied in the field of computer vision. In addition to this, this was also my first time using Pytorch and I am interested in learning how I can apply this deep learning framework to some of my own personal projects!