CS194-26 Project 4 - Eric Leong
Overview
In this project, I learned how to use neural networks to detect facial keypoints.
Part 1: Nose Tip Detection
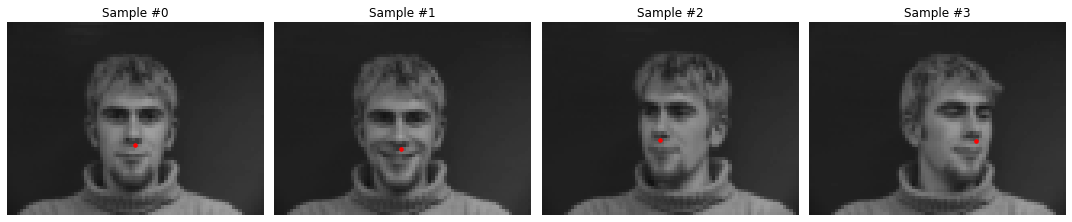
First, I designed a neural network architecture for detecting only the keypoint of the tip of the nose. To train the neural network model, I first had to create a data loader interfacing with PyTorch. For this part of the project, I utilized images from this website, which also contained the ground-truth keypoints that we will use for training our model.
Once I've set up the data loader, I loaded in my training data and test data, so that I could begin training my model. For the neural network, I used a convolutional neural network with 3 convolutional layers and 2 fully connected layers:
- Convolutional layer with 12 output channels, 7x7 kernel, followed by RELU and 2x2 max pool
- Convolutional layer with 20 output channels, 5x5 kernel, followed by RELU and 2x2 max pool
- Convolutional layer with 32 output channels, 3x3 kernel, followed by RELU and 2x2 max pool
- Fully Connected layer with input size 896, output size 50
- Fully Connected layer with input size 50, output size 2
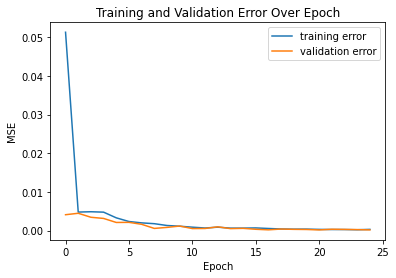
For training, I utilized the Adams Optimizer with learning rate .001 and batch size 5, training for 25 epochs in total. I used a MSE function as the loss function. As shown by the following plot of training and validation loss across 25 epochs, the model converged pretty quickly.
Here are some good predictions (red) that were almost the same as ground-truth (green).

Our model performed well for most of the images, but as shown by the above examples of bad predictions, some images it failed on. It seems like the model fails on images with less contrast between the nose and surrounding features, or when the person in the image was turned away from the camera. Lighting seemed to also have an impact on predictions. Because of these properties, the model has difficulty identifying where the nose is.

Part 2: Full Facial Keypoints Detection
In this section, I made some modifications to our previous data loader and neural network model for predicting all keypoints of the face. I built a very similar CNN but to make our model more adaptable, performed data augmentation on the images, including rotating the images randomly with degree in range [-10, 10] and randomly shifting images horizontally and vertically by -10px to 10px. I also updated the ground-truth keypoints accordingly based on the augmentations.
For the neural network, I used 5 convolutional layers and 2 fully connected layers:
- Convolutional layer with 8 output channels, 7x7 kernel, followed by RELU and 2x2 max pool
- Convolutional layer with 16 output channels, 5x5 kernel, followed by RELU and 2x2 max pool
- Convolutional layer with 32 output channels, 3x3 kernel, followed by RELU and 2x2 max pool
- Convolutional layer with 64 output channels, 3x3 kernel, followed by RELU and 2x2 max pool
- Convolutional layer with 128 output channels, 3x3 kernel, followed by RELU
- Fully Connected layer with input size 128*3*5, output size 128
- Fully Connected layer with input size 128, output size 116
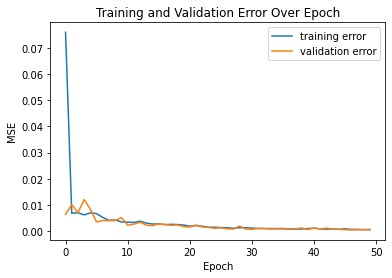
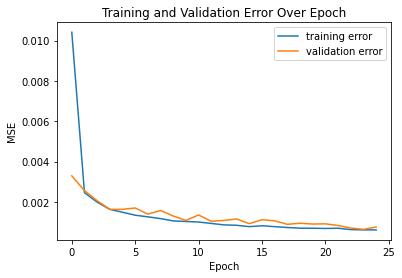
For training, I utilized the Adams Optimizer again with learning rate .001 and batch size 5, training for 50 epochs in total. I used a MSE function as the loss function. As shown by the following image of the training and validation losses across 25 epoch, the model also converged pretty quickly.
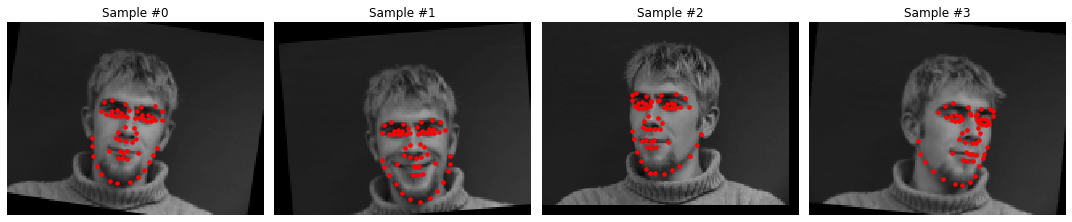
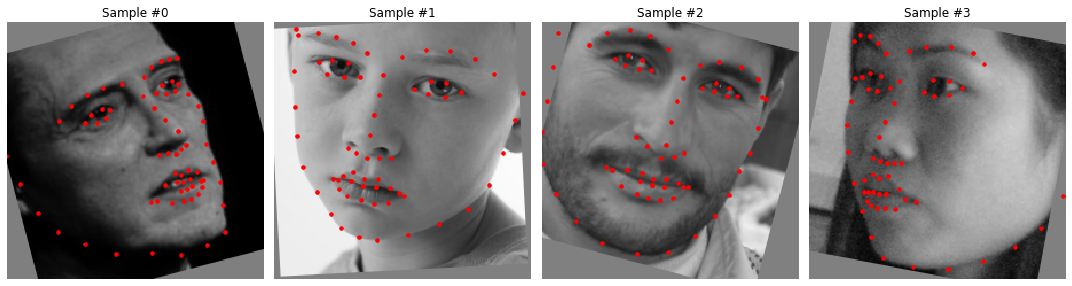
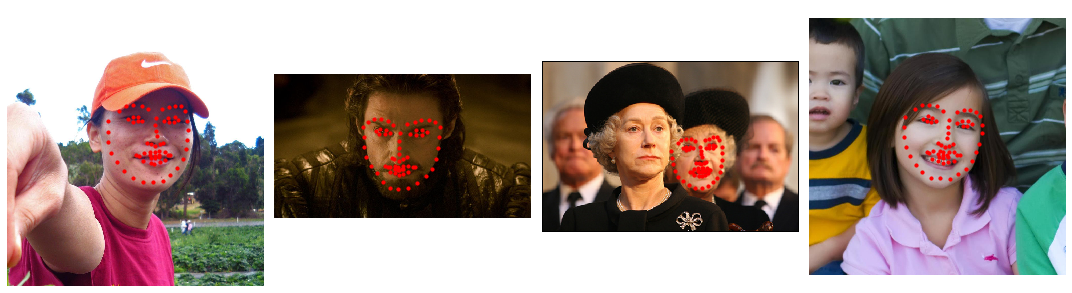
Here are some good predictions. Notice that although the predictions (red points) are not the exact same as the ground-truth (green points), they still accurately denote the facial features that we want.


The model did not perform well for a couple of images and were actually quite off. The images that our model failed on were very similar to the ones it failed on for the nose keypoint prediction: images with poor contrast and brightness. The keypoints did not match any general facial feature of the people in the images and it seems like it is detecting the eyes as a nose, causing the other keypoints to be shifted.

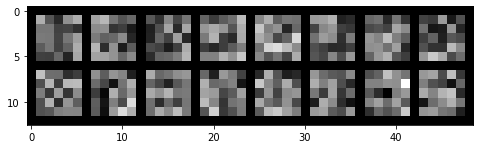
Here are some of the filters that were learned in the convolutional layers:

Part 3: Train With Larger Dataset
In this section, we utilize a much larger dataset, containing 6666 images of varying sizes and characteristics, each with 68 facial keypoints and a bounding box. For each image, I used the same data augmentations as previous, randomly rotating within range [-10, 10] and randomly shifting vertically and horizontally from up to 10px. I created a dataloader adapted to this dataset, operating on the images and keypoints similarly but also including the bounding boxes. Since the bounding boxes tend to overcrop, I increasing the bounding boxes by a factor of 1.2x and also made some checks to ensure it included all of the keypoints.
Instead of using a custom neural network architecture, I utilized the preloaded PyTorch ResNet 18 model, with some adjustments to make it compatible with our data. The follow adjustments are as follows:
- Change the input channels of the first convolutional layer from 3 to 1, since we are training on grayscale images
- For the final fully connected layer, set the output channels to 68*2=136 for each x,y value of each keypoint
I again trained the model using a Adams optimizer and MSE loss function, learning rate of .001, batch size of 20. Below are the results of training for 25 epochs.
On Kaggle, my resulting mean absolute error (MAE) on the test set was 18.61156.
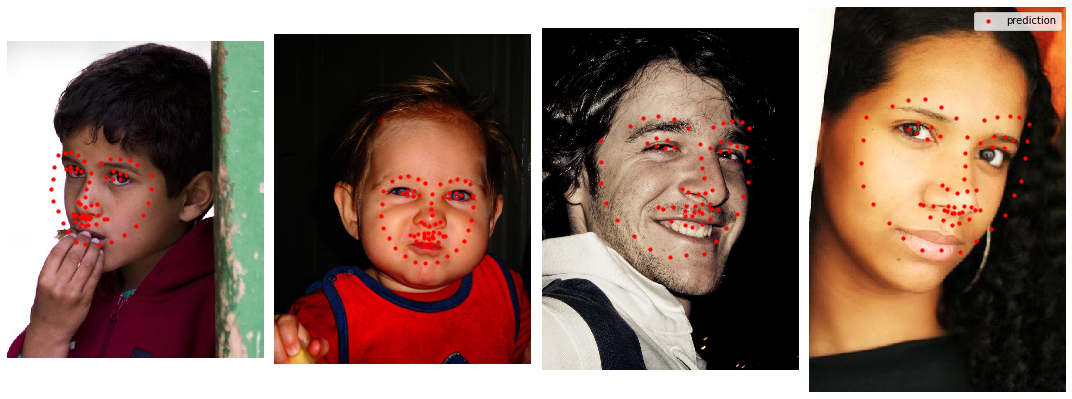
Here are some predictions on images from the dataset using our trained model:
Our predictions are really close to the ground-truth points in the validation images
The model performed pretty well on most of the test images, as shown in the examples, the predictions could clearly identify the facial keypoints.
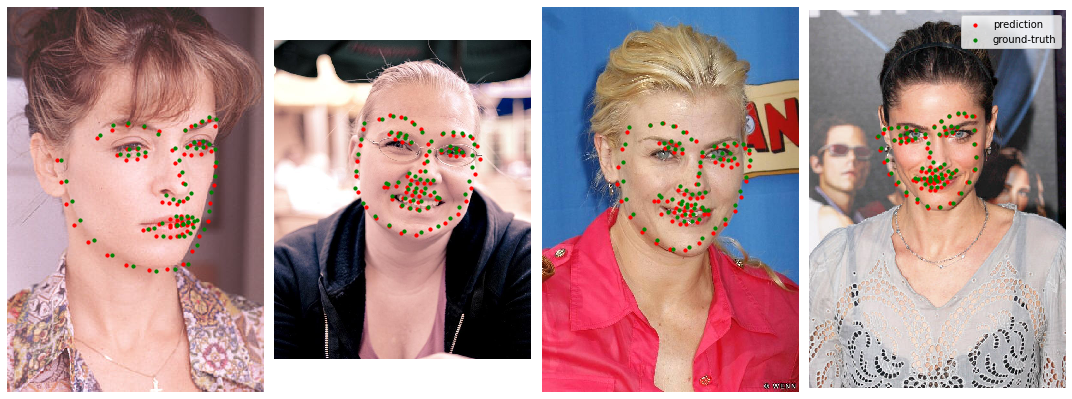
In some of the images, our model did not perform as well. 3 of the example images that had bad predictions were because the person's face was turned or tilted. The 2nd image had a bad prediction because the face was very oddly shaped which shows our model was slightly overfitting to the training set (there probably isn't many chubby baby faces in it).
Finally, let's look at some images not in the data set. I decided to use some images of my friend, and manually set the bounding boxes using some helper script I wrote! The first 2 rows of images had predictions that turned out pretty well, while the last row had pretty bad predictions.
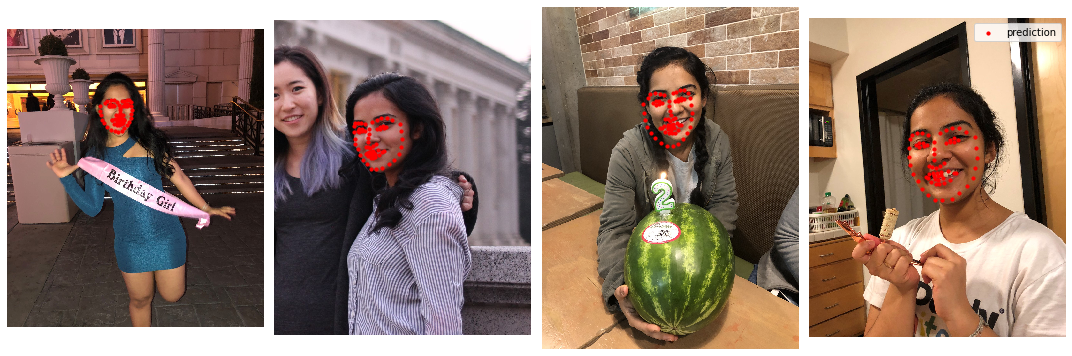
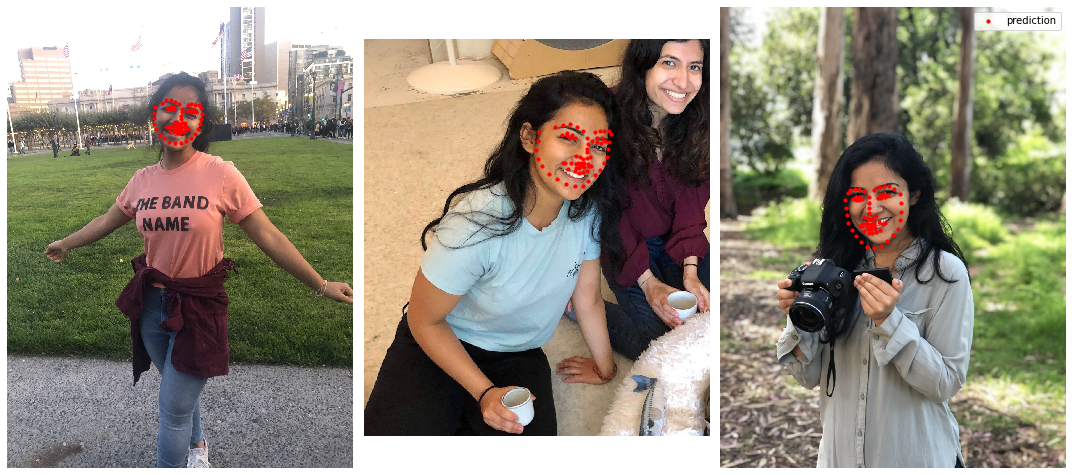
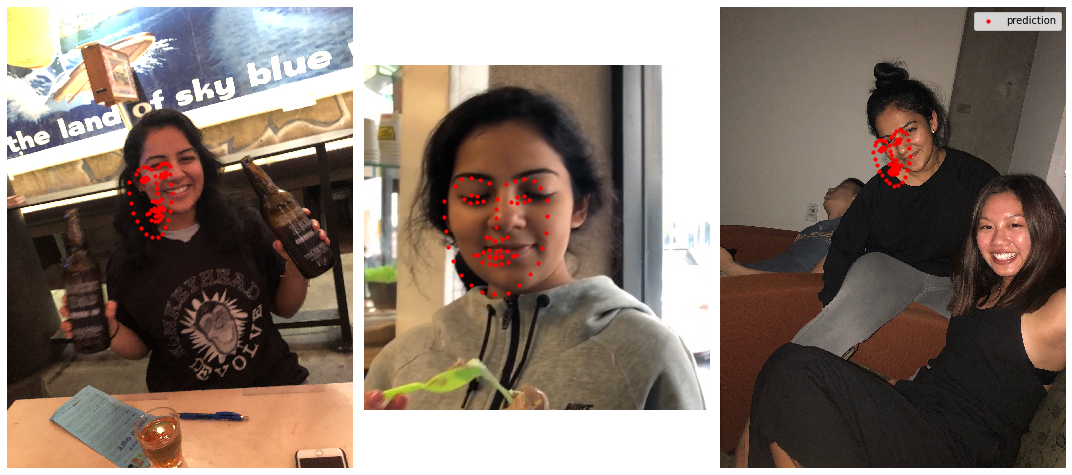
I noticed that setting bounding boxes had a significant impact on keypoint detection. When I set the bounding box to contain more than just the face, it often turned out to be very in accurate. It was also very hard to find bounding boxes for images with tilted faces. In the last row, where the predictions were not great, you could see that the face was either tilted or the lighting on the face made predictions bad. In the 2nd image, the lighting created an edge that the model likely confused with the edge of a face, impacting our prediction.
Bells & Whistles
For Bells & Whisles, I decided to use the keypoint predictions as keypoints for morphing faces, which we implemented in a previous project. I used the imagse and keypoint predictions of my friends face from the previous part, and removed the bad predictions. Then I simply used some helper functions to integrate with my implementation of face morphing from before.
This was a really interesting project (though training models was really pretty annoying) and I'd love to work on projects in a similar realm again!