
In this project, I used deep neural networks to automatically detect facial keypoints. Parts 1 and 2 were run locally, whereas part 3 was run on Google Colab.
First, I trained a toy model to detect only the nose tip within a facial image. The model was trained on 192 images from the IMM Face Database and validated on 48 other images.
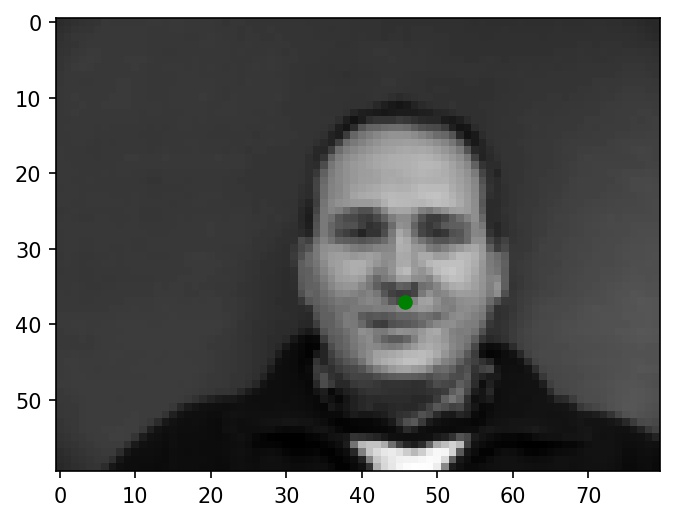
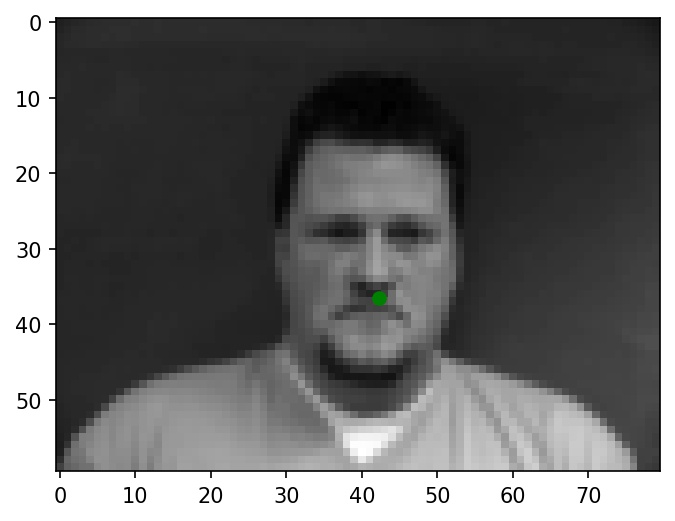
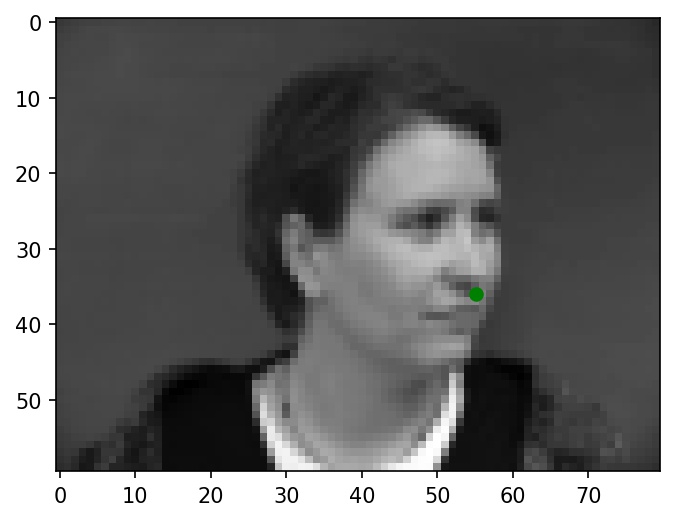
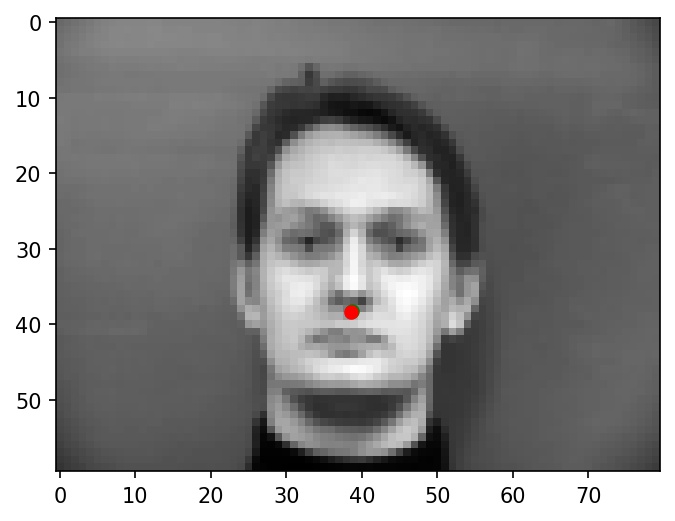
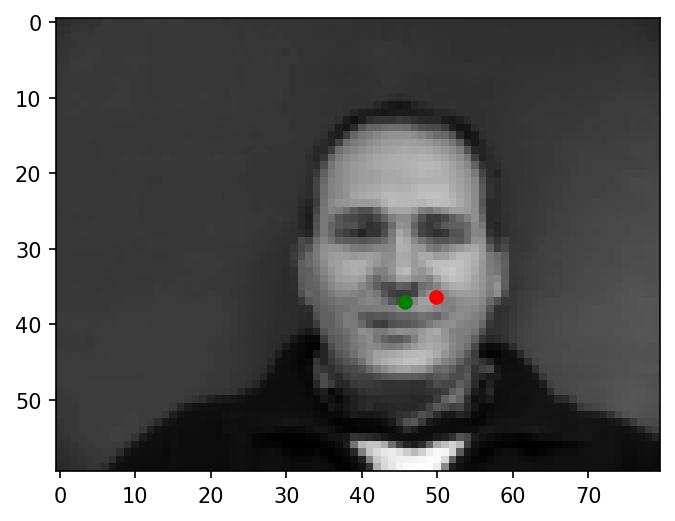
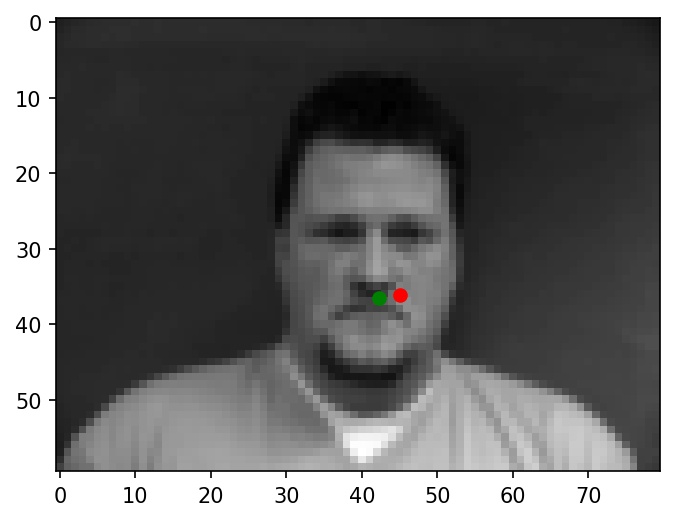
I wrote a custom dataloader to load in nosetips coordinates and images, convert them to grayscale, resize them to 80x60, and normalize pixel brightnesses from -0.5 to +0.5. Below are a few sample images from my dataloader (nosetip ground truths are marked with green dots):
 |
 |
 |
After some experimentation, I settled on a CNN architecture with the following layers:
NoseNet(
  (conv1): Conv2d(1, 12, kernel_size=(3, 3), stride=(1, 1))
  (relu1): ReLU()
  (pool1): MaxPool2d(kernel_size=2, stride=2, padding=0, dilation=1, ceil_mode=False)
  (conv2): Conv2d(12, 12, kernel_size=(3, 3), stride=(1, 1))
  (relu2): ReLU()
  (pool2): MaxPool2d(kernel_size=2, stride=2, padding=0, dilation=1, ceil_mode=False)
  (conv3): Conv2d(12, 12, kernel_size=(3, 3), stride=(1, 1))
  (relu3): ReLU()
  (pool3): MaxPool2d(kernel_size=2, stride=2, padding=0, dilation=1, ceil_mode=False)
  (fc1): Linear(in_features=480, out_features=64, bias=True)
  (relu4): ReLU()
  (fc2): Linear(in_features=64, out_features=2, bias=True)
)
There are three successive convolutional layers, each followed by a ReLU layer and a max-pooling layer with kernel size 2 and stride 2. The convolutional layers have 12 output channels and 3x3 kernels. Finally, there are two linear fully-connected layers, the first of which is followed by ReLU. The input is an image with one channel and the output is a set of two doubles, representing the x and y coordinates of the nose expressed as a fraction of the image's width and height, respectively. I trained with a batch size of 4 and a learning rate of 1e-3 (Adam) for 25 epochs.
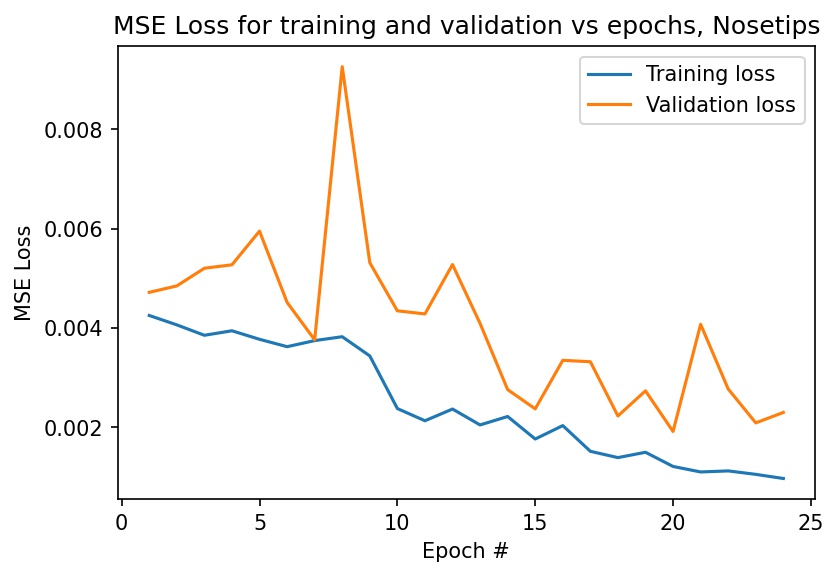
Here is a graph of my MSE loss for training and validation sets. I achieved a final training loss of 0.000974 and a final validation loss of 0.00230.
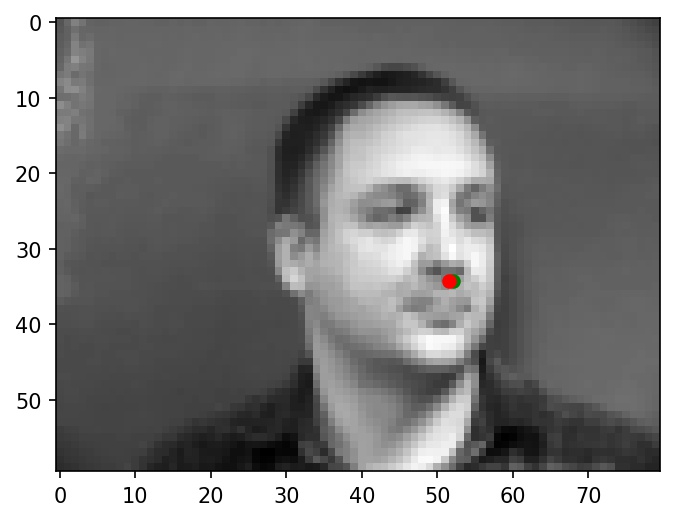
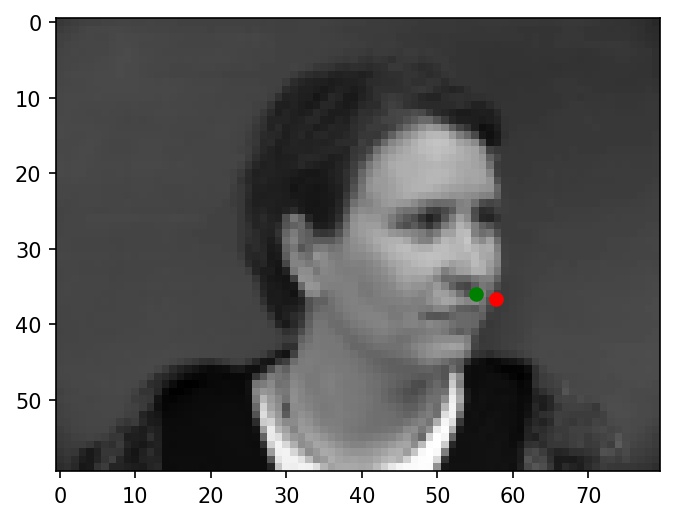
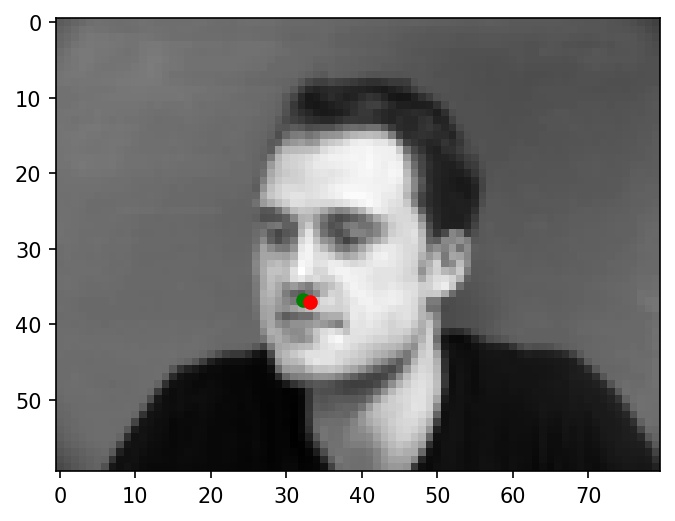
Below are two images where the nose is identified correctly. Green dots represent ground truth and red dots represent my network's predictions. Note that the green dot is completely covered by the red dot in the left example.
 |
 |
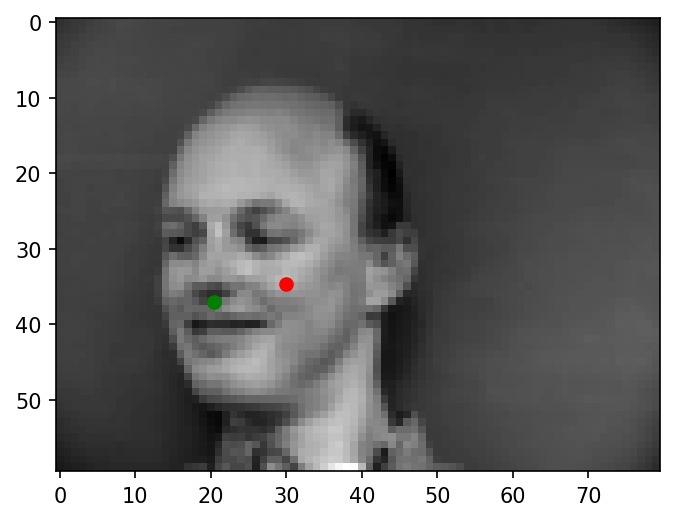
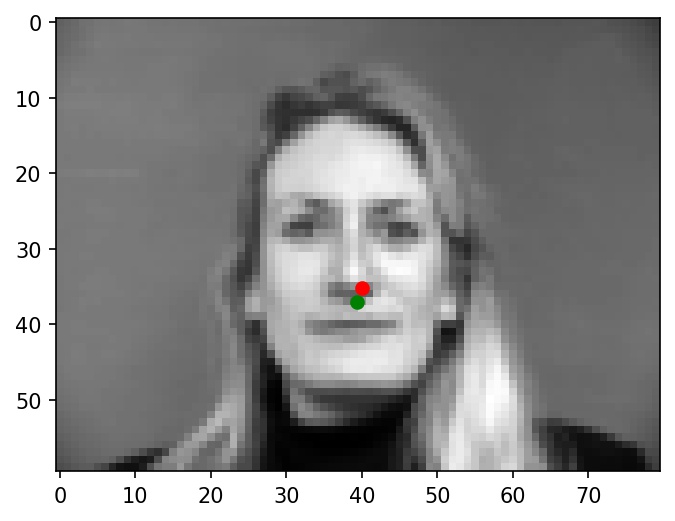
Now, here are two images where the nose is not identified correctly. Again, green dots represent ground truth and red dots represent my network's predictions.
 |
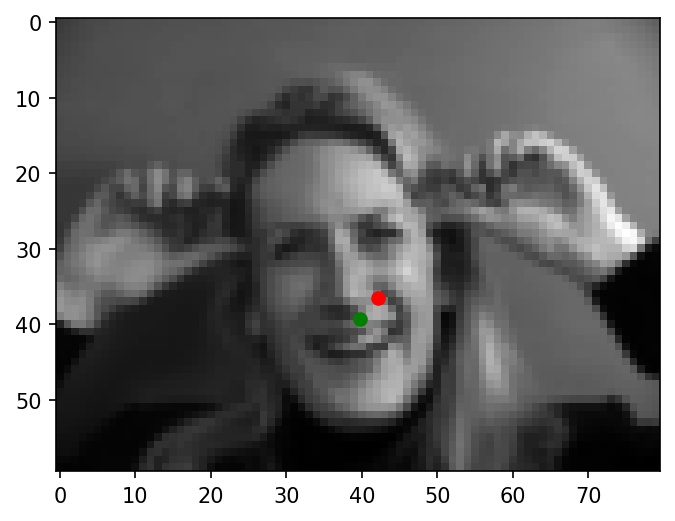 |
Why these cases failed:
I noticed that the mislabeled faces tend to be darker lighting than the correctly labeled ones, which causes the nose to be less easily distinguishable, especially at low resolutions. I believe this difference in lighting could be a major contributor to these failure cases.
Some more examples of nose tip predictions:
 |
 |
 |
 |
 |
 |
In the second part, I trained a model from the same IMM Face Database data to detect all 58 facial keypoints.
I wrote a custom dataloader to load in keypoint coordinates and images, convert them to grayscale, resize them to 240x180, and normalize pixel brightnesses from -0.5 to +0.5. For this facial dataloader, I also added several random transformations for data augmentation purposes. These data augmentation transformations include the following:
The keypoints are updated along with the images themselves.
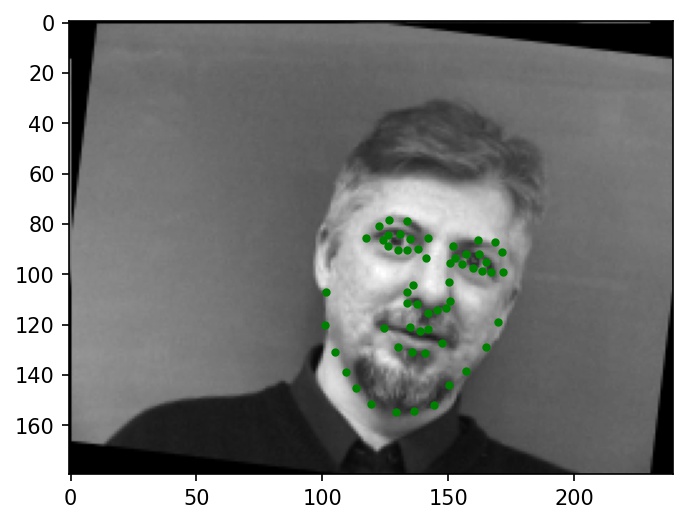
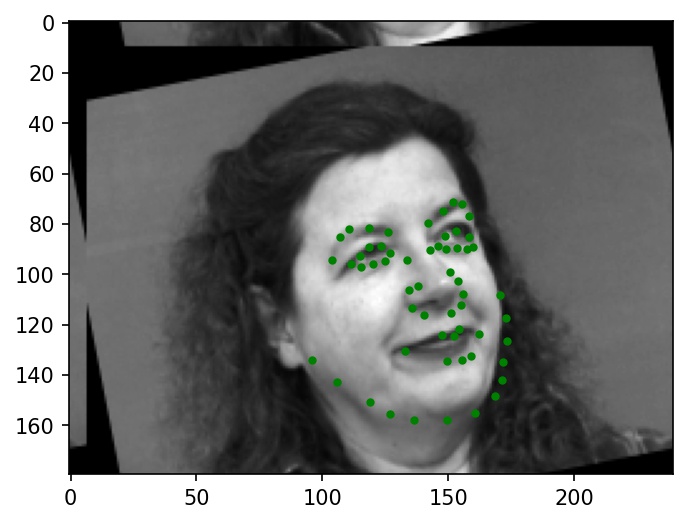
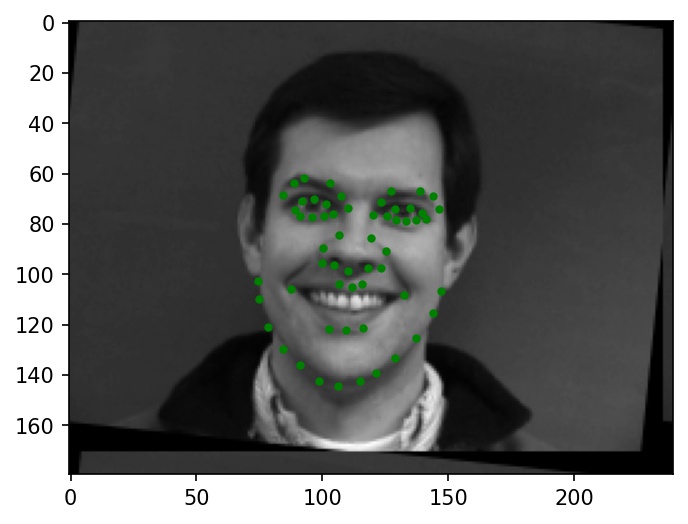
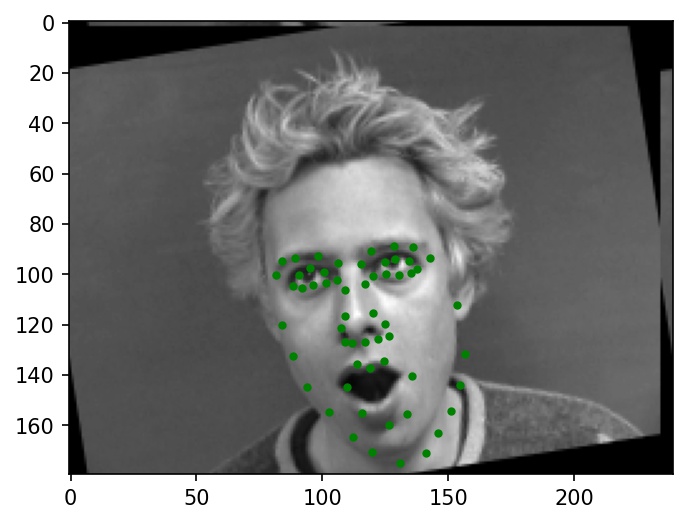
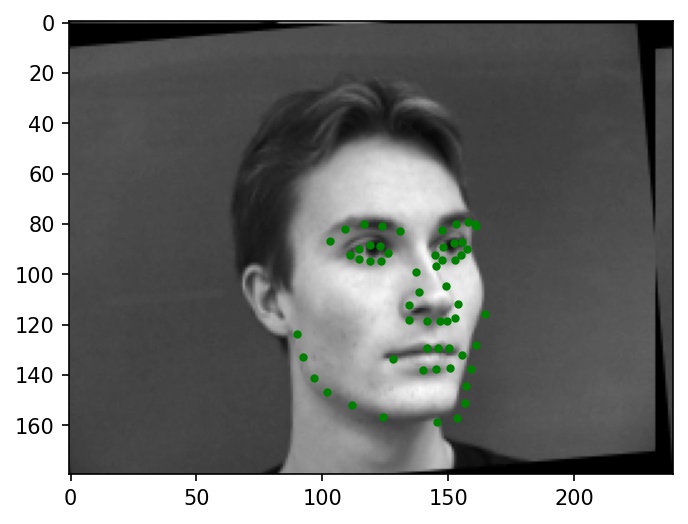
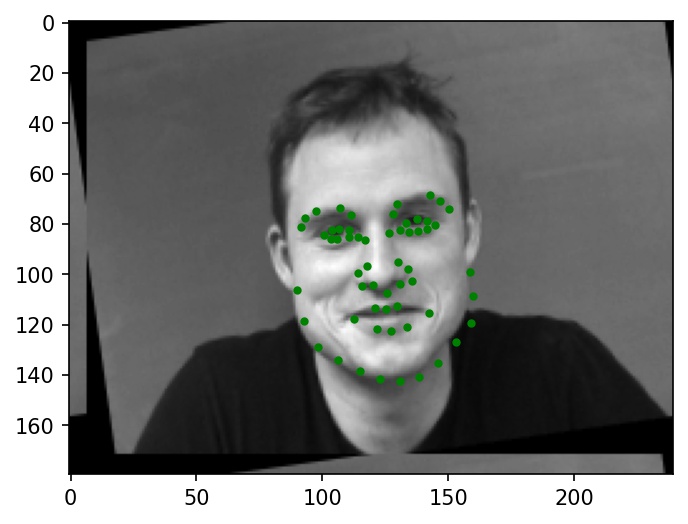
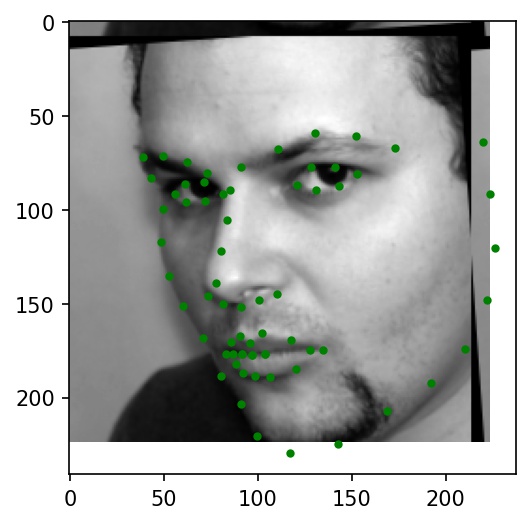
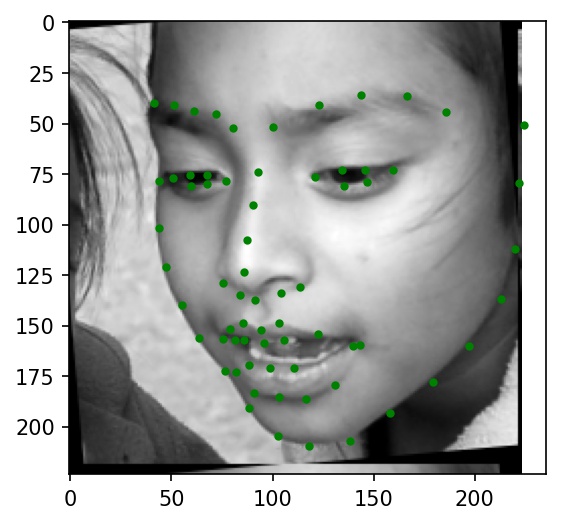
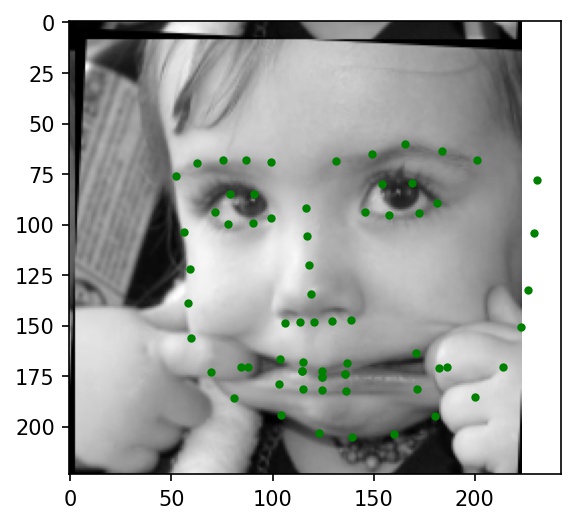
Below are a few sample images from my dataloader (keypoint ground truths are marked with green dots):
 |
 |
 |
 |
 |
 |
After some experimentation, I settled on a CNN architecture with the following layers:
FaceNet(
  (conv1): Conv2d(1, 8, kernel_size=(5, 5), stride=(1, 1))
  (relu1): ReLU()
  (pool1): MaxPool2d(kernel_size=2, stride=2, padding=0, dilation=1, ceil_mode=False)
  (conv2): Conv2d(8, 16, kernel_size=(5, 5), stride=(1, 1))
  (relu2): ReLU()
  (pool2): MaxPool2d(kernel_size=2, stride=2, padding=0, dilation=1, ceil_mode=False)
  (conv3): Conv2d(16, 32, kernel_size=(5, 5), stride=(1, 1))
  (relu3): ReLU()
  (pool3): MaxPool2d(kernel_size=2, stride=2, padding=0, dilation=1, ceil_mode=False)
  (conv4): Conv2d(32, 64, kernel_size=(5, 5), stride=(1, 1))
  (relu4): ReLU()
  (pool4): MaxPool2d(kernel_size=2, stride=2, padding=0, dilation=1, ceil_mode=False)
  (conv5): Conv2d(64, 128, kernel_size=(5, 5), stride=(1, 1))
  (relu5): ReLU()
  (pool5): MaxPool2d(kernel_size=2, stride=2, padding=0, dilation=1, ceil_mode=False)
  (fc1): Linear(in_features=384, out_features=1600, bias=True)
  (relu6): ReLU()
  (fc2): Linear(in_features=1600, out_features=116, bias=True)
)
There are five successive convolutional layers, each followed by a ReLU layer and a max-pooling layer with kernel size 2 and stride 2. The convolutional layers have 5x5 kernels, with output channels doubling per layer, from 8 to 16 to 32 to 64 to 128. Finally, there are two linear fully-connected layers with 1600 hidden features, the first of which is followed by ReLU. The input is an image with one channel and the output is a set of 2 * 58 doubles, representing the x and y coordinates of all 58 keypoints expressed as a fraction of the image's width and height, respectively. I trained with a batch size of 4 and a learning rate of 1e-3 (Adam) for 35 epochs.
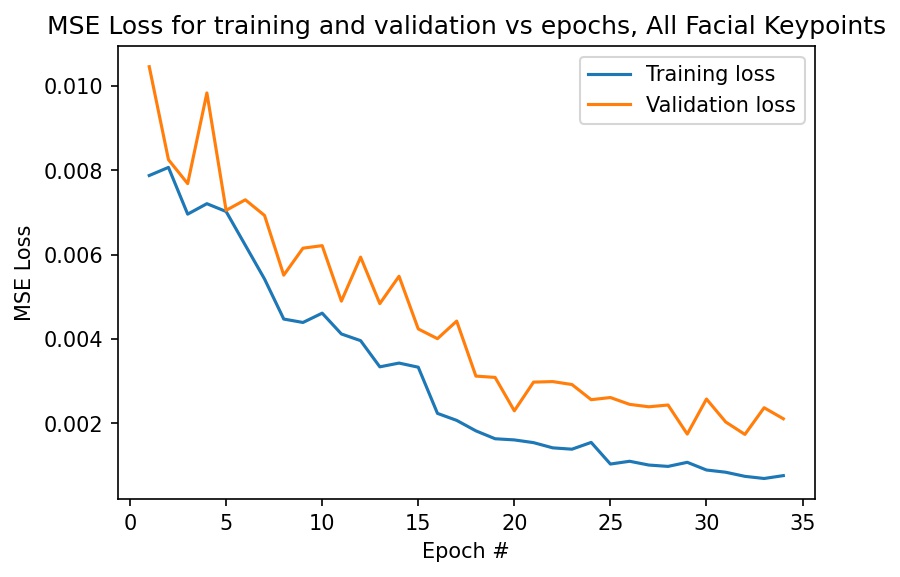
Here is a graph of my MSE loss for training and validation sets. I achieved a final training loss of 0.000759 and a final validation loss of 0.00211.
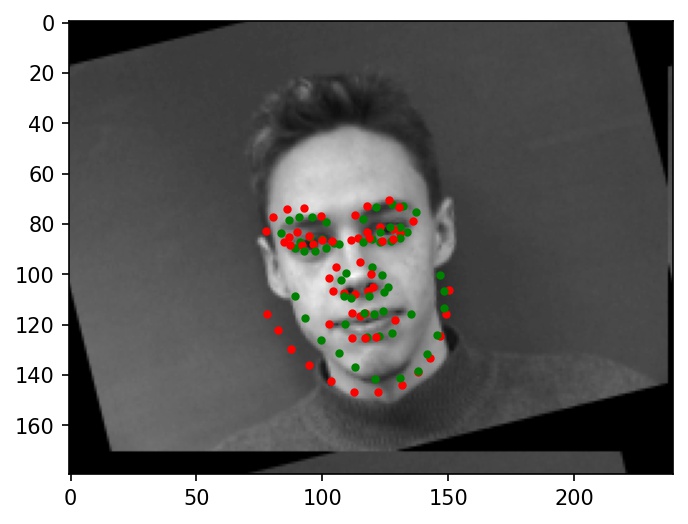
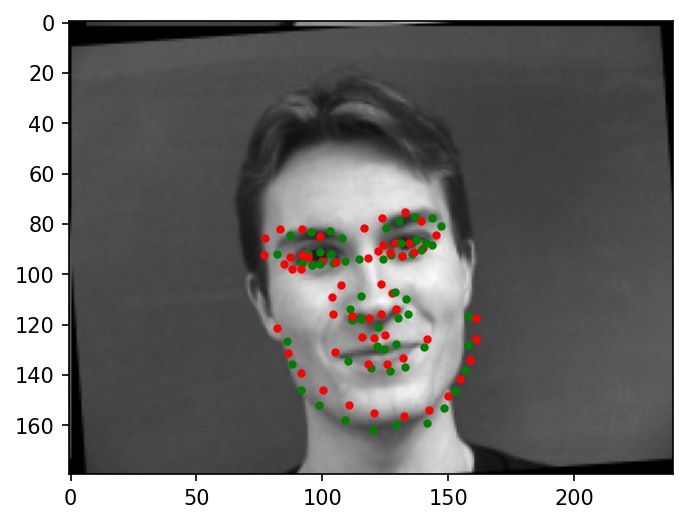
Below are two images where the facial keypoints are identified correctly. Green dots represent ground truth and red dots represent my network's predictions.
 |
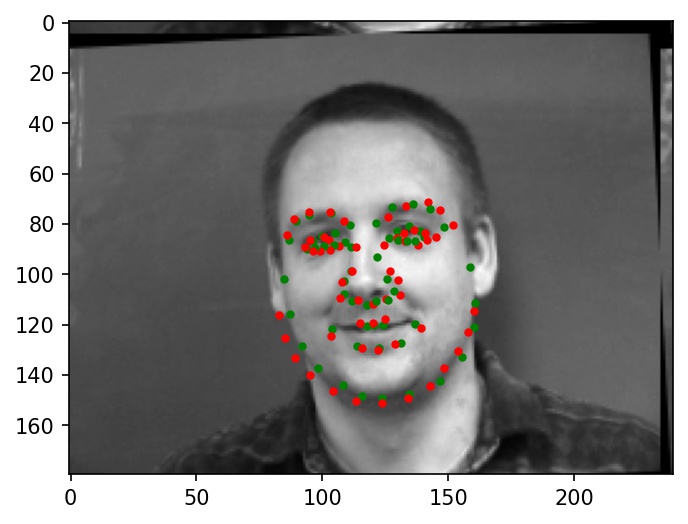 |
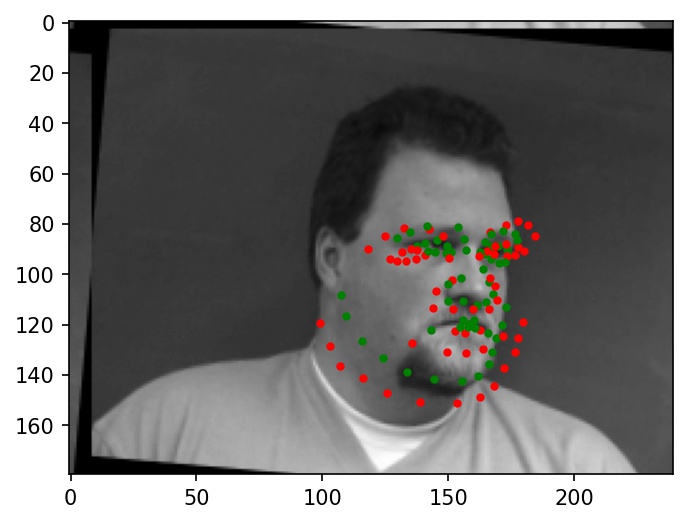
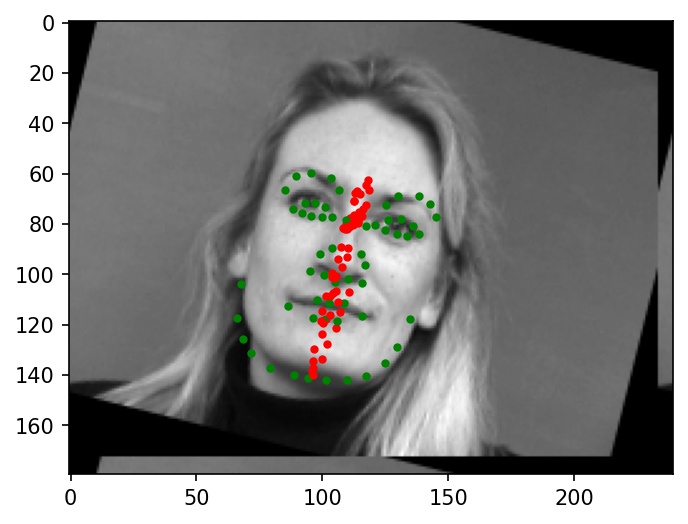
Now, here are two images where the facial keypoints are not identified correctly. Again, green dots represent ground truth and red dots represent my network's predictions.
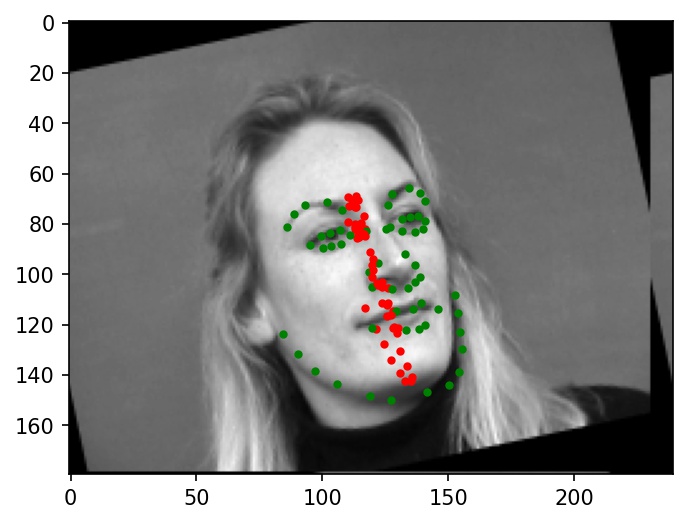 |
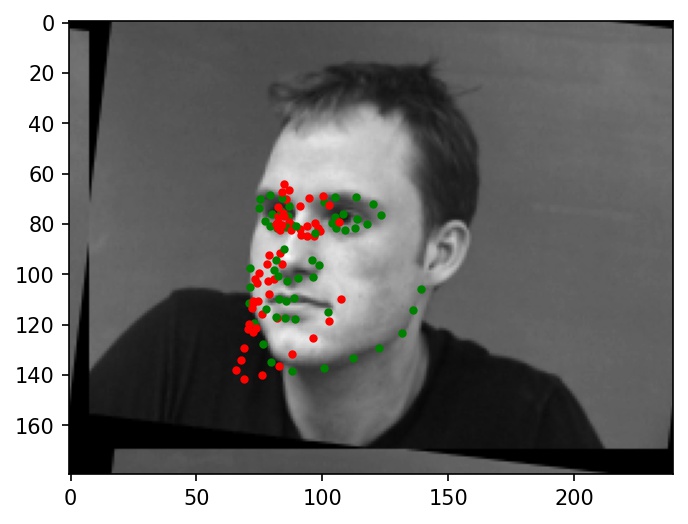 |
Why these cases failed:
It looks like the incorrectly labeled faces are often either rotated at relatively high angles (from data augmentation), or turned to the side. Many of the filters learned by my neural network might not work well with faces that have been transformed in this way, since they are sensitive to angles. In such cases, the neural network might choose to cluster the predicted points in a line around the center of the face as a way of hedging to minimizing expected loss. I believe that these qualities are a major reason for the below failure cases.
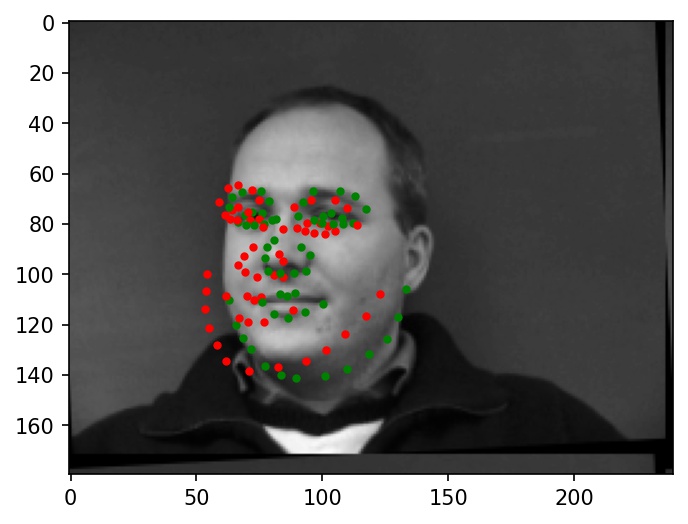
Some more examples of facial keypoint predictions:
 |
 |
 |
 |
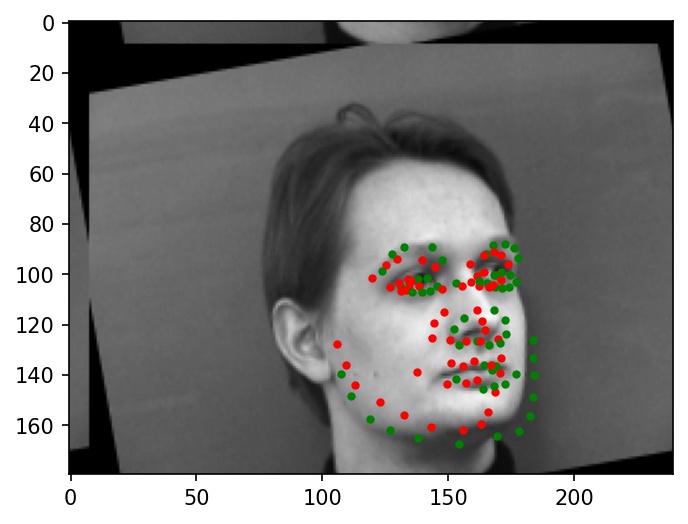 |
 |
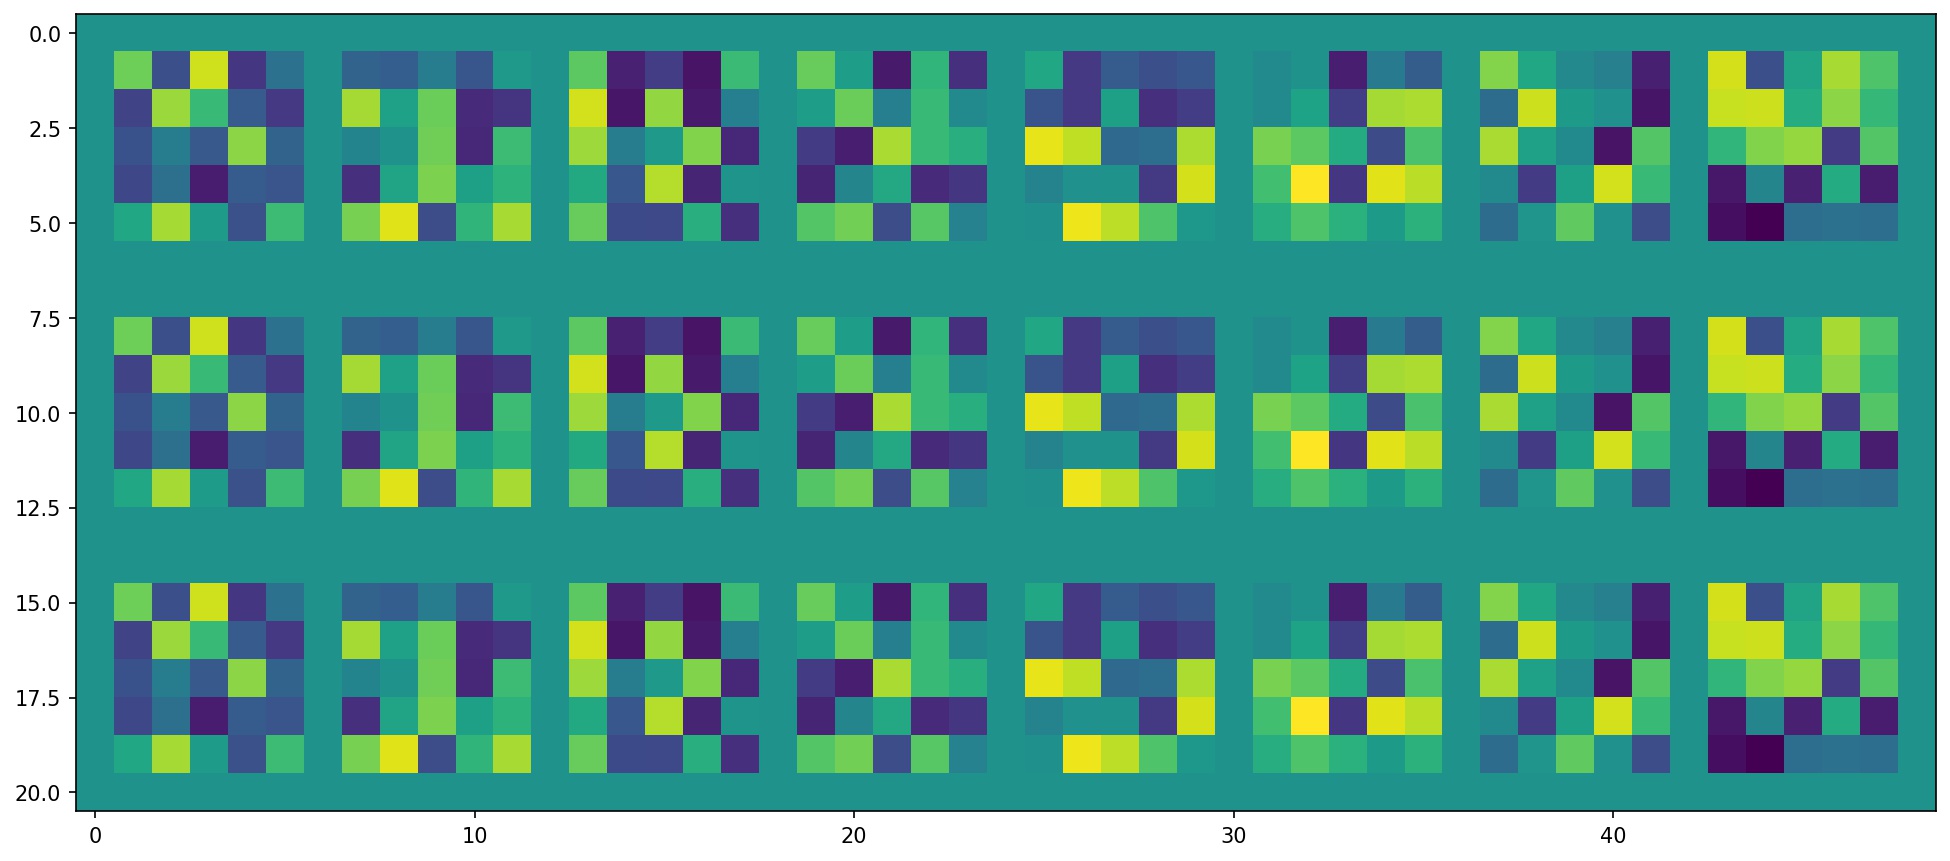
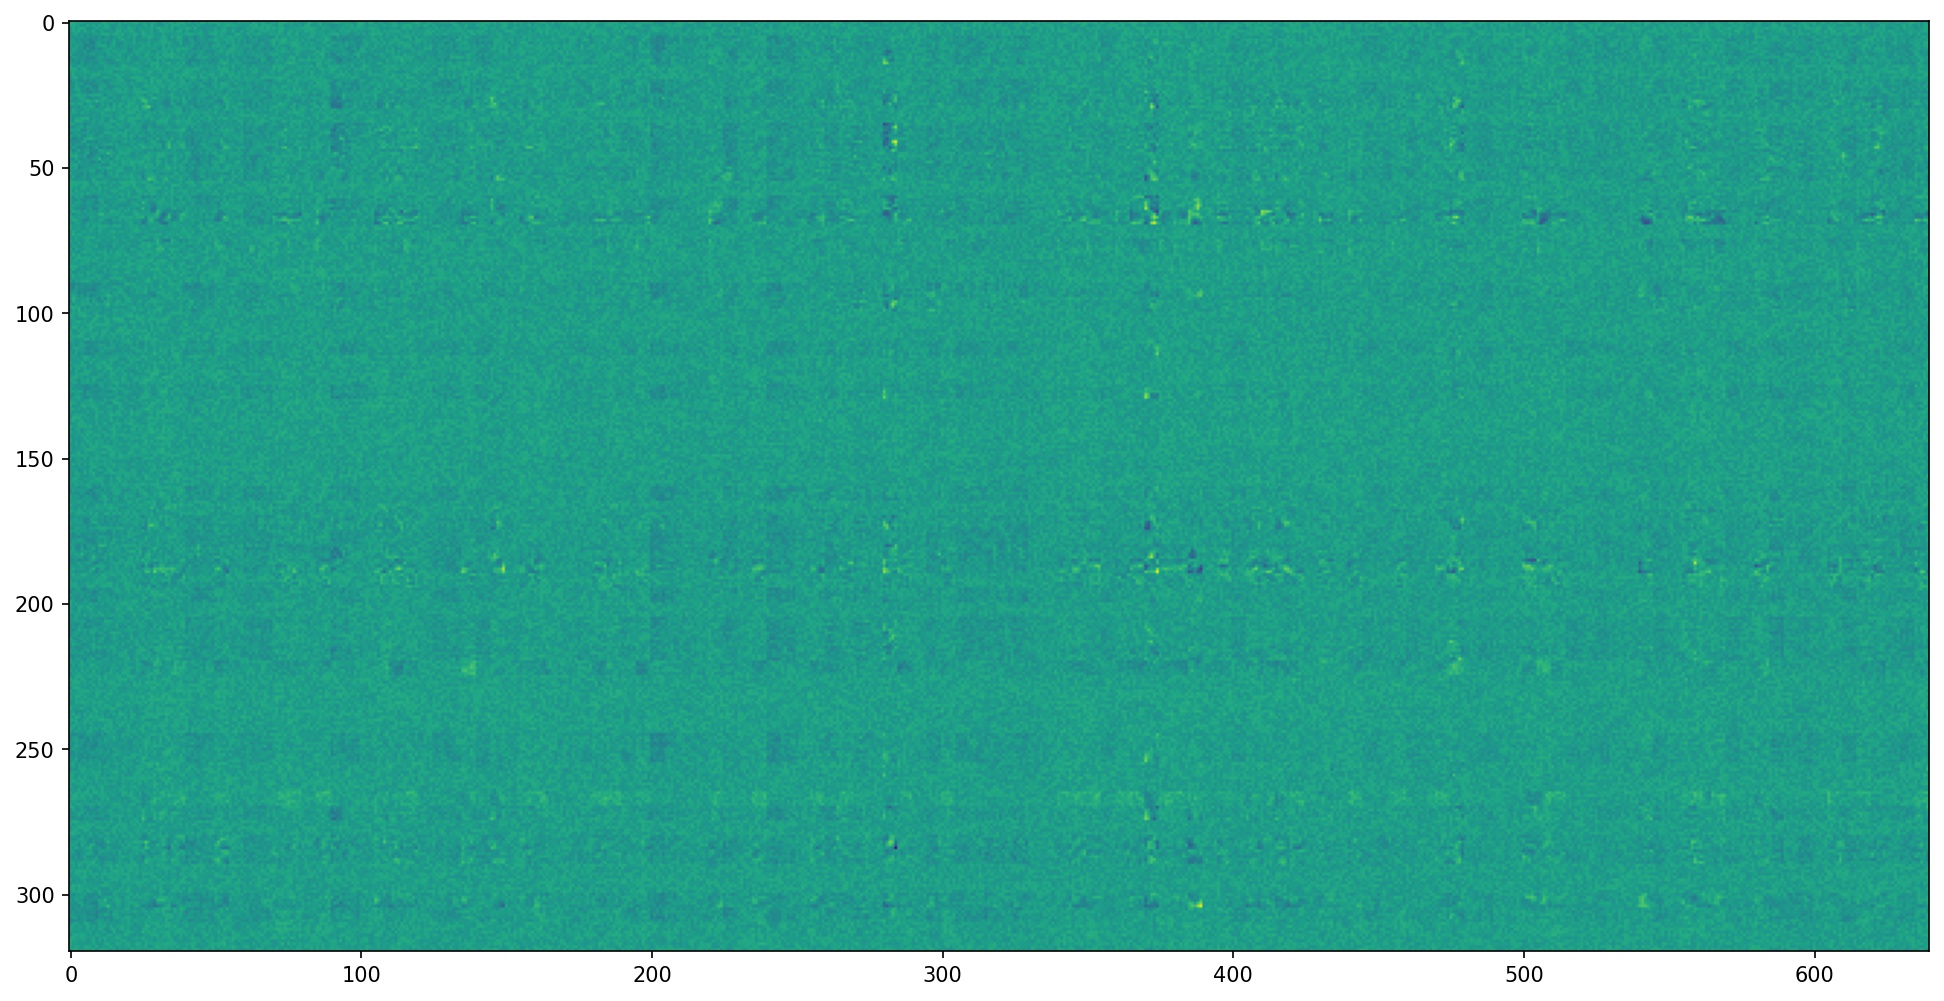
Below, I have visualized the filters learned by final, trained version of my model. Since the number of output channels doubles per layer in my architecture, the number of filters per layer grows exponentially. So, the earlier layers are much easier to visualize than the later ones. Still, I have included filters from all five layers below.
Filters in Convolutional Layer 1:
Filters in Convolutional Layer 2:
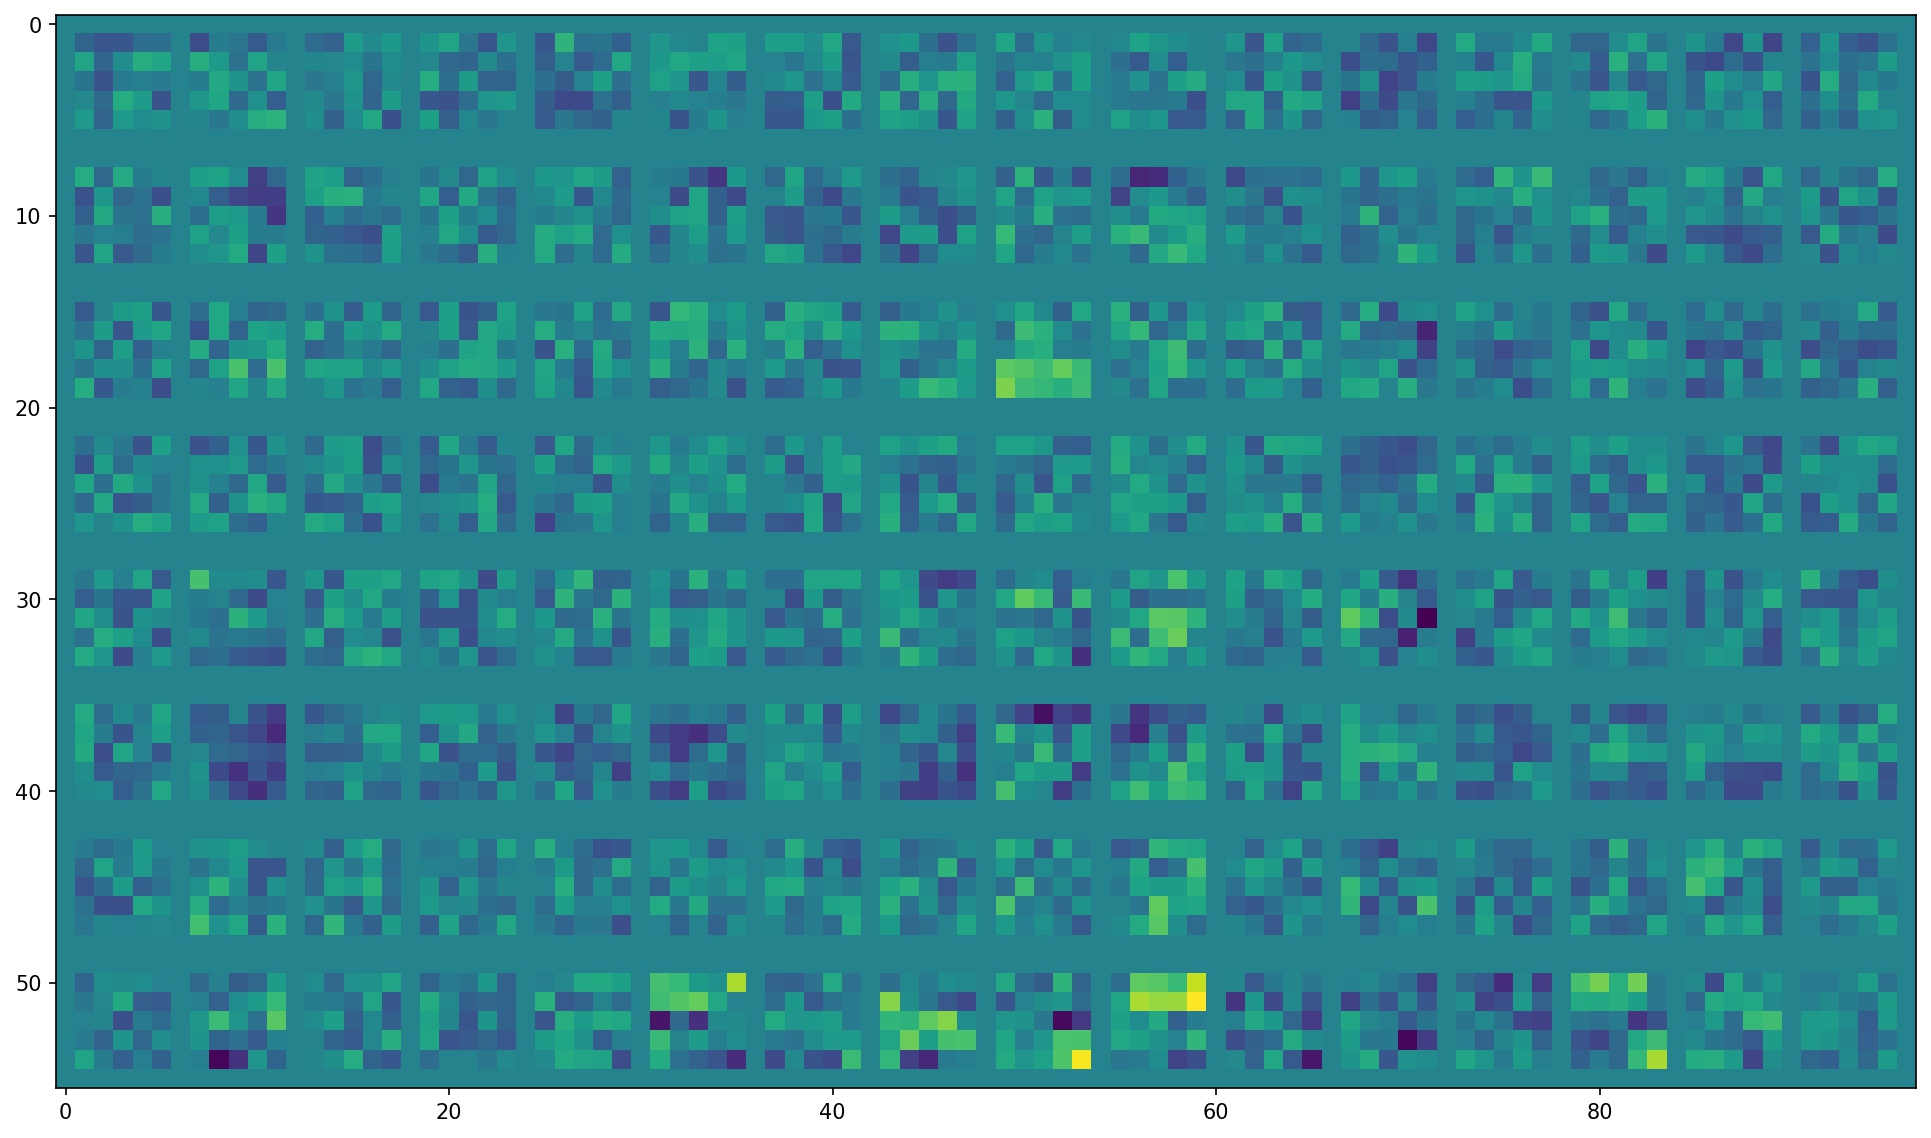
Filters in Convolutional Layer 3:
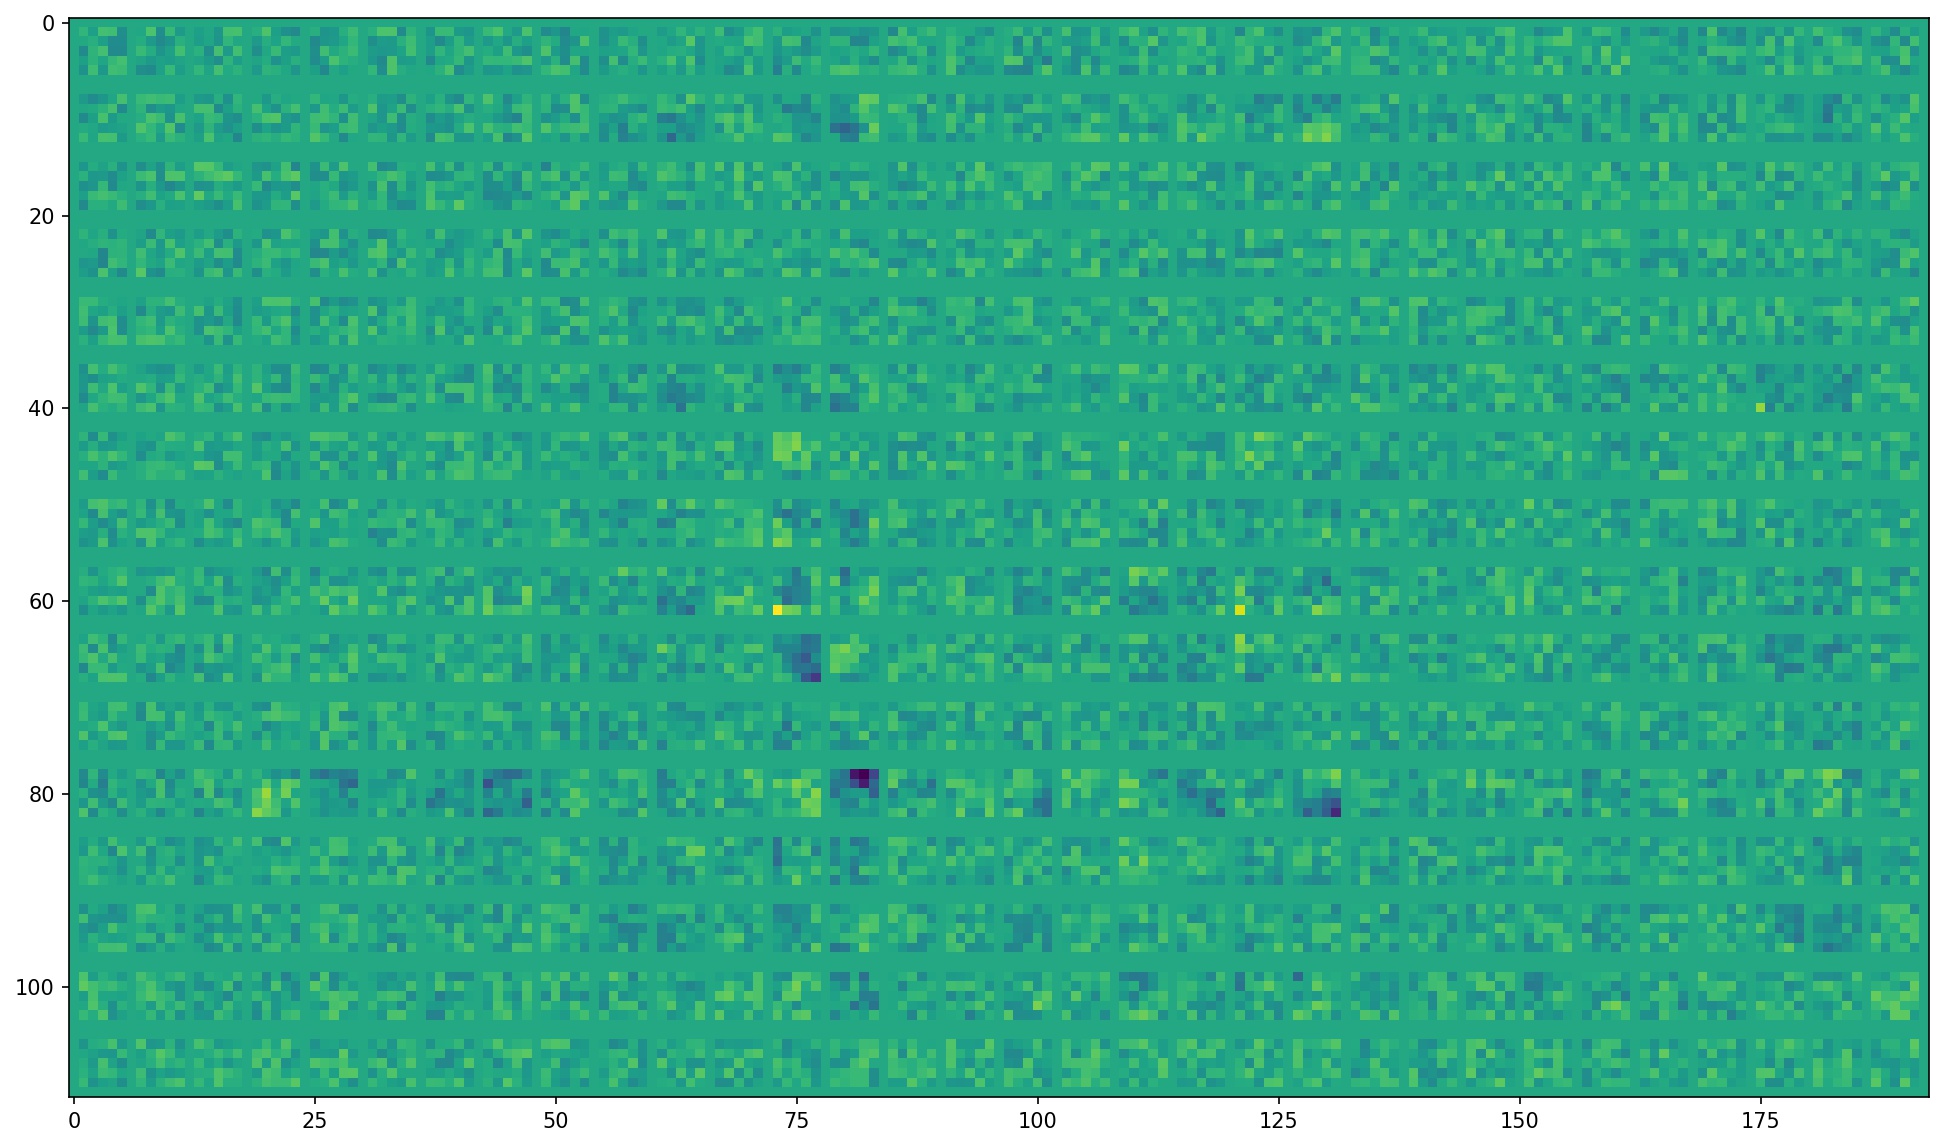
Filters in Convolutional Layer 4:

Filters in Convolutional Layer 5:
Once I finished the full facial keypoints model, I trained a similar model in Google Colab with 6666 images from the iBug Faces in the Wild dataset. I started with a pre-trained Resnet-18 model, modified to have only 1 input channel and 68 * 2 = 136 output values.
Faces in the iBug dataset tend to take up only a small part of their respective images. So, I wrote a custom dataloader to load in keypoint coordinates and images, crop faces based on bounding box coordinates, convert them to grayscale, resize them to 224x224, and normalize pixel brightnesses from -0.5 to +0.5. I also applied the same data augmentation transformations from Part 2 to this dataloader.
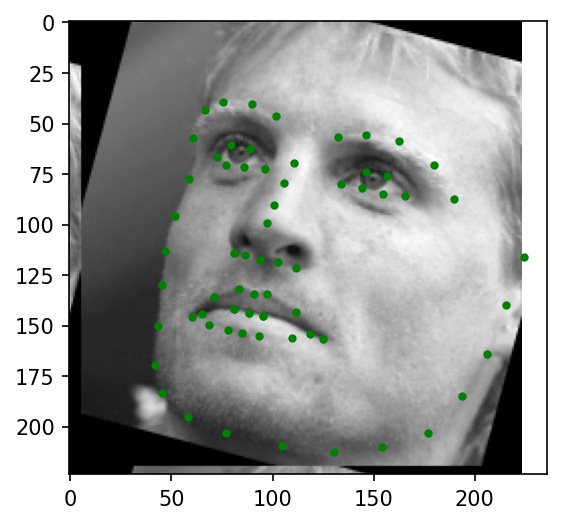
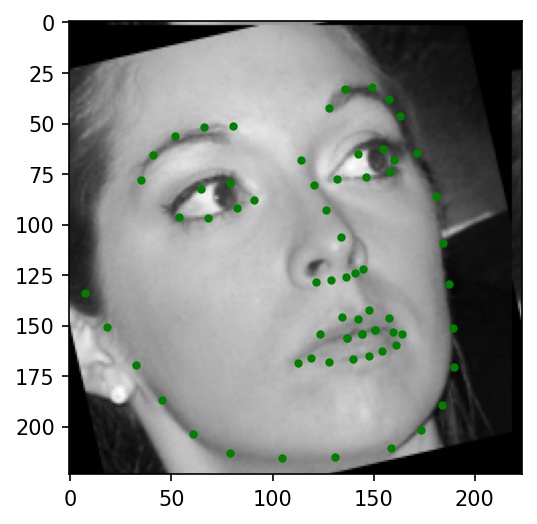
Below are a few sample images from my dataloader (keypoint ground truths are marked with green dots):
 |
 |
 |
 |
 |
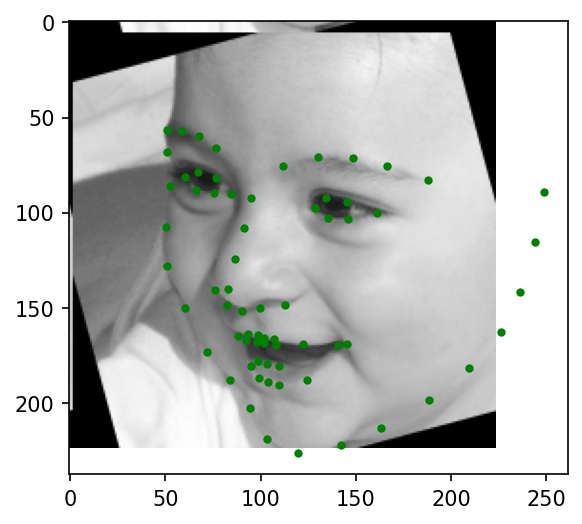 |
As mentioned, I started with a pre-trained ResNet-18 model. I then replaced the first layer with a Conv2d layer that takes in an image with 1 channel and the last layer with feed-forward Linear layer that outputs 2 * 68 = 136 features. Other than these two layers, I did not make further changes to the architecture. Below is the result of my tinkering:
ResNet(
  (conv1): Conv2d(1, 64, kernel_size=(7, 7), stride=(2, 2), padding=(3, 3), bias=False)
  (bn1): BatchNorm2d(64, eps=1e-05, momentum=0.1, affine=True, track_running_stats=True)
  (relu): ReLU(inplace=True)
  (maxpool): MaxPool2d(kernel_size=3, stride=2, padding=1, dilation=1, ceil_mode=False)
  (layer1): Sequential(
    (0): BasicBlock(
      (conv1): Conv2d(64, 64, kernel_size=(3, 3), stride=(1, 1), padding=(1, 1), bias=False)
      (bn1): BatchNorm2d(64, eps=1e-05, momentum=0.1, affine=True, track_running_stats=True)
      (relu): ReLU(inplace=True)
      (conv2): Conv2d(64, 64, kernel_size=(3, 3), stride=(1, 1), padding=(1, 1), bias=False)
      (bn2): BatchNorm2d(64, eps=1e-05, momentum=0.1, affine=True, track_running_stats=True)
    )
    (1): BasicBlock(
      (conv1): Conv2d(64, 64, kernel_size=(3, 3), stride=(1, 1), padding=(1, 1), bias=False)
      (bn1): BatchNorm2d(64, eps=1e-05, momentum=0.1, affine=True, track_running_stats=True)
      (relu): ReLU(inplace=True)
      (conv2): Conv2d(64, 64, kernel_size=(3, 3), stride=(1, 1), padding=(1, 1), bias=False)
      (bn2): BatchNorm2d(64, eps=1e-05, momentum=0.1, affine=True, track_running_stats=True)
    )
  )
  (layer2): Sequential(
    (0): BasicBlock(
      (conv1): Conv2d(64, 128, kernel_size=(3, 3), stride=(2, 2), padding=(1, 1), bias=False)
      (bn1): BatchNorm2d(128, eps=1e-05, momentum=0.1, affine=True, track_running_stats=True)
      (relu): ReLU(inplace=True)
      (conv2): Conv2d(128, 128, kernel_size=(3, 3), stride=(1, 1), padding=(1, 1), bias=False)
      (bn2): BatchNorm2d(128, eps=1e-05, momentum=0.1, affine=True, track_running_stats=True)
      (downsample): Sequential(
        (0): Conv2d(64, 128, kernel_size=(1, 1), stride=(2, 2), bias=False)
        (1): BatchNorm2d(128, eps=1e-05, momentum=0.1, affine=True, track_running_stats=True)
      )
    )
    (1): BasicBlock(
      (conv1): Conv2d(128, 128, kernel_size=(3, 3), stride=(1, 1), padding=(1, 1), bias=False)
      (bn1): BatchNorm2d(128, eps=1e-05, momentum=0.1, affine=True, track_running_stats=True)
      (relu): ReLU(inplace=True)
      (conv2): Conv2d(128, 128, kernel_size=(3, 3), stride=(1, 1), padding=(1, 1), bias=False)
      (bn2): BatchNorm2d(128, eps=1e-05, momentum=0.1, affine=True, track_running_stats=True)
    )
  )
  (layer3): Sequential(
    (0): BasicBlock(
      (conv1): Conv2d(128, 256, kernel_size=(3, 3), stride=(2, 2), padding=(1, 1), bias=False)
      (bn1): BatchNorm2d(256, eps=1e-05, momentum=0.1, affine=True, track_running_stats=True)
      (relu): ReLU(inplace=True)
      (conv2): Conv2d(256, 256, kernel_size=(3, 3), stride=(1, 1), padding=(1, 1), bias=False)
      (bn2): BatchNorm2d(256, eps=1e-05, momentum=0.1, affine=True, track_running_stats=True)
      (downsample): Sequential(
        (0): Conv2d(128, 256, kernel_size=(1, 1), stride=(2, 2), bias=False)
        (1): BatchNorm2d(256, eps=1e-05, momentum=0.1, affine=True, track_running_stats=True)
      )
    )
    (1): BasicBlock(
      (conv1): Conv2d(256, 256, kernel_size=(3, 3), stride=(1, 1), padding=(1, 1), bias=False)
      (bn1): BatchNorm2d(256, eps=1e-05, momentum=0.1, affine=True, track_running_stats=True)
      (relu): ReLU(inplace=True)
      (conv2): Conv2d(256, 256, kernel_size=(3, 3), stride=(1, 1), padding=(1, 1), bias=False)
      (bn2): BatchNorm2d(256, eps=1e-05, momentum=0.1, affine=True, track_running_stats=True)
    )
  )
  (layer4): Sequential(
    (0): BasicBlock(
      (conv1): Conv2d(256, 512, kernel_size=(3, 3), stride=(2, 2), padding=(1, 1), bias=False)
      (bn1): BatchNorm2d(512, eps=1e-05, momentum=0.1, affine=True, track_running_stats=True)
      (relu): ReLU(inplace=True)
      (conv2): Conv2d(512, 512, kernel_size=(3, 3), stride=(1, 1), padding=(1, 1), bias=False)
      (bn2): BatchNorm2d(512, eps=1e-05, momentum=0.1, affine=True, track_running_stats=True)
      (downsample): Sequential(
        (0): Conv2d(256, 512, kernel_size=(1, 1), stride=(2, 2), bias=False)
        (1): BatchNorm2d(512, eps=1e-05, momentum=0.1, affine=True, track_running_stats=True)
      )
    )
    (1): BasicBlock(
      (conv1): Conv2d(512, 512, kernel_size=(3, 3), stride=(1, 1), padding=(1, 1), bias=False)
      (bn1): BatchNorm2d(512, eps=1e-05, momentum=0.1, affine=True, track_running_stats=True)
      (relu): ReLU(inplace=True)
      (conv2): Conv2d(512, 512, kernel_size=(3, 3), stride=(1, 1), padding=(1, 1), bias=False)
      (bn2): BatchNorm2d(512, eps=1e-05, momentum=0.1, affine=True, track_running_stats=True)
    )
  )
  (avgpool): AdaptiveAvgPool2d(output_size=(1, 1))
  (fc): Sequential(
    (fc1): Linear(in_features=512, out_features=1600, bias=True)
    (relu): ReLU()
    (fc2): Linear(in_features=1600, out_features=136, bias=True)
  )
)
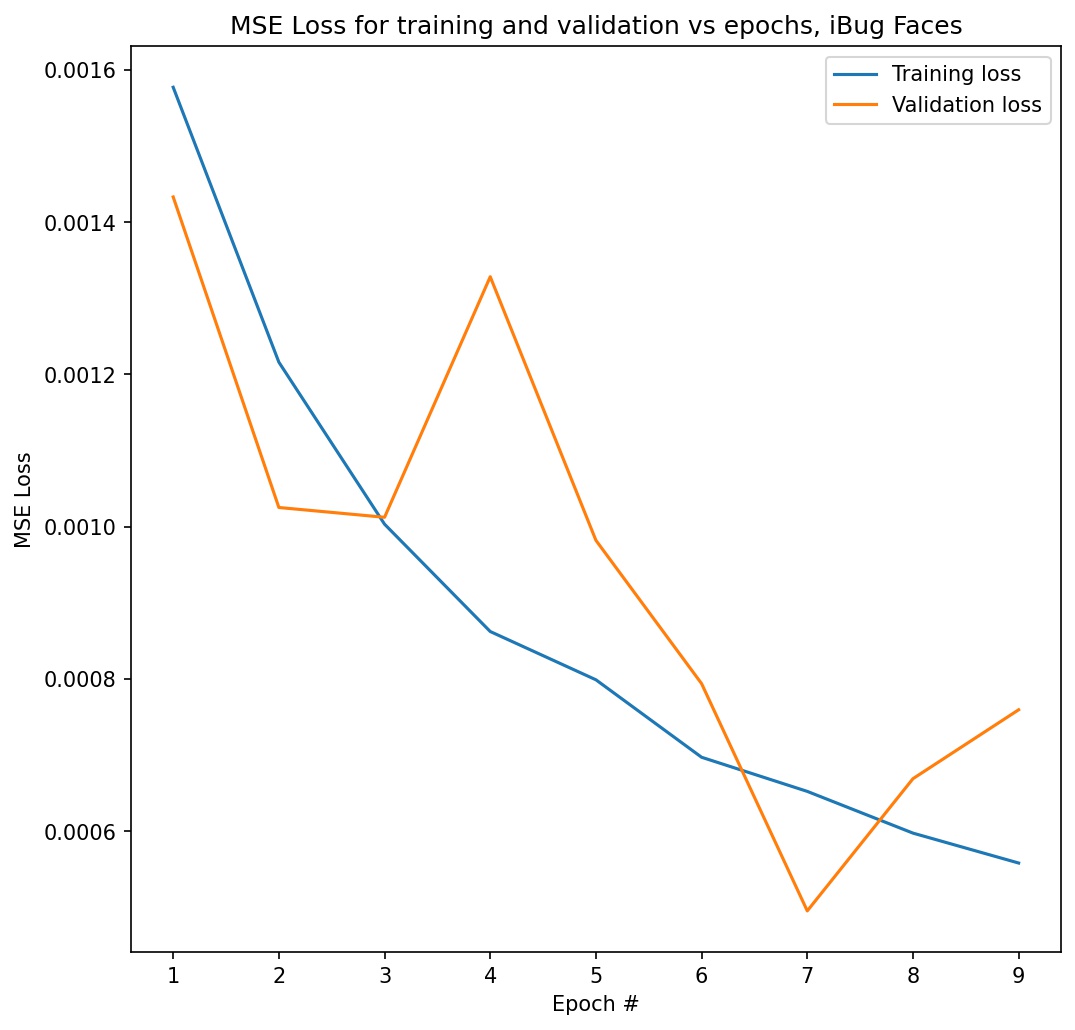
For my best entry, I trained with a batch size of 4 and a learning rate of 1e-3 (Adam) for 10 epochs. However, previously I experimented with other batch sizes (16, 32), learning rates (1e-4, 1e-2), and epoch counts.
Here is a graph of my MSE loss for training and validation for this model. I achieved a final validation loss of 0.000793 and a final training loss of 0.000588. On Kaggle, my test set results achieved a mean absolute error of 11.77980 (username: mywang-berk).
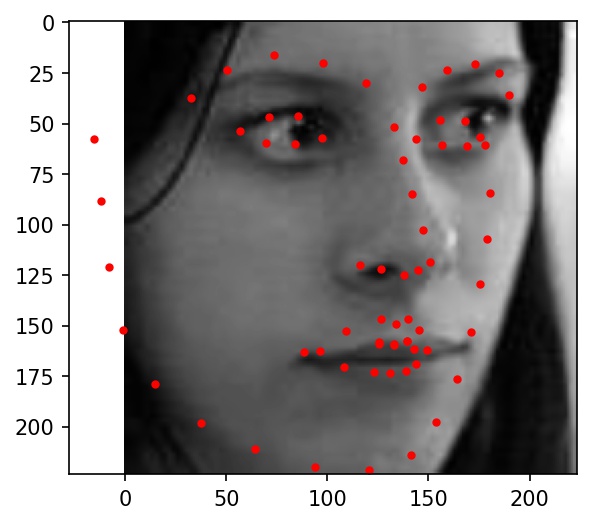
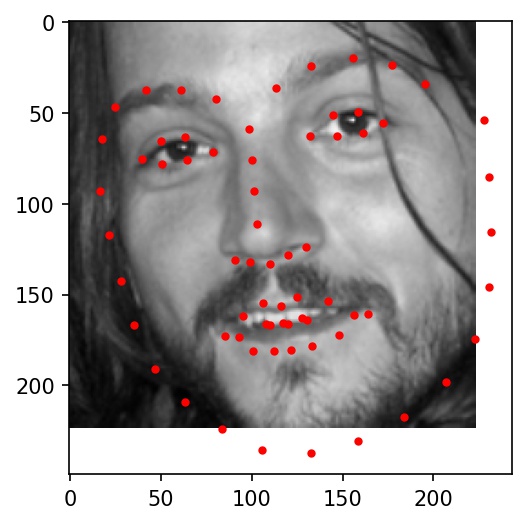
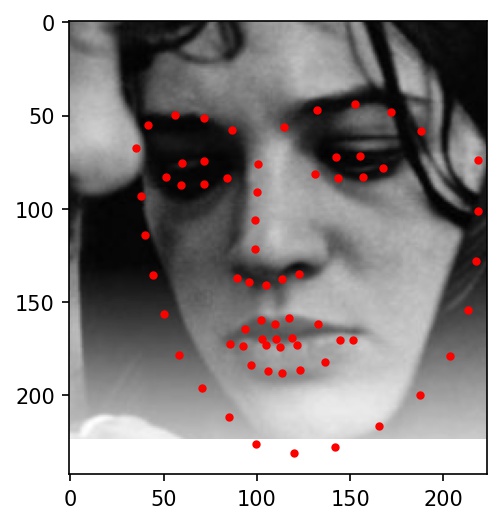
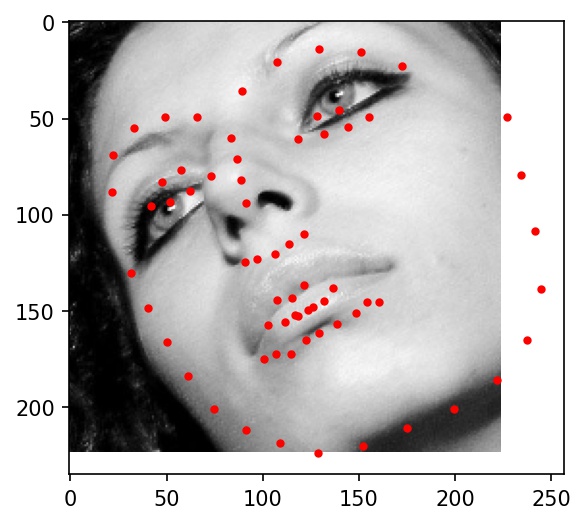
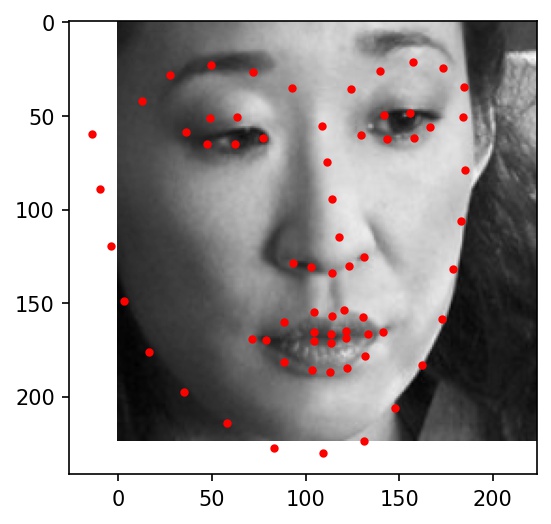
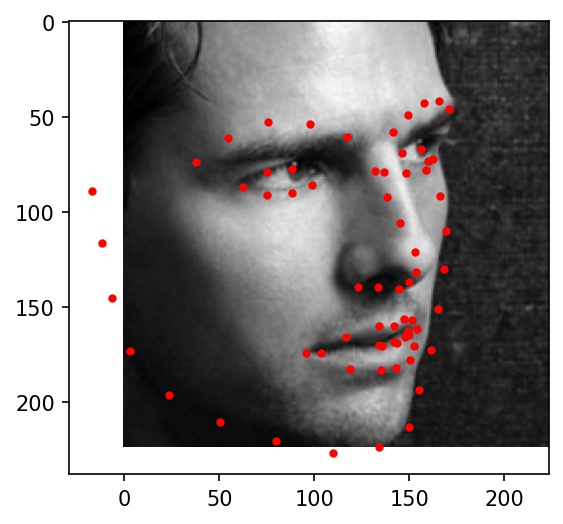
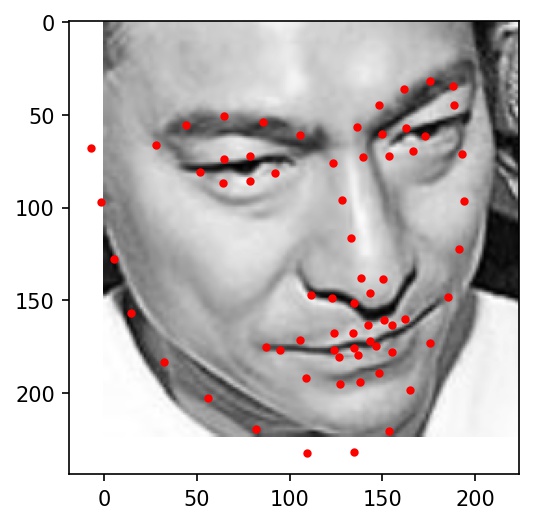
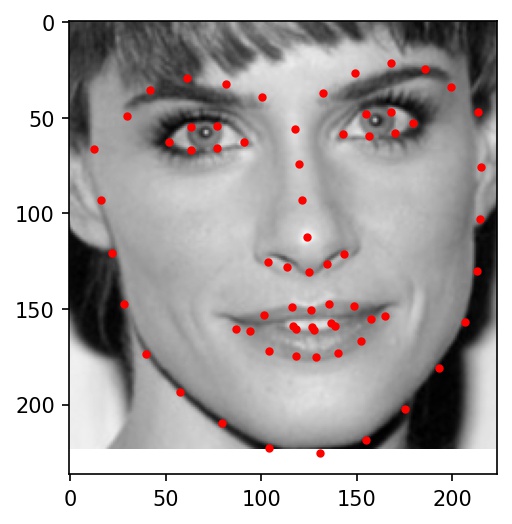
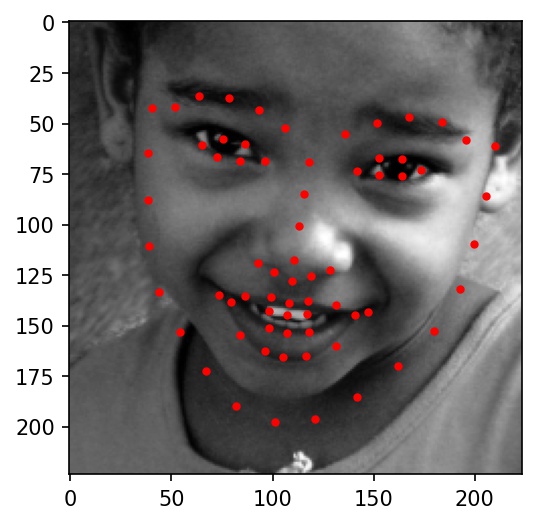
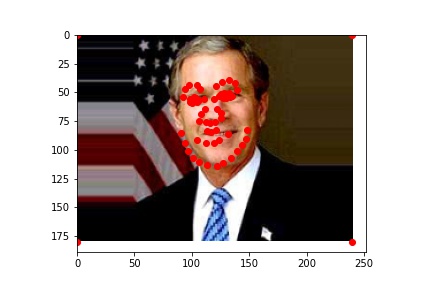
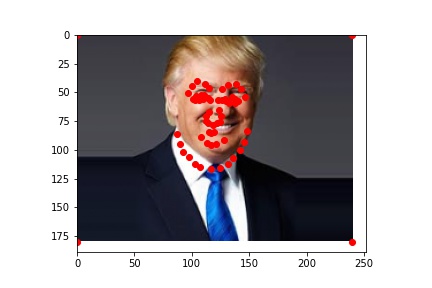
Here are some examples of testing set facial keypoint predictions. Red dots represent my network's predictions.
 |
 |
 |
 |
 |
 |
 |
 |
 |
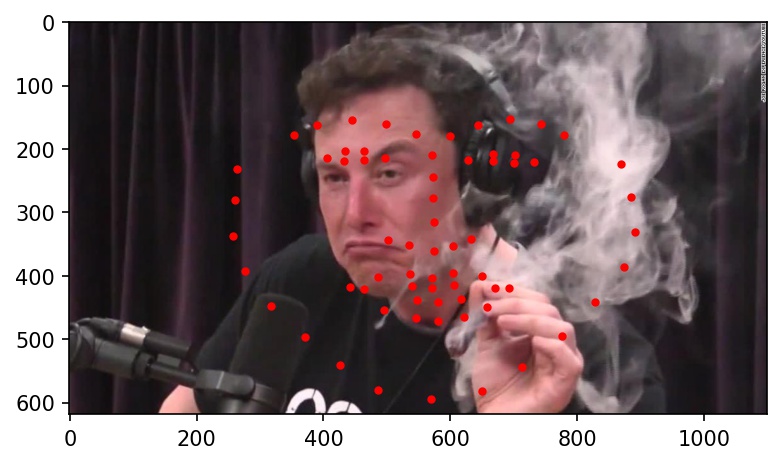
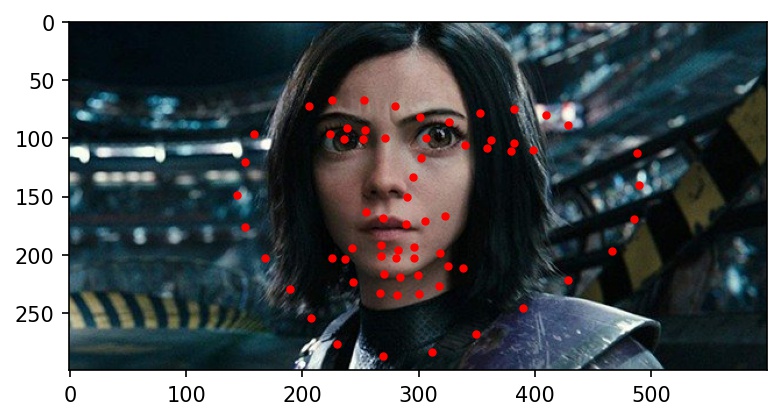
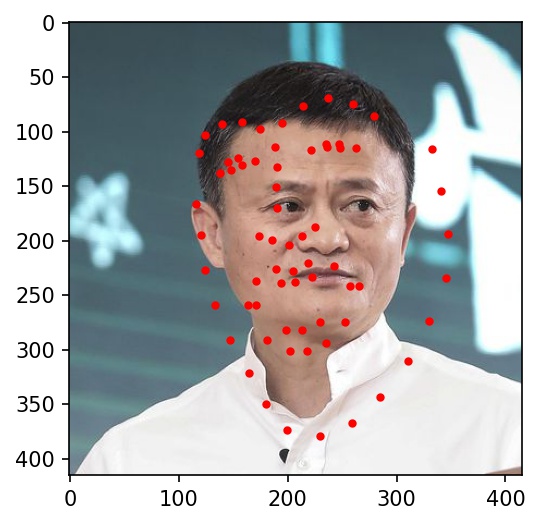
Here are the results on Elon Musk, Alita, and Jack Ma. My network doesn't really work well with any of the three below photographs. It gets the location right, but the key points always seemed to indicate a face much bigger than in the actual photograph. I believe this is because most of the cropped images from the training dataset are very zoomed in, leading the network to overfit for faces that take up the majority of the frame of the image.
 |
 |
 |
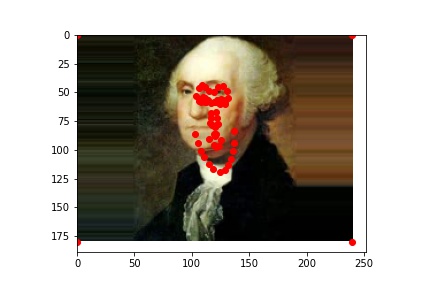
Now that I have an automatic facial keypoint detector, I can use it to morph between large groups of people. I will use this power to create a morph chain between all the US Presidents (just in time for the election!), something that would be pretty infeasible if I had to label all the keypoints by hand. To make the video, I imported some of my code from project 3 and used the same FaceNet I trained in Part 2 to label keypoints.
I used my model from Part 2 since it is a little more reliable than my Part 3 model. The results (shown below) are not perfect, since my model labels some faces more accurately...
 |
 |
... but some, not so much.
 |
 |
The completed gif: