Facial Keypoint Detection with Neural Networks
by Pauline Hidalgo
Overview
This project uses convolutional neural networks and data augmentation from PyTorch to automatically detect facial keypoints from the IMM Face dataset and the ibug face in the wild dataset.
Part 1: Nose Tip Detection
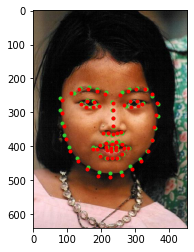
In this section, I used a convolutional neural net trained for 20 epochs with 3 conv layers and 2 fully connected layers to predict the location of the nose tip. In the dataloader, every image is converted to grayscale, the pixel values are converted to floats normalized in the range -.5 to .5, then finally the image is resized to 60 x 80. The model was trained on and predicts relative pixel positions, but all positions are converted to the actual location for display.
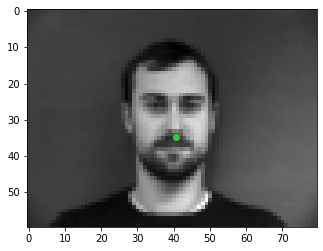
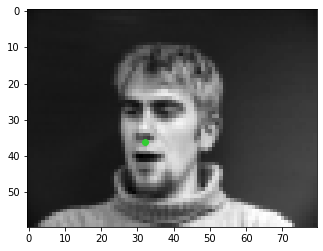
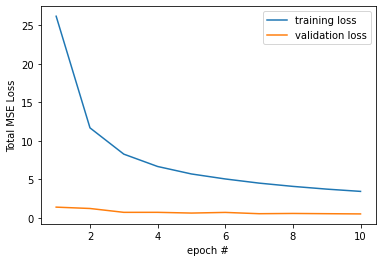
The first 192 images of the dataset were used for training, and the remaining 48 for validation. I used a learning rate of .001 and a learning rate scheduler to reduce the learning rate if the validation MSE loss didn't decrease for 2 epochs. Below are some outputs of the model with the actual points in green and the predicted points in red.
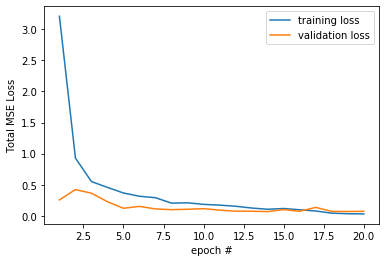
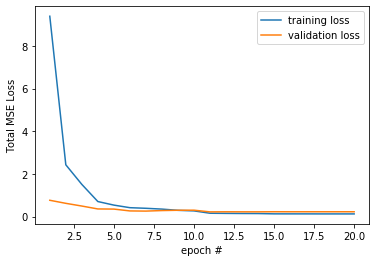
total MSE loss per epoch pt 1
dataloader output
dataloader output
dataloader output
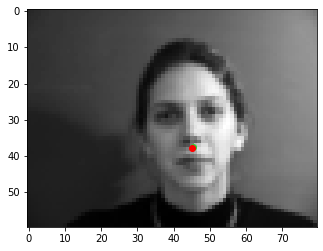
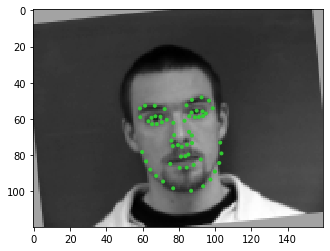
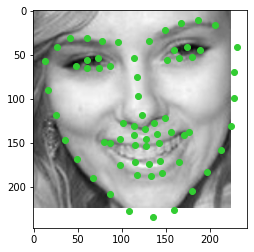
success
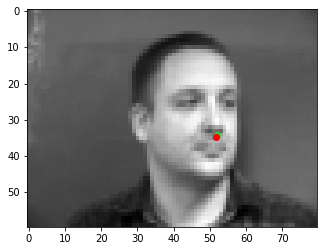
success
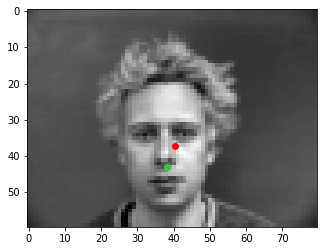
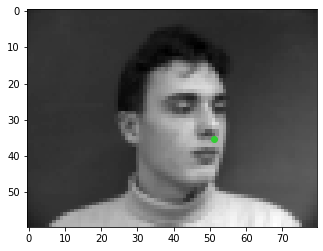
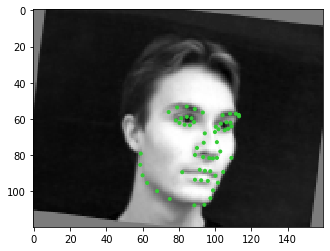
failure
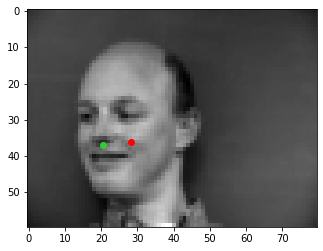
failure
For the two failure cases, it might have something to do with the hair and lack thereof, which may trick the model into thinking the face is larger than it actually is since there are more light colored pixels. The second failure case is also quite far off to the left side, which is not the typical case the model was trained on.
Part 2: Full Facial Keypoints Detection
In this part, I create a model to predict 58 facial keypoints rather than just the nose tip. The dataloader transforms the image similarly to part 1, only resizing to 120 x 160 rather than 60 x 80. To prevent overfitting, I augmented the data using PyTorch ColorJitter to randomly change the brightness and saturation of the image. Each augmented image (and corresponding keypoints) were also randomly rotated from -10 to 10 degrees. Overall, 3 new images were created for each original image, so the total size of the dataset was 240*4=960 with data augmentation. The first 192*4=768 images were used for training and the remaining 48*4=192 for validation.
Model Architecture:
This model was trained for 20 epochs with a learning rate of .0001 and a learning rate scheduler to reduce the learning rate if the validation MSE loss didn't decrease for 2 epochs. I also used a batch_size of 1.
(# input channels, # output channels, kernel size (if applicable))
- Conv layer 1: (1, 16, 7) followed by ReLU
- Conv layer 2: (16, 32, 5) followed by ReLU then maxpool of kernel size 2
- Conv layer 3: (32, 24, 3) followed by ReLU
- Conv layer 4: (24, 16, 7) followed by ReLU then maxpool of kernel size 2
- Conv layer 5: (16, 12, 5) followed by ReLU
- Fully connected layer 1: (6612, 348)
- Fully connected layer 2: (348, 116)
total MSE loss per epoch pt2

dataloader output
dataloader output
dataloader output
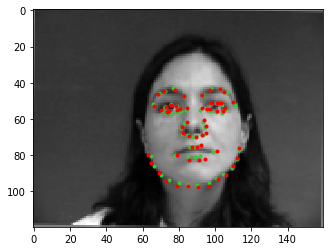
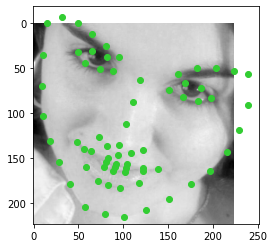
success
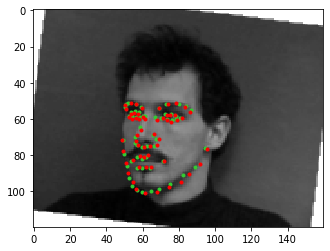
success
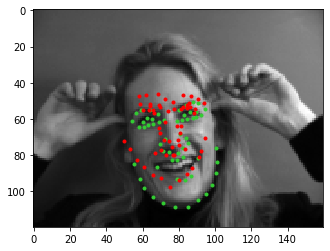
failure
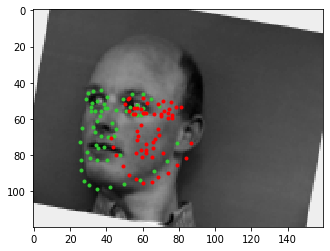
failure
The edges and pixels from the hands in the first failure case probably threw off the model's guess for where the face was/where the person was facing/the size of the face as no other training images had hands. The second failure case might've again been due to the baldness, along with looking far off to the left and having a good amount of rotation, too.
Visualizing filters:
From the first conv layer (7x7 filters):

From the second conv layer (5x5 filters):

Part 3: Train With Larger Dataset
In this part, I train a model on the ibug face in the wild dataset, consisting of 6666 images and 68 landmarks per image. Similar to previous parts, images are converted to grayscale and the pixel values are converted to floats normalized in the range -.5 to .5. Every input image is also cropped to according to the bounding box (any negative bounding box coordinates are set to 0) then finally resized to 224x224. For data augmentation, I again used ColorJitter to randomly change the brightness and saturation of the image in the __getitem__ method (as opposed to expanding the size of the entire dataset like in part 2). I also decided not to rotate the images to help with training time and preserve the accuracy of the landmarks. The first 6000 images were used for training and the remaining 666 for validation.
Model Architecture:
This model was trained for 10 epochs with a learning rate of .001 and a learning rate scheduler to reduce the learning rate if the validation MSE loss didn't decrease for 2 epochs. I also used a batch_size of 1. As suggested in the project spec, I used the ResNet18 model predefined by Pytorch with the first input channel set to 1 for grayscale images, and the final output channel set to 68*2=136 for the landmark predictions. The exact definition/details of the architecture can be found at the bottom of this site.
total MSE loss per epoch pt3
dataloader output
dataloader output
dataloader output
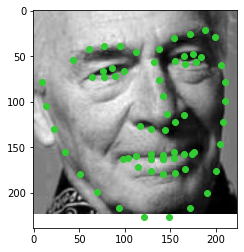
success
success

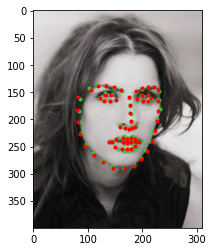
failure
failure
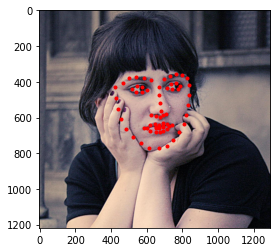
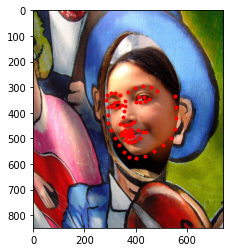
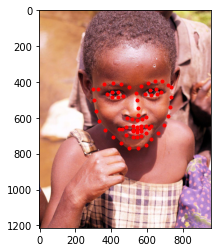
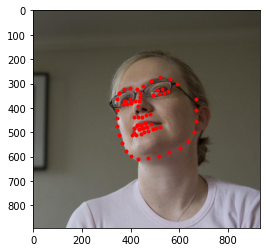
Generally, the model does pretty well, especially with faces pointed directly at the camera. The two failure cases are faces more to the side and with textured backgrounds directly behind the face, which might've thrown off the model's guess for where the face ended. Below are some predictions for the test set, and from Kaggle this model has a mean absolute error of 8.48938.
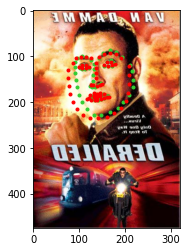
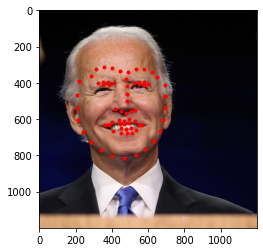
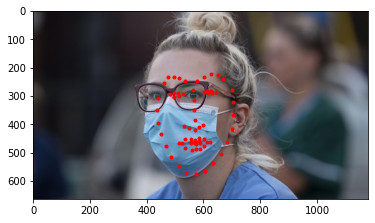
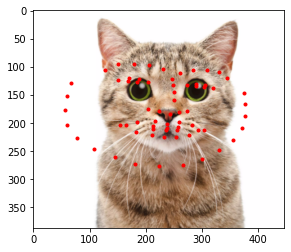
Finally, here is the model run on some photos that I thought would be interesting. It does decently for Joe Biden, but less so for the masked face and cat which is understandable since the model wasn't trained on images like those.
collection 1
collection 2
collection 3
Overall, this was a really interesting project that took a lot of patience, but the model results were pretty cool to see and it was nice to learn how to use PyTorch! Below is the detailed model used in part 3: