Sample 1
Sample 2
Ikram Magzoub, Fall 2020
Overview
In this project, our goal is to create and train Convolutional Neural Networks to automatically detect keypoints on various faces using Pytorch and key linear algebra concepts. Essentially, we were automating the part of project 3 where we selected the correspondence points manually one at a time.
Part 1: Nose Tip Detection
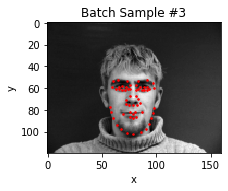
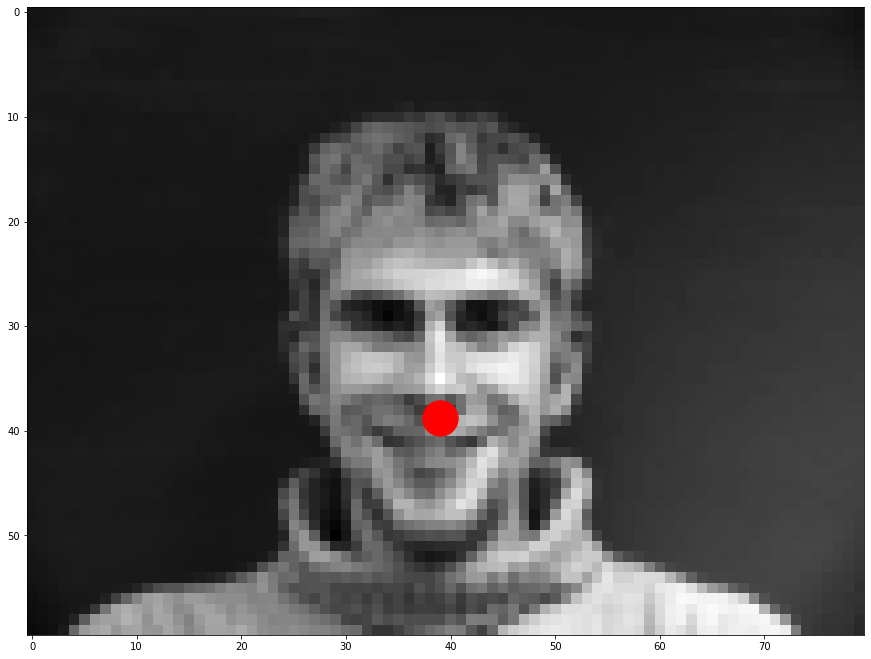
In this portion of the project, I first began by processing the images from the IMM Face Database and reading the ground truth points. I created a dataloader and visualized the ground truth keypoints on the IMM images. Below are sampled images from my dataloader:
Sample 1 | Sample 2 |
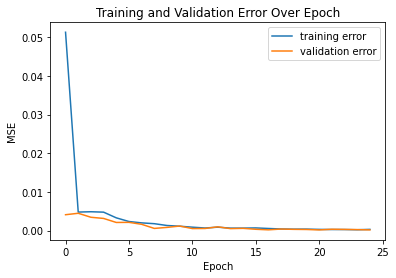
From here, I built a small neural network that automatically detects the nose tip on each image. To do that, I had to build and train a model. I chose to use a 5 layer neural net that has 3 convolutional layers. Below is the training loss vs. validation loss across all epochs.
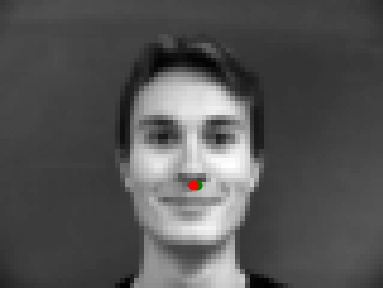
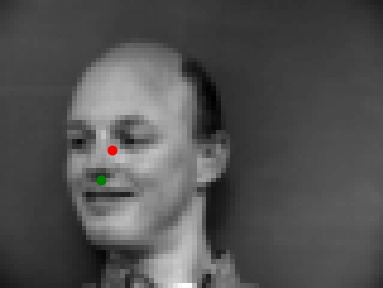
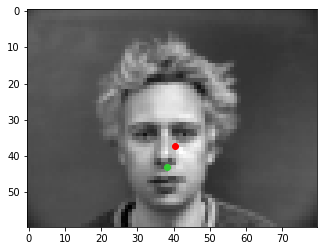
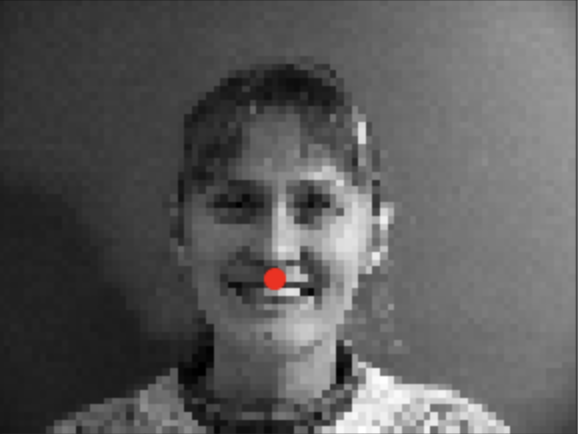
From there, I ran my trained model on images from the IMM database. Below are some sampled results that show my predicted nose tip in red and the ground truth keypoint in green.
Sample 1 (Success) | Sample 2 (Good prediction) |
Sample 3 (Failure) | Sample 4 (Failure) |
As you can see, my model was not perfect. There were some cases where the predicted point was not close to the ground truth point making it a failure case. The first failure case above likely happened due to the picture being taken at an angle. His face is not straight which probably contributed to the wrong detection. In the second failure case, the person’s hair is very high making it seem that the face is much larger than what it actually is.
Part 2: Full Facial Keypoints Detection
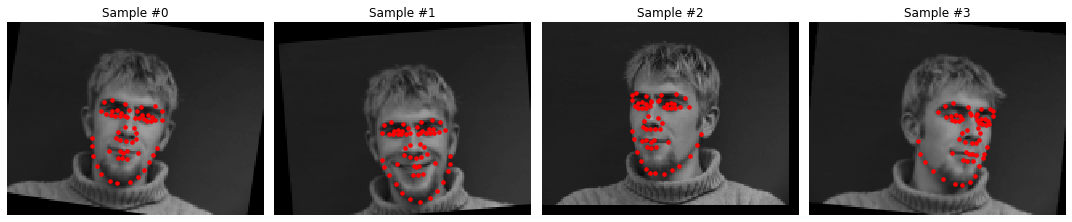
In the second part of the project, the main goal was to build on our knowledge from part one and create a model that predicts all 58 facial keypoints at once.I randomly rotated each image between -8 to 8 degrees and also changed the brightness. Below are sampled images from my dataloader:
Sample 1 | Sample 2 |
The model I built used an Atom optimizer with a learning rate of .001. For the neural network, I used 5 convolutional layers and 2 fully connected layers. Here is my architecture:
{
conv1: Conv2d(in_channels=1, out_channels=12, kernel_size=5, stride=2, padding=2)
conv2: Conv2d(in_channels=12, out_channels=24, kernel_size=5, stride=2, padding=2)
conv3: Conv2d(in_channels=24, out_channels=32, kernel_size=3, stride=1, padding=1)
conv4: Conv2d(in_channels=32, out_channels=32, kernel_size=3, stride=1, padding=1)
conv5 = nn.Conv2d(in_channels=32, out_channels=24, kernel_size=3, stride=1, padding=1)
fc1: Linear(in_features=360, out_features=240, biased = True)
fc2: Linear(in_features=240, out_features=116, biased = True)
}
I also followed each convolution layer with a ReLU and followed the first 4 layers with a maxpool of kernel size 2.
Below is the training loss vs. validation loss across all epochs:
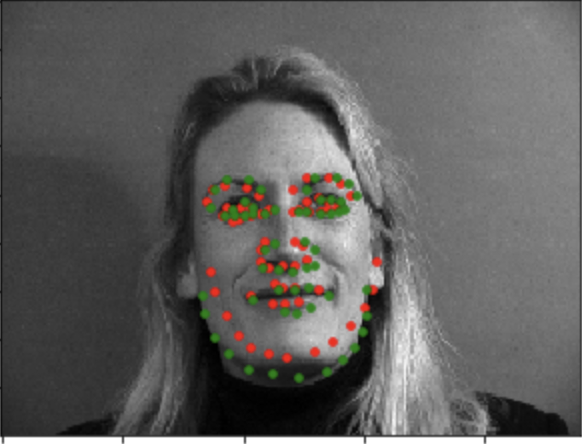
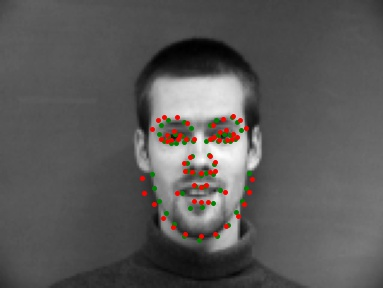
Here are my prediction after running the model:
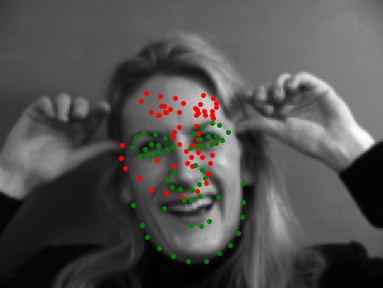
Sample 1 (Success) | Sample 2 (Good prediction) |
Sample 3 (Failure) | Sample 4 (Failure) |
As you can see above, not all outputs were a success. Similar to the first part of the project, images where the face was at an angle or there was noise (i.e hand motions or exaggerated faces) the keypoints were not detected properly. This is why sample 3 and sample 4 were a failure case.
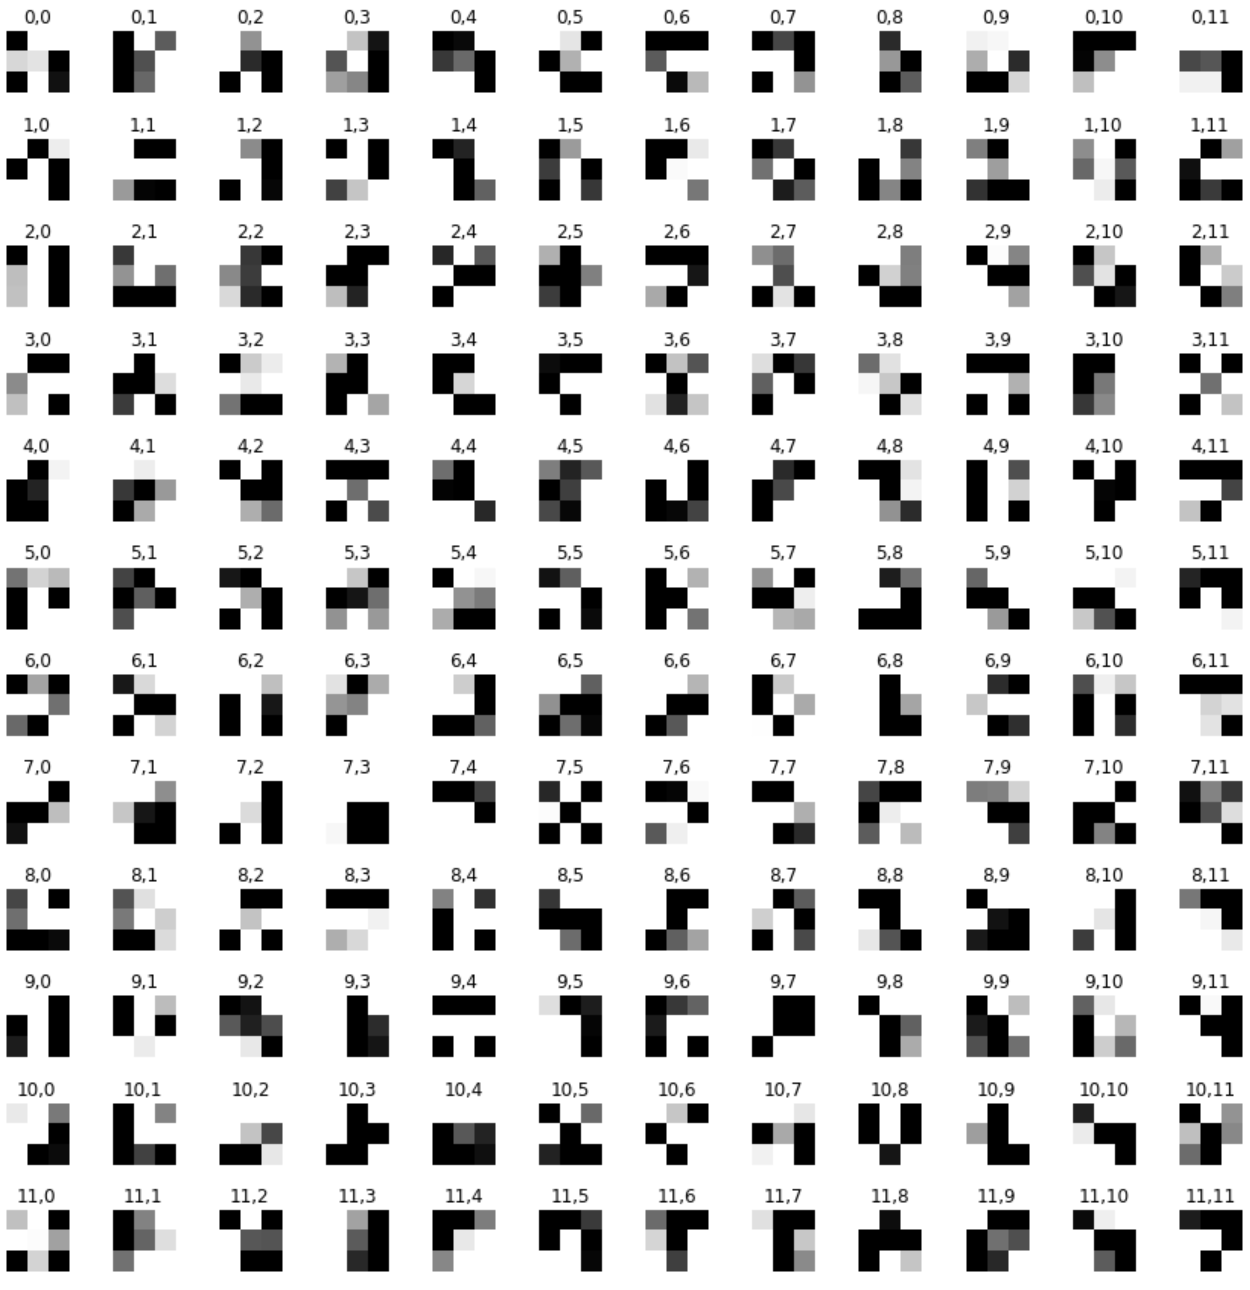
Below is a sample of the visualized filters which was taken from the first and second convolution layer.
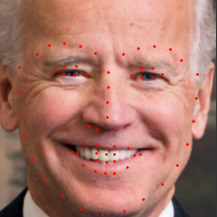
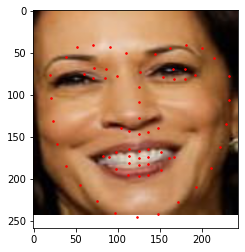
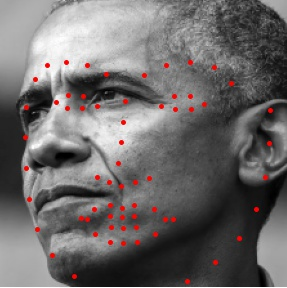
Part 3: Train With Larger Dataset
For this part, the goal was exactly the same as part 2. However, we needed to train the model on a larger dataset. For the CNN, I used ResNet18 from pytorch to complete this portion. I didn’t need to modify the architecture a lot from part 2 other than changing the input channel to 1 and output channel to 68*2. I still used the Adam optimizer.
Below is the training loss vs. validation loss across all epochs:
Unfortunately, I kept encountering an error when submitting to kaggle and was unable to properly format my csv file. Below are sampled results from the training set images as well as a few ones selected by me.
- | |
Sample 1 from training set | Sample 2 from training set |
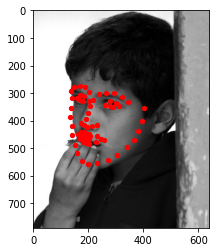
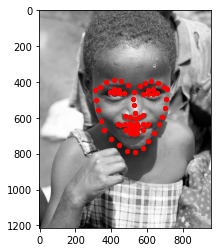
Sample 1 from my collection | Sample 2 from my collection | Sample 3 from my collection |
As you can see, the final image was a failure case and it was again due to the angle of Obama’s face.
Final Thoughts
Overall, this project was extremely difficult for me. I had a really hard time navigating everything and getting to the end result. I also really struggled with part three and figuring out how to properly submit to kaggle. Although this project was extremely difficult, I still learned a lot from it.