In this project, we first learned how to load and normalize our image sets and to build neural networks that can utilize this data by using PyTorch. We then designed a neural network that was capable of detecting a nose on human faces. Then, we learned how to build a more sophisticated network that could do simple facial recognition and how to augment our data to improve the machine learning process by using transformations. And lastly, we used used all of these techniques to process a larger image set and use it to train a predesigned PyTorch neural network that could do much more robust facial recognition.
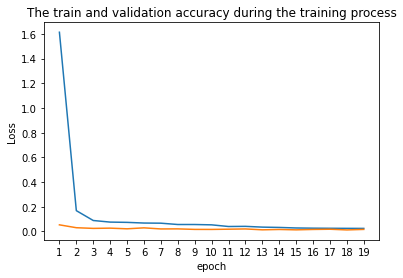
In this section we imported our Dane premarked images and designed a very simple five to six layer convolutional neural network. Our images were turned to greyscale, normalized, and rescaled to (80 x 60) prior to being used for training and validation.
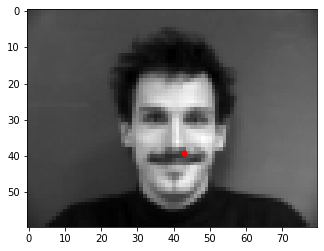
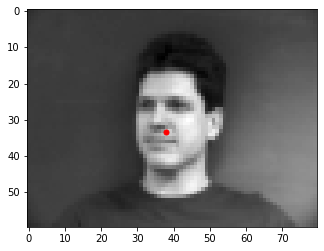
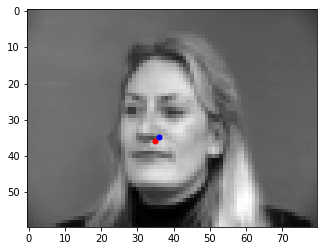
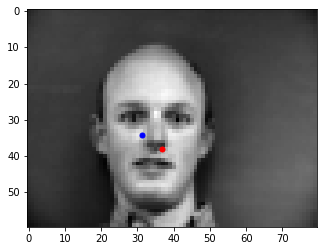
Before training the actual model, I first had to load the data and ground truth nose tips into the program. Here are some images from the training set along with the true nose tip keypoints(in red).
Net
(
(conv1): Conv2d(1, 12, kernel_size=(5, 5), stride=(1, 1))
max_pool2d(relu(conv1(x)),(2, 2))
(conv2): Conv2d(12, 32, kernel_size=(3, 3), stride=(1, 1))
max_pool2d(relu(conv2(x)),(2, 2))
(conv3): Conv2d(32, 18, kernel_size=(5, 5), stride=(1, 1))
max_pool2d(relu(conv3(x)),(2, 1))
(fc1): Linear(in_features=1008, out_features=120, bias=True)
relu(fc1(x))
(fc2): Linear(in_features=120, out_features=2, bias=True)
)
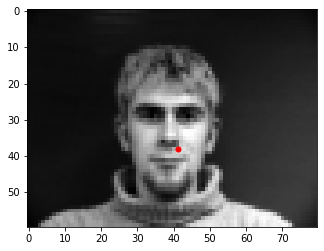
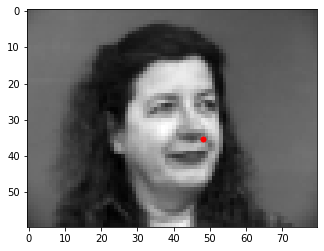
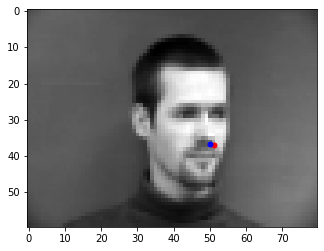
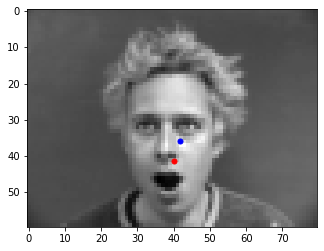
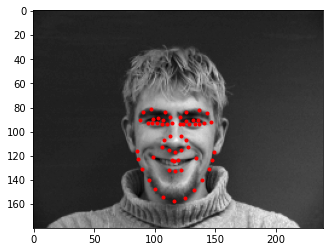
And finally you can see the results of 4 images from the validation set being passed into our neural network. The first and second images are successes, with the network either predicting the exact location or being only a couple of pixels from the actual value of the nose point. Unfortunately, though, the third and fourth images are failures. There re two reasons for these failures. For third face, we could see that he has a face with open mouth which is abnormal compared to other faces in the training data set. For the fourth face, this is most likely because most of the images in our training dataset are of the humans being in the center of the frame, however the forth man was a little bit left to the center, which may lead to the failure.
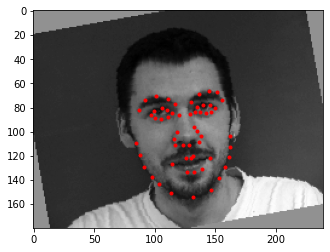
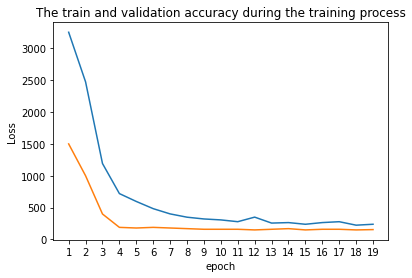
In this section, we expanded on what we did in the first section, building a neural network that involves more convolutional layers with outputs 116 data points (58 facial point), representing the 58 points used to detect faces. Moreover, we used data augmentation to generate more photo for training and help prevent our network from overfitting on the training data. Below you can see the results of our data augmentation on the the training image set. The images are being randomly rotated ± 15 degrees, and the face point in the figure were transformed based on the image transformation Lastly, the images that the network processes have dimensions (240 x 180).
Net
(
(conv1): Conv2d(1, 16, kernel_size=(7, 7), stride=(1, 1))
max_pool2d(relu(conv1(x)),(2, 2))
(conv2): Conv2d(16, 32, kernel_size=(5, 5), stride=(1, 1))
max_pool2d(relu(conv2(x)),(2, 2))
(conv3): Conv2d(32, 20, kernel_size=(3, 3), stride=(1, 1))
relu(conv3(x))
(conv4): Conv2d(20, 12, kernel_size=(7, 7), stride=(1, 1))
max_pool2d(relu(conv4(x)),(2, 2))
(conv5): Conv2d(12, 16, kernel_size=(5, 5), stride=(1, 1))
relu(conv5(x))
(fc1): Linear(in_features=3840, out_features=300, bias=True)
relu(fc1(x))
(fc2): Linear(in_features=300, out_features=116, bias=True)
)
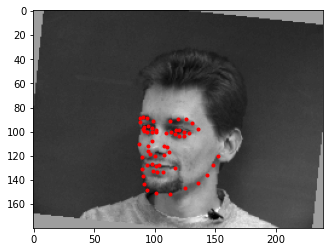
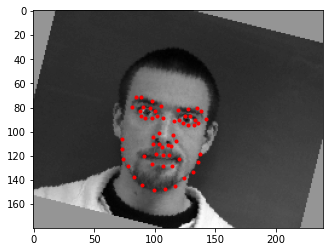
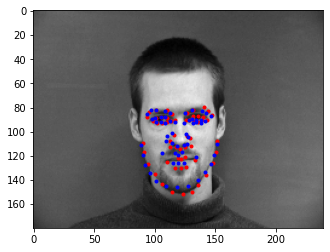
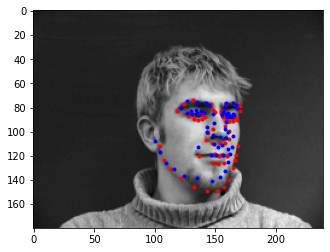
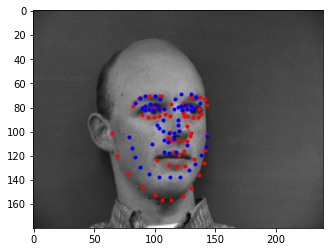
Below you can see the results of our simple facial detection network on the validation set images. As can be seen, the model is successful predict the facial point for first two faces, however it fails for the last two faces. The possible reason could be there are little photo showing the side of the face, espcially when the face is located left to the center of the figure. The other reason could that my data augmentation (only rotating phtot) is not enough for 58 facial point, the model is not genralizeable for all knid of faces. In the futrue, we need to try larger data set and more ways of data augmentaion, such as shifting and change of brightness.

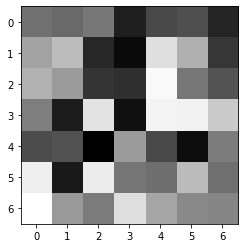
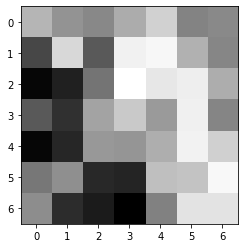
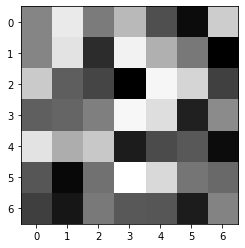
Below you can see the visualization of the filter of the first convolution layer [(conv1): Conv2d(1, 16, kernel_size=(7, 7), stride=(1, 1))]

After several attempation on smaller dataset, in this part we deal with larger dataset from the iBug image set and used a pretrained PyTorch model called ResNet18 with two modifications. The first layer was modified to accept images with 1 input channel (i.e. greyscale images) and the last layer was modified so that its output channel was 136 which is the number of landmark points for each image. Before training the model, several photos along with its face points were shown in the following part.
In the Kaggle competition, this ResNet18 model's predictions received a mean absolute error of 15.21469 on testset.
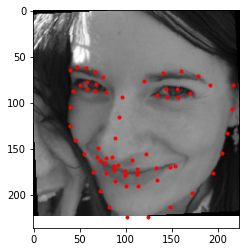
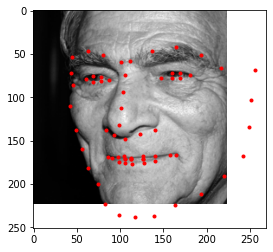
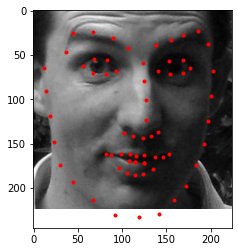
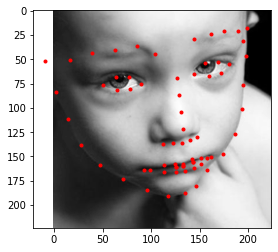
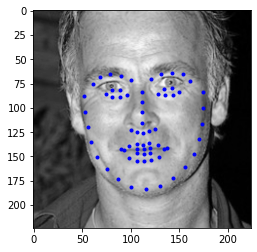
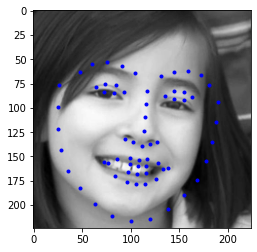
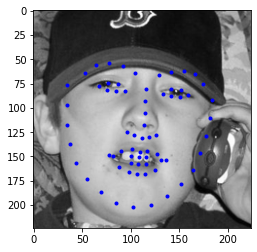
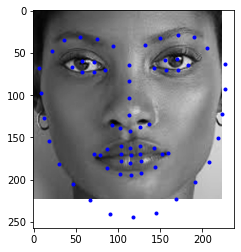
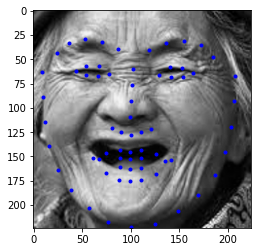
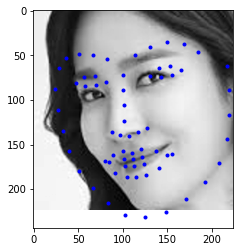
Below you can see the results of simple facial detection network on the test set images. In most of the face images, the facial points were predicted correctly and some time may have larger error on face that were rotated to one side, such as the woman and the older man's face in the following figures.
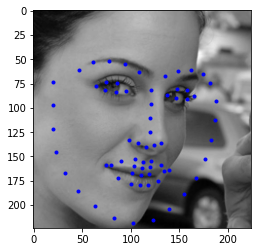
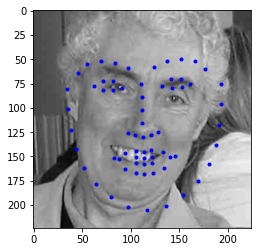
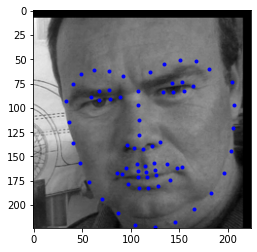
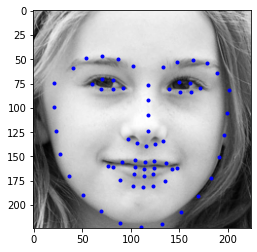
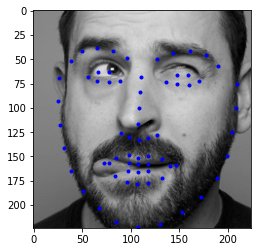
Then, I choose four faces from my collection, the results are shown below. For most of the face, this ResNet18 model did a good job, however as the faces in the test set, ratated faces usually had larger error. Although, the predicted facial point looked good on my collection but when you look into it, you may find litter offset, this may due to the high contrast or higher brightness.

I love this project! It is tough to finish this project and I need to think of the mapping algorithm, but I really enjoy it. I am thinking that this morphng technique might be the behind scence algorithm of beauty function for most of the retouching software. I am the one who is the fan of Photography, this project really help me understand how some function inside the Photoshop work.