CS 194
By Won Ryu
When determining the facial keypoints in the previous projects, the keypoints were hand labeled manually. However this project is going to enable us to automatically find those keypoints using computational techniques. We will be using Convolutional Neural Networks that will be trained with data which will be pictures of faces and their facial keypoints. With this Convolutional Neural Network, we will be able to automatically find the facial keypoints from a picture of a face.
To start, we’ll be starting with a toy problem where our objective is to predict the nose tip. There are 240 images of faces labeled with facial keypoints in the dataset we are using and for this part we will only use the label for the nose tip when training our model. As there are 240 images we will be using 80% of it (192 images) for the training and the remaining 20% (48 images) as the validation data that we can check the error on to ensure we aren’t overfitting. The images were converted to a grayscale image and pixels were normalized to values between -0.5 and 0.5 and resized to a smaller size of 80X60.
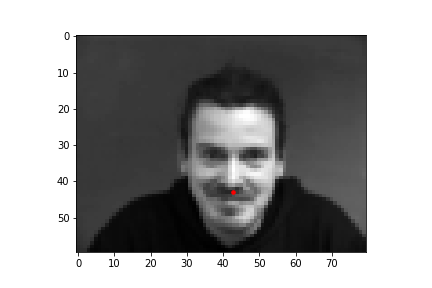
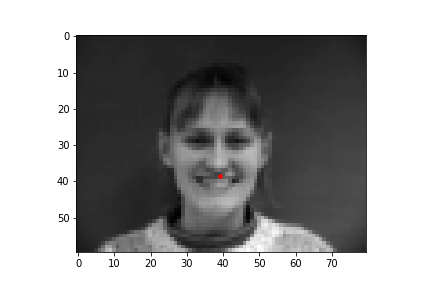
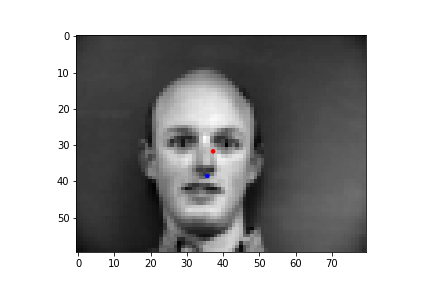
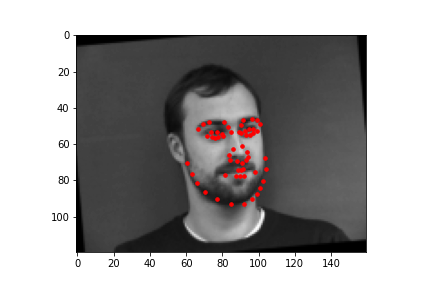
These are samples of images along with the nose tip label plotted on the image that are loaded to the data loader for training and validation.
These were trained with a Convolutional Neural network with these parameters shown below. Since we are trying to predict 1 point with x and y coordinates, this is a CNN for regression for 2 values. After each of the convolutional layers, there is also a relu operation followed by a max pool. After each of the fully connected layers, there is a relu operation except for the very last layer.
NetNoseTip(
  (conv1): Conv2d(1, 9, kernel_size=(5, 5), stride=(1, 1))
  (conv2): Conv2d(9, 15, kernel_size=(7, 7), stride=(1, 1))
  (conv3): Conv2d(15, 12, kernel_size=(3, 3), stride=(1, 1))
  (conv4): Conv2d(12, 5, kernel_size=(3, 3), stride=(1, 1))
  (fc1): Linear(in_features=10, out_features=25, bias=True)
  (fc2): Linear(in_features=25, out_features=2, bias=True)
  (dropout): Dropout2d(p=0.5, inplace=False)
)
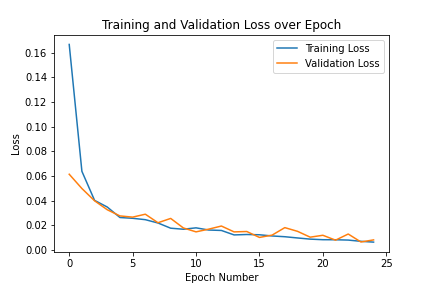
They were trained for 25 epochs with these training and validation losses. This is the training and validation losses across epochs.
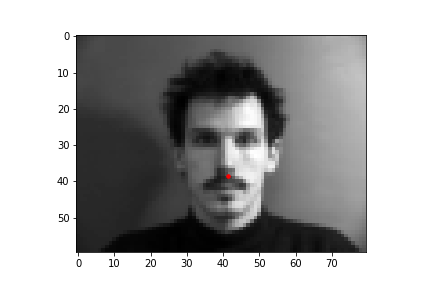
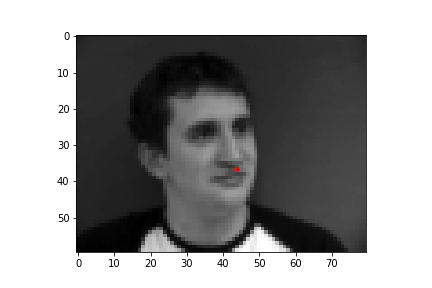
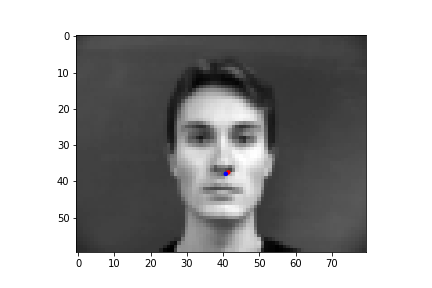
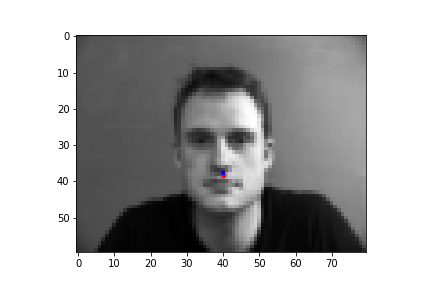
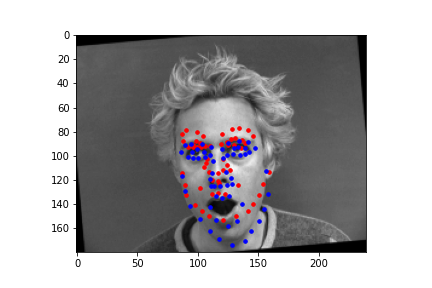
In these images, the red dot is the prediction by the model and the blue dot is the actual label.
Success cases:
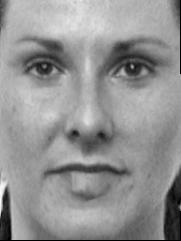
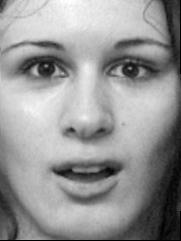
Failure cases:
I think this case fails as most of the images used for training had people with hair and therefore pixel values that made the image darker on the top of the head. However, this case doesn’t have much hair and therefore the image is lighter on the top of the head which could have caused it to have different values during convolutions than those with hair which could have caused inaccuracies in finding the nose.
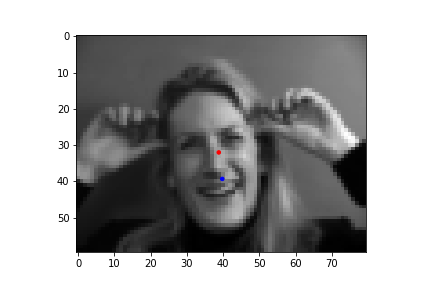
This one likely fails as the person is having a different pose than the other images it was used to train as a result the image has different body parts in the image which could have caused inaccuracies.
Now, we will be using the same data to train a model that can predict all 58 facial keypoints. Since it was the same data, the data was loaded similarly but now we resized it to a size of 240X180. Also since there are more parameters to train in the model we need more data to avoid overfitting. For this, data augmentation was used. For the data augmentation, rotations and shifts were used on the original image.
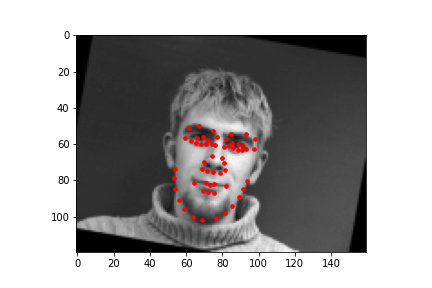
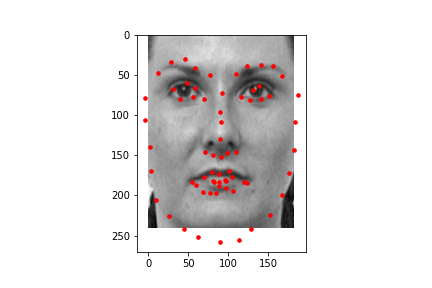
These are samples of images along with the facial keypoints label plotted on the image that are loaded to the data loader for training and validation.

This was the architecture of the model. It had 5 convolutional layers and 2 fully connected layers and a dropout layer. After each of the convolutional layers, there is also a relu operation followed by a max pool. After each of the fully connected layers, there is a relu operation except for the very last layer. The details of each layer are below.
FullFaceLandMarkNet(
  (conv1): Conv2d(1, 4, kernel_size=(7, 7), stride=(1, 1))
  (conv2): Conv2d(4, 12, kernel_size=(5, 5), stride=(1, 1))
  (conv3): Conv2d(12, 24, kernel_size=(3, 3), stride=(1, 1))
  (conv4): Conv2d(24, 32, kernel_size=(5, 5), stride=(1, 1))
  (conv5): Conv2d(32, 48, kernel_size=(3, 3), stride=(1, 1))
  (fc1): Linear(in_features=384, out_features=450, bias=True)
  (fc2): Linear(in_features=450, out_features=116, bias=True)
  (dropout): Dropout2d(p=0.5, inplace=False)
)
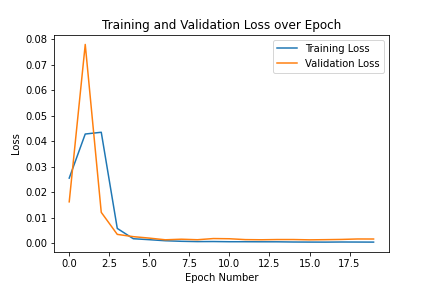
The Adam optimizer was used. A learning rate of 0.001 was used and the batch size was 4. The model was trained over 20 epochs. This is the training and validation losses across epochs.
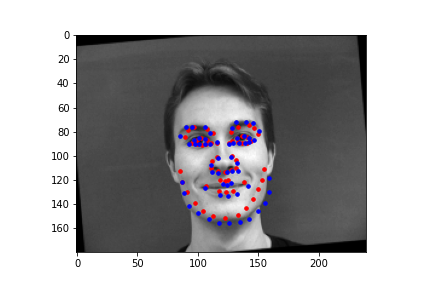
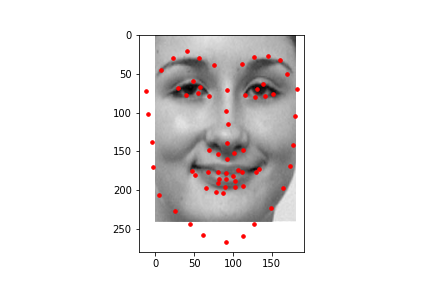
In these images, the red dot is the prediction by the model and the blue dot is the actual label.
Success cases:
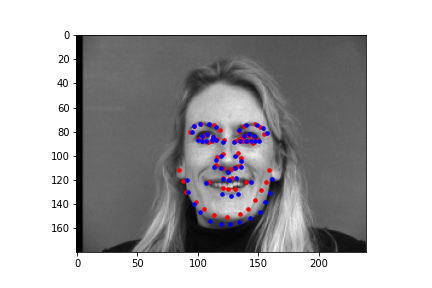
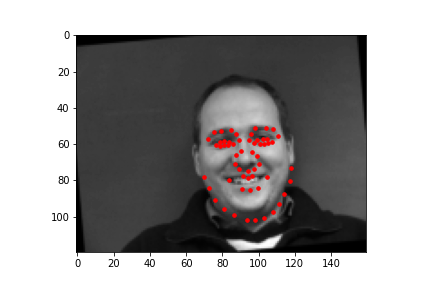
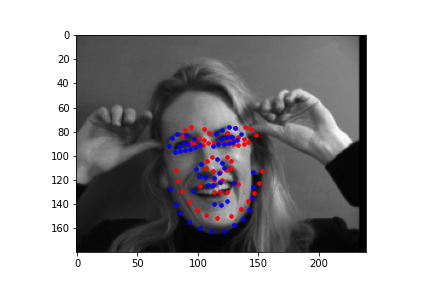
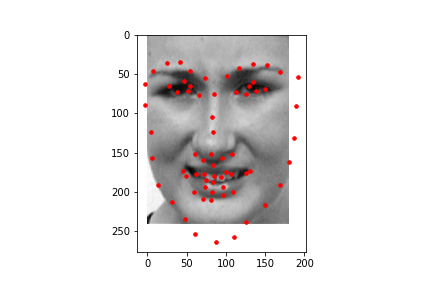
Failure cases:
I think this case fails as most of the images used for training had people with teeth and not too open mouths and therefore pixel values near the mouth were not as dark as this one. However, this case the person opens the mouth wide without showing teeth which is light and instead shows the inside of the mouth which is dark in this picture which could have caused it to have different values during convolutions which could have caused inaccuracies in finding the mouth which could have affected in shifting all other keypoints upwards.
This one once again likely fails as the person is having a different pose than the other images it was used to train as a result the image has different body parts in the image which could have caused inaccuracies.
Here are the filters from the first layer of the trained model visualized:

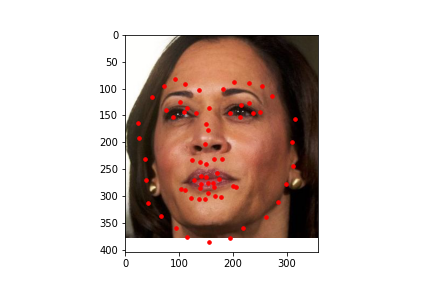
Now, we’ll be training a model that detects facial keypoints with a larger dataset and for this data set there are 68 keypoints as opposed to the previous 58. For these images, we will also be given a box of the image on which the face is located on. Using the box, we will crop the image to feed only the face for the model. Other transformations of grayscale and normalizing will be the same as before and the resizing will now be 224X224. Same augmentations were done to increase the number of data.
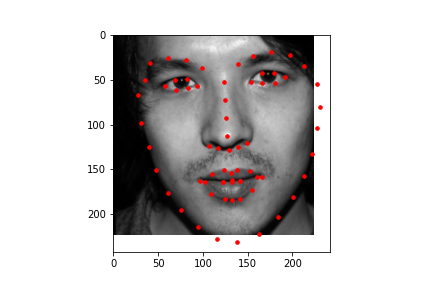
To show how the data that is labeled that is used for the training of the model looks like, here are some samples of cropped and grayscale images along with the facial keypoints plotted.
After training, the mean absolute error for the Kaggle competition was 12.95337.
This was the architecture of the model. It was a modification of the pytorch’s resnet18 where the first convolutional layer’s number of input channels was modified from 3 to 1 as we were inputting grayscale images and the number of outputs for the final layer was changed to 136 as there are 68 coordinates each with 2 values (x and y) that we are typing to predict. The details of each layer are below.
ResNet(
  (conv1): Conv2d(1, 64, kernel_size=(7, 7), stride=(2, 2), padding=(3, 3), bias=False)
  (bn1): BatchNorm2d(64, eps=1e-05, momentum=0.1, affine=True, track_running_stats=True)
  (relu): ReLU(inplace=True)
  (maxpool): MaxPool2d(kernel_size=3, stride=2, padding=1, dilation=1, ceil_mode=False)
  (layer1): Sequential(
    (0): BasicBlock(
      (conv1): Conv2d(64, 64, kernel_size=(3, 3), stride=(1, 1), padding=(1, 1), bias=False)
      (bn1): BatchNorm2d(64, eps=1e-05, momentum=0.1, affine=True, track_running_stats=True)
      (relu): ReLU(inplace=True)
      (conv2): Conv2d(64, 64, kernel_size=(3, 3), stride=(1, 1), padding=(1, 1), bias=False)
      (bn2): BatchNorm2d(64, eps=1e-05, momentum=0.1, affine=True, track_running_stats=True)
    )
    (1): BasicBlock(
      (conv1): Conv2d(64, 64, kernel_size=(3, 3), stride=(1, 1), padding=(1, 1), bias=False)
      (bn1): BatchNorm2d(64, eps=1e-05, momentum=0.1, affine=True, track_running_stats=True)
      (relu): ReLU(inplace=True)
      (conv2): Conv2d(64, 64, kernel_size=(3, 3), stride=(1, 1), padding=(1, 1), bias=False)
      (bn2): BatchNorm2d(64, eps=1e-05, momentum=0.1, affine=True, track_running_stats=True)
    )
  )
  (layer2): Sequential(
    (0): BasicBlock(
      (conv1): Conv2d(64, 128, kernel_size=(3, 3), stride=(2, 2), padding=(1, 1), bias=False)
      (bn1): BatchNorm2d(128, eps=1e-05, momentum=0.1, affine=True, track_running_stats=True)
      (relu): ReLU(inplace=True)
      (conv2): Conv2d(128, 128, kernel_size=(3, 3), stride=(1, 1), padding=(1, 1), bias=False)
      (bn2): BatchNorm2d(128, eps=1e-05, momentum=0.1, affine=True, track_running_stats=True)
      (downsample): Sequential(
        (0): Conv2d(64, 128, kernel_size=(1, 1), stride=(2, 2), bias=False)
        (1): BatchNorm2d(128, eps=1e-05, momentum=0.1, affine=True, track_running_stats=True)
      )
    )
    (1): BasicBlock(
      (conv1): Conv2d(128, 128, kernel_size=(3, 3), stride=(1, 1), padding=(1, 1), bias=False)
      (bn1): BatchNorm2d(128, eps=1e-05, momentum=0.1, affine=True, track_running_stats=True)
      (relu): ReLU(inplace=True)
      (conv2): Conv2d(128, 128, kernel_size=(3, 3), stride=(1, 1), padding=(1, 1), bias=False)
      (bn2): BatchNorm2d(128, eps=1e-05, momentum=0.1, affine=True, track_running_stats=True)
    )
  )
  (layer3): Sequential(
    (0): BasicBlock(
      (conv1): Conv2d(128, 256, kernel_size=(3, 3), stride=(2, 2), padding=(1, 1), bias=False)
      (bn1): BatchNorm2d(256, eps=1e-05, momentum=0.1, affine=True, track_running_stats=True)
      (relu): ReLU(inplace=True)
      (conv2): Conv2d(256, 256, kernel_size=(3, 3), stride=(1, 1), padding=(1, 1), bias=False)
      (bn2): BatchNorm2d(256, eps=1e-05, momentum=0.1, affine=True, track_running_stats=True)
      (downsample): Sequential(
        (0): Conv2d(128, 256, kernel_size=(1, 1), stride=(2, 2), bias=False)
        (1): BatchNorm2d(256, eps=1e-05, momentum=0.1, affine=True, track_running_stats=True)
      )
    )
    (1): BasicBlock(
      (conv1): Conv2d(256, 256, kernel_size=(3, 3), stride=(1, 1), padding=(1, 1), bias=False)
      (bn1): BatchNorm2d(256, eps=1e-05, momentum=0.1, affine=True, track_running_stats=True)
      (relu): ReLU(inplace=True)
      (conv2): Conv2d(256, 256, kernel_size=(3, 3), stride=(1, 1), padding=(1, 1), bias=False)
      (bn2): BatchNorm2d(256, eps=1e-05, momentum=0.1, affine=True, track_running_stats=True)
    )
  )
  (layer4): Sequential(
    (0): BasicBlock(
      (conv1): Conv2d(256, 512, kernel_size=(3, 3), stride=(2, 2), padding=(1, 1), bias=False)
      (bn1): BatchNorm2d(512, eps=1e-05, momentum=0.1, affine=True, track_running_stats=True)
      (relu): ReLU(inplace=True)
      (conv2): Conv2d(512, 512, kernel_size=(3, 3), stride=(1, 1), padding=(1, 1), bias=False)
      (bn2): BatchNorm2d(512, eps=1e-05, momentum=0.1, affine=True, track_running_stats=True)
      (downsample): Sequential(
        (0): Conv2d(256, 512, kernel_size=(1, 1), stride=(2, 2), bias=False)
        (1): BatchNorm2d(512, eps=1e-05, momentum=0.1, affine=True, track_running_stats=True)
      )
    )
    (1): BasicBlock(
      (conv1): Conv2d(512, 512, kernel_size=(3, 3), stride=(1, 1), padding=(1, 1), bias=False)
      (bn1): BatchNorm2d(512, eps=1e-05, momentum=0.1, affine=True, track_running_stats=True)
      (relu): ReLU(inplace=True)
      (conv2): Conv2d(512, 512, kernel_size=(3, 3), stride=(1, 1), padding=(1, 1), bias=False)
      (bn2): BatchNorm2d(512, eps=1e-05, momentum=0.1, affine=True, track_running_stats=True)
    )
  )
  (avgpool): AdaptiveAvgPool2d(output_size=(1, 1))
  (fc): Linear(in_features=512, out_features=136, bias=True)
)
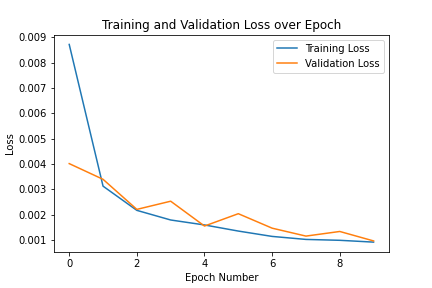
The Adam optimizer was used. A learning rate of 0.00025 was used and the batch size was 14. The model was trained over 10 epochs. This is the training and validation losses across epochs.
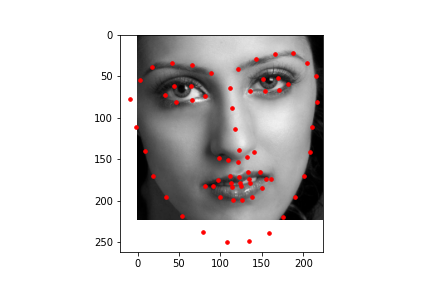
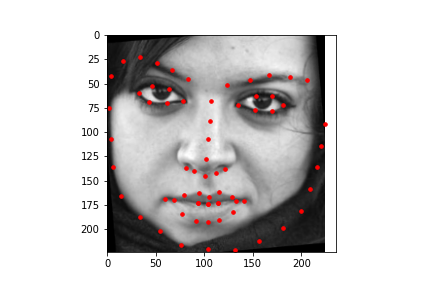
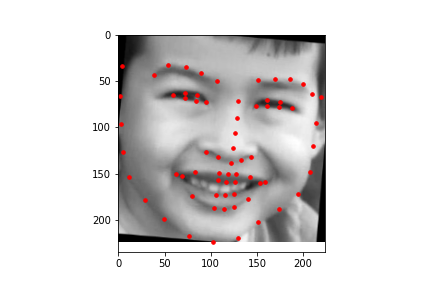
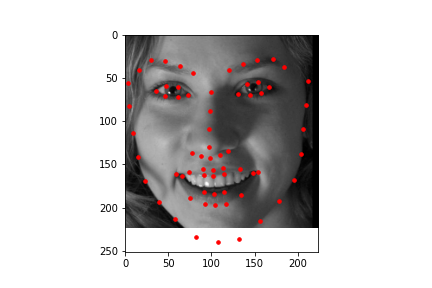
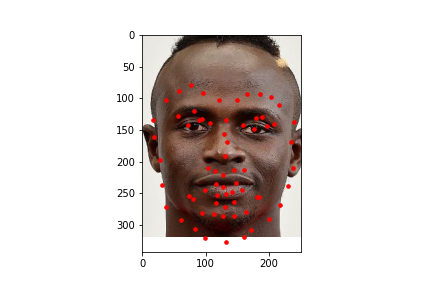
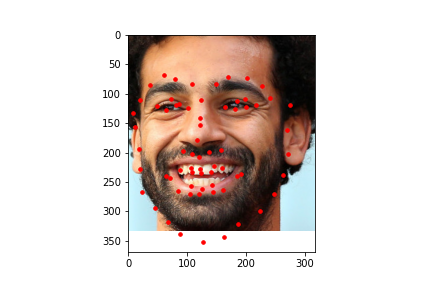
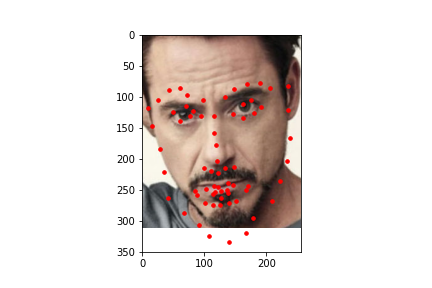
Here are some predictions made on images from the test data set. In these images, the red dot is the prediction by the model.
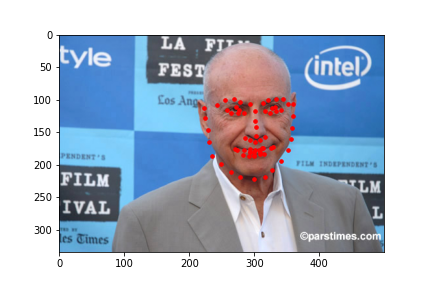
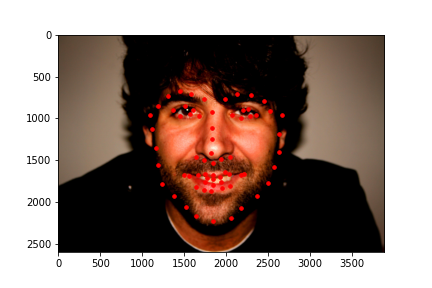
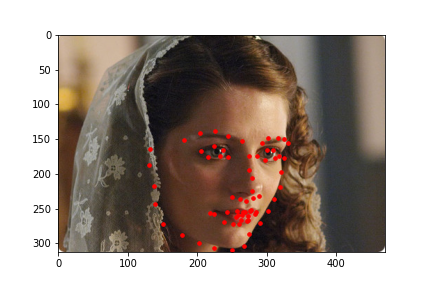
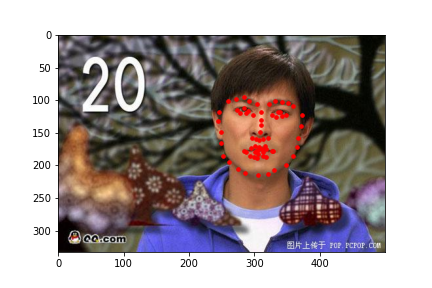

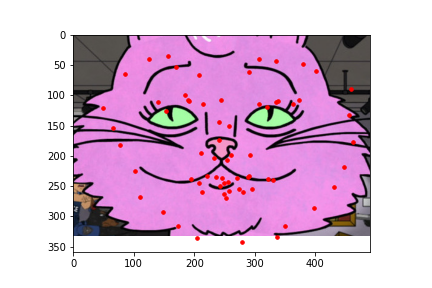
I also ran the model on some images I chose on my own. In general it was able to predict the facial keypoints and on some it predicted the chin to be lower than it actually was which could be due to that most of the test data I chose had significantly higher height than width and the data gets rescaled to a square image which means it loses more information on the x axis than on the y axis which could explain that most of the inaccuracy came from the y coordinate of the chin. For fun, I also tried a fictional personified character of a cat which had a wider face than humans and it was inaccurate in that it predicted the face shape to be more narrow than it was likely because it was trained on human faces which are narrower than the fictional cat.


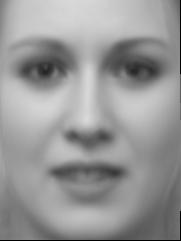
In project 3, I worked with manually annotating facial keypoints. But now with a model that can predict facial keypoints automatically, I integrated it with project 3! I found a dataset of 84 facial expressions and I thought it would be interesting to see what the average face of the 84 different facial expressions would be like.
I first started by using the model to predict 68 facial keypoints and here are some samples of the facial keypoints plotted.
Then using project 3 code, I found the average facial keypoints and morphed each face to the average shape before taking the average of all the faces that were morphed to the average face just like project 3.
Here are some examples of faces morphed to the average shape.

The average of all the faces with different facial expressions that were morphed to the average face ended up looking like this. Since the faces all had different facial expressions, this face could be interpreted as the average facial expression.