In the last project - Project 3: Face Morphing, we had to manually click the keypoints to identify a face. To step up our game, we are making this project that automatically detect the face for us! How we acheive this is by using convolutional neural networks.
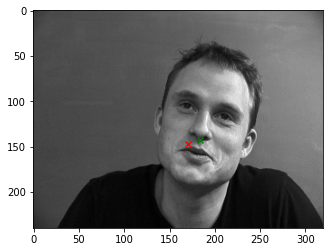
Before detecting the whole face, we will try detecting just the nose.
We will be using the IMM Face Dataset.
All the
images
are resized to 240 x 320 and no data augmentations are done.
For the dataloader, I used batch_size = 64.
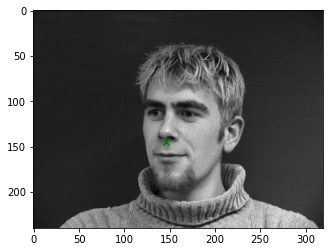
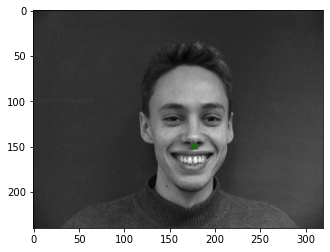
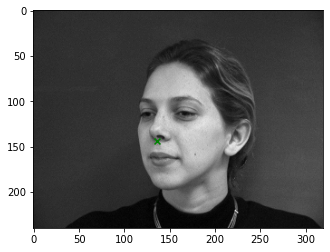
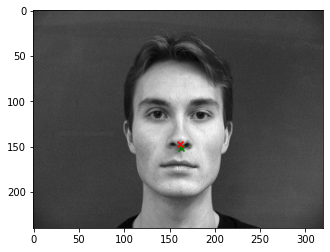
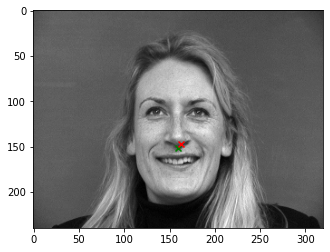
Here are some sampled images and the truth nose keypoint:
I used a neural network with 5 convolution layers, each followed by ReLU and max pooling. They are then followed
by two fully connected layres. I used
kernel_size = (3, 3) for all the layers that needed one.
Here are all the conv layers:
To train my model, I
used MSELoss and the Adam optimizer with
learning_rate=3e-4 and with num_epochs = 20.
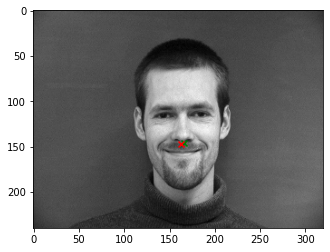
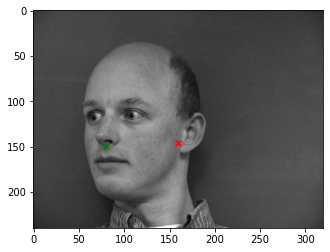
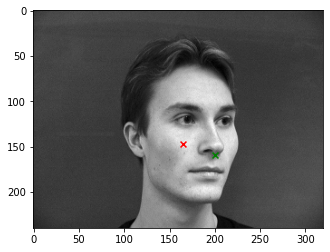
Some reasons why these images failed could be because of the nose is generally around the center of an image. The model is not good at detecting the nose when it is not the case -- when the person's head is rotated, and especially for the case when the person is not standing at the middle and his head is very rotated.
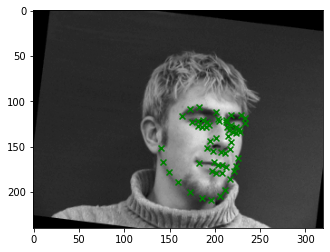
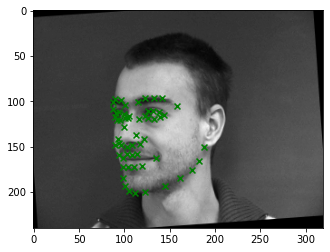
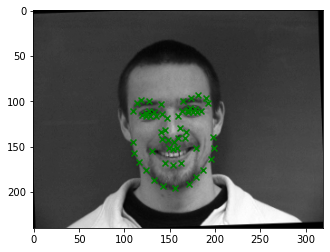
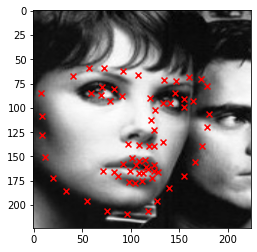
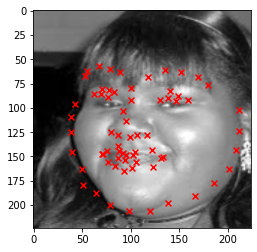
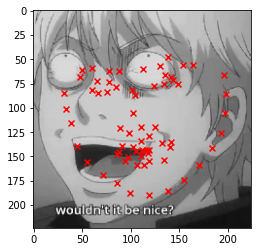
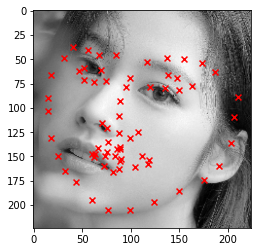
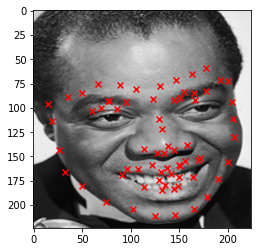
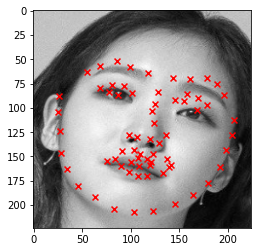
Now we have succeeded in detecting one point, we can do that for more keypoints - 58 keypoints to be exact. Again,
we are using the IMM Face Dataset.
All the
images
are resized to 240 x 320. For training, data augmentation is done by randomly rotating the images (at most 12
degrees).
For the dataloader, I used batch_size = 64.
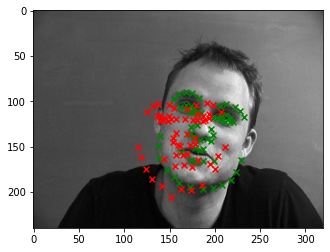
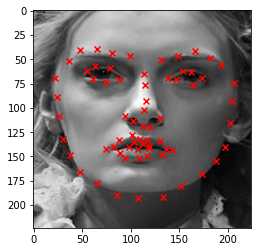
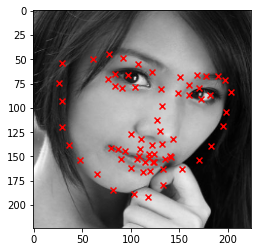
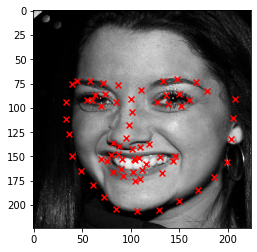
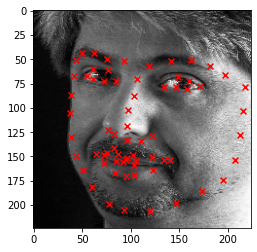
Here are some sampled images and the ground-truth face keypoint:
I used a neural network with 3 convolution layers, each followed by ReLU and max pooling. I used
kernel_size = (3, 3) for all the layers that needed one.
Similarly to Part 1, I trained my model using
MSELoss and the Adam optimizer with
learning_rate = 15e-5 and with num_epochs = 50.
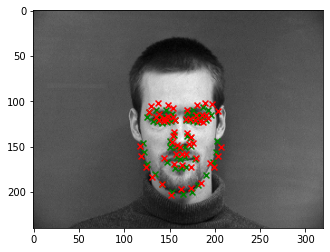

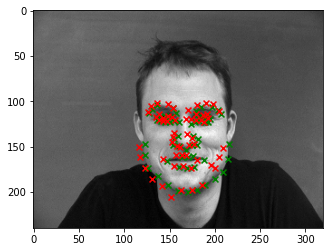
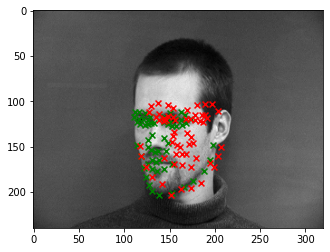

Similarly to part 1, the model is not good at detecting rotations of the head. It also fails to detect as accuratyly when the person's head it not at the very center of the input image. This problen is improved when I lowered the learning rate and increased the number of epochs. Maybe it can be further improved with more data augmentation, especially shifting.
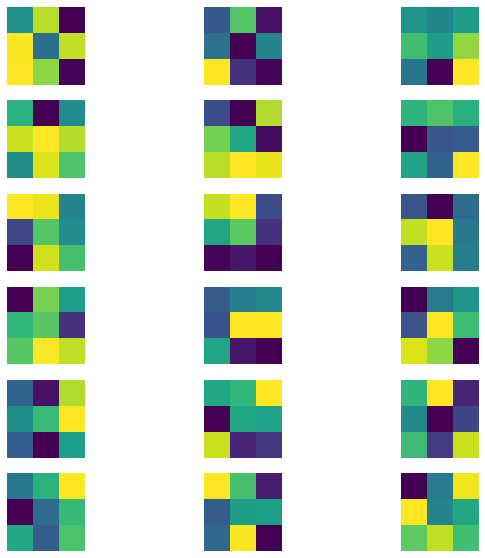
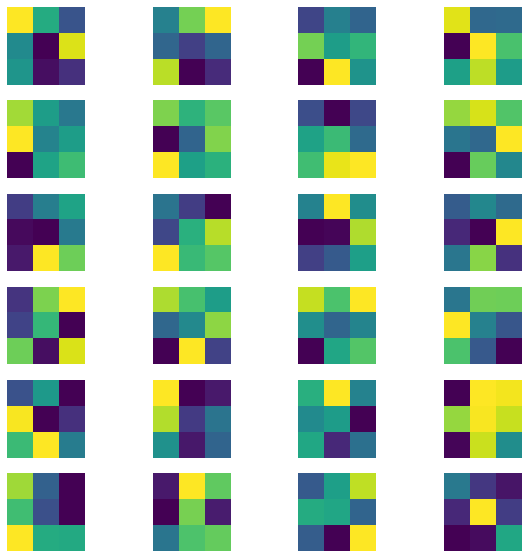
Here are the learned filters from the first two layers of my trained CNN model.
In this part we will be using a way bigger dataset! (It has 6666 training images and 1008 test images.)
It would take forever to run if we were to train our model with our laptops. Luckily, we have access to GPUs such
as Google
Colab. With batch_size = 512, it took about an hour to run!
For the CNN, I used ResNet18. And to train, I again used MSELoss and the Adam optimizer with
learning_rate = 3e-4. But this time I have num_epochs = 100.
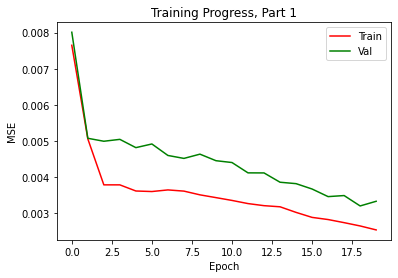
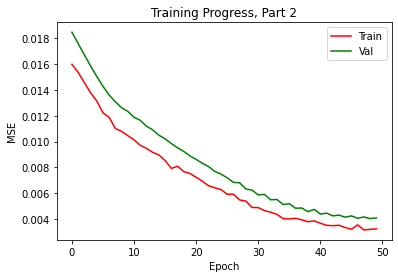
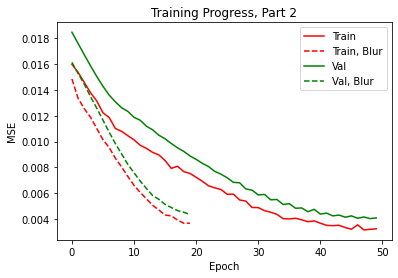
Using anti-aliased max pool antialiased_cnns.BlurPool from the work of Richard
Zhang (Github) in replace of
torch.nn.MaxPool2d, I was able to produce better results for part 2. As we can see from the graph, the
loss drop quicker than before.
I also used the trained model from part 3 to find keypoitns of my face from various years, and created a morphing
video out of it!
Here it is: https://youtu.be/0nH9xbJT-m0