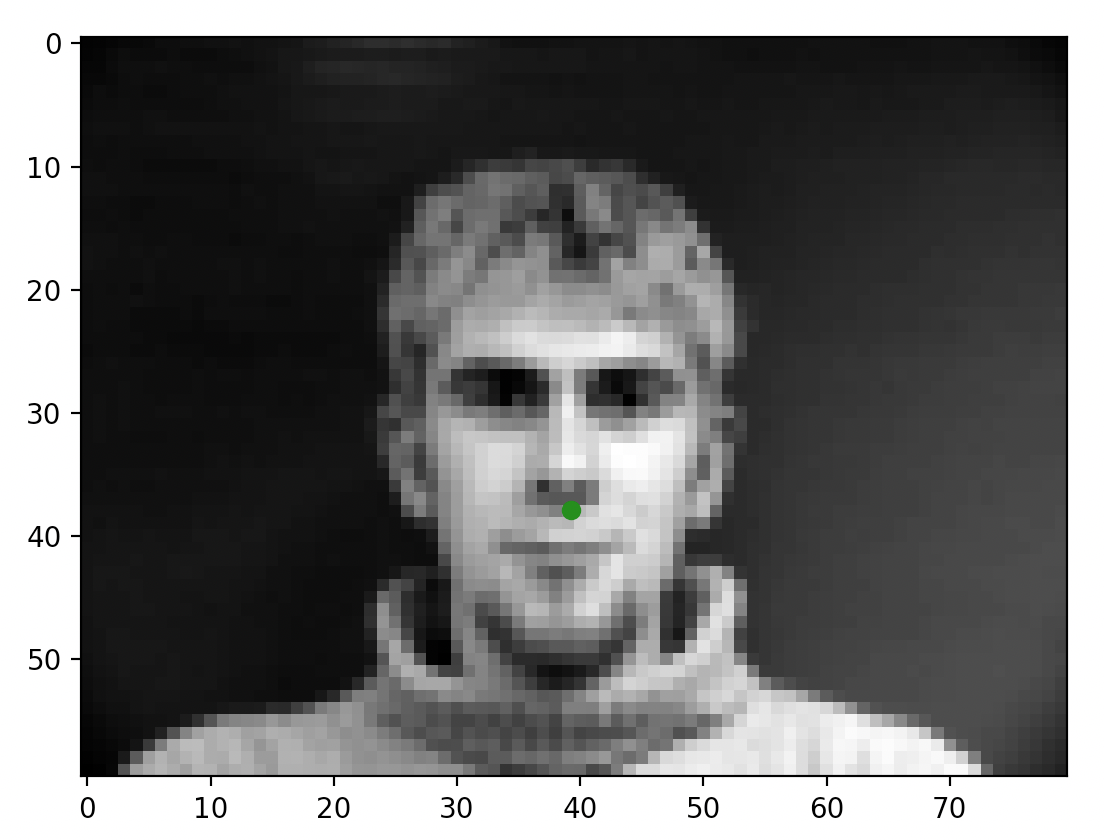
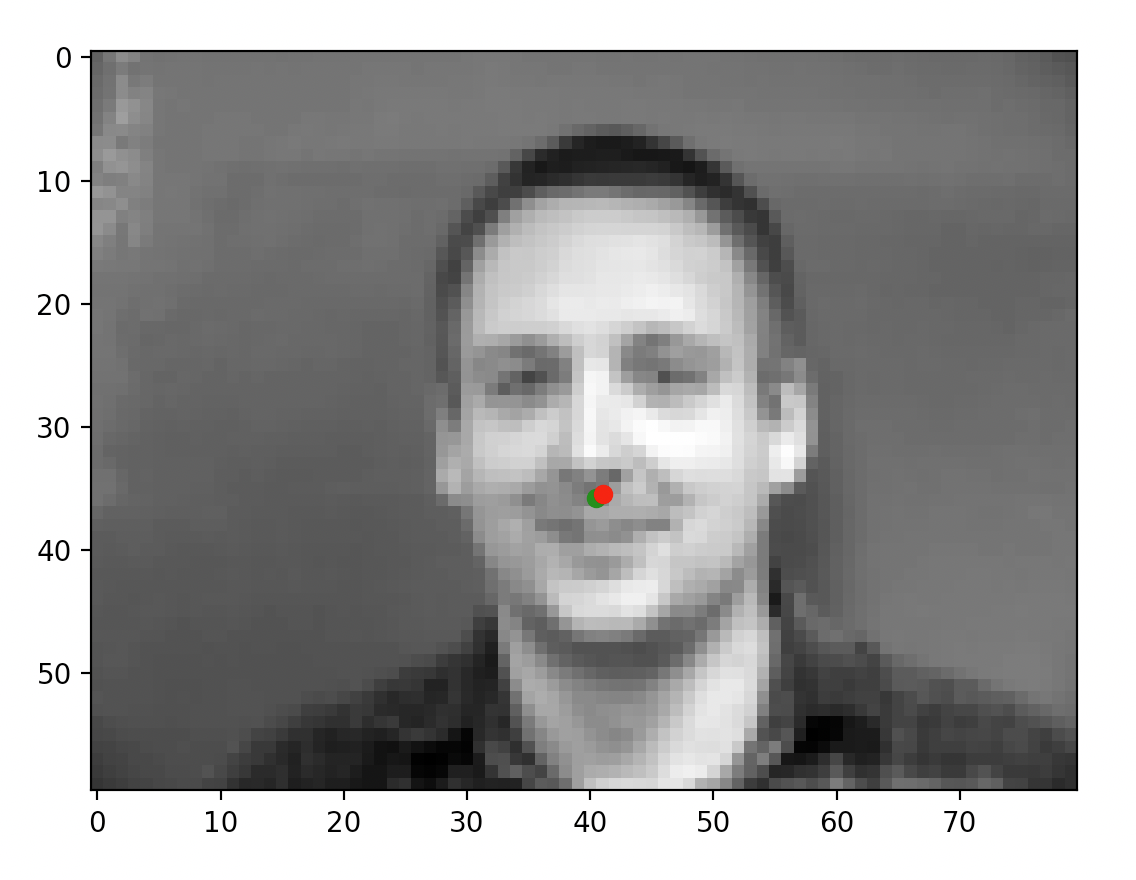
Included below are some of the sampled images after I completed the dataloading task. The green dot represents the nose annotation taken from the annotation files. This task was pretty straightforward; the only minor thing I had to do was convert some of the data into tensors for making sure things worked later on.
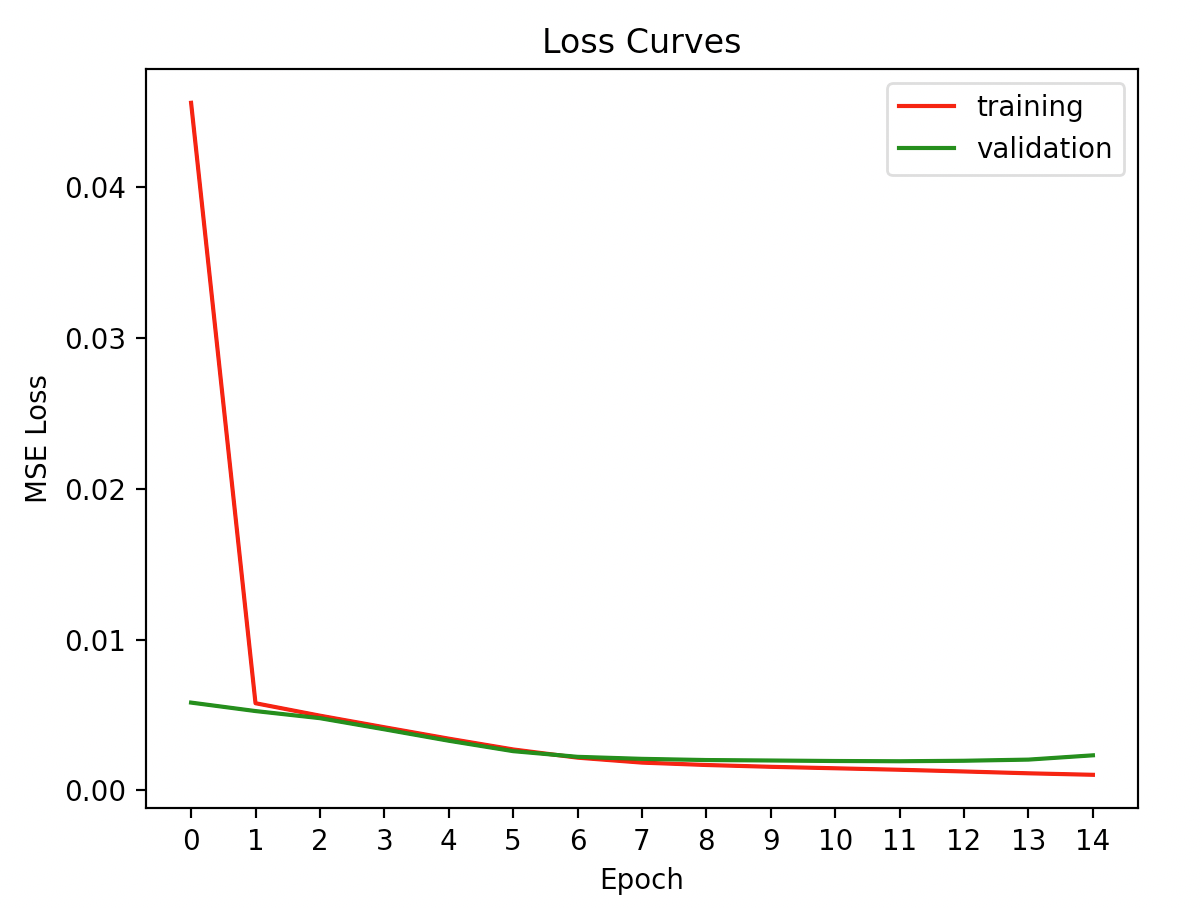
Below here are the loss curves. An interesting thing here is that running my code does not produce deterministic results; this is likely because within the Adam update rule, there is an element of randomness. This intrinsically makes sense to me, the same way the most basic stochastic gradient descent method uses randomness to help with problems that arise from deterministically modifying the weights with the gradient. Additionally, you can observe that at a certain epoch, the training loss decreases and yet the validation loss increases. While there is some degree of randomness involved, this indicated to me that some overfitting occurred. In fact, during my hyperparameter tuning, I had encountered the problem of overfitting a lot until I adjusted learning rate and the depth and width of the hidden layers. Having too many weights with the relatively simple problem of identifying the nose actually hurt the performance because of overfitting. Likewise, having a learning rate that was too high also caused the model to overfit too rapidly. Ideally, I would have some way of determining the ideal number of epochs. I ultimately settled upon 15 epochs through trial and error.
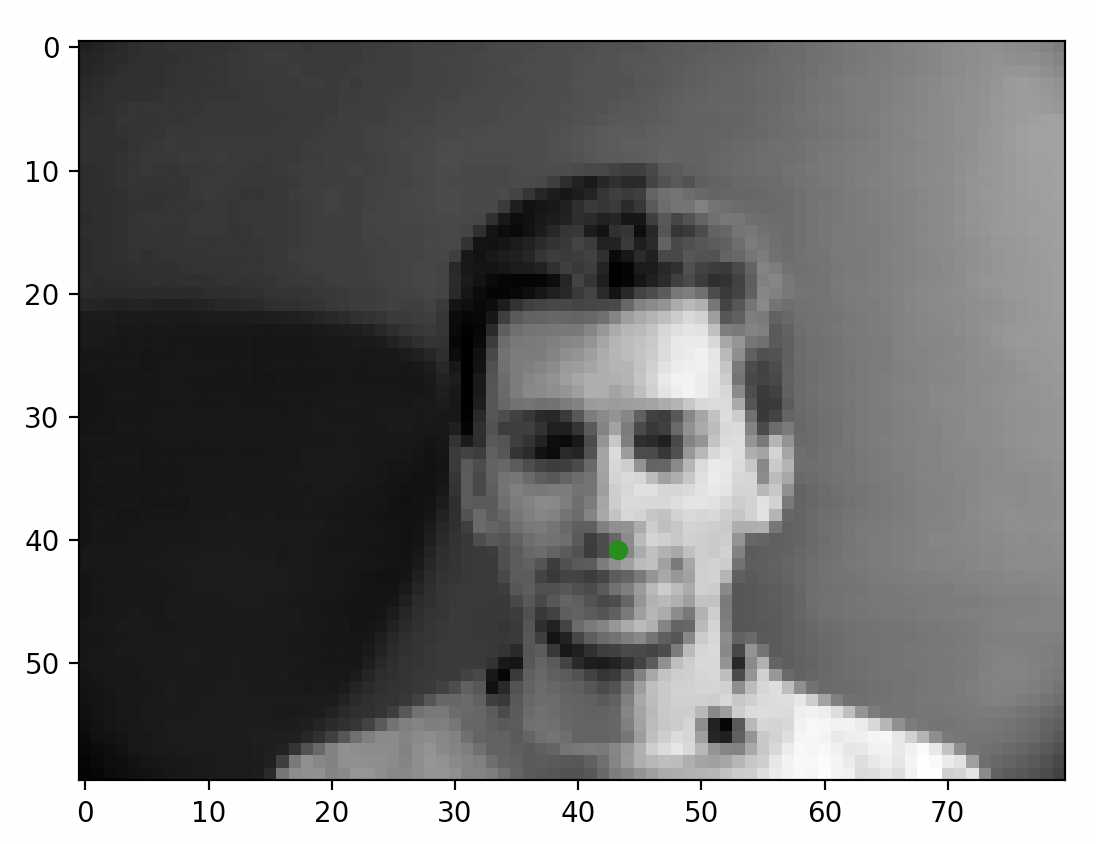
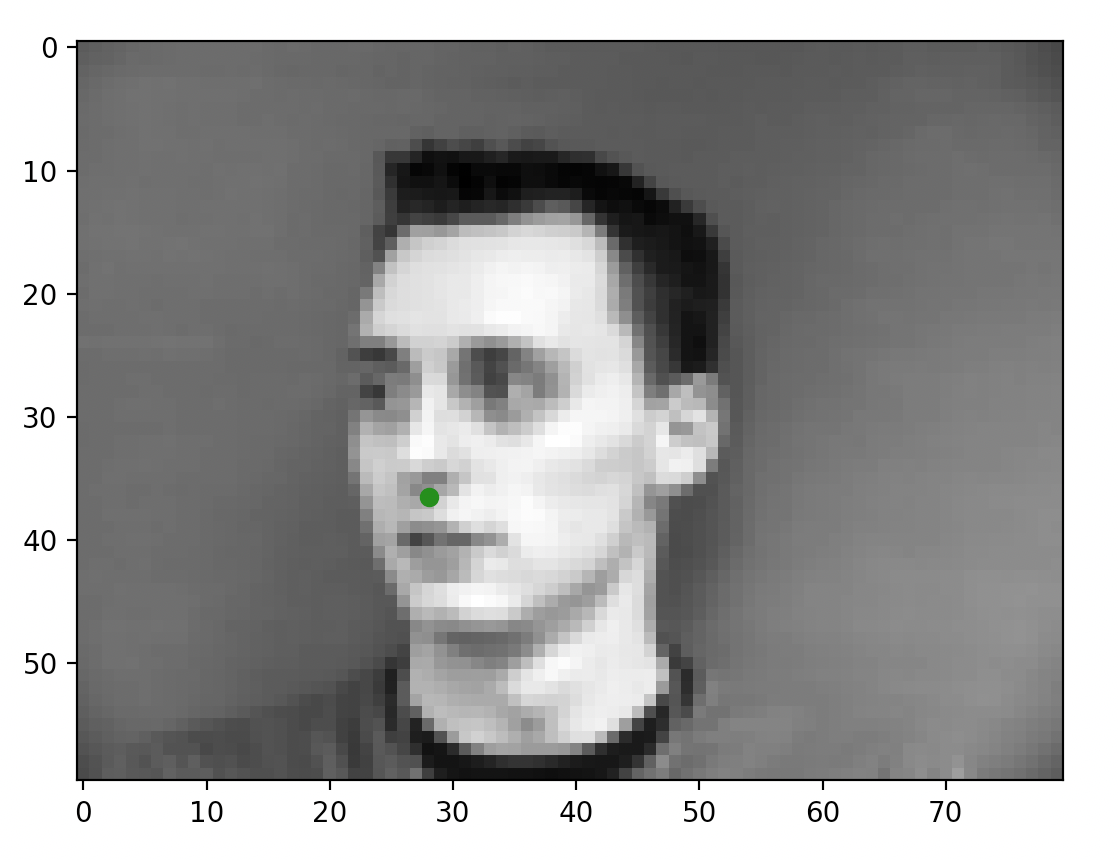
After training the network, here are some example outputs.

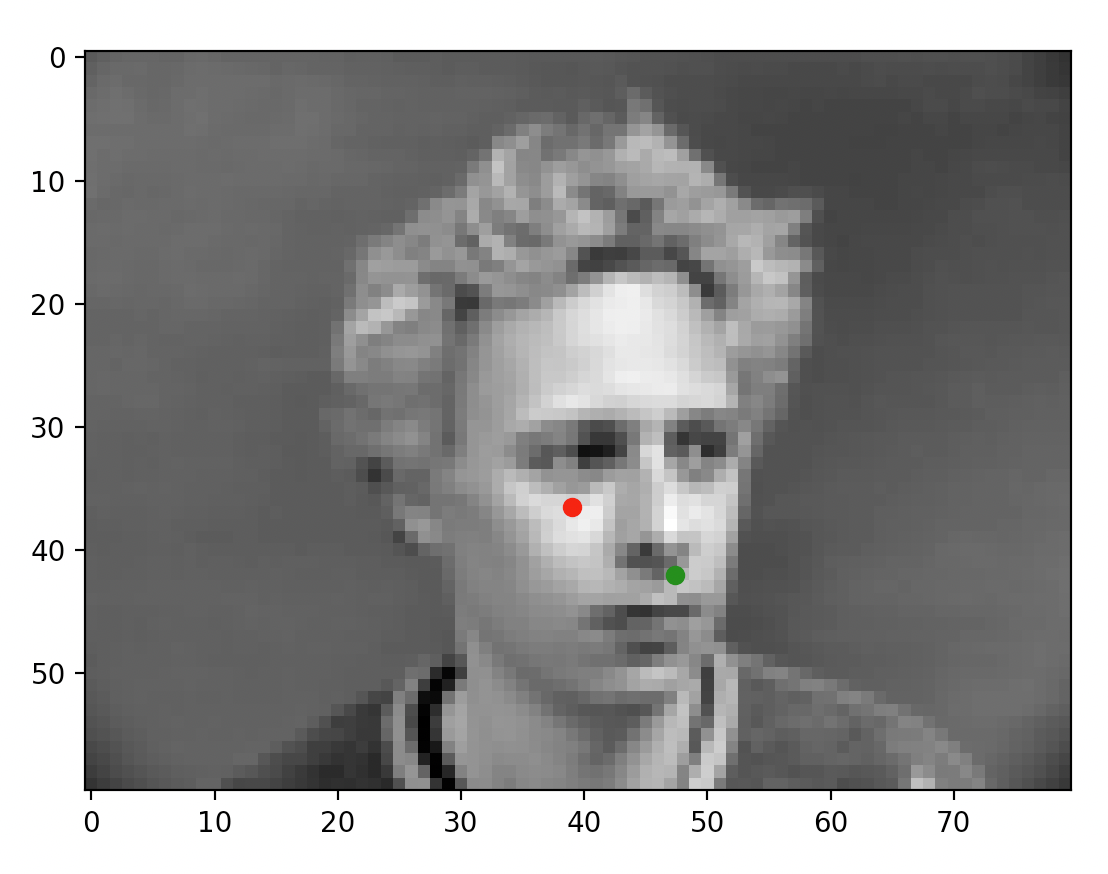
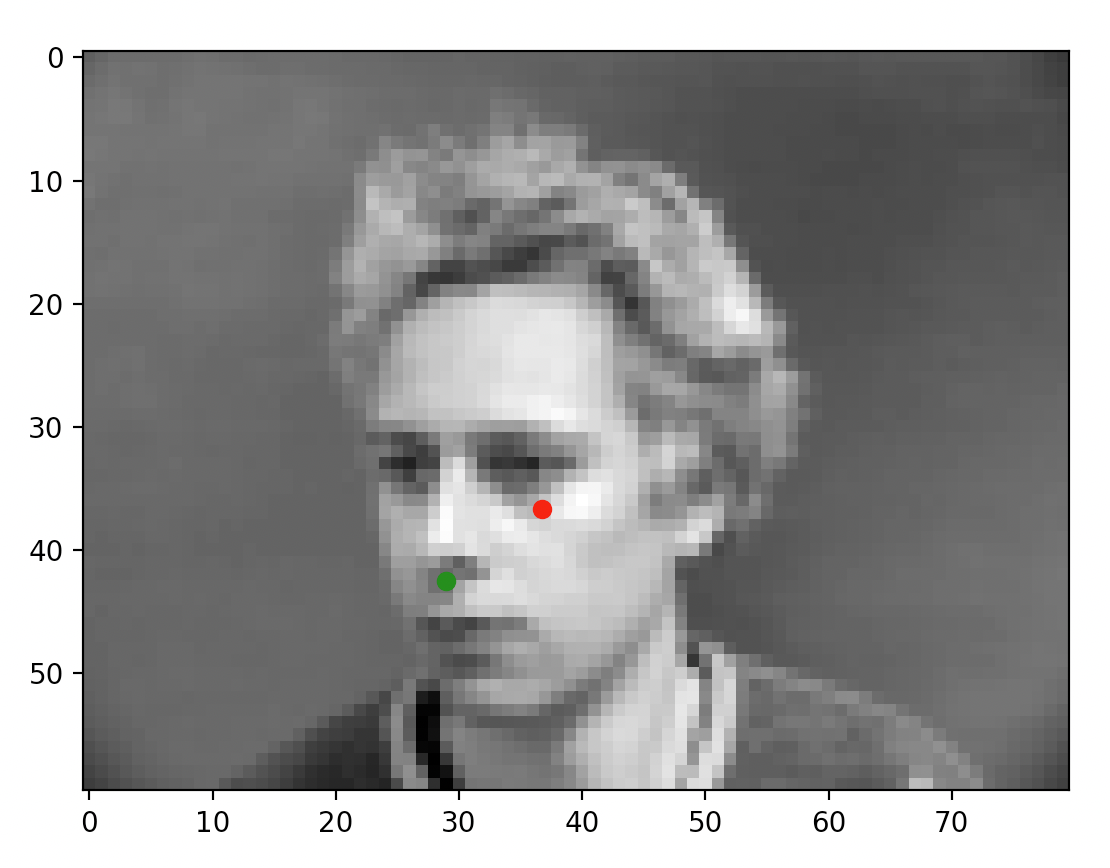
When the model does well, it can predict very accurately: for the first two images, the prediction is almost perfectly where the annotation is. For the latter two, however, this is not the case. As mentioned on Piazza and through my own observation, the more offset a face is from the default, forward facing and centered pose, the more likely the prediction is of poor quality. I suspect that the low number of training samples we are working with are causing some degree of overfitting (which is backed by my observations in the prior portion). While the data technically contains plenty of images of people looking to the side, the mean gravitates to the center and the network ends up very inclined to place the dot in the center of the image regardless of whether the face is oriented in that direction. That isn't to say the model did not accurate place predictions for all faces not centered; however, it simply did a lot better on the centered, forward facing images.
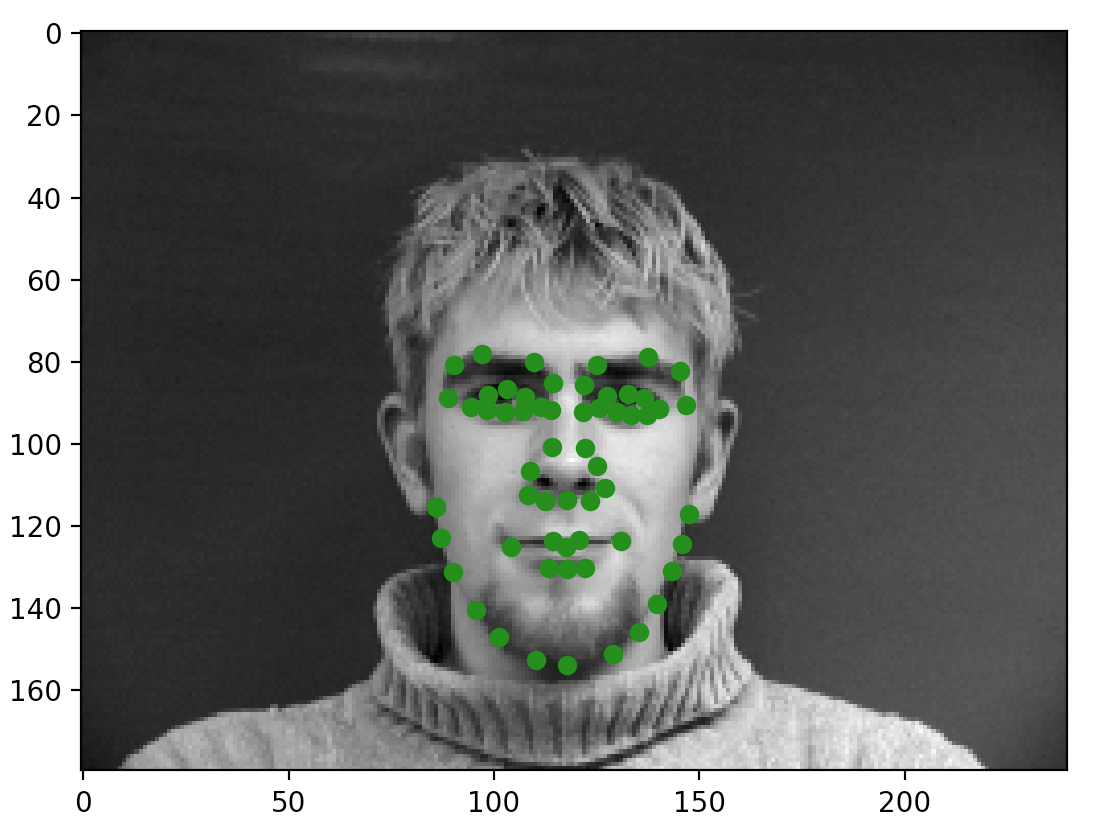
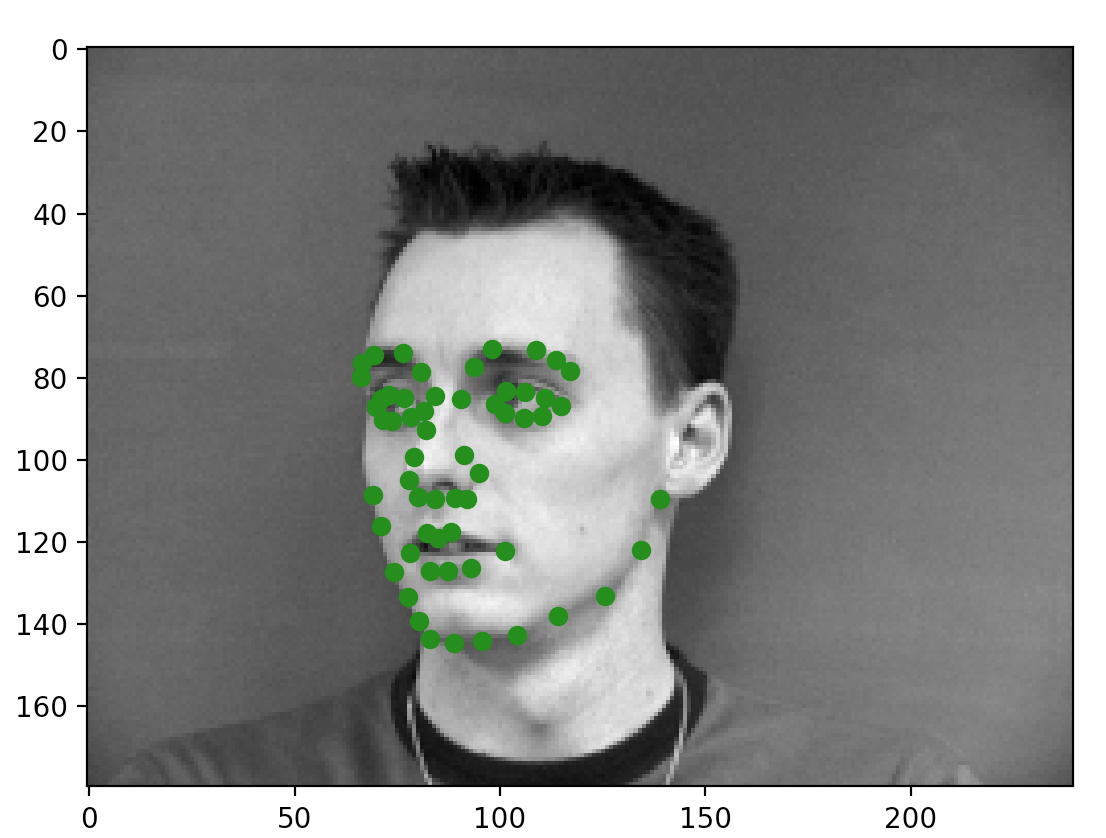
Included below are some of the sampled images after I completed the dataloading task. The green dots represent the keypoint annotations taken from the annotation files. Again, this task was pretty straightforward; the only minor thing I had to do was convert some of the data into tensors for making sure things worked later on.

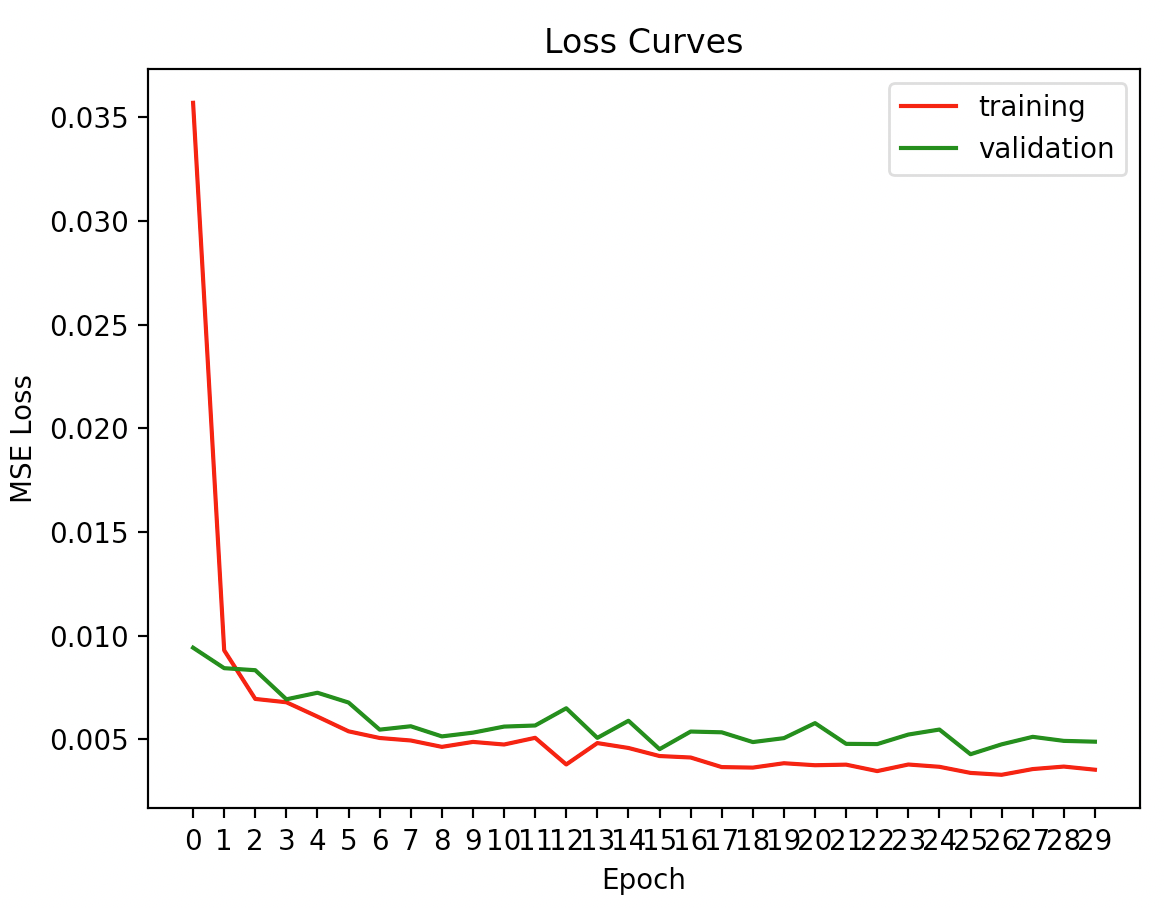
Below are the loss curves. This time around, there is more variation than in the nose keypoint scenario. The problem is more complicated, and the images used are significantly higher resolution. Some trends still apply: the training loss starts very high, and then decreases rapidly before gradually tapering off (although it continues to decrease with every epoch, as expected). The validation loss decreases as well, but only to a certain extent: the training loss becomes noticably lower than the validation loss for many of the epochs. The problem implied here is that there is some degree of overfitting and that there aren't enough training samples. I attempted various techniques to address this problem, including attempting the data augmentation strategy suggested by the project spec. However, I found many of them were unable to help with the problem here. I also observed that the number of epochs and the learning rate could affect things, but I will explain that below in the explanation of my hyperparameters.
Here are my hyperparameters:
5 Convolutional Layers followed by 2 Fully Connected Layers
Conv1: In: 1, Out: 8, Kernel Size: 5
Conv2: In: 8, Out: 12, Kernel Size: 5
Conv3: In: 12, Out: 16, Kernel Size: 3
Conv4: In: 16, Out: 20, Kernel Size: 3
Conv5: In: 20, Out: 24, Kernel Size: 3
FC1: In: 360, Out: 200
FC2: In: 200, Out: 116
Epochs: 30, Learning Rate: 0.00075
Moreover, I added a dropout after every layer to help with overfitting problems. Each node was given a 25% chance of being excluded.
Many of these parameters were chosen through trial and error, but here were some guiding principles I had. I generally wanted to avoid an overly wide or deep network, as I saw that frequently led to rapid overfitting. I additionally added the dropout layer because I saw it improved the performance on the validation set (although mildly worsened performance on the training set). The number of epochs and the learning rate took a very long time to adjust. A learning rate too low caused poor accuracy on the training set and the validation set, while a learning rate too high caused overfitting problems. Likewise, having too few epochs did not give the model enough time, and having too many was redundant and contributed to overfitting.
After training the network, here are some example outputs.
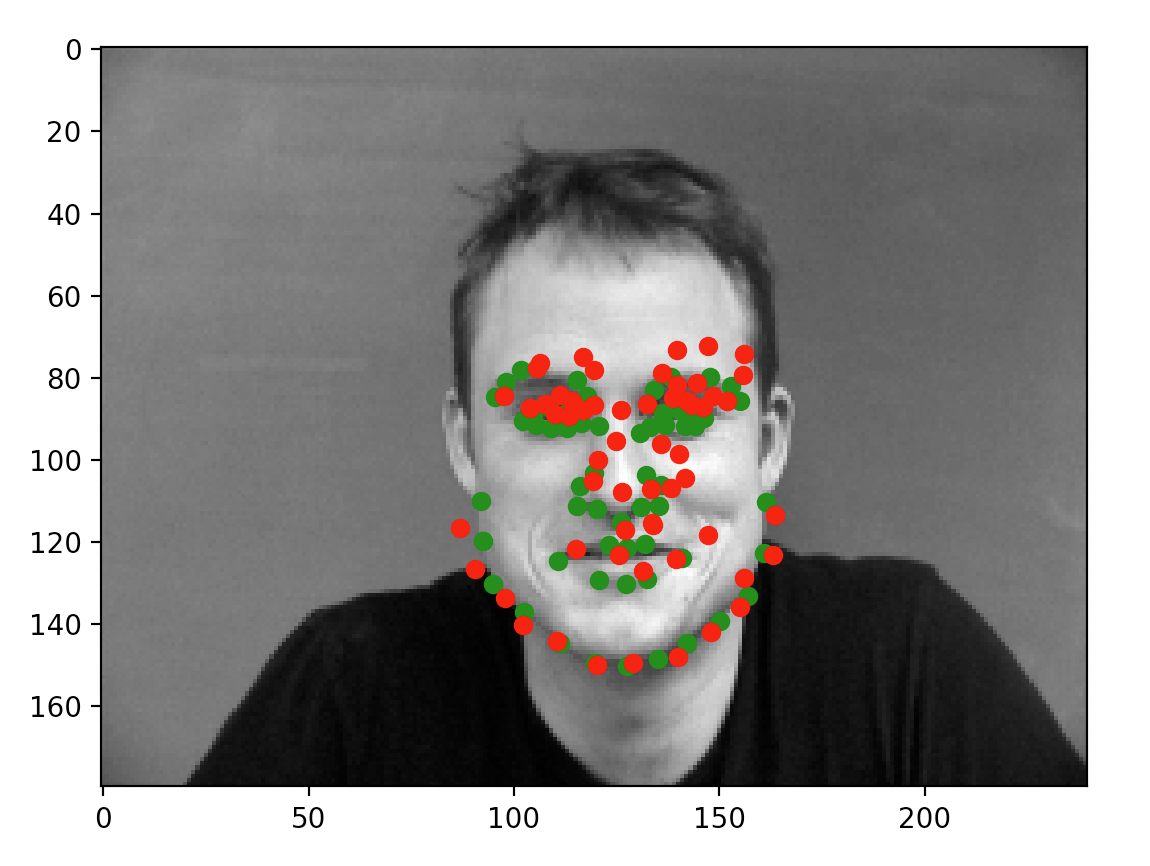
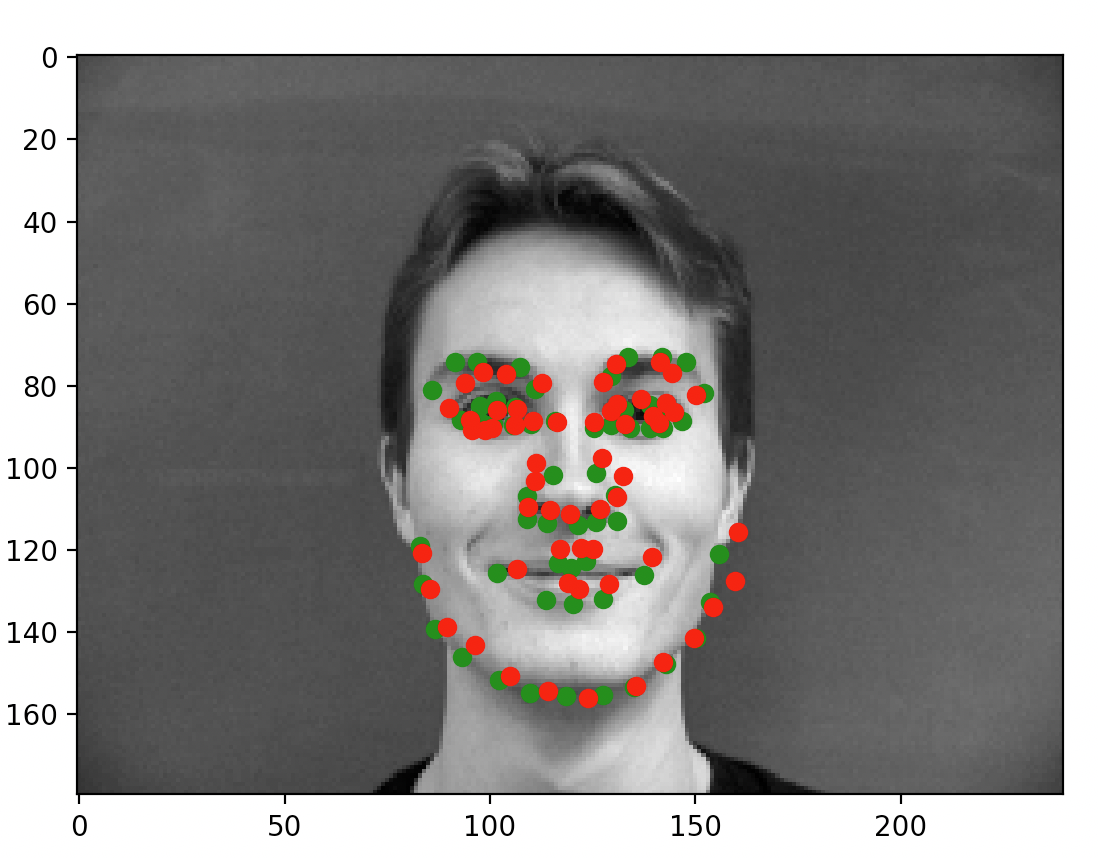
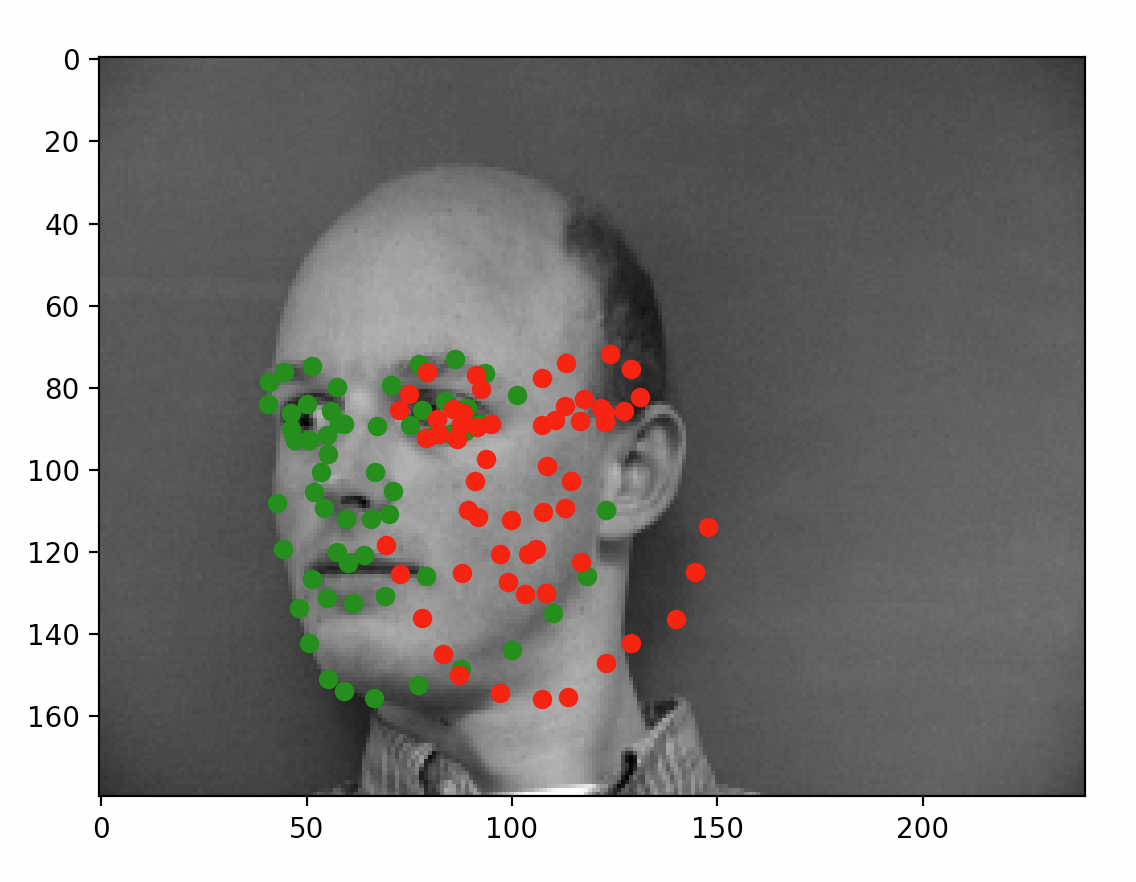
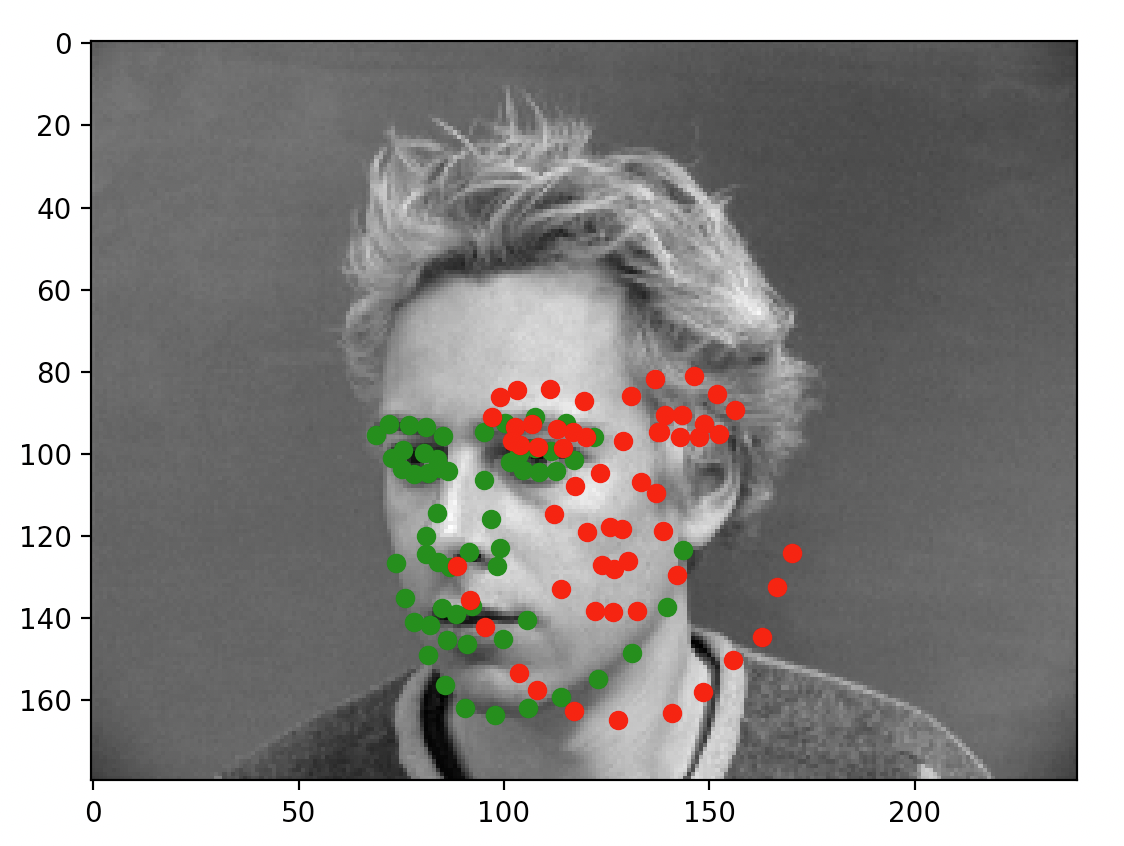
As you can see, some of the faces (the left two) are fitted reasonably well. The predictions are all close to the annotations. On the other hand, we run into the exact same problem as from part 1: faces not centered and not forward facing caused a lot of problems for our model.
Here are the learned filters.

I unfortunately was unable to complete this portion.