Facial Keypoint Detection with Neural Networks
Avni Prasad, CS194-26-aej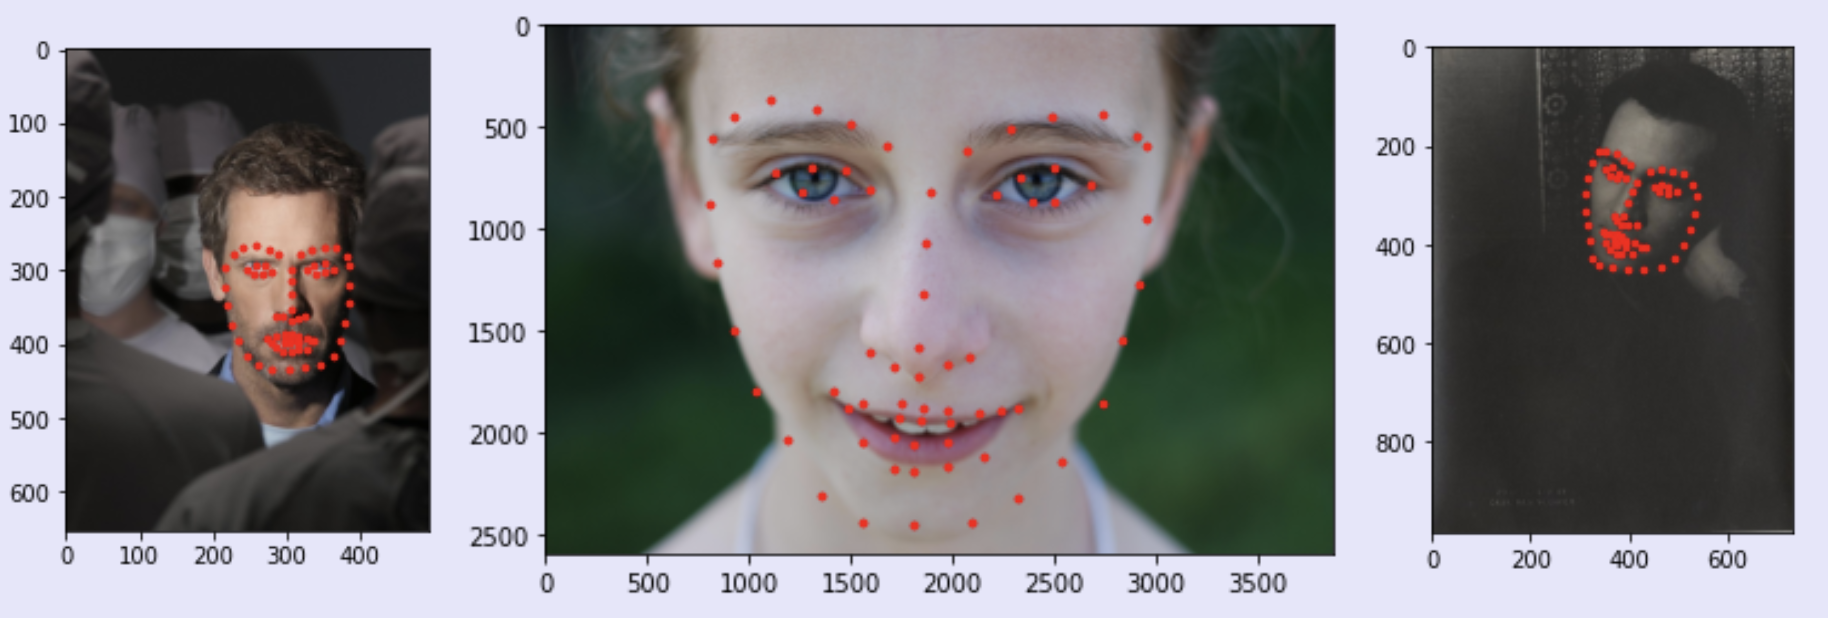
Overview
In this project, I created Neural Networks to detect the shape of the face in an image automatically. In general, I trained the Neural Network model by using training images that had ground truth landmarks given. For building these models, the main process I use is:
- Creating datasets for training data and validation data respectively
- Creating dataloader to iterate through all images and coresponding ground truth key points.
- Creating CNN model, including convolution layers, RELU layers and max pool layers.
- Train CNN model on training data by minimizing MSE loss.
- See result on validation data and evaluate training and validation loss.
Nose Tip Detection
Set up
- First, I uploaded the images from the IMM Face Dataset. This dataset contains 240 images of 40 people where each person has 6 different pictures of themselves and each image contains 58 labeled facial keypoints.
- Then, I split the dataset into 192 images for the training set and the remaining 48 images for the validation set.
- I ran each set through its respective dataloader with the following transformations:
- Convert image to grayscale
- Resize image to an 80 x 60
- Only keep nose tip landmark, remove remaing 58 labeled facial keypoints
- Convert image to Tensor
Nose CNN Model
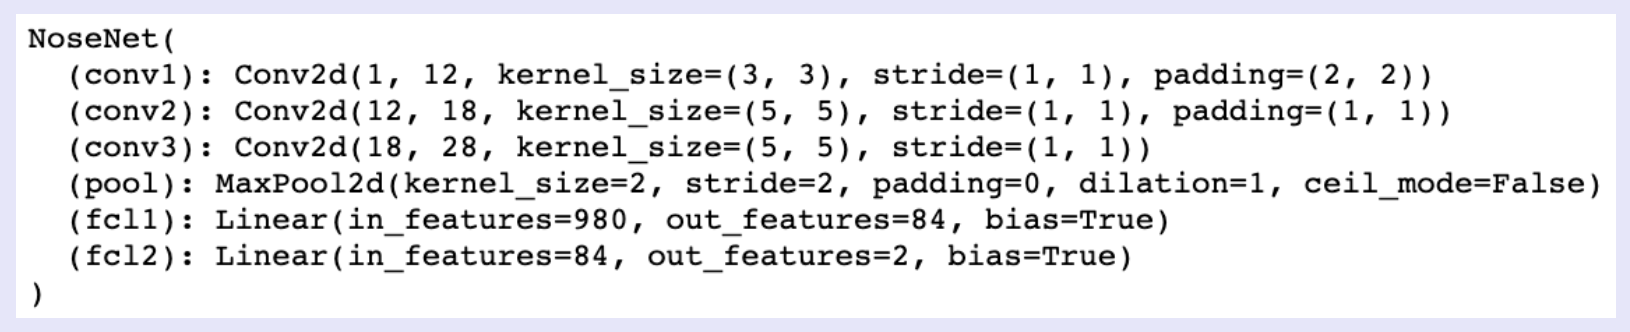
Once the data was loaded and processed, I had to train my model. The model I used was a 5 layer neural net, with 3 convolutional layers and 2 fully connected layers all using the RelU non-linearity. For this CNN, I had the following architecture:
Loss Function and Optimizer
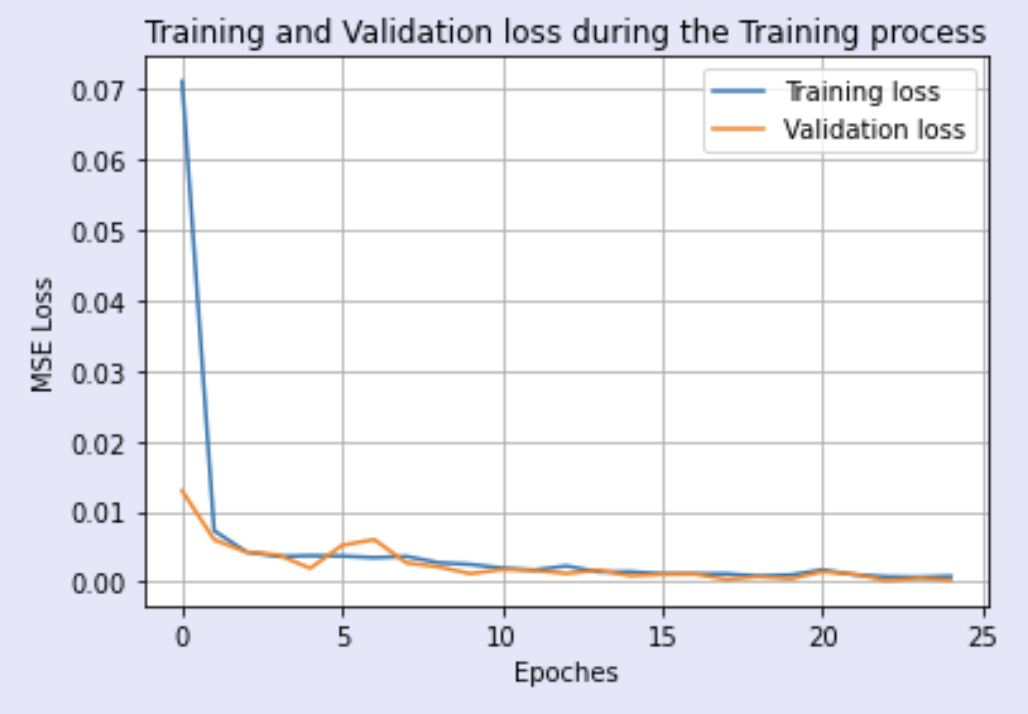
The above CNN model was trained over 25 epochs using an Adam optimizer with a learning rate of .001 and batch size 8. Below I plotted the training loss versus validation loss across the epochs:
Results
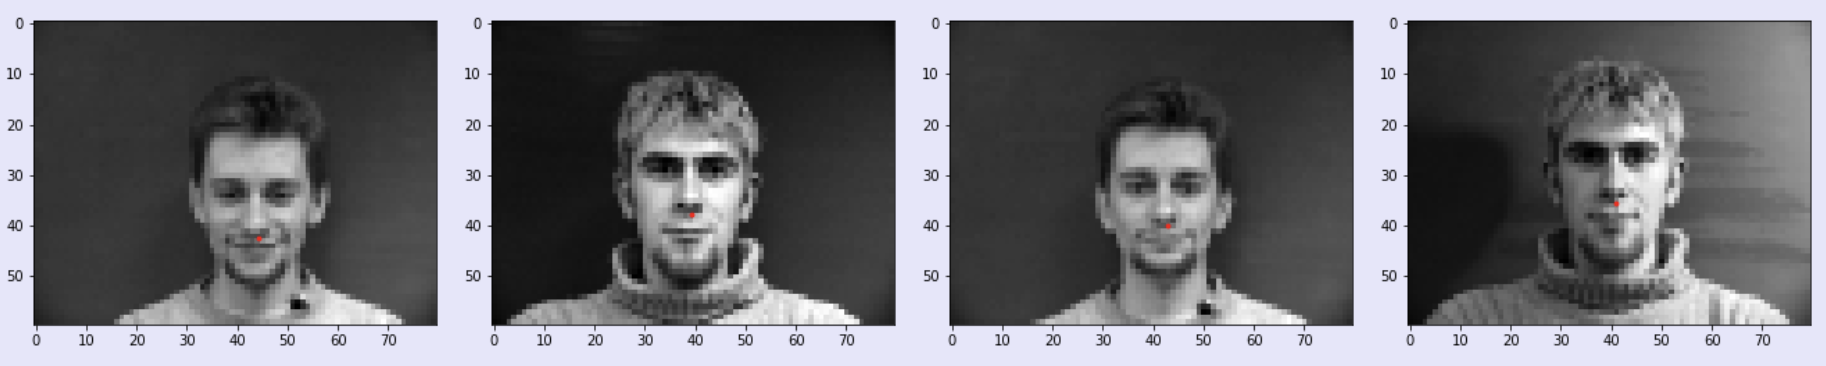
The model returns two ratios corresponding to the point of the nose tip. These rations can be scaled by the width and height to get the prediction point. Some examples are shown below where the green labels are the ground-truth nose tip landmark and the red labels are the predicted nose tip landmark from the model

While the model predicted the nose tip well for images that were centered and had people facing forward, the neural net didn't work that well when the face was tilted like in the images below. This could be due to the difference in orientation was not something the model was well trained for.

Full Facial Keypoints Detection
Set up
I used the same IMM Face Dataset from the previous neural net and used the same split for the training set and validation set. However, in this neural network I want to use all the keypoints, not just the nose keypoint. One another important improvement is augmentation on both training data and validation data. Because we have relatively small dataset (only 240 images), we try to increase our dataset size by having random rotation on original images to create new images.
The transformations for these images were the following:
- Convert image to grayscale
- Resize image to 160 x 120
- Randomly rotate image anywhere from -15 to 15 degrees
- Convert image to Tensor

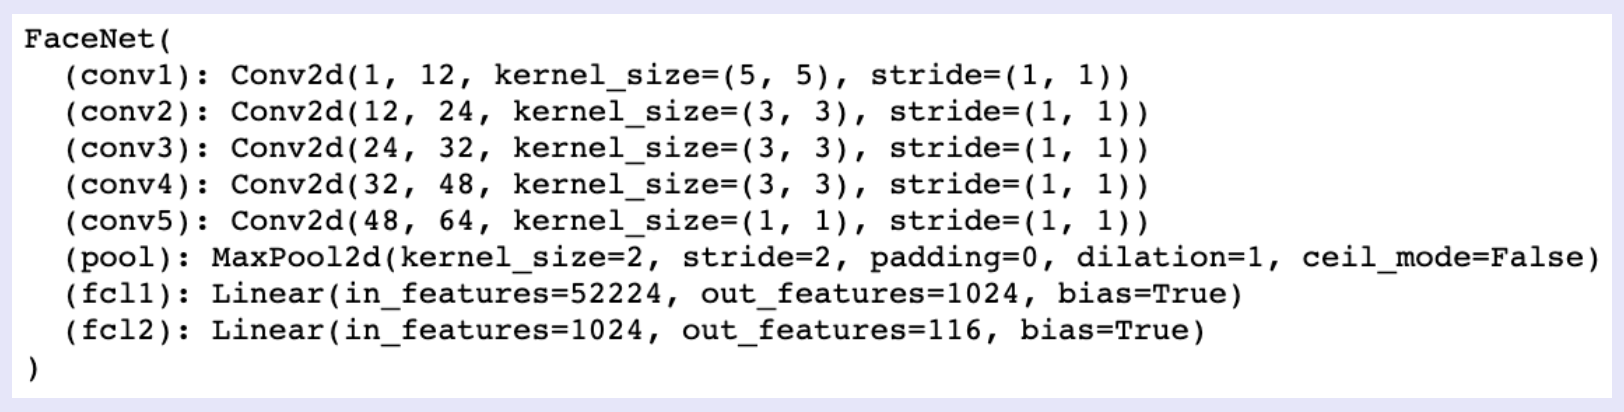
Face CNN Model
Once the data was loaded and processed, I had to train my model. The model I used was a 7 layer neural net, with 5 convolutional layers followed by 2 fully connected layers. The output of this model has length (58 keypoints) * (2 coordinates) = 116. For this CNN, I had the following architecture:
Loss Function and Optimizer
After completing the training process, we are able to visualize the filters on each convolutional layer. Below, I included the 5x5 learning filters on the 1st convolution layer:

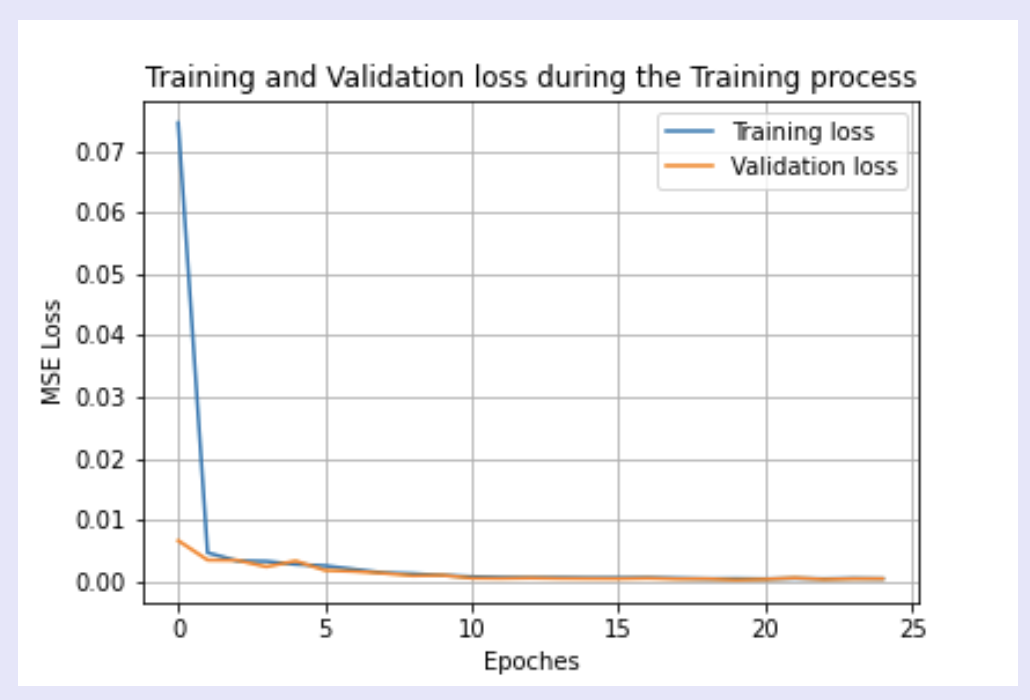
I trained the Face CNN describe above over 20 epochs using an Adam optimizer with a learning rate of 0.001 and batch size 24. Below I plotted the training loss versus validation loss across the epochs:
Results
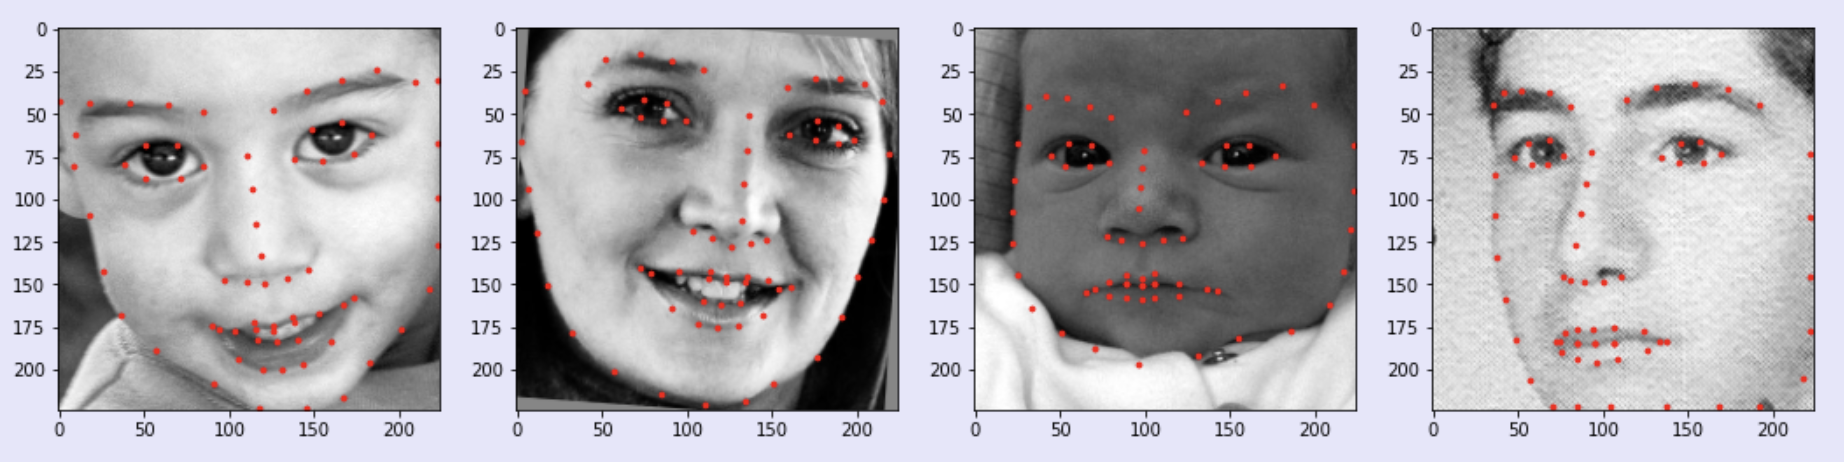
The model returns predicted keypoints for the 58 landmarks. Some examples are shown below where the green labels are the ground-truth landmarks and the red labels are the predicted landmarks from the model

While the left two images were fairly accurate, my model did not do very well with the right two images. Similar to the nose model, we see that my model is not performing well with different orientations and shifts. This could be due to a lack in images with the face turned and tilted. For the last neural net, I will work with a much larger dataset that will address some of the issues seen in the nose and face neural net which were working off of a significantly smaller dataset.
Train with Large Dataset
Set up
For this part, we are going to use a much larger image dataset from iBUG, Face in the Wild, which contains 6666 images of varying image sizes, and each image has 68 annotated facial keypoints. As in the previous part, I will use data augmentation to artificially and randomly rotate the images to prevent overfitting in the model.
Because these images were wildly different from each other (in size, shape, orientation, etc.), I included transformations in the dataload to standardize the images and make sure the face was what the model was picking up on. These transformations were:
- Convert image to grayscale
- Crop image to a square that includes only the face (used box limit values provided by dataset)
- Resize image to 240 x 240
- Randomly rotate image anywhere from -15 to 15 degrees
- Convert image to Tensor
Large Dataset CNN Model
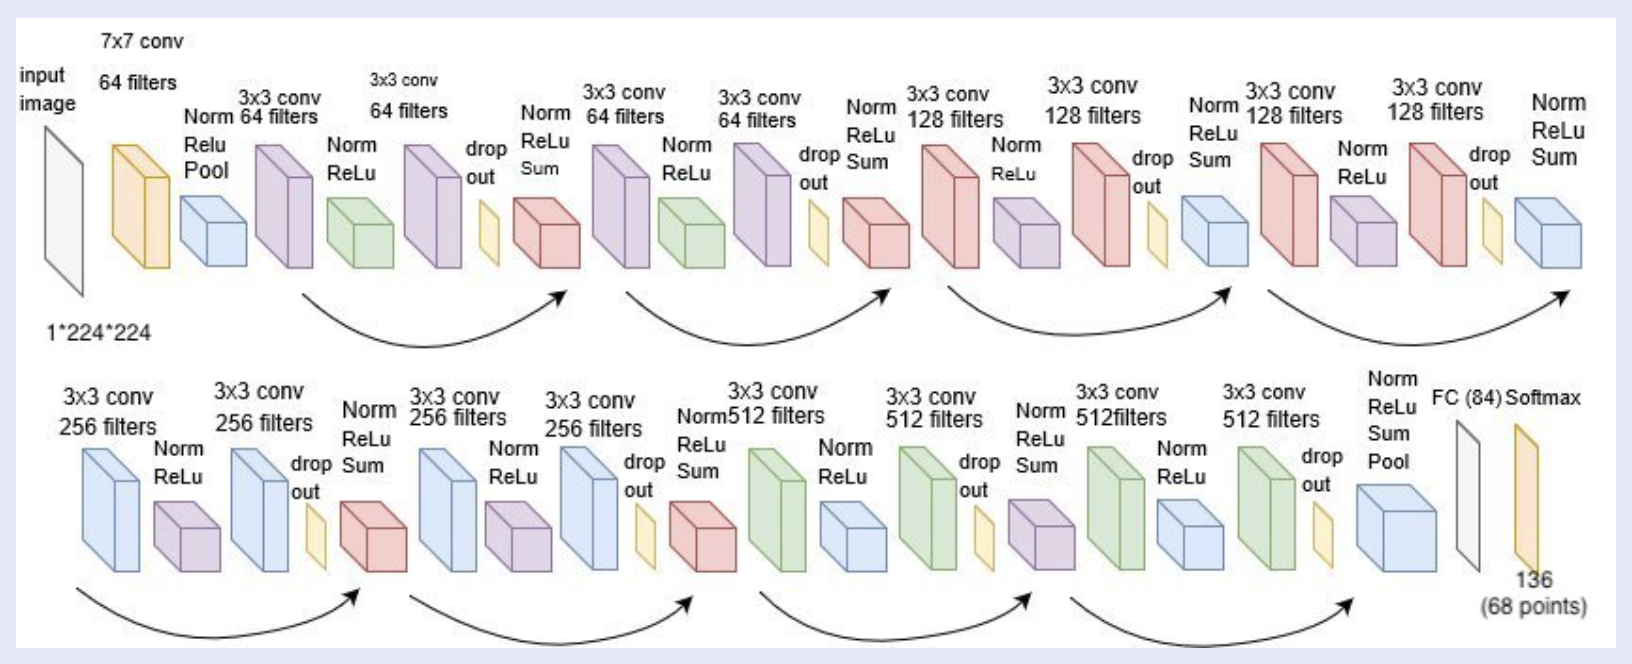
For this part, I used a predefined model called RESNET18 with some minor tweaks. The structure of this model is shown below, except for this project, I changed the input to only take in 1 channel since we are taking in grayscaled images.
Loss Function and Optimizer
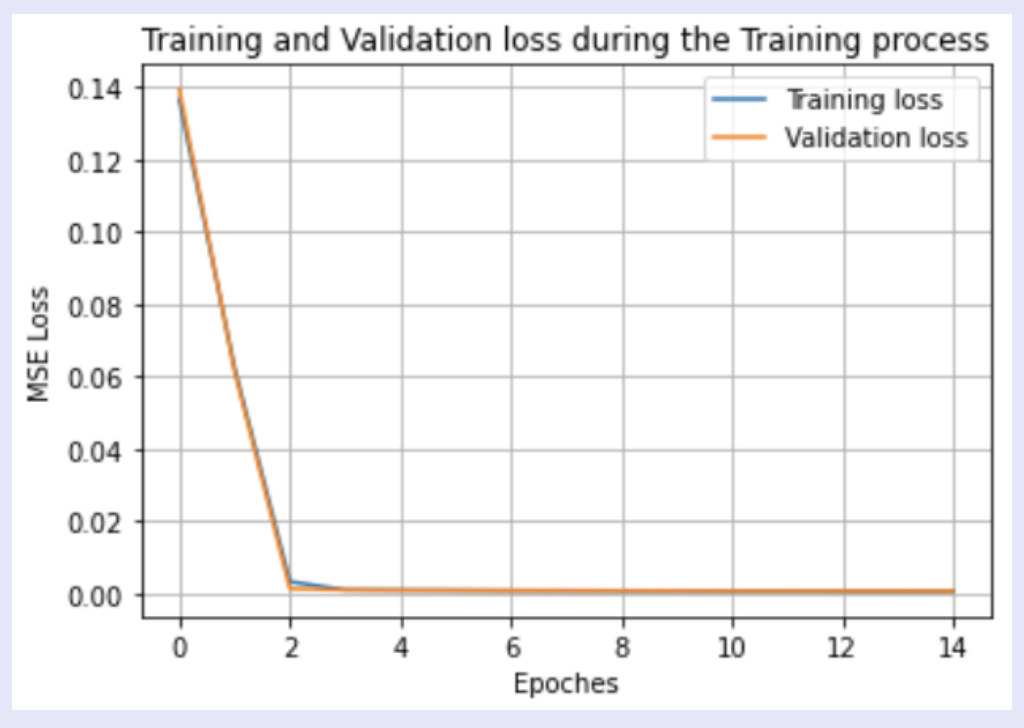
Since it did take a lot longer to train the data on 6666 images, I only ran this model over 15 epochs using an Adam optimizer with a learning rate of 0.0001 and batch size 3. Below I plotted the training loss versus validation loss across the epochs:
Results
The model returns predicted keypoints for the 68 landmarks. Below I have included examples of predicted landmarks from the model:
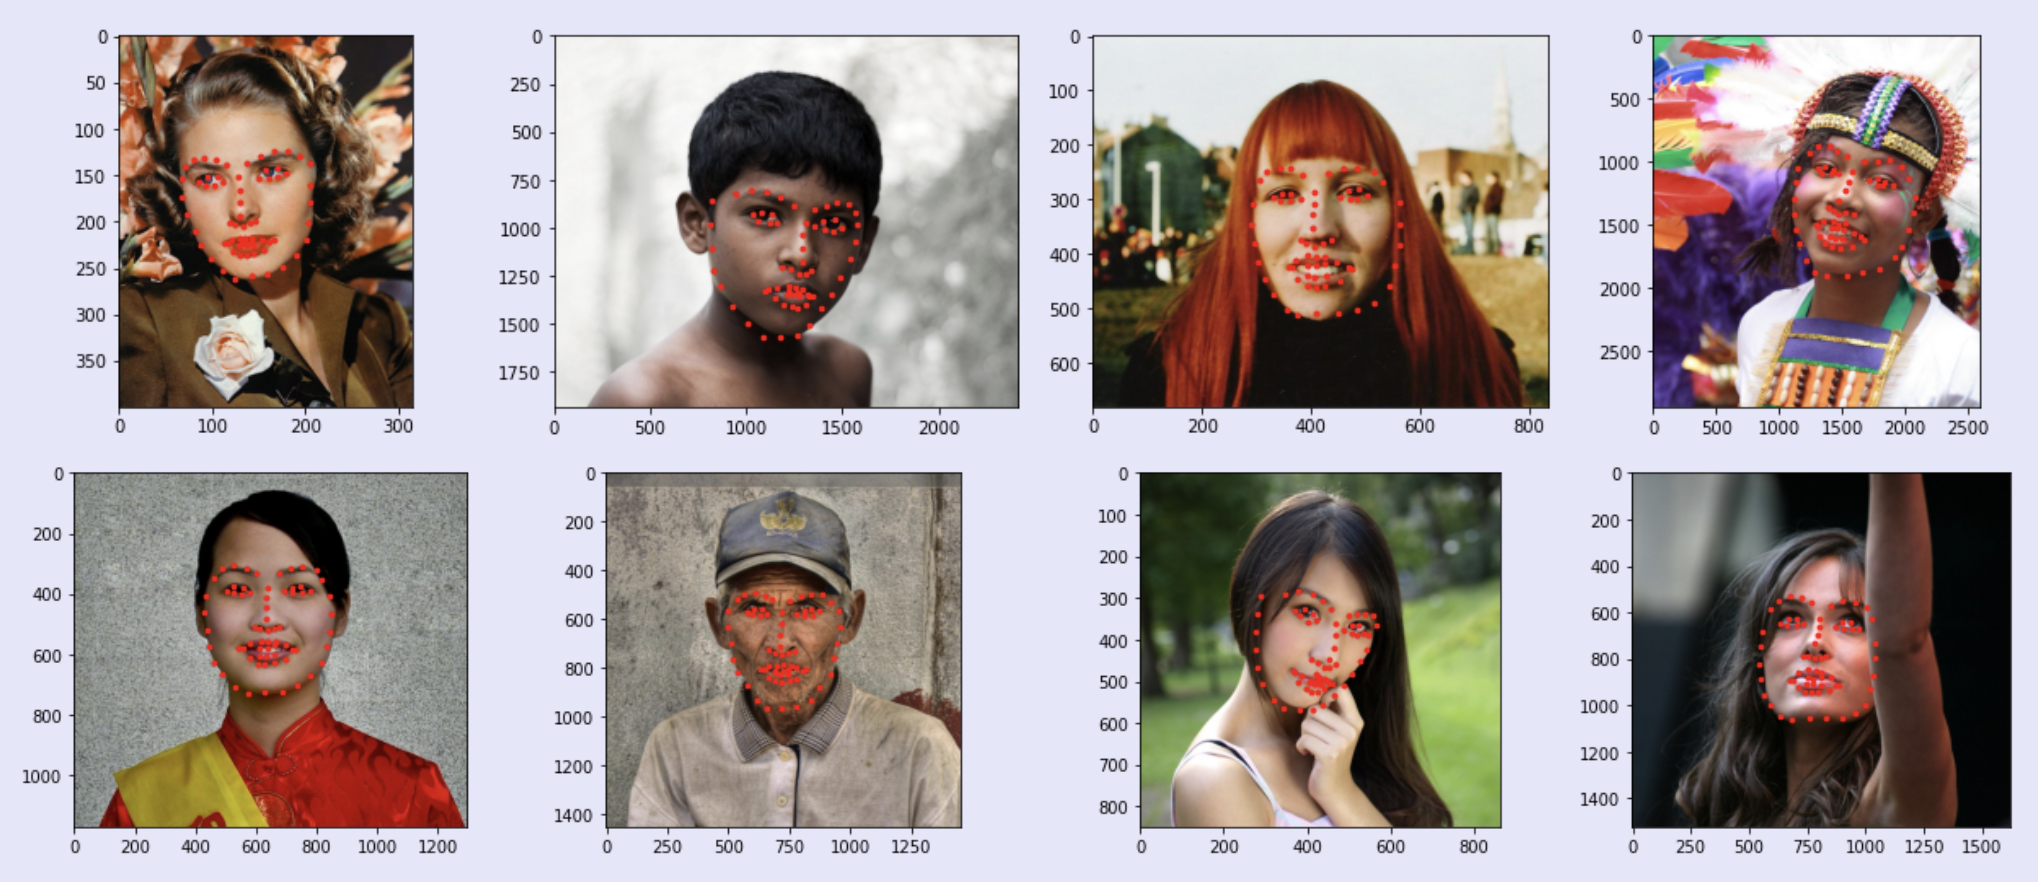
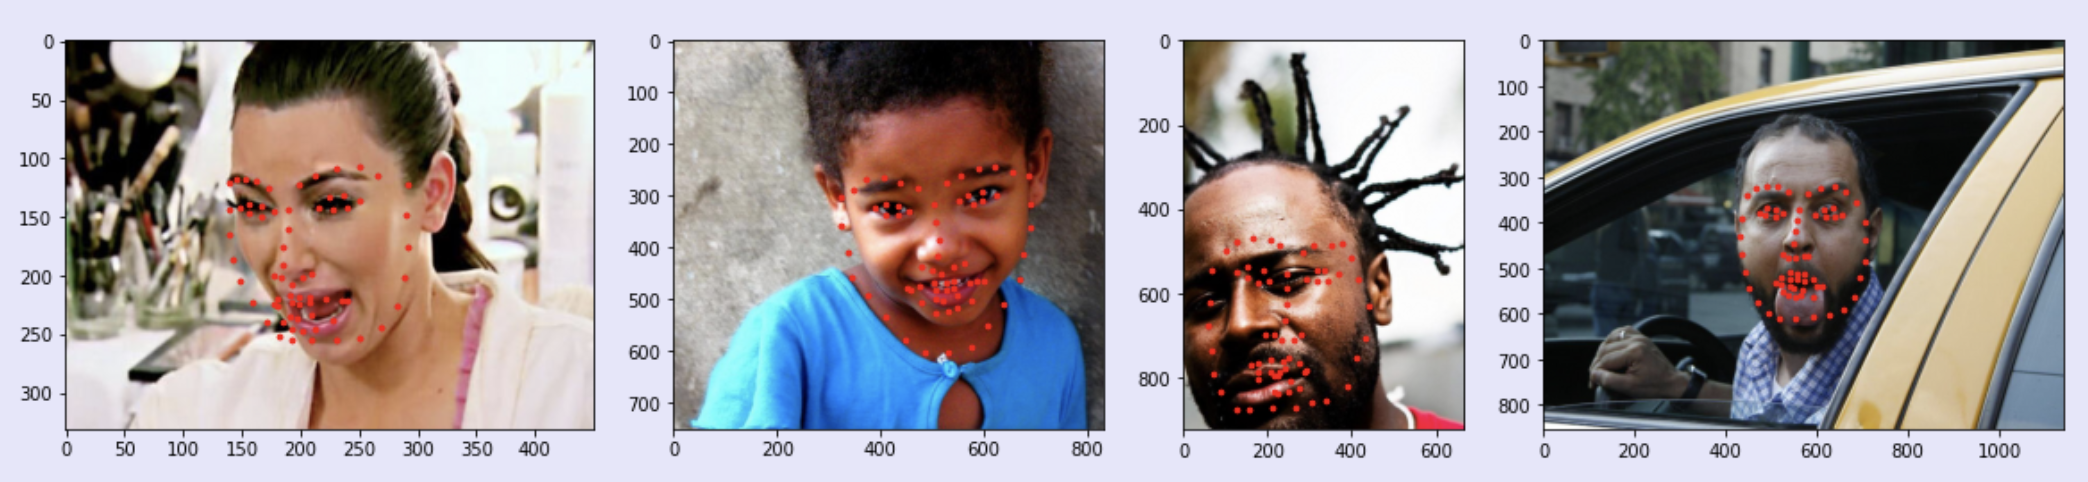
While the above images did well with the model, there were other images that the model did not do very well with. In particular, I noticed that images with facial expressions that are not commonly represented in the dataset (ex. opening the mouth) or faces that are partly cut off in the image do not do as well with the model. Here are some examples that did not do too well:
Despite the model not doing well on some of these images, overall the model did well on the entire test dataset. Our class had a Kaggle competition for users to submit their model's predictions on a test set of the images and see whose model performs the best. My model performed relative well with a mean absolute error of 10.23392.