Here is the first pair of photos I took (more to come for future parts).
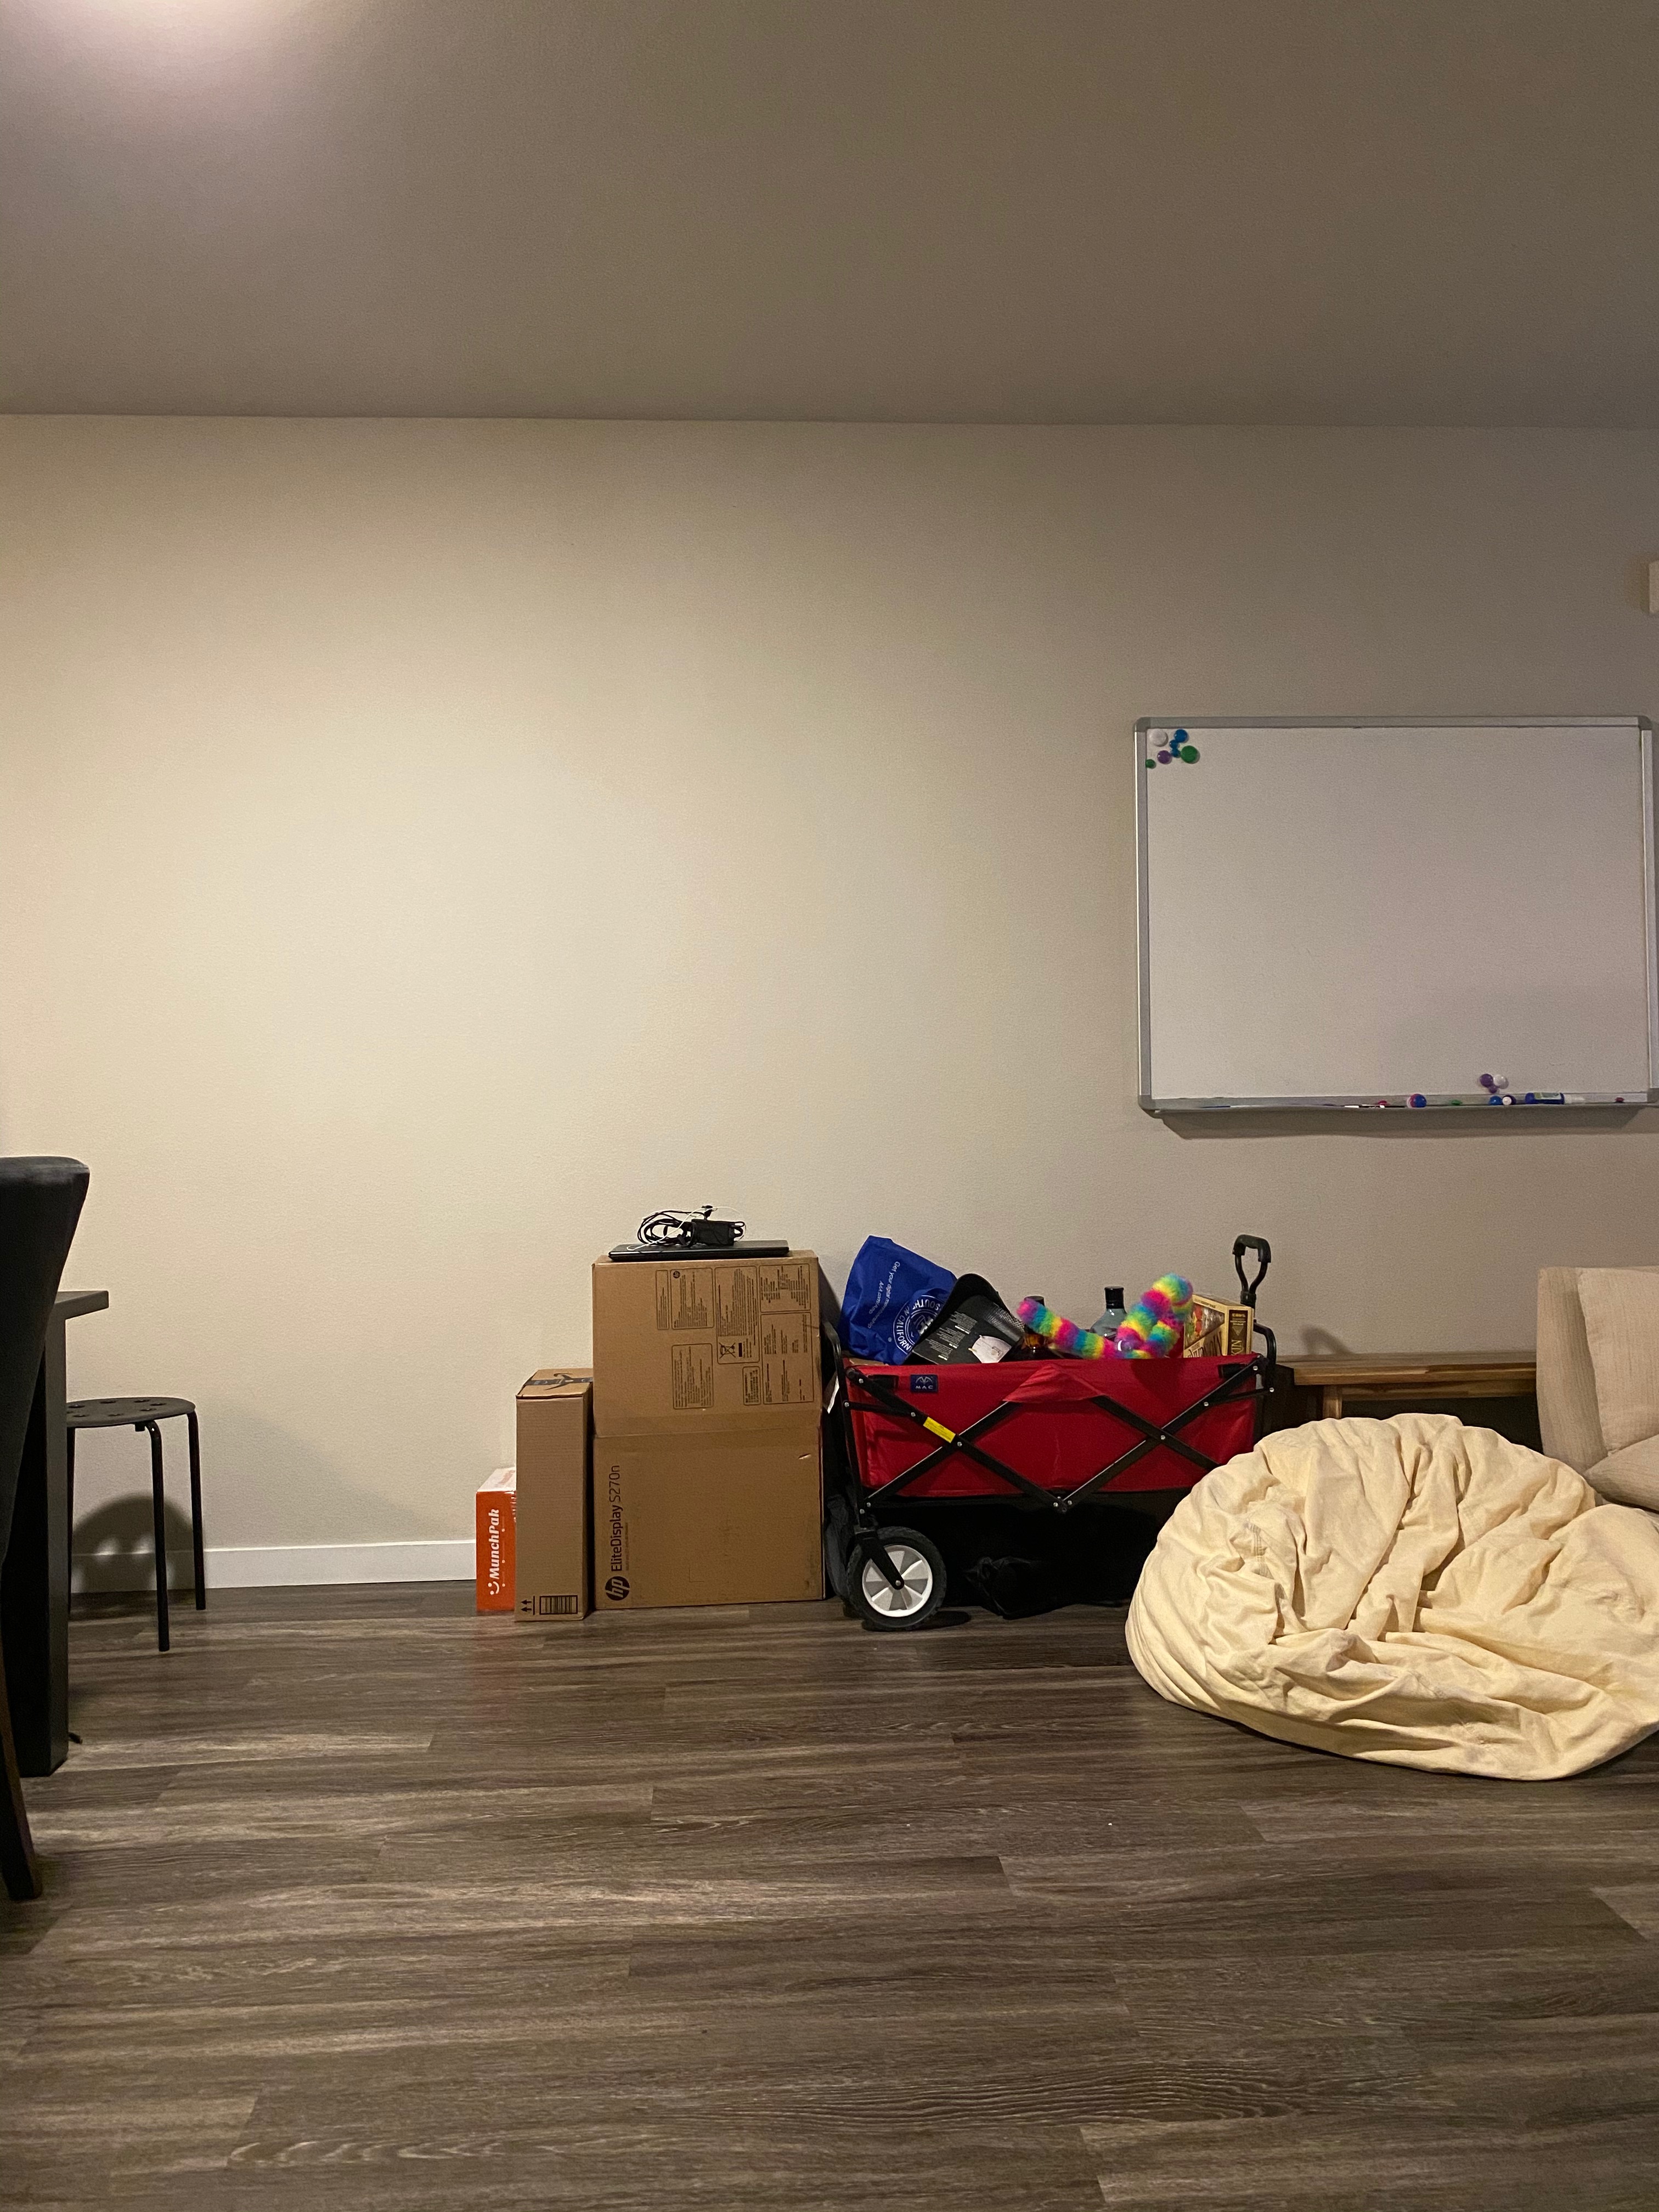
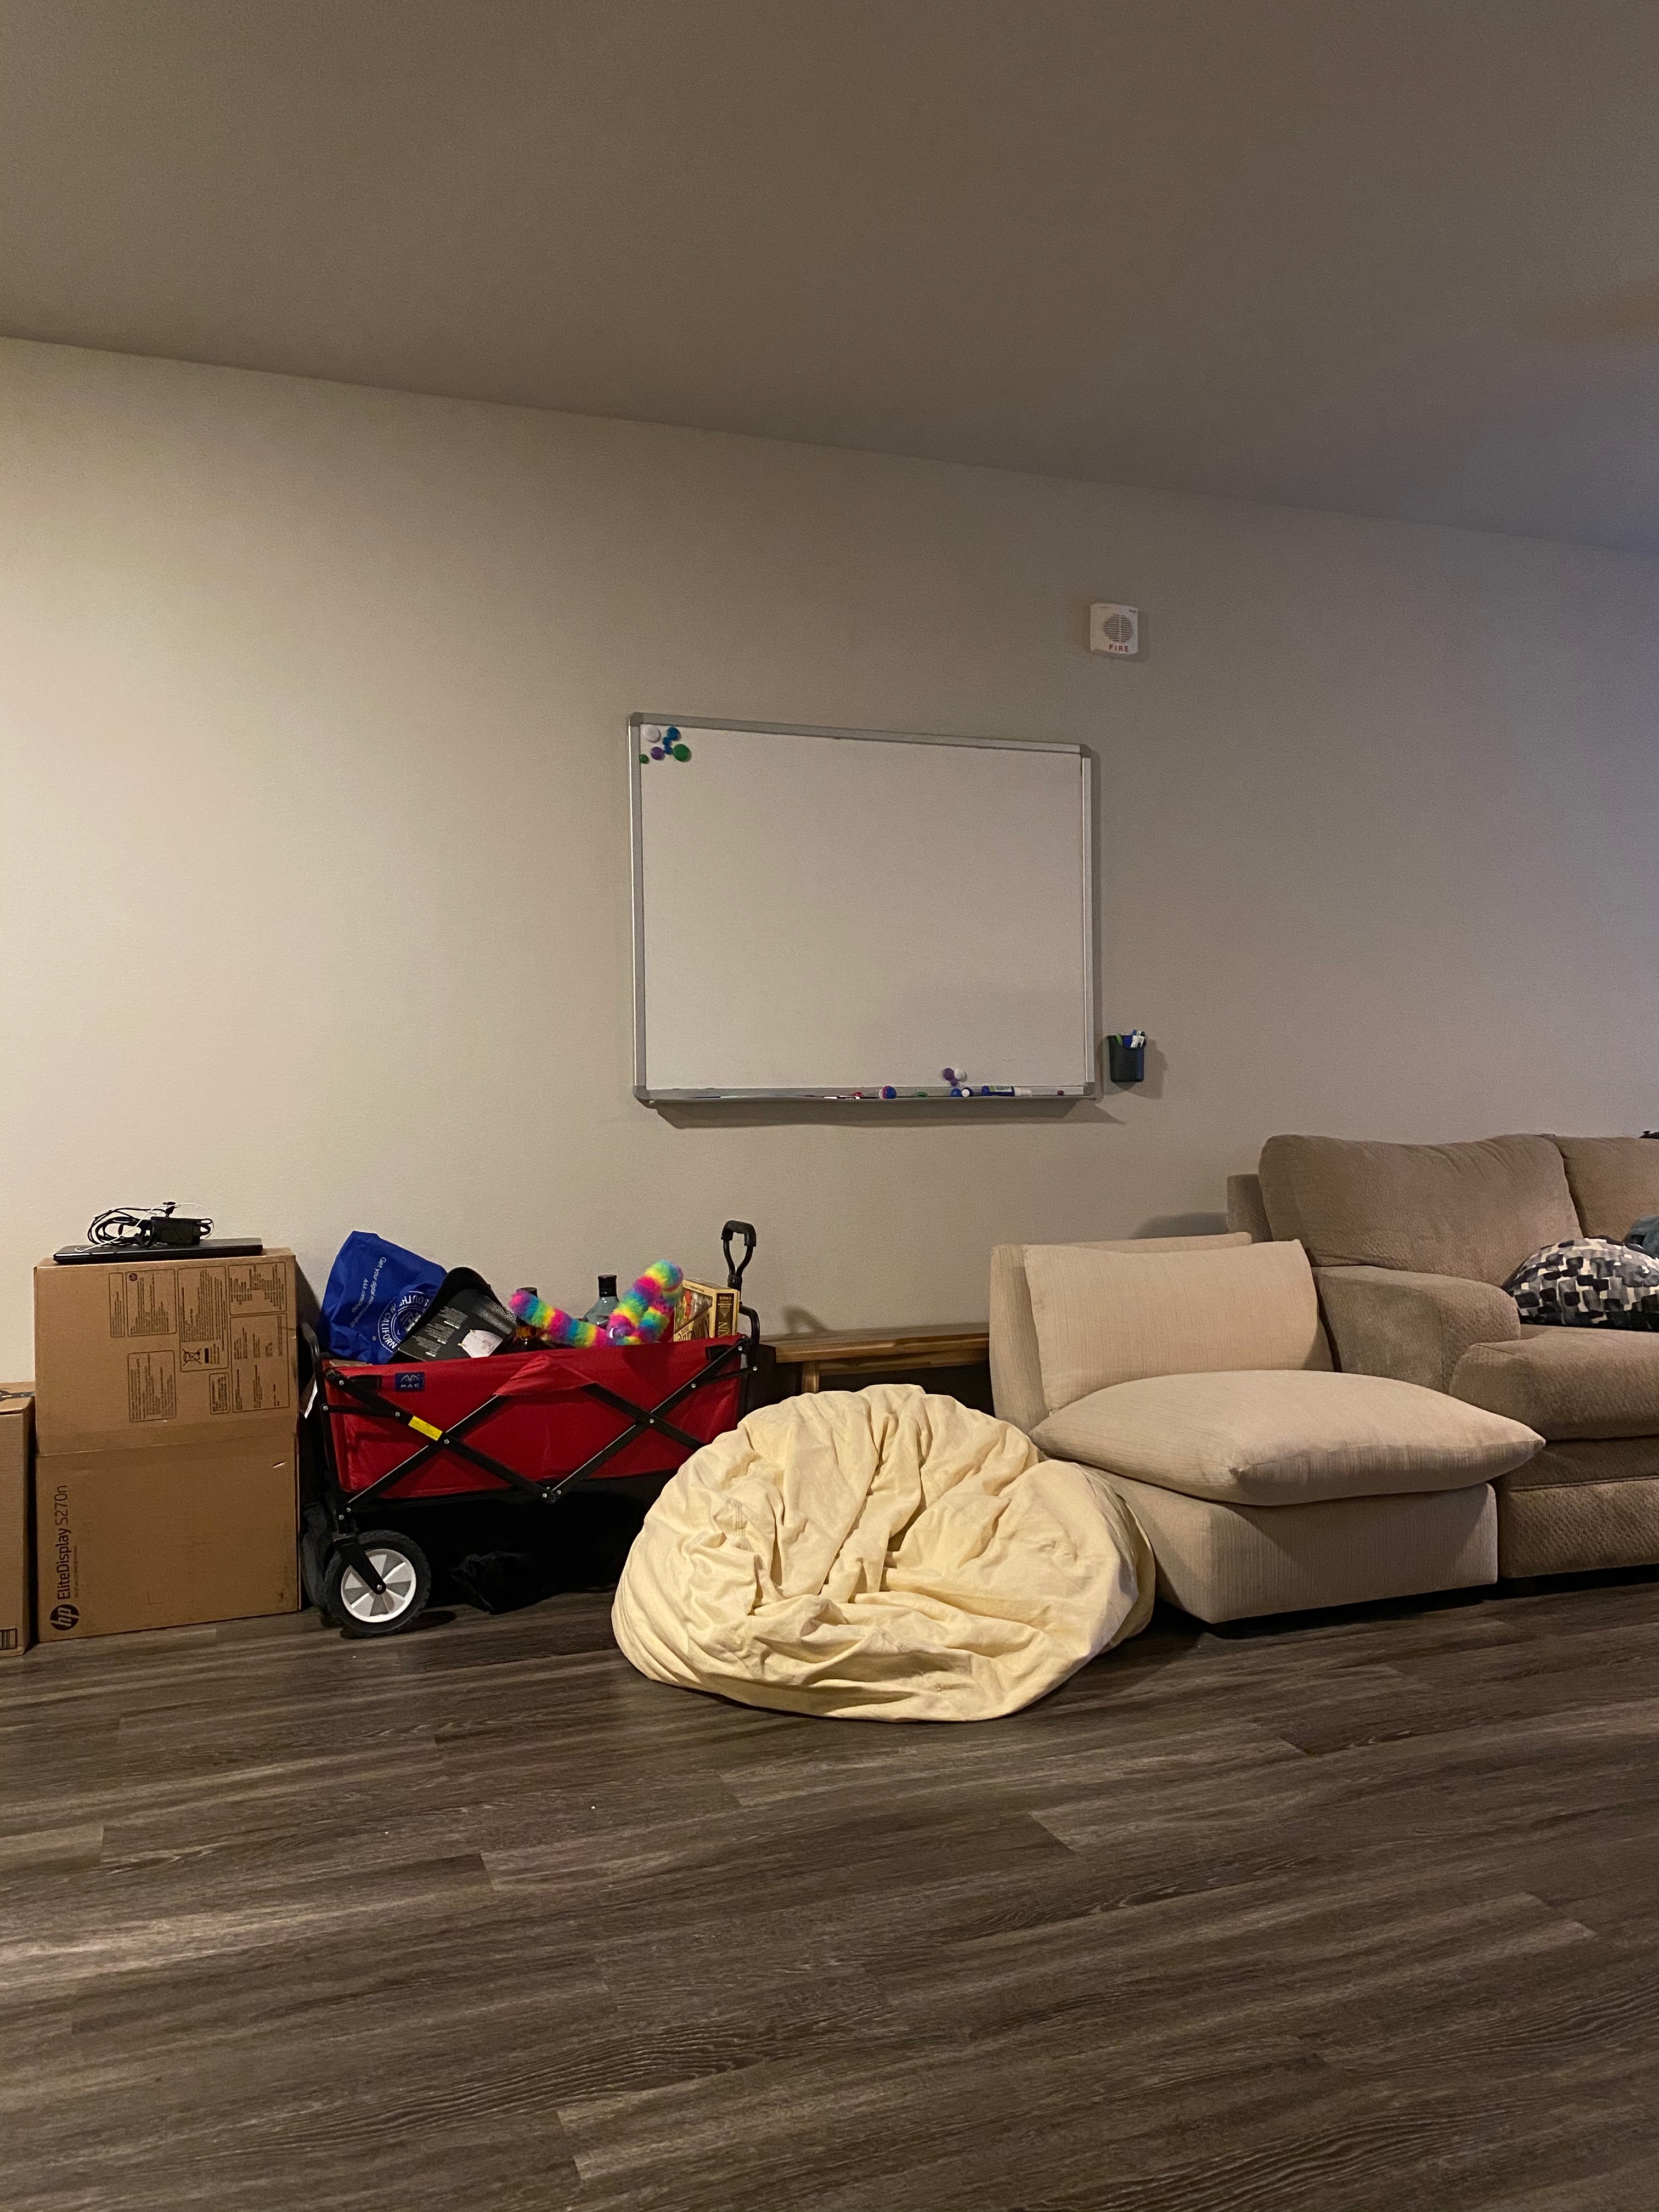
The images are taken of my Berkeley apartment from the same location. They differ only in the angle; as you can see, the notable features that cross both images are the whiteboard, beanbag, boxes, and red cart.
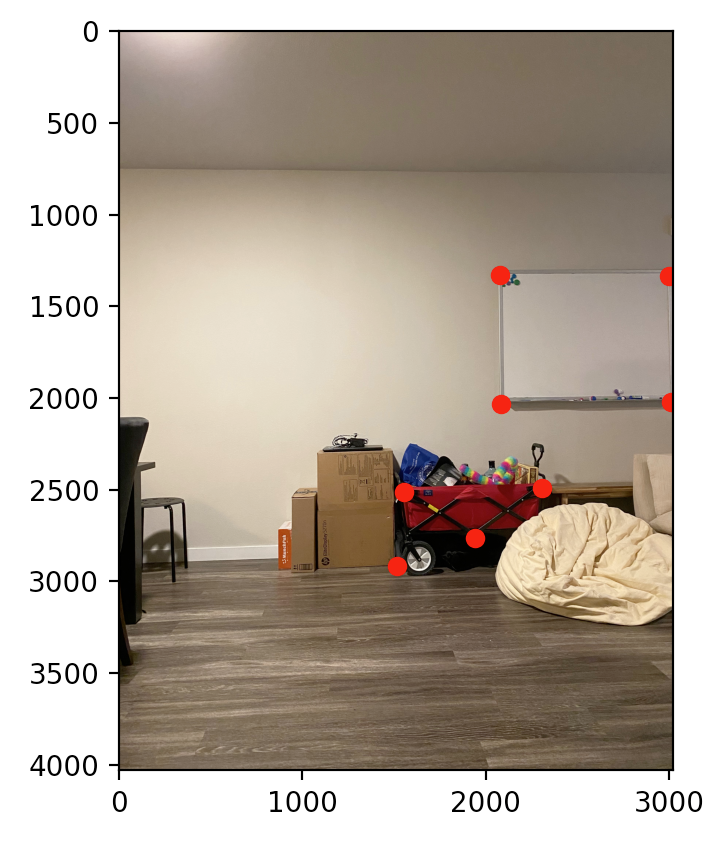
First, I defined the correspondences manually. Here are the images from before, but this time with labeled correspondences.

Obtaining the homographies after I had the correspondences was relatively easy. It involved solving an equation (done with the help of np.linalg.lstsq) to find H in the equation p' = Hp.
Warping the images required computing some important information first. For example, I needed to roughly know where the corners would be, how much padding I needed, and other details. This I implemented through multiplying the homography matrix with a dummy matrix of just the corners of my input to see where things "end up".
With the above information in hand, I was able to perform a warp on my image. Below is the result of warping.
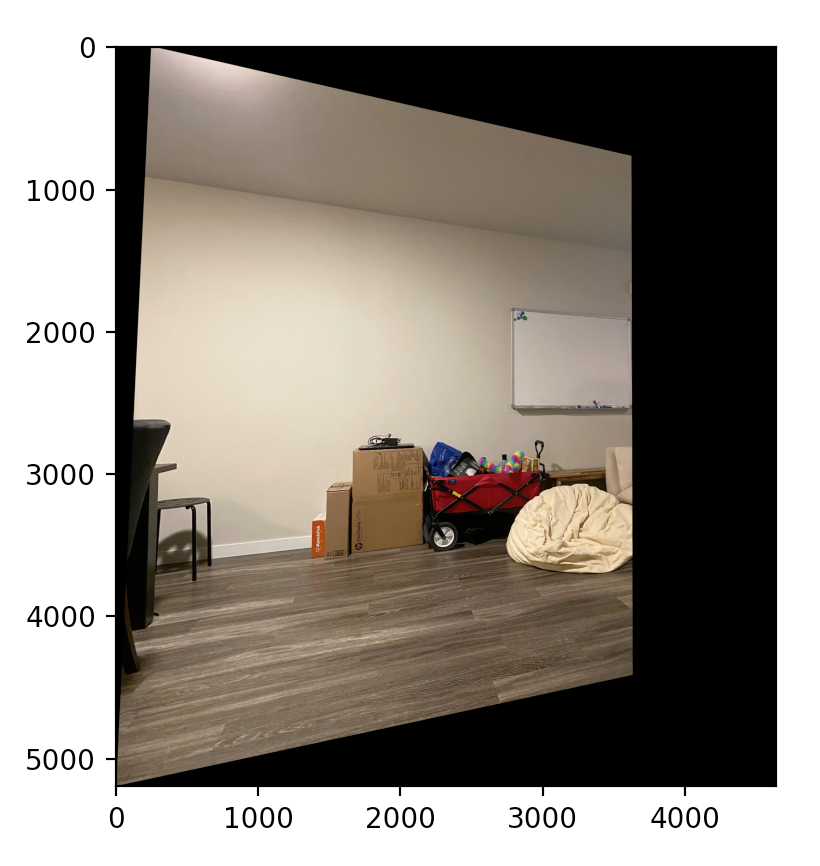
Perhaps indicative of the how well the warp went is the fact that in the warped image and in image that did not undergo warping, the ceiling/wall connection and the floorboards are, respectively, roughly parallel.
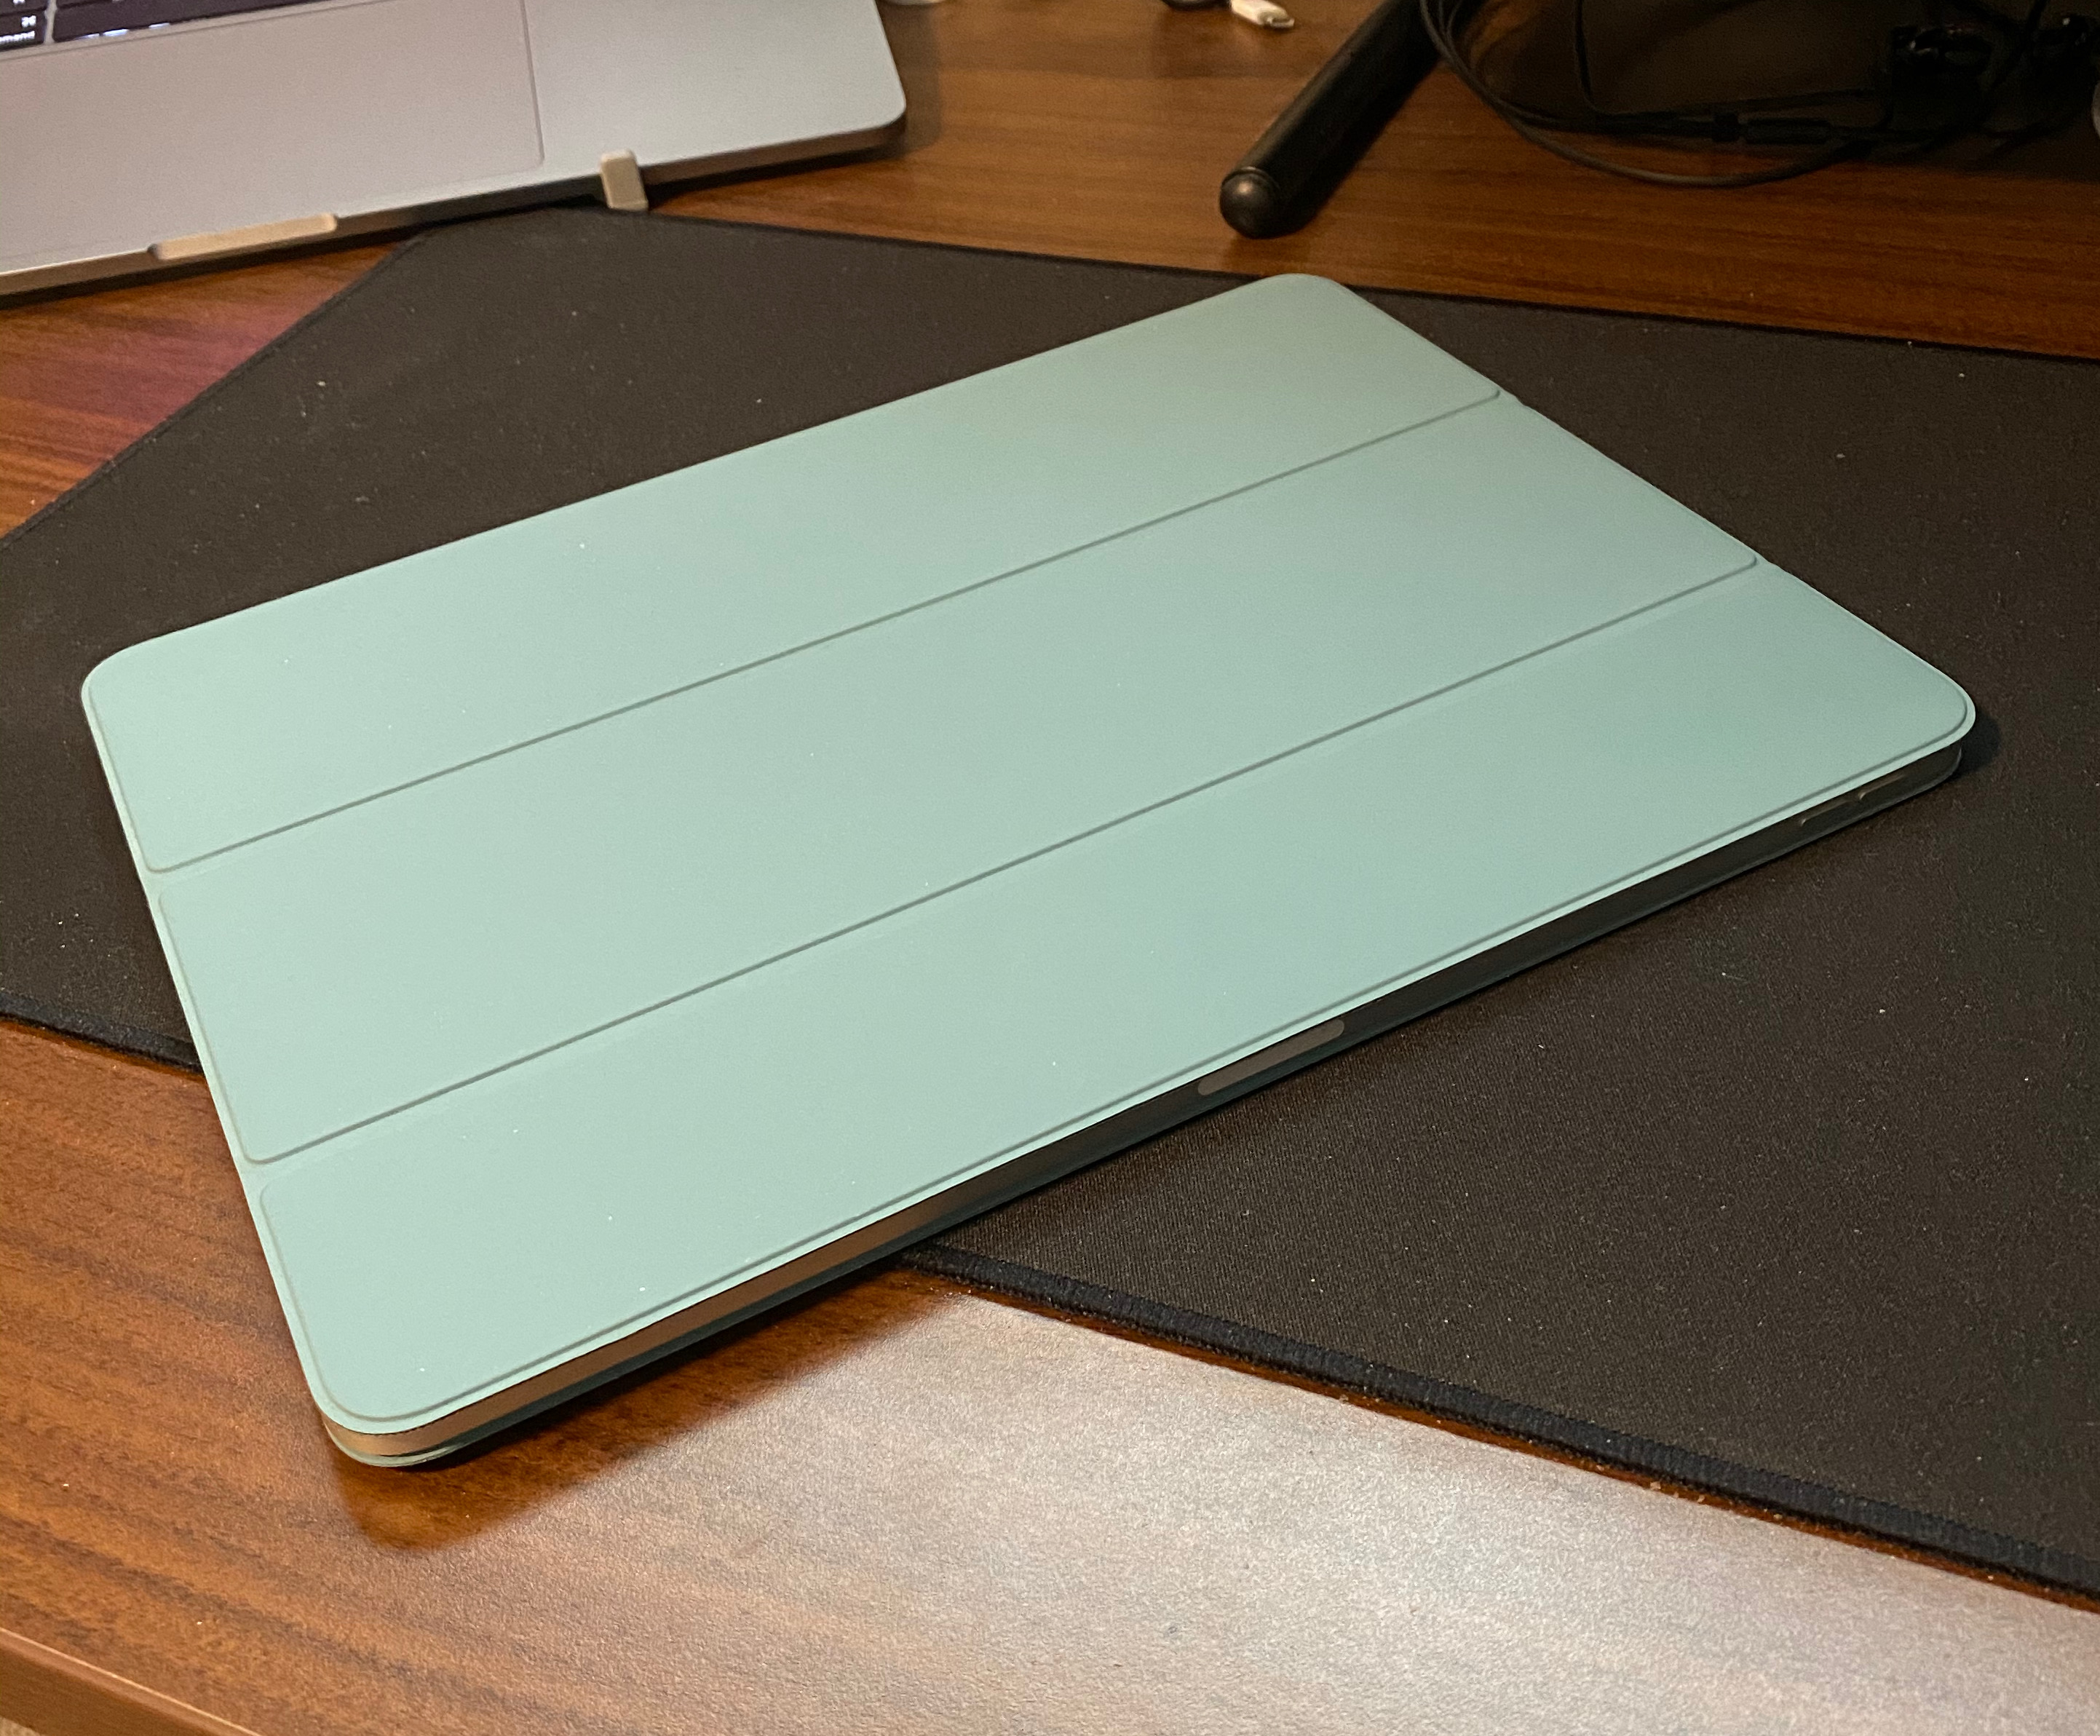
Before I proceeded with the rest of the project, I first followed the spec to check that my homography/warping is actually functional. Specifically, we take a look at rectifying an image. In this case, my input image is of an iPad on my computer desk.
Here, I proceeded to rectify the iPad image so that we get a top-down view of the iPad.
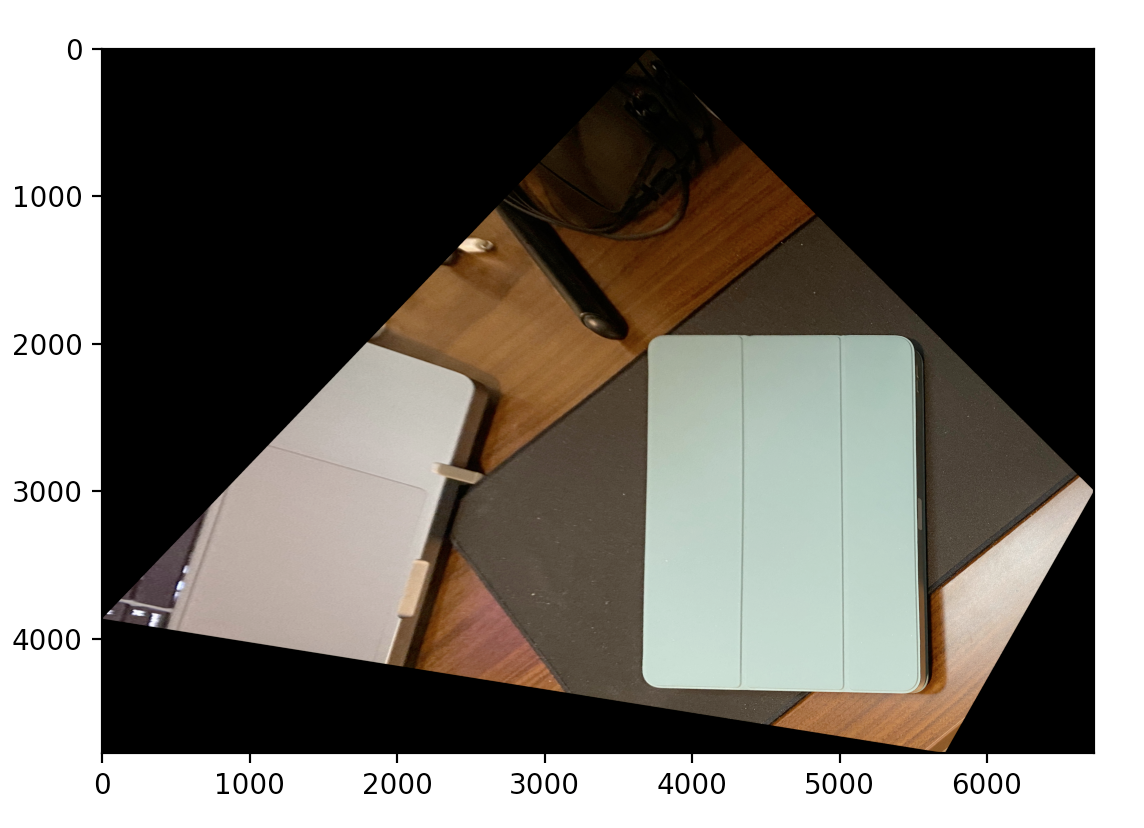
Here, you can see the iPad is oriented correctly and appears to be viewed from above. There are minor artifacts, such as at the bottom right corner of the ipad, but this is to be expected: we aren't generating information out of nothing, after all.
For this particular image, my methodology was to define correspondences on the iPad image twice: the first time, using points where the iPad actually was, and the second time, using points to indicate where I wanted the iPad to go, roughly.
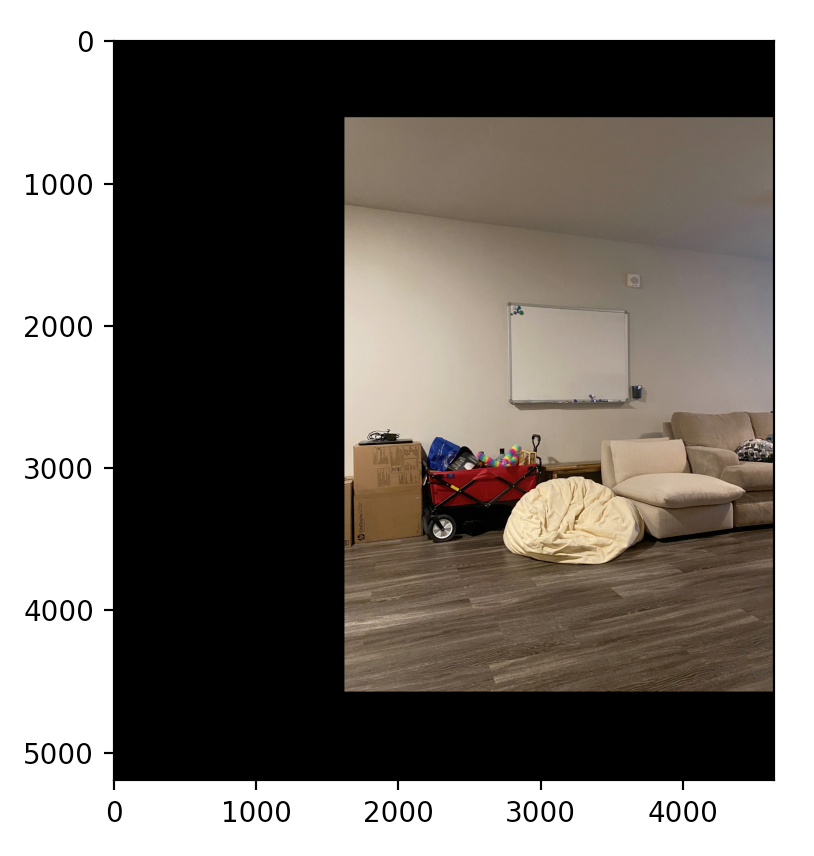
First, for the sake of convenience, I apply a simple modification to the image that did not undergo warping in order for it to fit appropriately within the mosaic image space.
The result of blending the images together is:
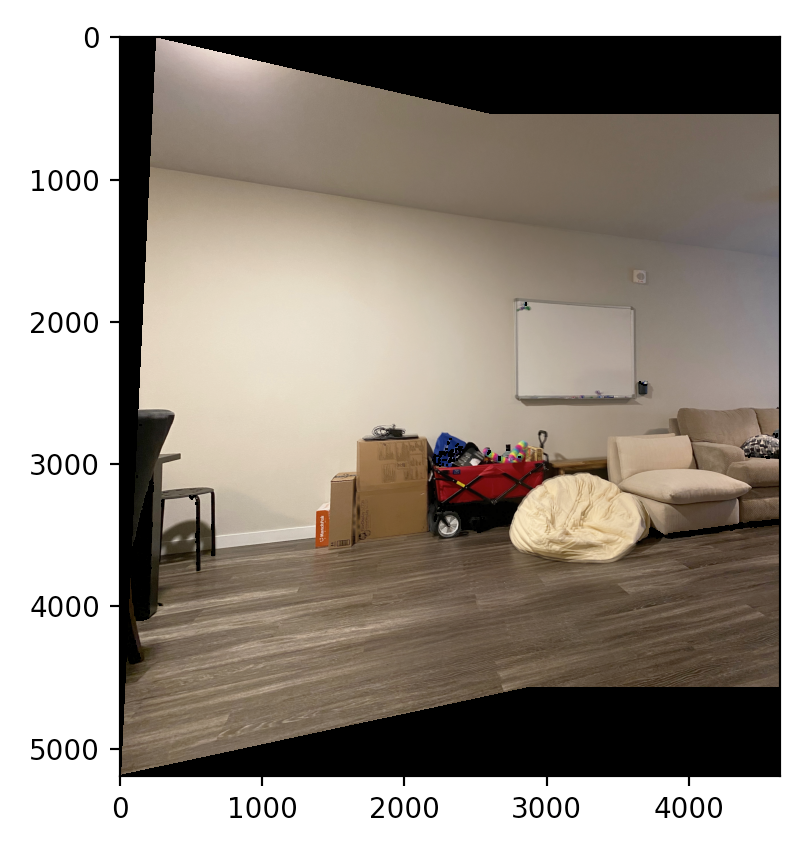
I am honestly very impressed by how aligned the floorboards and the ceiling/wall joins are. There is some level of blurriness, coming from slight inaccuracies in setting the correspondences and also from the operations done to each of the input images along the way.
The coolest, if not necessarily most important, thing that I learned from this project so far is probably that even without extrapolating or generating "fake"/"extra" information, we can change the perspective of an image pretty convincingly.