Project 05: [Auto] Stitching Photo Mosaics
Vanessa Lin
Part A
Overview
In this project, I am trying to stitch together photos to create a "panoramic"-like effect. For this part, I produce an image mosaic through projective warping on image correspondences between images and stitching the warps together.Shoot the Pictures
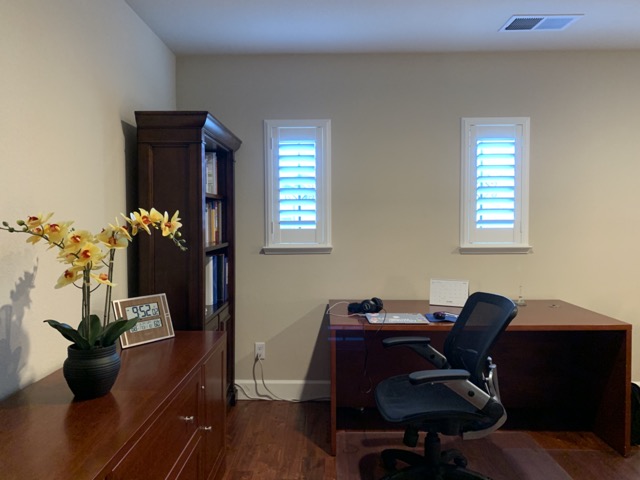
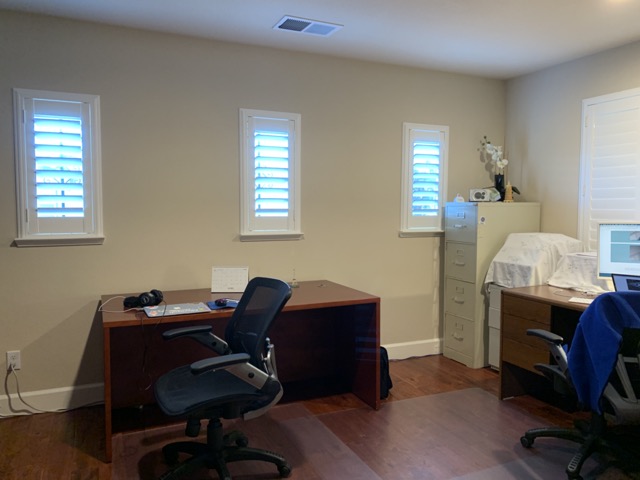
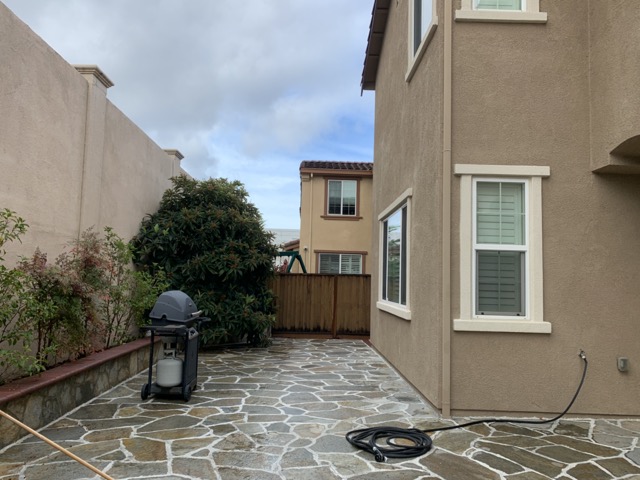
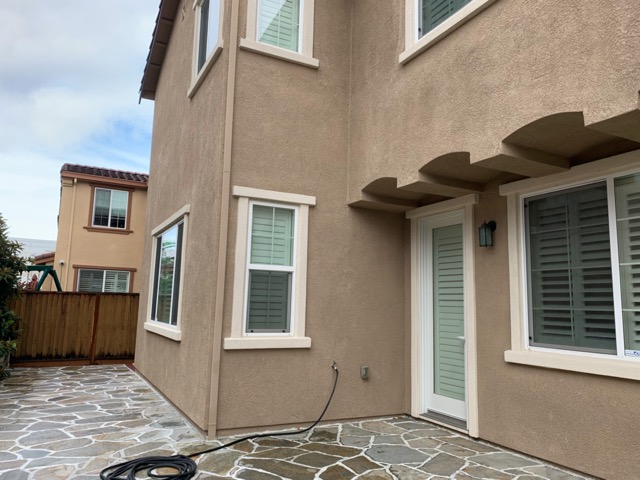
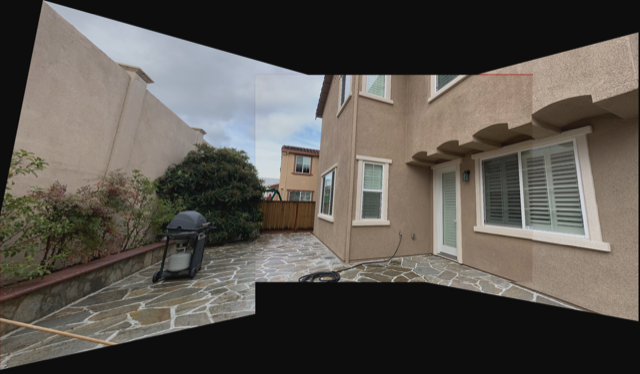
To start off, I shot several photos inside my house and outside my house, because of COVID-19, I rarely go out, so I will be creating a sort of "house" tour (and "yard" tour) through my mosaics. I used an iPhone XR to shoot these images by standing and rotating my phone to take the images. Also, I made sure there was at least 50% overlap between the images to find correspondences.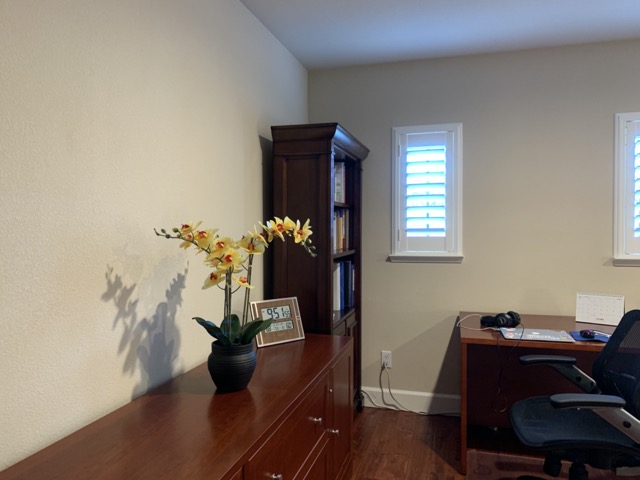
Recover Homographies
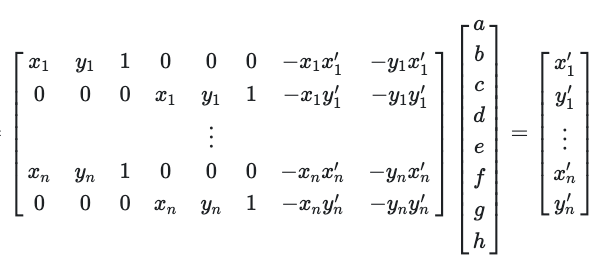
To calculate the homography matrixH, I created a system of equations and used least squares to find the 8 degrees of freedom, like so. The system can be solved with only 4 points to find the homography matrix; however, the homography recovery will be very unstable and prone to noise. Therefore, more than 4 points should be used to create a more robust homography matrix, and since that creates an overdetermined system, I use np.linalg.lstsq to find the least squares solution.
Warp the Images
After finding the homography matrix to transform a set of points to another, I created a warp function similar to Project 3. In the function, I first forward warp the input image corners to find the the size of the output bounding box for the resulting warp. Afterwards, I inverse warp the coordinates in the output bounding box to find the pixels in the input image that the coordinates corresponded to through cv2.remap , in other words, interpolation.
Image Rectification
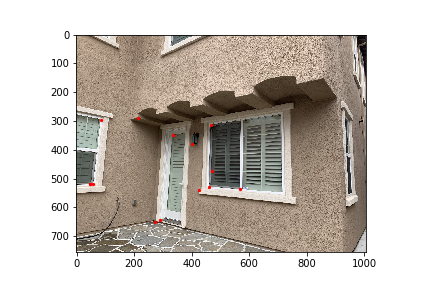
To rectify images, I chose the corners of planar surfaces at an angle and took points of an arbitrary square/rectangle, and then warped them to become rectangles in the output.
Blend Images into Mosaics
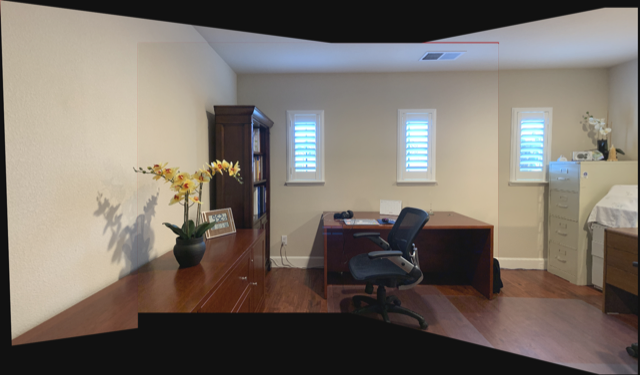
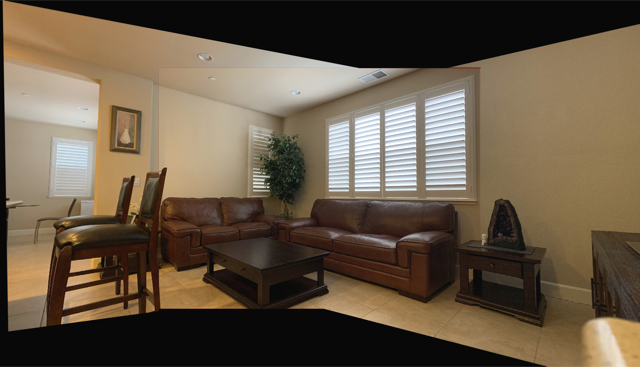
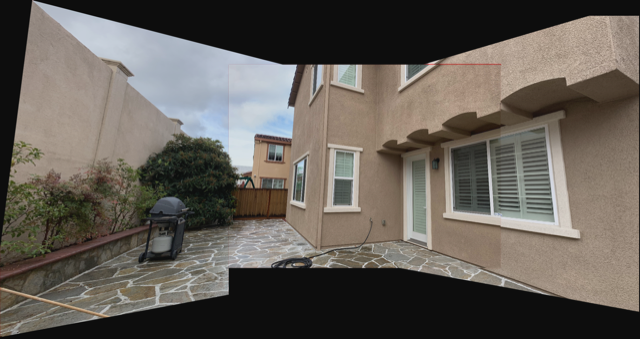
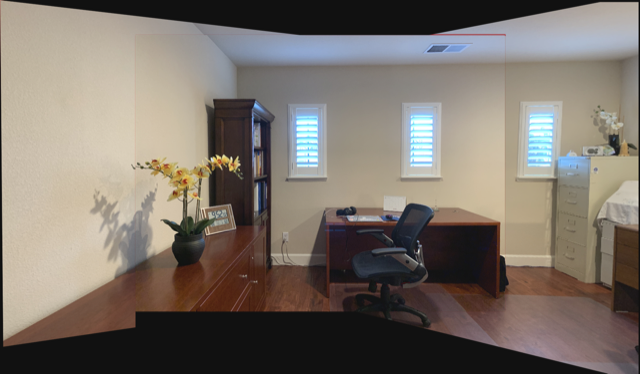
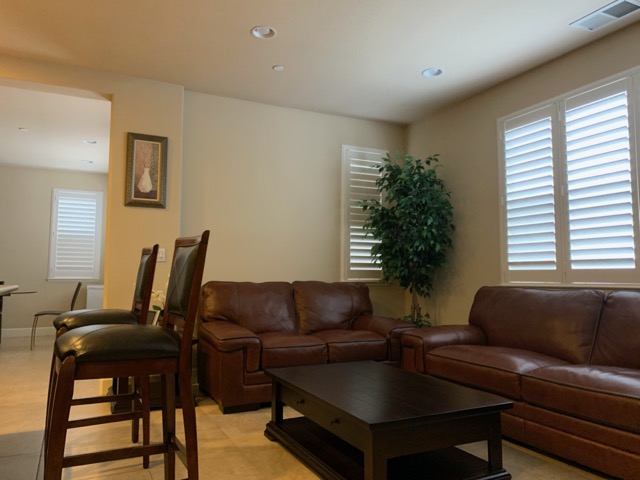
To create a mosaic between three images, I used the warp function that I implemented above, and warped the images one by one. First, I found correspondences between left and middle images. Afterwards, using the homography matrices to transform left to middle, I warped the left image to match the geometries of the center image. To stitch the images together, I created a larger canvas and used the blending technique with Laplacian Pyramids from Project 2 to blend the edges together. After producing the combined left and middle image, I then found correspondences between the combined image and the right-most image and warped the right most image to the geometries of the combined left and middle image. Finally, I stitched the combined left and middle image and the right most image through the same blending technique with Laplacian Pyramids, and voila, created a full mosaic between the three images.

What I've learned
Through this first part, I realized how easy (maybe not easy to implement because this took me a while to finish) it is to construct a mosaic between images, if you have the correspondences between two images and a good warping function that can take in a homography matrix and an image. This made me wonder if the panorama function in our phones does some similar transformation. Since the mosaics above were all created with an iPhone camera, I was pretty impressed with the second mosaic, because I did not realize how nice our living room looked until I finished stitching the images together.Part B
Overview
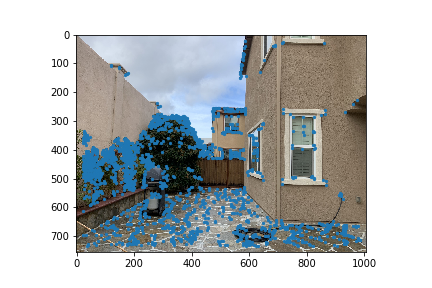
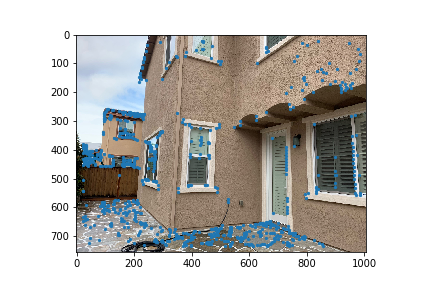
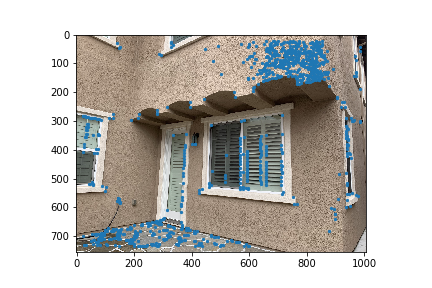
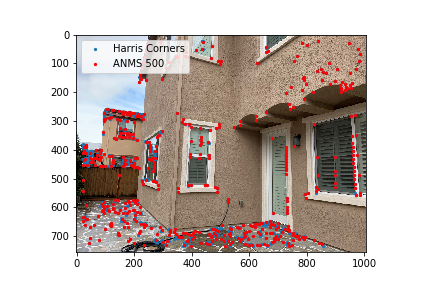
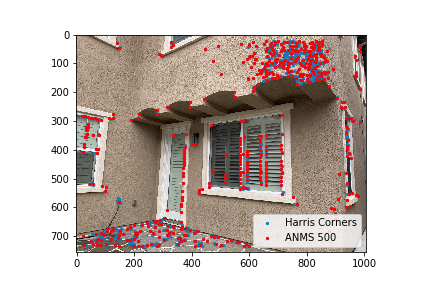
For this part of the project, I followed the paper "Multi-Image Matching using Multi-Scale Oriented Patches" by Brown et al. to implement an autostitching algorithm, so I can just automatically detect the image correspondences between two images. The algorithm follows by starting off with a Harris Interest Point Detector to detect corner points, then Adaptive Non-Maximal Suppression, Feature Descriptor extraction, Feature Matching, and 4-Point RANSAC.Harris Corner Detection
To detect the corners of the image, I used the Harris corner detection algorithm provided in the starter code, replacingpeak_local_max with corner_peaks. Below are the results of running the Harris Interest Point Detector.


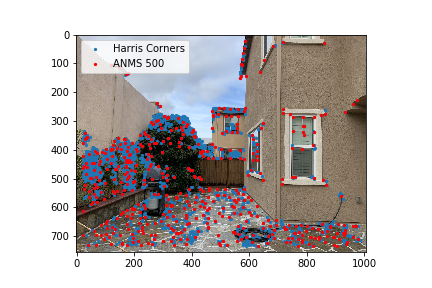
Adaptive Non-Maximal Suppression
In the yard photos, it is apparent that the Harris corner detection algorithm sometimes gives us thousands of corner points. To filter and spread the points out, I used Adaptive Non-Maximal Suppression to choose the strongest corner points that are also spread out from each other (meaning points with higher radii).
Feature Descriptor Extraction and Feature Matching
Now, using the filtered corner points, I extracted feature descriptors for each point by getting 40x40 patches around each point (with the point at the center of the patch). I then Gaussian blurred the point and down-sized the 40x40 patch into an 8x8 patch.After calculating the 8x8 patches for all the corner points, for each feature descriptor of input image A, I found the nearest neighbor (1-NN) and second nearest neighbor (2-NN) feature descriptors in input image B, through the provided
dist2 function in the starter code. By finding Euclidean distance between the 1-NN and the feature descriptor in A and 2-NN and the feature descriptor in A using np.linalg.norm, I calculated the ratios of dist(1-NN)/dist(2-NN) of each feature descriptor in input image A. I only kept the matches that had ratios less than 0.25 as the probability density of incorrect matches was low in Figure 6B of the paper.


RANSAC
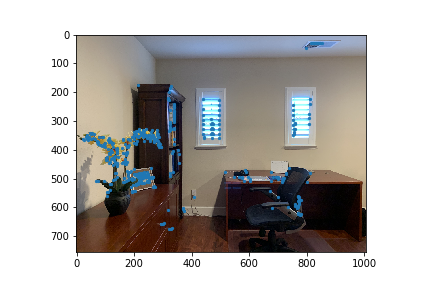
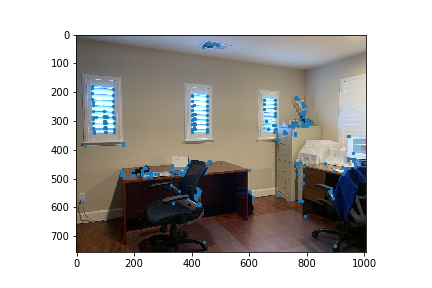
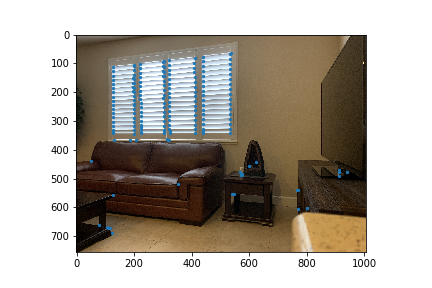
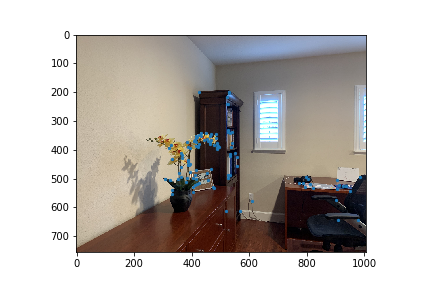
Using 4-point RANSAC as described in lecture, I removed any more outliers of the corner points to make sure that I had all the inliers for correspondence between the images.I ran RANSAC for 3000 iterations each time, and below are the results of the produced RANSAC points for all the images.
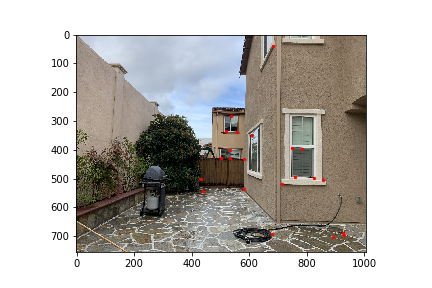

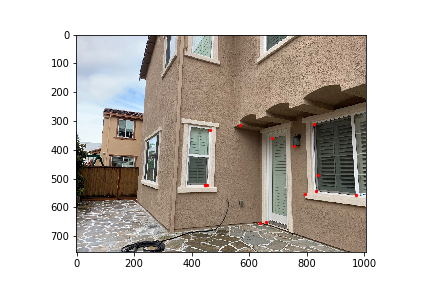
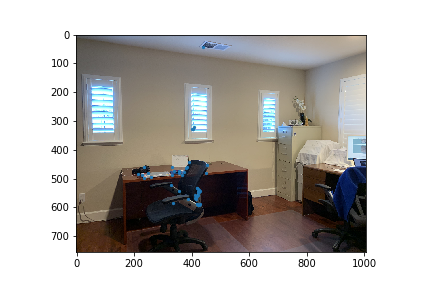
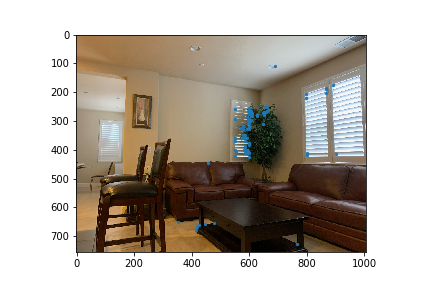
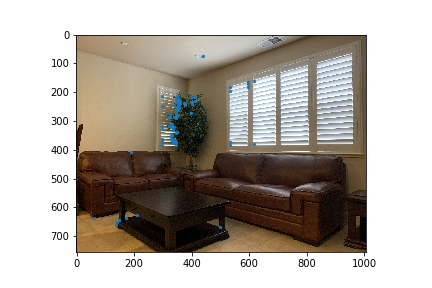
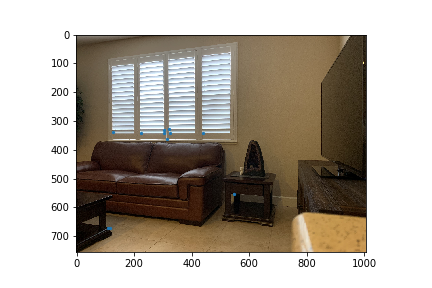
Here are the remaining photos with their RANSAC keypoints (in blue).
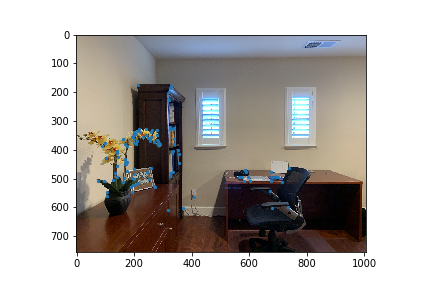
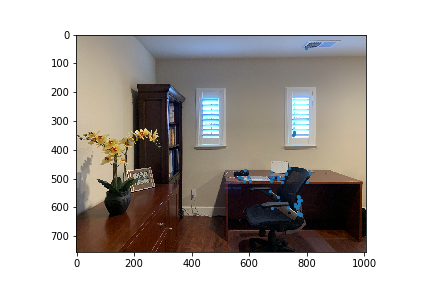

Auto-Mosaics
Below are the comparisons between the manual mosaics and the auto-stitched mosaics.