CS 194 - 26: Computational Photography Final Project
Ritika Shrivastava, cs194-26-afe
I really enjoyed CS 194! This is a collection of my two final projects.
Final Project 1: Poor Man's AR
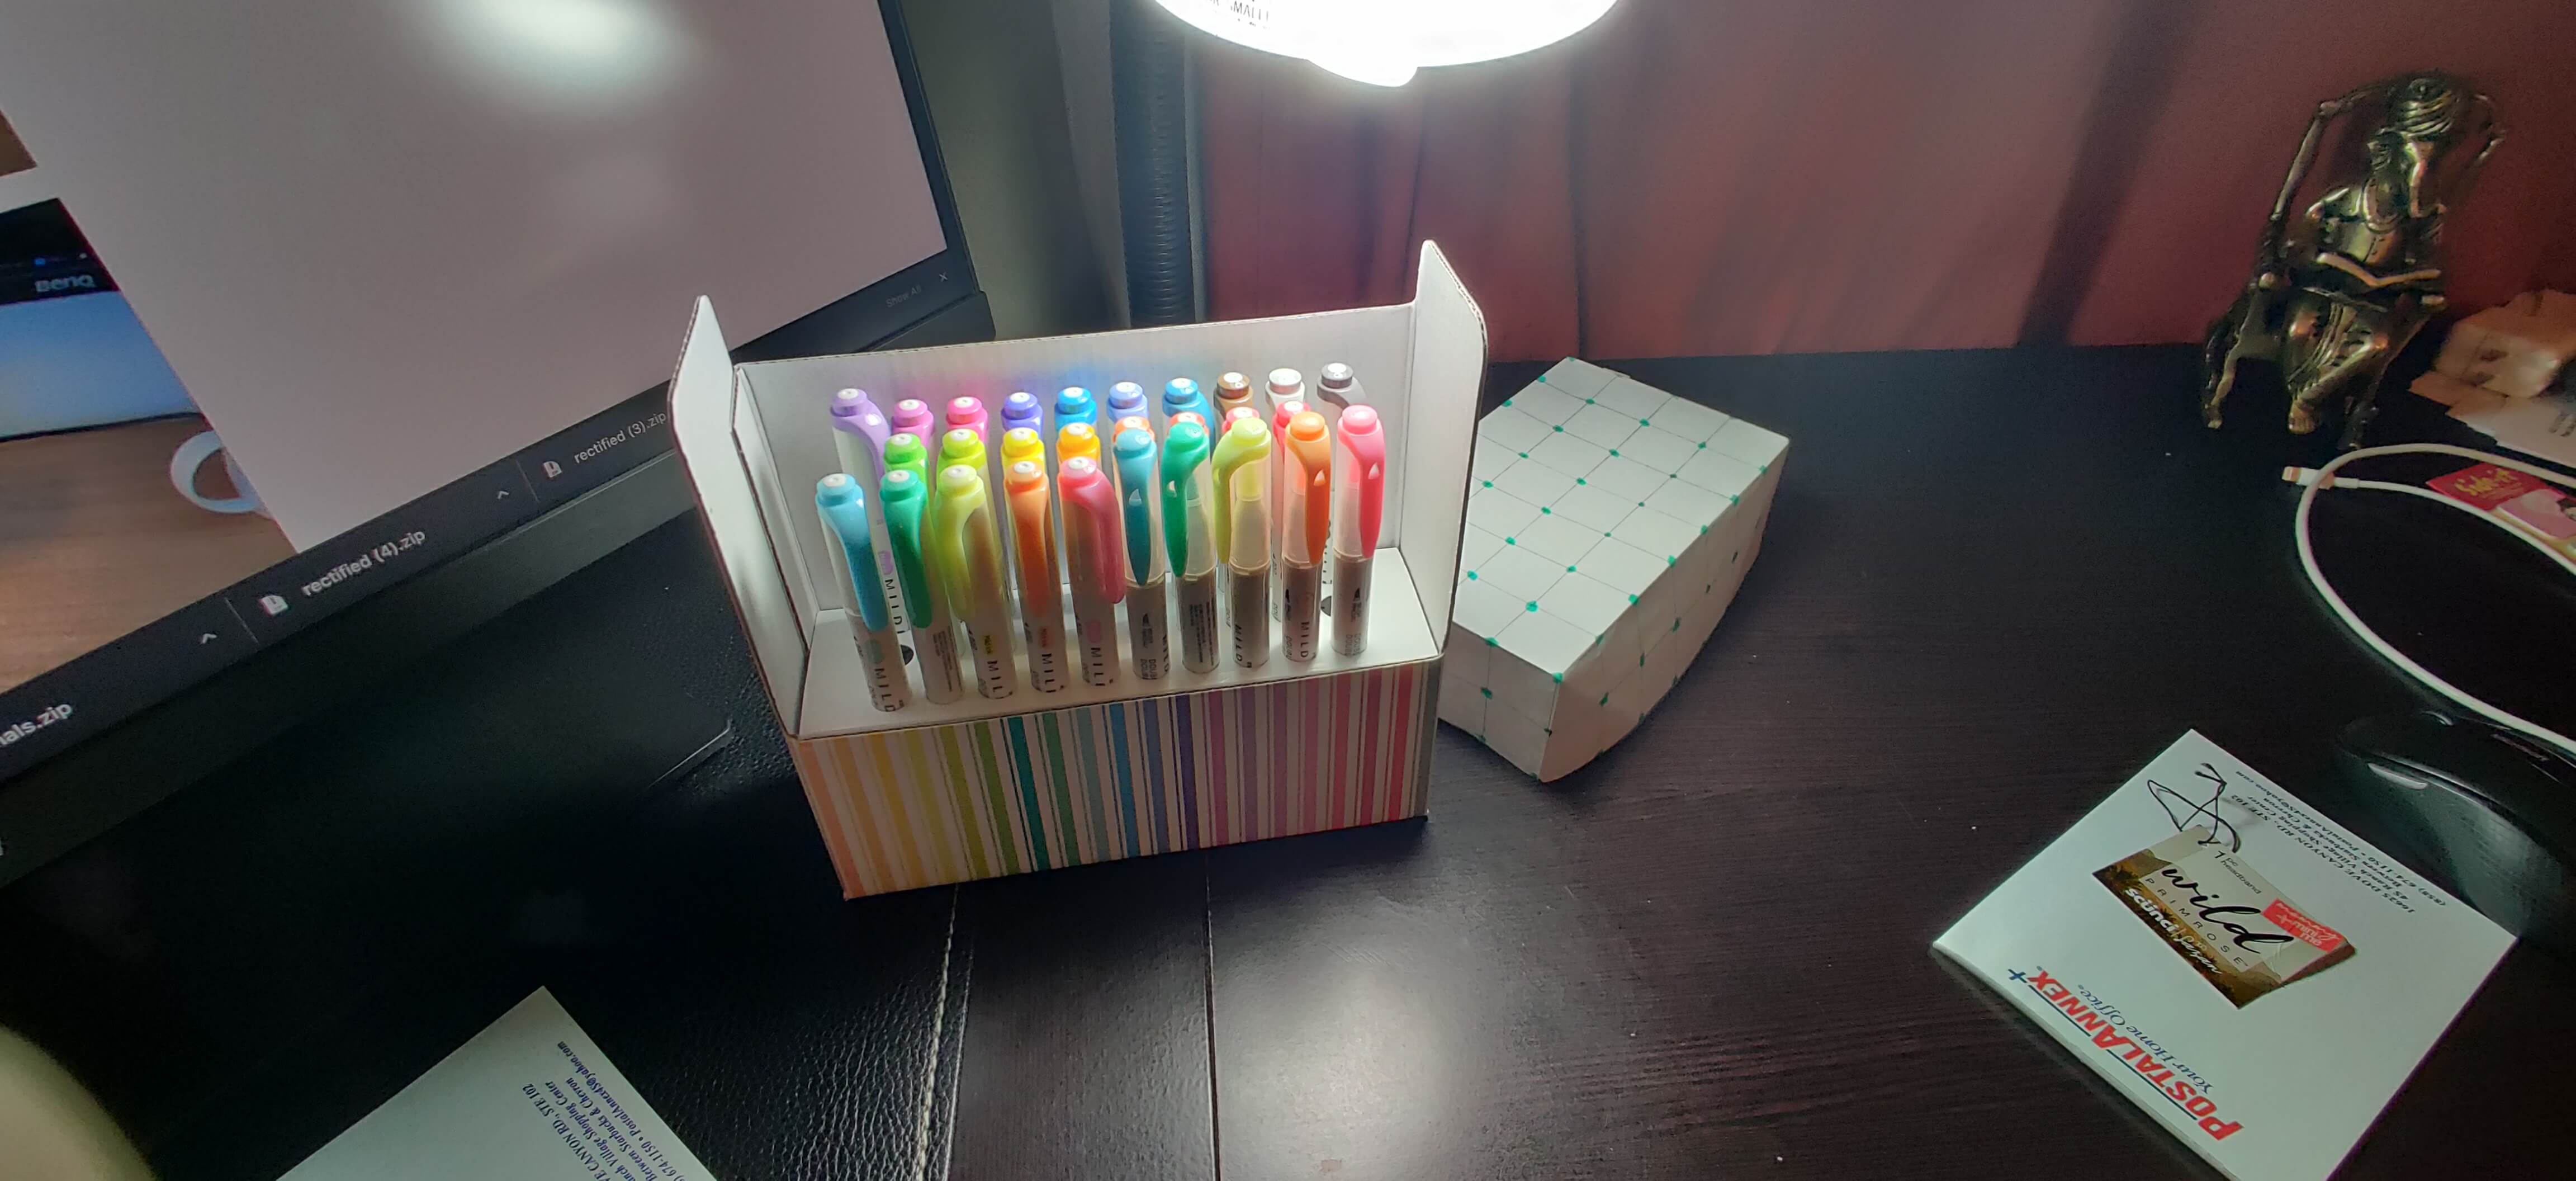
This AR application is very basic. I will use a small box that I made and marked. Then I will put a AR box on it!
Setup
I started by setting up my box and making a small video.
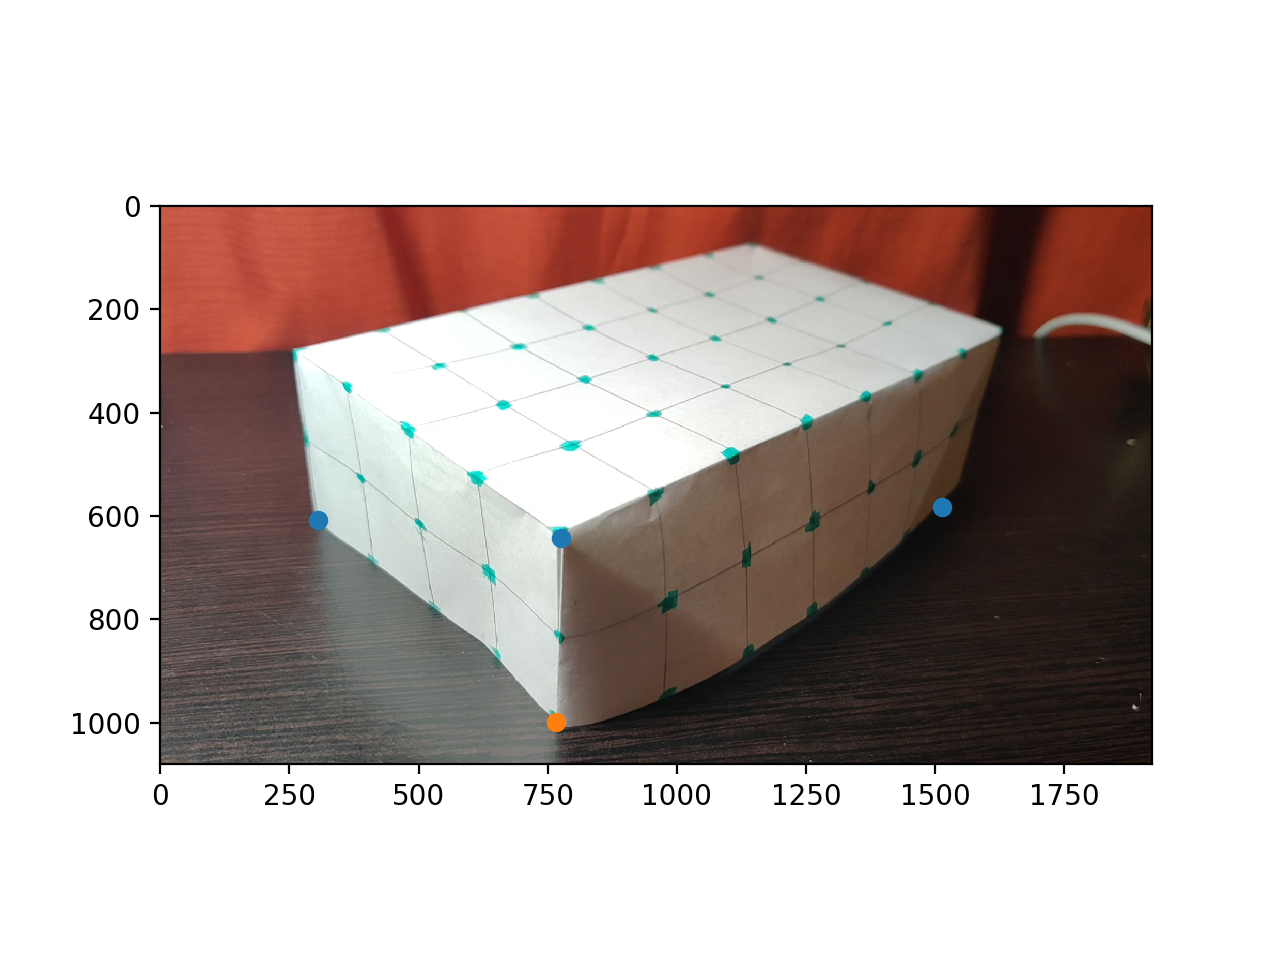
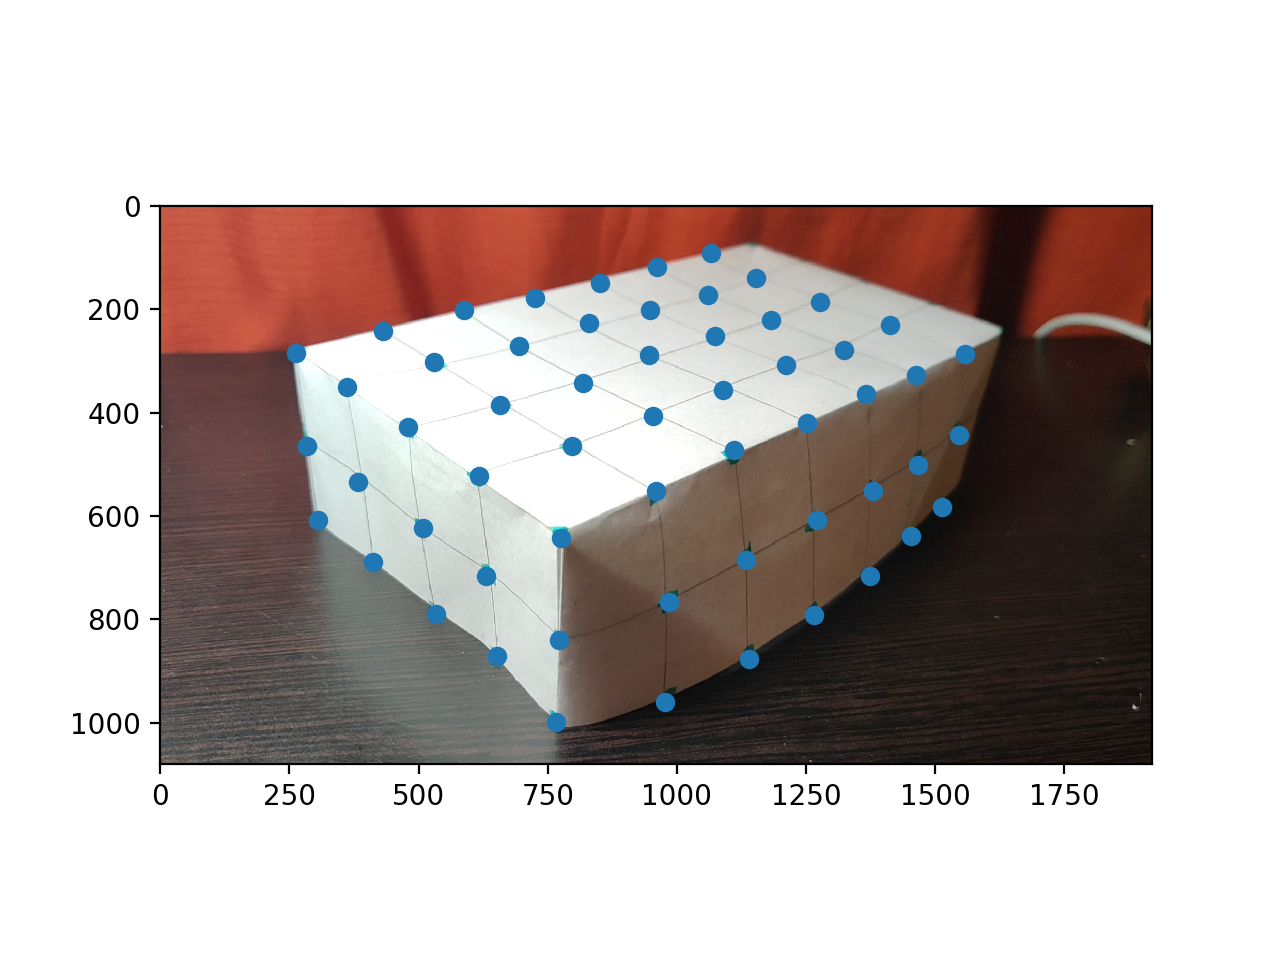
Keypoints with known 3D world coordinates
Then I established known keypoints for the 0,0,0 location on the box. This was seen with the orange point in the image (left image). The other blue points are the X, Y, and Z axis. Then I also established points of interest on the first image in the video. These are seen with the blue points. There were 57 points of interest.
Propogating Keypoints to other Images in the Video
Now I needed to apply these points to the other frame of the image. The first set was to create bounding boxes around all of the points in the first image. From there, I went along and used the CSRT tracker given by CV2 to keep track of those points in the video. This led to the video below. I think the tracking was really good. Some points are slightly off, but overall the tracking is good.
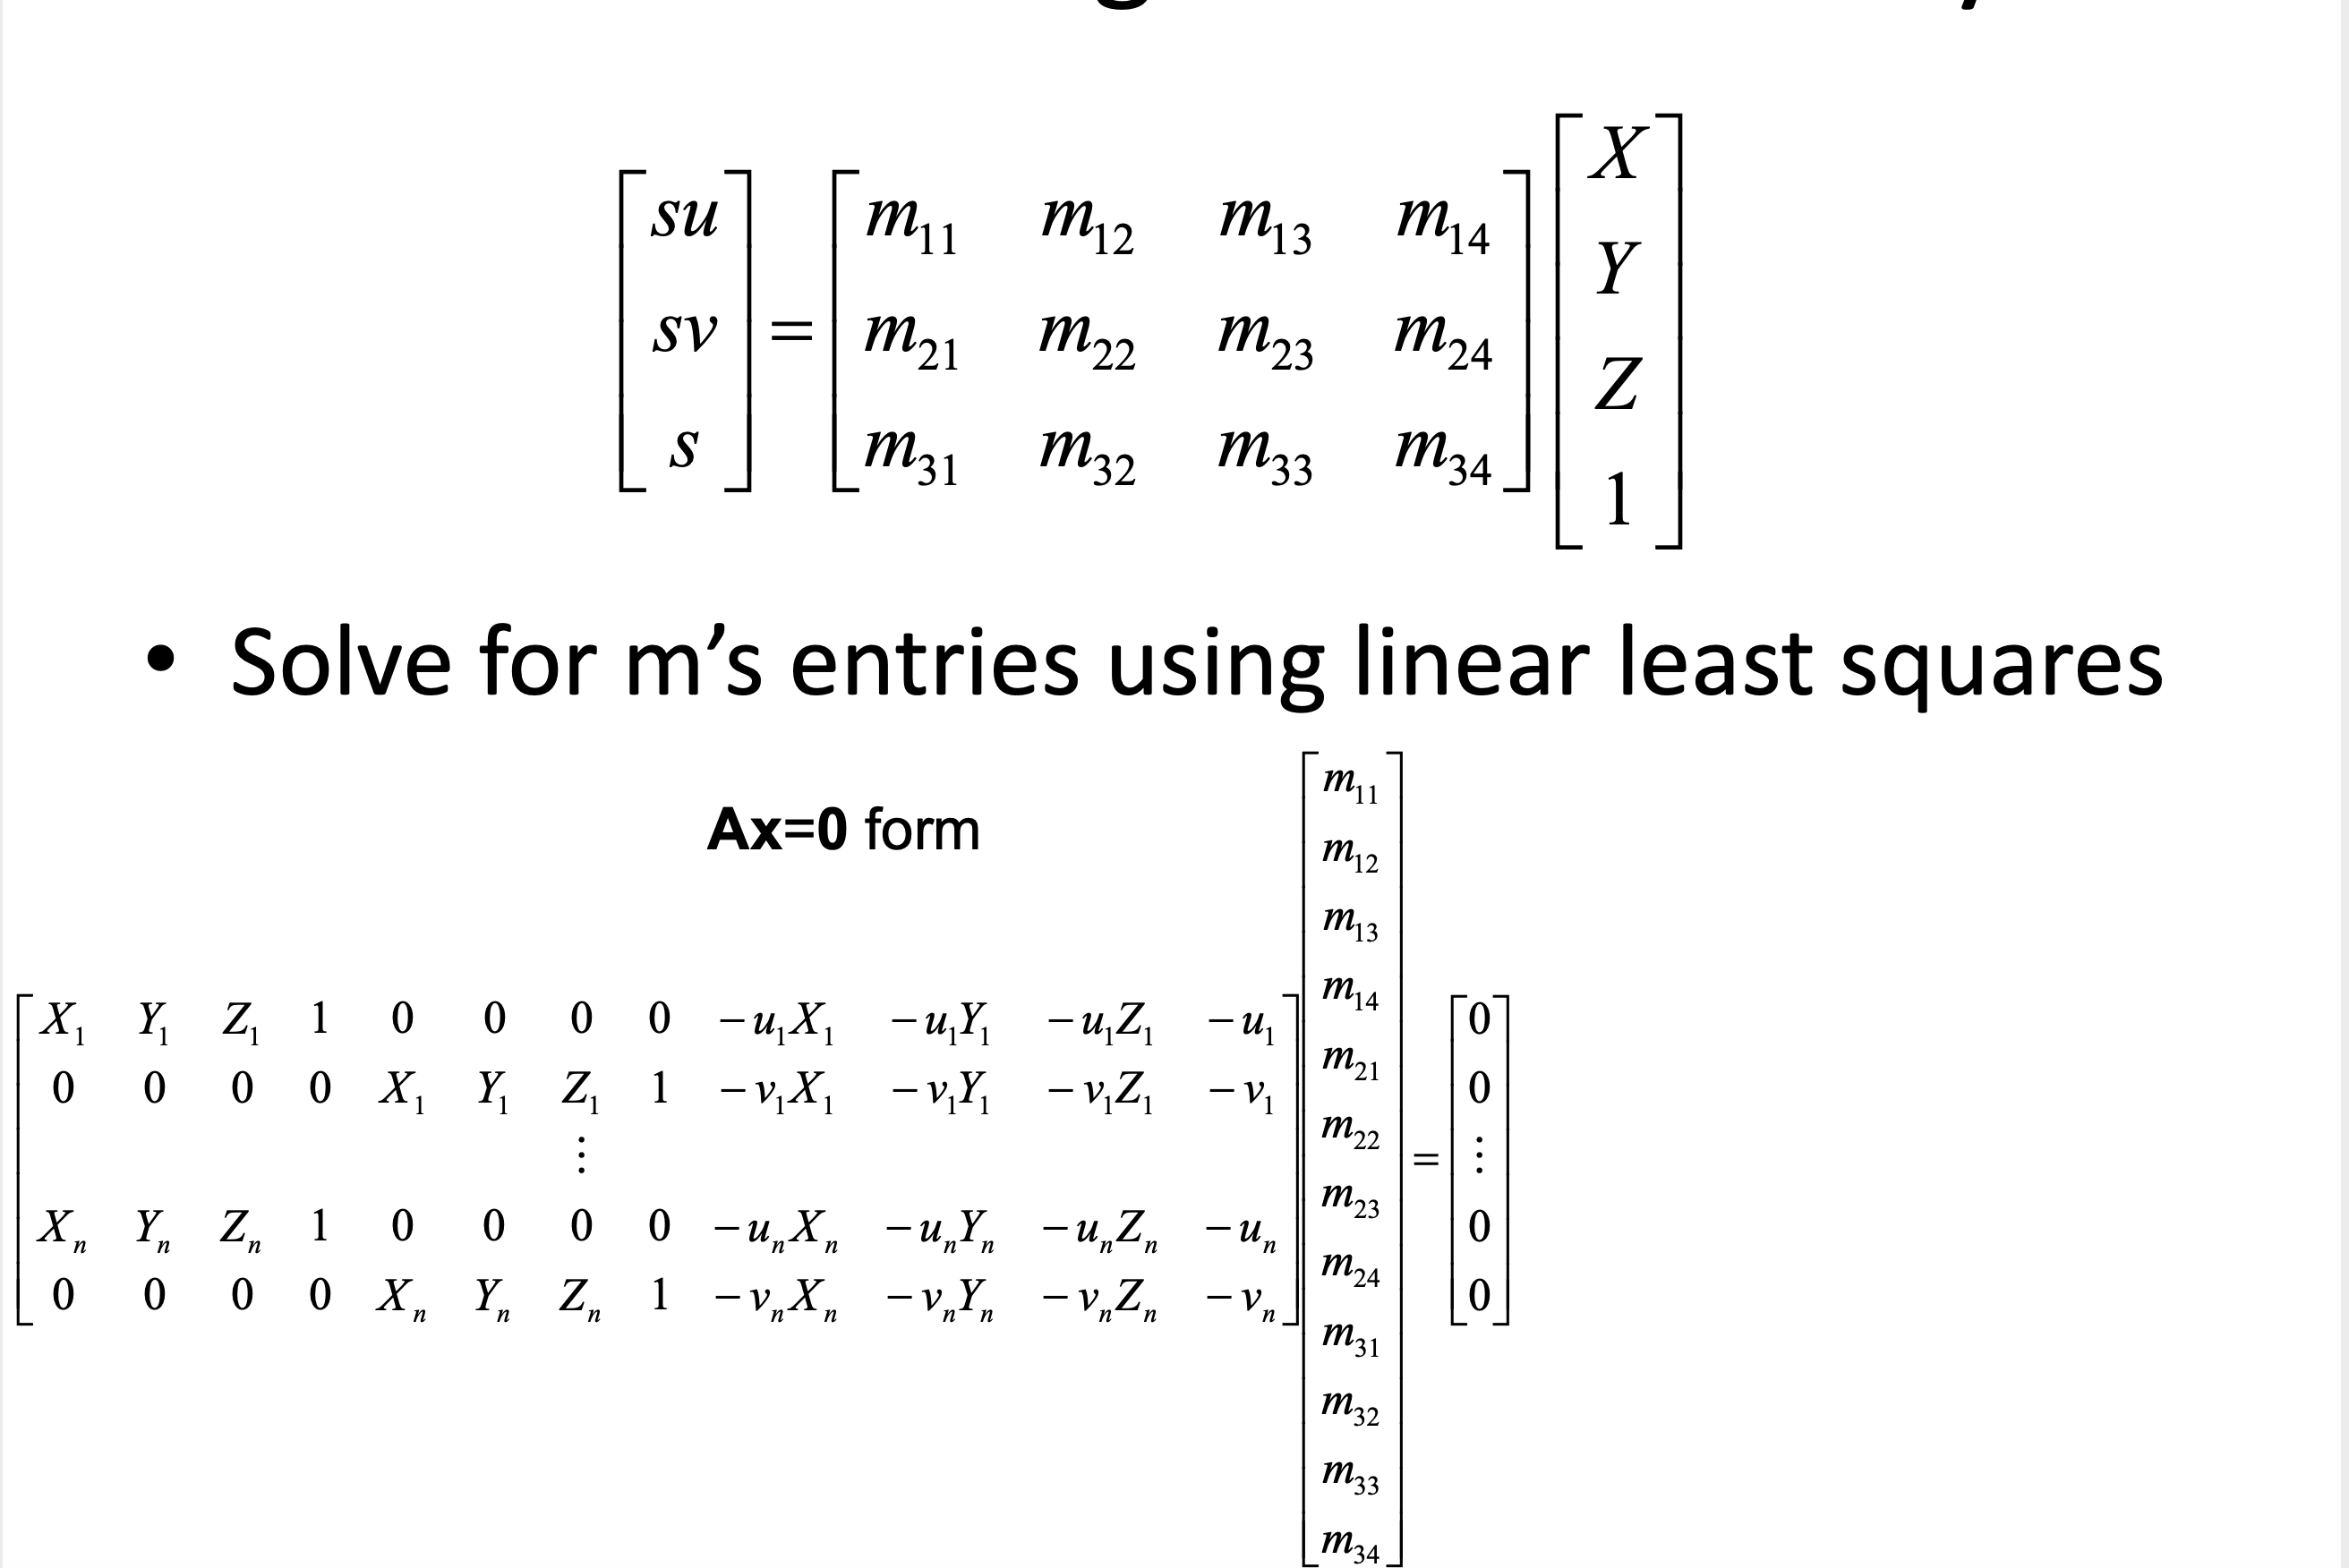
Calibrating the Camera
The next step was to calibrate my camera. This means for each frame, I wanted to get a projection matrix that would be able to convert from the 3D coordinates of the box to the 2D points on the image. To do this I used the following equation. Credit for this goes to the multiview lecture in class. I had to calculate the projection matrix for all of the frames in the video, using the points calculated in the last part.
Projecting the Cube in the Scene
The next step was to establish points for the cube. I defined this points as : [1,1,2],[2,1,2],[2,2,2],[1,2,2],[1,1,3],[2,1,3],[2,2,3],[1,2,3]. Remember that I had defined the front bottom corner as [0,0,0]. Then, I applied the respective camera projection to each point at respective to the frame. From there, all I had to do was plot the point! The result is below! Poor Man's AR!
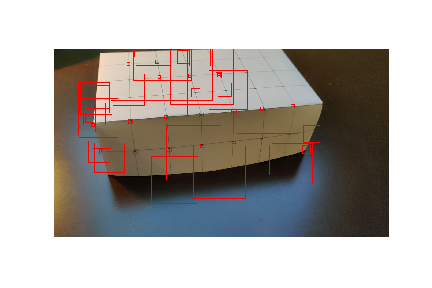
Before I move onto the next project I want to mention an issue I had. One issue I had was making sure that I was accidentally editing the original image. If I edited the original image/ frame in the video it would cause the tracking to be off, as the edited frames were being tracked. It led to tracking like the image seen below. But by making sure that the original frames of the video were not edited, I was able to correct this.
Final Project 2: Lightfield Camera!
As a paper by Ng et al. (Ren Ng is the founder of the Lytro camera and a Professor at Berkeley!) demonstrated, capturing multiple images over a plane orthogonal to the optical axis enables achieving complex effects (see this gallery - hover around different part of images) using very simple operations like shifting and averaging. The goal of this project is to reproduce some of these effects using real lightfield data.
I read over this paper and implemented the following two features: Depth Refocusing and Aperture Adjustment
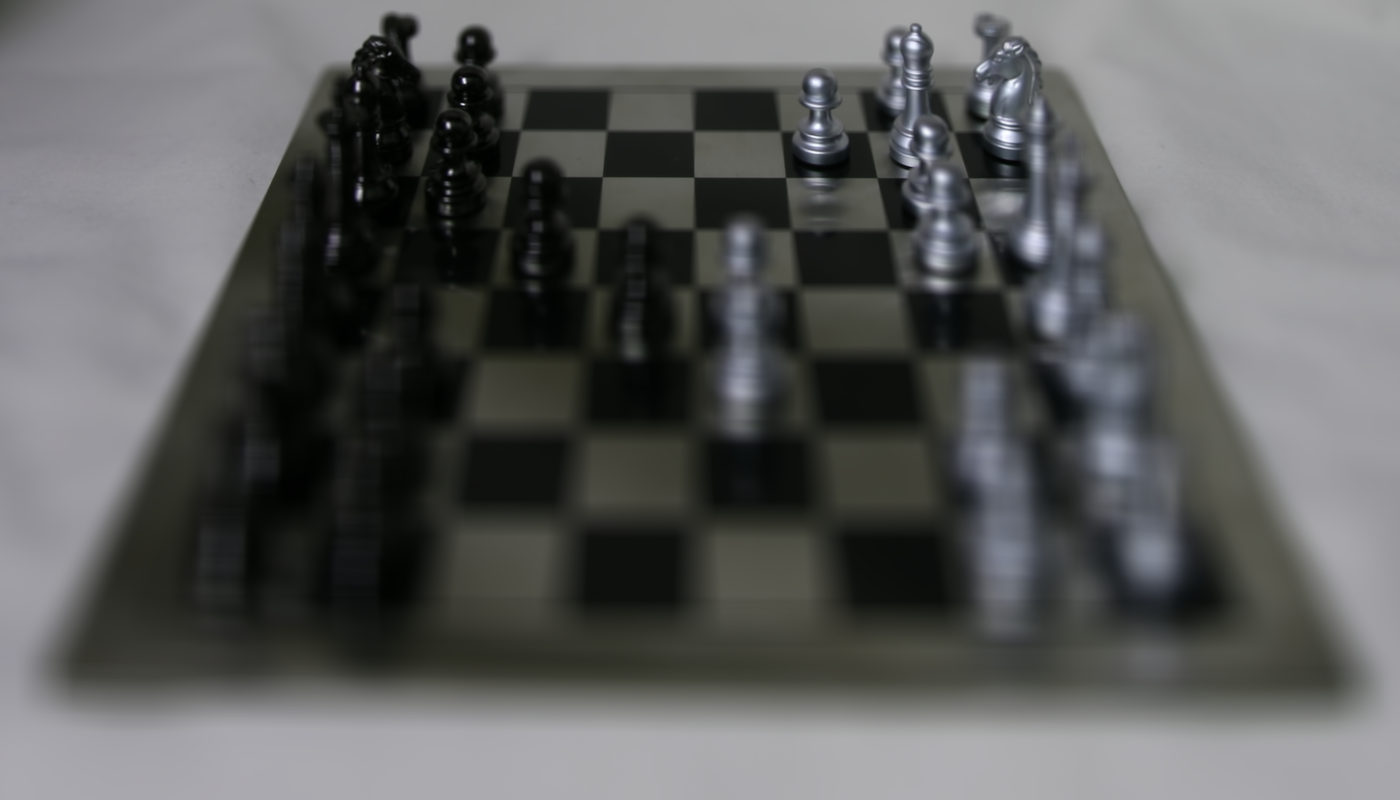
Depth Refocusing
The objects which are far away from the camera do not vary their position significantly when the camera moves around while keeping the optical axis direction unchanged. The nearby objects, on the other hand, vary their position significantly across images. Averaging all the images in the grid without any shifting will produce an image which is sharp around the far-away objects but blurry around the nearby ones. Similarly, shifting the images 'appropriately' and then averaging allows one to focus on object at different depths.
For this part of the project, I implemented this idea to generate multiple images which focus at different depths.
For refocusing, I started by finding the way to correct the shift in the images. This shift could be scale to focus on the front and back of the image. I was able to get the following results.
I got the original shift from the name of the file. The scale of the shift ranges from -0.1 to 3 and incremented by 0.1. This generated 30 image. I used these images to generate the following gifs. They look really good!
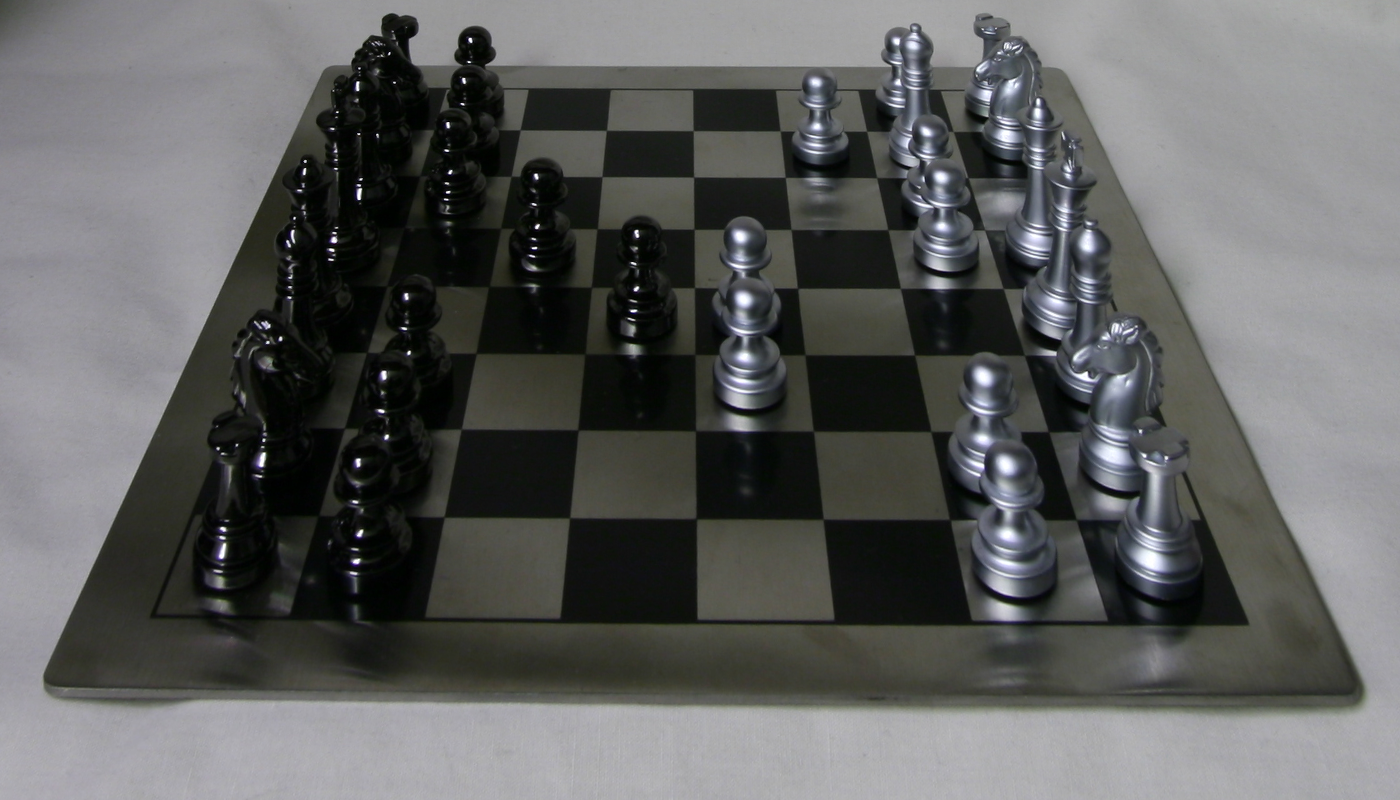
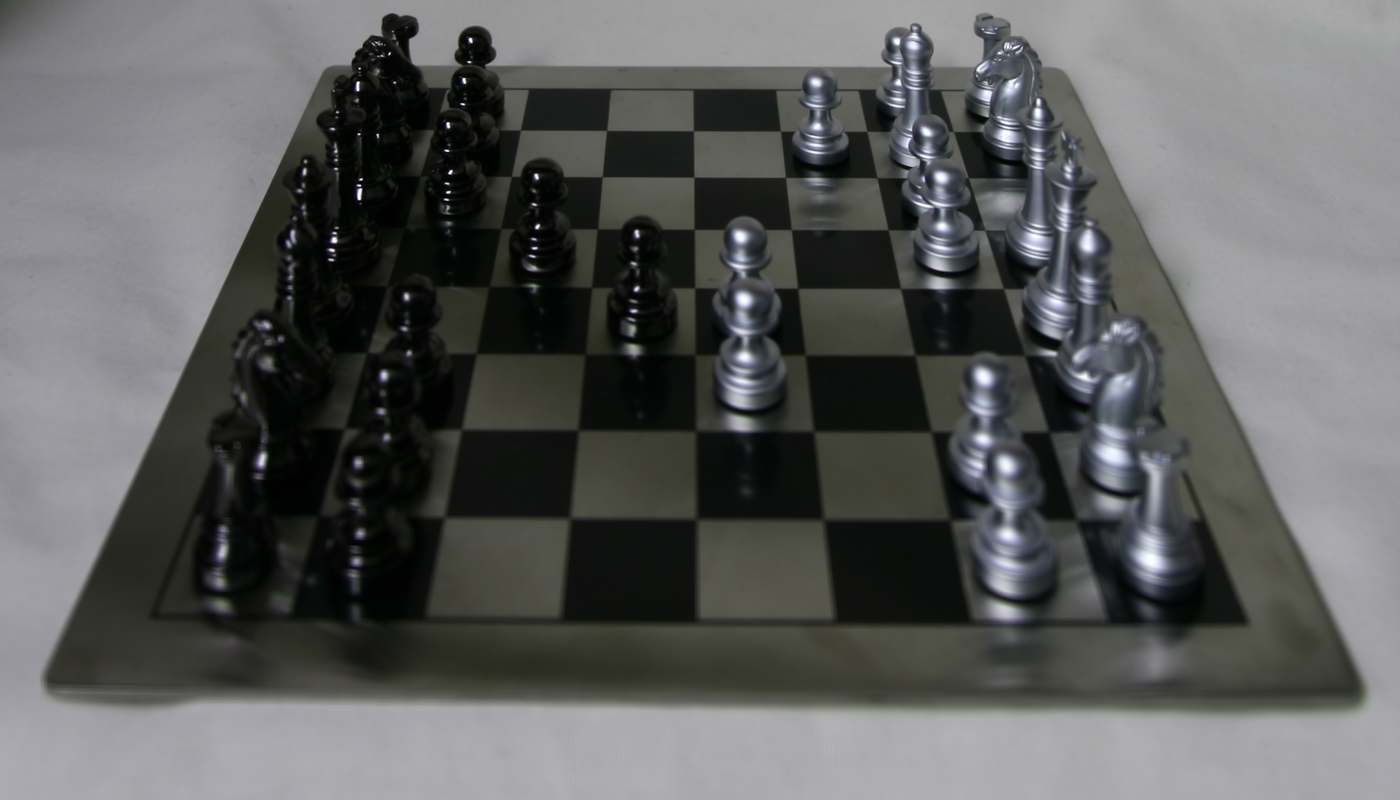
Aperture Adjustment
The next task was aperture adjustment. For this task, I selected a radius value to see what photos would be chosen for averaging. This was able to replicate different aperture values.
I used the radius to select images and shift them by the appropriate shift values. This was the center was at the center of that radius. Below are the results for chess. The images have not been converted to gifs as the gifs were taking up too much space on the website.
What I learned!
I learned a lot about how camera's work! In the modern instagram era, most features that are used are filters, which change the color scheme of an image. It was really interesting to learn about a way to use several images to alter the focus and aperture of an image. These fields typically are changed by the lens of a camera!
Bells & Whistles
I took 9 of my own images. Here is one for reference! The next two are the results for Depth Refocusing and Aperture Adjustment.
.png)
_(1).png)
Overall, these results were not good because I didn't find the right shift for the images, I had attempted to shift the my phone at a standard rate, however, this was the results I got. In the future, I might want to set up 9 tripods at a standard distance and use those shifts.