
|

|

|

|
A genius ahead of his time, Sergei Mikhailovich Prokudin-Gorskii traveled around Russia taking pictures with a black and white camera, but with three different filters: one red, one green, and one blue. With these black images, he had RGB representations for his pictures, enabling us to reconstruct and create the earliest color photos in history. Although he never got to see his envisioned tri-color projectors displaying these images, the digital age has enabled us to take it a step further and display RGB visuals with tiny pixels in a screen. With this modern technology we take for granted and some code, in this project, I mimic the Library of Congress (who bought his RGB negatives) and convert them to color images.
Prior to any alignment, we need to split the image negatives, which are currently stacked on top of each other. Since they are taken on the same camera and at the same time, we can reasonably assume they are the same size, and therefore split into vertical thirds, as shown below for the cathedral image.
|
|
|
|
|
Even with this splitting, we have the black borders around the split negatives. For this reason, in the next section before running image matching metrics for any image, I cut the first and last fifths of the negatives, both vertically and horizontally, eliminating the bordrs and only comparing the main parts of the negatives.
To combine the color channel negatives, I need to use a metric to measure the similarity/overlap of the images, and determine how much to shift the negatives to make them overlap properly (since the individual negatives might have been slightly shifted due to camera movements or other factors between takes). The two metrics I used were the Sum of Squared Differences (SSD) and Normalized Cross-Correlation (NCC), as described in the project spec. I use NCC for the remainder of the project. My steps to align two negatives are as follows:
After these steps, I have the optimal pixel shift to overlap the negatives, based on the matching metric. With this alignment method, I align the G negative to the B negative, and the R negative to the B negative. Then, using the optimal shifts, I create an RGB image with the shifted negatives to create the aligned, combined RGB image, as demonstrated in the lower-resolution examples below.

|

|

|
With larger images, exhaustive search doesn't work as well. First of all, the images are much larger, so runnimg a [-15, 15] window will not work, since shifts will be larger pixel-wise. At the same time, simply expanding the window is costly, since checking larger windows like [-100, 100] on large images is really slow. Instead, I utilize an image pyramid to align the images at multiple image scales.
I begin by determining how many times to downscale the image. I decided that the minimum size to operate on my images should be (80, 80). With this in mind, I calculate the number of downsize (cutting height and width by half) operations to do with a logarithmic operation. After knowing how many downsizes to do, I iterate through each image scale. I start with the smallest image (so maximum downscaling), calculate the optimal offset of for the negative at that scale, then move to the next resolution (which is 2 times the width and height). As I go to each larger resolution, I double the existing shift since the image is twice as large on each axis, and only then add the shift that is found at that image size.
I initially tested [-15, 15] shifts at each level, but this was not only too slow, but also innacurate in many cases. I then realized that I could push the load of checking larger offsets to the lower-resolution images, since shifting them is much less computationally intensive, and fine-tune smaller offsets at higher resolutions. More programmatically, if the smallest resolution is level n in the pyramid, and the original resolution of the negatives is level 0, I check the horizontal and vertical shift window of [-2^i, 2^i] at level i. With this image pyramid algorithm, I get outputs on high-resolution images as follows:

|
|

|
The algorithm worked perfectly on almost all images. The only exception was Emir: in his picture, the algorithm was struggling to align the negatives together, primarily because his clothing in the picture is blue. Since it was blue, the G negative was fine in aligning with the blue (since G and B have a lot of overlap), but the R negative was not aligning with the B negative since there was basically no red pixels on the clothing to align with blue pixels in the image matching metric. As a result, the algorithm found more alignment metric-wise with the wall, which had some blue and red portions to it, as displayed below.

the top (B) vs the clothing color on the bottom (R) |

|
To work around this issue, I try to improve the features used by running an edge detection algorithm, which provides better results for Emir. This modification is explained in the Bells and Whistles section.
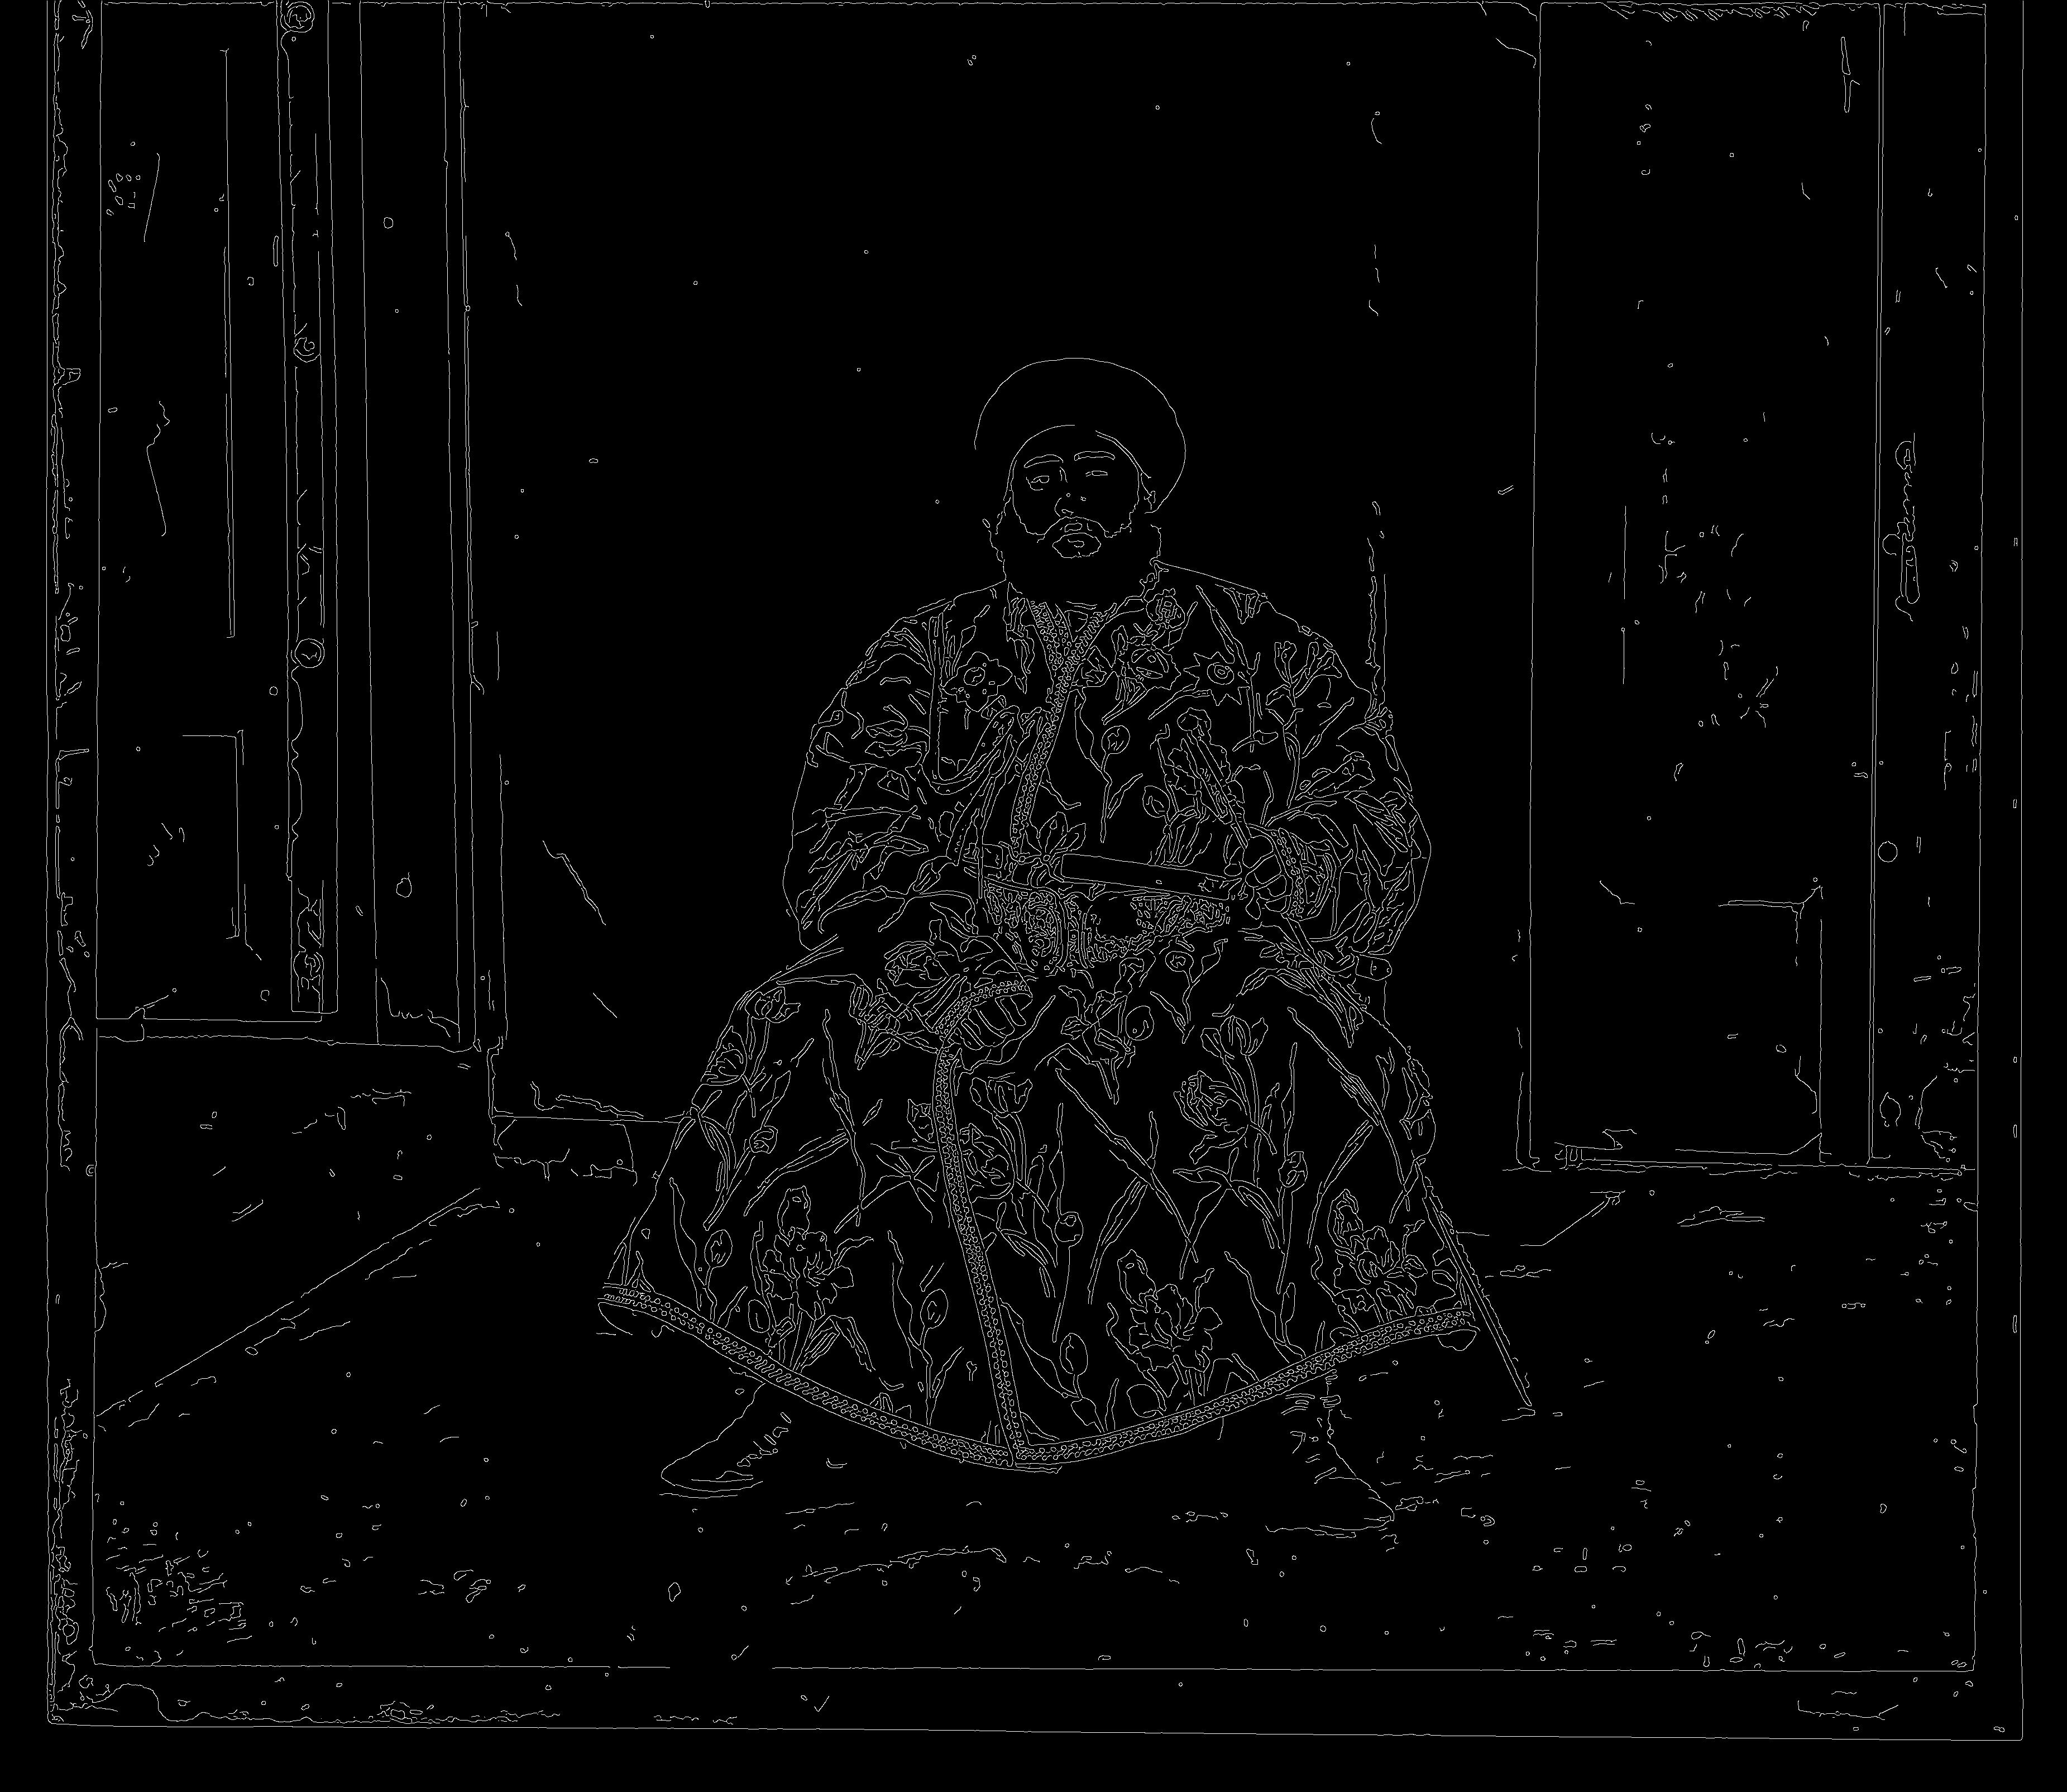
With the results obtained from processing Emir's picture, I decided to improve on the features passed into the image matching metric. Since comparing pixel values fails on images with strong blue areas, I decided to instead run edge detection on the image, and pass that into NCC instead. To do so, I utilized the skimage implementation of Canny edge detection. While I also researched Sobel and other edge detection algorithms, I preferred Canny edge detection because it is tunable to the noise in an image (by letting you pass in the width of the Gaussian derivative filter it uses), as well as its fine-tuning of edges at a pixel level (Canny outputs a 1-pixel curve). This is important because the negatives are a bit noisy, having small blotches and noise in some areas, and also because tighter edges allow for tighter alignment. With this in mind, I tuned the Gaussian derivative filter width as a hyperparameter to be 2 (after trying between 1 and 3). With the Canny edge detection, I get the following outputs for Emir:

|

|
|
|
|

algorithm |


