Xinwei Zhuang
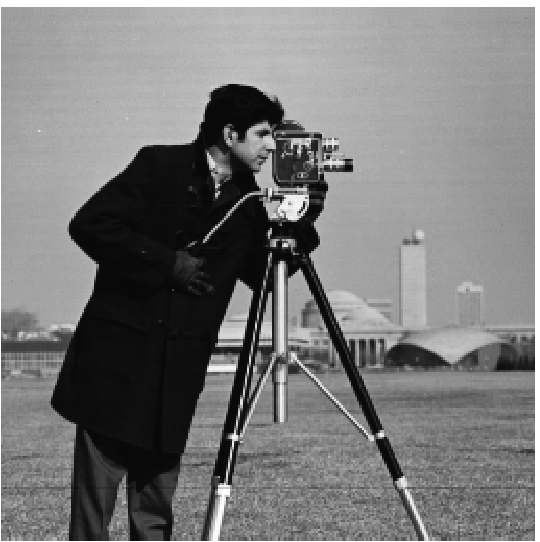
The goal of this assignment is to take the digitized Prokudin-Gorskii glass plate images and, using image processing techniques, automatically produce a color image with as few visual artifacts as possible. The initial image is formatted as a vertical collage. One example is shown below. Firstly, I extract the three color channel images, place them on top of each other, and align them so that they form a single RGB color image.
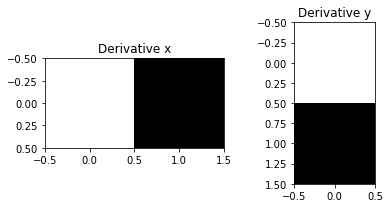
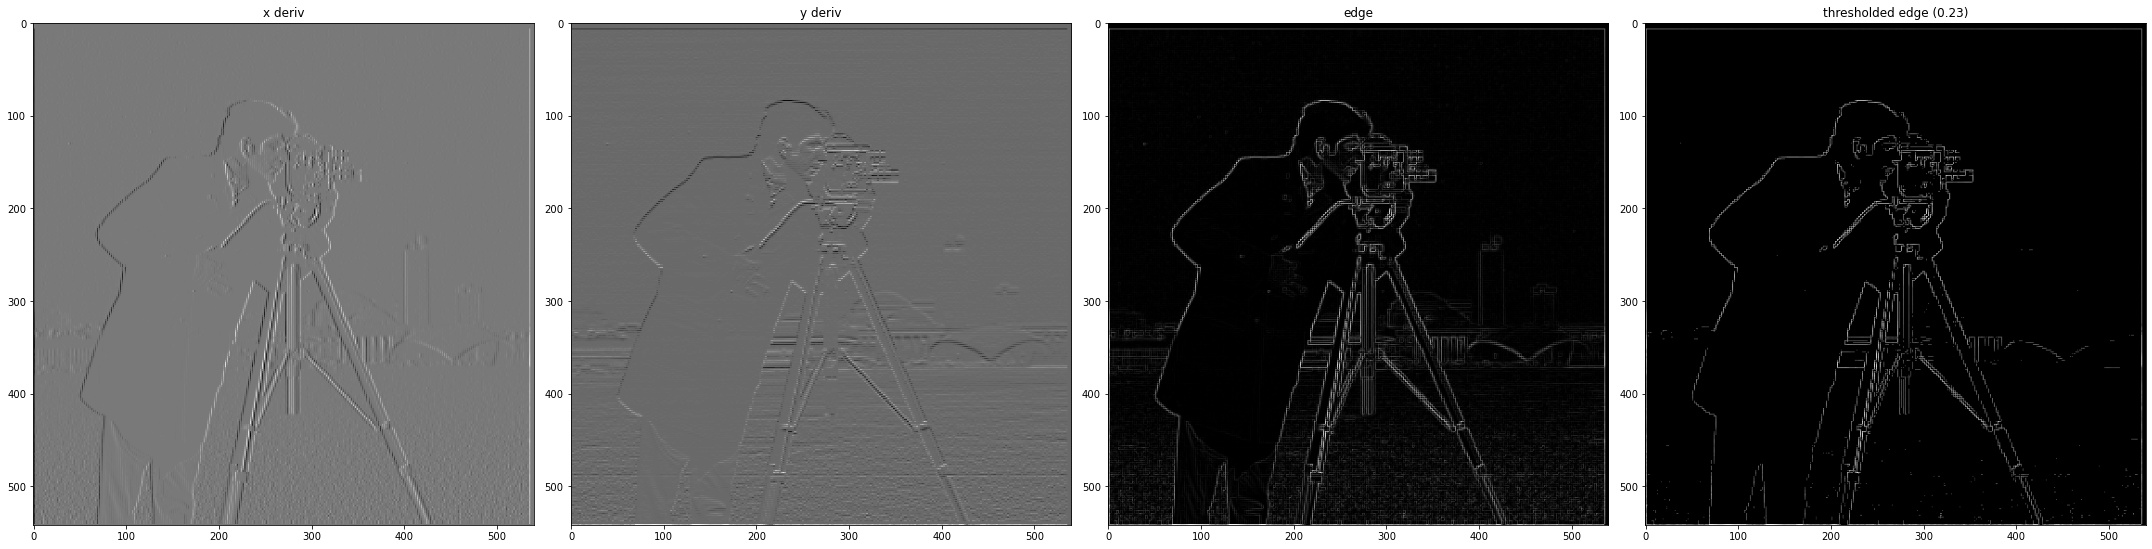
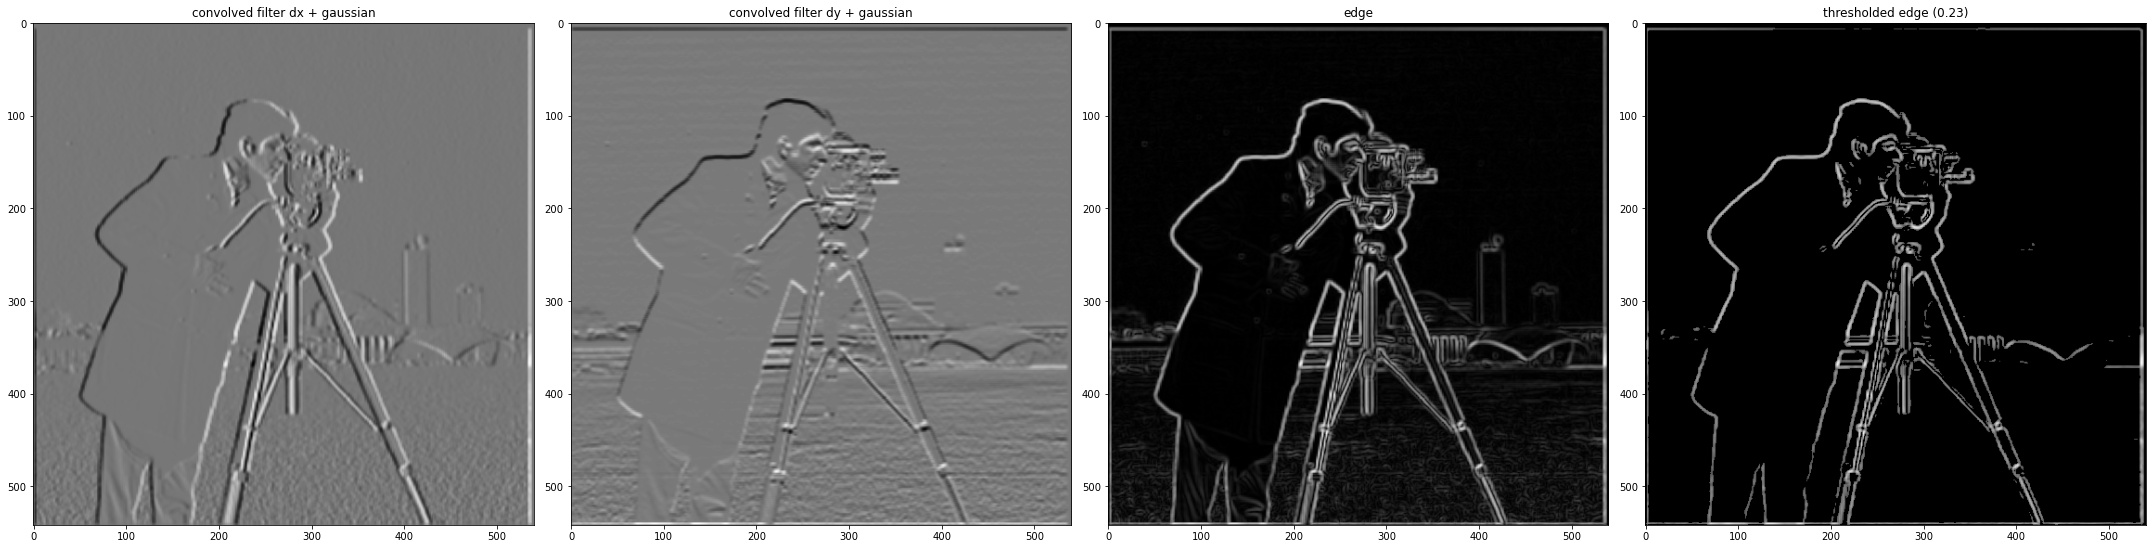
I cauculated the partial detivatives of the camaraman in both x and y directions, then combined them to calculate the gradient magnitude to get edge. By setting a threshold to edge, I got a clearer edge map without too many noise point, which demonstrated most clearly in the lower part where a lot of grass gives the noise.
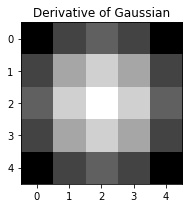
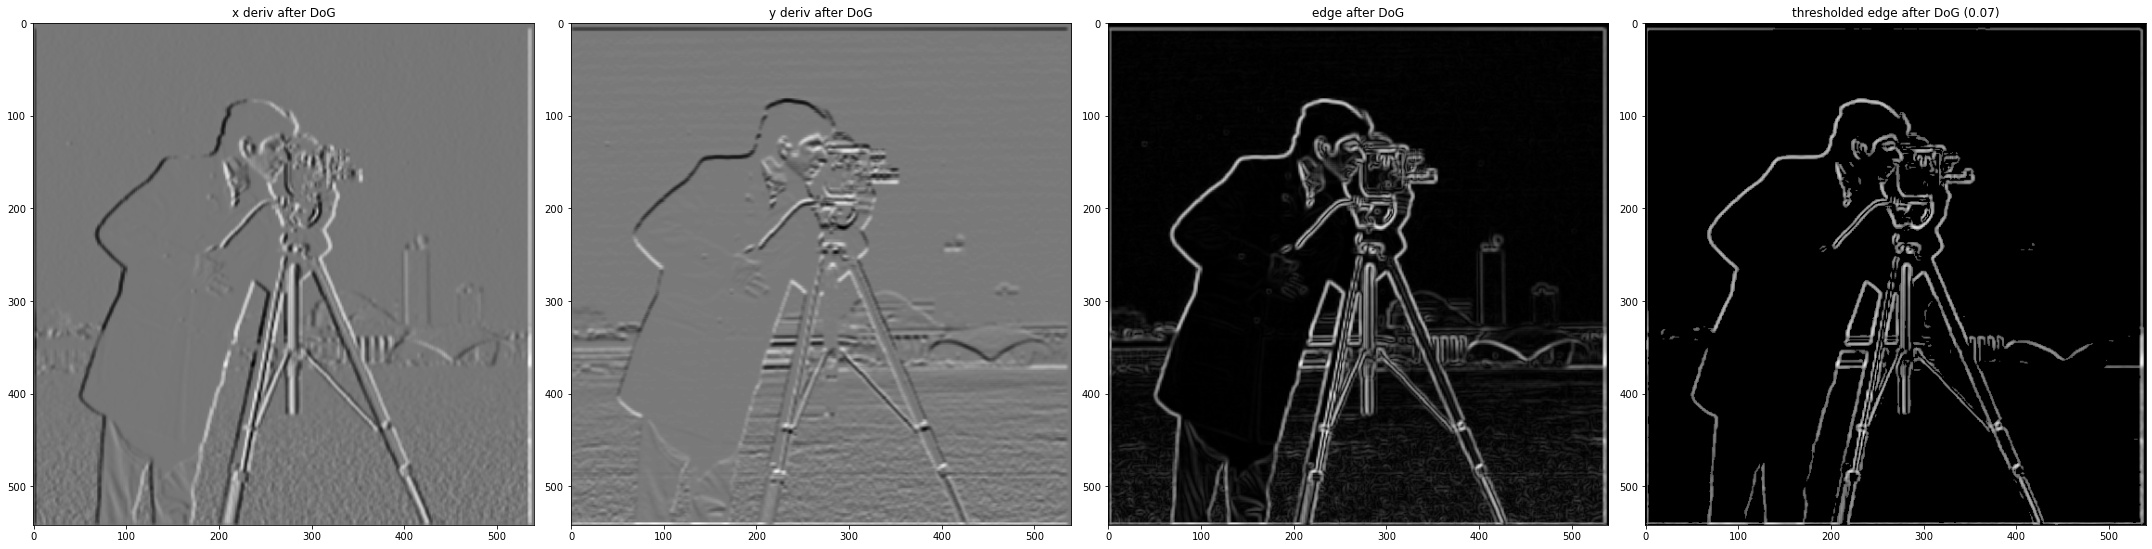
To eliminate the noise, I used a 2D DoG filter to blur the original image, and do the same processing as described in part 1.1. We can see that the x and y derivative is more 'deeper' than the ones without Gaussian. The edge result is more distinct, and I only need a very low threshold to get a clearer image. Note that the sequence of applying filter convolution doesn't matter to the final result. Apply Gaussian filter then apply derivative x and y renders the same result of convolve Gaussian with x and y deriv and then apply the combined filter once on the original image.

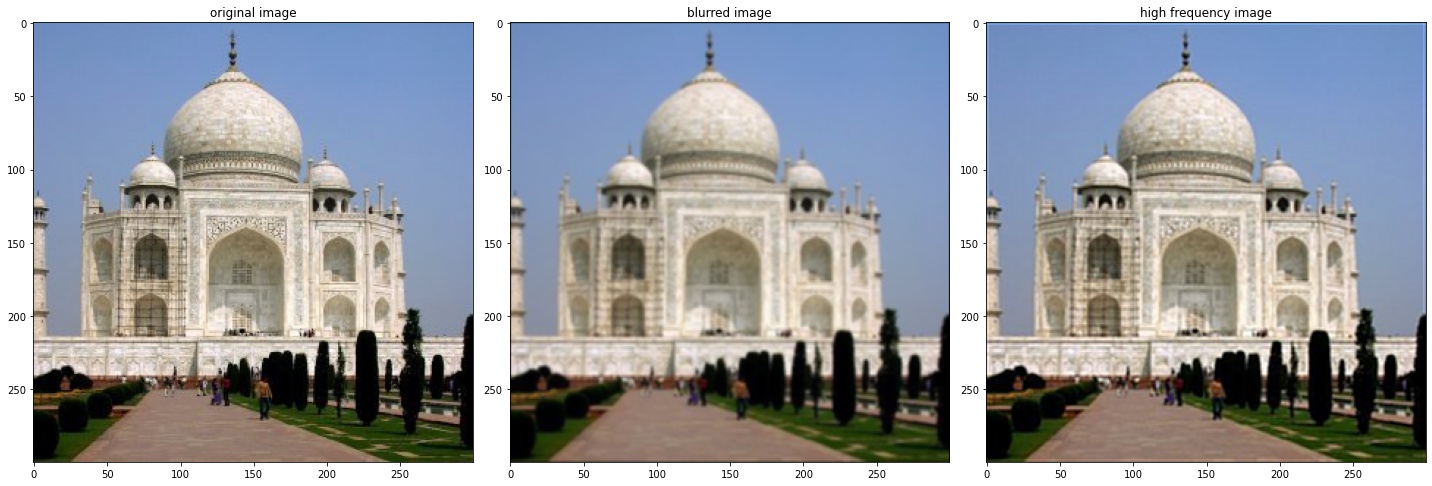
An image often looks sharper if it has stronger high frequencies. Here I used a Gaussian filter to generate the blurred image (in low frequencies), and use the original image to subtract the low frequency image to get the high frequencies, then add it to the original image to make it looks sharpener.
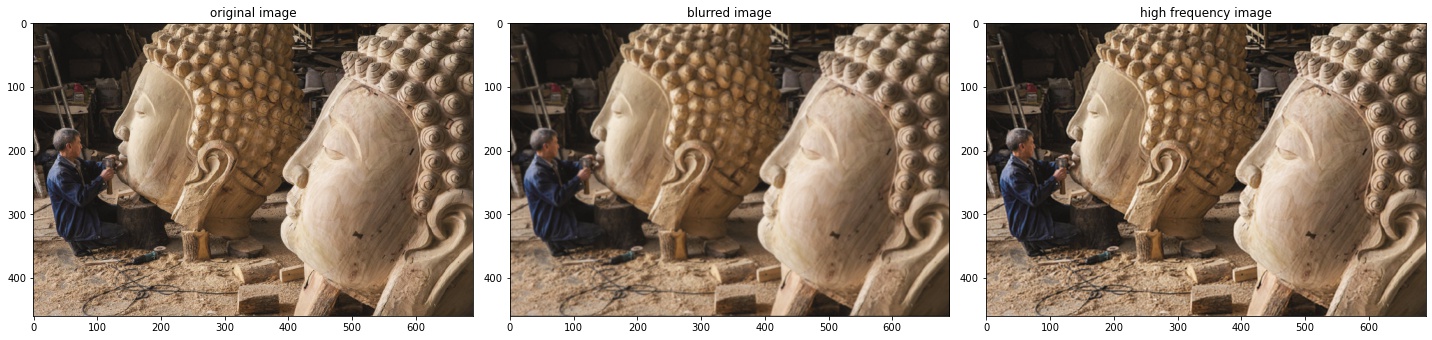
The given taj.jpg renders a very poor-quality-cell-phone-camera look, but the photo I selected myself actually looks amazing. The wood texture might be more influenced by the blurring and frequency manipulation. Sorry for bragging.
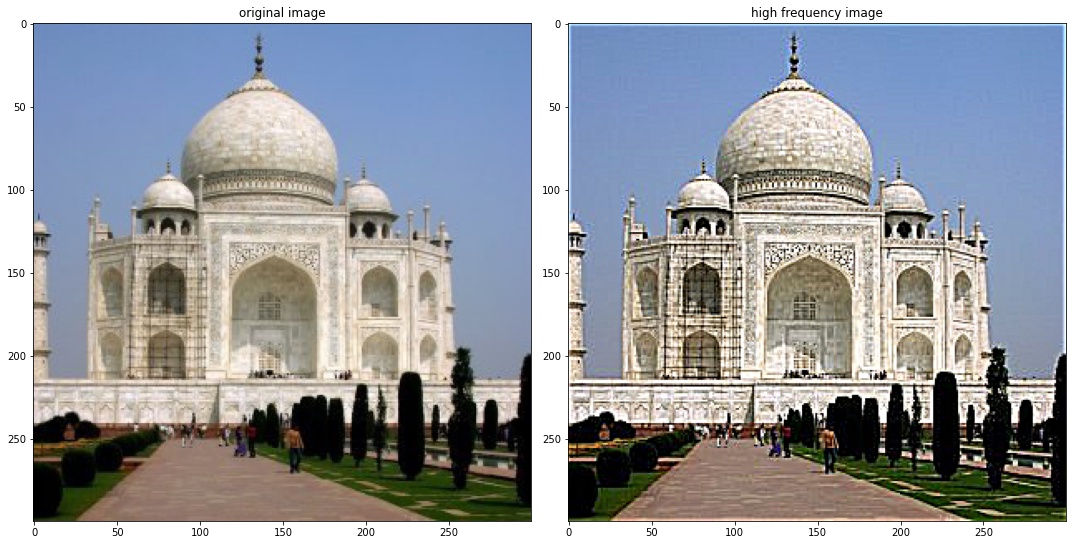
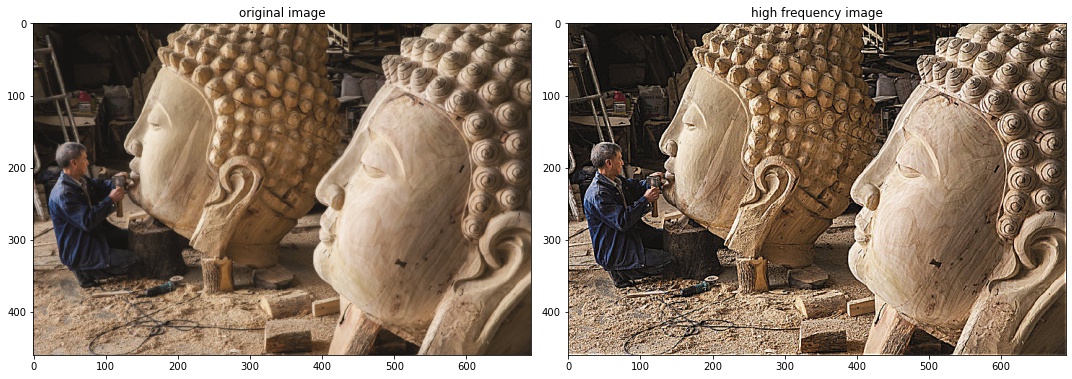 Photo credit: Buddha Carving Plant in east China’s Zhejiang Province, 2020, ©Wang Xiaohong.
If I blur the original image and apply the sharpening filter on the blurred image, the taj photo doesn't look as clear as the original one, but there is imperceptible difference of the buddha one. What influenced the quality most might be the ratio between size of the image and the size of the Gaussian kernel.

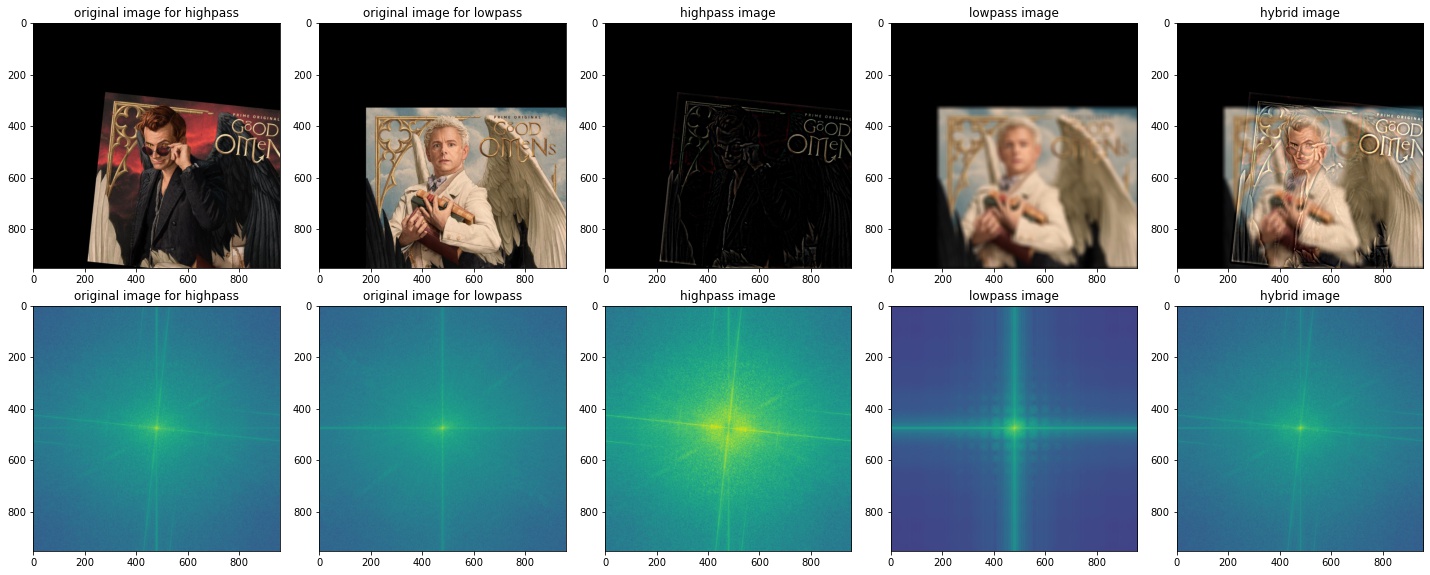
Although I thought the image will merge better because they generally share same angle of photo, same contour (of the wings). But the text and frame are disaligned. Also the hands are not in the same position, renders a wired edges in the hybrid images. Also the texts are not overlapping each other. I'd take it as a failed case.
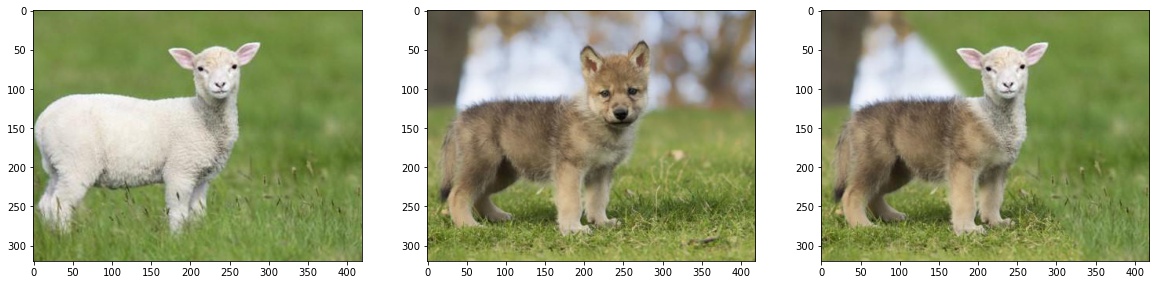
The animal looks better than I thought! Because they share the same pose and even same background with grass. Also the size is similar, both small and cute figure.
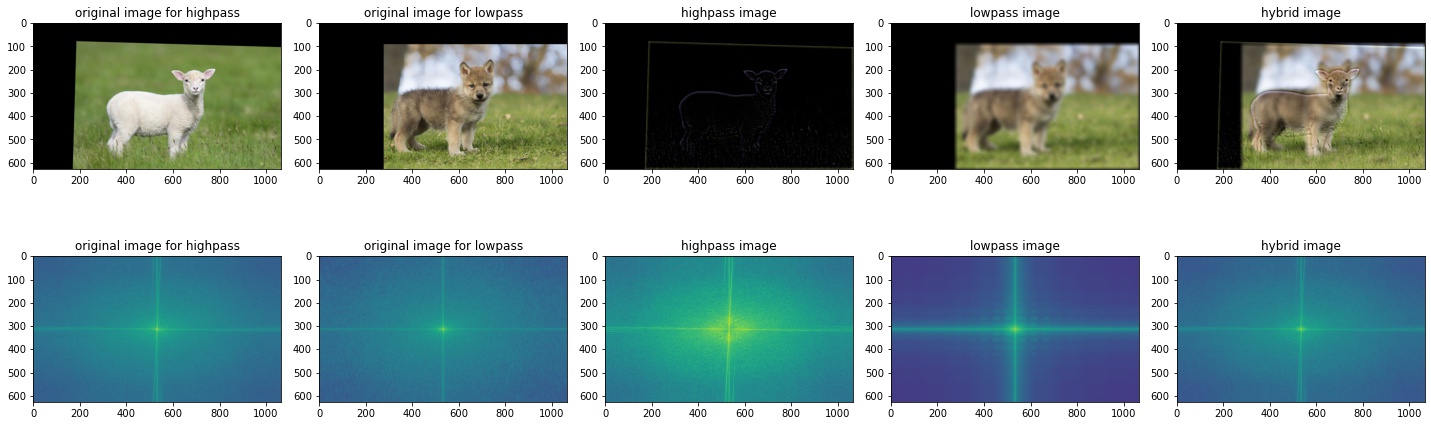
Image credit for this part\ good omen poster https://levycreative.com/rory-kurtz-good-omens-poster-released-today-at-nycc/ \ baby wolf (https://www.nydailynews.com/news/world/ny-mummified-wolf-20201223-33le6lgdnngchghdqgrfeg22eu-story.html, Shutterstock)\ lamb https://www.bbc.com/news/uk-england-nottinghamshire-57460798
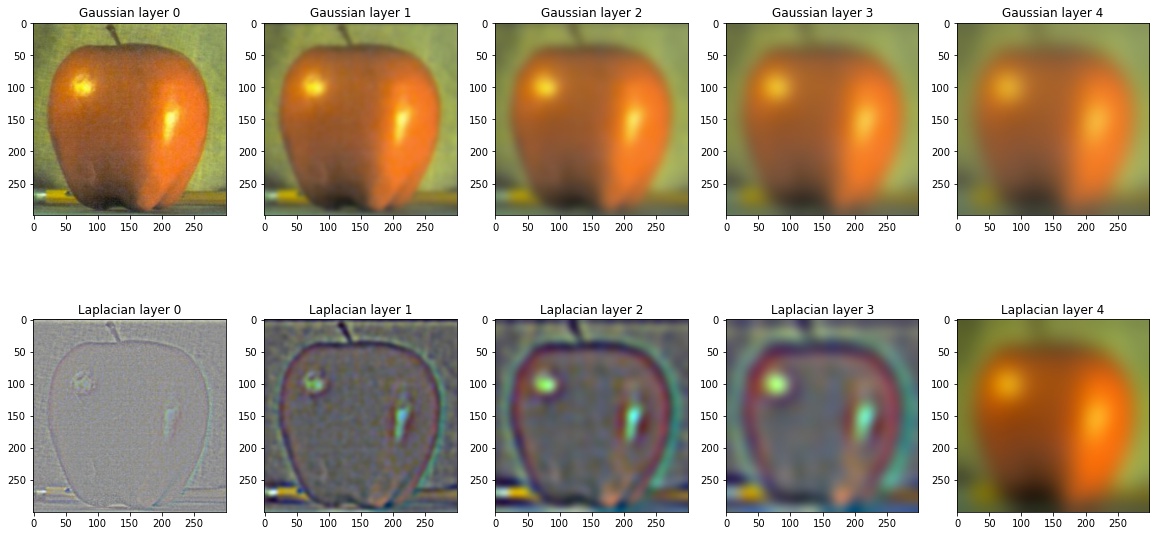
The gaussian stack is simple, just bluring each of the previous image. The first layer is the original layer, then blurred of the original layer with sigma^(2*layer). Note that since the size of the image is not changed, the sigma changes exponentially. Laplacian stack is reprensenting image at different frequency bands. To achieve this just subtracting the current Gaussian with the previous one. The last layer of Laplacian is the same of the Gaussian.
The construction of Gaussian and Laplacian stacks is as follows. Notice that the blured 4 is added to the laplacian stack so that when sum it up it goes back to the original image. Below are demonstrations for the Gaussian stack of the apple, and the laplacian stack.
| Layer | Gaussian | Laplacian |
|---|---|---|
| 1 | Original image | Original image - Blured 1 |
| 2 | Blured 1 | Blured 1 - Blured 2 |
| 3 | Blured 2 | Blured 2 - Blured 3 |
| 4 | Blured 3 | Blured 3 - Blured 4 |
| 5 | Blured 4 | Blured 4 |
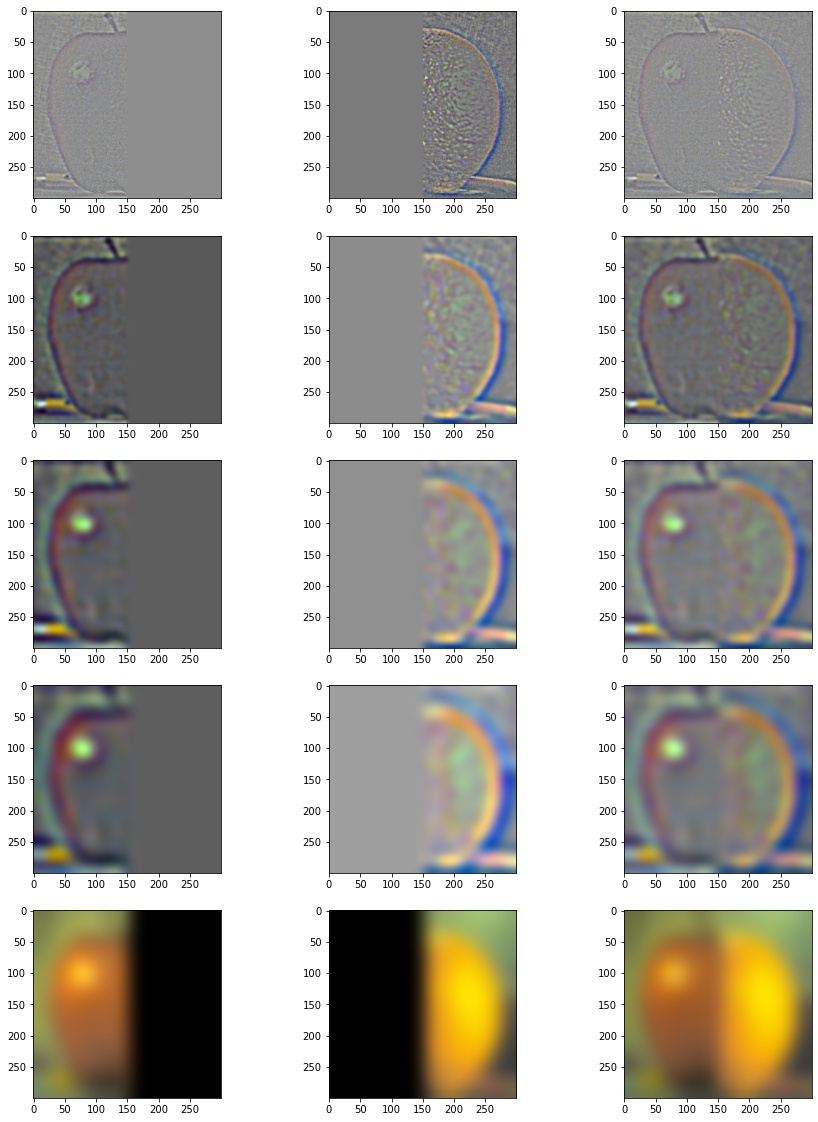
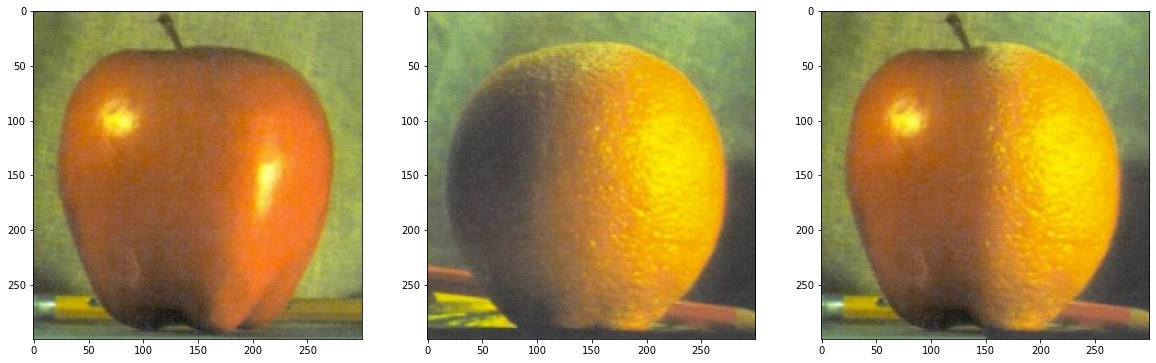
With the building block of our Gaussian stack and Laplacian stack, I can blend these two image easily.
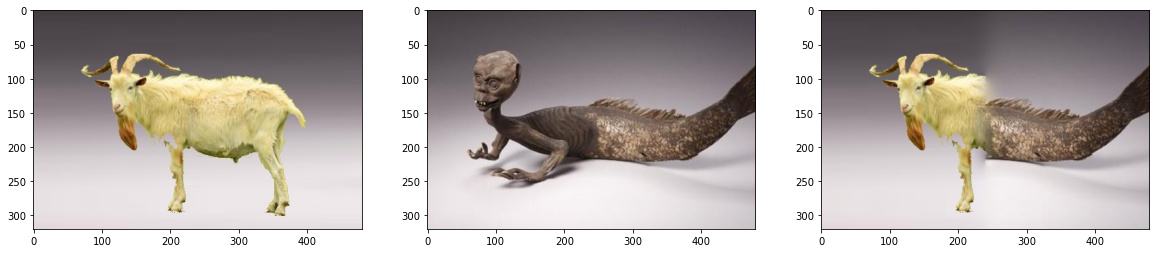
After has the algorithm working, I tried with two different images to construct a capricorn. However, in the very beginning I forgot to use matched background and it works in a disaster. The two blending image cannot be chosen schocastically but rather need to be carefully selected.
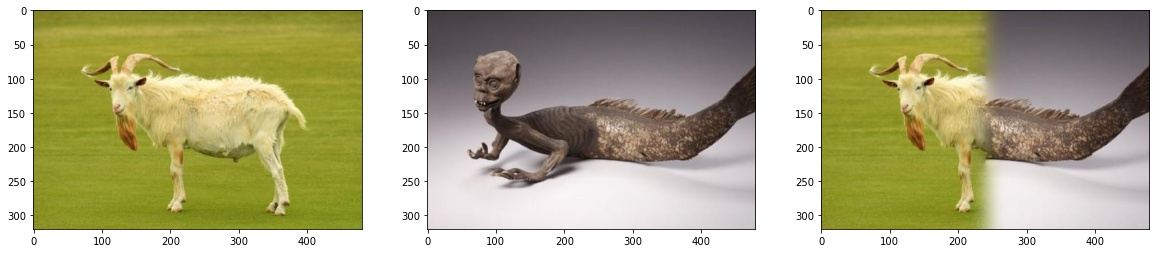
This is a terrible example, soon I noticed that the background should be similar to enhance continuity. I mannually converted the grass to gradient for the goat, and did the blending again. It looks definatly better but still not satisfying due to the misalignmente of the two creatures.
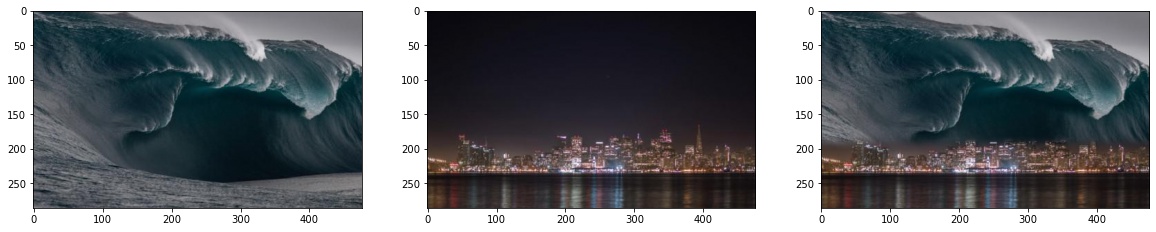
Other trials.
irregular masks
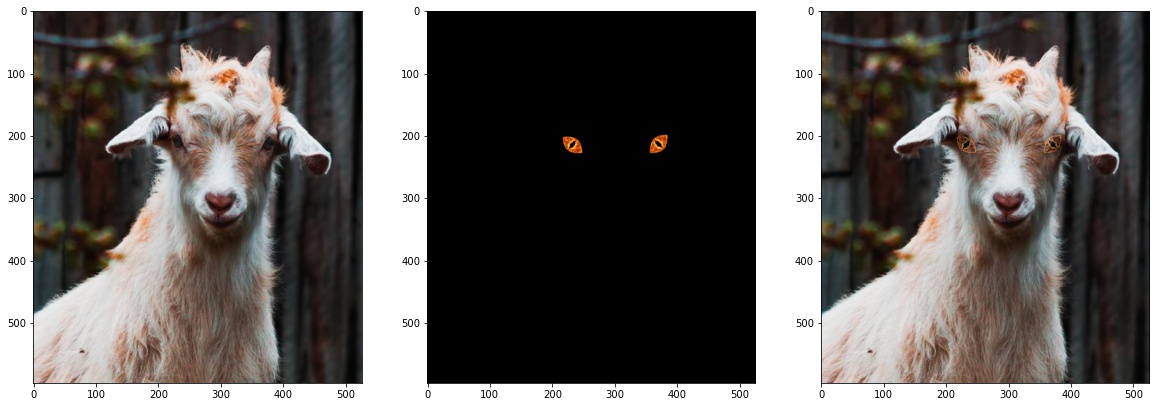
For the last one though it's irregular mask, but the blur kernel might be too big that the architecture renders a transparency appearance.
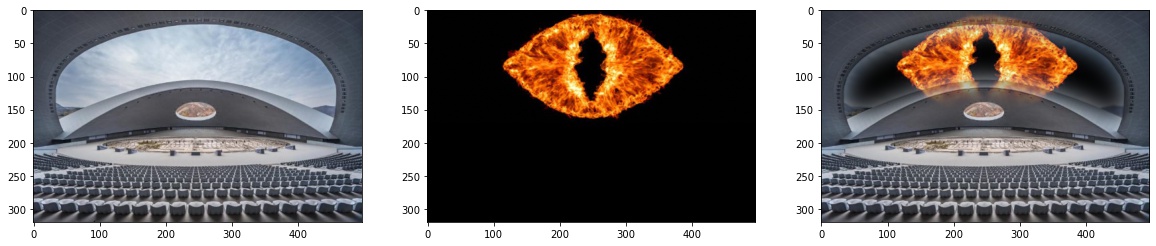
Image credit for this part:
Goat: Ross Kinnaird/Getty Images\ Fish: Alastair Pollock Photography/Getty Images
city skyline: Travis T @ttorres00 \ wave: https://www.redbull.com/au-en/the-right-like-youve-never-seen-it-before
Standing goat: Andrei Caliman human: https://overlandexp.com/transportation/young-white-man-in-suit/
Architecture: Courtesy Qingdao Tengyuan Design Institute Co., Ltd\ Devil eye: https://www.shutterstock.com/video/clip-22609942-4k-burning-devil-eye-seamless-loop-alpha