Overview
In this project, we used keypoints and affine transformations to morph different faces into each other through a sequence of mid-way faces.
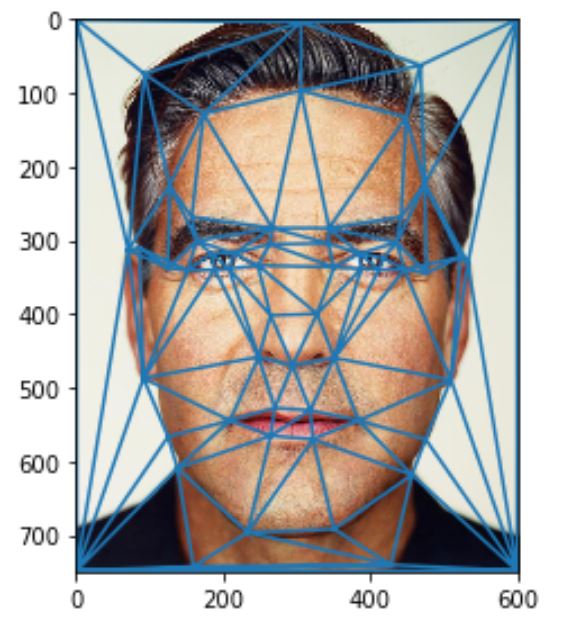
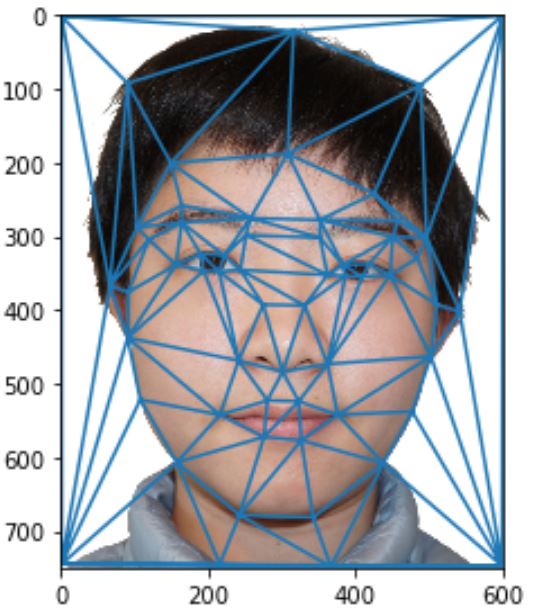
Part 1 Defining Correspondences
In this part, I implemented code for selecting facial keypoints and created a triangulation mesh of these points.
Algorithm Explain
First, using ginput from the matplotlib library, I selected 59 keypoints for each face. I distribute the keypoints so that they represent the features in the face evenly.
Then, I took the average position of the two sets of keypoints, and input it into scipy's delaunay function. This way, we get the most ideal triangulation of the inputs.
We then could simply show the image and plot the triangles with indexes in the tri.simplices that the Delaunay function returned, and we get images below:
Result Showcase
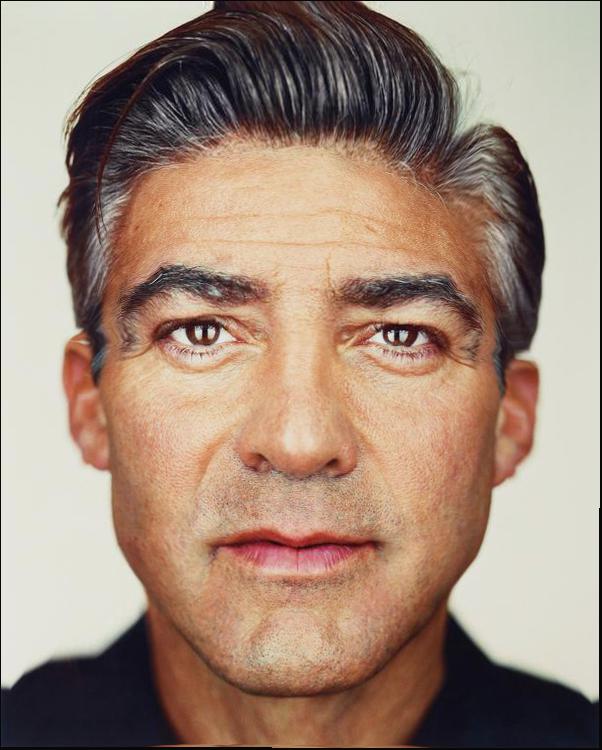
Part 2: Computing the "Mid-way Face"
In this part, we Computed the midway face using the average shape(keypoints positions), morphing the pixels using the affine transform function and inverse warping, and averaging the pixel value of the two faces warped to mid-way shape to get the final Mid-way Face.
Algorithm Explain
In this part, we first split the colored pictures into RGB channels, and operate on each channel, and combine them together in the end.
To warp an image from, say, shape defined by keypoint array arr1 to a new shape defined by keypoint array avg, we first want to calculate the affine transform from the destination shape avg to the starting shape arr1 (note: because we are using inverse warping).
We then take each triangle defined in the avg shape and get the index of pixels in it using the geometry function. We then transform the position of all those pixels into the space of arr1 using the inverse warping affine function that we got.
Next, we do an interpolation using function RectBivariateSpline to mark those pixels using pixel values of the original image corresponding to arr1.
After warping both the images to the midway shape using the above procedures, we average out the pixel values of the two warped images to get the final mid-war face.
Result Showcase

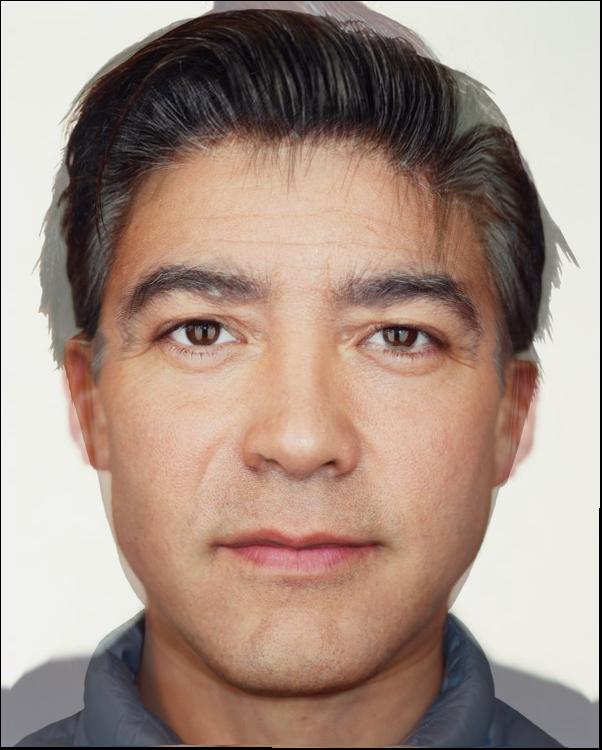
Note: This is difficult as our eye shape, jawline and hairstyle are very different haha.
Part 3: The Morph Sequence
In this part, we make a morph sequence to allow smooth transition from one image to another.
Algorithm explain
The code in this part is relatively trivial. for i from 1 to 44, we create a mid-way face shape that has the shape of i/45 of im1 plus (45-i)/45 of im2, and after getting the two morphed faces, also do the final averaging of the pixel values with a i:(45-i) weight. In this way, we form a sequence of morphing images.
Result Showcase (Youtube video link)
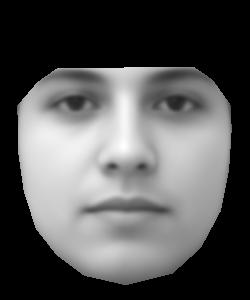
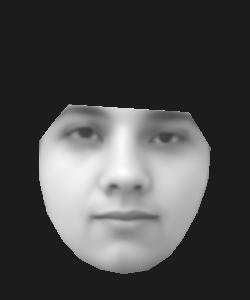
Part 4: The "Mean face" of a population
In this part, we try to create the average face, or mean face, of a population.
Algorithm Explain
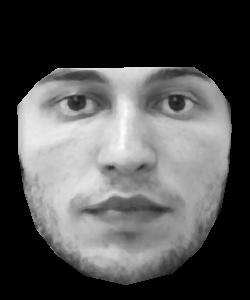
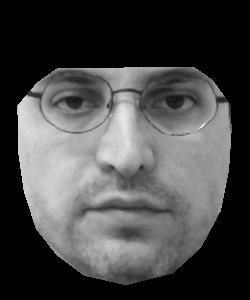
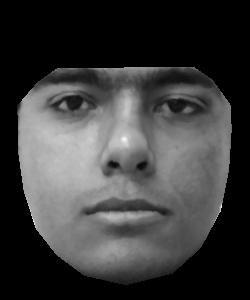
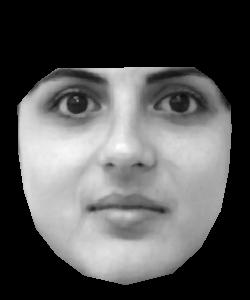
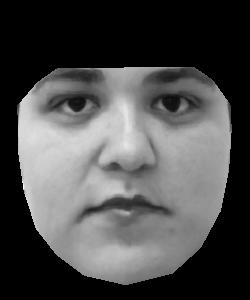
We got the population dataset from the FEI Face Database. Specifically, I used their spatially normalized, black and white, full frontal face image with no smile. I then downloaded their 46 keypoints for each image.
I then calculated the average shape using the average of all the keypoints. I then warped the different faces into the average shape. It result in images looking ike these:
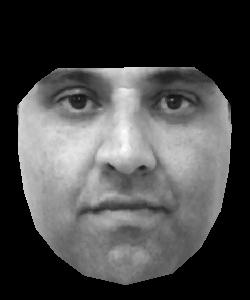
With the average shape calculated and each face morphed to the average shape, we can use the pixel averages among all morphed photos to get the average face. Shown below:
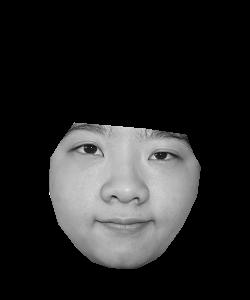
Last but not least, to have some fun, I morphed my own face to the average shape, and also morphed the average face into my face shape. The algorithm is just reusing the steps in part2, but changing it to only one color channel.
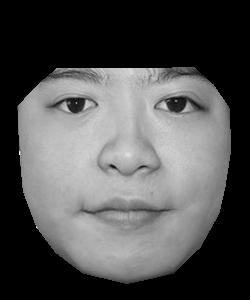
Part 5: Caricatures - Extrapolating from the mean
In this part, we made a caricature of my face using the shape of my face, image of my face, and shape of the average face of the dataset population.
Algorithm Explain
The code in this part is also kind of trivial. I set an alpha value to be 0.5, and set the caricature shape to be (1 + alpha) * my_shape - alpha * avg_shape. This will basically make my face deviate from the average even more. Then we morph the image to the new caricature shape, and result in a caricature image shown below:
Note: The dataset is mostly white, so I realized that the caricature is mostly exaggerating my asian features, especially my smiley, monolid eyes and my wide, flat nose shape. I find that pretty interesting.
Part 6: Bells and Whistles - Visual Lip-syncing
In this part, I showcase my Extra Credit work in Visual Lip-syncing. Basically, I took photos of myself with the mouth shape of pronouncing "g", "o", "b", "ea", "r" and "s". I then morphed them from one image to the next in the aforementioned order. This produces a visual lip-sync of me saying "go bears". I think it looks pretty nice and interesting.
Part 7: Bells and Whistles - Haus Music Video
In this part, I took photos of my housemates and try to make a morph chain.
People in my house also call ourselves toadies, so I accompanied the video with the "Crazy Frog" Song :P It ended up being pretty funny.
Huge Shoutout to my lovely housemates who volunteered to be my models. They are Kenny Garcia, Connor Boyd, Koda Slingluff, Claire Combredet, Oona Foley, Lizbeth Ortiz-Pivaral, Nida Sinha, and Jenny Tseng. Love you all<33