CS194-26 FA21 Project 4A: Stitching Photo Mosaics
By Austin Patel
Overview
The purpose of this project is to generate photo mosaics using projective warping. By labeling keypoints shared across images, we can compute a projective warp to make corresponding keypoints align in the images. Since the images overlap, we can do alpha blending to make it seems like there are smooth transitions between the images.
Results
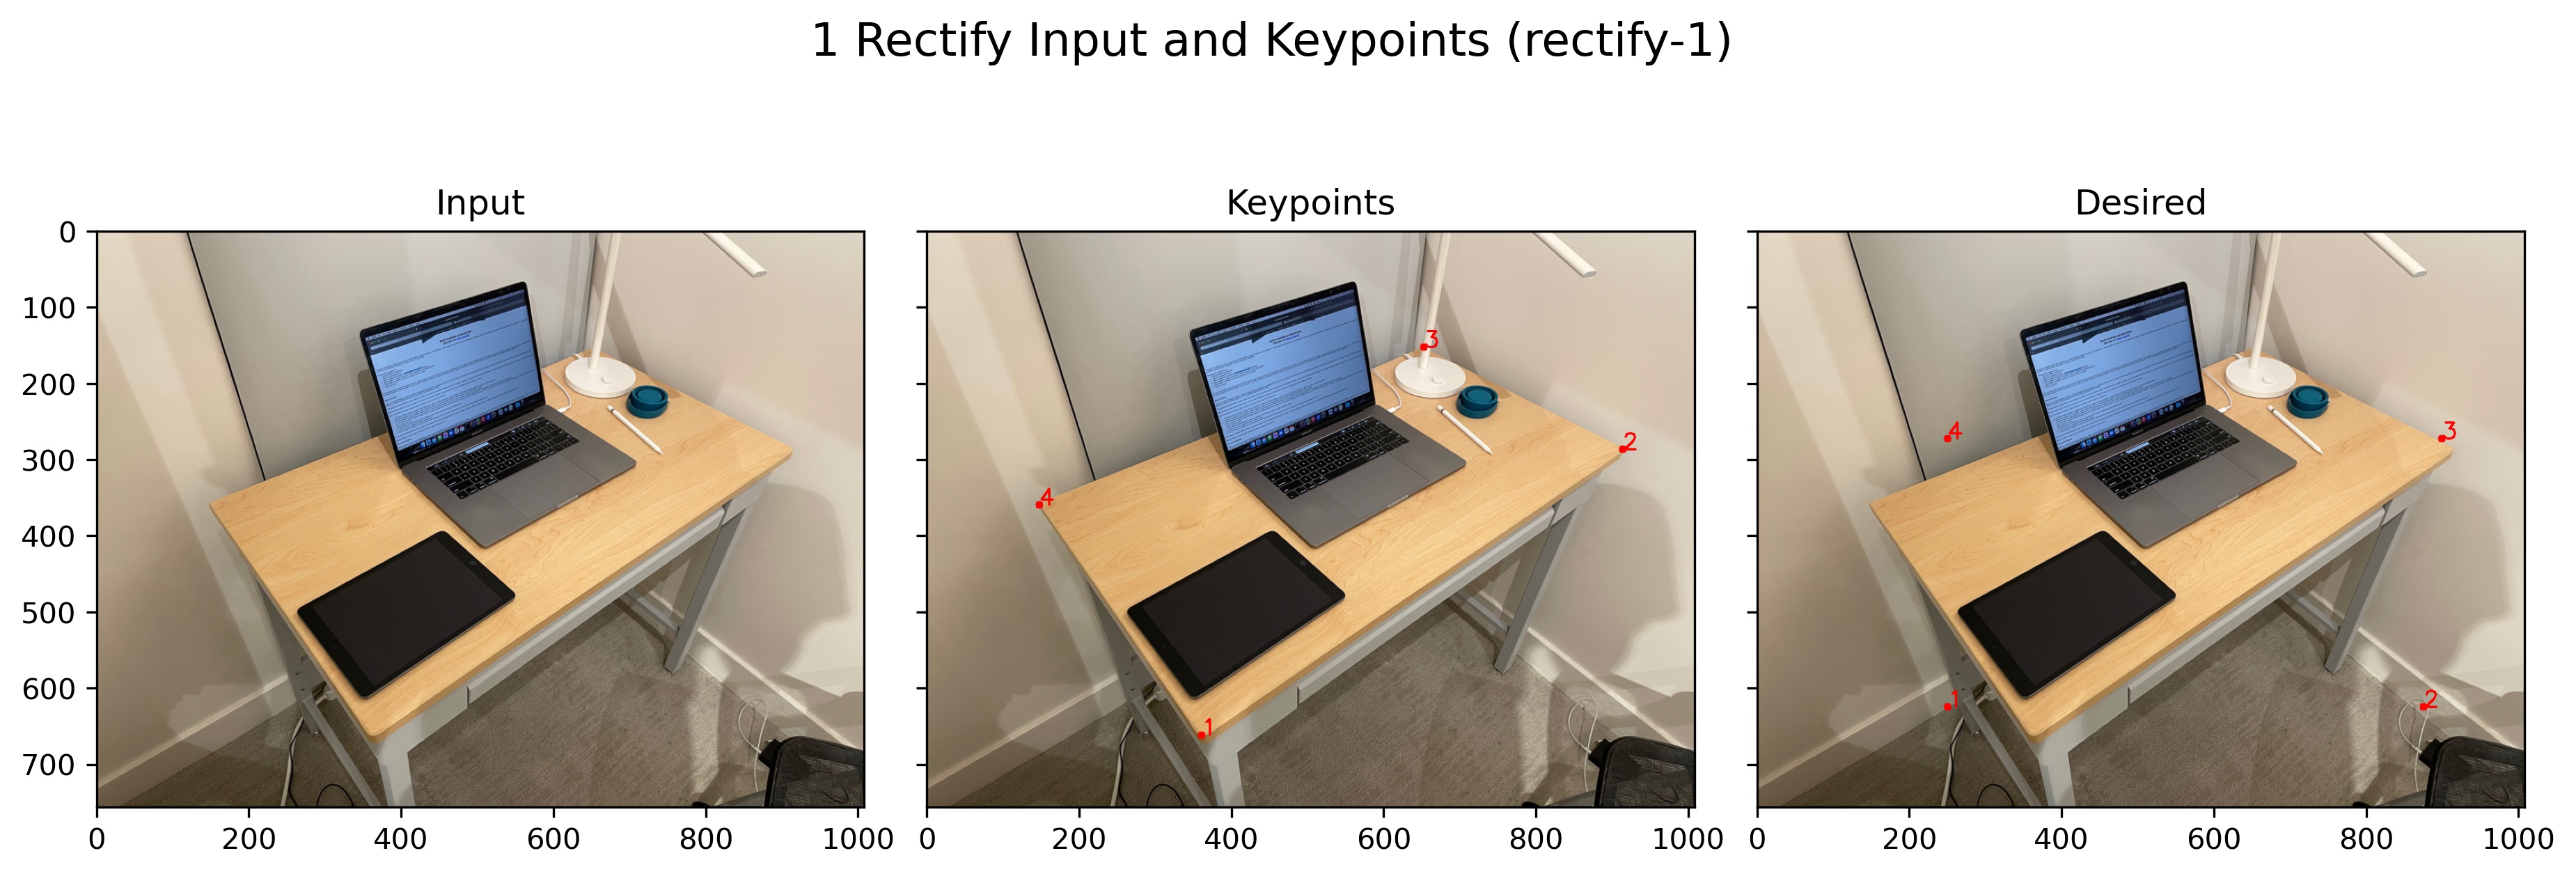
The first goal is to rectify an image. This means that the image is taken at an angle and we want to apply a projective work to the image to make it appear like we took the image from a different angle. This requires keypoints to be manually selected in the images as well as the desired keypoints to align our image to. I wanted the image to appear like it was taken top down with respect to the table.
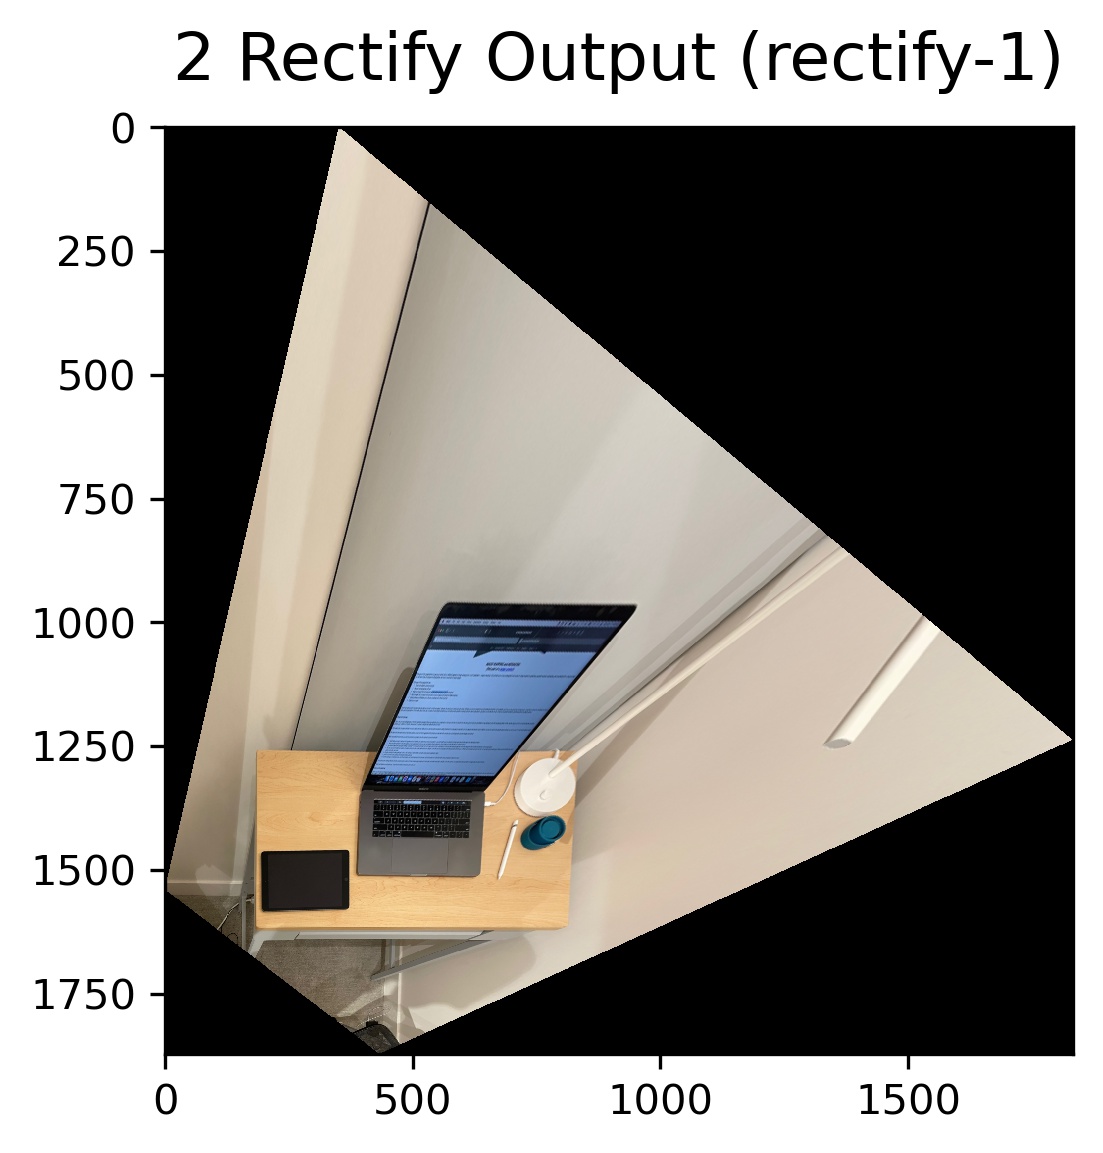
Here is the projected result! It looks like objects in the same plane as the table look good in the projection (laptop keyboard, iPad), but objects like the laptop screen appear stretched because the screen comes out of the plane.
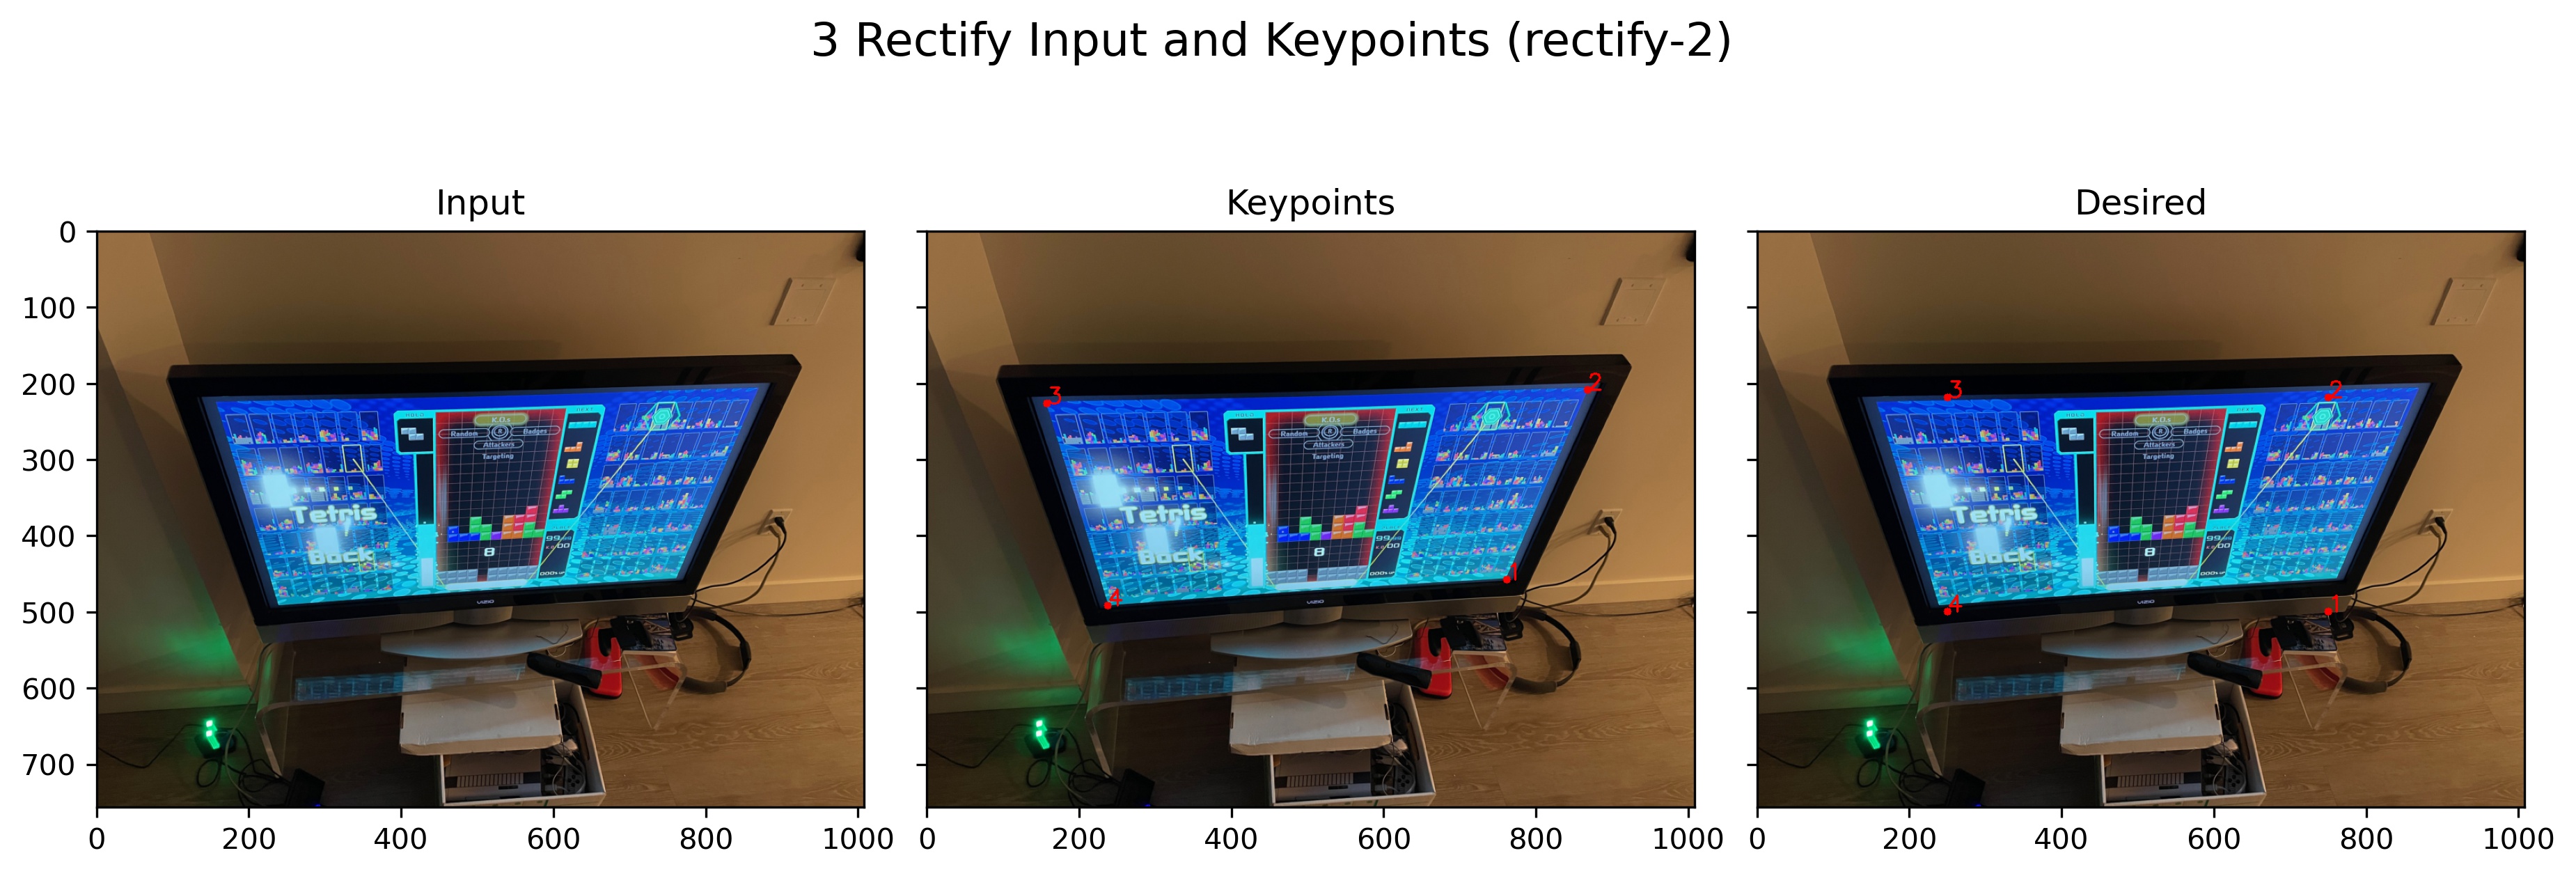
Now another example of rectify. Here the input is an image of a TV taken at a strange angle and we want to make it appear as if we took the image of the TV straight on with respect to the screen.
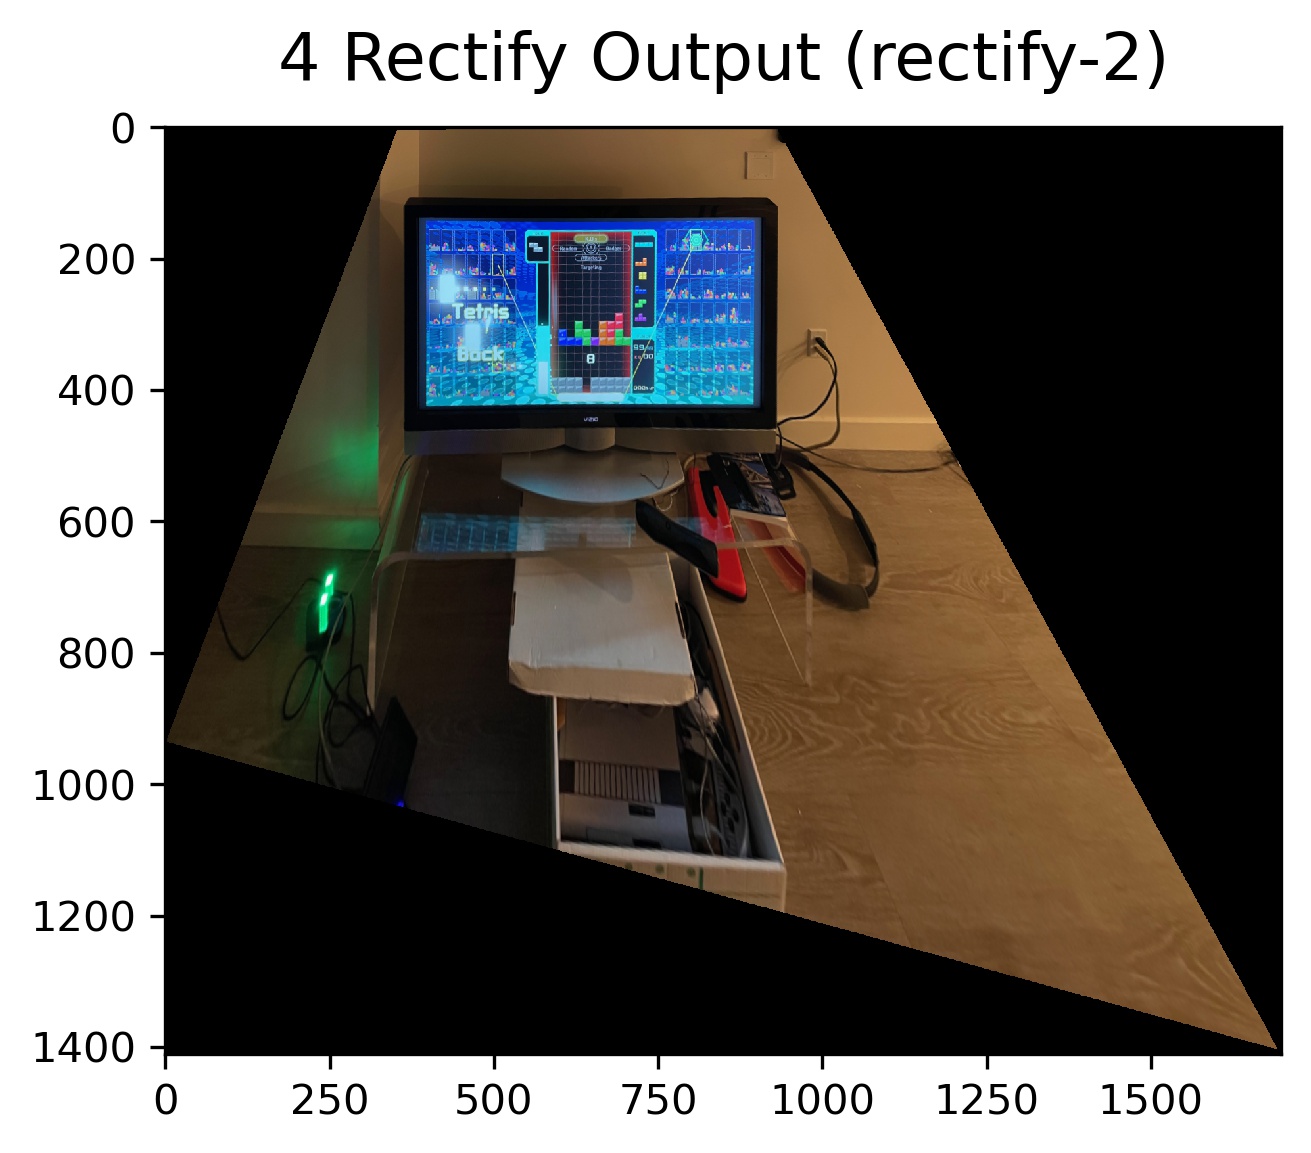
Here is the rectified output. The screen looks non distorted, but the elements in front of the TV (out of plane) looked stretched.
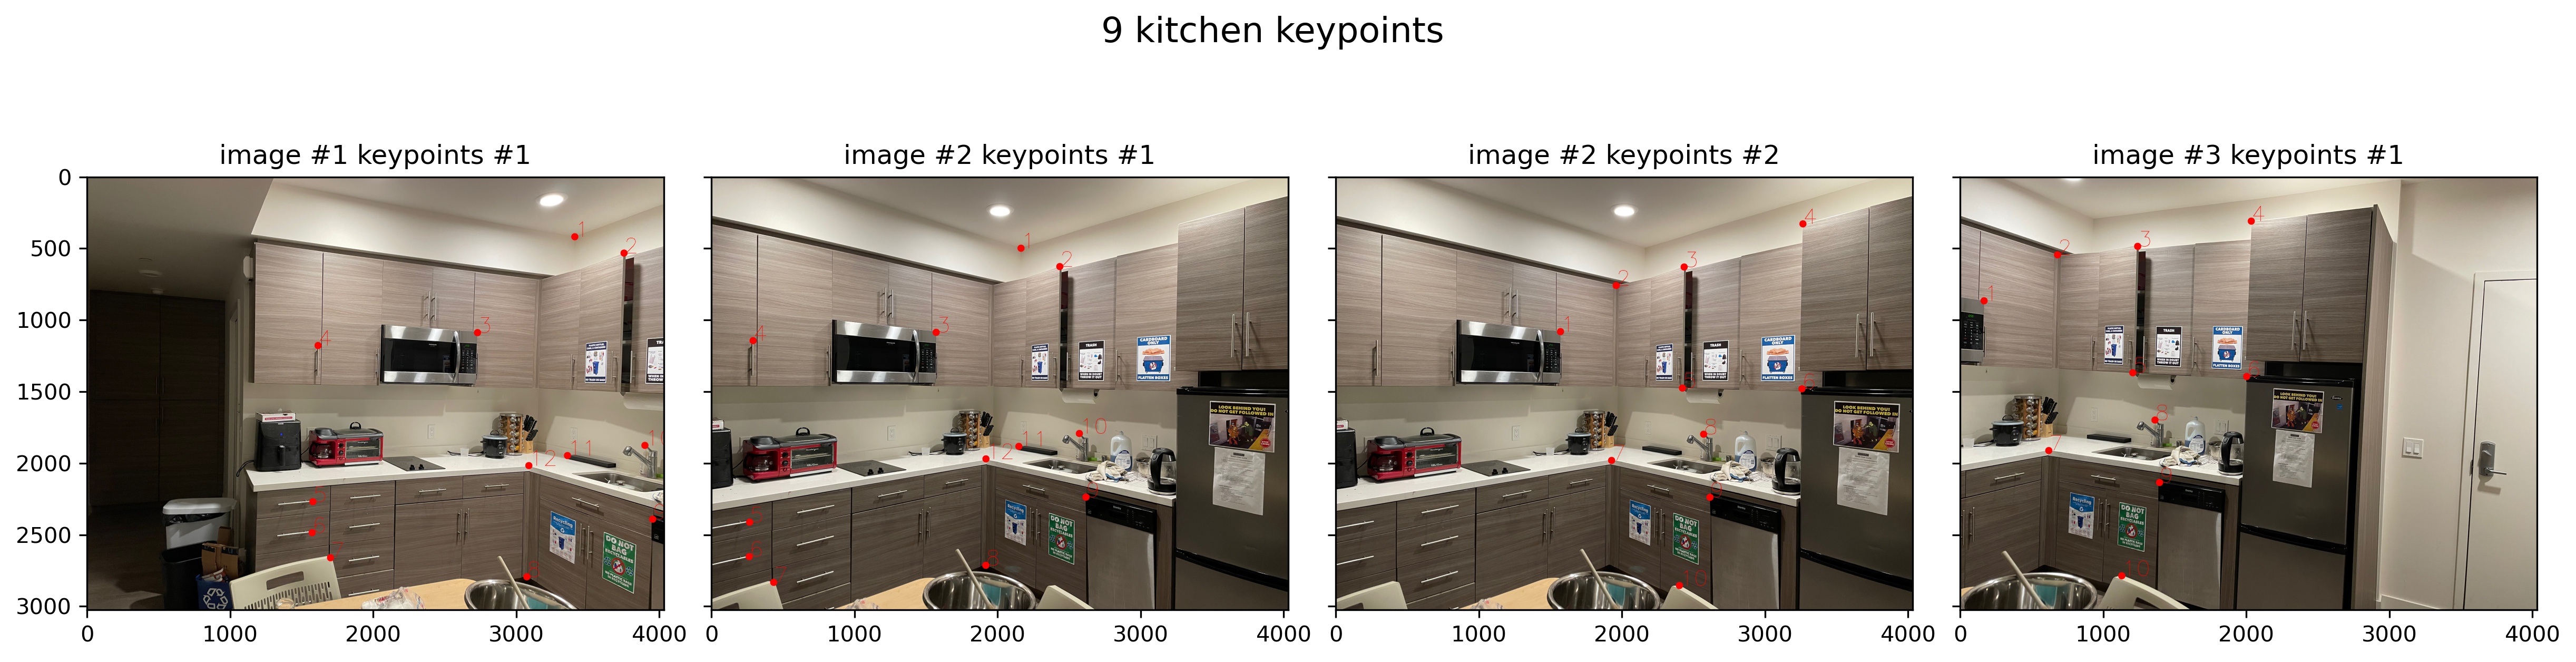
The next step is combining multiple images into photo mosaics. I take images from different rotations about a center point and then manually label keypoints that are shared between them. Here are the three input images and corresponding keypoints.
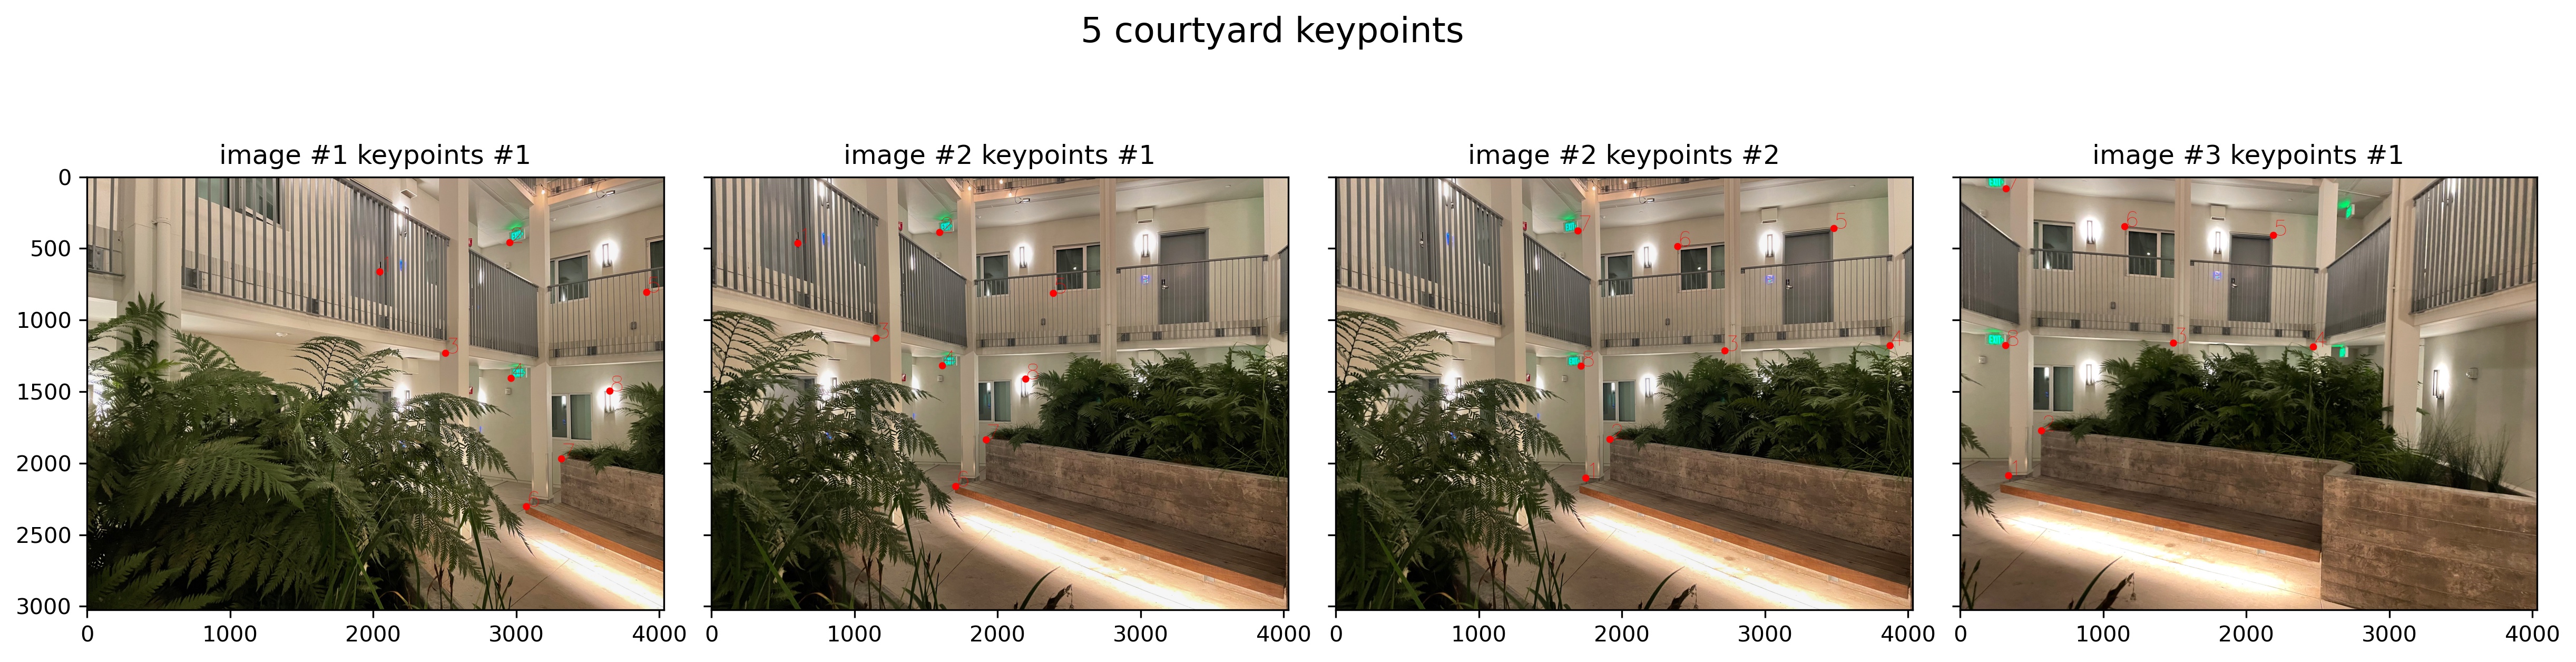
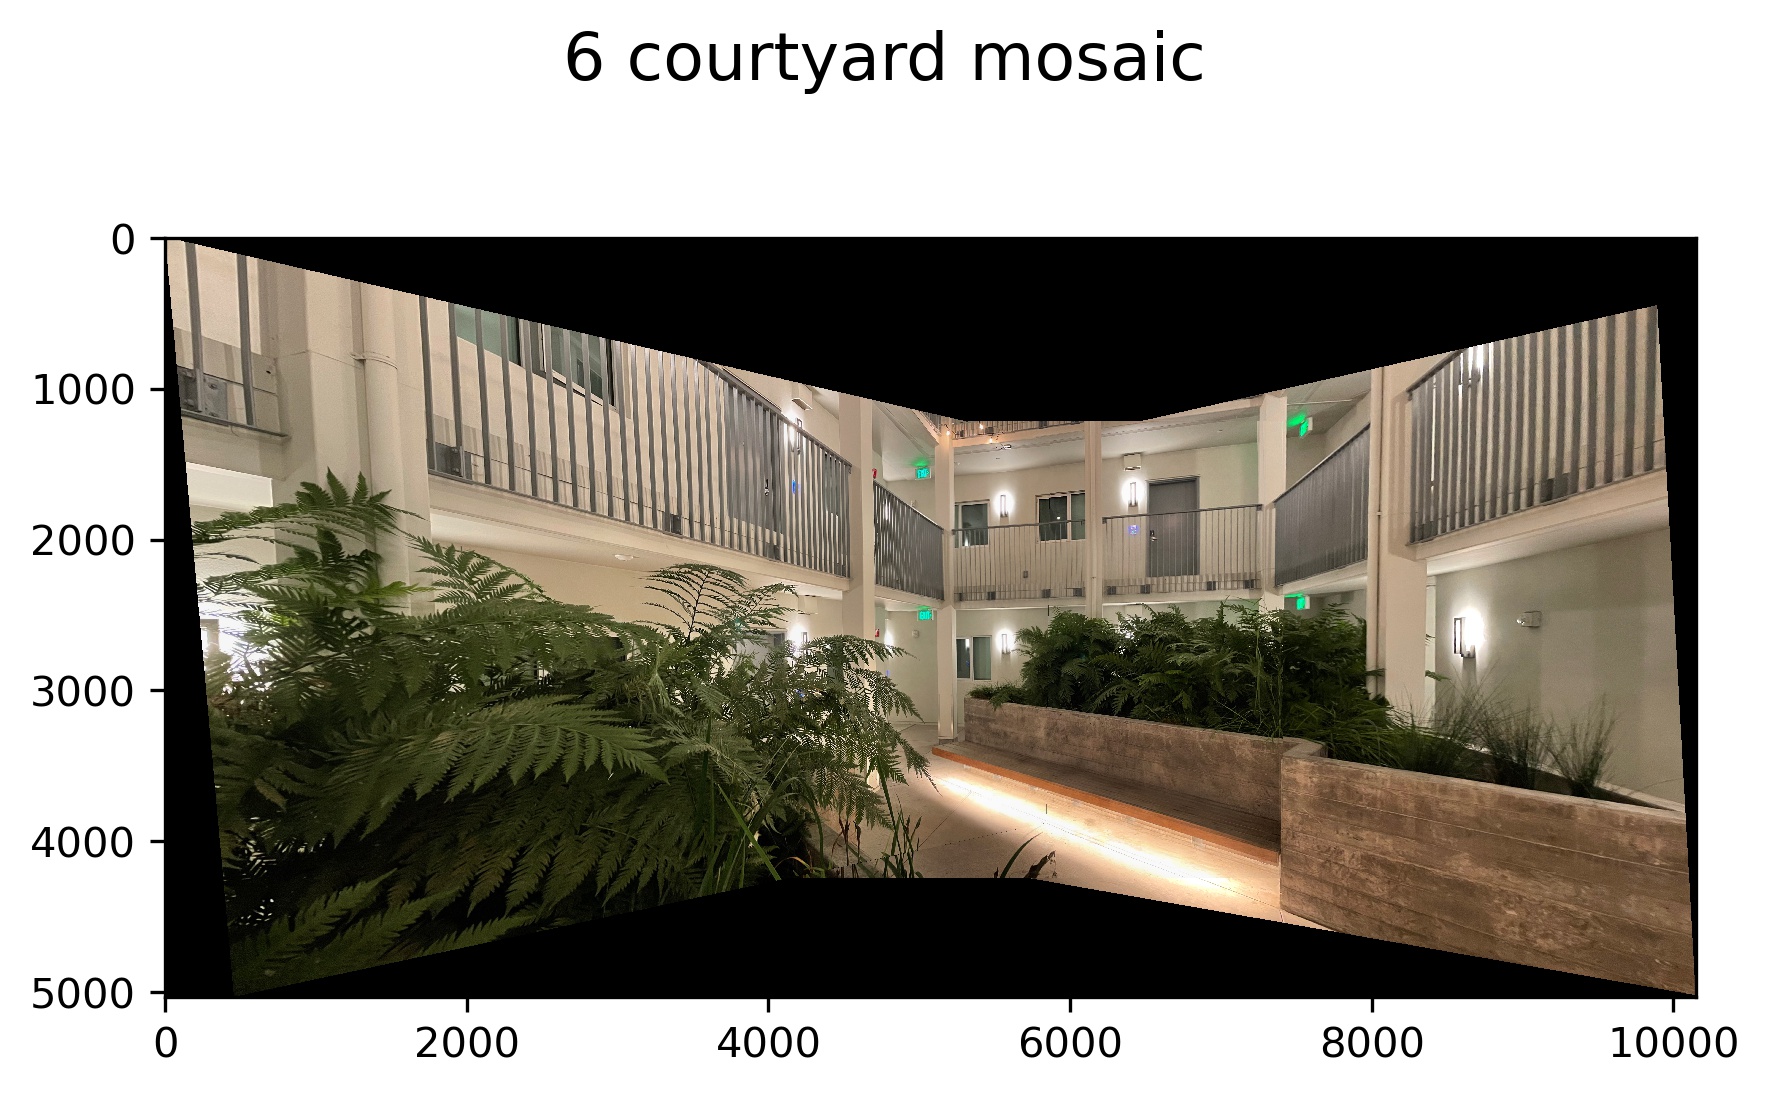
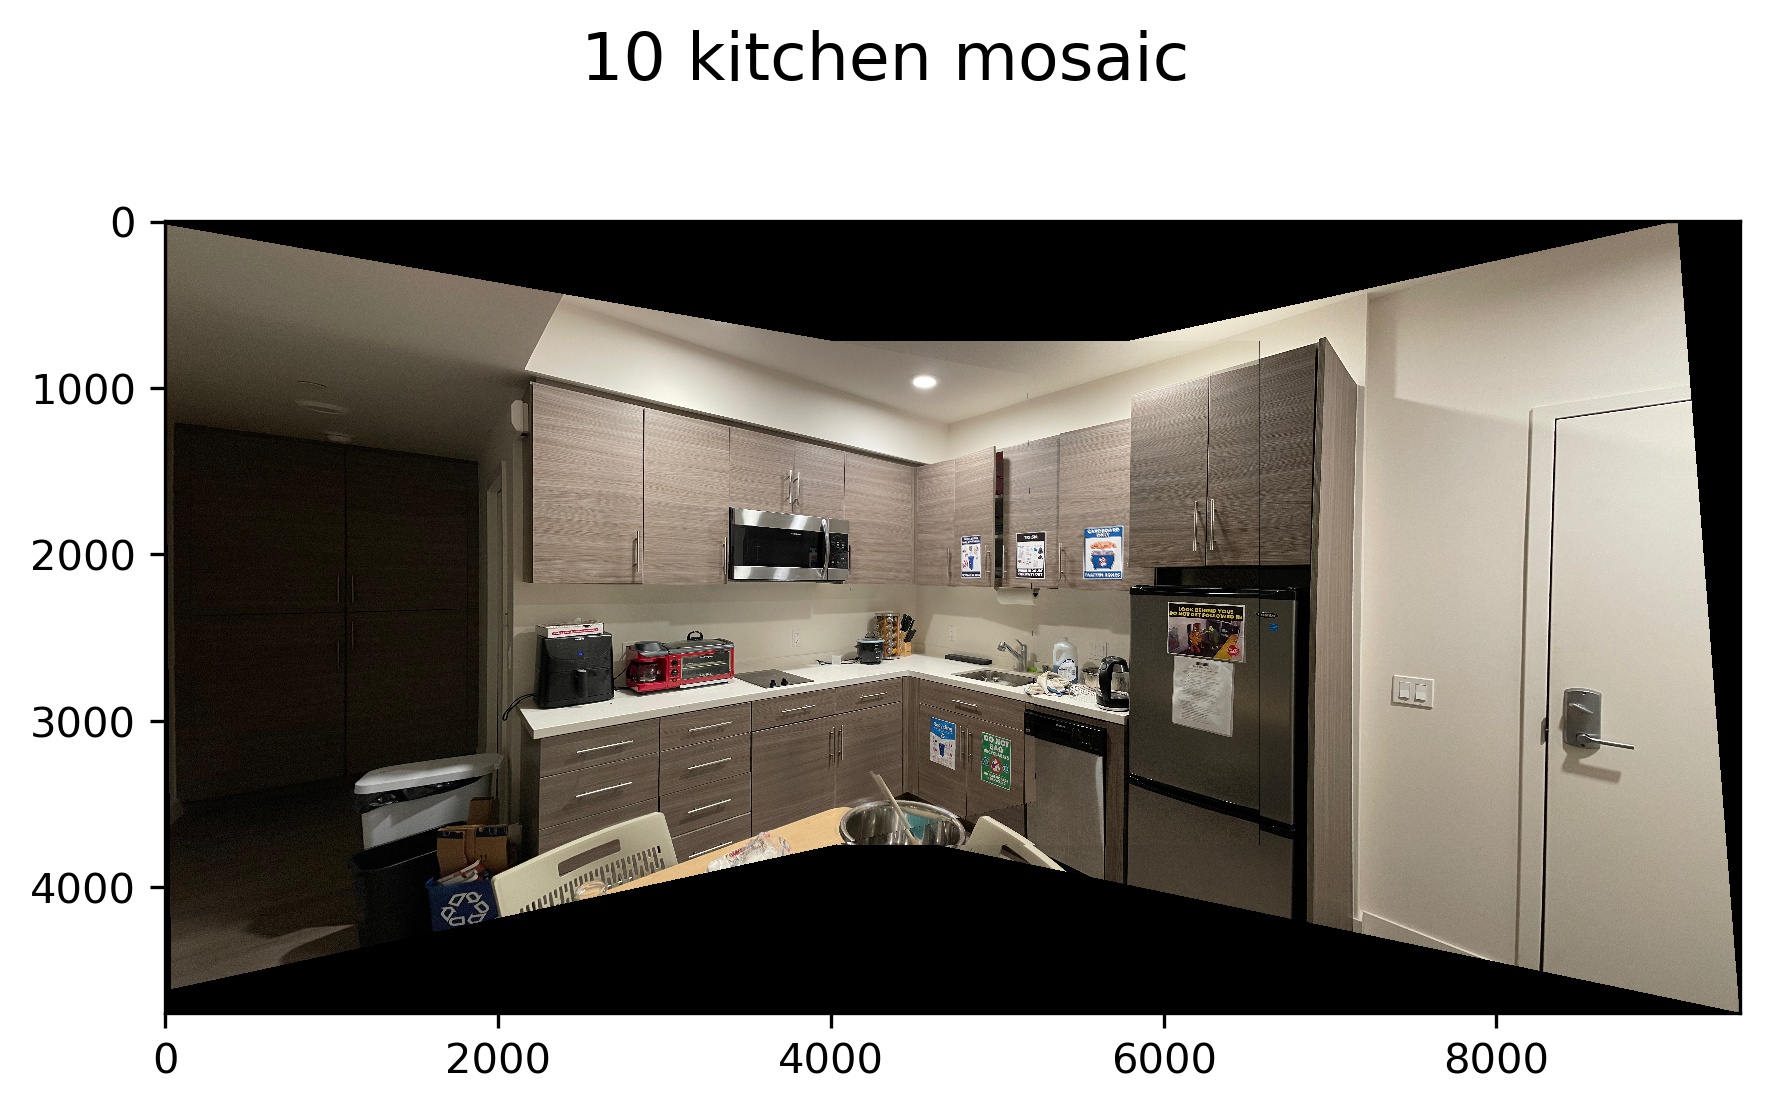
After computing projective warps between the keypoints, we can align the images to make a good looking photo mosaic. Here is the final result which looks pretty good! There are slight problems with the big plant near the bottom center of the result. This is likely due to the fact that wind was blowing on the plant and thus it may have moved between shots.
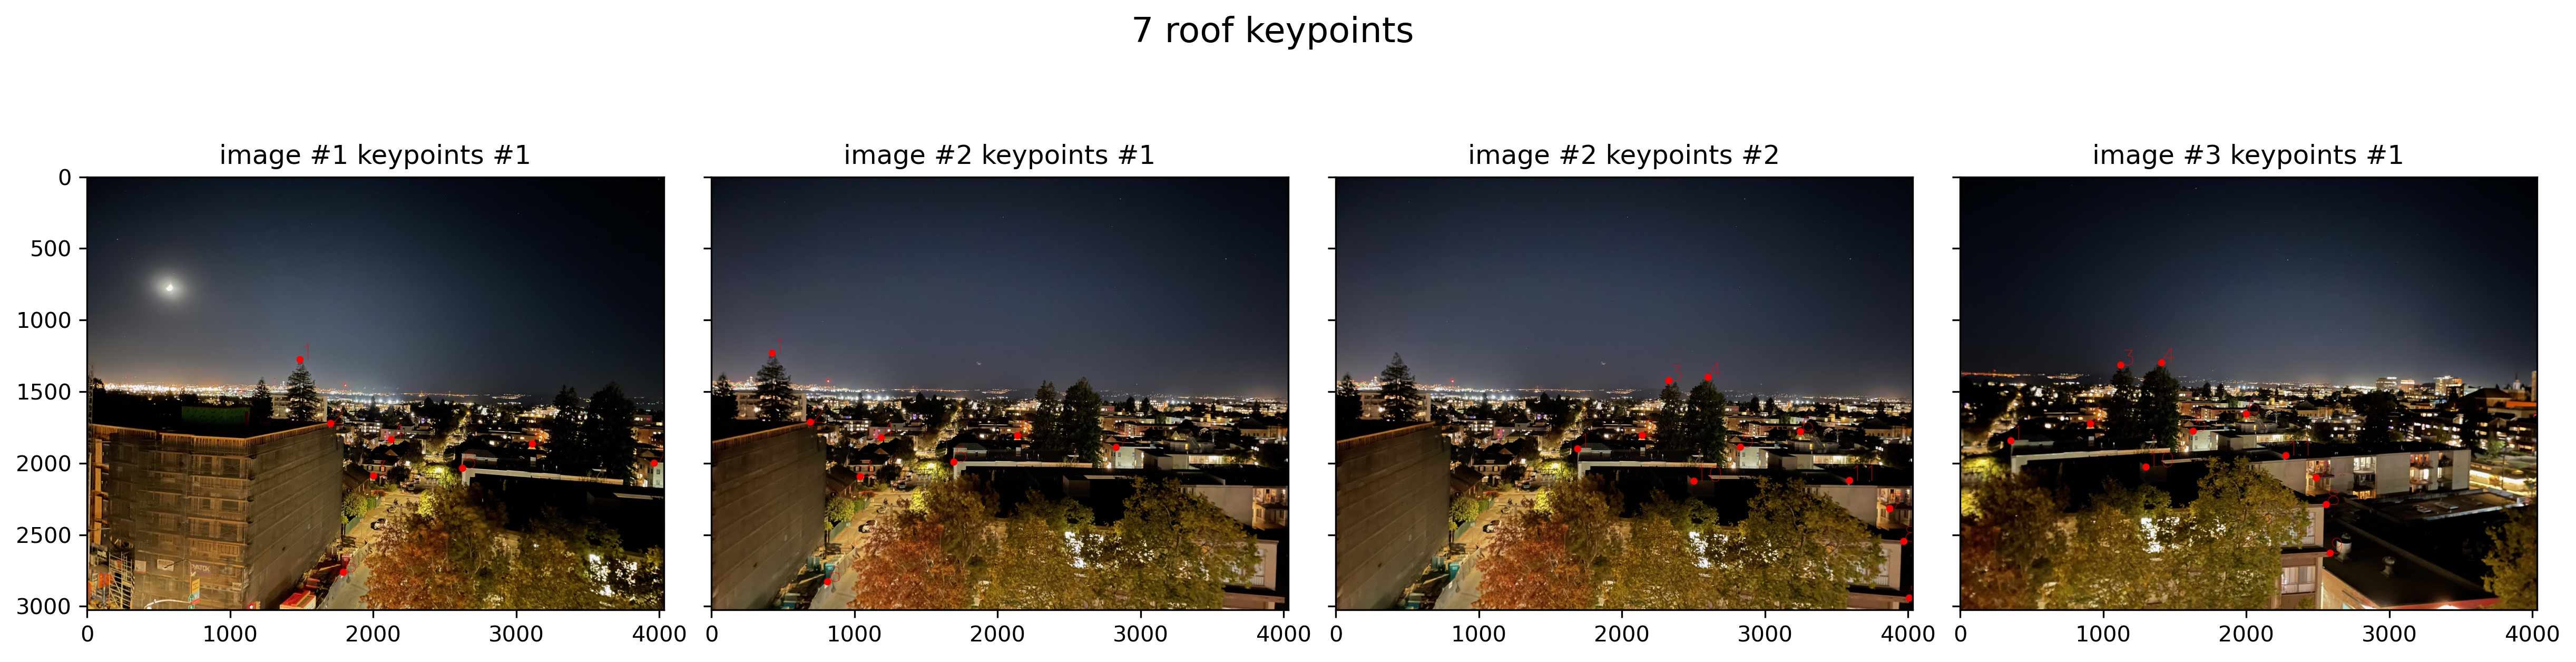
Here is the second input sequence. Once again keypoints and projective warps are computed.
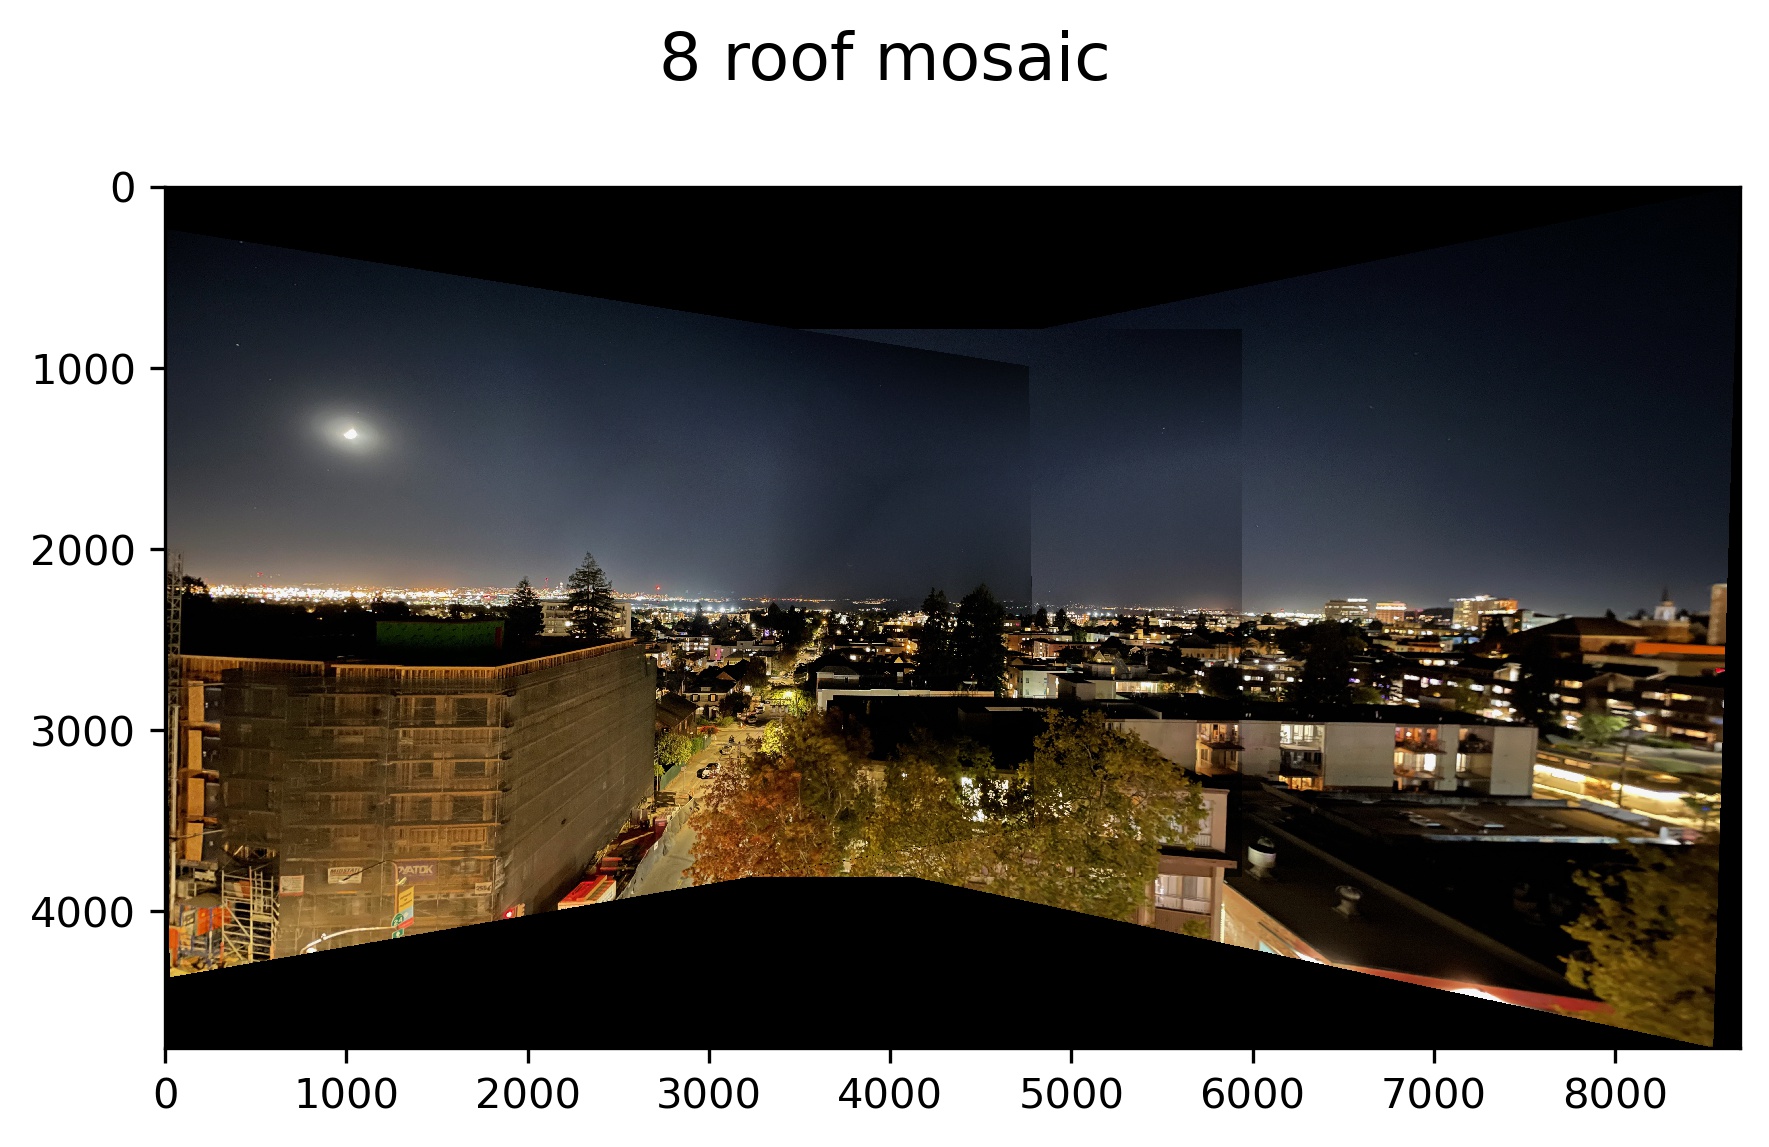
There are some strange artifacts at the edges of the images. I mitigated these effects somewhat by doing alpha blending between the images at the points where two images overlapped. In this case the alpha blending still did not make a super convincing result. If you look back at the input images there is this weird effect on all of them where the sky is bright in the center an then dark around the edges. Since each image has dark spots at the sides in the sky the strange artifacts remain in the alpha blended results. I took this images using the iPhone's night mode which is why these problems are likely present.
The inputs for the third mosaic.
Output for third mosaic!
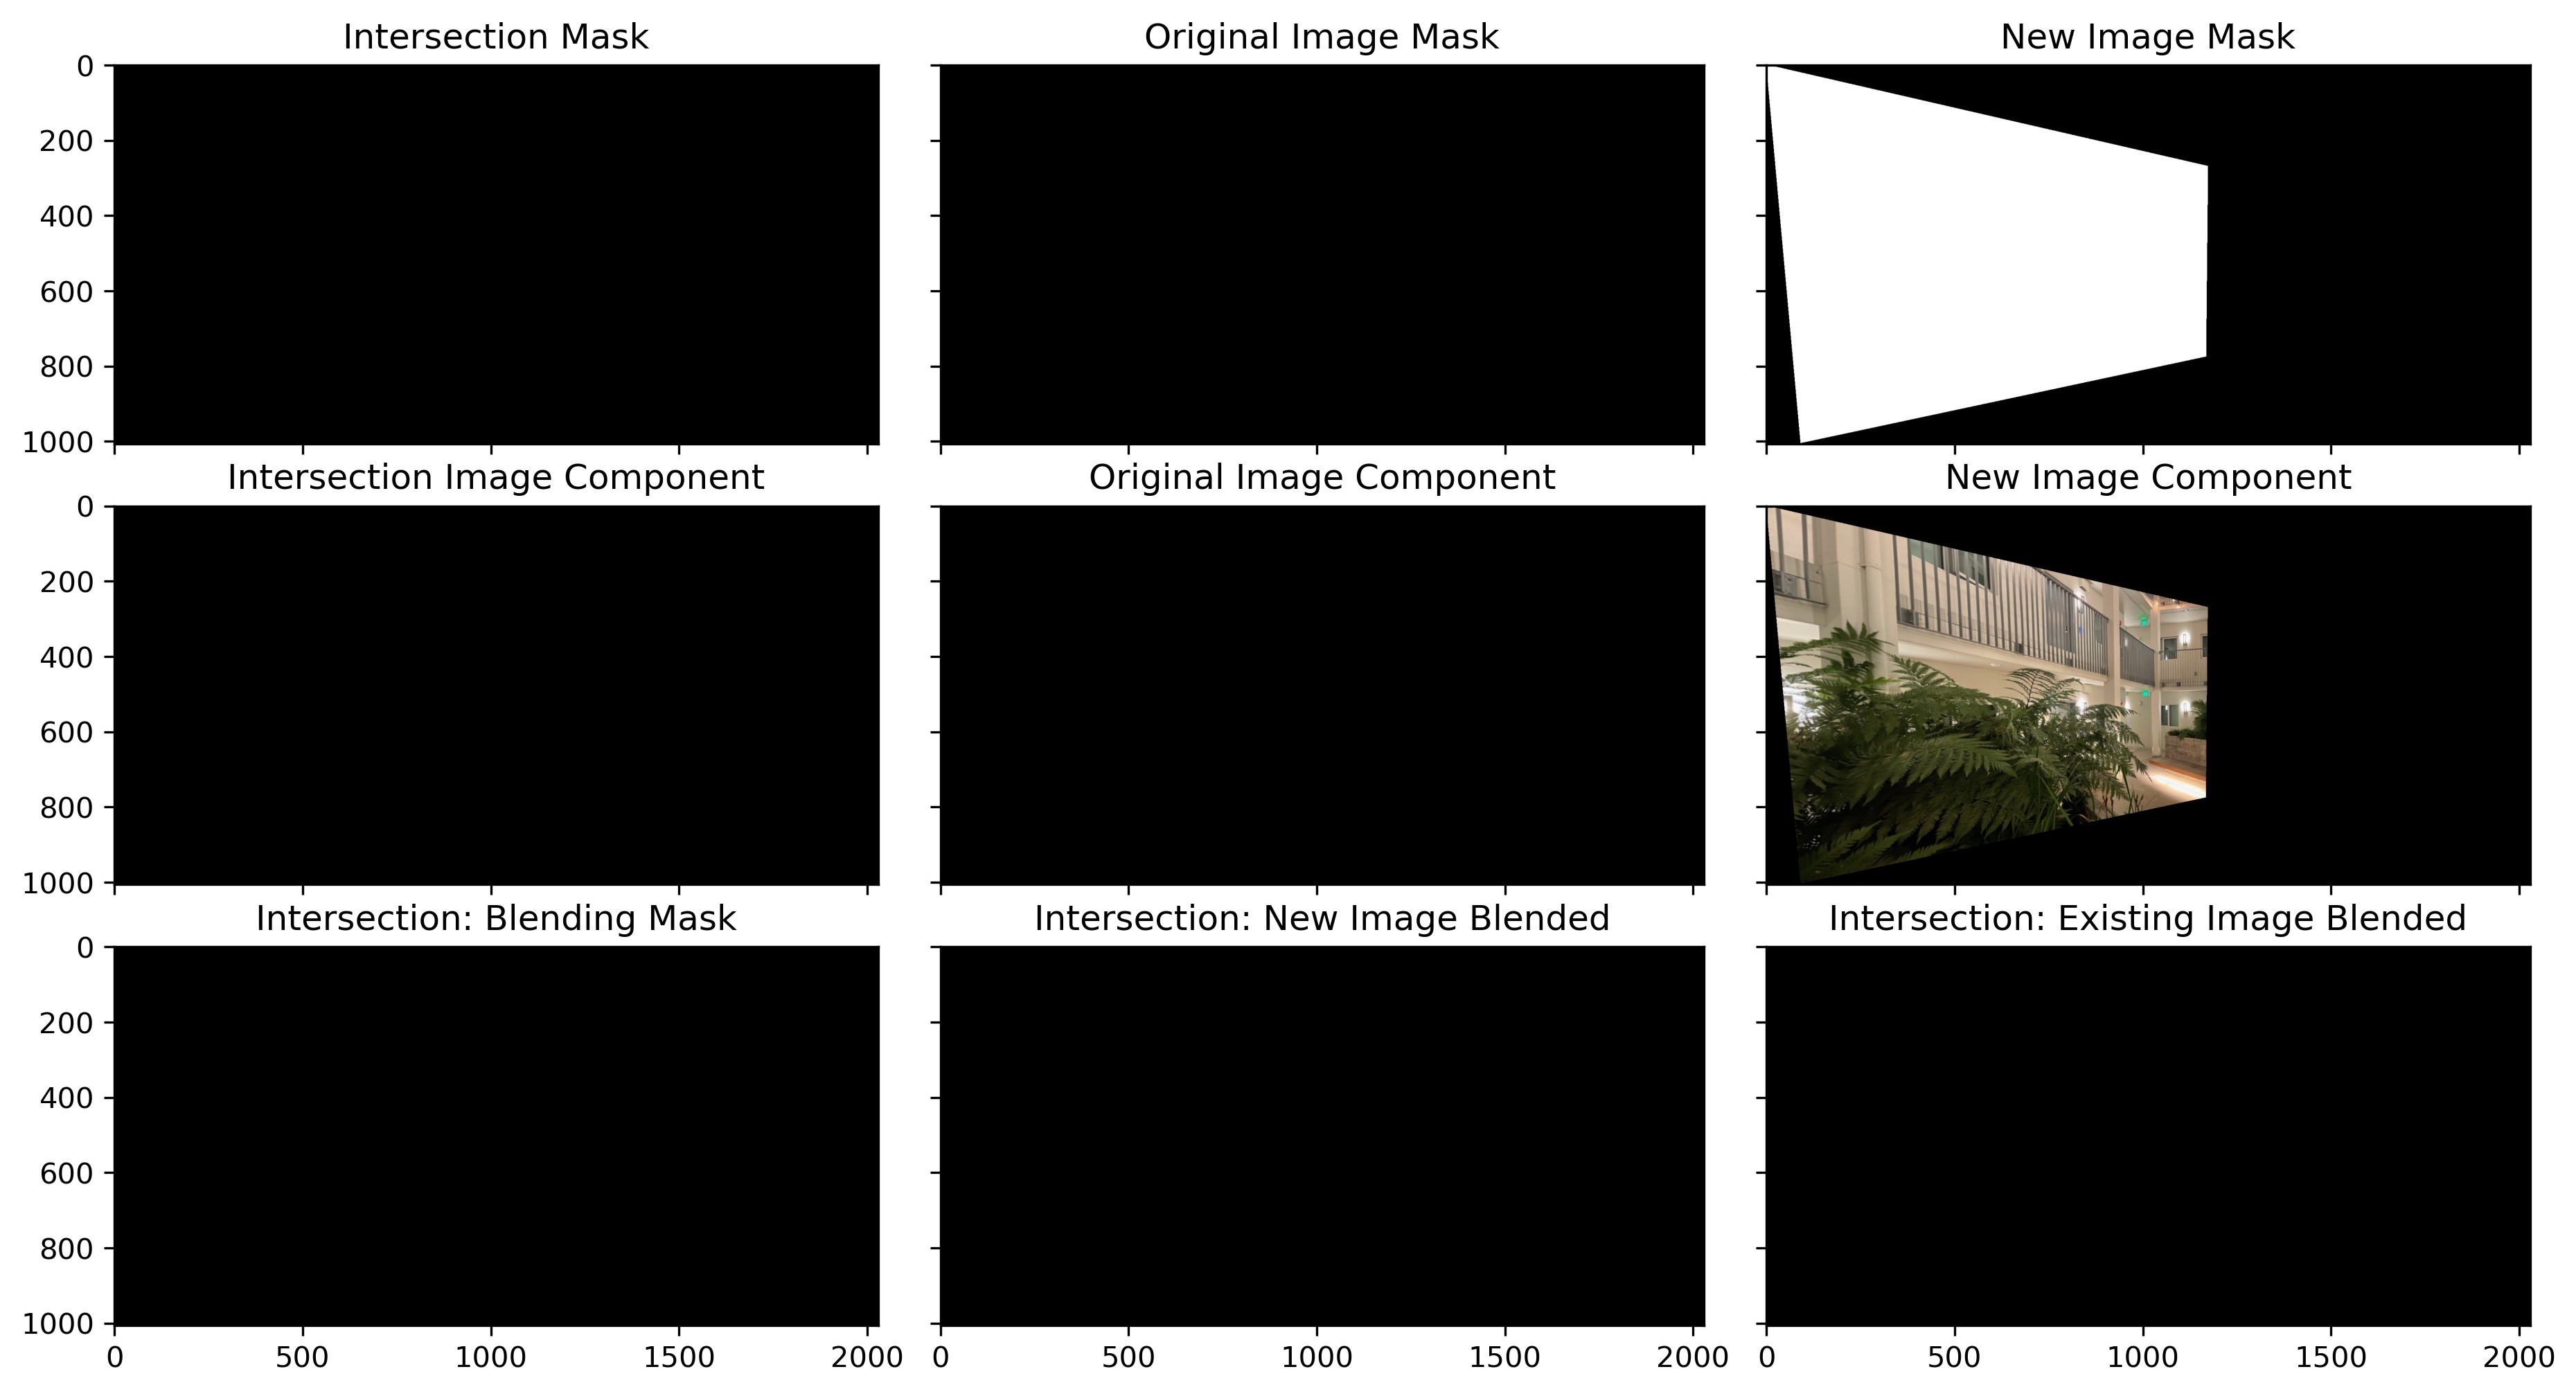
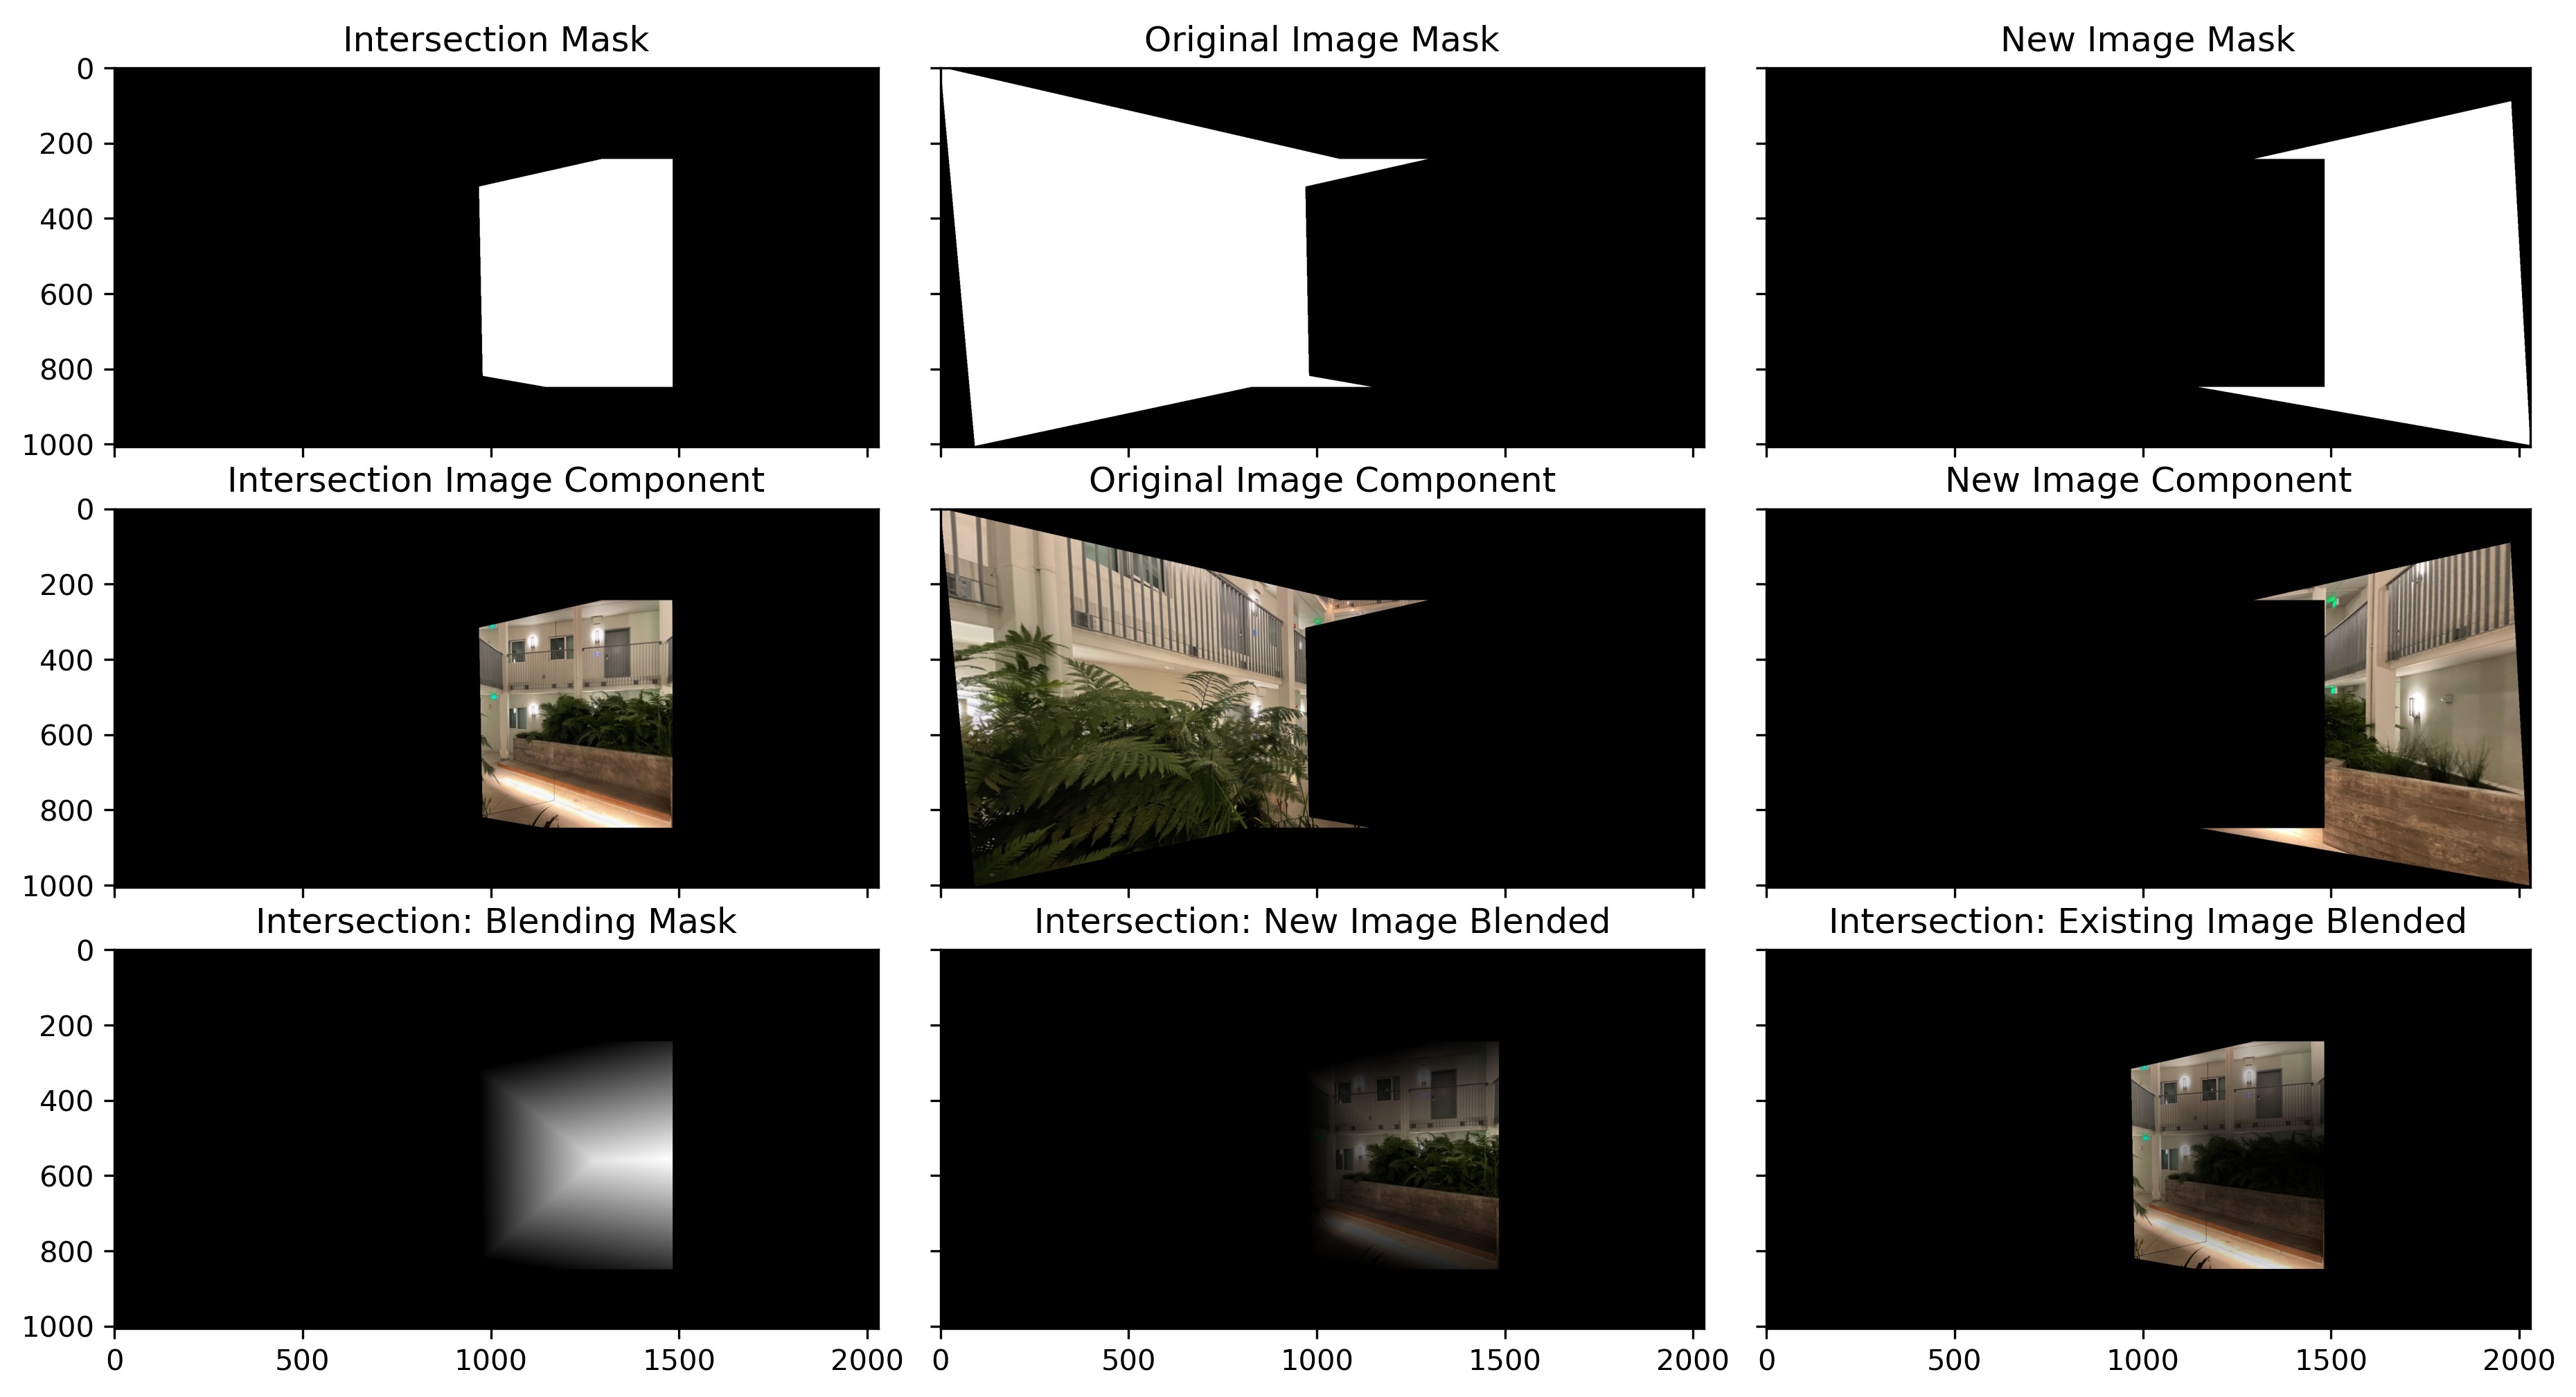
Now I will dive into more detail on how I actually go about doing blending to make the final output images look more realistic. The first thing I need to be able to do is to create three masks that represent the three different areas in my final mosaic for each new image added: the place where new image content will overlap will overlap existing content, the location that will be purely existing image content, and the location where we will have purely new image content. For the non-intersection components we can just directly copy image content from the source images to the final result. For the intersection component we will need to alpha blending to make a realistic transition. Instead of just doing simple weighting, I compute the a nice transitional blend by computing the distance of each pixel in the new image going to be added from black pixels (edges of the intersection) (see "Intersection: Blending Mask" images below). Then I take a linear combination of the existing and new image content according to this blend mask to get a nice transition. Here is this process when adding the first image (not interesting for first image).
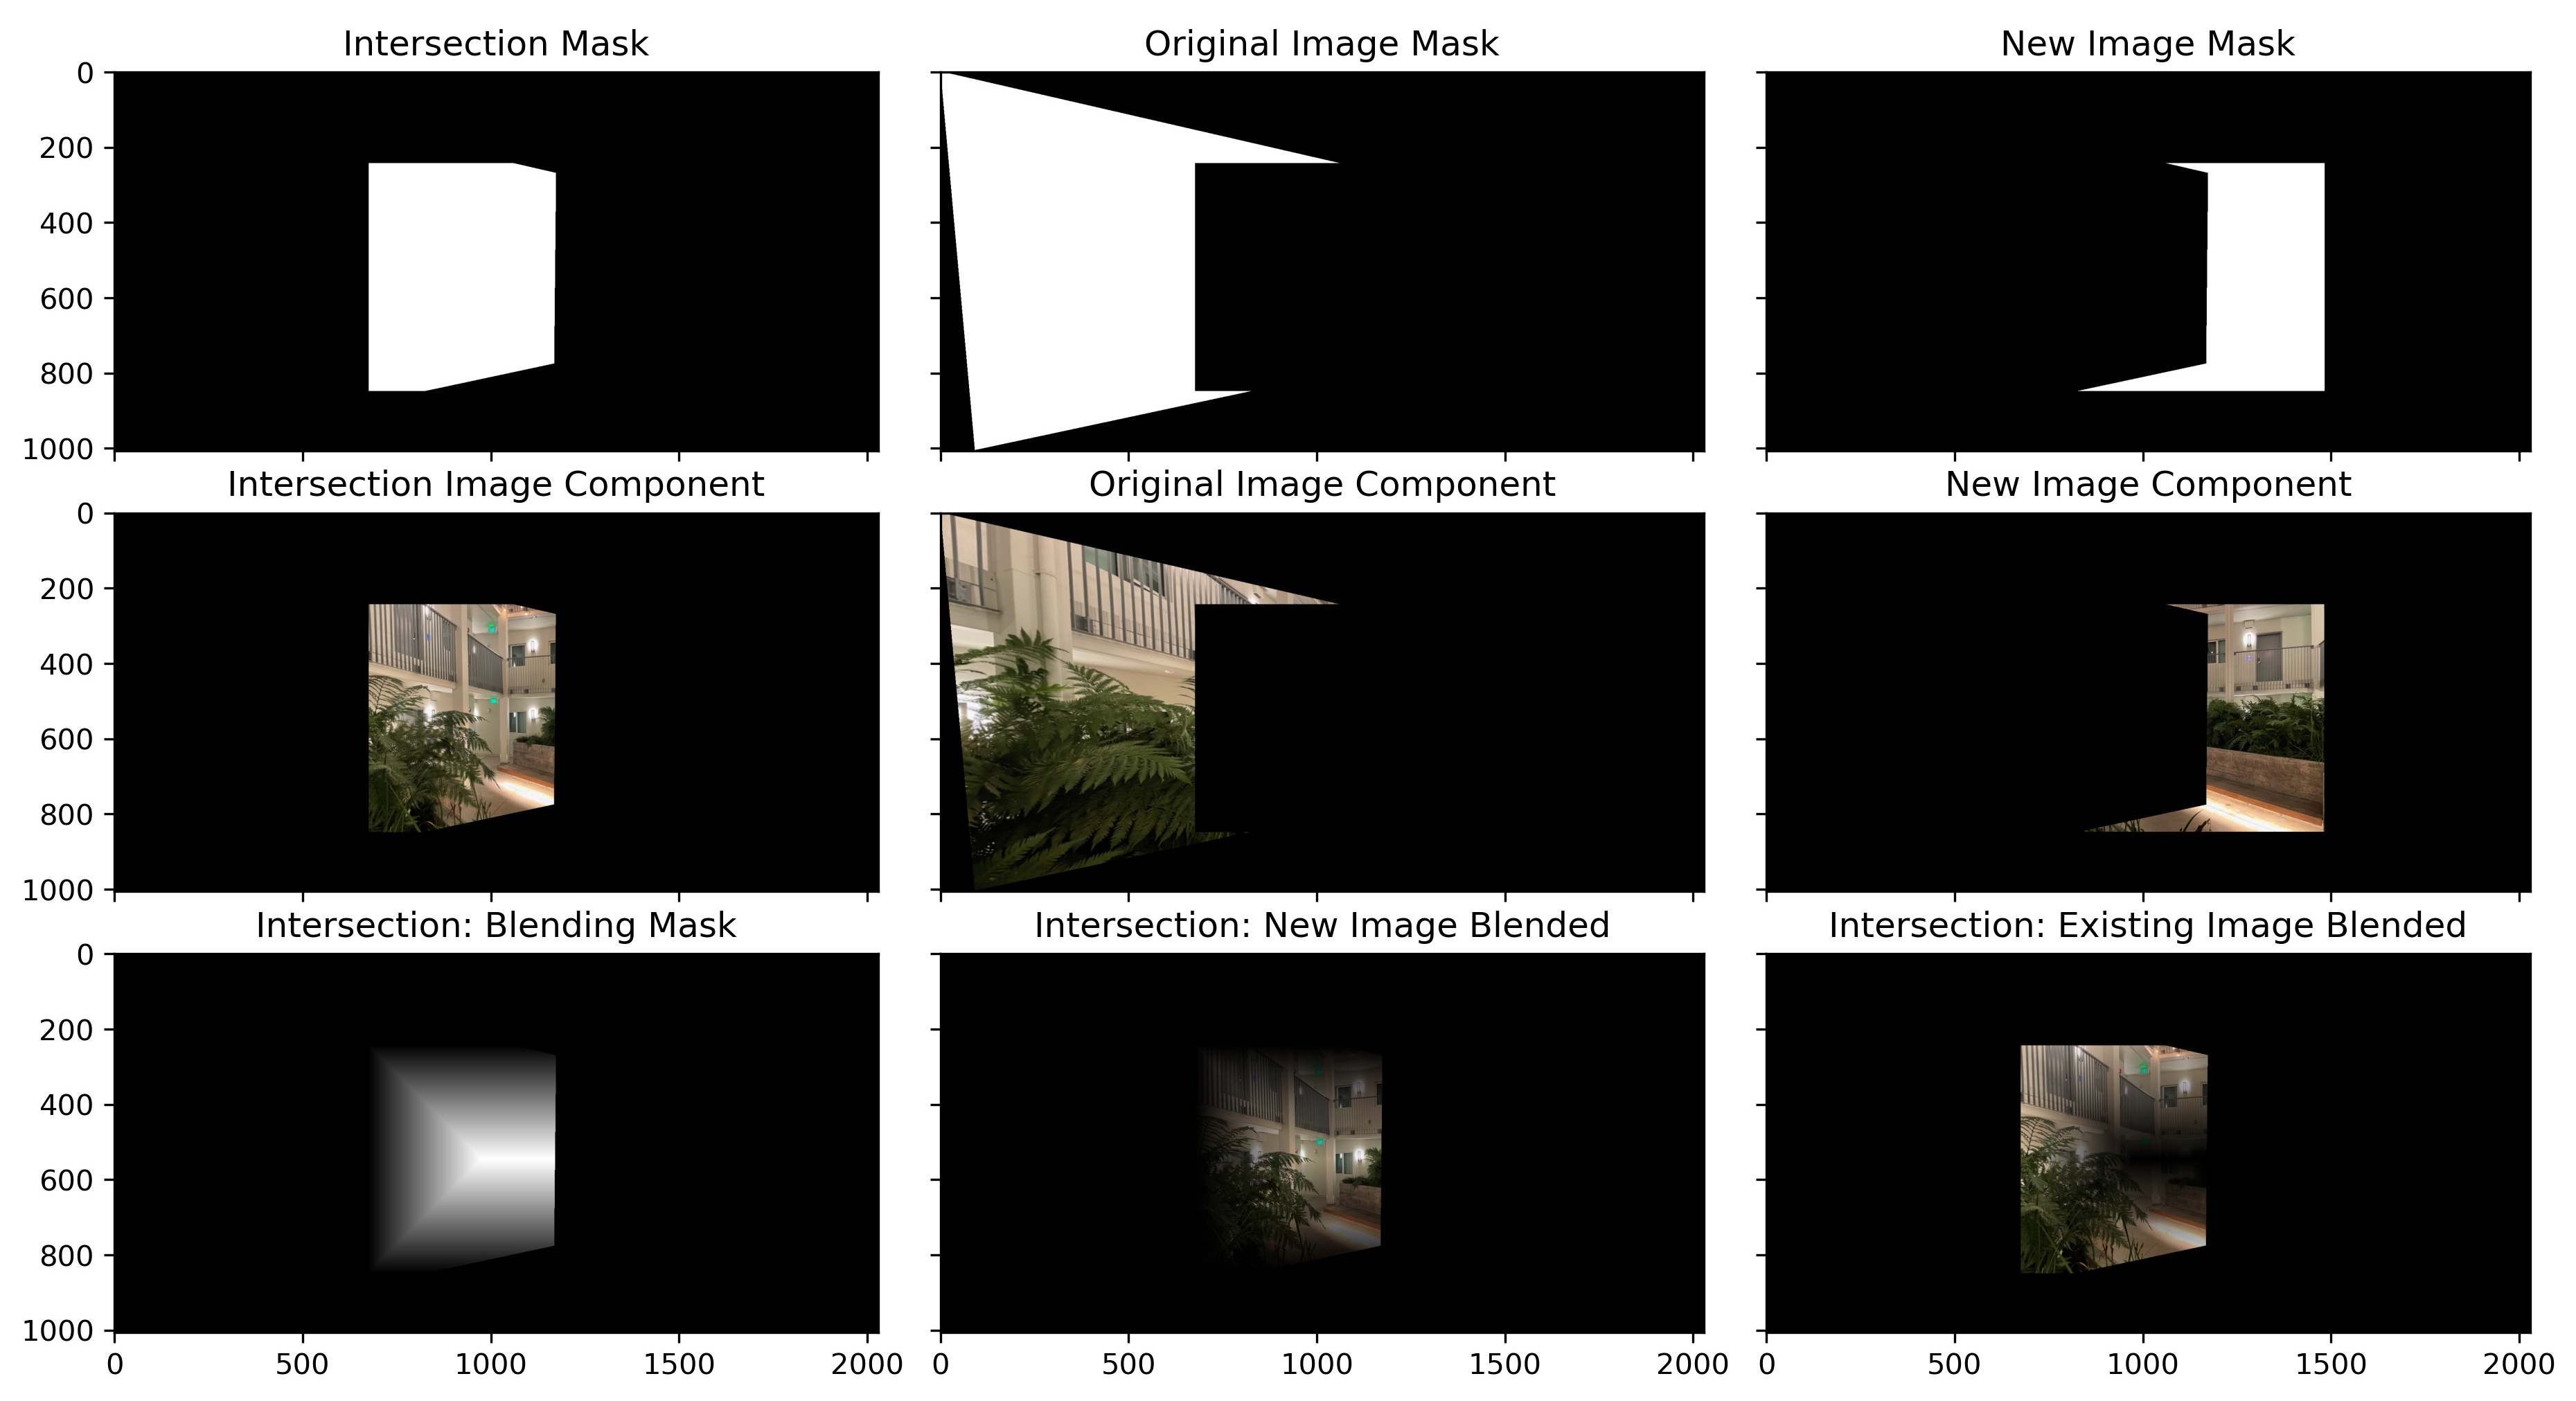
Here is the process for second image added.
Here is the process for the third image added.
Project reflection & takeaway
The coolest thing I learned on the project was figuring out how to make the final image mosaic output look convincing. The basic case of just aligning the images will result in a visible border between images, which does not look realistic. I resolved this issue by computing the areas where two images would overlap and then do alpha blending between the two images in the overlap section to produce a blended output. Instead of doing a simple weighted blending I computed a mask that smoothly transitions between images. This process was discussed at the end of the results section.