Image credit to this website
I took all of my photos on my iPhone and ensured that the aperture and exposure settings remained the same across any series of photos by taking a "burst".
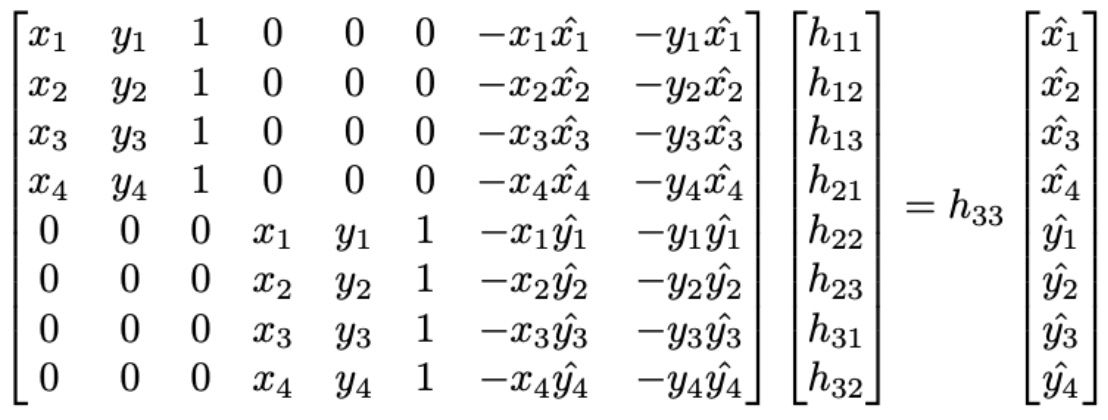
In order to recover the homography, I unraveled the homography change of basis (see above) into a system of linear equations (see below). I knew that I would want to use more than 4 correspondences for most of my images, so I wrote my code to construct this linear system to generalize to any number of correspondence points, and then solved the system with least squares.
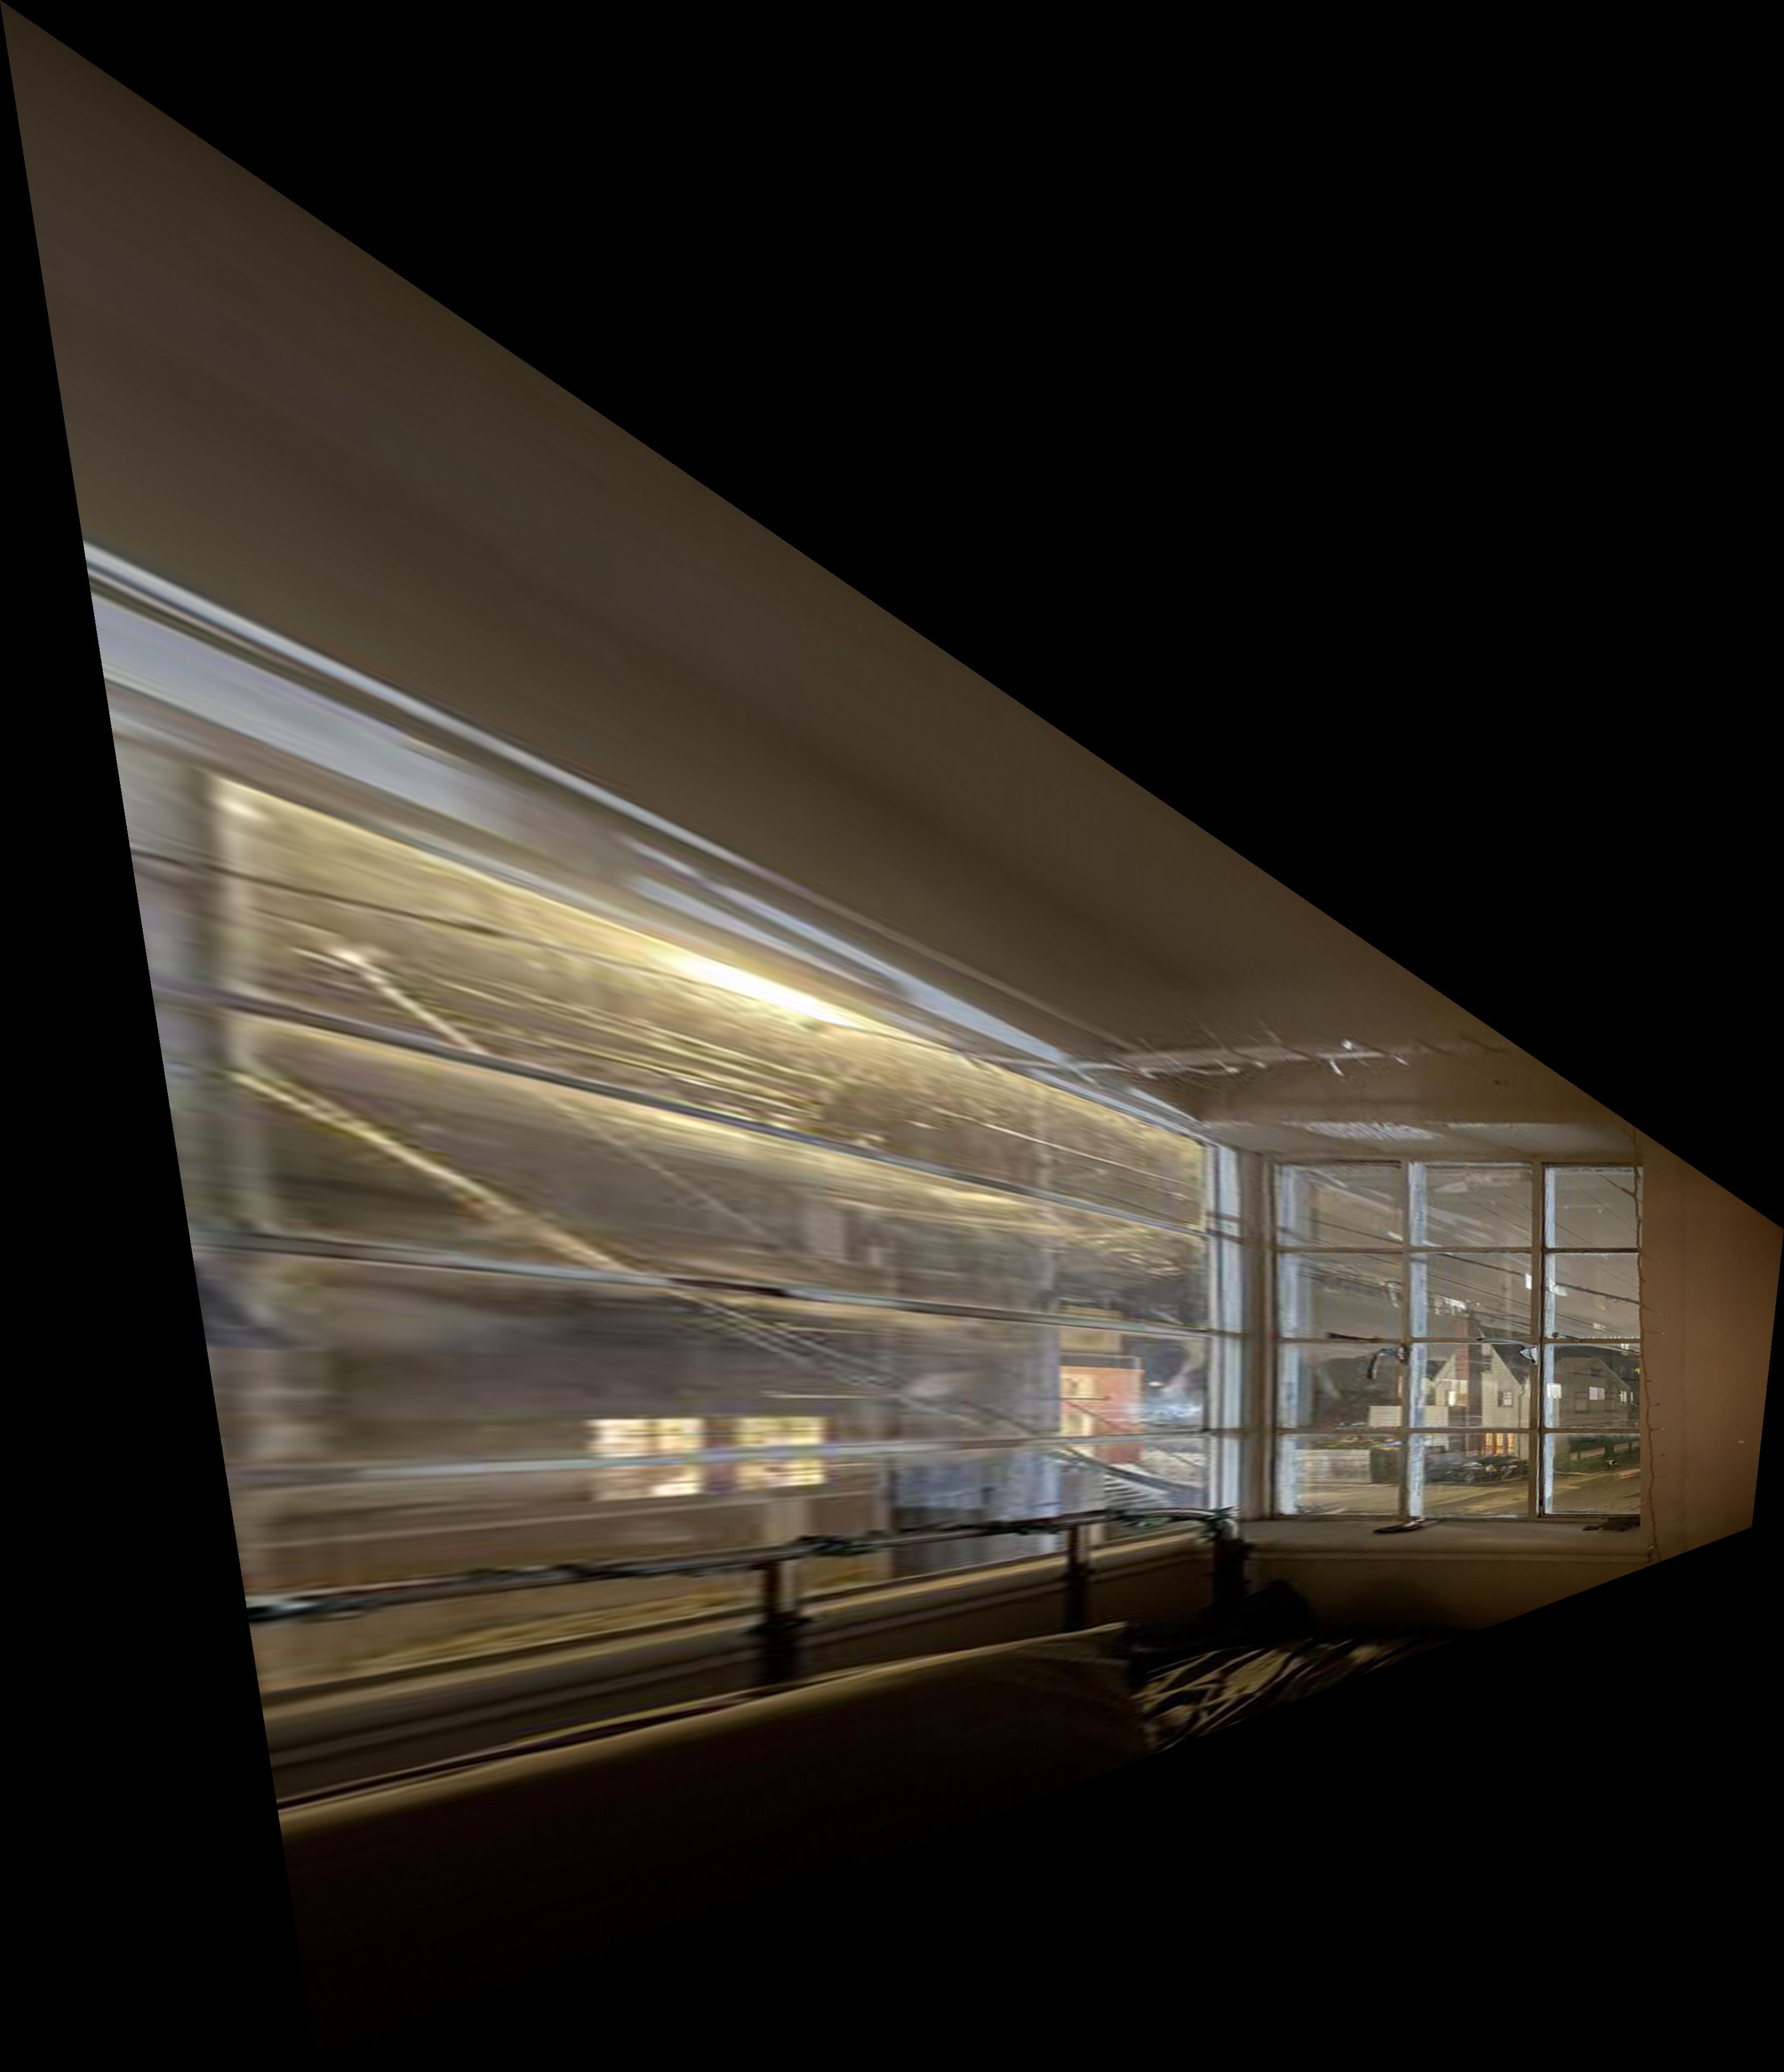
To rectify an image, I first recovered the desired homography transformation and then performed inverse warping with linear interpolation to obtain the pixel values in the final warped image. This entailed first transforming the corners of the original image into the target space by doing a forward warp, in order to determine the dimensions of the final warped image. Then, I created a blank image with those dimensions and performed an inverse warp on it with a small translation, in order to obtain the coordinates to interpolate within the original image. I then filled the blank image with the corresponding interpolated points.
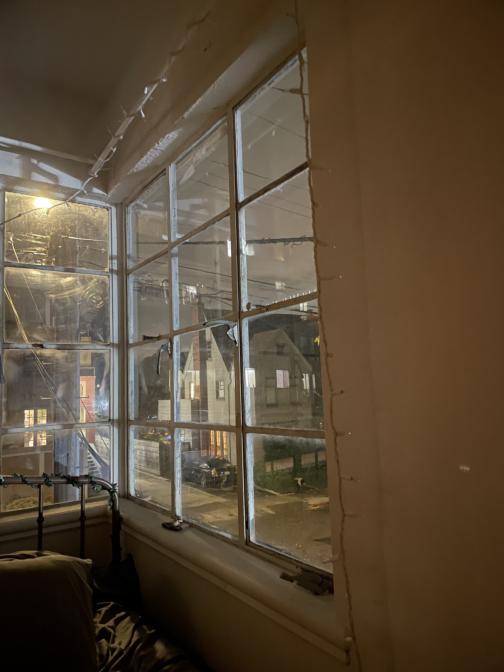
I was quite satisfied with the results in this section; my homography estimation and inverse warping methods were clearly working. It was cool to see how this worked in the extreme rectification case of the window (2nd example).

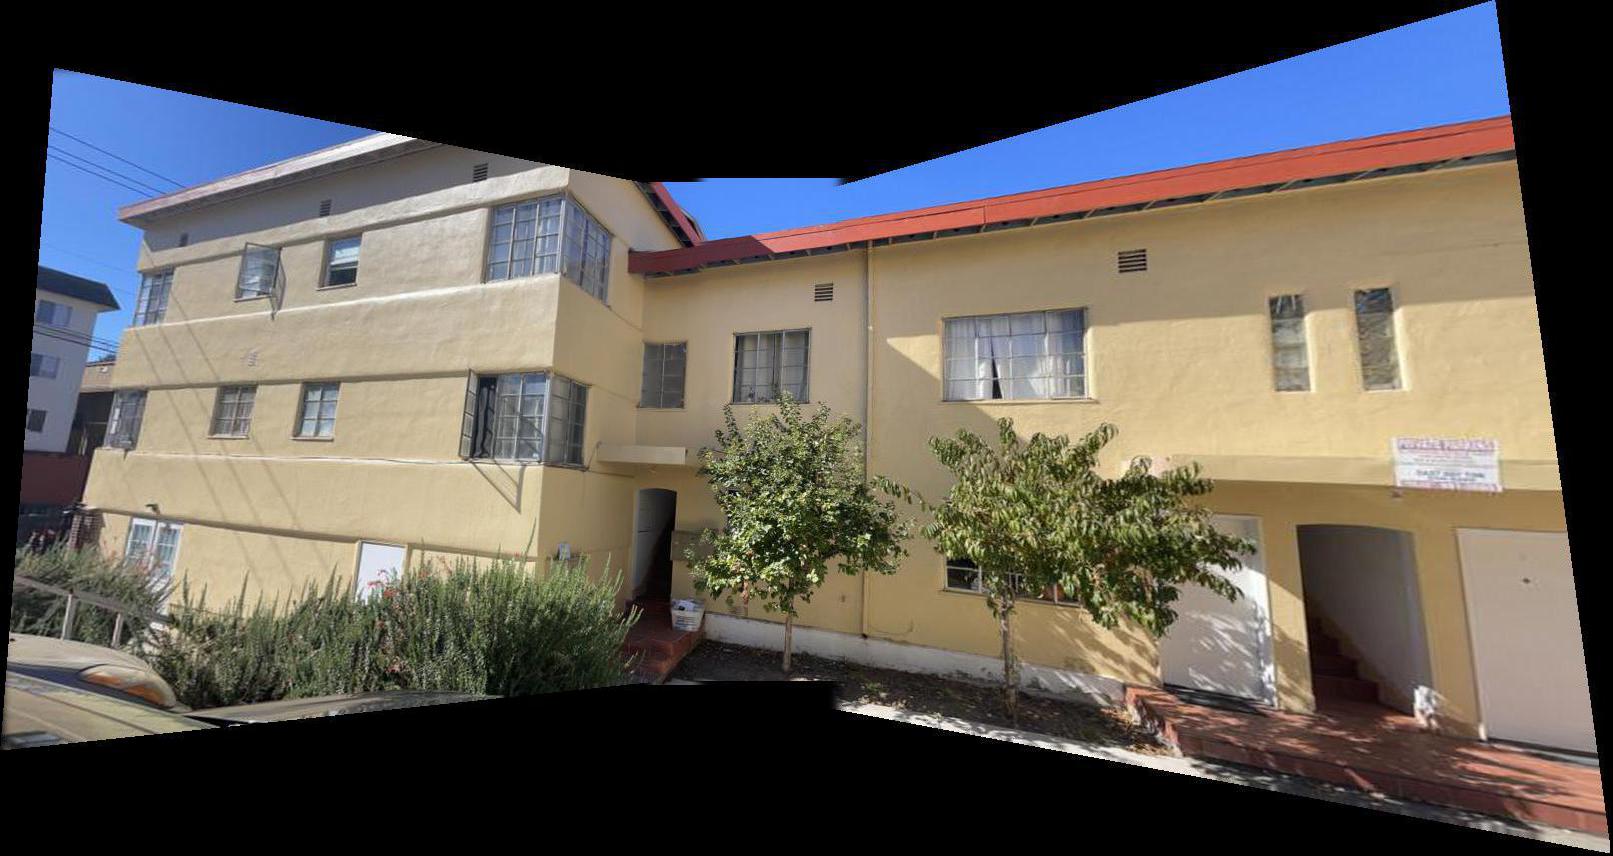
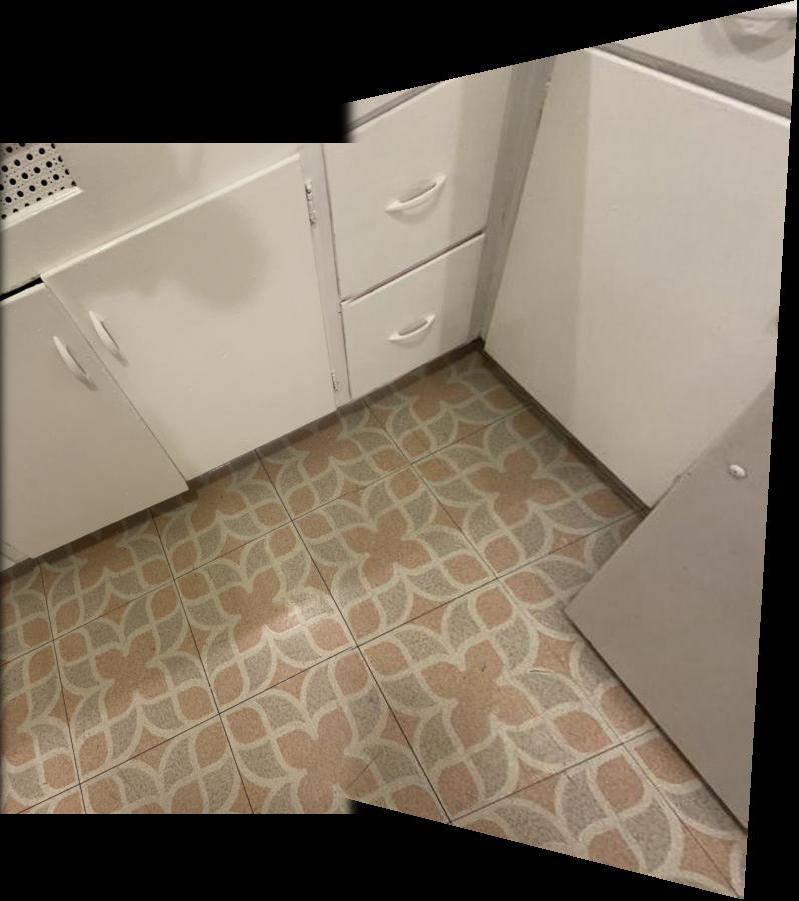
I constructed my mosaics by warping each image to another image in the mosaic. Then, I aligned each of these pairs through a simple x, y translation and finally, performed alpha blending. In the case of more than two images in a mosaic, I continue to align and alpha blend these pairs of images until one final mosaic is obtained. My code is generalized to support the alignment of any number of image pairs. My first mosaic is an example that uses three images. I was really happy with seeing all of my work come together in this result! I also love the red, yellow, and blue colors in the photo.

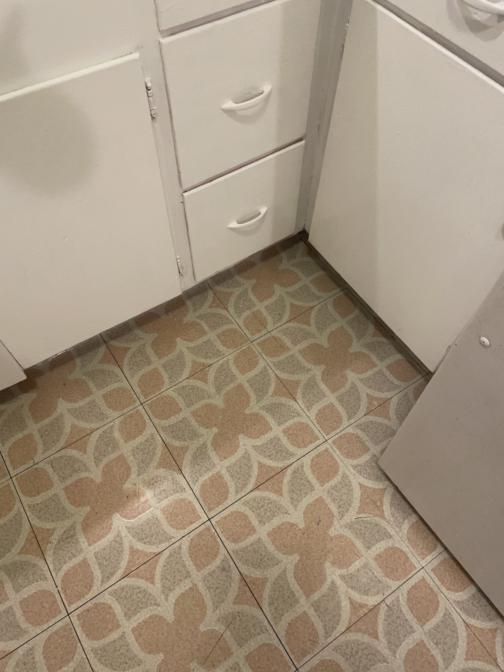
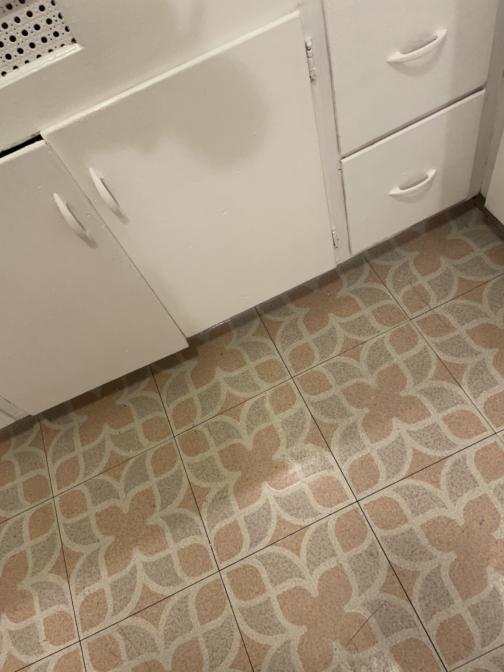
I was very happy with how flawlessly this linoleum result came out.
The most interesting thing I learned through this project is how difficult it is to take photos for a successful homography estimation and application. I went through many sets of photos, but eventually found that consistent lighting and good reference points are very important features for the photos to have.