Cs 194 Project 4a:

Image Warping and Mosaicing

Project Overview

The goal of this project is to stitch images together into an image mosaic by recovering homographies and using them to warp images into alignment.

Part 1: Shoot the Pictures

The goal of this part is to take pictures that can be aligned and blended into a mosaic. It was important to take pictures standing from the same location, just rotating the persepctive of the camera. The pictures should also have a significant amount of overlap, allowing us to select correspondence points between images for alignment purposes. I also took pictures of items that would be used for image rectification. I made sure that these items were rectangular in nature, but due to camera perspective, they would appear slanted in the original image.


Images for rectification:

Music Folder
Laptop

Mosaic Image Sets


Image Set 1: Living Room
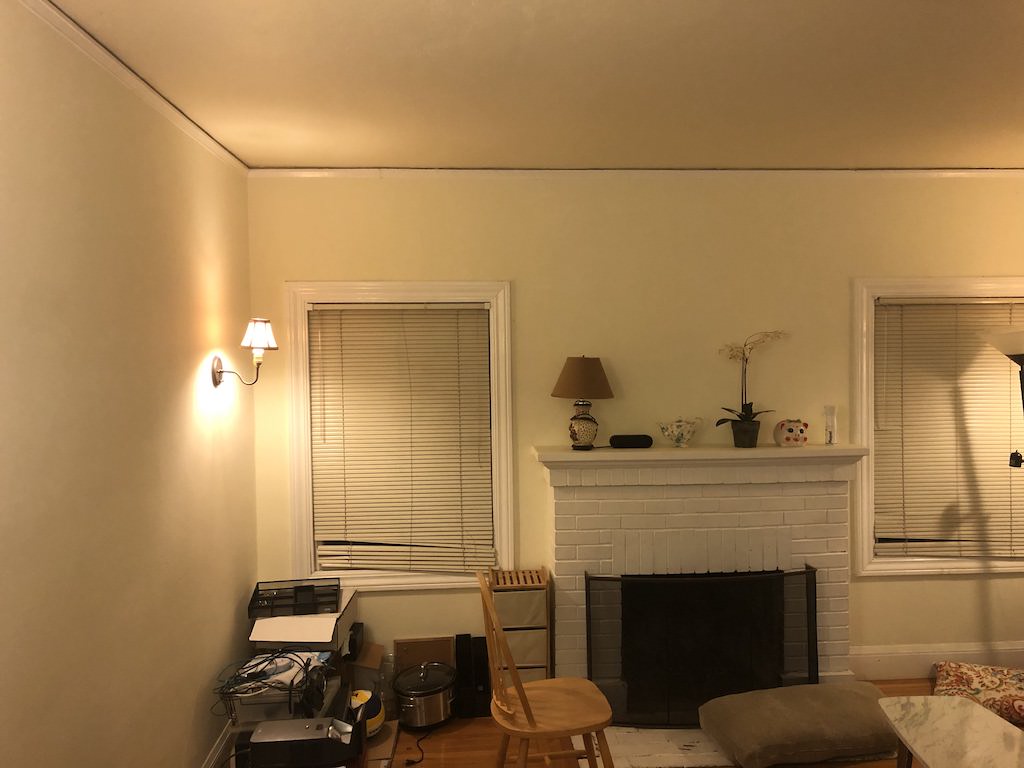
Living Room Left
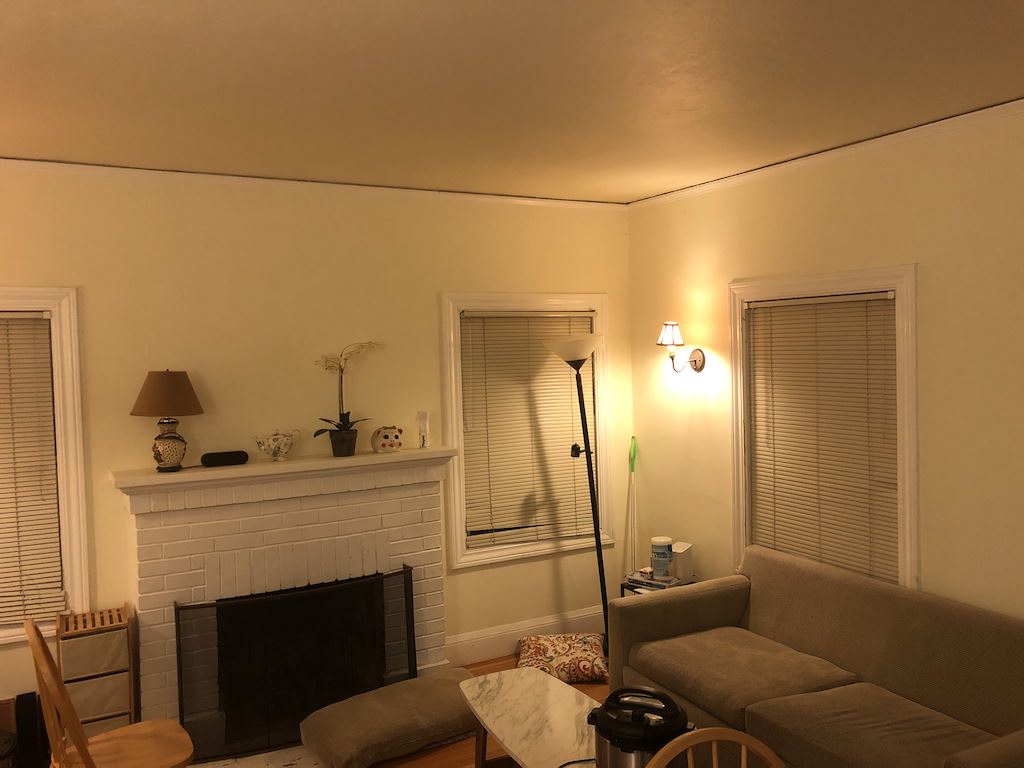
Living Room Right

Image Set 2: Side of HMMB
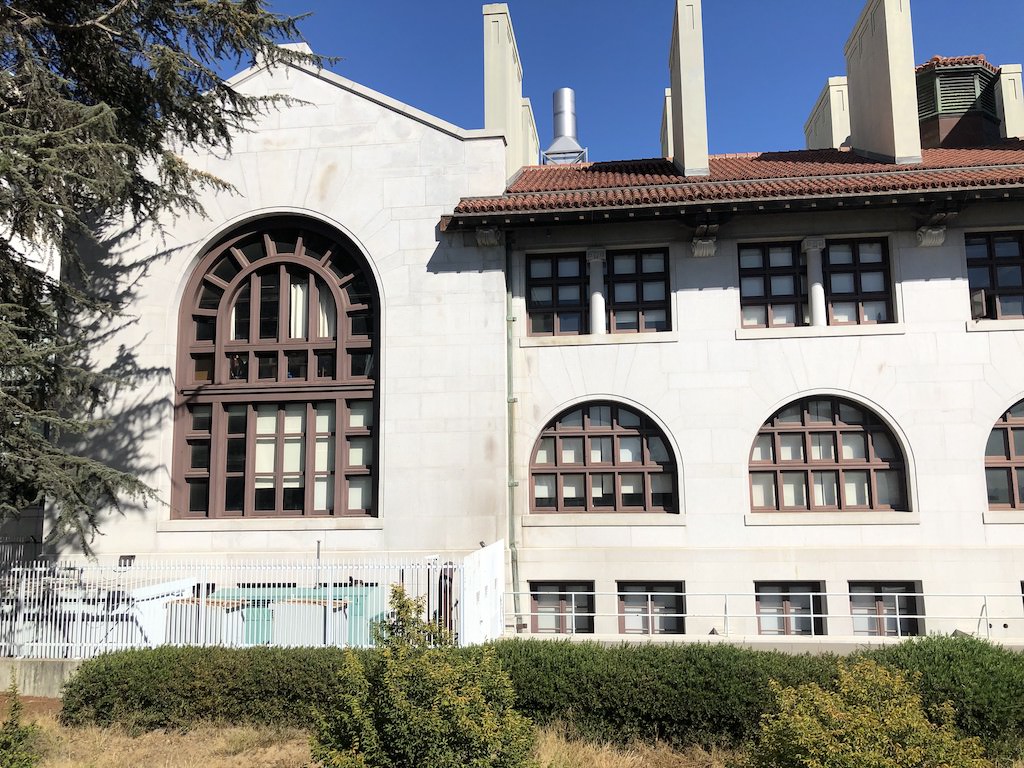
HMMB Left
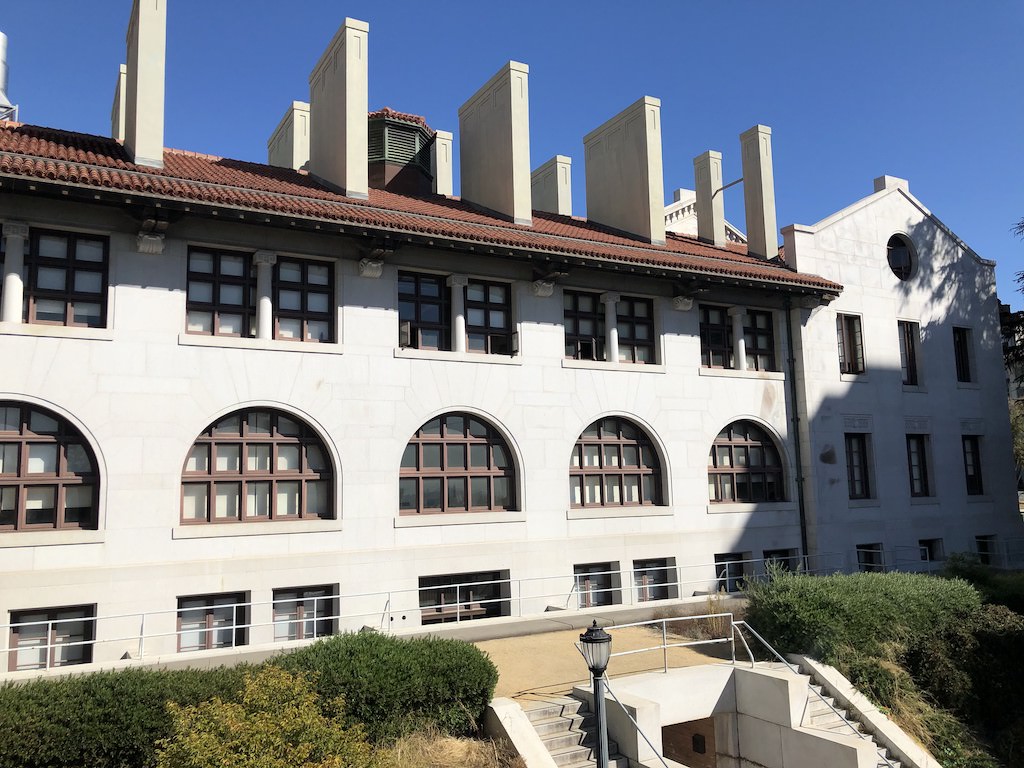
HMMB Right

Image Set 3: Wheeler Hall
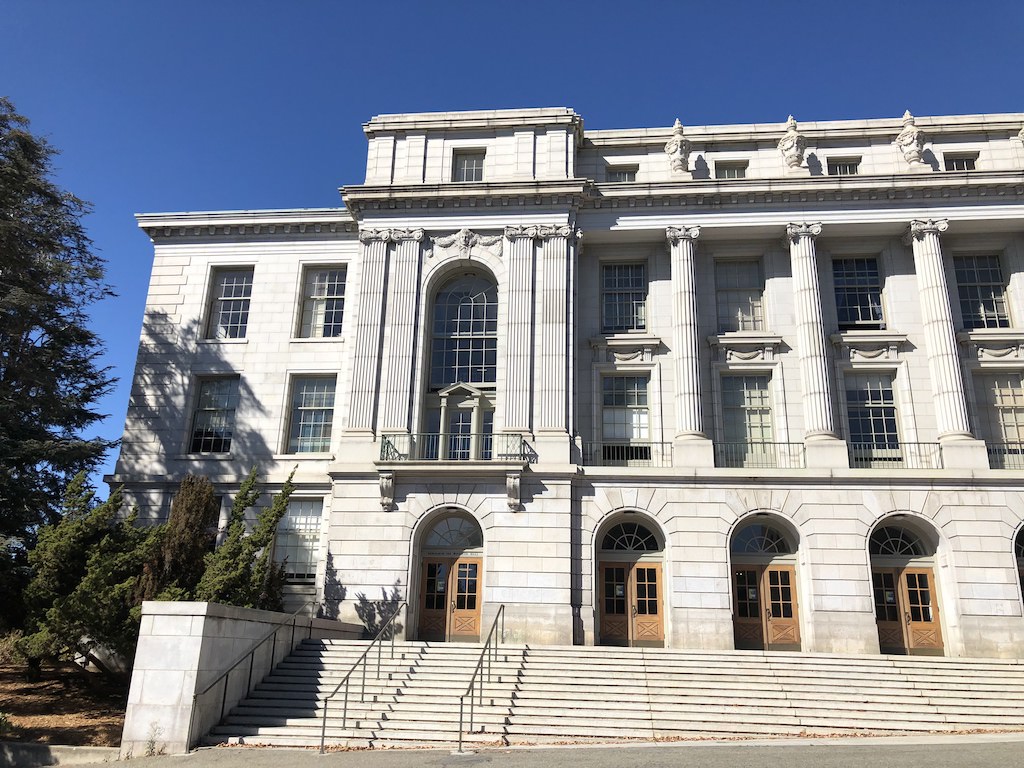
Wheeler Hall Left
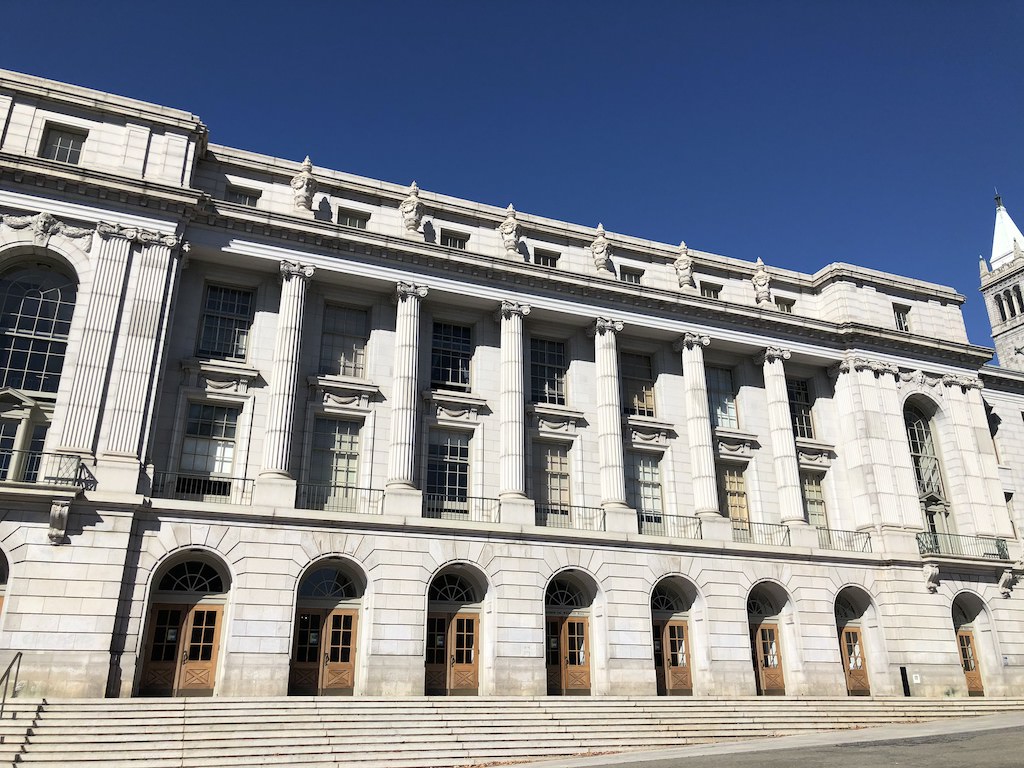
Wheeler Hall Middle
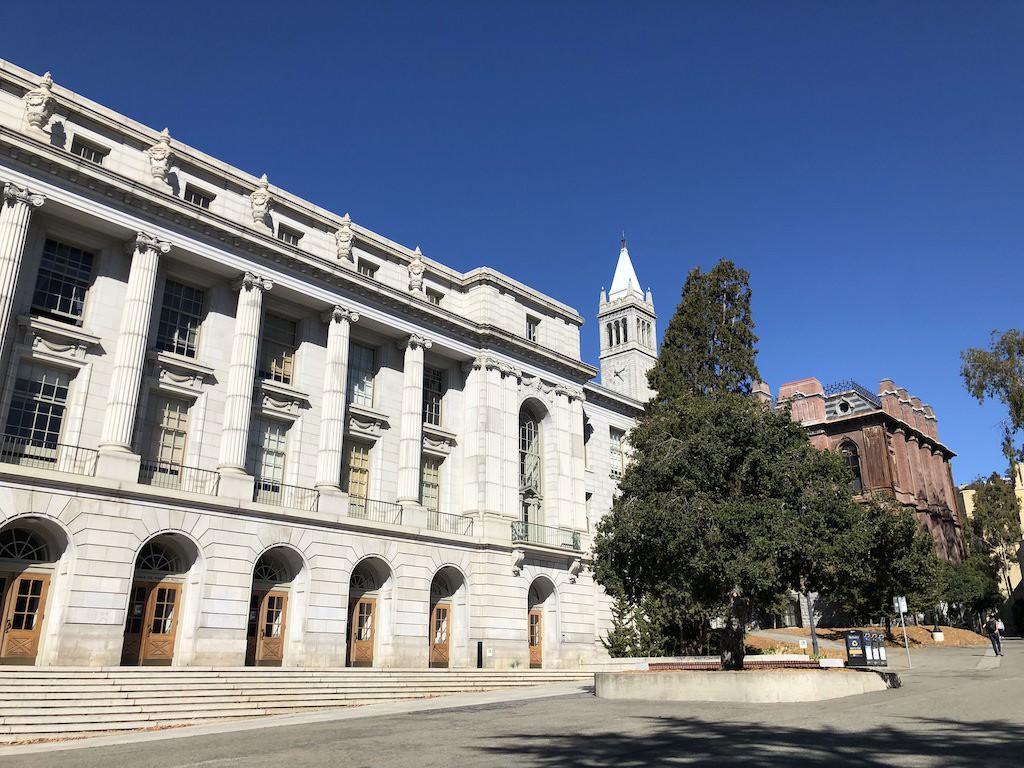
Wheeler Hall Right

Part 2: Recover Homographies

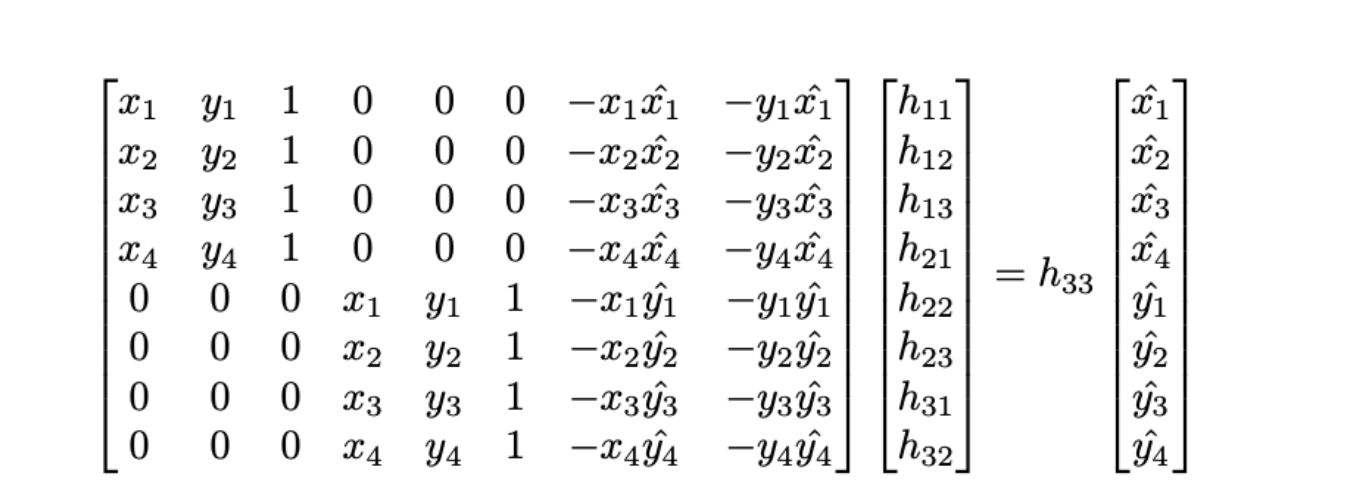
In order to recover homographies between images, we first select points of correspondence between our two images. Then, we can set up the following equation to map from the points of one image to the other:

We can then rewrite this equation in the form of a matrix multiplication equation, which will allow us to use least squares to solve for the elements of H. We solve for the first 8 elements of H, as we assume that the lower right element h33 is always 1.


Source: https://towardsdatascience.com/estimating-a-homography-matrix-522c70ec4b2c

Part 3: Warp the Images

Now that we have our homography matrix, we can warp images. To warp an image, I create a meshgrid of coordinates, and then inverse transform these coordinates to get their mappings. Then I call cv.remap with linear interpolation in order to map pixels in the image to the interpolated values at their mapped coordinates. See below parts for examples of warping in both image rectification and image stitching.

Part 4: Image Rectification

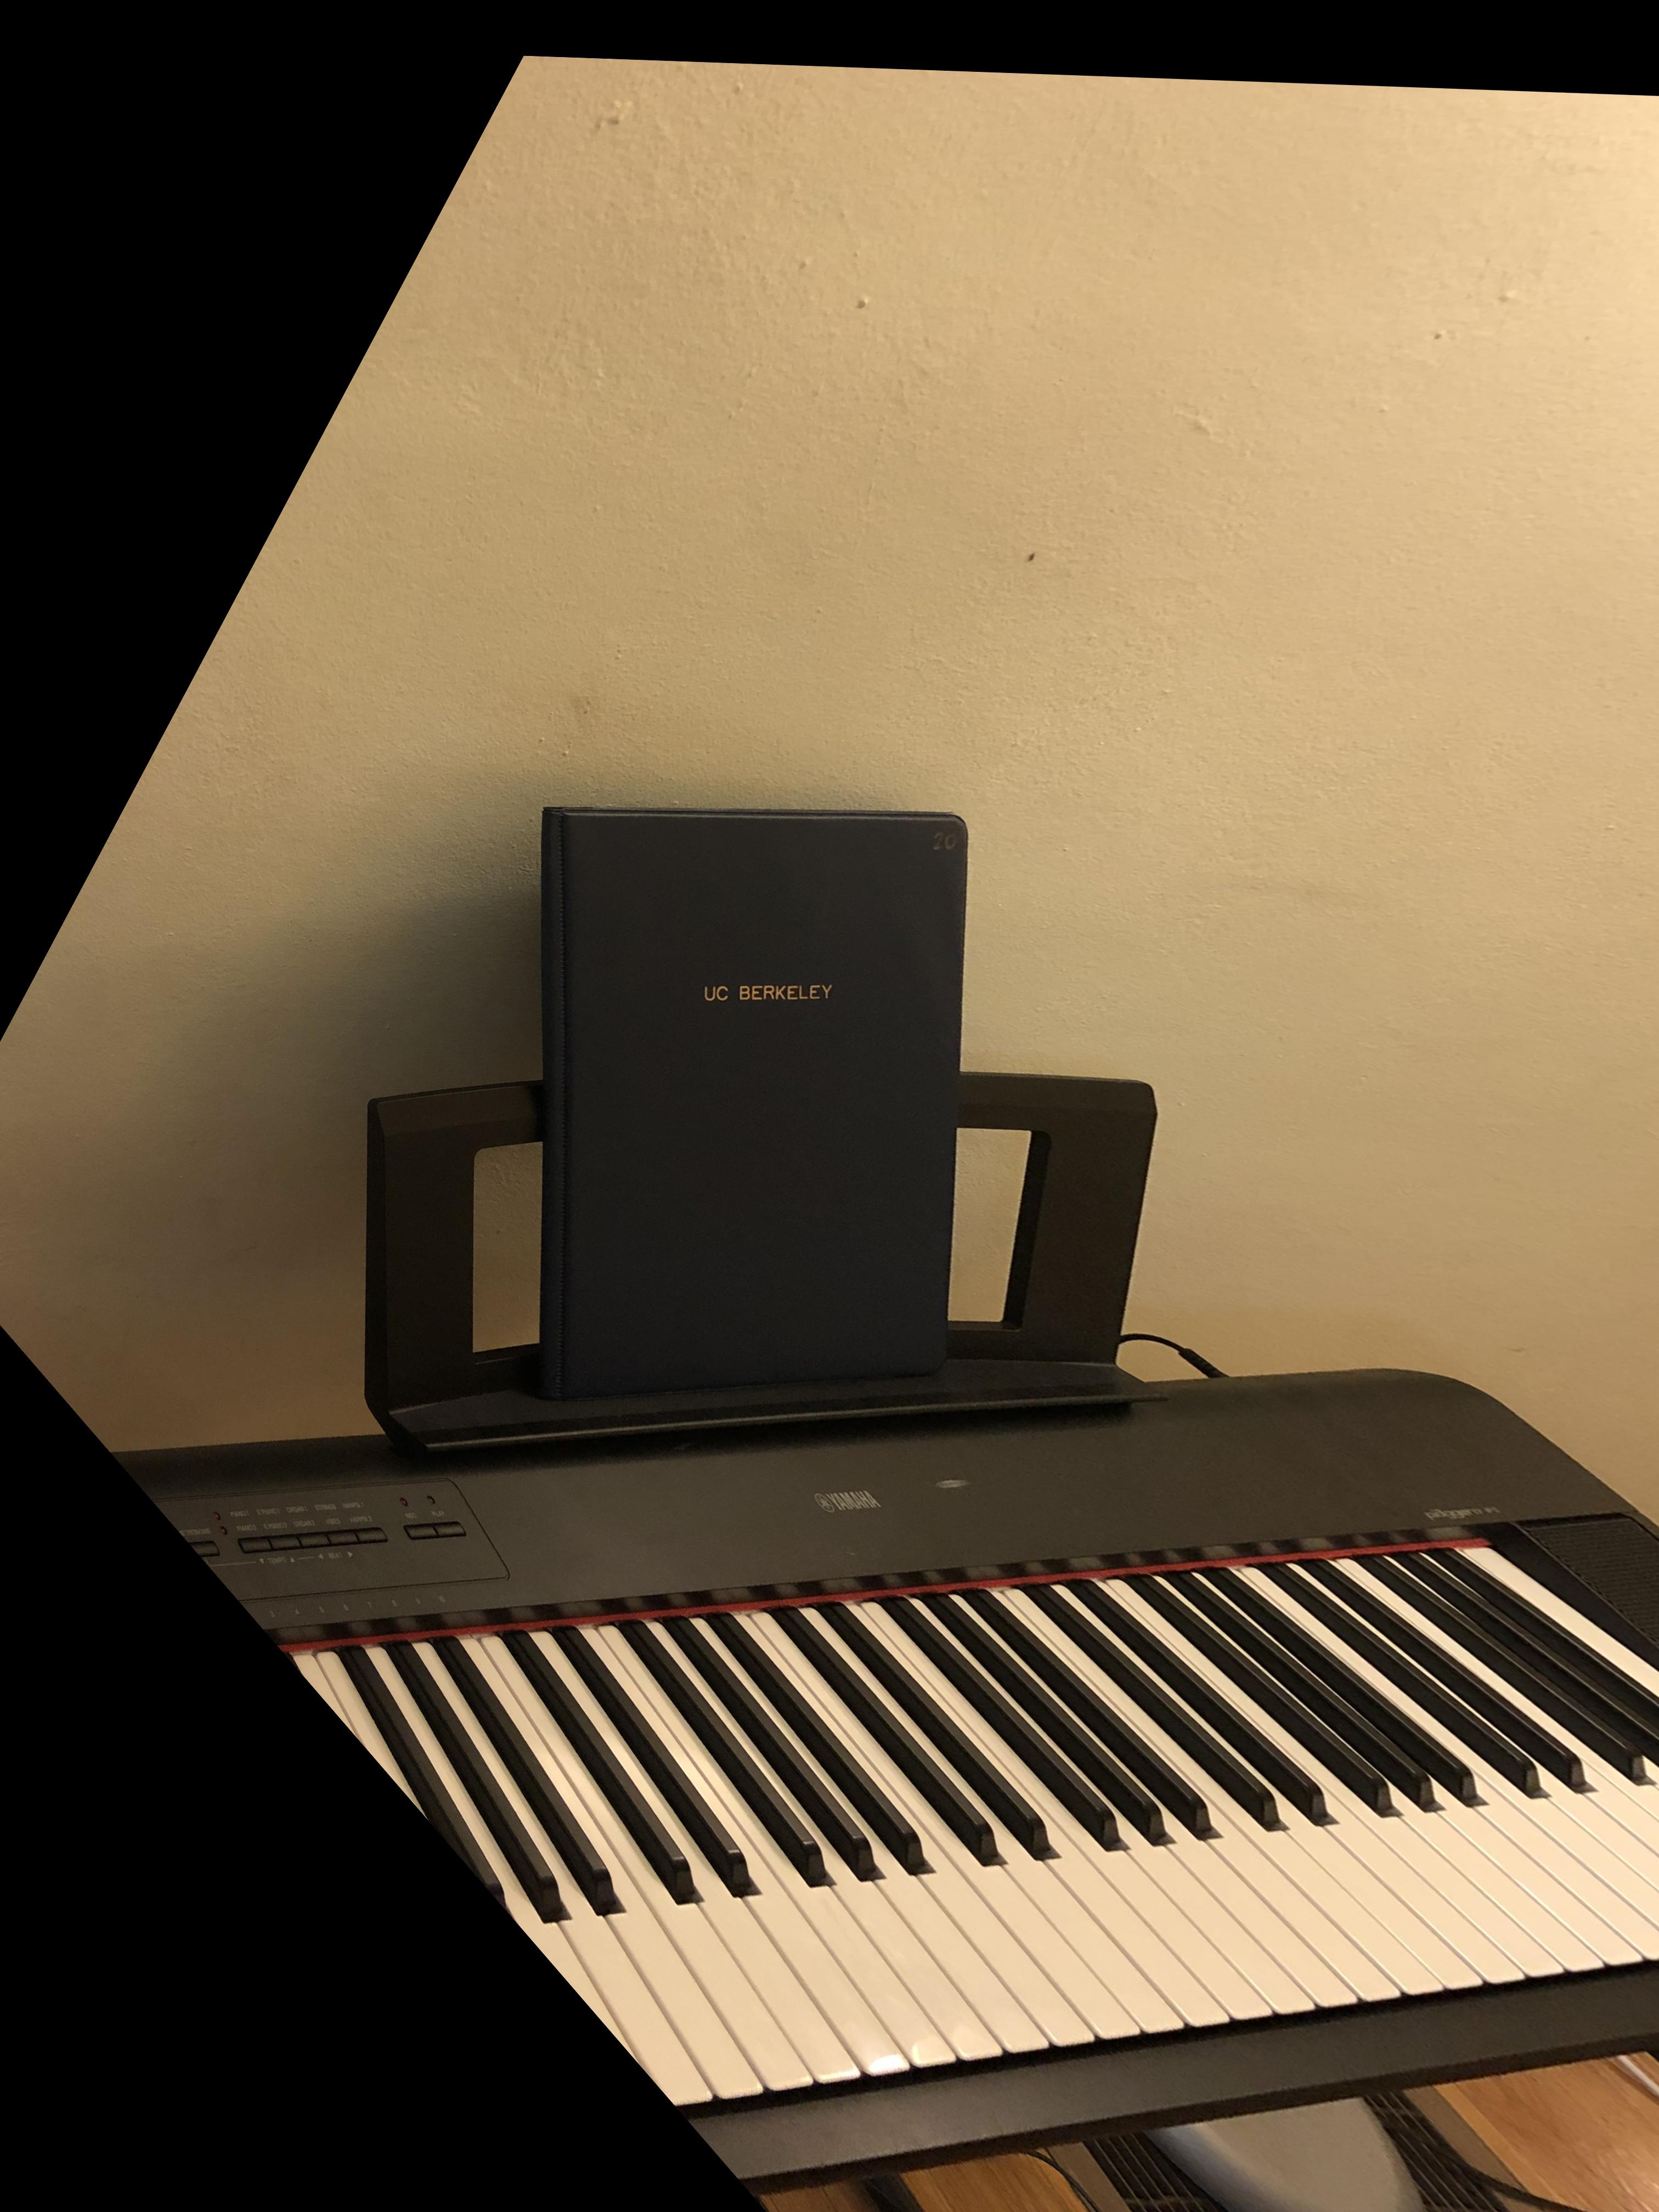
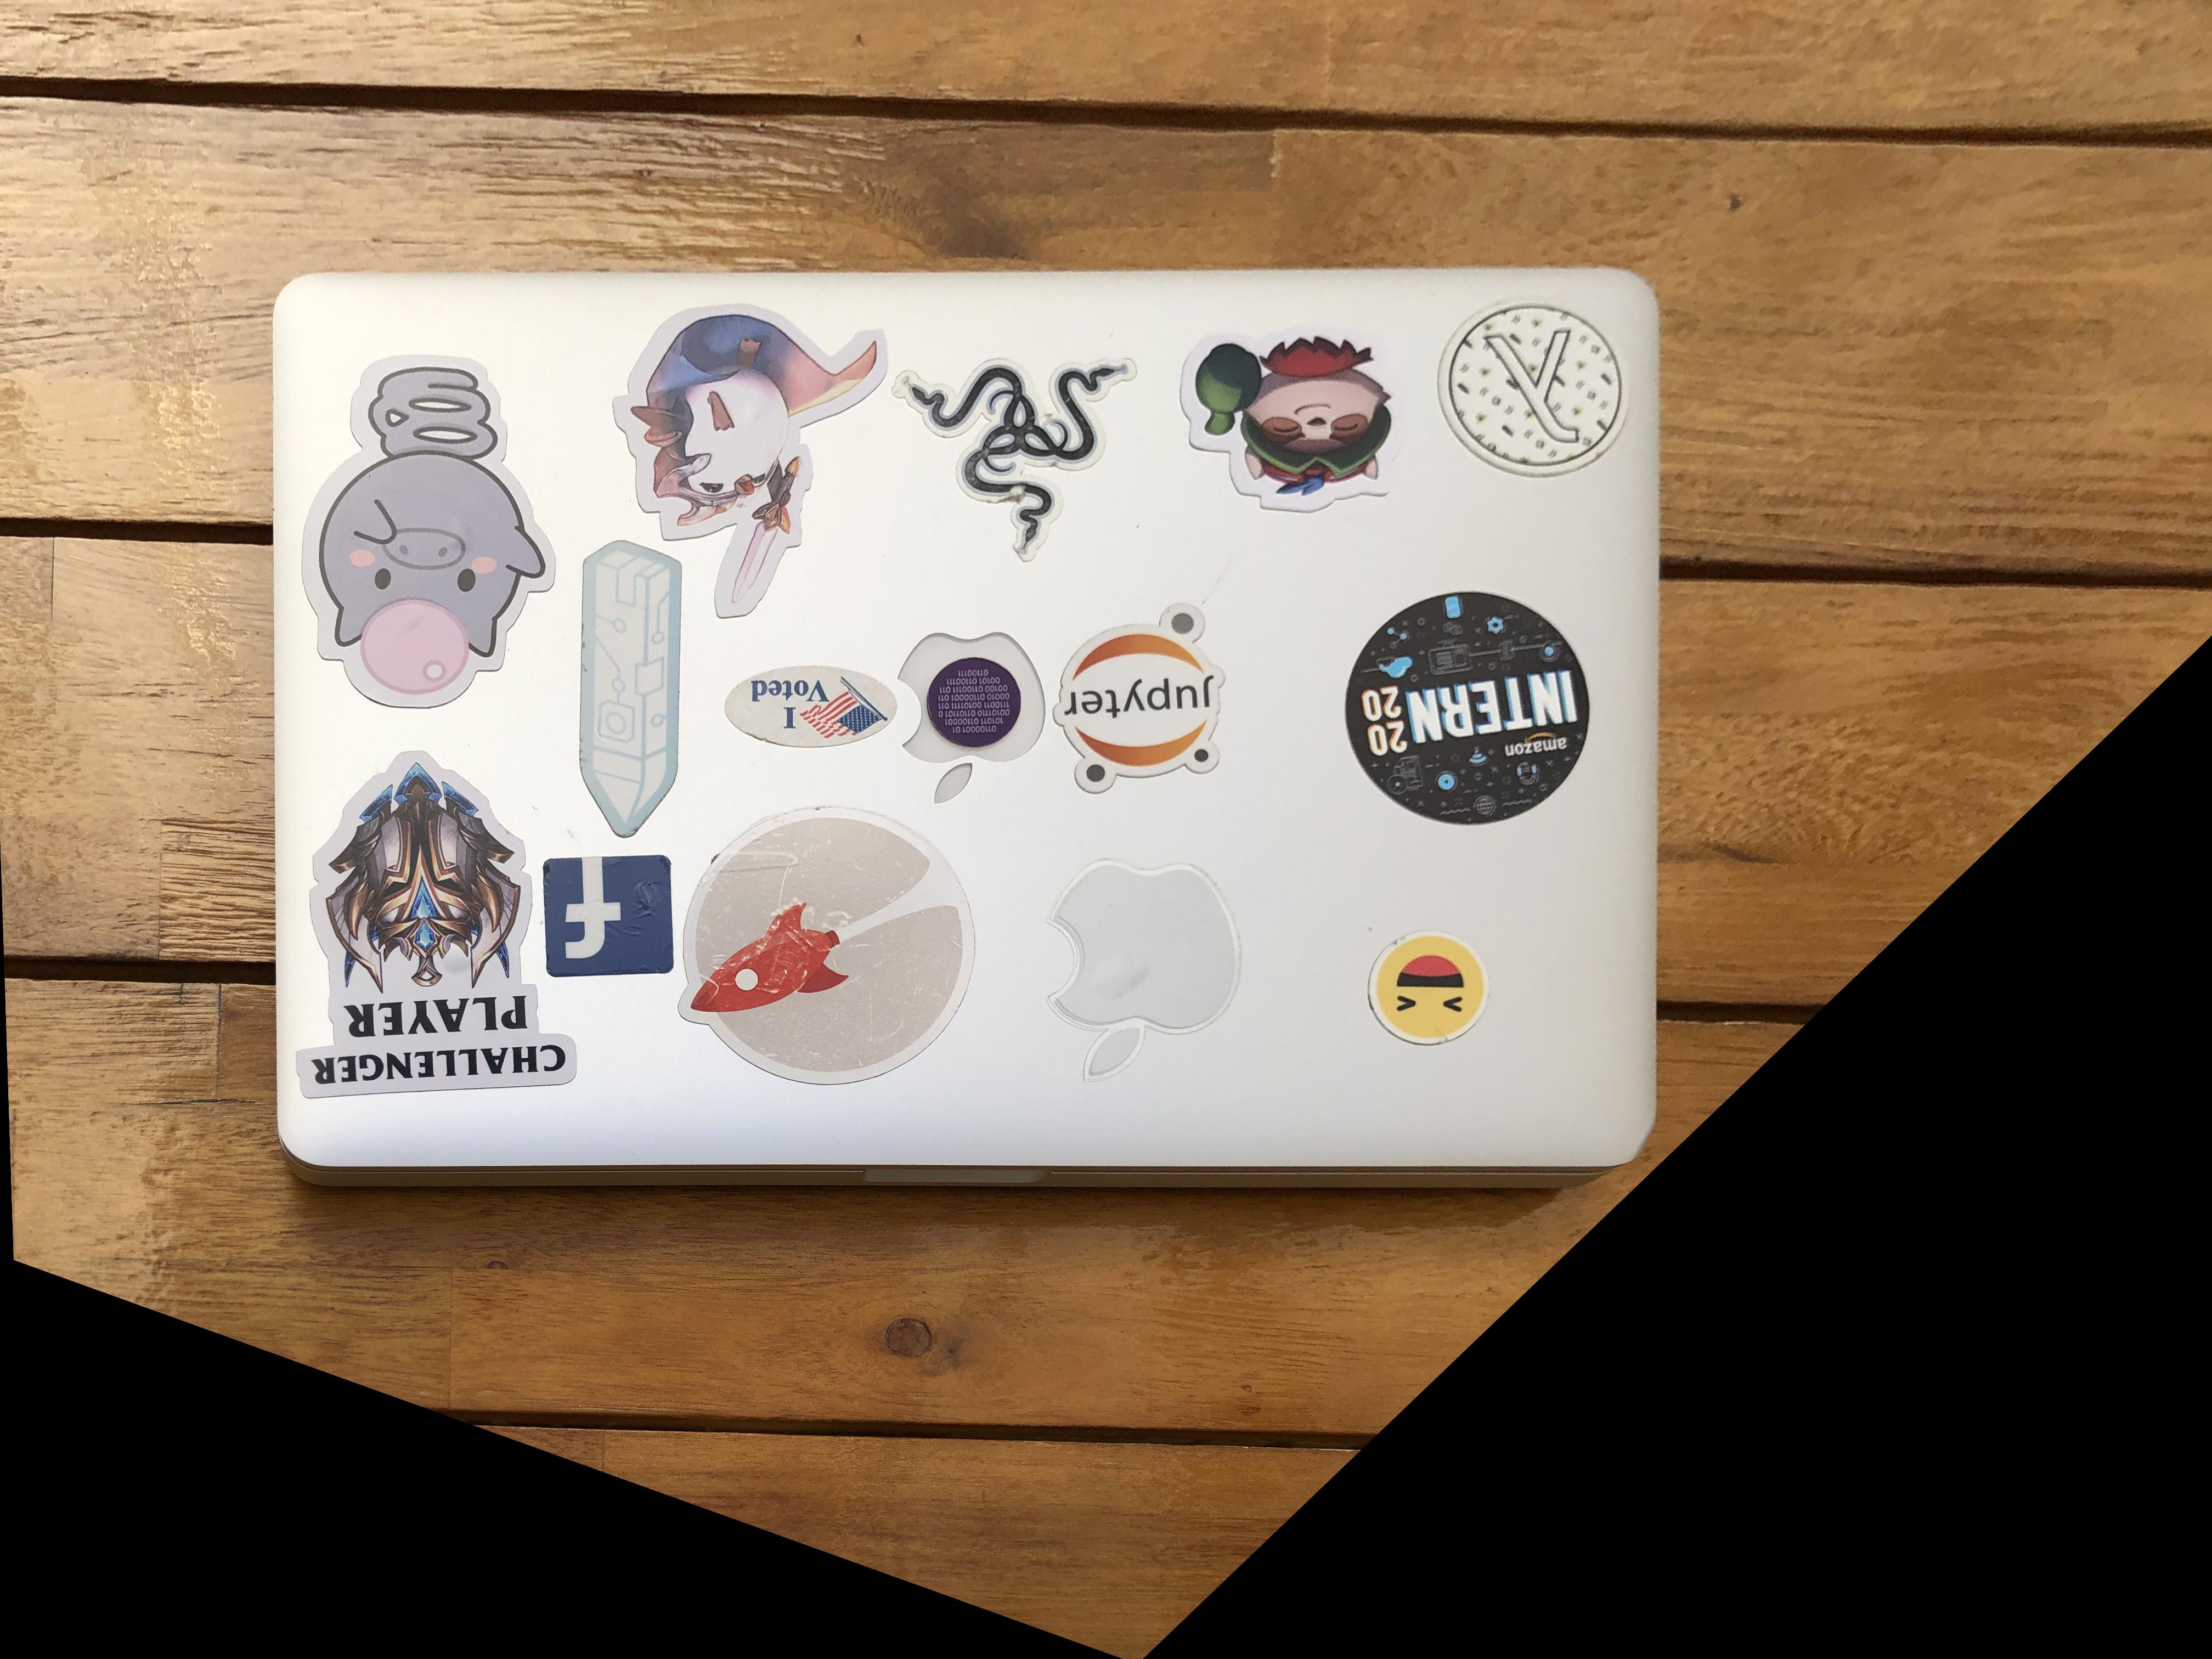
In image rectification, we want to warp an image such that our object of interest appears to be planar. We select the four corners of our object, and find the homography between those points and a rectangular point set. Then, we perform a warp using this homography.


Examples of rectified images

Original Music Folder
Rectified Music Folder
Original Laptop
Rectified Laptop

Part 5: Image Mosaic

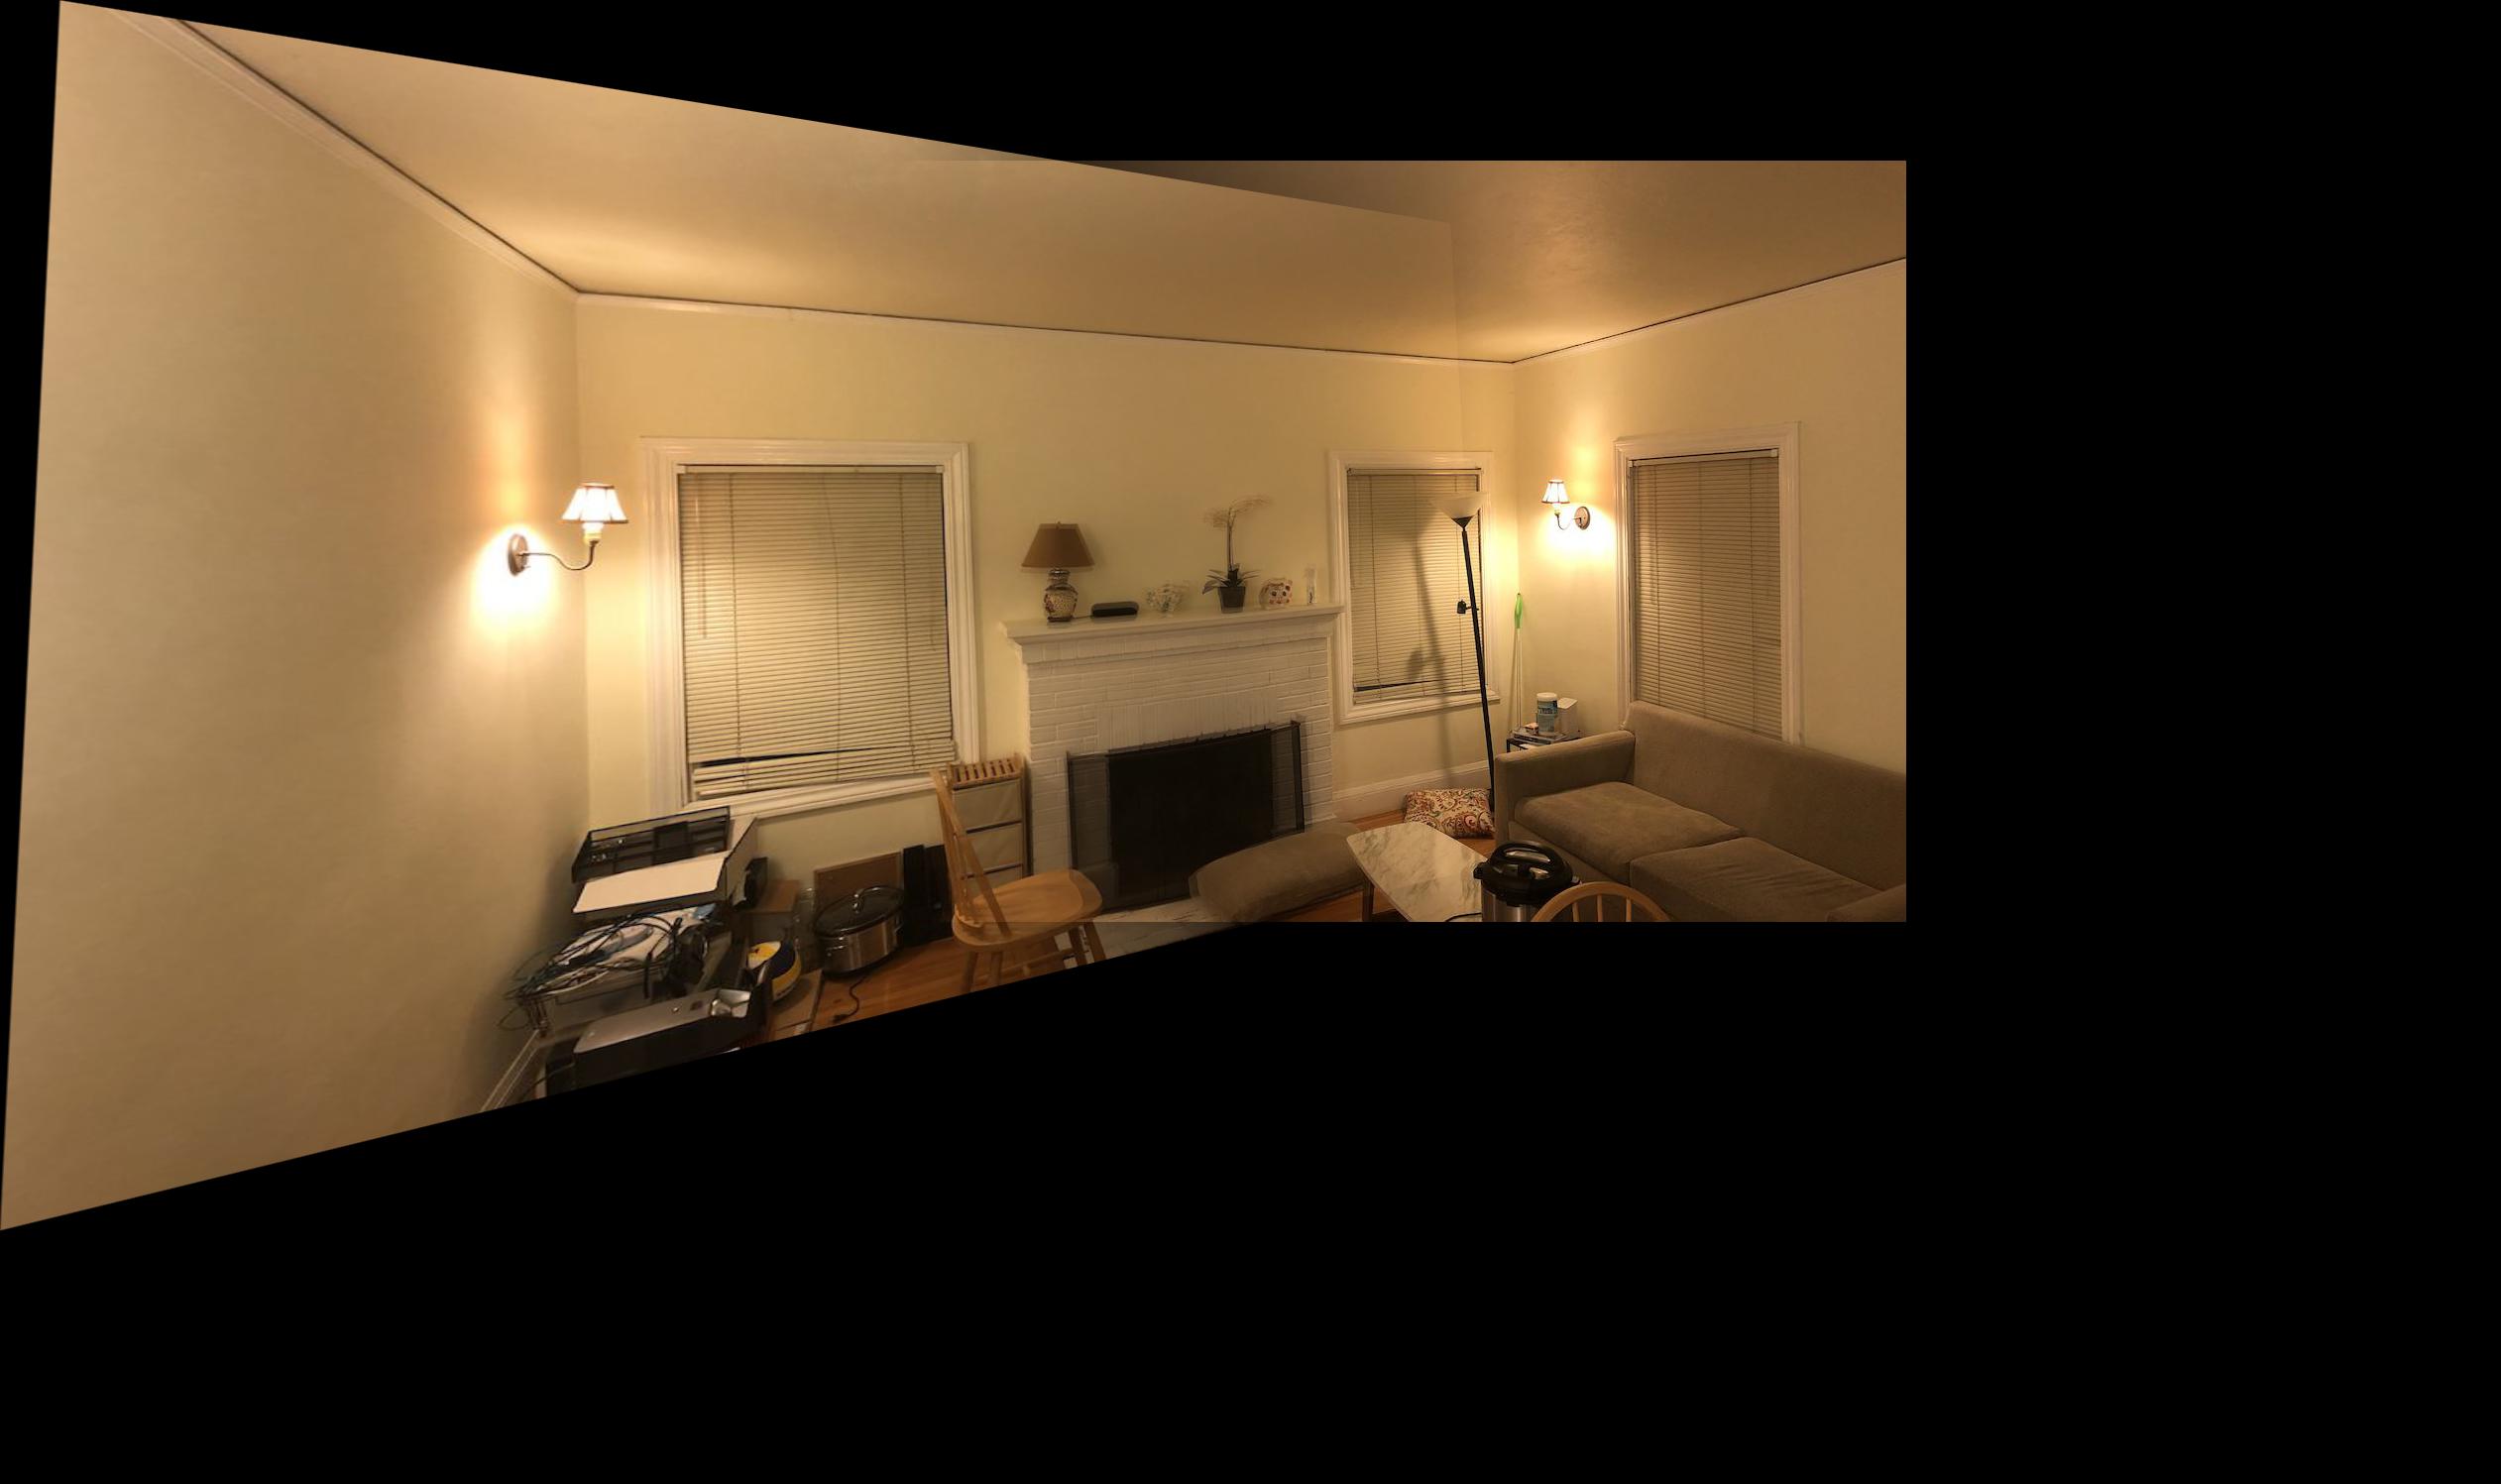
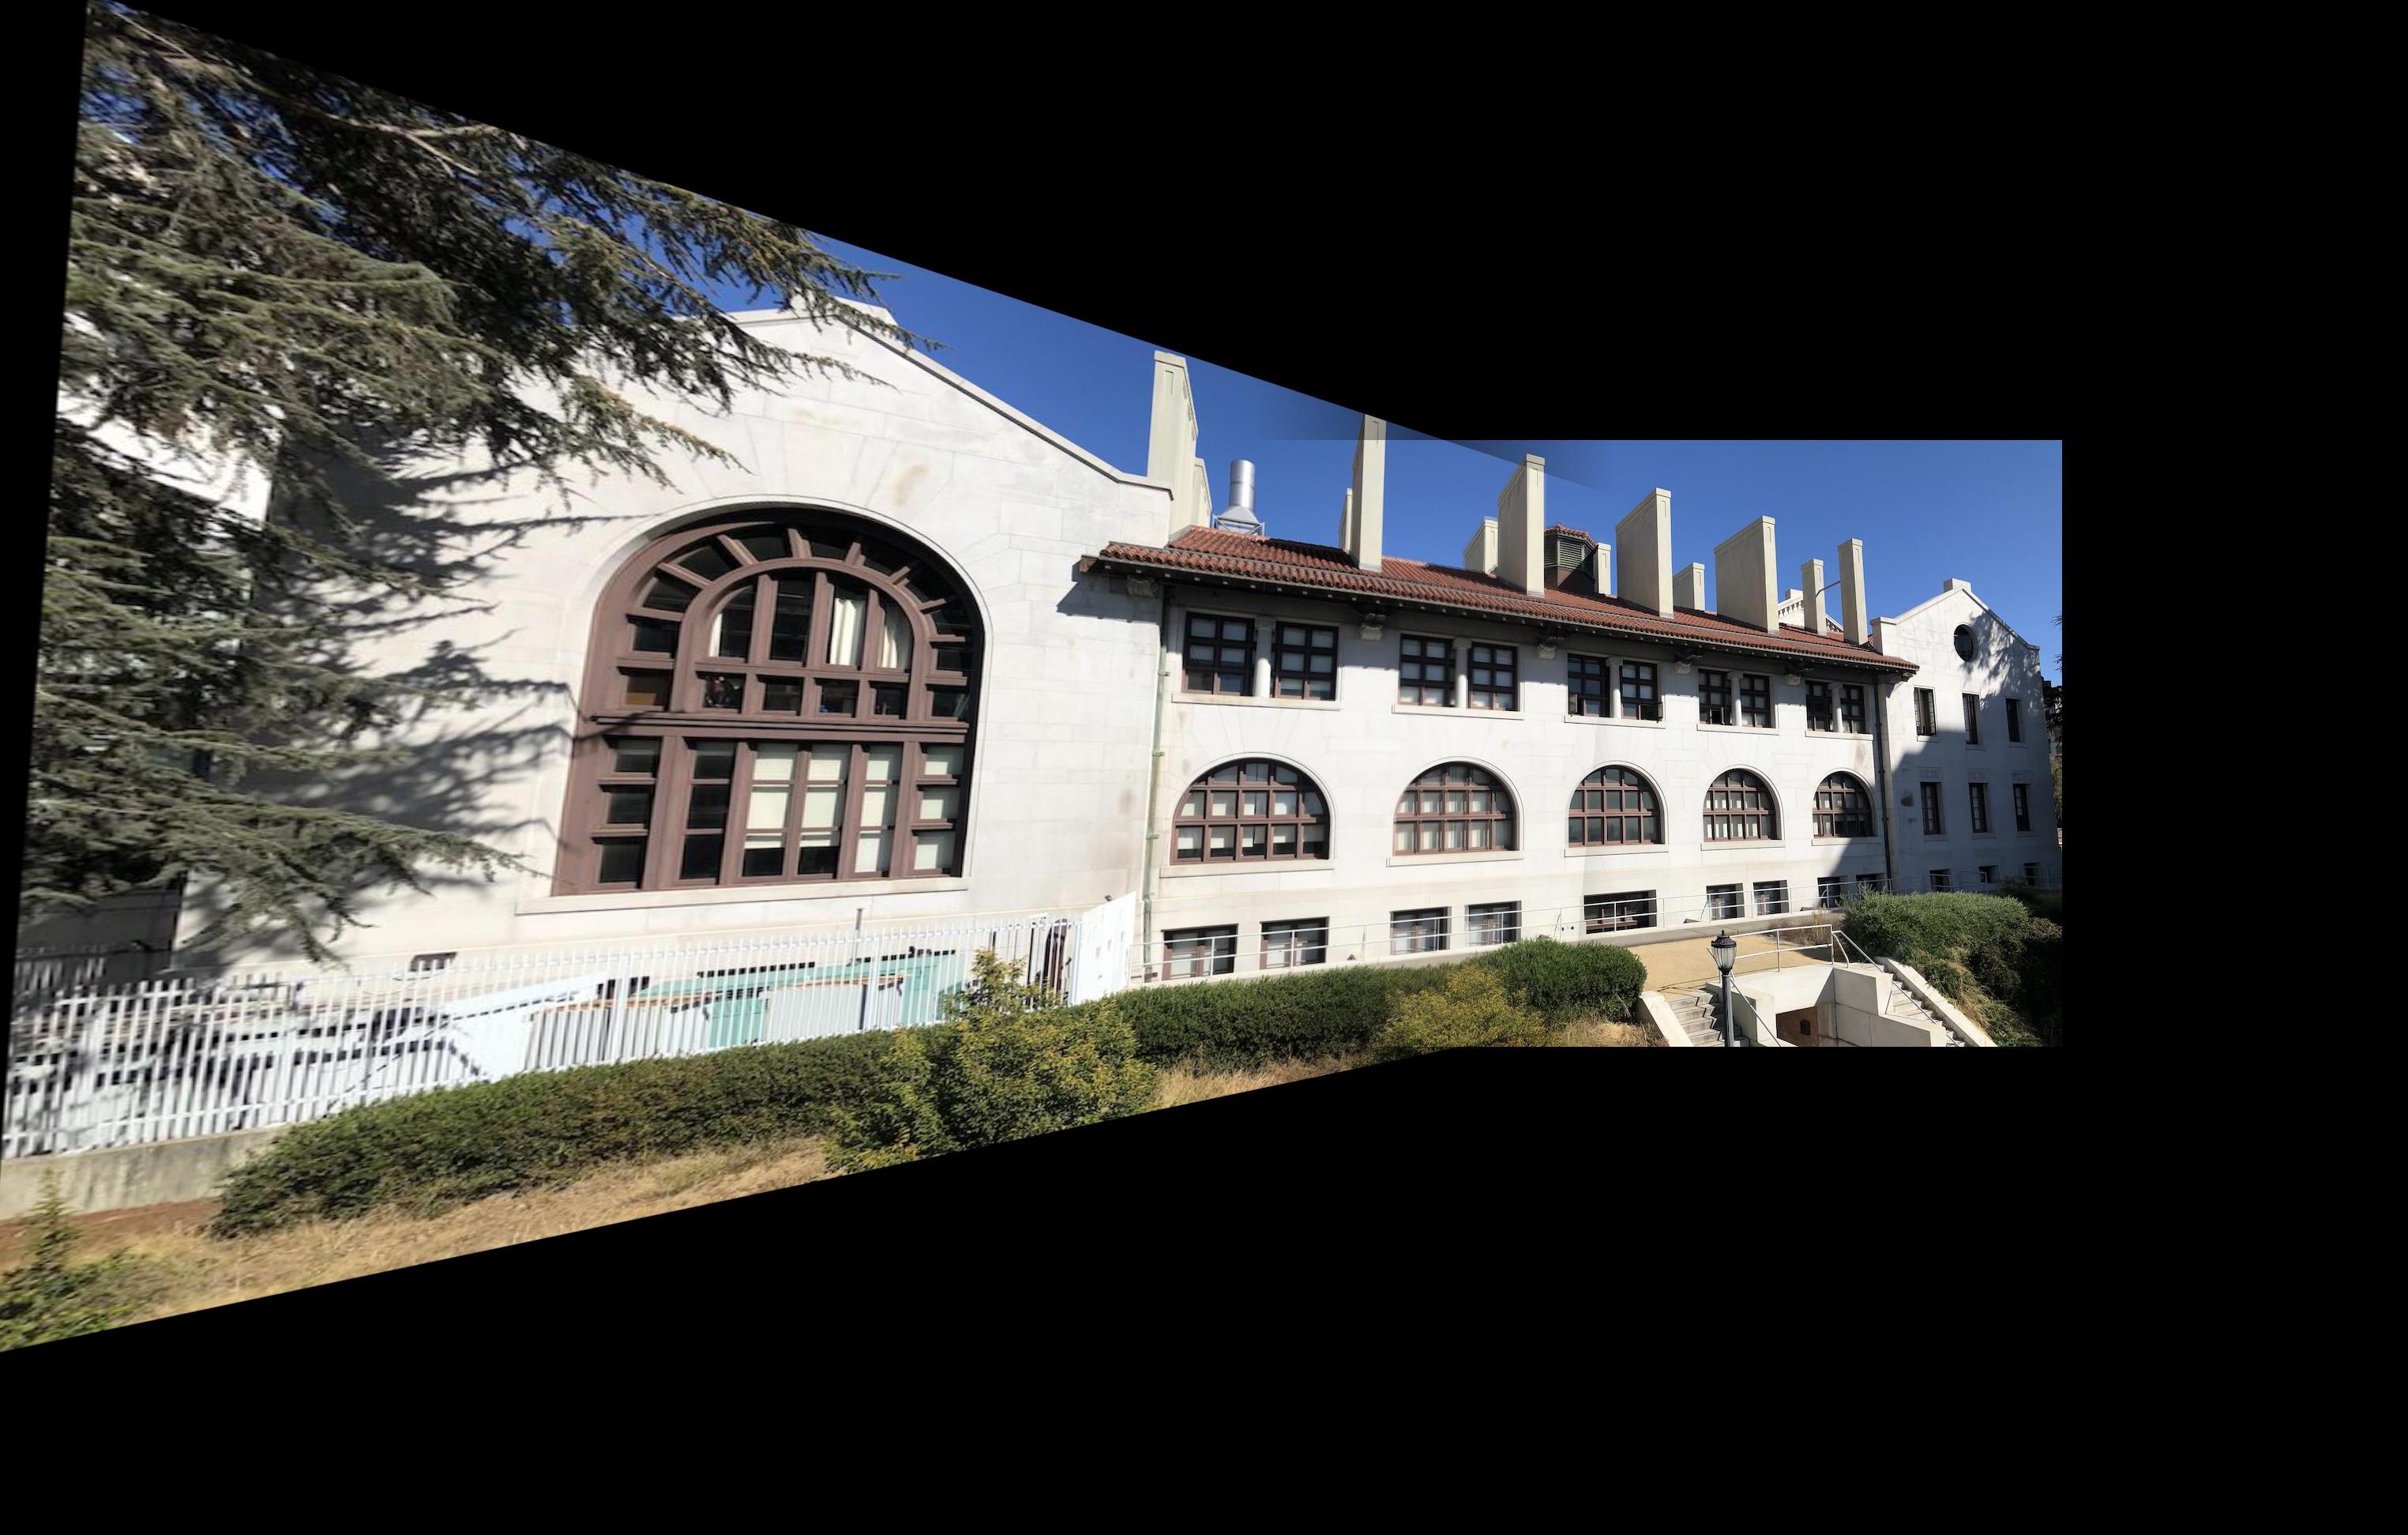
The goal of image mosaicing is to stitch together two or more overlapping images in order to create one panoramic image. For my implementation of mosaicing, I always warped the left image onto the right image. I first found a homography from the left image to the right image. Then, I applied that transformation to my left image corners to see what the transformed corners would look like. This helped me determine the appropriate x and y shifts that I would need to perform on my transformed image in order to keep it fully in the image frame. Next, I transformed my left image correspondence points using the homography matrix. This helped me determine where the points would lie post transformation, allowing me to determine shifts I would need to perform on the right image to align the points properly. I then created a canvas large enough to hold both of my images. I performed the warp on my left image, and shifted it to the appropriate location in the canvas. I also shifted my right image to its appropriate location. To blend the edges nicely, I used a linearly changing weighted average at the intersection points of the two images, and preserved the pixel values of left and right images outside of the intersection.


Living Room

Room Left
Room Right
Room Mosaic


HMMB Side View

HMMB Left
HMMB Right
HMMB Mosaic


Wheeler Hall

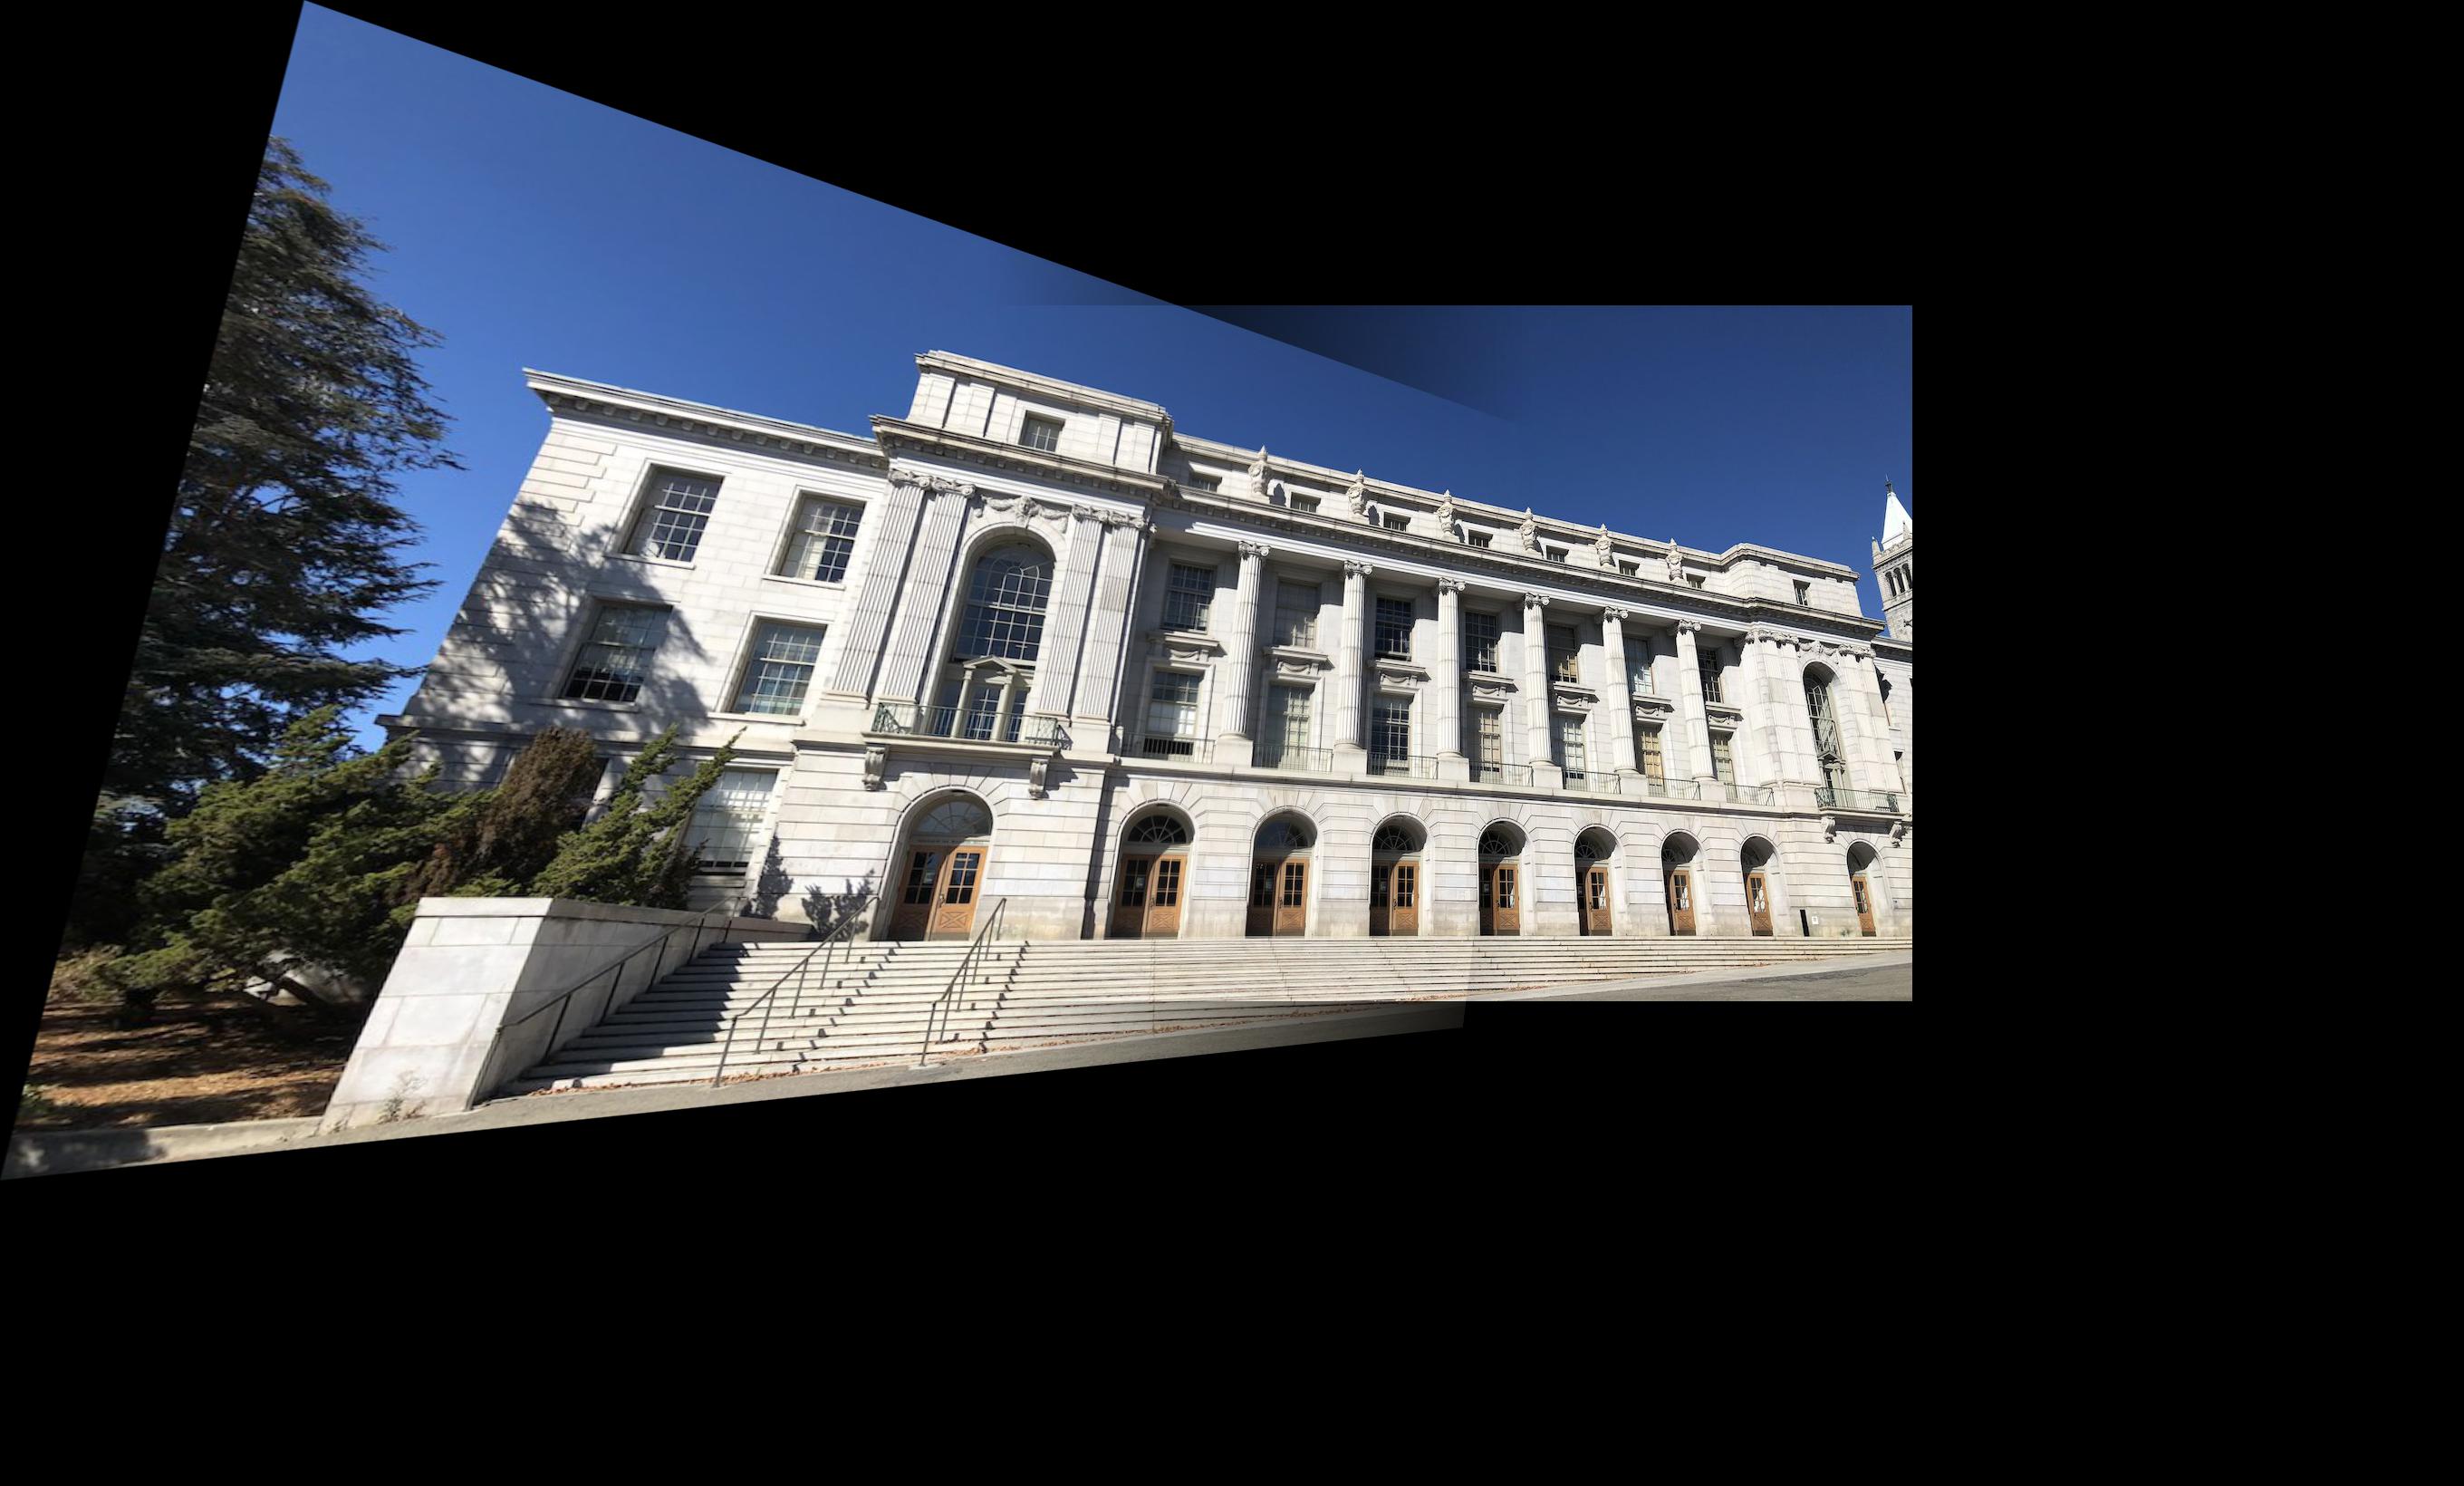
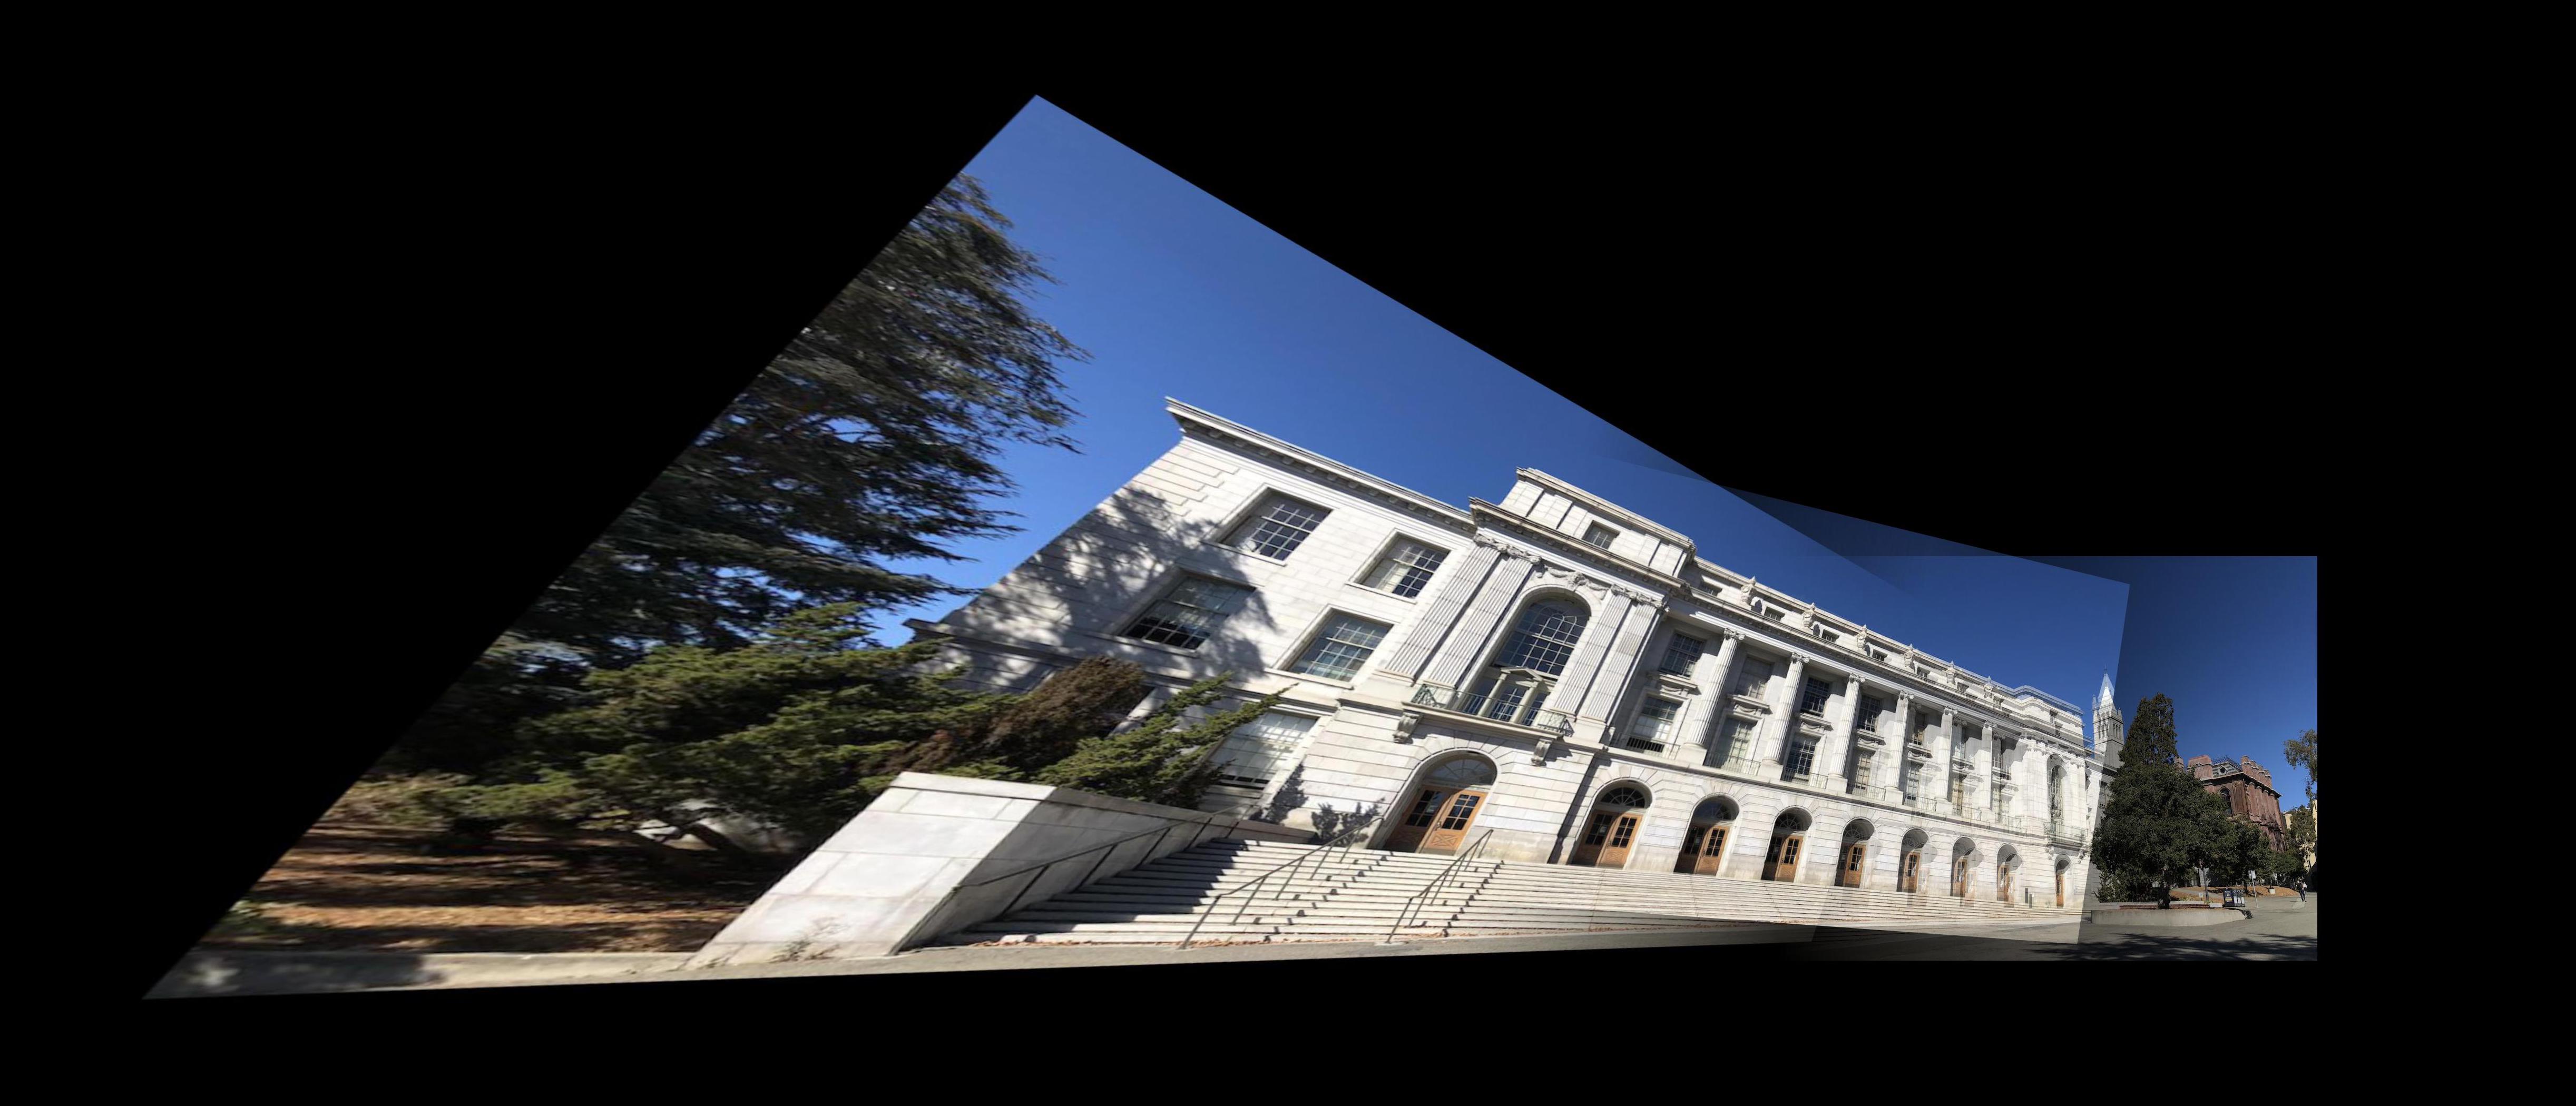
For my Wheeler Hall mosaic, I attempted to stitch together three images by first stitching together the first two, and then stitching the result of that with the third. The result of stitching just the first two is relatively clean, but after it gets to the third image, it has already become increasingly warped, and the blending is not as clean. A better solution to this would be to stitch everything to the middle rather than always stitching from left to right, but I ran out of time to implement this for part A of this project. I will definitely look into improving this so I can see better stitching results in part B of this project.

Wheeler Hall Left
Wheeler Hall Middle
Wheeler Hall Right
Wheeler Hall Left and Middle
Wheeler Hall Full Mosaic


What I Learned

One thing I learned from this project is that maintaining good alignment in image stitching is a very challenging process. I had to reselect correspondence points many times when stitching together images, as selecting suboptimal point sets resulted in images that were very poorly aligned. This makes me excited for part B of this project, as I can imagine that selecting points with automatic feature detection has potential to be very good in selecting high quality correspondence points.