Recovering Homographies
In order to transform points between any of the images, we need to compute a homography matrix.
The homography matrix is defined as the matrix H that allows us to relate a set of corresponding points in the images.
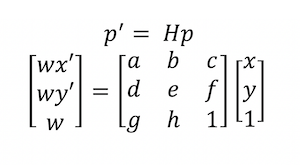
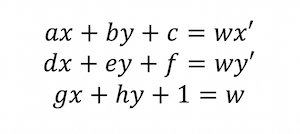
In the equation above, p represents a point in your first image and p' represents a point in the second image scaled by a factor of w.
The bottom right value in the matrix of H is set to 1 as it determines the scaling factor.
To find the homography matrix, we need to solve for all the remaining values in the H matrix. To do so, given we have points from the first image (x, y) and points from the second
image (x', y'), we can solve for these unknowns by creating a linear system of equations.
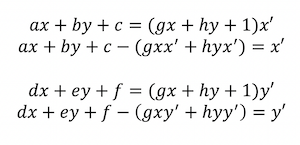
From the above equations, you get the below equations.
Rewriting the equations to isolate x' and y' on the righthand side, you get the below.
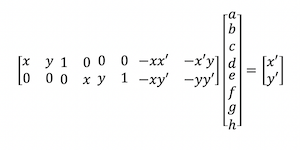
Given these, you can represent the H matrix unknowns as a vector and get the below.
Expanding this for n points instead of just one set of corresponding points, you get the below.
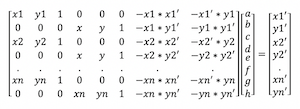
This gives a total of 2 * n equations that can be solved to determine the 8 unknowns in the H matrix. Given there are 8 unknowns, the number of correspondence points
you choose must be greater than or equal to 4.
It is best to have more than 4 points for the best results. I used around 10-15 for my images. Given more than 4 points, the linear system of equations is overconstrained and can be
solved using least-squares.
Once the unknowns are solved, you can reformat the unknowns vector into a 3x3 matrix with 1 in the bottom righthand corner and that is your homography matrix.
Image Warping
After computing the homography matrix, it can be used to warp images to another image's coordinate system. I used inverse warping to be able to determine the colors of the warped image from the original input images.
Given an image to be warped and a homography matrix H, I followed the below steps to create the warped image.
Computation Steps
1) Use the homography matrix H to find the warped coorindates of the image
2) Use cv2.remap() to map the colors of these warped coordinates to the original coordinates of this image in order to colorize the image.
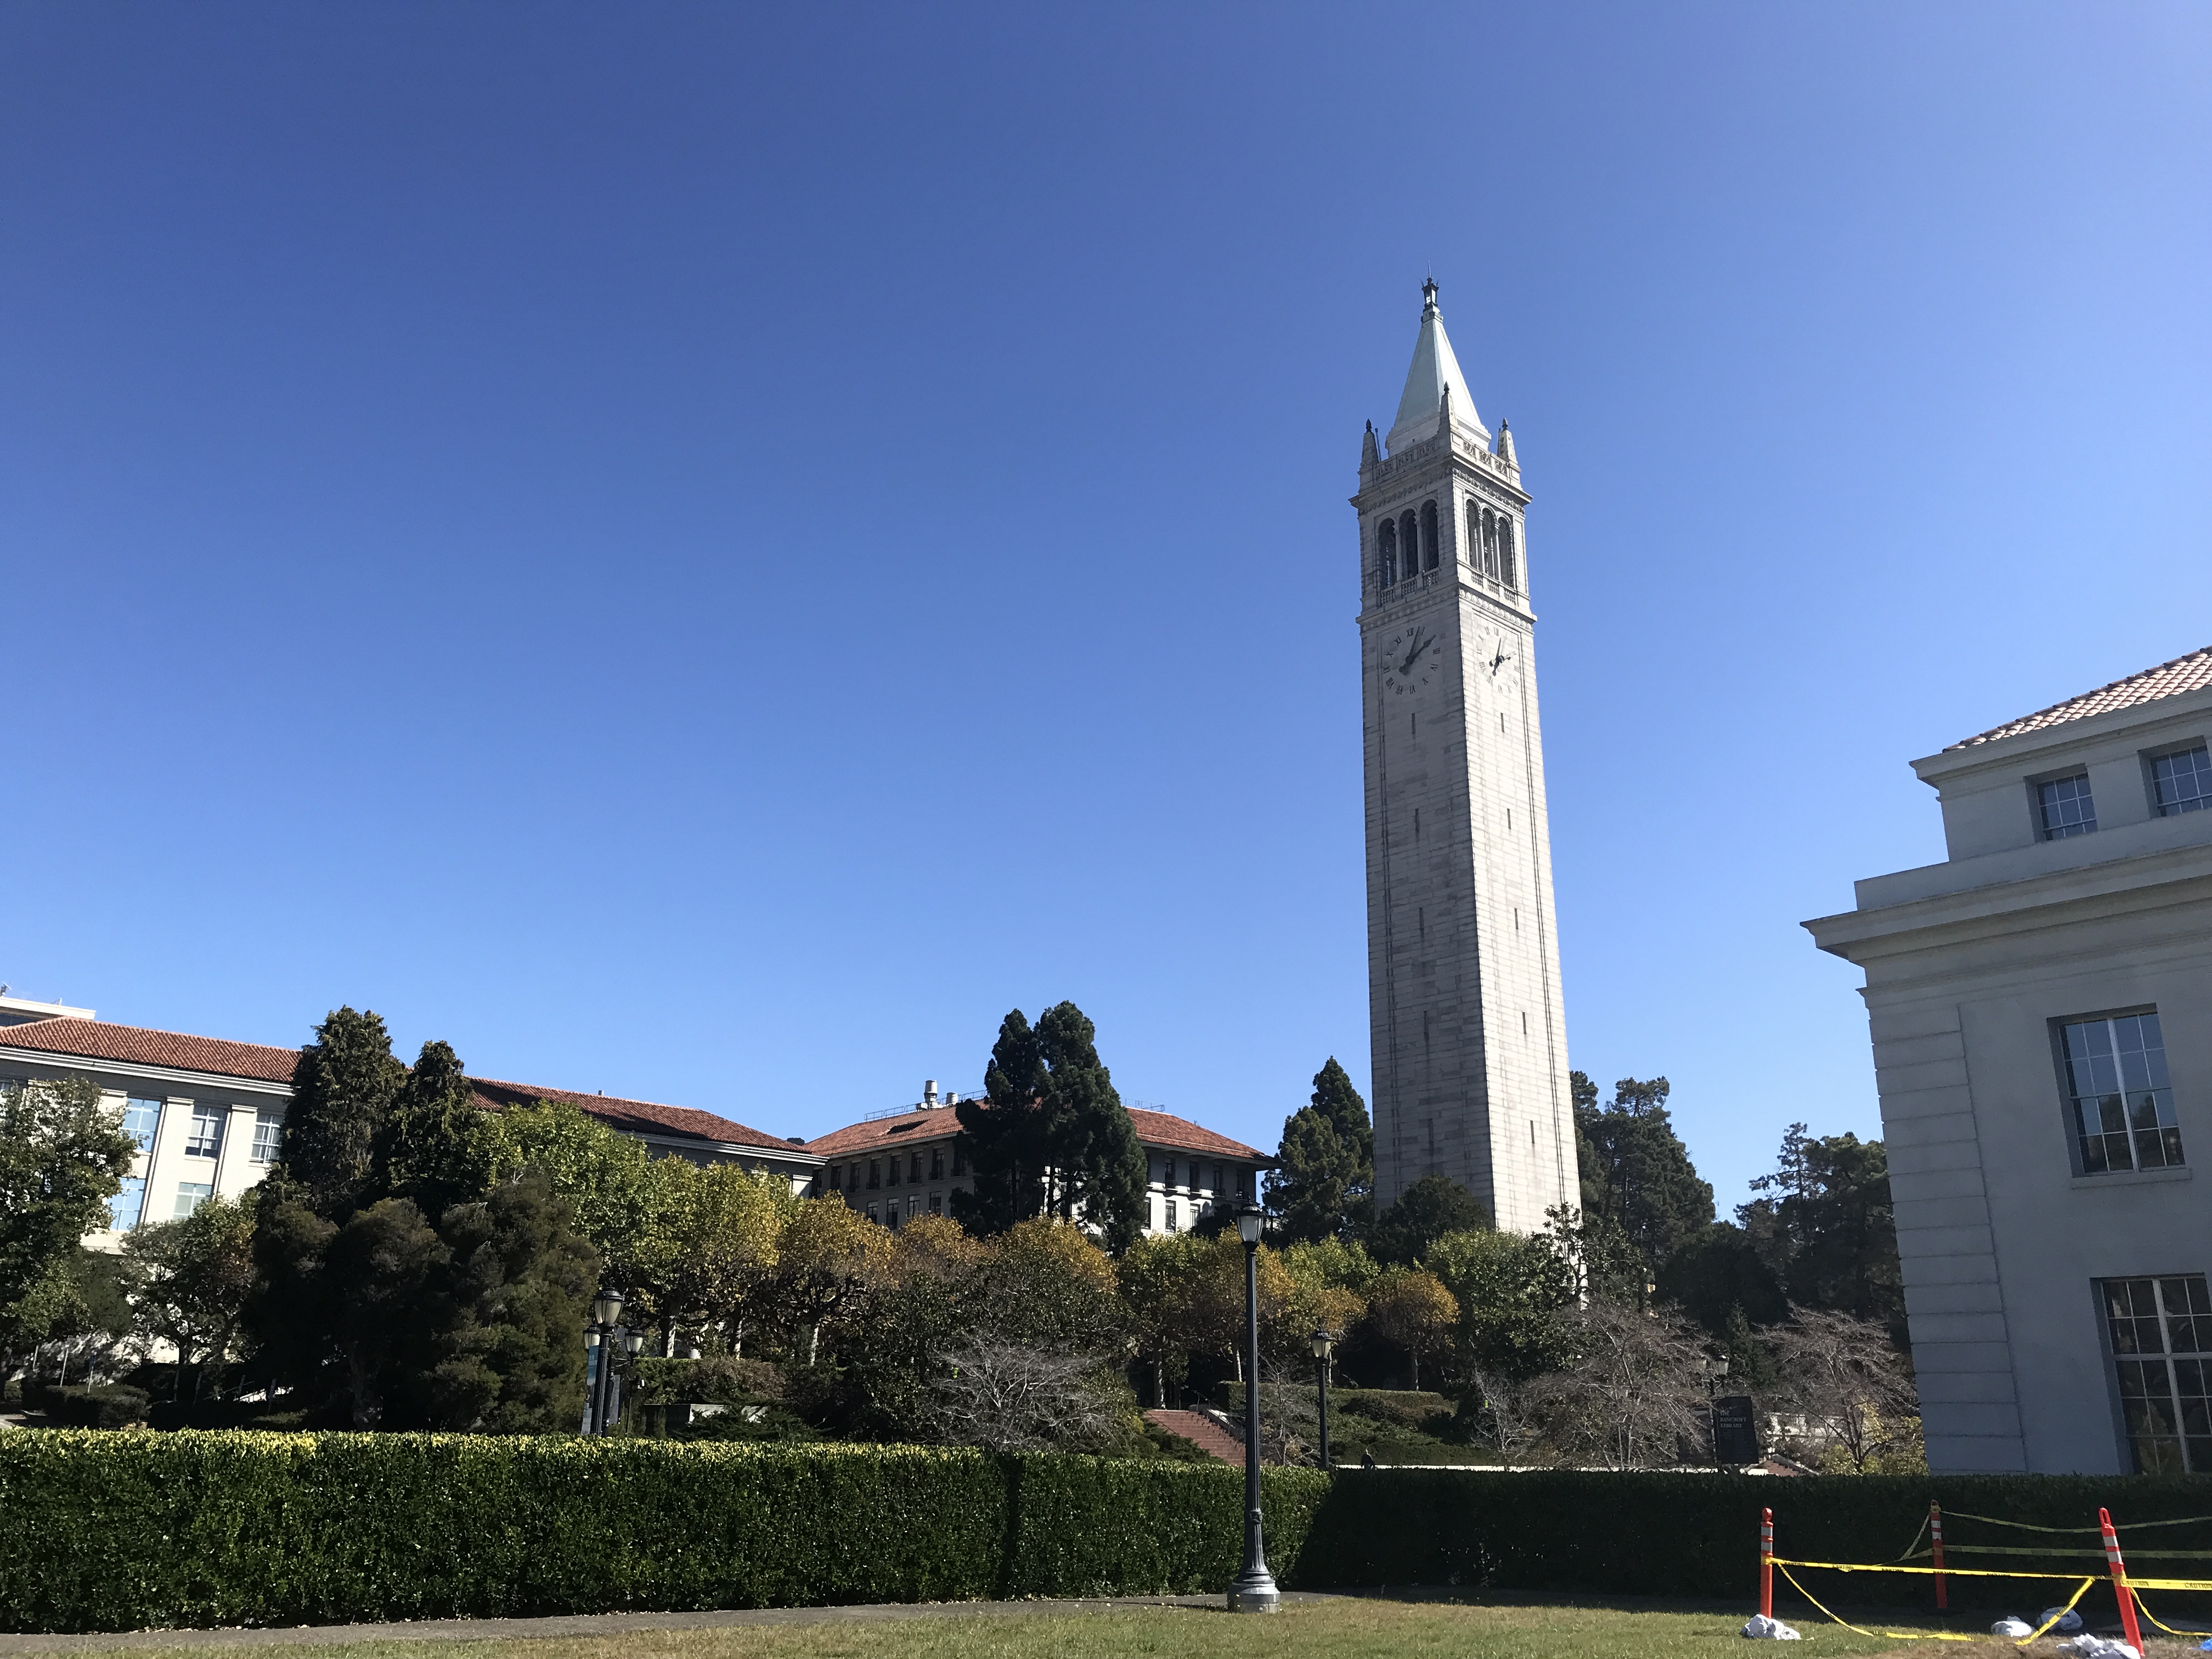
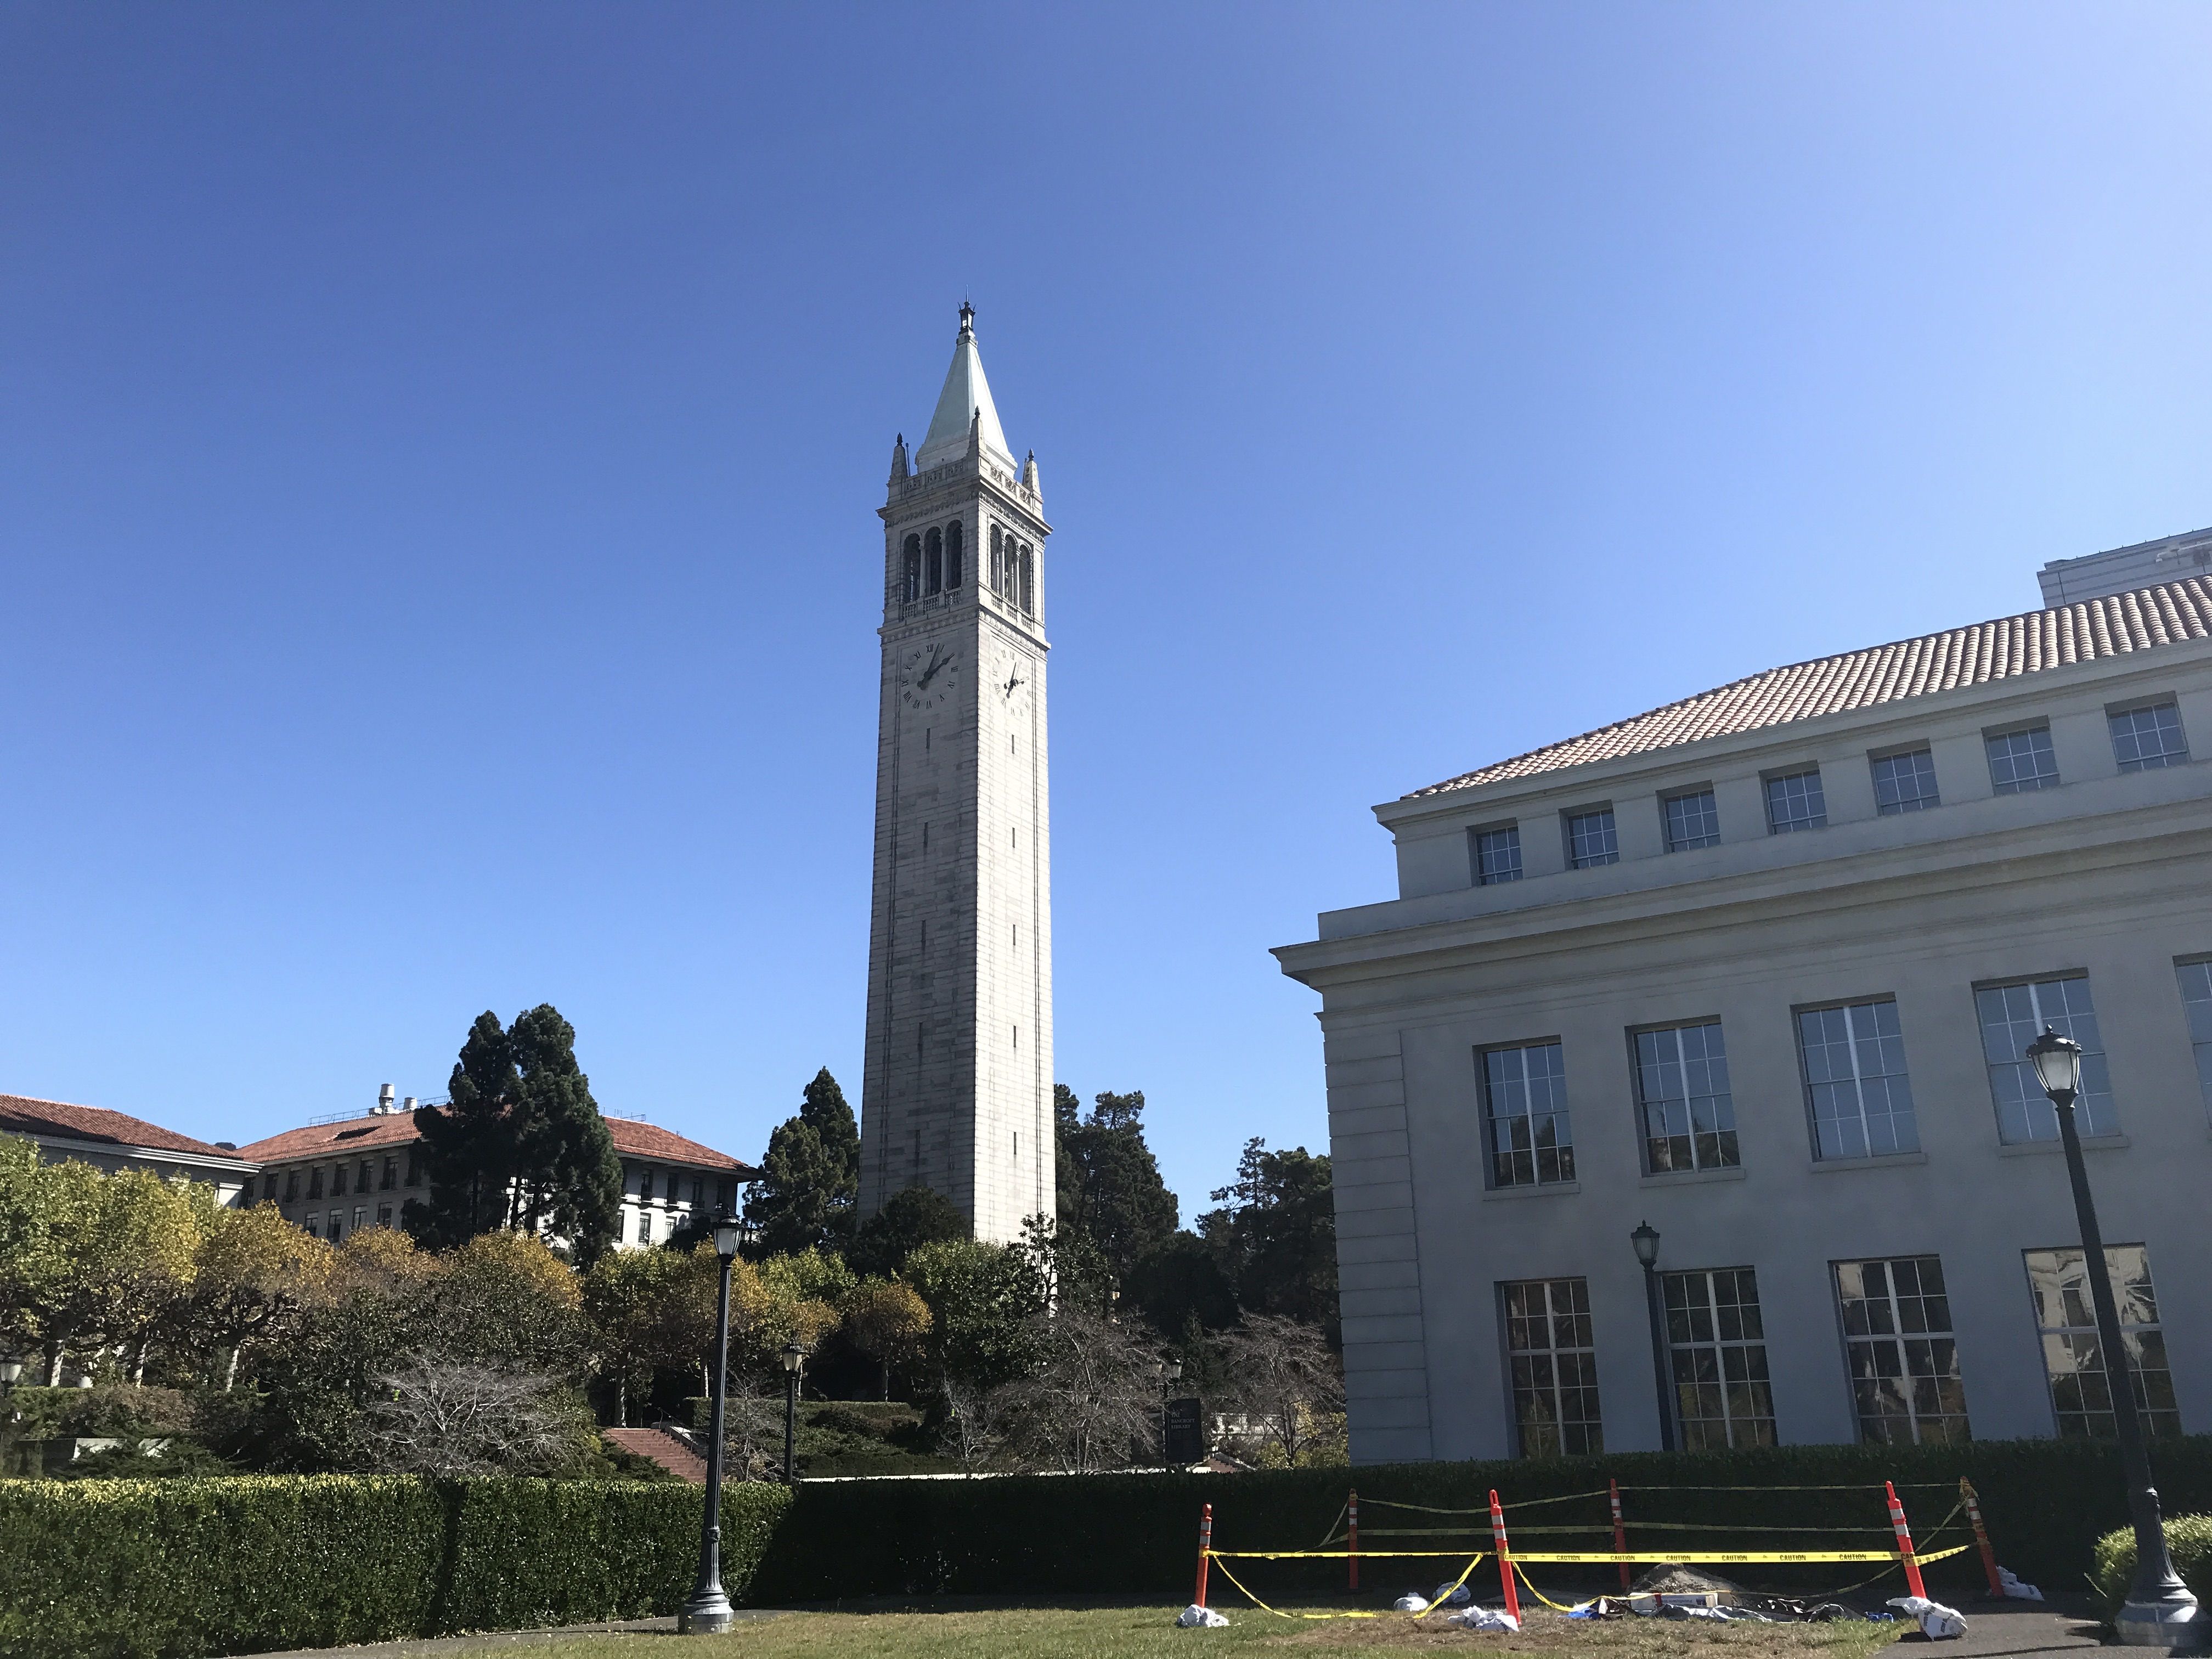
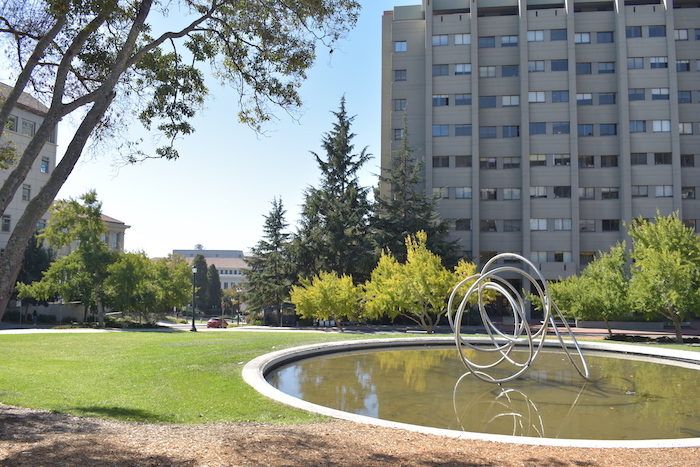
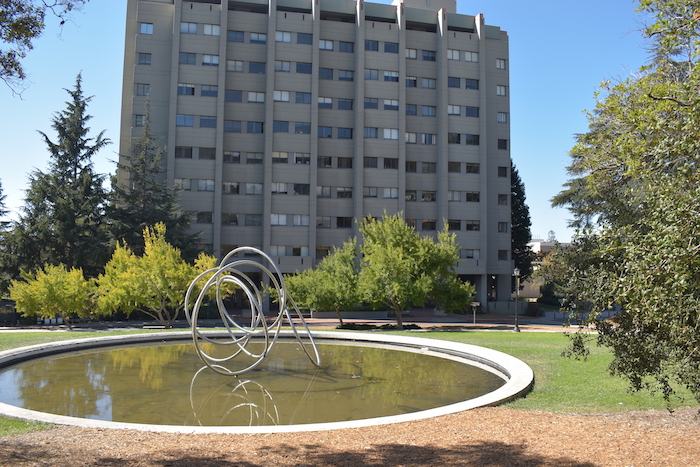
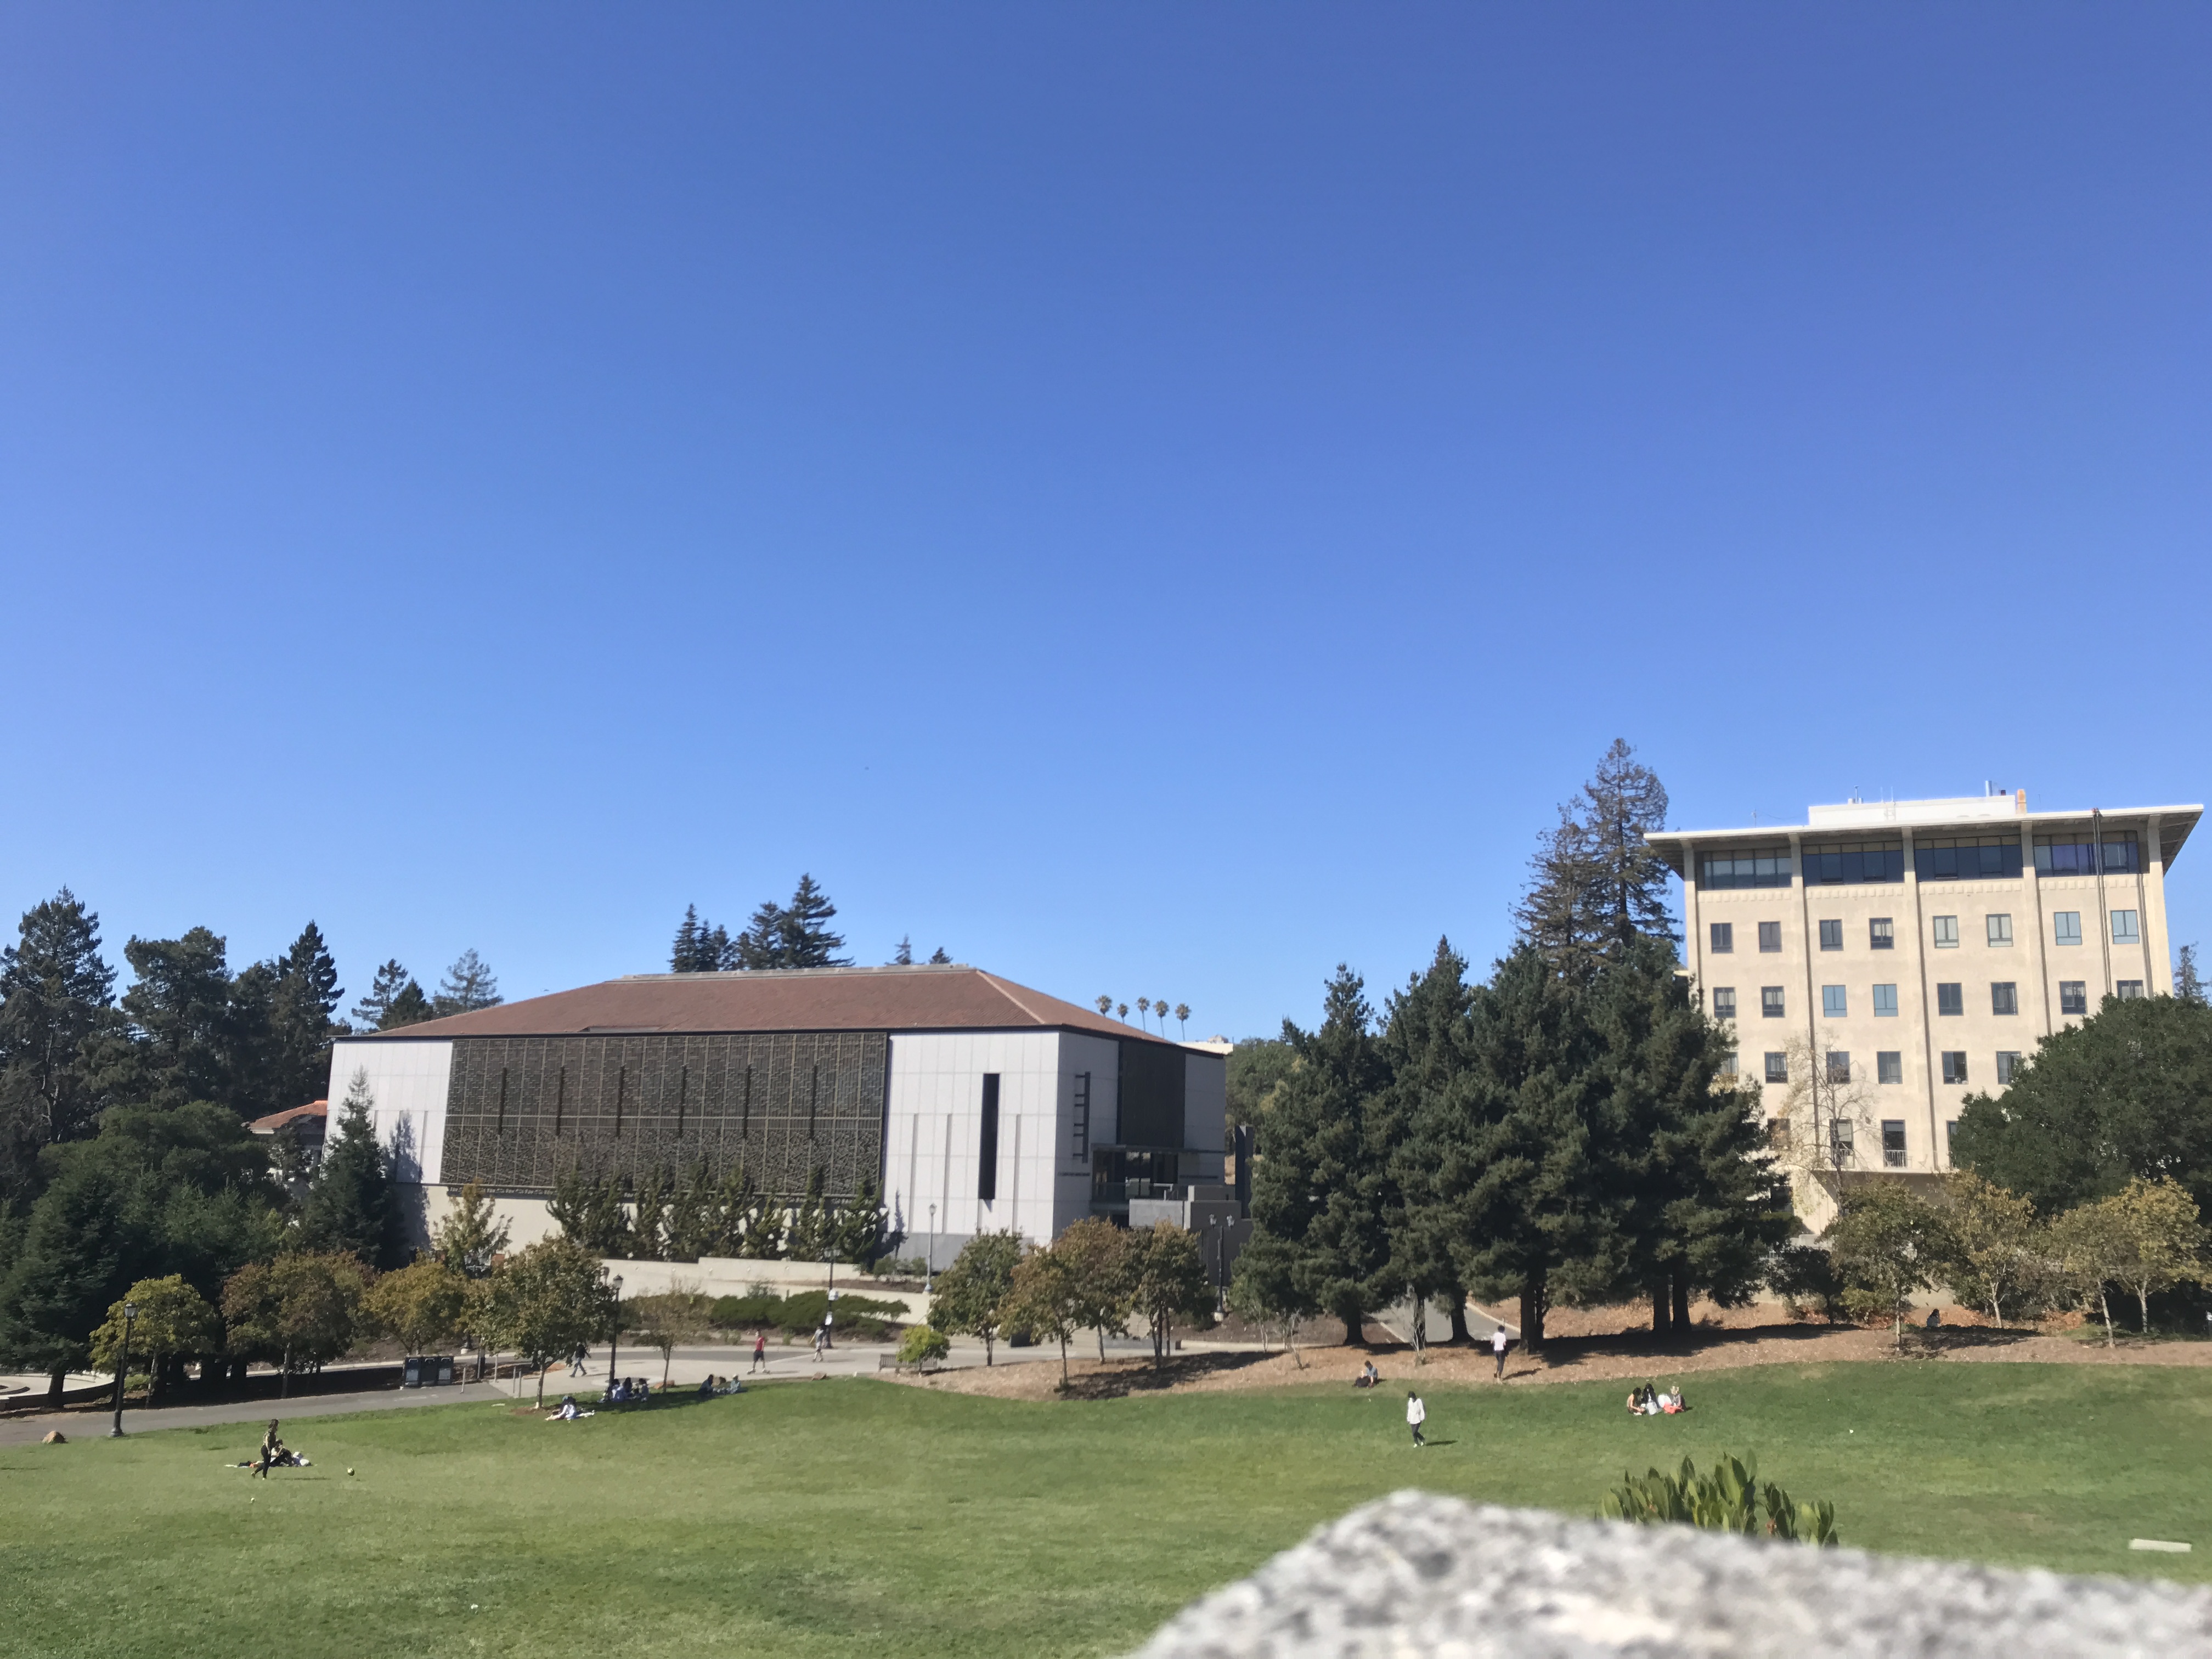
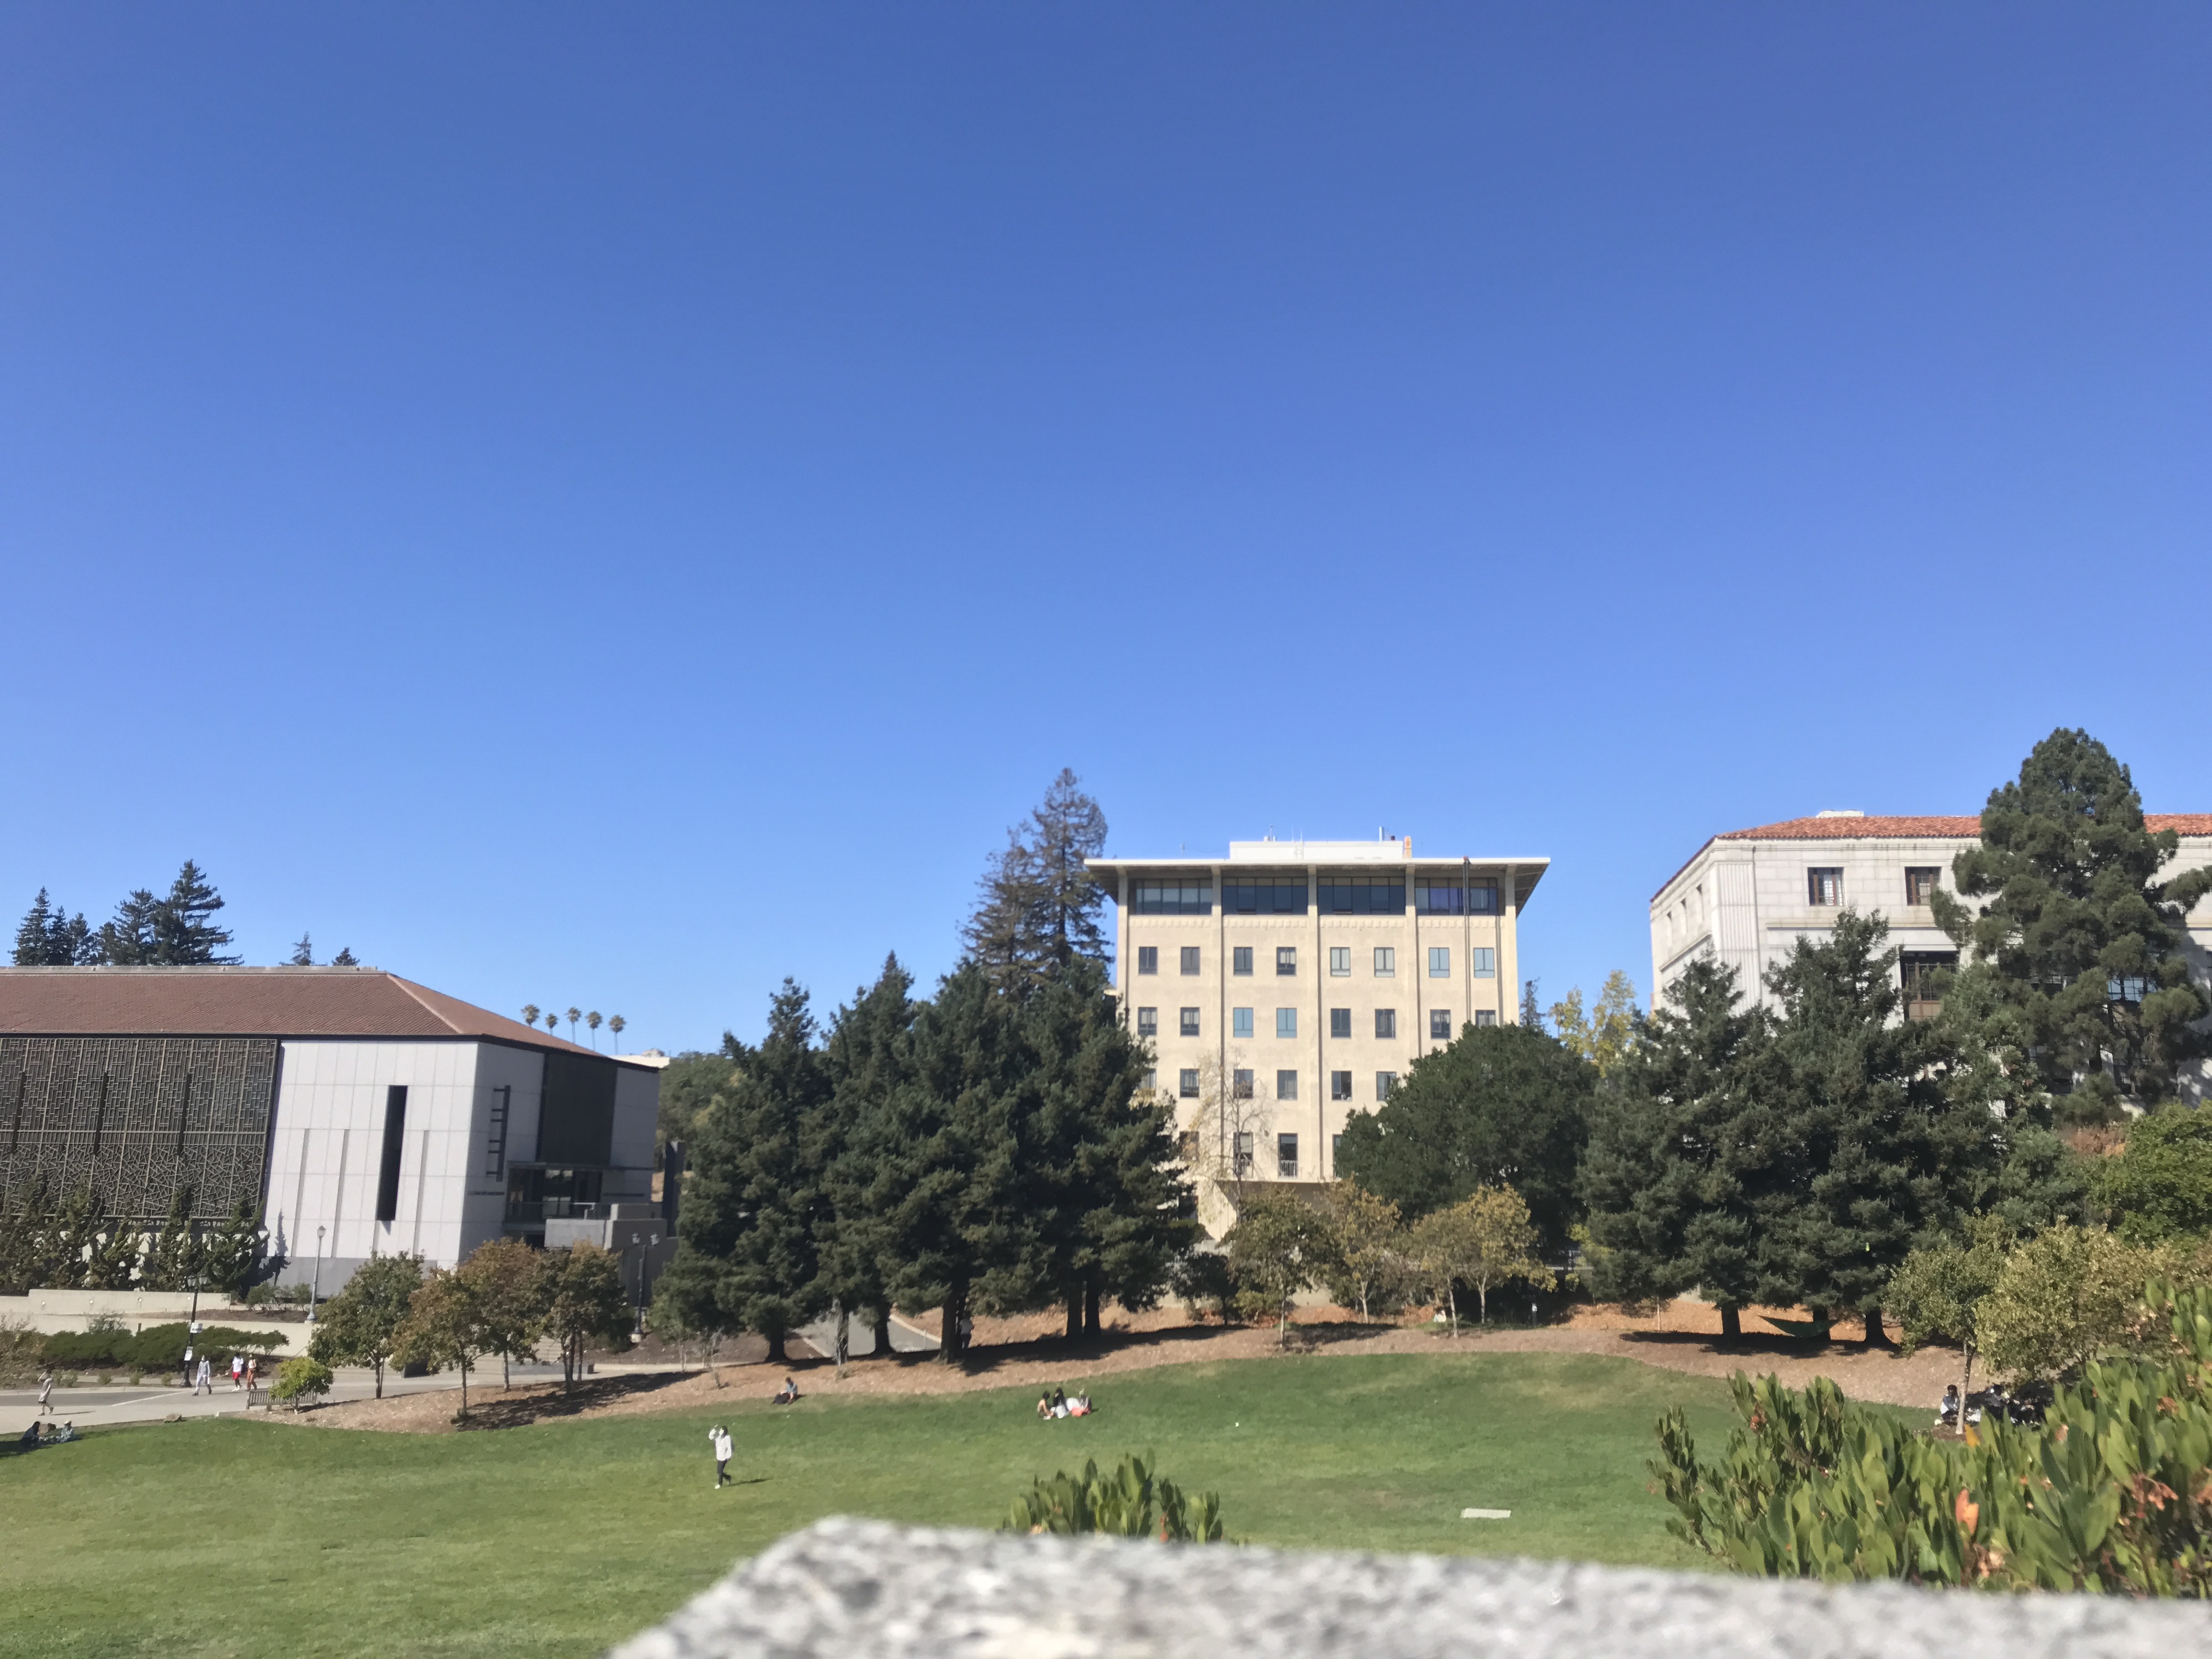
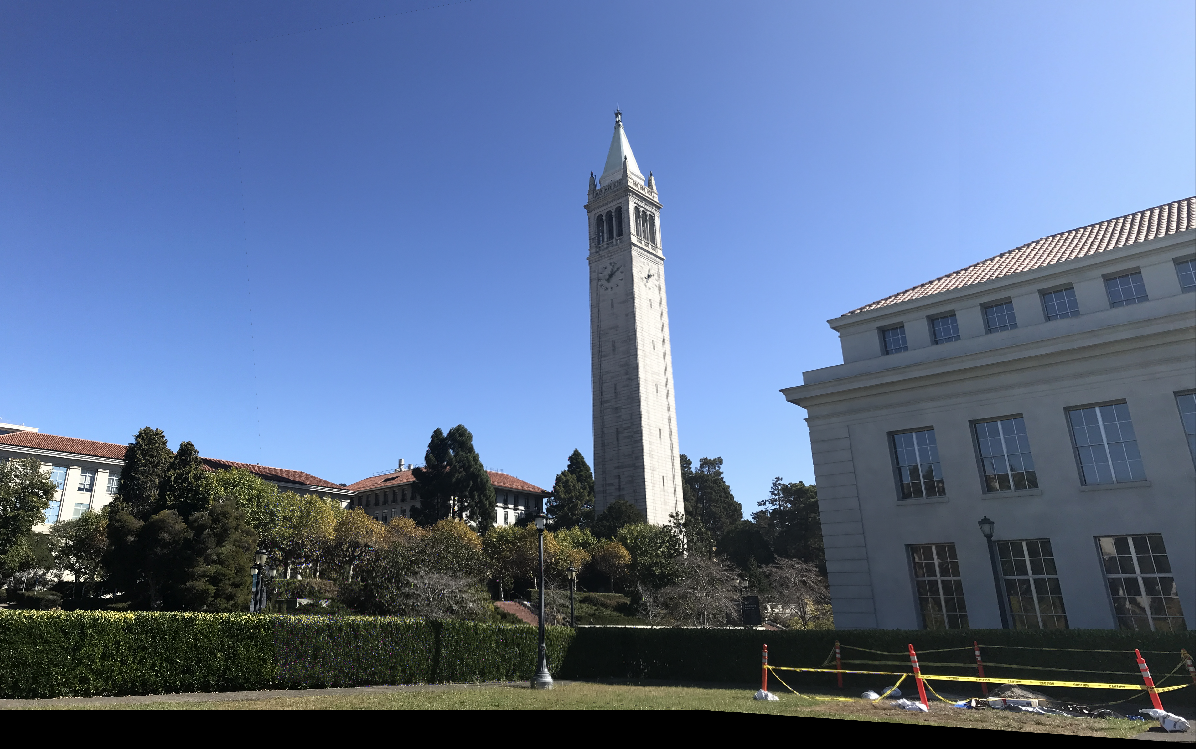
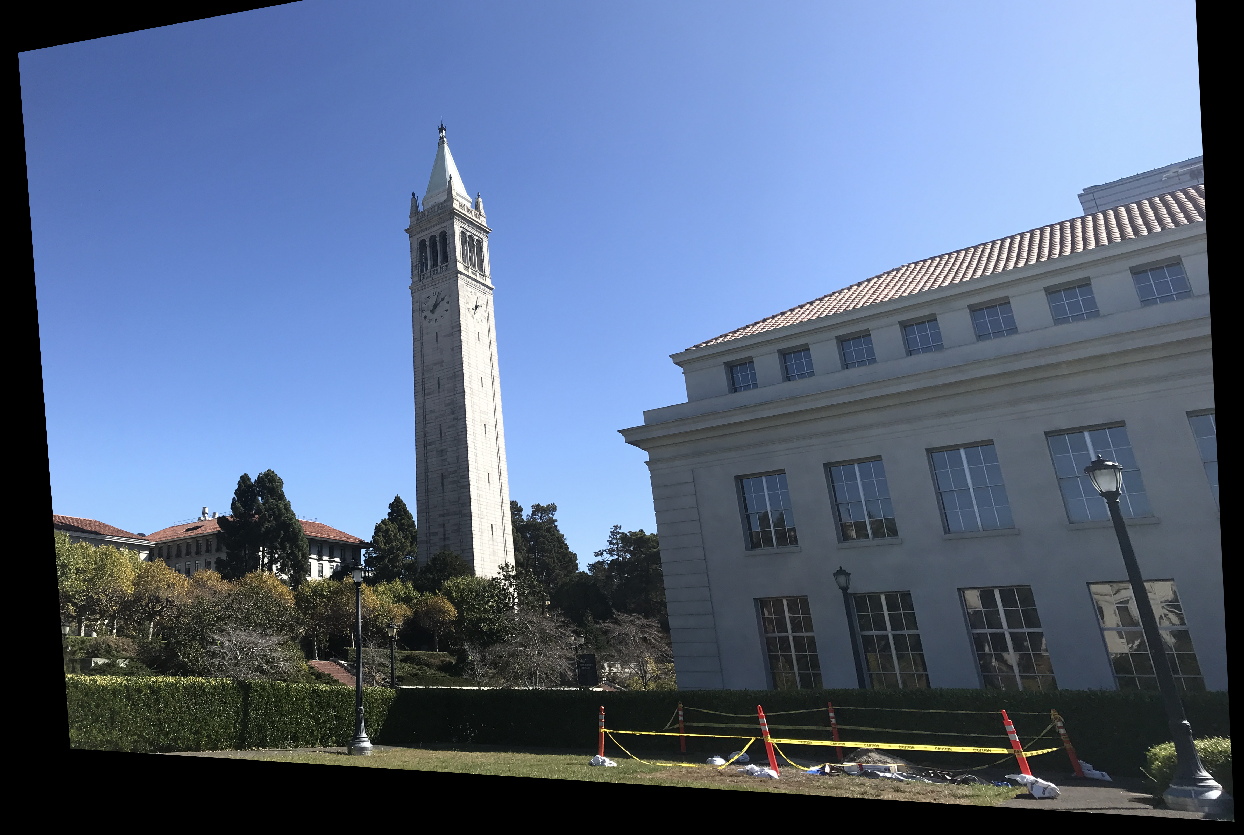
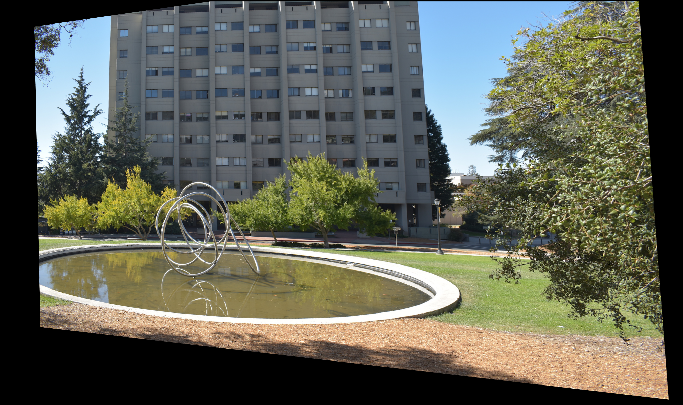
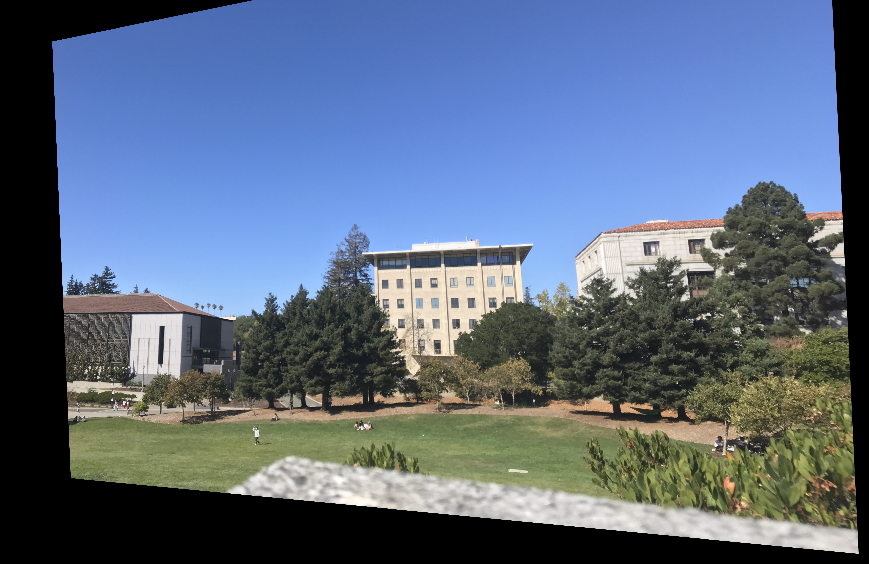
Below are some examples of warped images.
| Campanile (right) warped |
Hearst Mining Circle (right) warped |
Memorial Glade (right) warped |
|
|
|
Image Rectification
With this image warping implementation, you can rectify images. Given an image with some planar surfaces, you can select feature points for this planar surface and warp
the image so that the selected plane is frontal-parallel.
I chose squares for my warps, so this meant that the "image 2" in the warp was just the coordinates of a square.
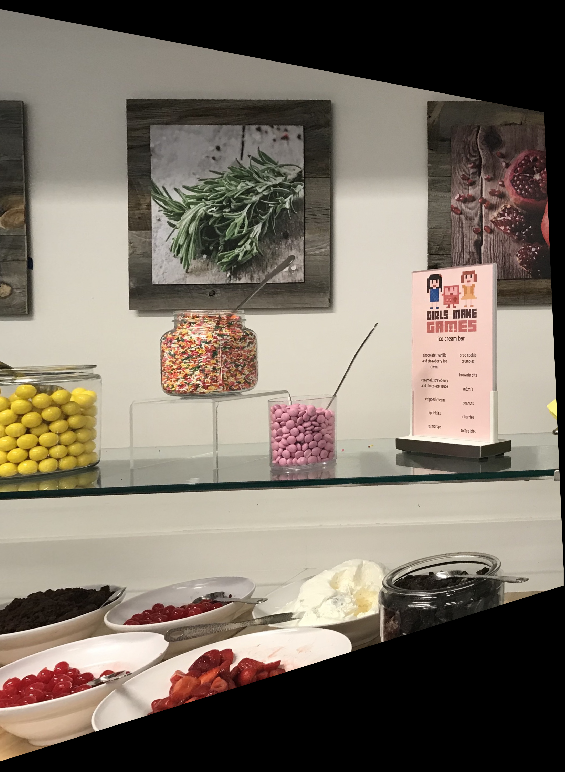
Below are some of the results of rectifying images.
| Original Image |
Rectified using the square herb framed picture |

|
|
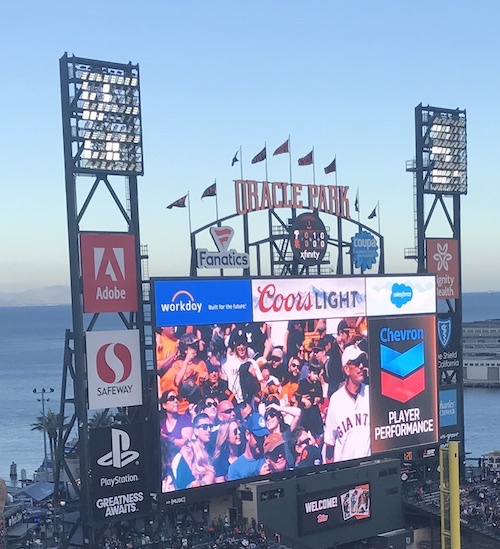
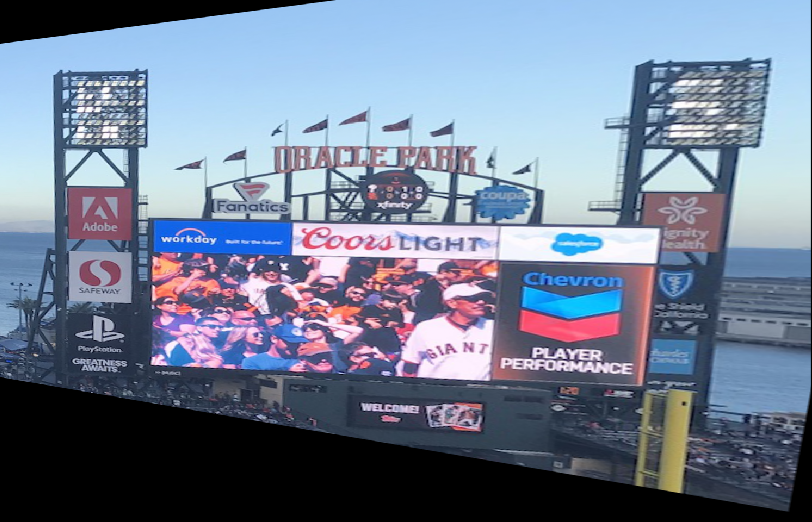
| Original Image |
Rectified using the Adobe sign |
|
|
Reflection
The coolest thing I learned from this project was how simply warping an image can allow you to see an image from a different perspective as seen in the examples of image rectification.