


I took three pictures of each mosaic (total 9 images). When I'm taking the picture, I did not move my hand and just rotated a phone to keep same center of projection. If I had a tripod, I might have a better images because I can just rotate the tripod in different angles.
|
|
|
|

|

|

|

|

|

|
In this part, I computed homograohy matrix H that was used for warping. H is 3 by 3 matrix and there are eight unkowns (a, b, c, d, e, f, g, h). Therefore, to solve for them, we need at least four points. Instead of solving 8 systems of equation, for this project, I used more than four points and did least square. To do least square, we need to make an equation Ax = b. Below, I wrote how to obtain two rows of A and b given one point. Once we obtained A and b, we can get x using least square, which are 8 entries of matrix H.

Using H, I did warping to do image rectification. By doing image rectification, I can see images from
different viewpoint.
This image was taken from left side of picture frame. Hence, we cannot see the picture frame
from front.

However, by doing image rectification, we can see the picture frame from front view.

Also, this image is taken from front view. Hence, it's hard to see words that are written at top of the box.
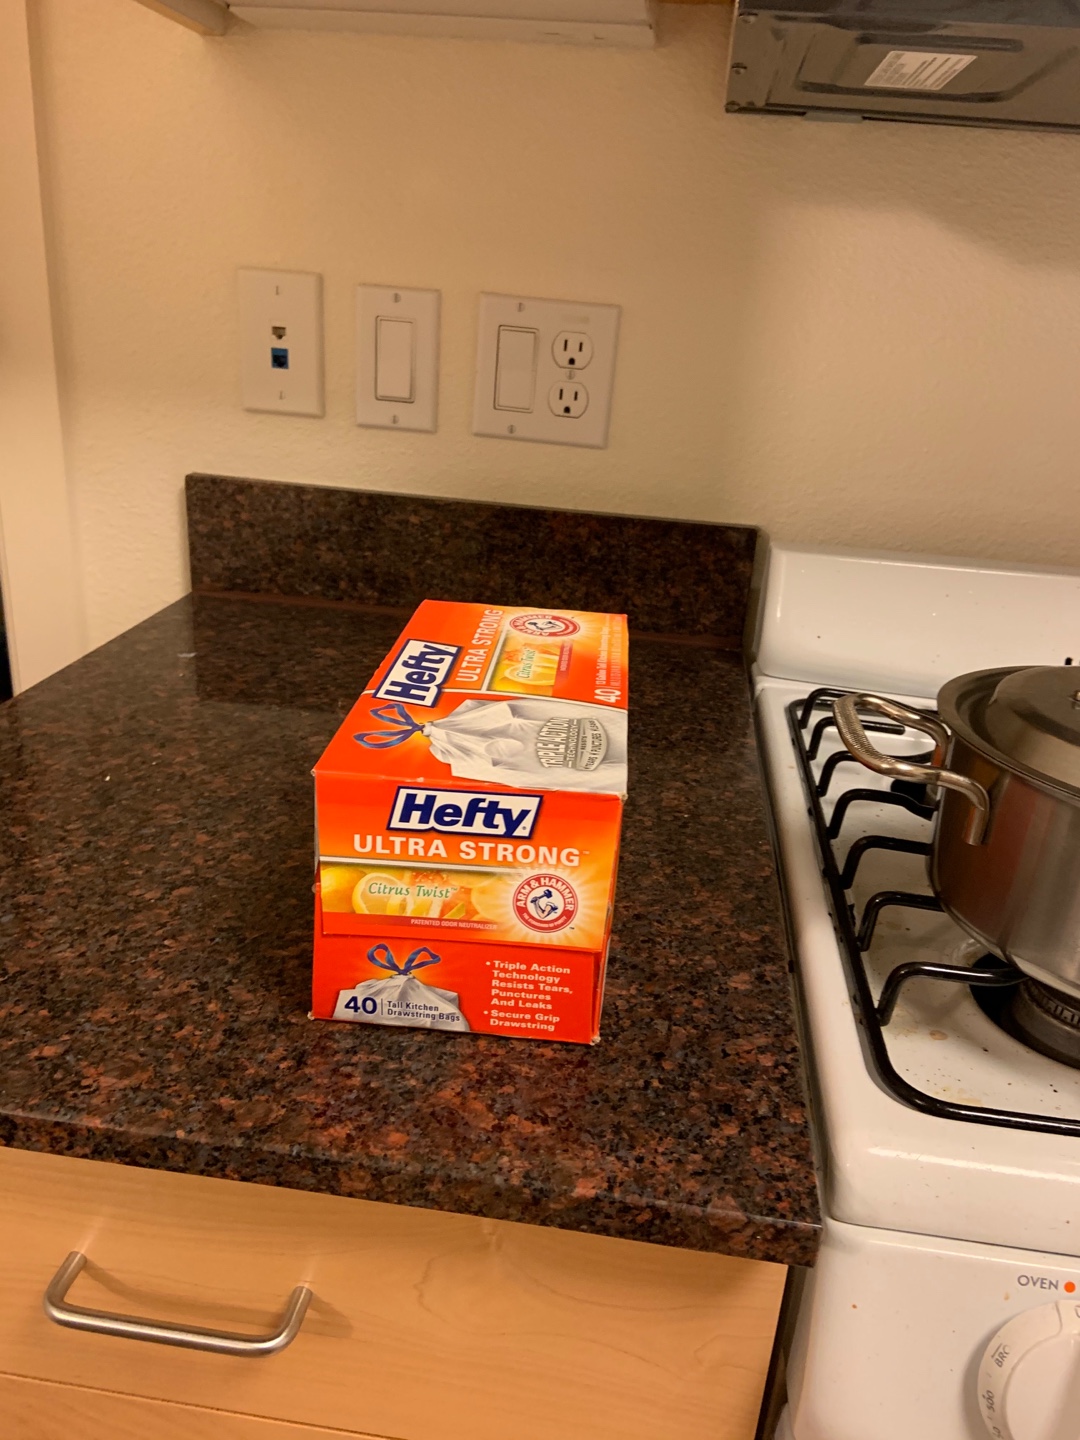
However, by doing image rectification, we can see the box from top, so we can read what is written on the top of the box.

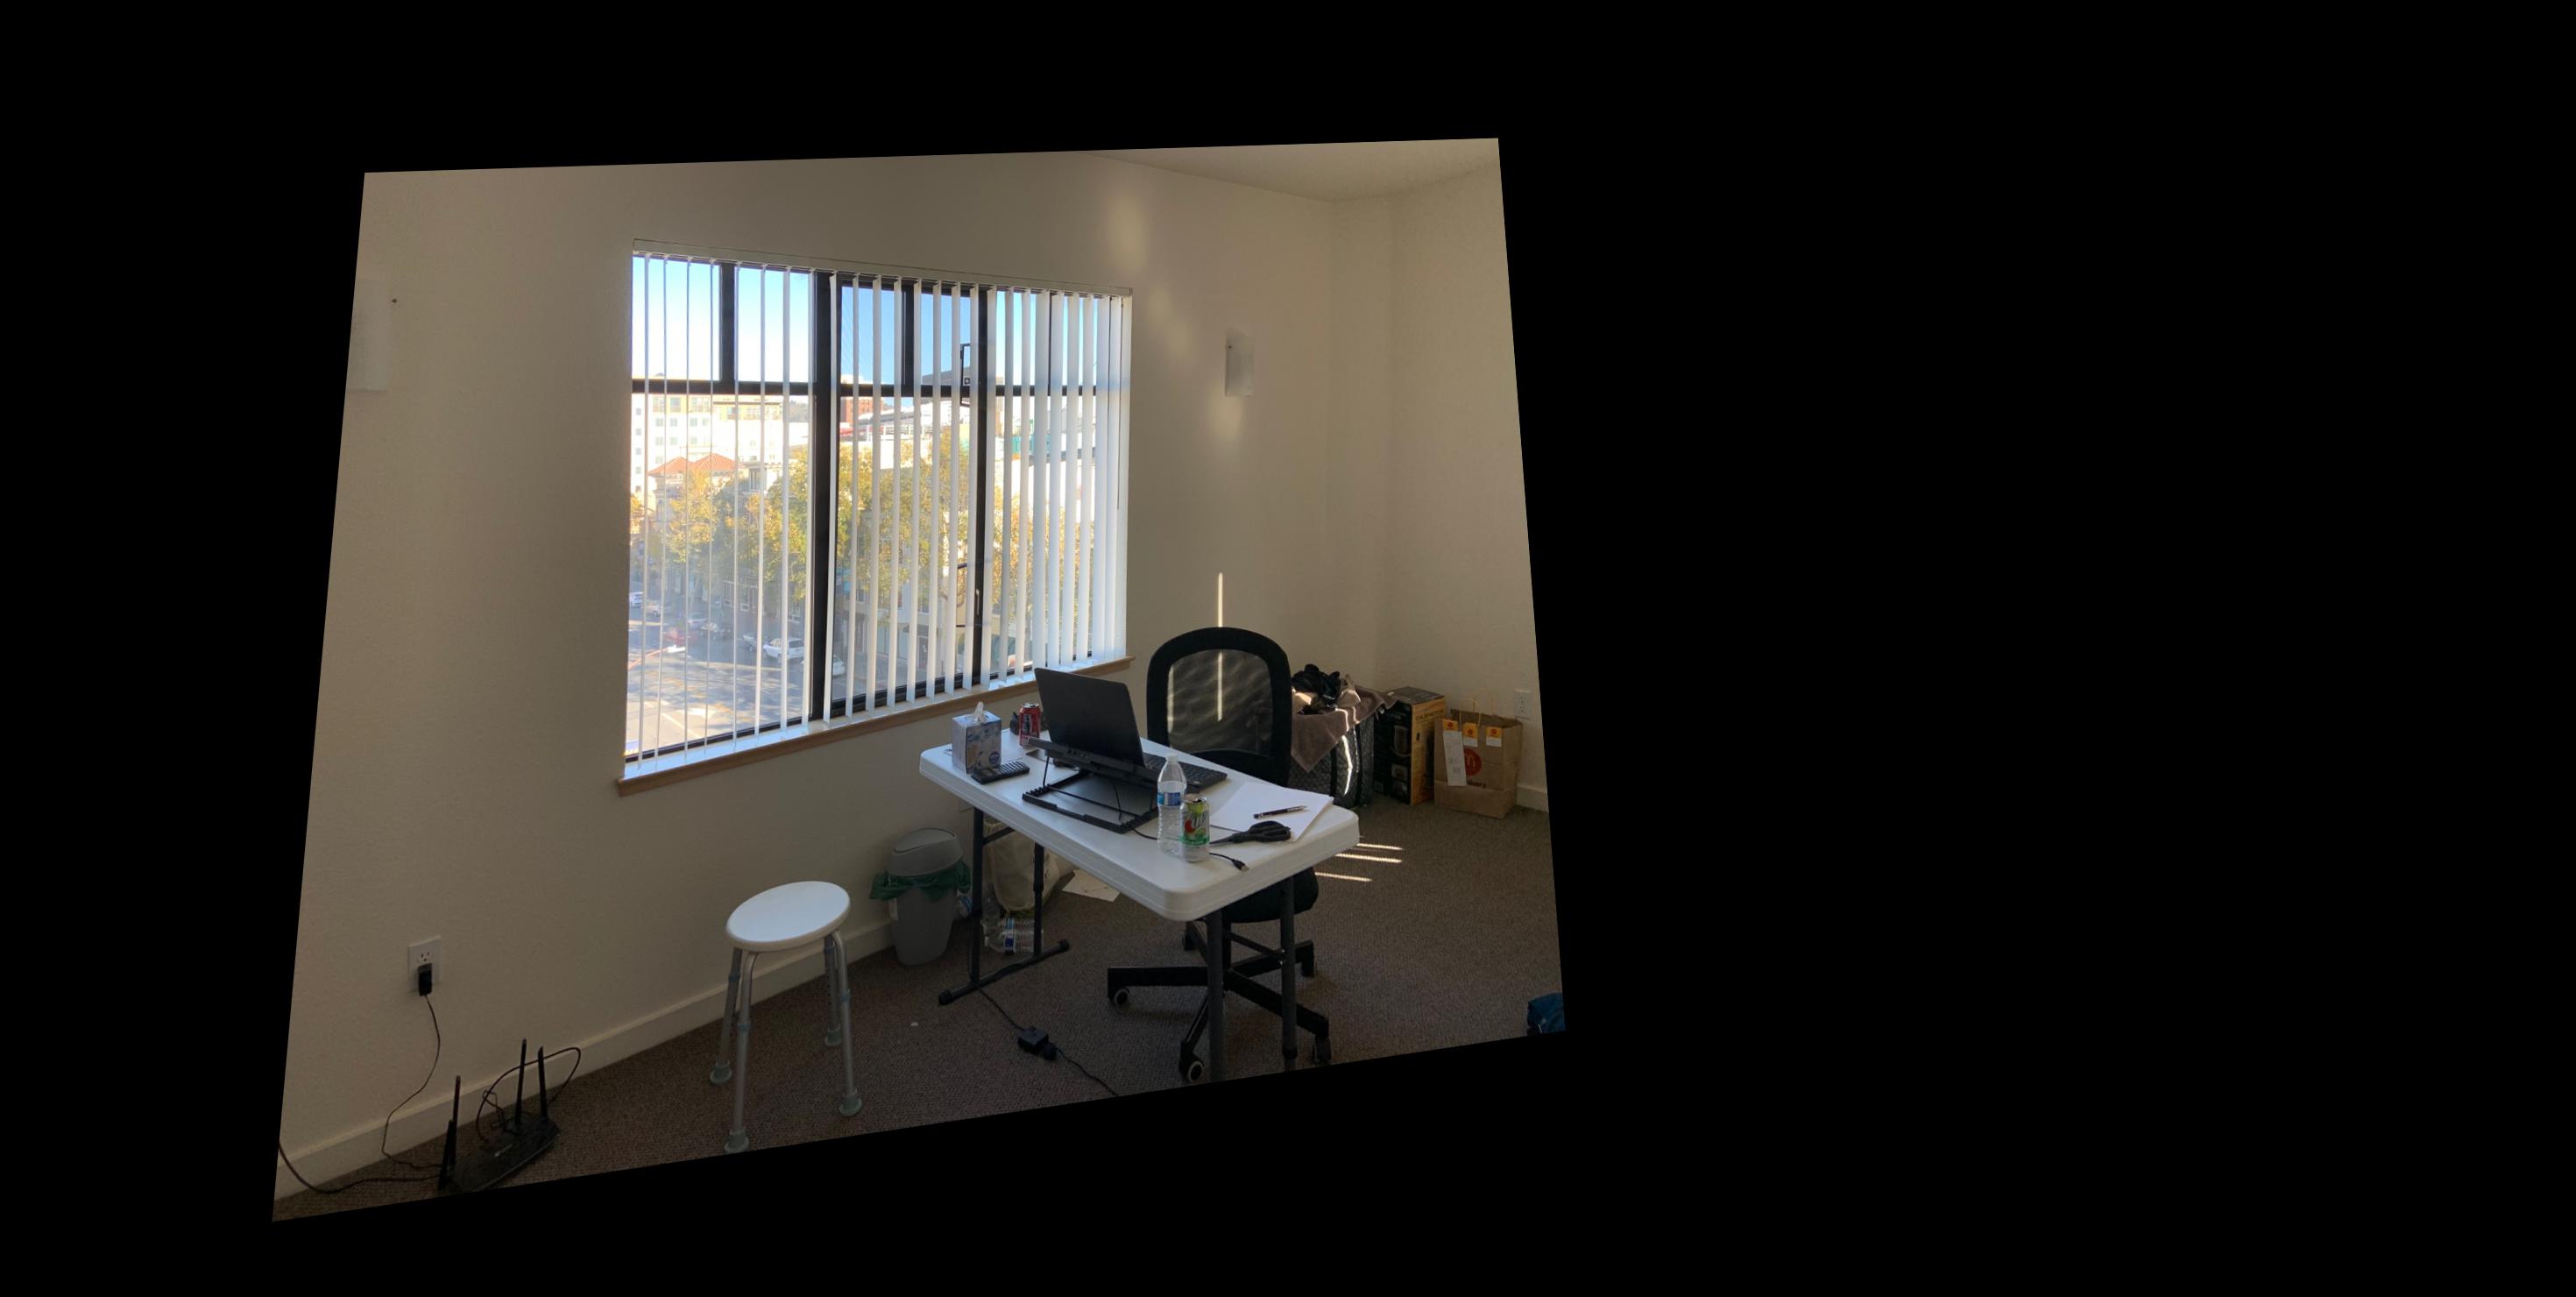
From the previous part, we saw how image warping works. Now, in this part, we will blend three images from different angle into one image. First thing I did was padding the image. I did padding because without it, a lot of information is lost in the warped image. After padding the images, I warped first and third image into the second image.
|

|

|

|

|

|

|

|

|
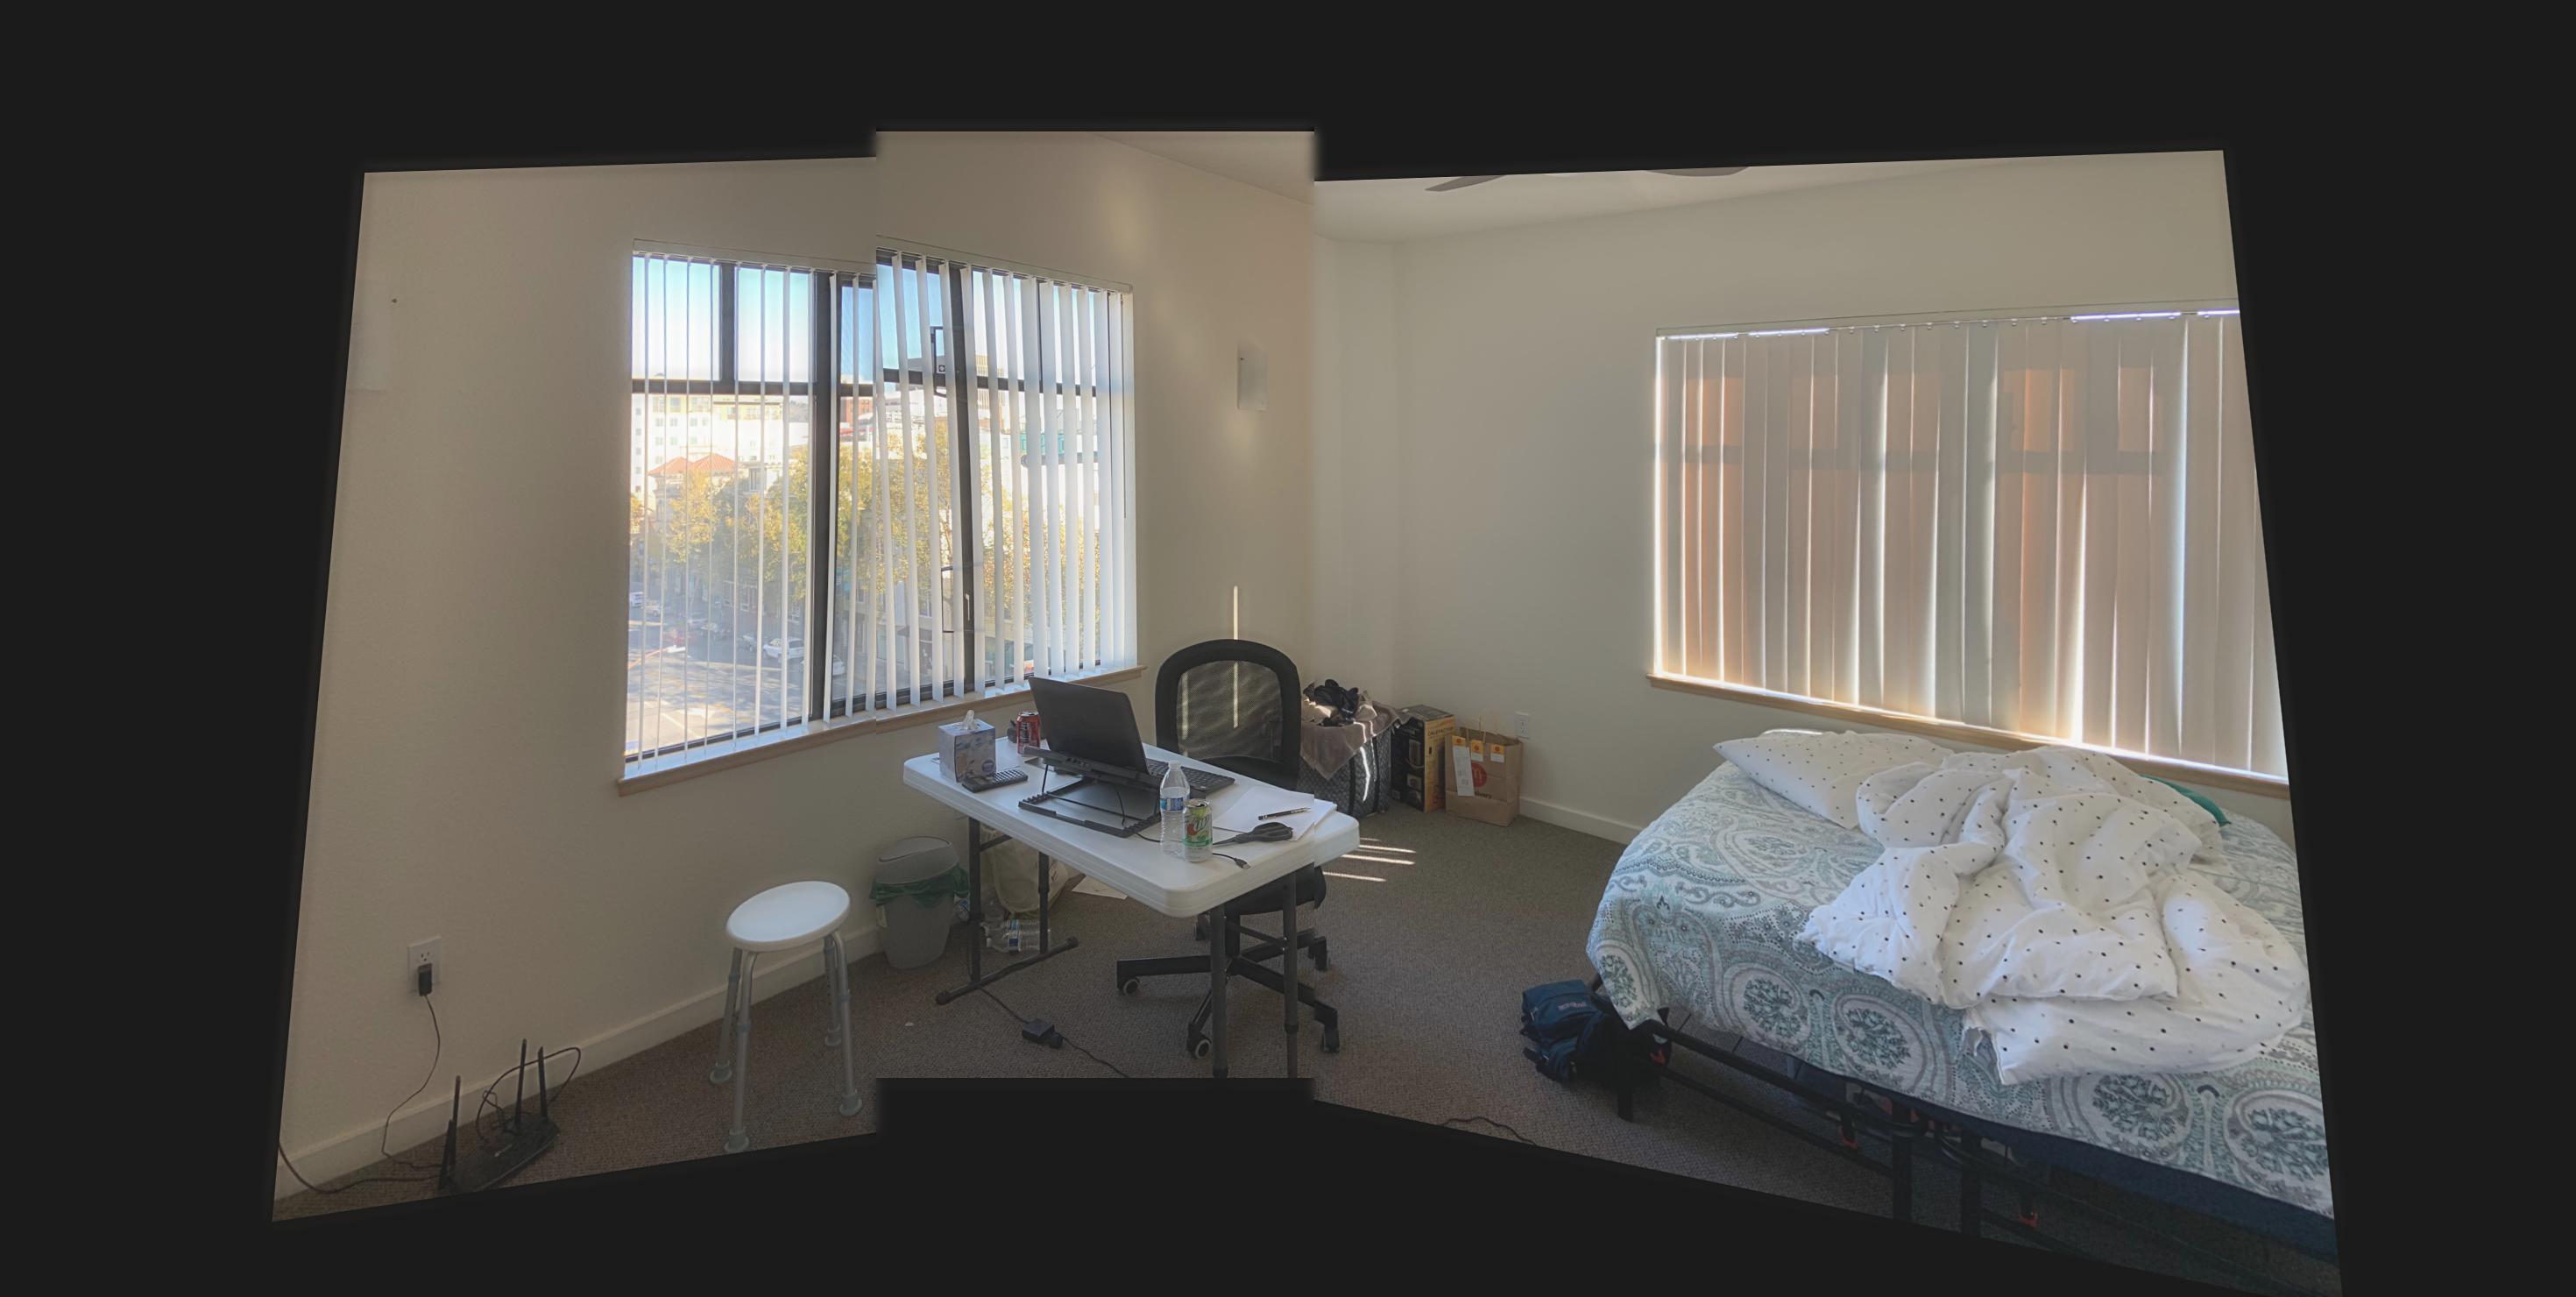
After obtaining warped images, I blended them using laplcain stack of level 3. Since the image size already had been increased because of warping, I did not need to increase the image size for the blended one.
|

|

|
From this project, the coolest thing was image rectification. In the hefty box example that I used, even though I cannot clearly see the words written in the box in original image, I can clearly see the words by using image rectification. It was amazing that I can see the image from different viewpoint by doing image warping using homography matrix H.