Image Warping and Mosaics
Gaurav Shah
Introduction
Have you ever wondered how panoramas are created? Or how we can shift the perspective of an image? Well, then wonder no longer, as that is what we will do today, both manually and automatically. First, let's take a look at the photos that we will be working with. These were shot with an iPhone 12.
Part A: Manual
Using manual point selection, our first goal will be to rectify the first 3 photos so that they are facing the viewer, as to build the functionality to support homography matrices. Once we have that, our second goal will be to take the 3 sets of remaining photos and warp/merge them to create the panoramic photos we desire.
Homography Matrix
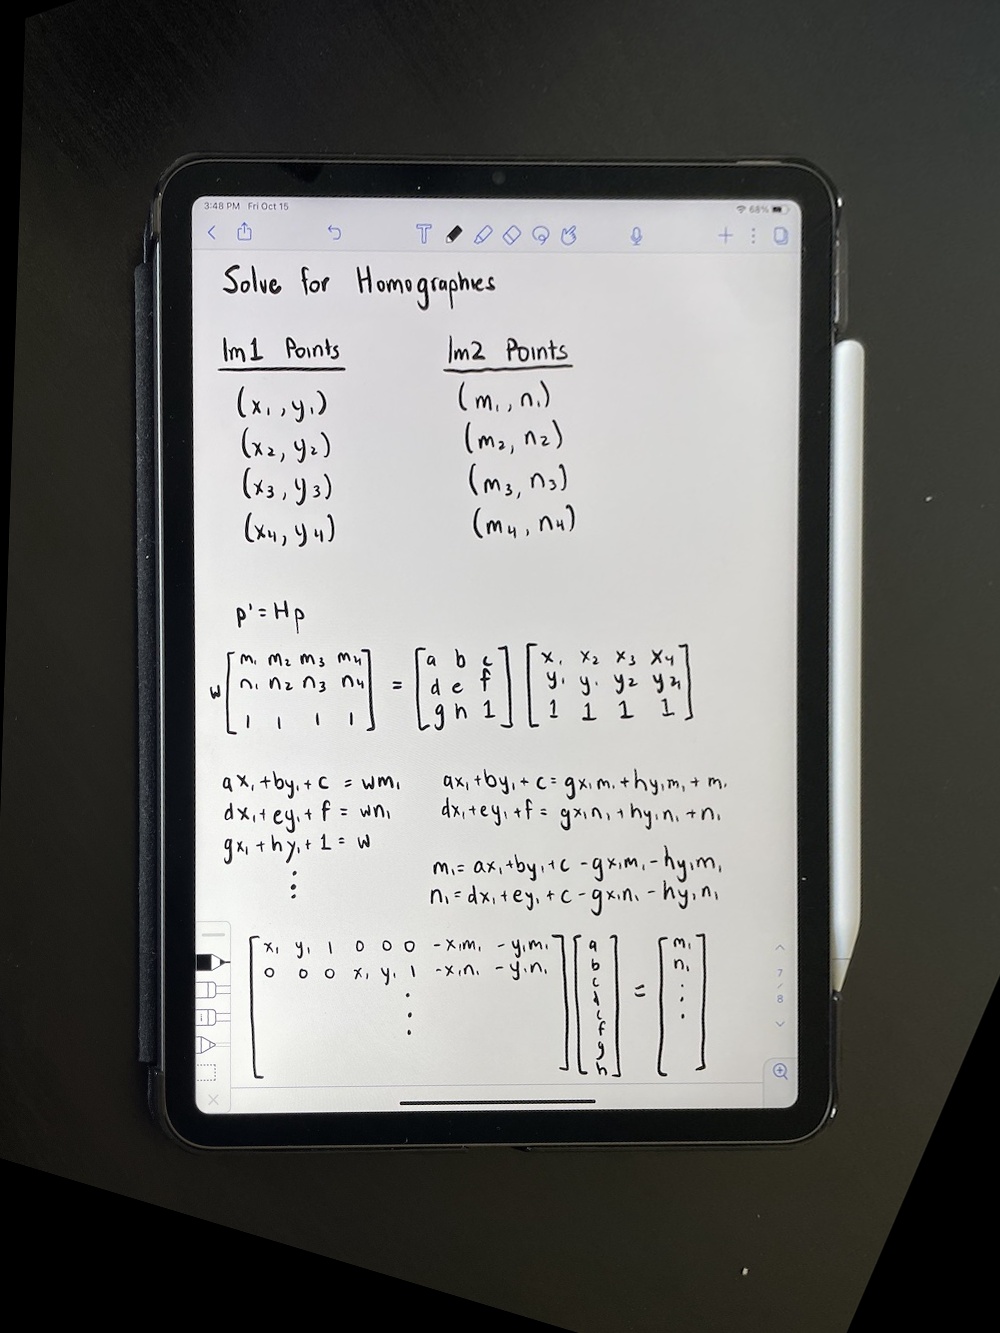
In order to acheive these goals, we have to establish a homography matrix that will perform the transformation needed on the pixels of one image to warp it to the desired shape. We can compute this matrix by selecting matching feature points (minimum of 4, but more to establish a more robust matrix), and then setting up a system of equations and using least squares to get the desired values. Take a look at the iPad screen, which serves not only as a show of work, but also as a sneak peek into the results of image rectification.
Image Rectification
Using our calculated Homography Matrix, we can rectify the perspective of images to be frontal-parallel. Instead of defining corrospondences between two images, we simply select features in our original image, and then provide the shape that we want it to take. For example, if we have an image where we expect a certain object to be a square, we can first select the corners of the object in the image. Then, we can provide [[0,0],[x,0][x,x],[0,x]] as our second input to have the object be warped to that of a square of dimension x. Below, we have some examples of changing the perspective of images to face towards the viewer. Hover to see the original image.
Image Mosaicing
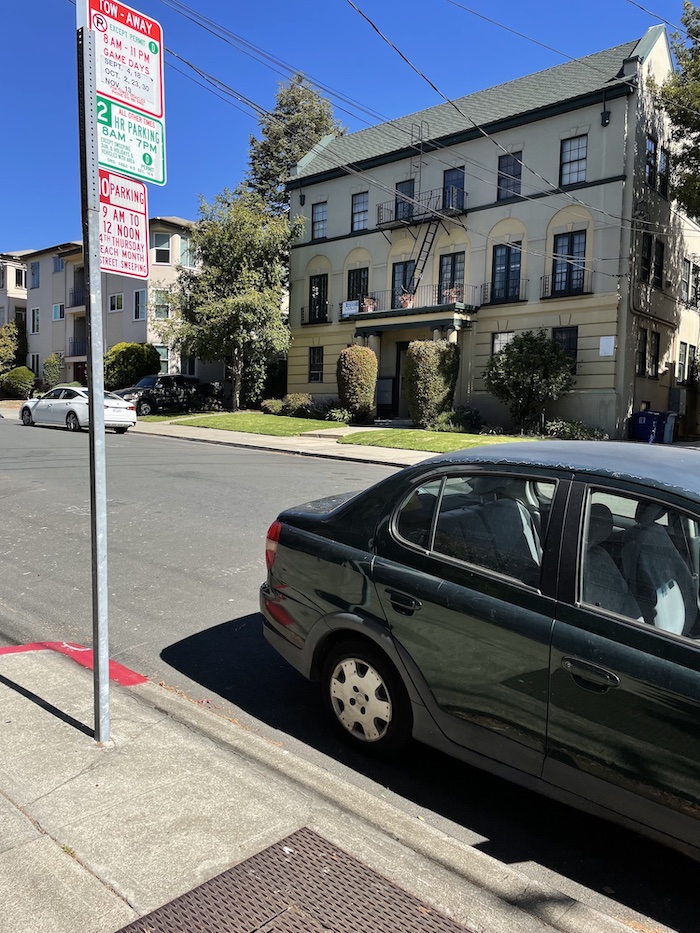
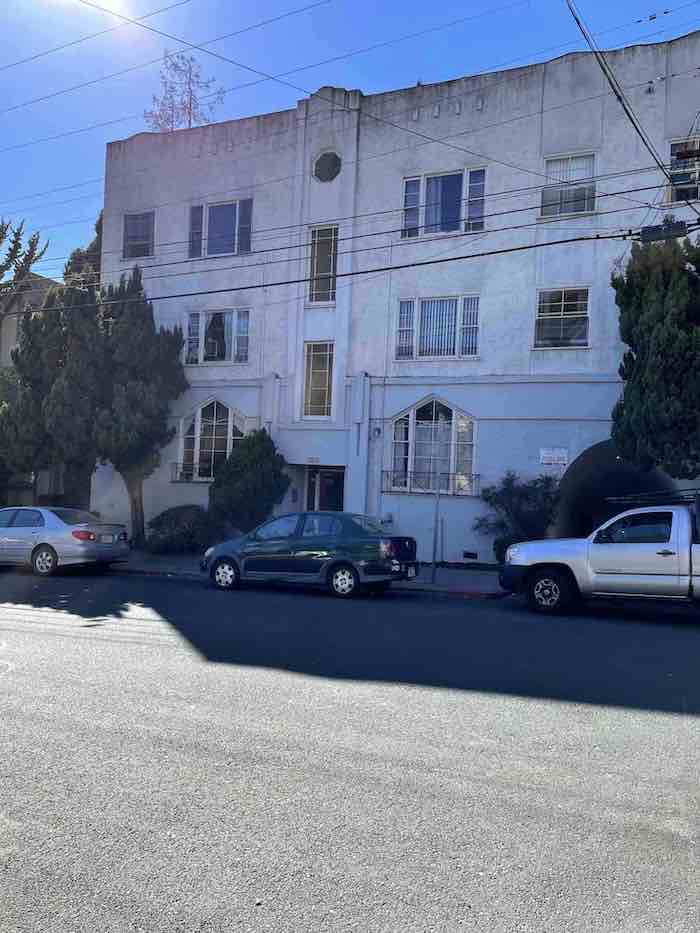
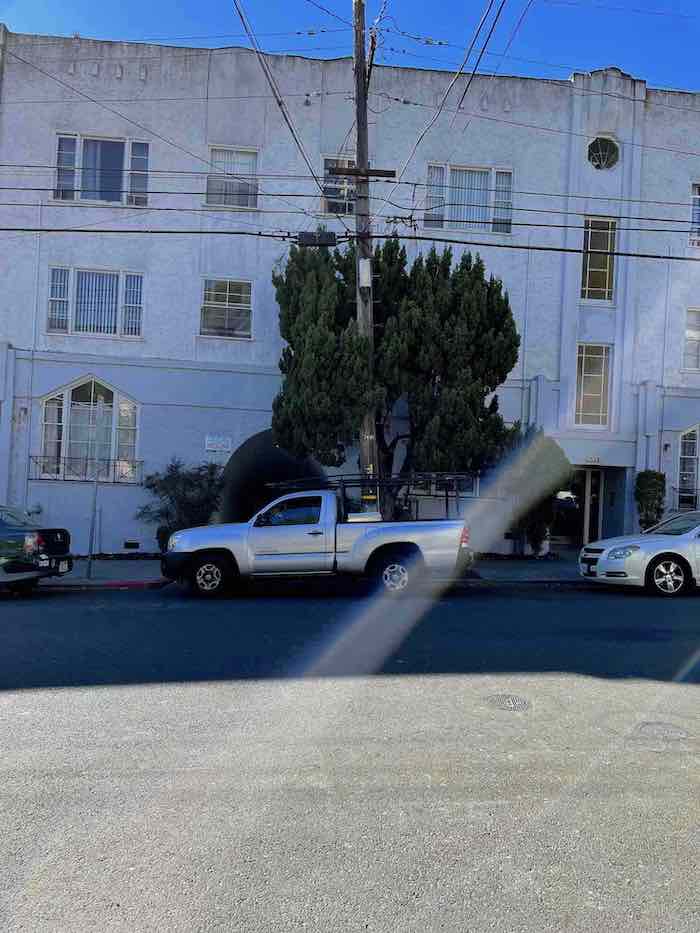
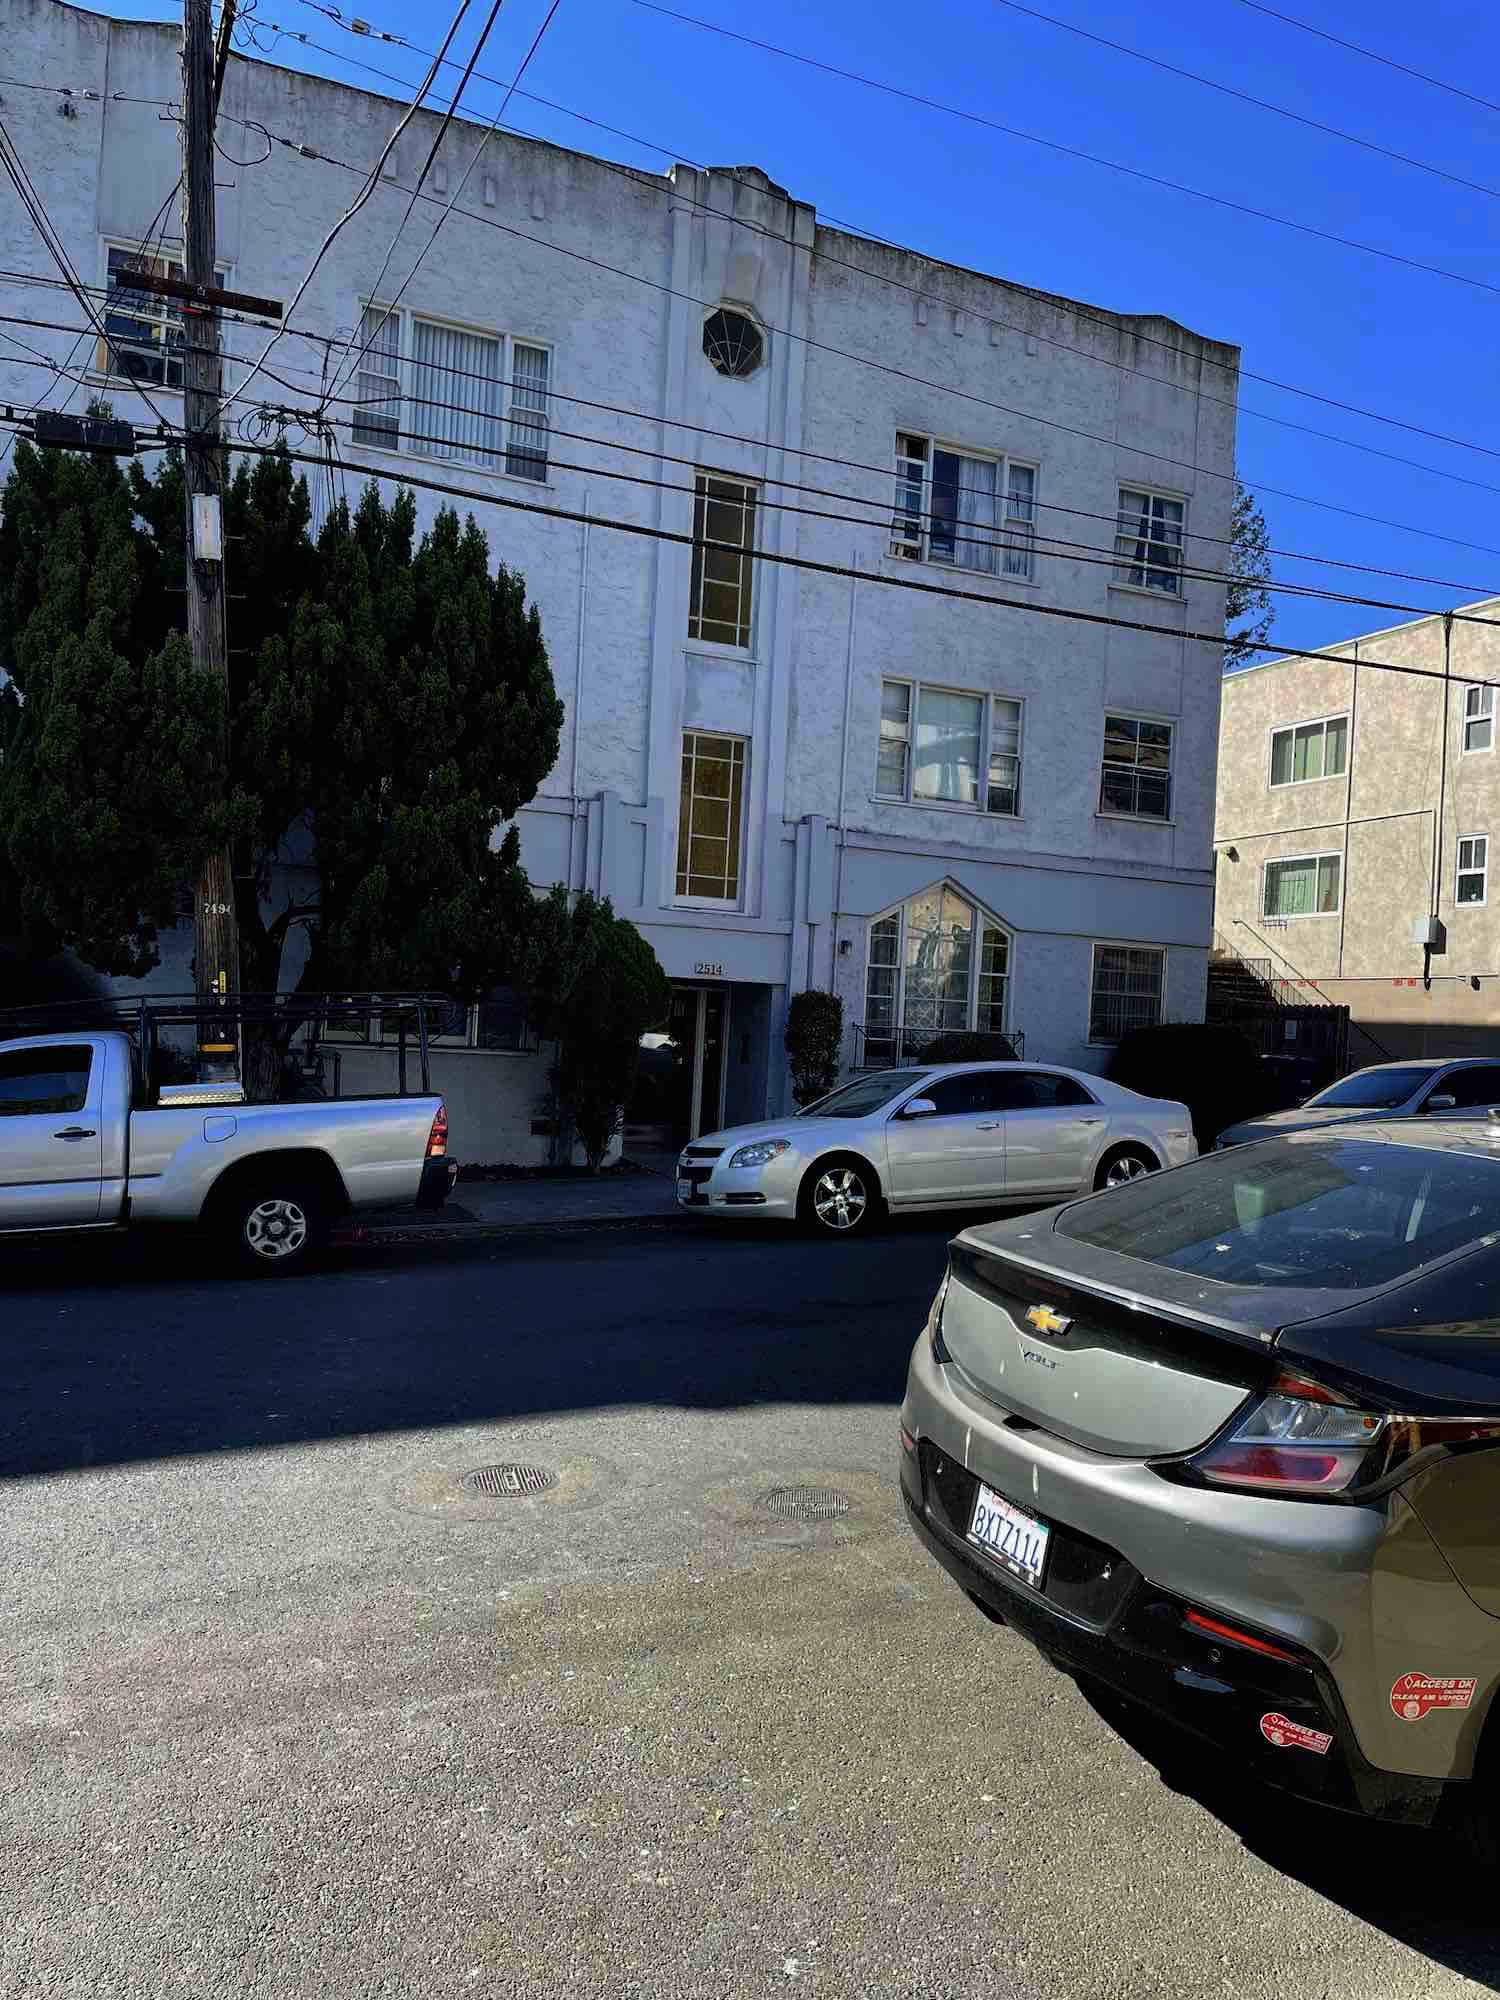
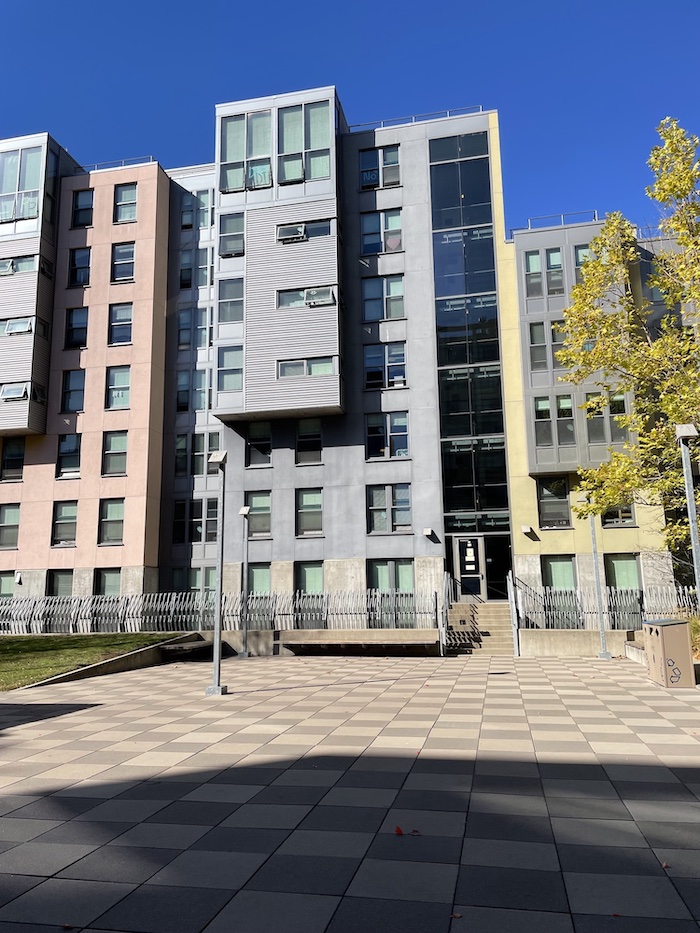
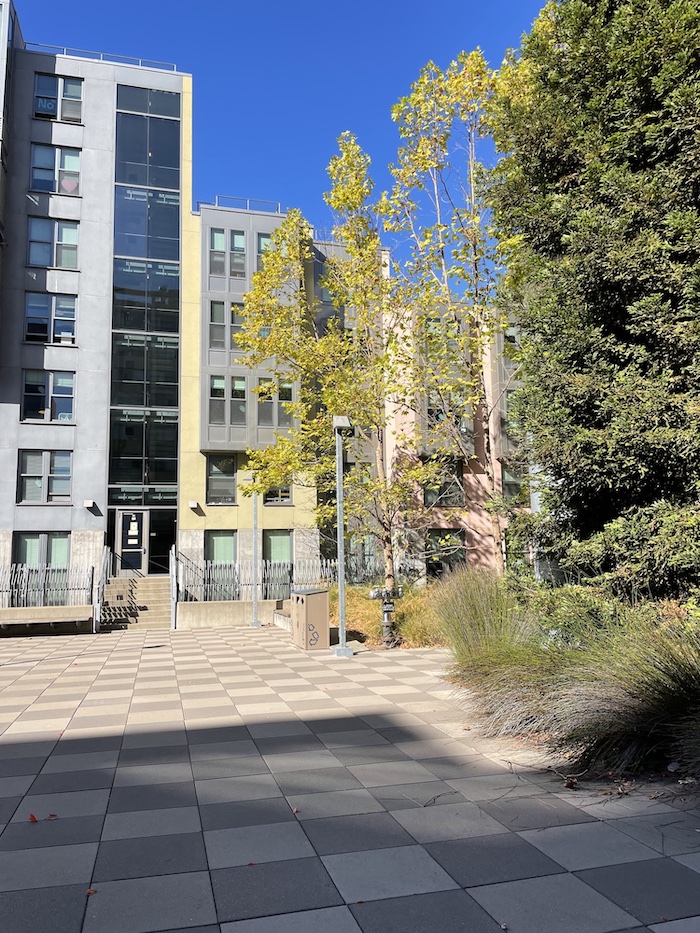
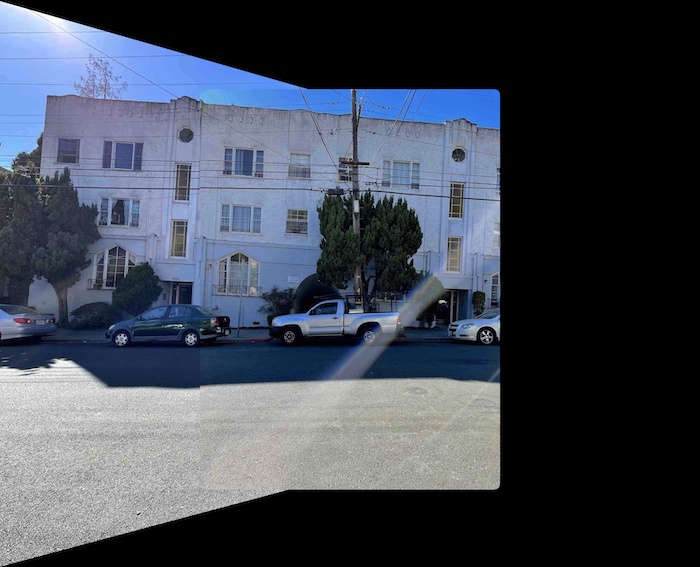
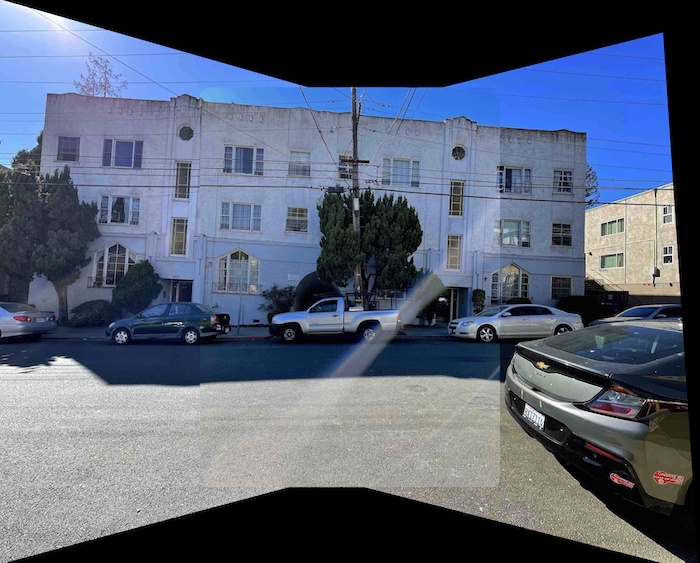
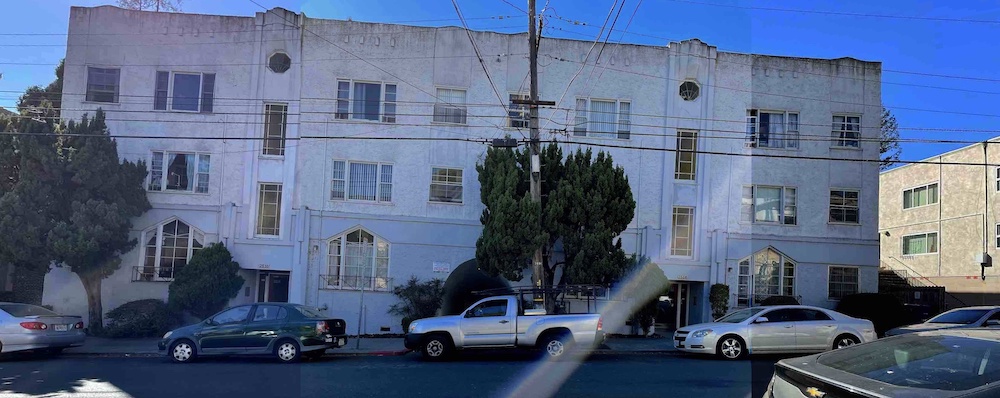
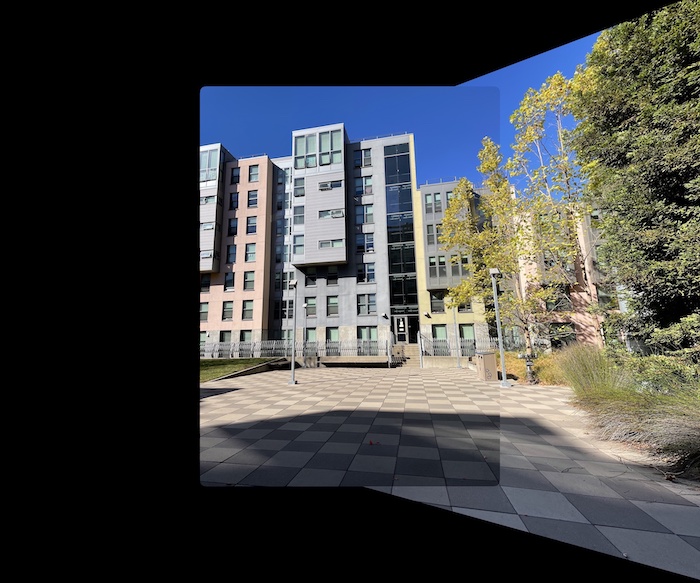
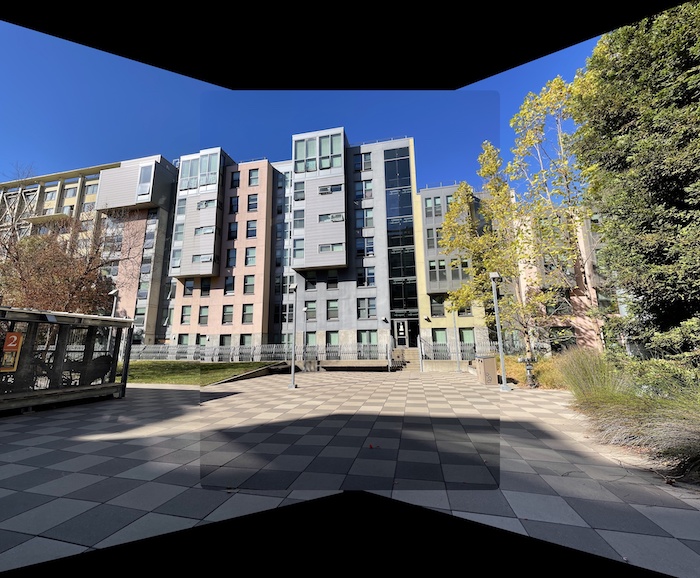
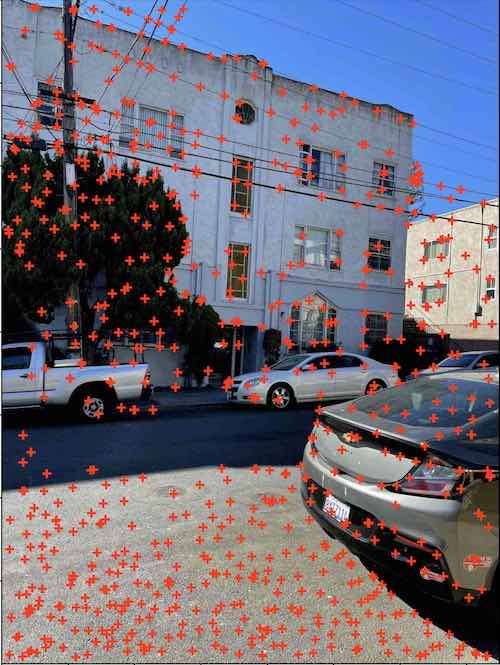
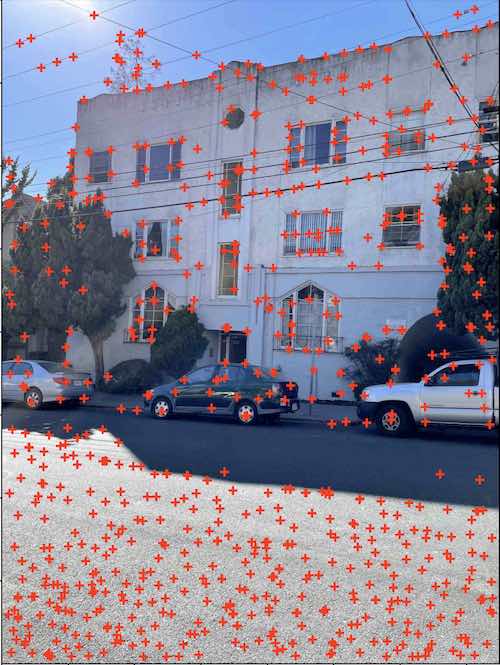
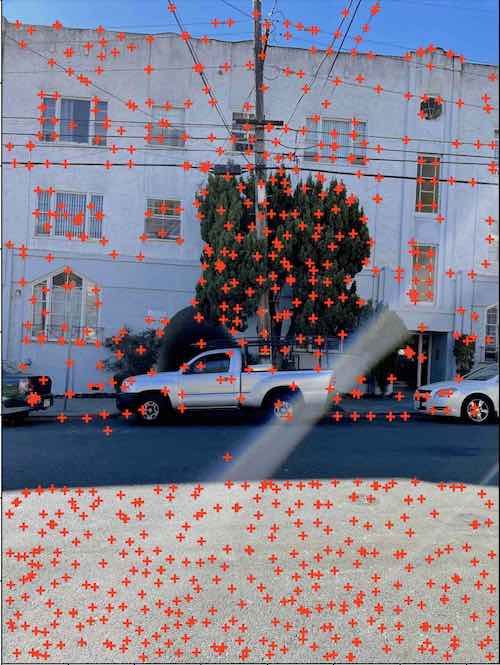
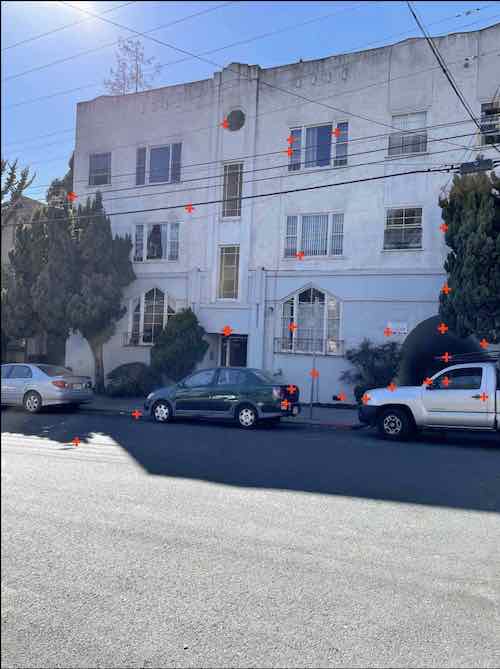
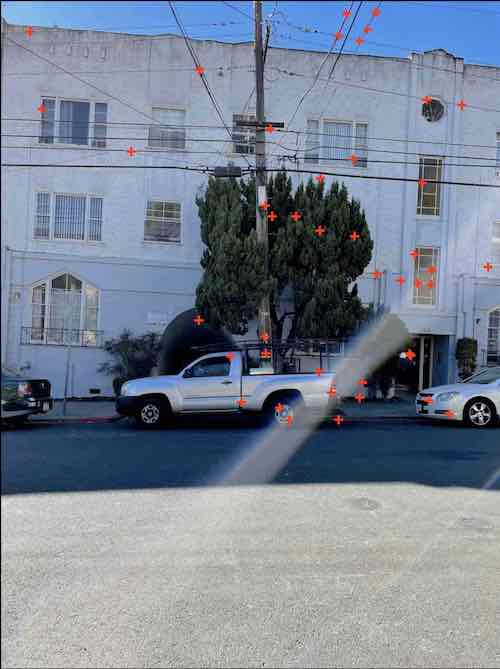
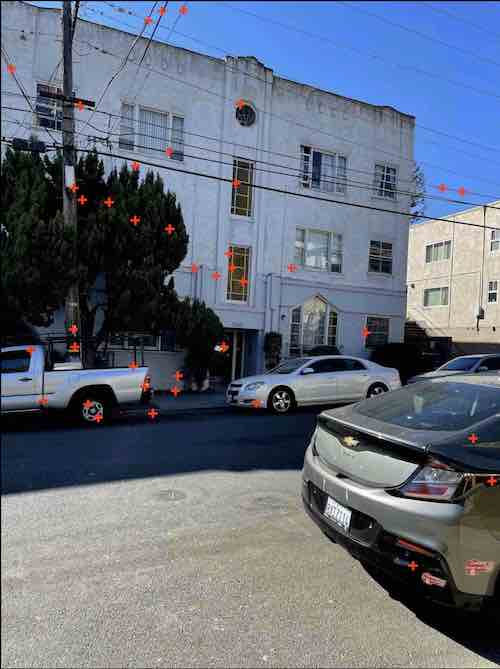
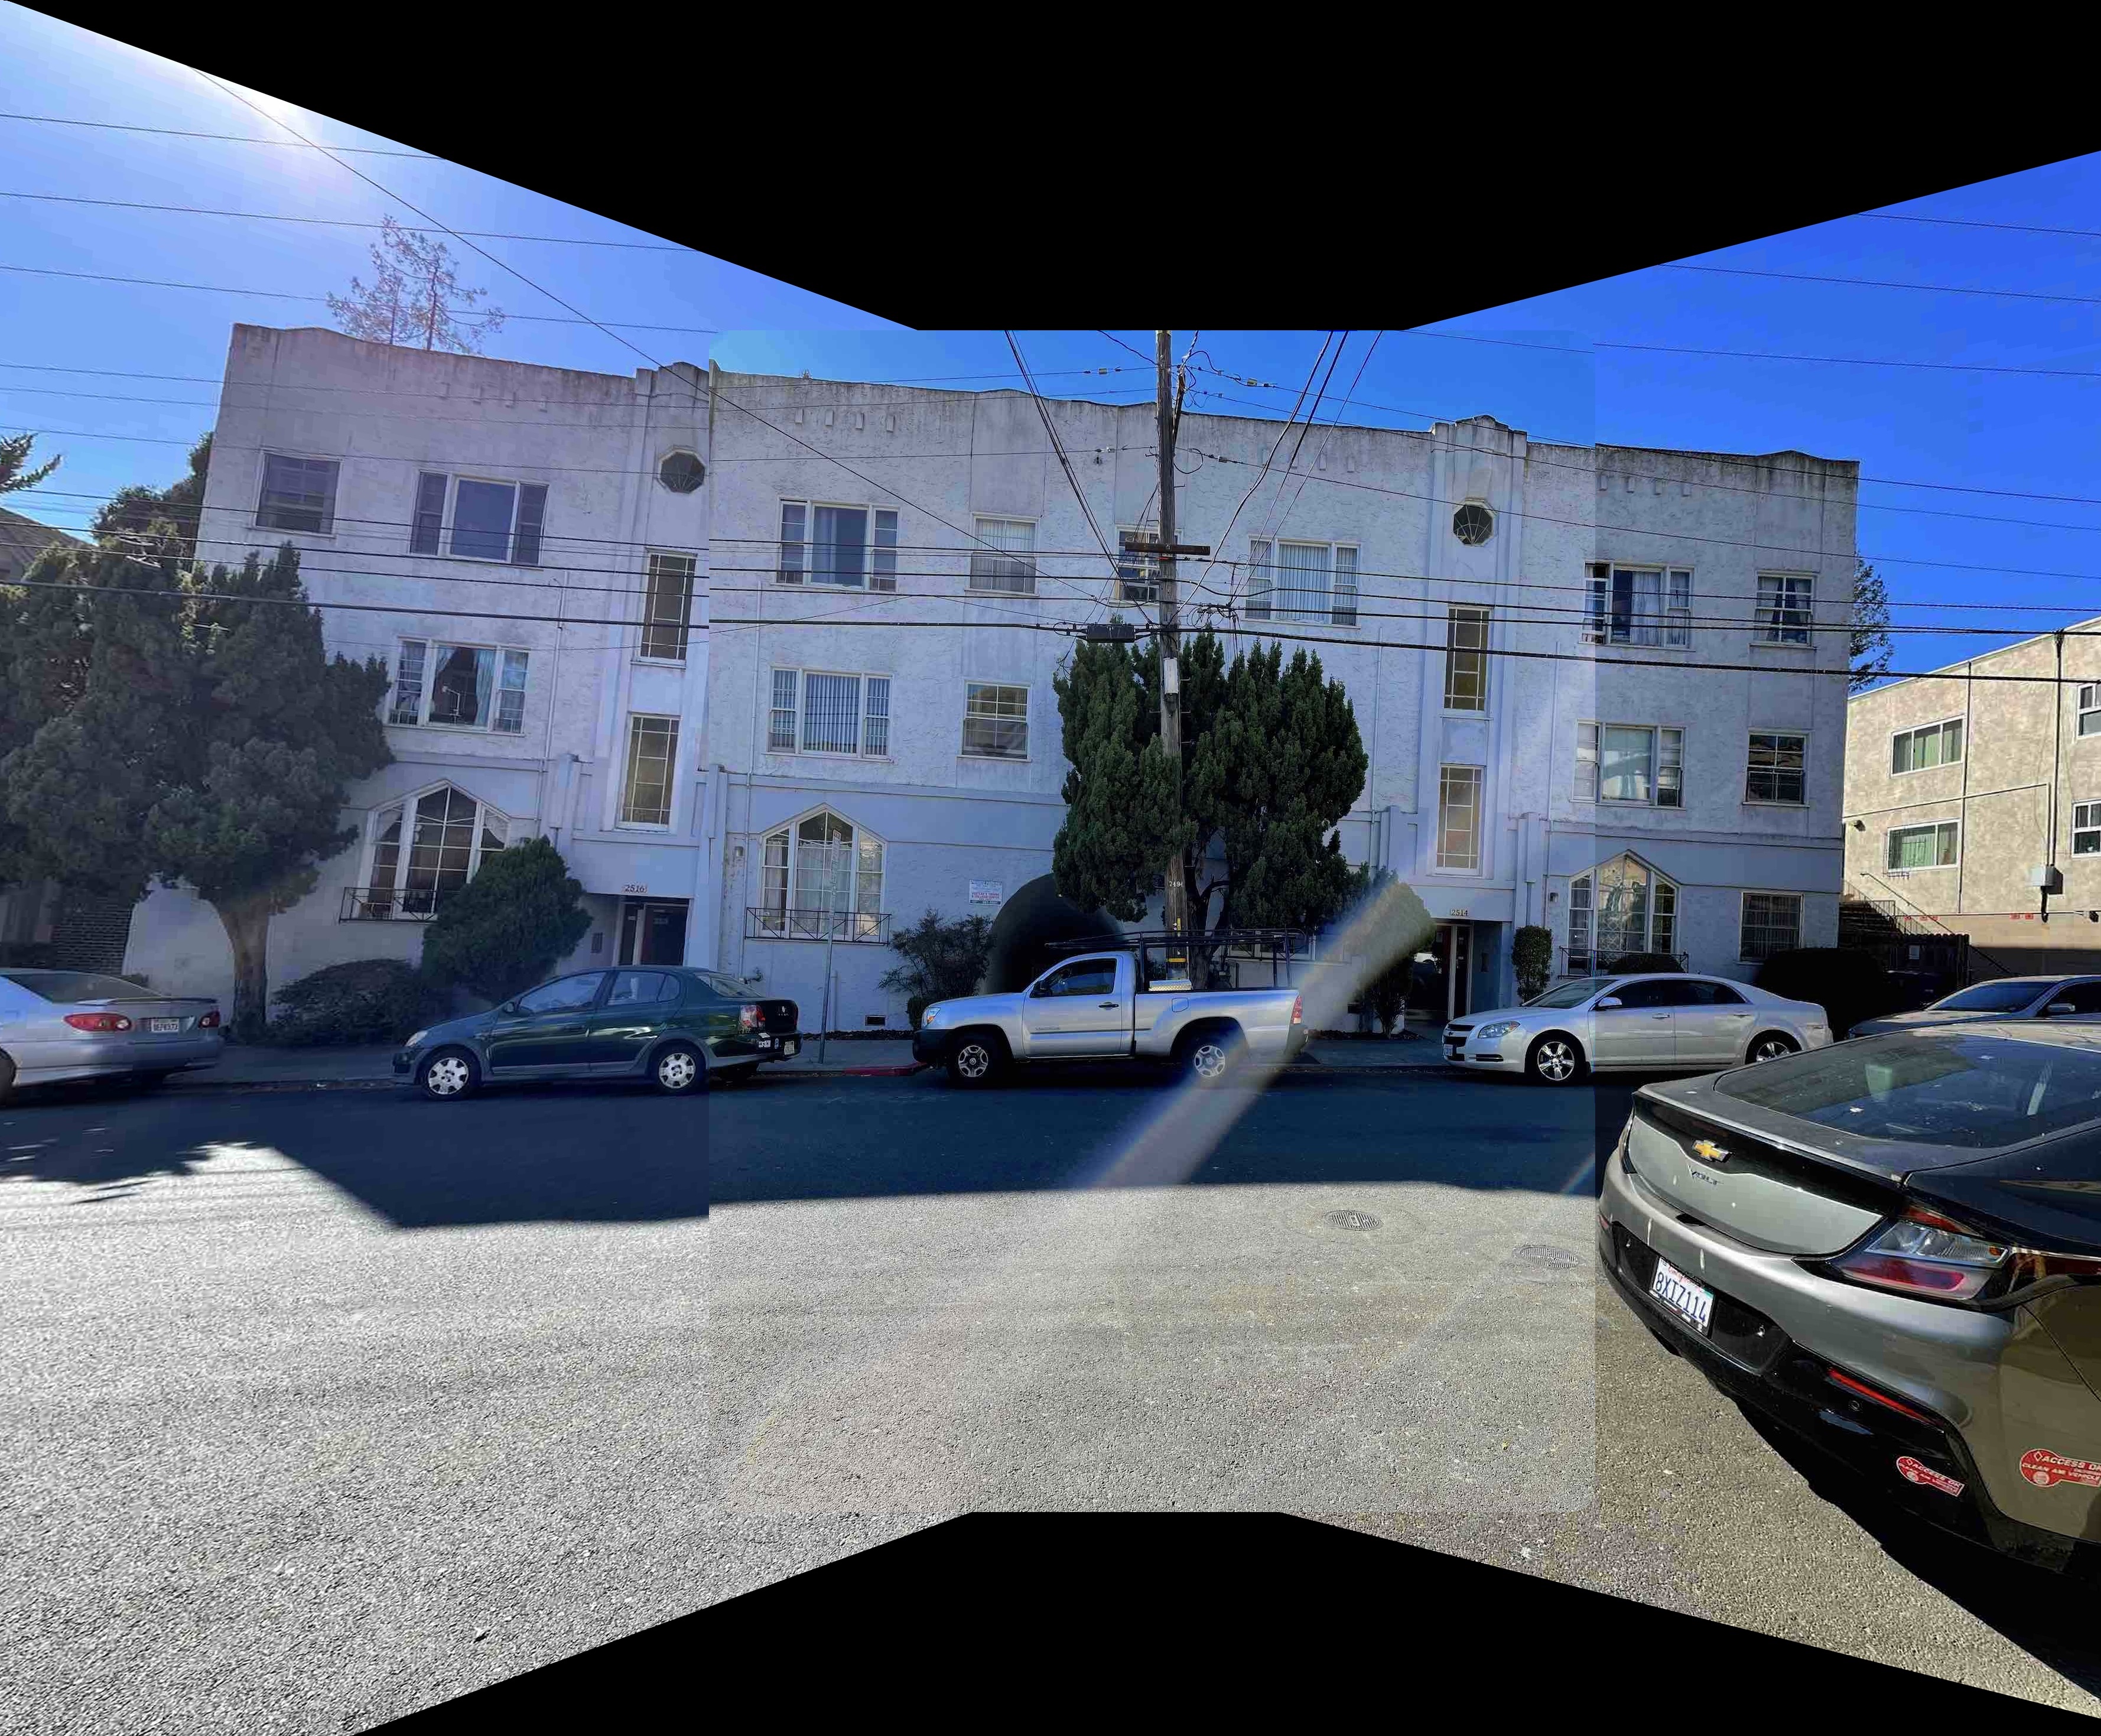
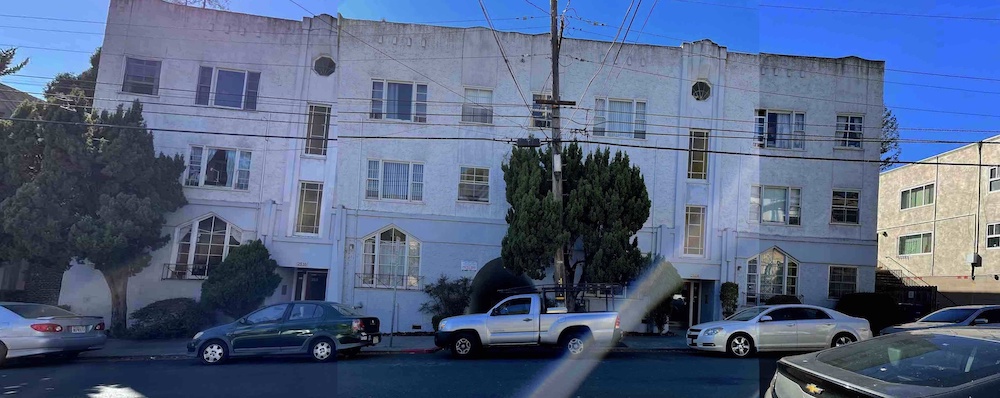
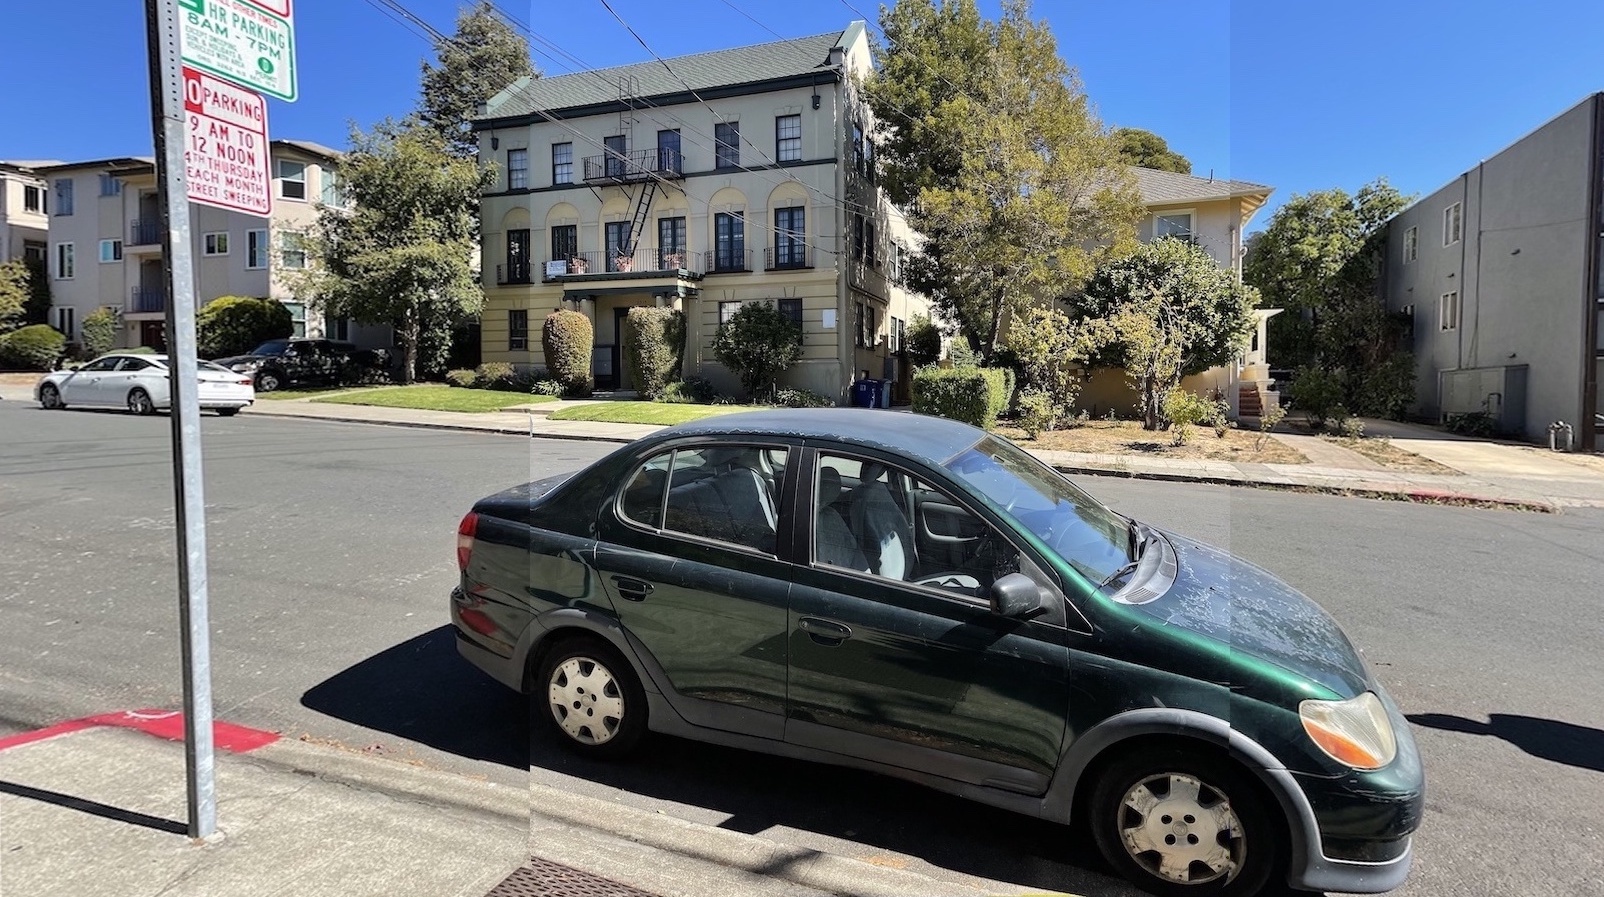
For the piece de resistance, we will now take several images, define their corrospondences, and then warp them towards each other and blend to create a mosaic of images. This will result in a panoramic photo. Before we can do this, we have to make sure to pad each image appropriately. I found that the best method to use was to simply apply the same large pad to each image and then process if from there. Another thing we have to keep in mind is that we want to choose one image to be the central image and then warp the rest to the view of that image. First, let's take a look at an example. Here we have 3 photos of my apartment building.
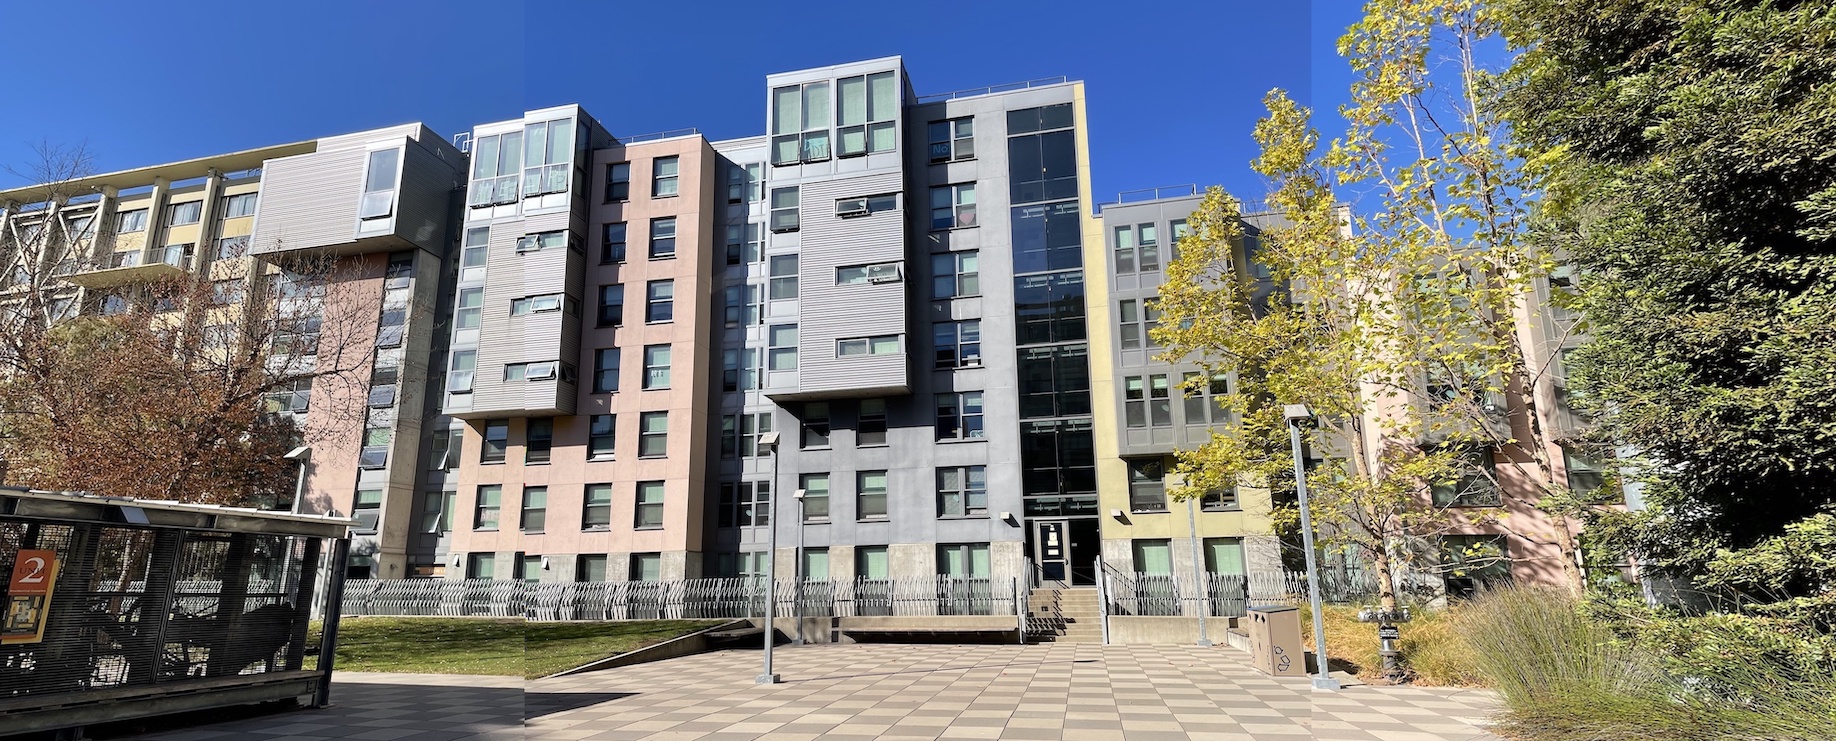
Lets warp the two images on either side towards the perspective of the one in the center. First, we warp the left image into the center one, and then we warp the right image into the warped image that we calculated in the previous step. Finally, we crop the image to get our desired panorama.
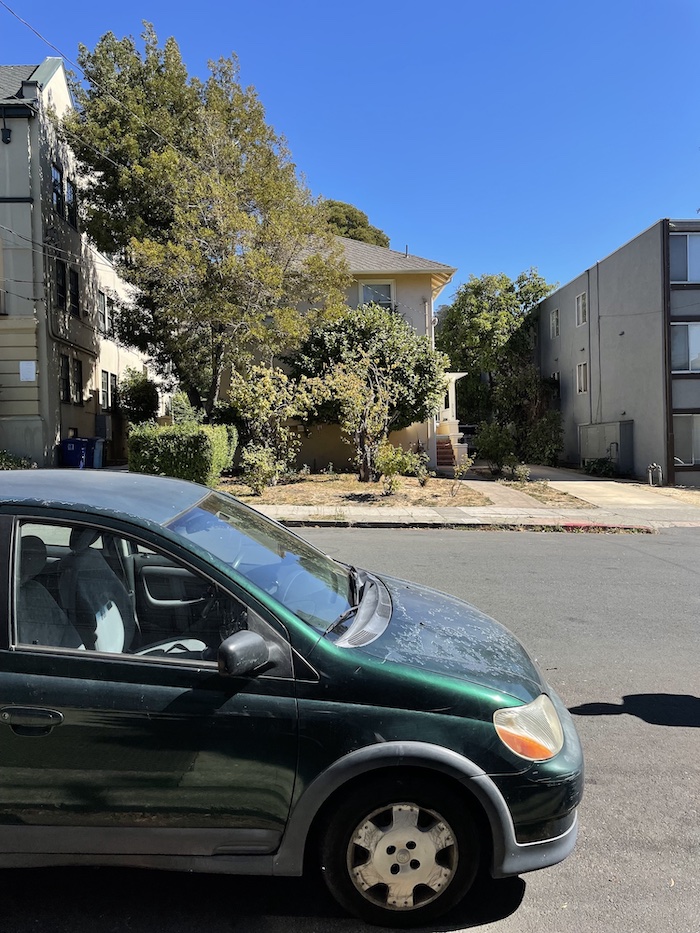
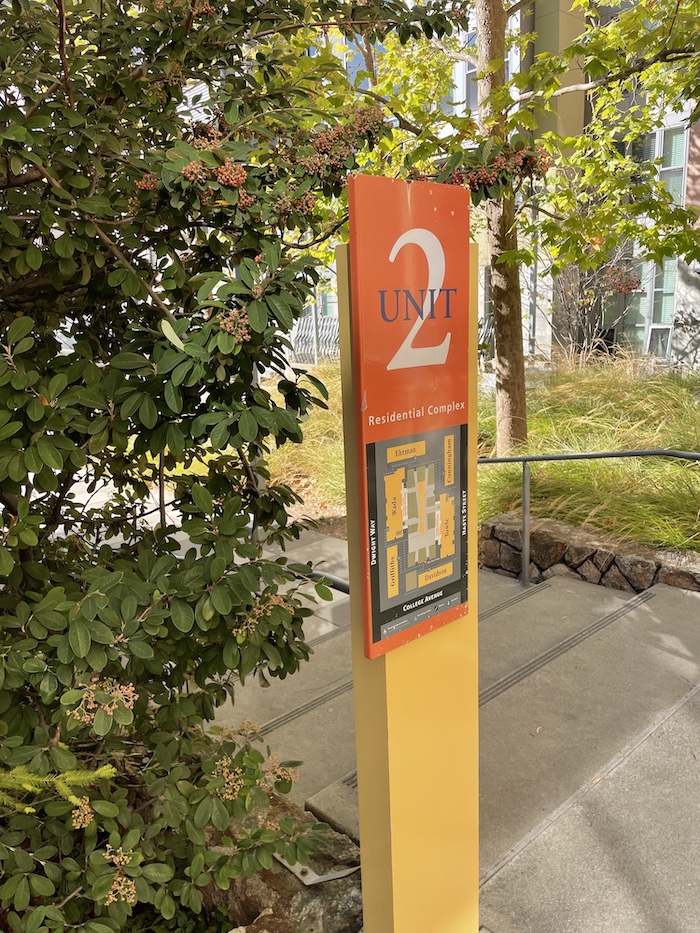
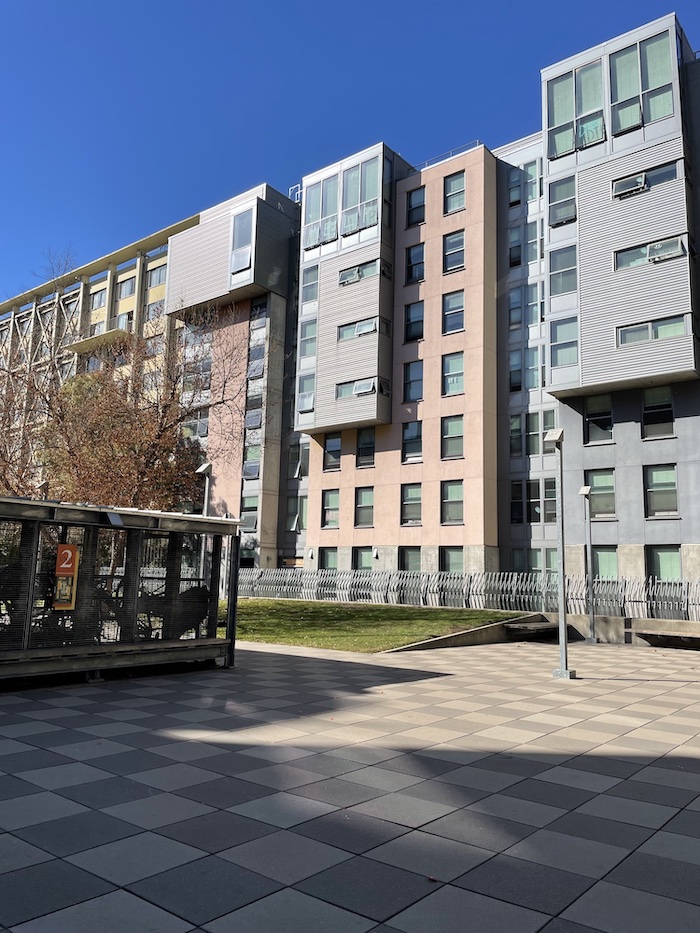
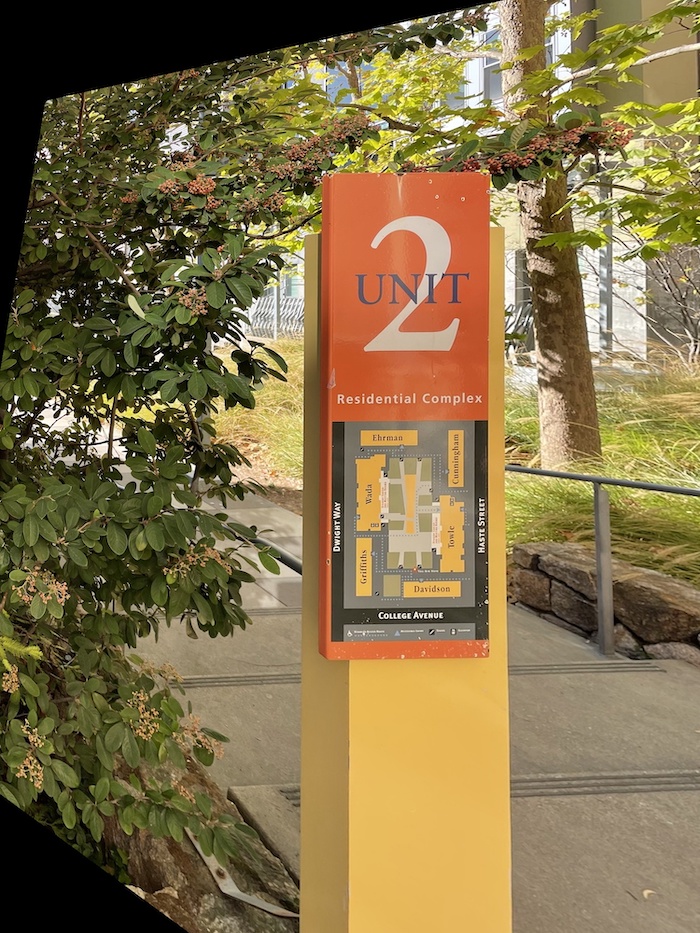
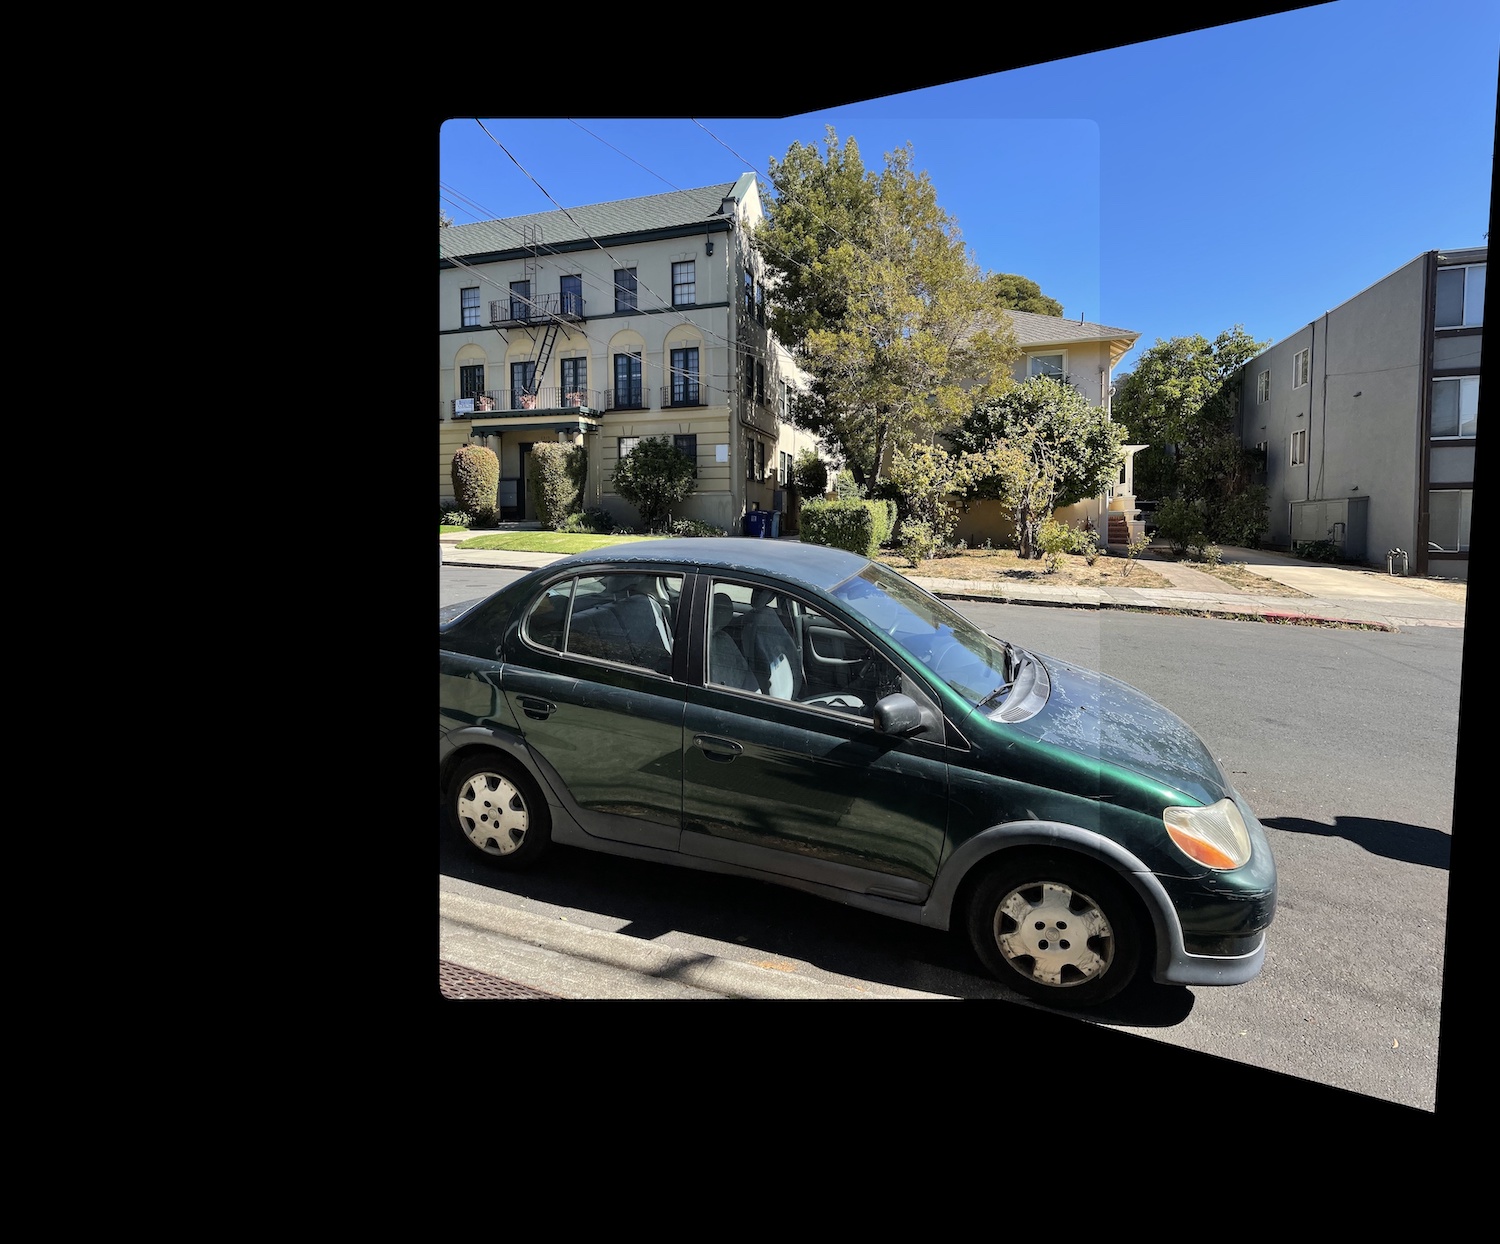
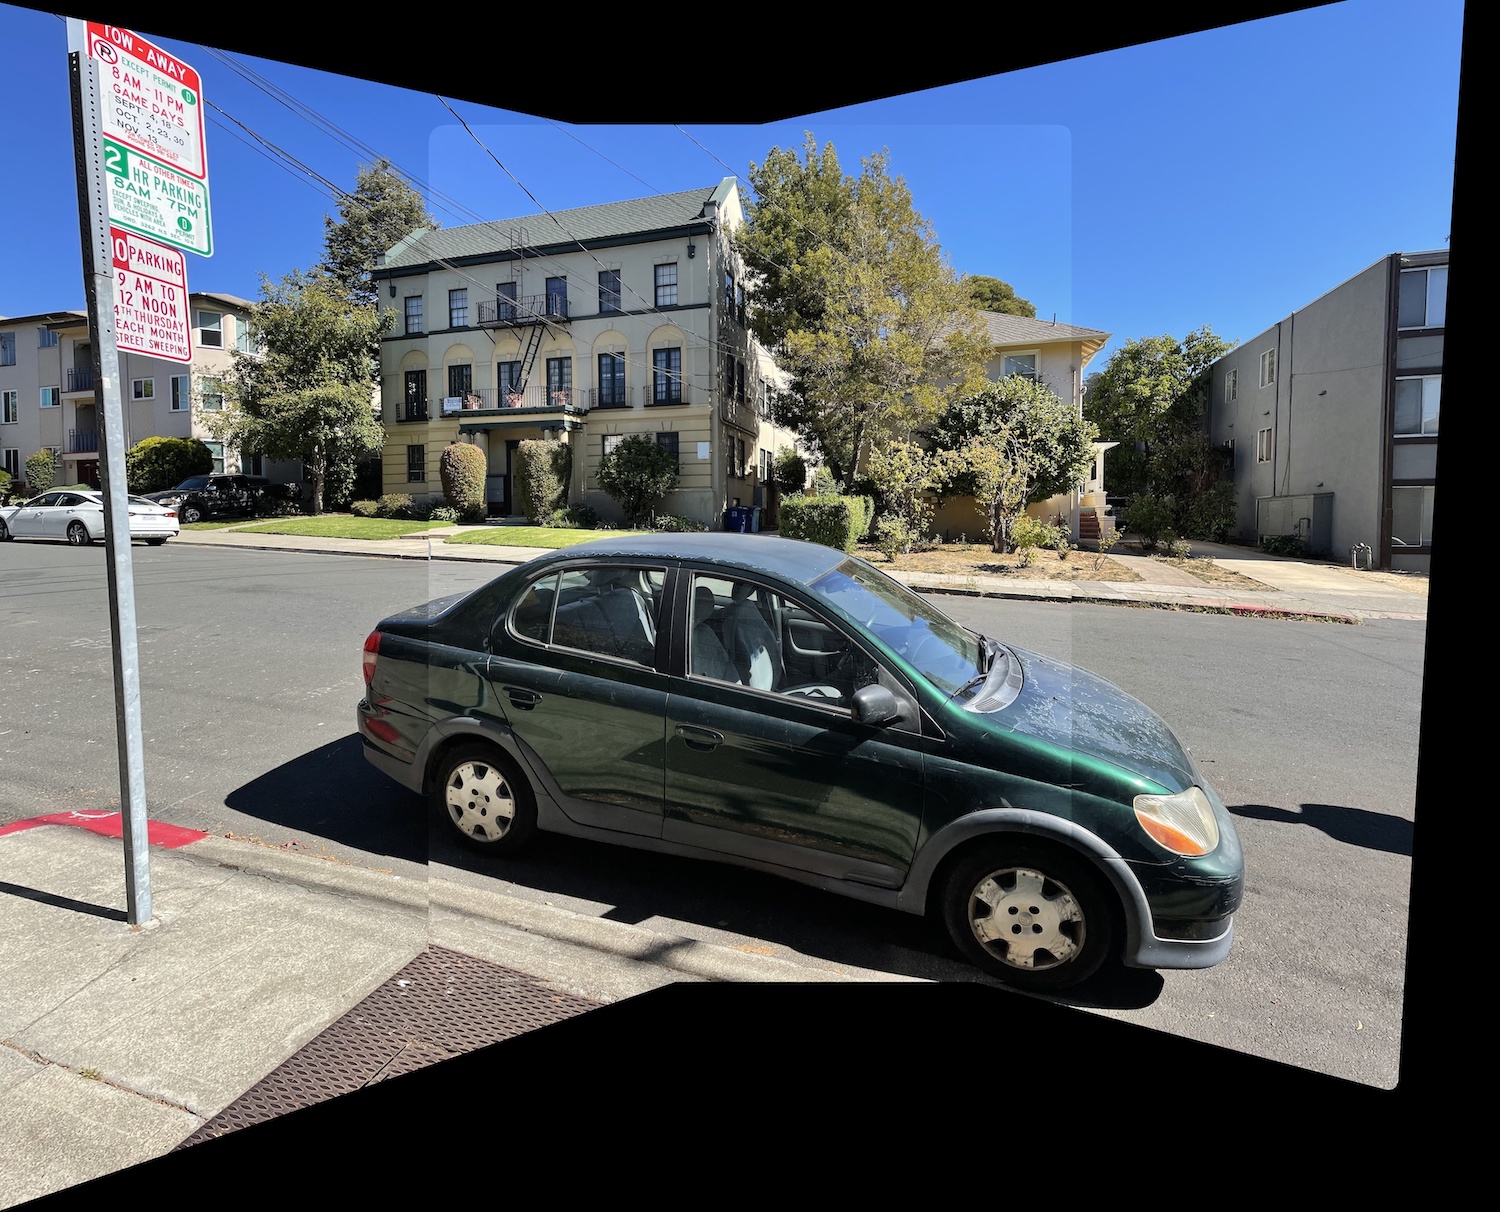
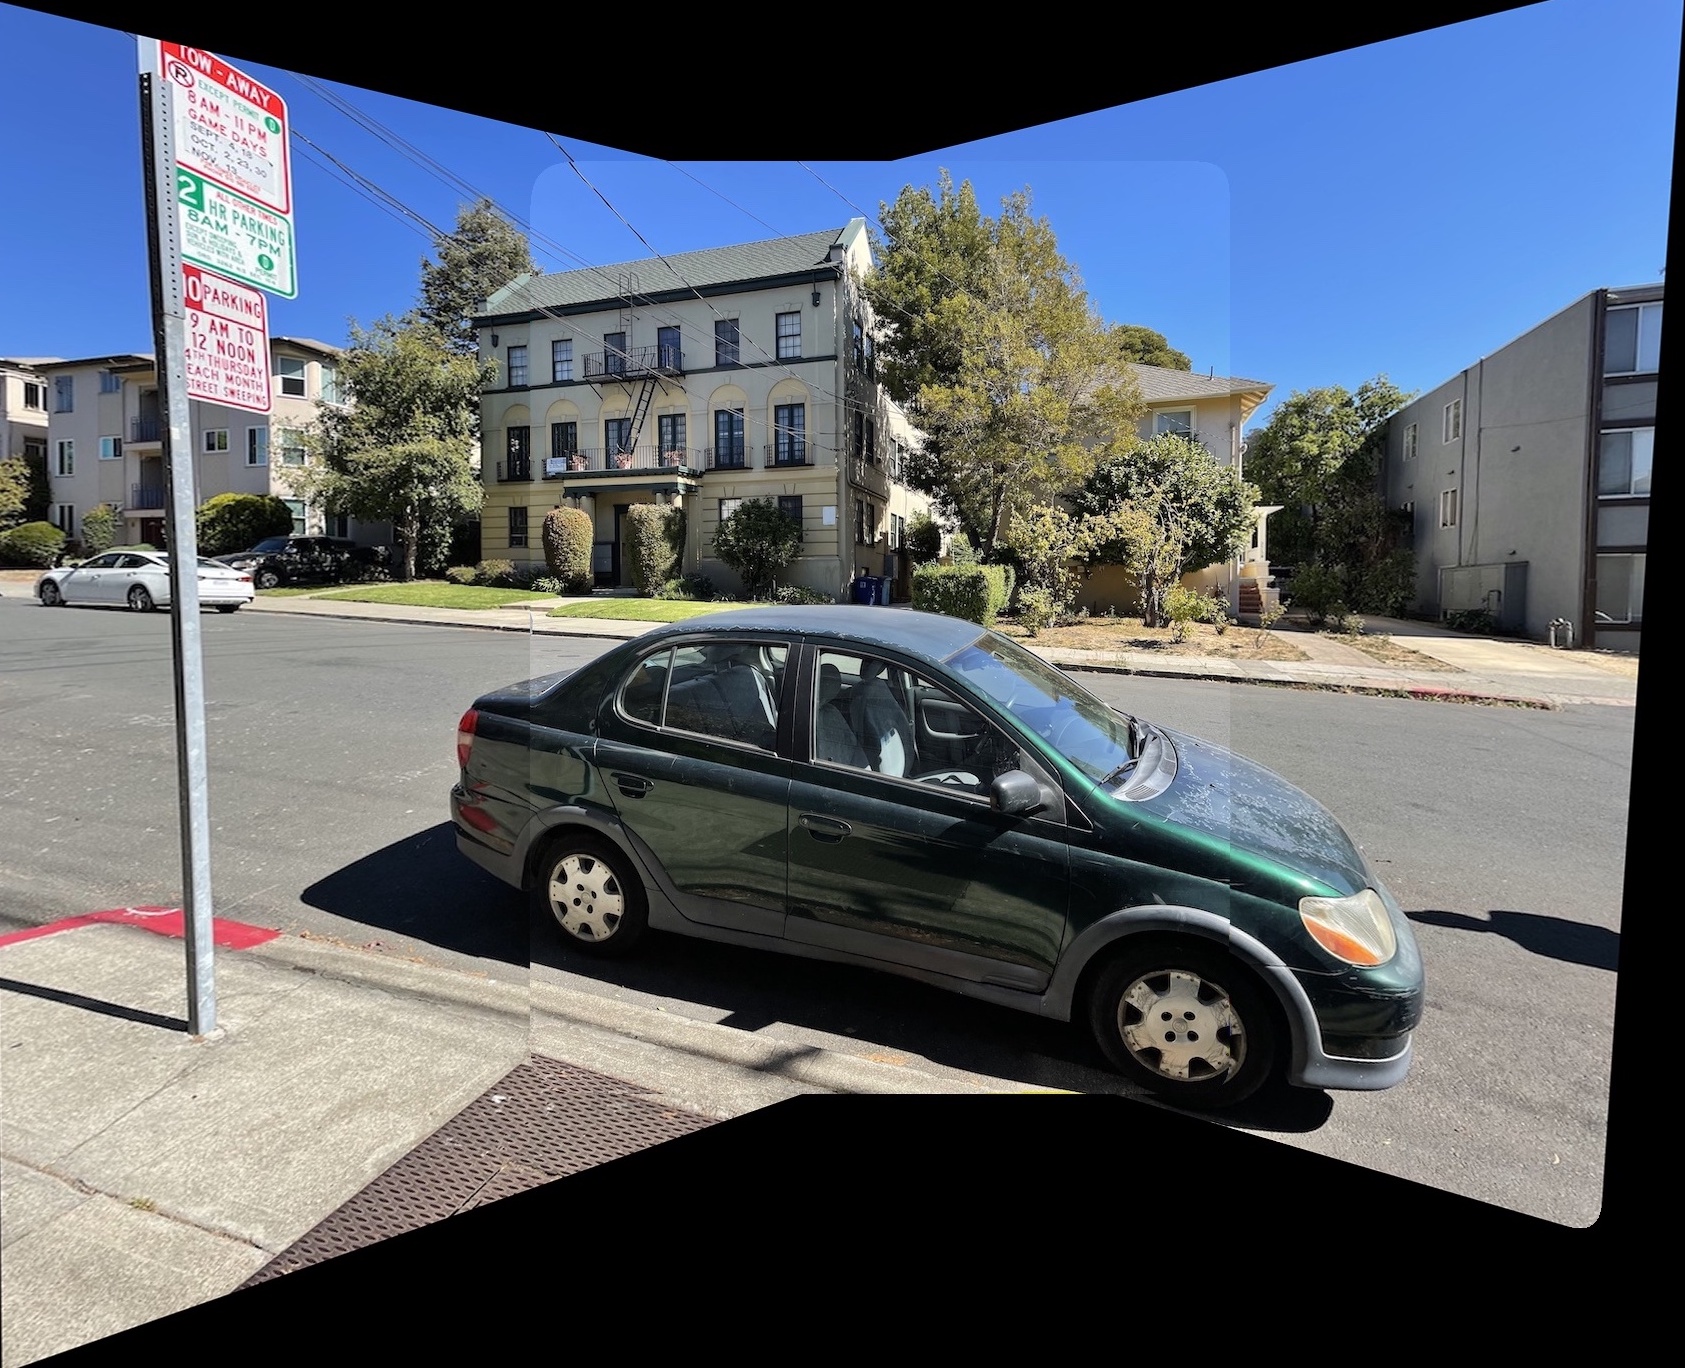
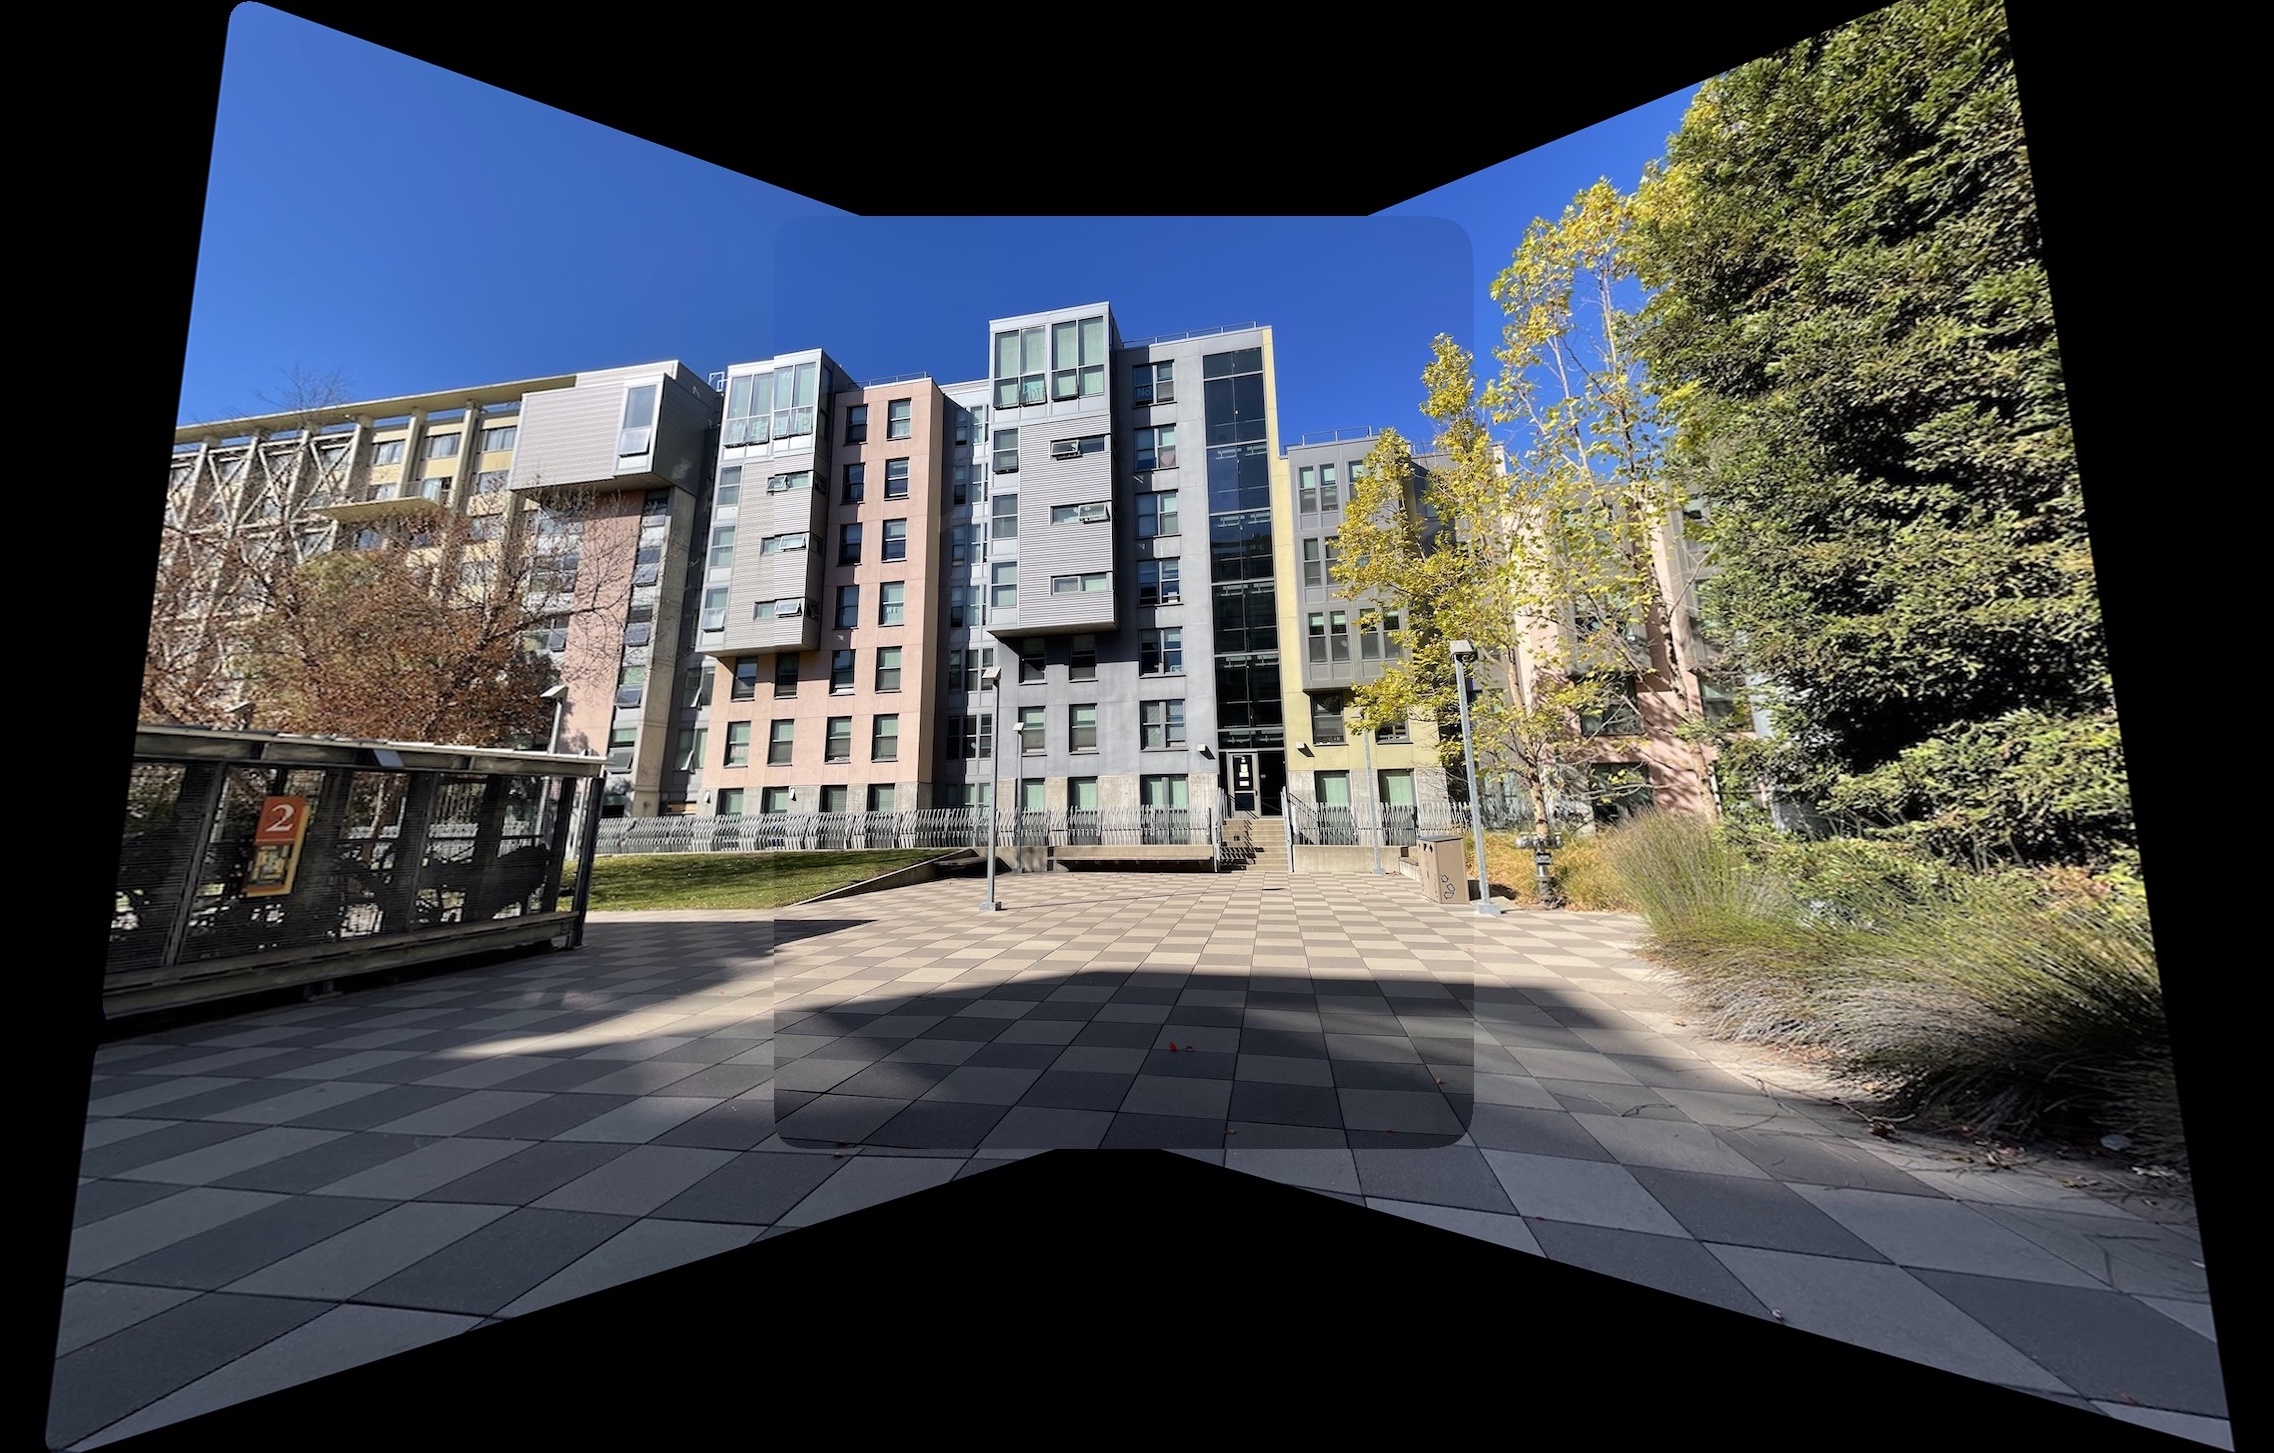
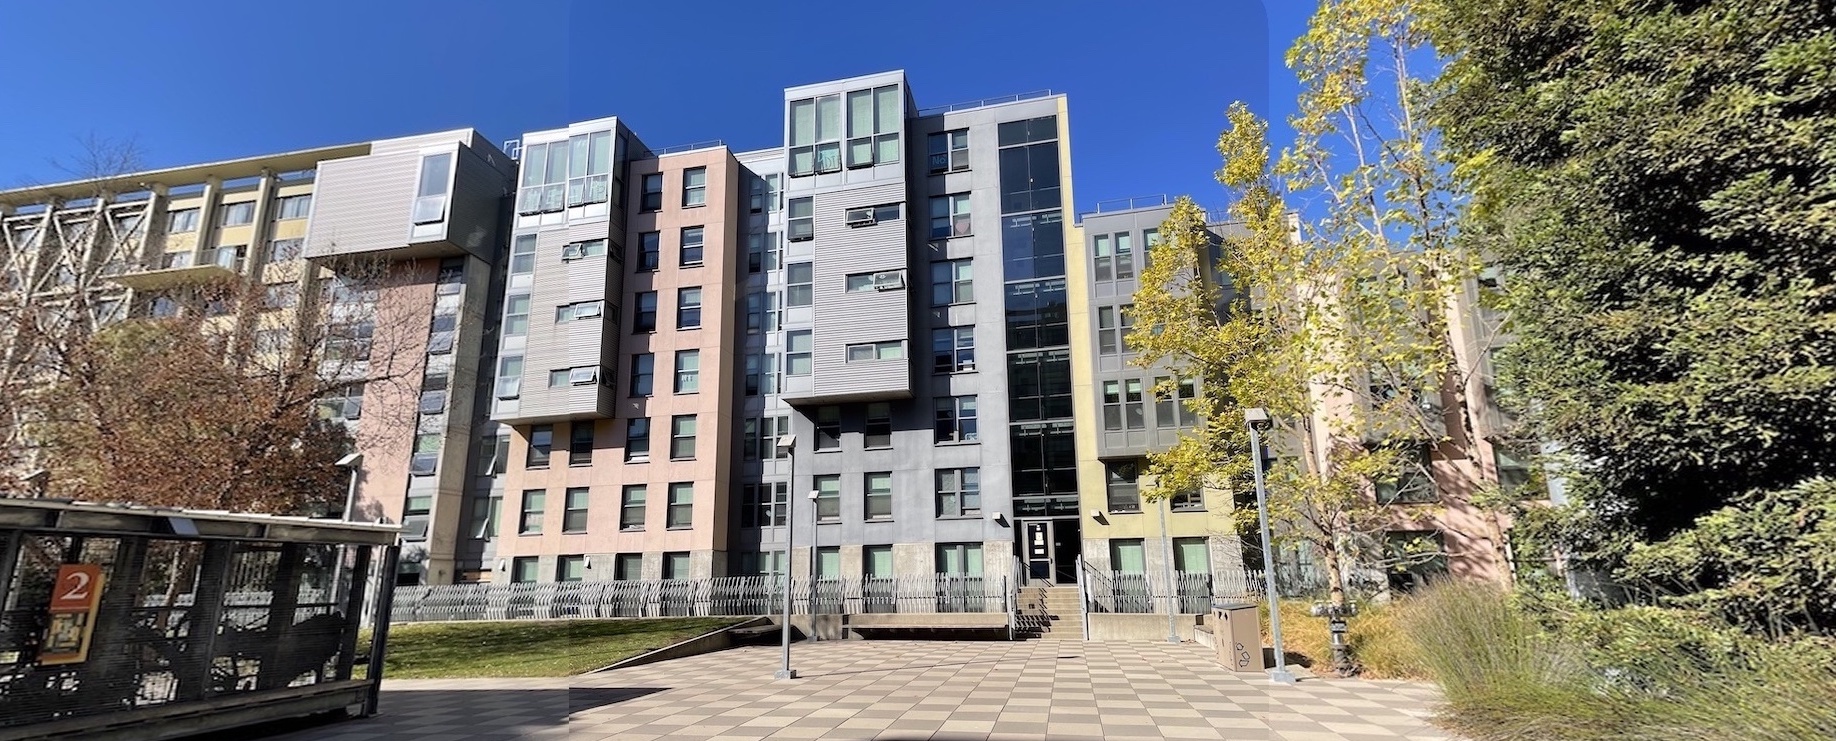
We can do this for the other photos as well. Below we have a mosaic for a car outside my building and another for the buildings of Unit 2. Although there were some lighting issues as a result of using an iPhone as opposed to a camera, the overall results turned out quite nice.
Part B: Automatic
As fun as it is to select the points manually over and over again for each picture, while having to keep track of the order you clicked in and the points you chose, as you can imagine, its much more fun to simply have the computer do all that while you spend your time elsewhere. So our next goal will be to automate this process of stitching together photos. We will be using the methods outlined in the Multi-Image Matching using Multi-Scale Oriented Patches by Brown, Szeliski, and Winder of Microsoft.
Harris Points
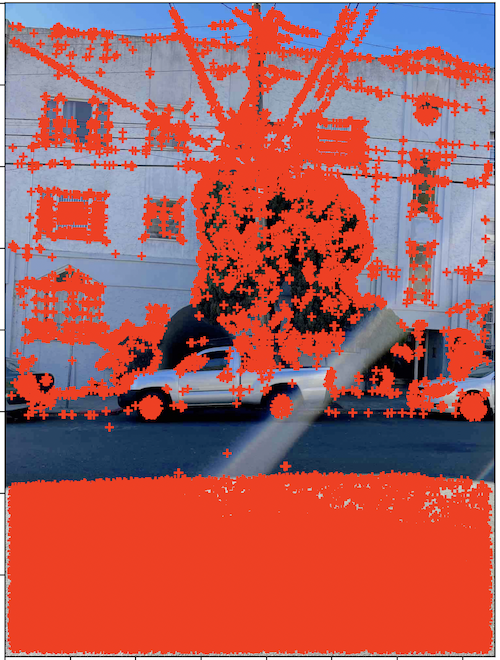
First, we identify the Harris Corner points to use as our points of interest. We do this with just one level as opposed to the multi-level approach outlined in the paper. We also filter out Harris points that are below the threshold of 0.1, to speed up processing in future steps. Below, you can see the original image, all of the Harris points of that image, and the filtered Harris Points.
Adaptive Non-Maximal Suppression
Clearly, there are too many points to do anything meaningful in terms of homographies yet. We need to get rid of some points and only keep those that will be of most use. To accomplish this, we make use of Adaptive Non-Maximal Suppression. We loop over every identified Harris point, and then find the distance between that point and any other points that have a significantly higher corner strenght. We then take the minimum of these distances as that points minimum suppression radius. Finally, we sort by the radiuses and take the top x number of points with the biggest radiuses. This ensures that we have strong corner points that are spaced out and therefore will be of better use. Here we have the resulting points selected after running ANMS and choosing the top 750 points, done on the 3 images we want to stitch together.
Feature Descriptor Extraction
At this point, a key issue we face is that although we have points of interests, there is no sense of corrospondence between the points. To fix that, we have to use some sort of algorithm that will identify which points line up with which points in two different images. To do this, make use of feature descriptors. By taking an interest point and creating a 40x40 pixel box around it, then downsampling it to an 8x8 box, and from there a vector with 64 entries, we can create feature vectors that describe each particular point. We also normalize these vectors to have zero mean and unit variance. Here are some of the feature descriptors for the images. Might not look like much to us, but they work wonders.
Feature Descriptor Alignment
Once we have these feature vectors for each interest point for each image we wish to align, to see which points align with which points, we go through each feature vector of one image and compare it using SSD against all of the feature vectors of the second image. Using Lowe's Trick, we take the ratio of the closest feature vector vs the second closest feature vector for a particular point. If the ratio is smaller than a set threshold, in this case 0.6 as a result of the graph in the paper, then we know that the feature vector from the first image has a strong match with the first feature vector of the second image. Below, we can see the matched points between picture 1 and picture 2, and then between picture 2 and picture 3.
RANSAC
The final thing we have to take care of is that there are still points that are outliers and are clearly in one image but not in the other. We don't want to cause our homography matrix to be skewed, so instead we make use of RANSAC, which stands for Random Sample Consensus. Essentially, over the course of many iterations (25,000 for me), we sample 4 points and create a homography. We then warp the points of one image to the other and see how many points are within a small error margin (1.0 for me). Over the iterations, we keep track of the longest list of points successfully transformed. These are our inliers, and therefore points that we can be sure are in both images. From there, we then calculate our homography matrix using the inliers and get our final images. Below we have the resulting images, with the manual ones on the left and the automatic ones on the right for comparison.
Gallery
Here are the final panoramic images, cropped. I think that they came out quite good. Comparing with the manual ones, there is not much discrepancy, most likely because when I did the manual, I selected well over 30 points for each image to ensure a nice homography, so the automatic selection did not need to do much in terms of image improvement. However, it definitely made life easier by not needing point selections.
Lessons and Takeaways
Part A: This has taught me a lot about how images work and also the mystery behind a lot of photo editing features on my phone that let me shift the perspective. As someone who likes things to be aligned perfectly, I use perspective warp quite a bit in my own photography and so its nice to know the behind the scenes of that. I also really enjoyed learning how to make my own panoramas, as now I don't have to hold my phone still and rotate extremely slow. Instead I can just take quick photos that have the same pencil of rays, fire up my laptop, and spend 5-10 minutes defining corrospondences and voila, Panorama!
Part B: I think the coolest part of this is finally no longer having to manually select the point, as that was awfully tedious. I also think its really cool how fast the process is, especially when you consider how many points are involved. Finally, I think its really impressive how the final image looks and how the blurry feature vectors which seem not too descriptive to my eyes allow the computer to do so much.
BONUS
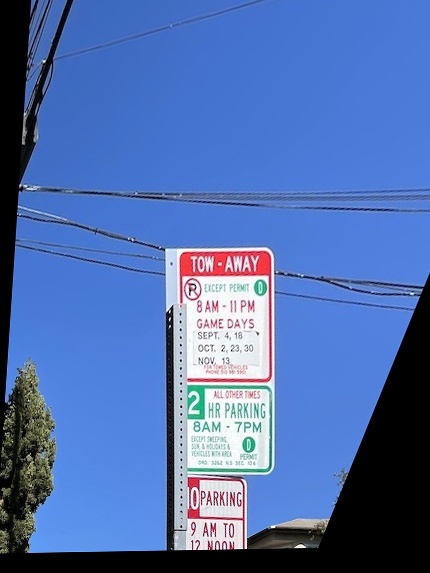
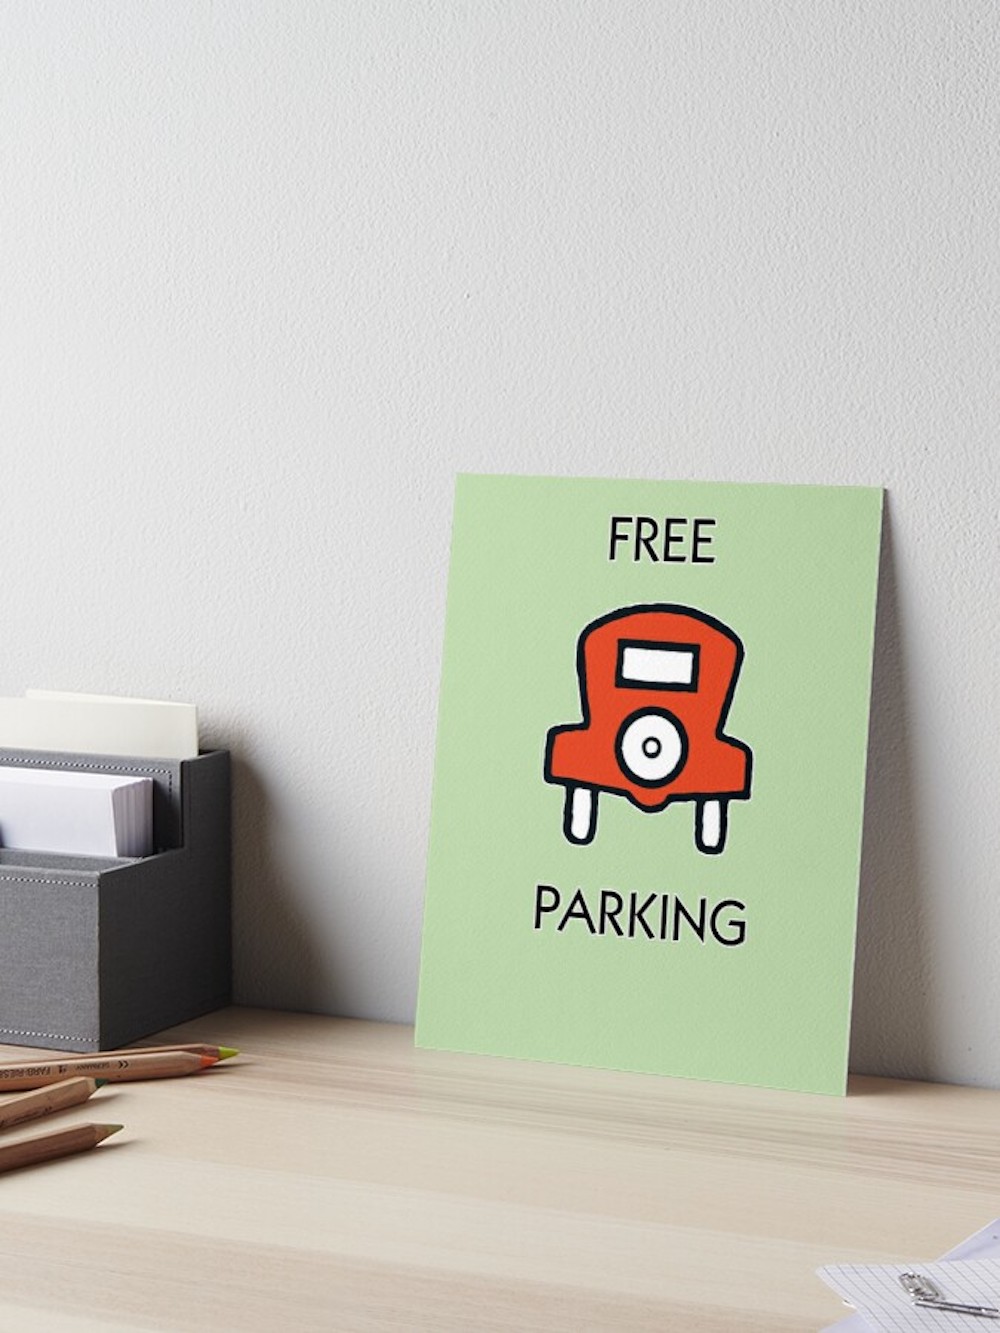
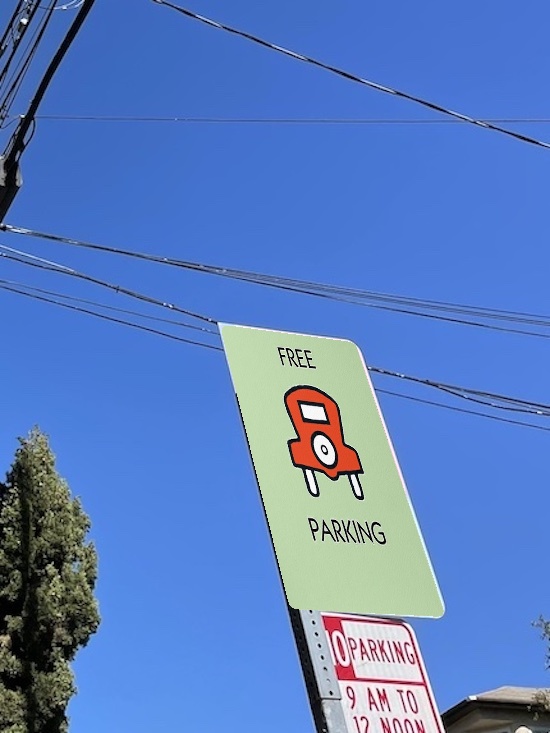
Although we can stop here, why should we? Let's try to do some fun things with our newfound technology. First, we can use the warp to project images onto a specific region of another image. Let's use this to fix the parking problem in Berkeley. We can replace the confusing parking signage with all its rules and regulations and instead create a nice, friendly parking spot.
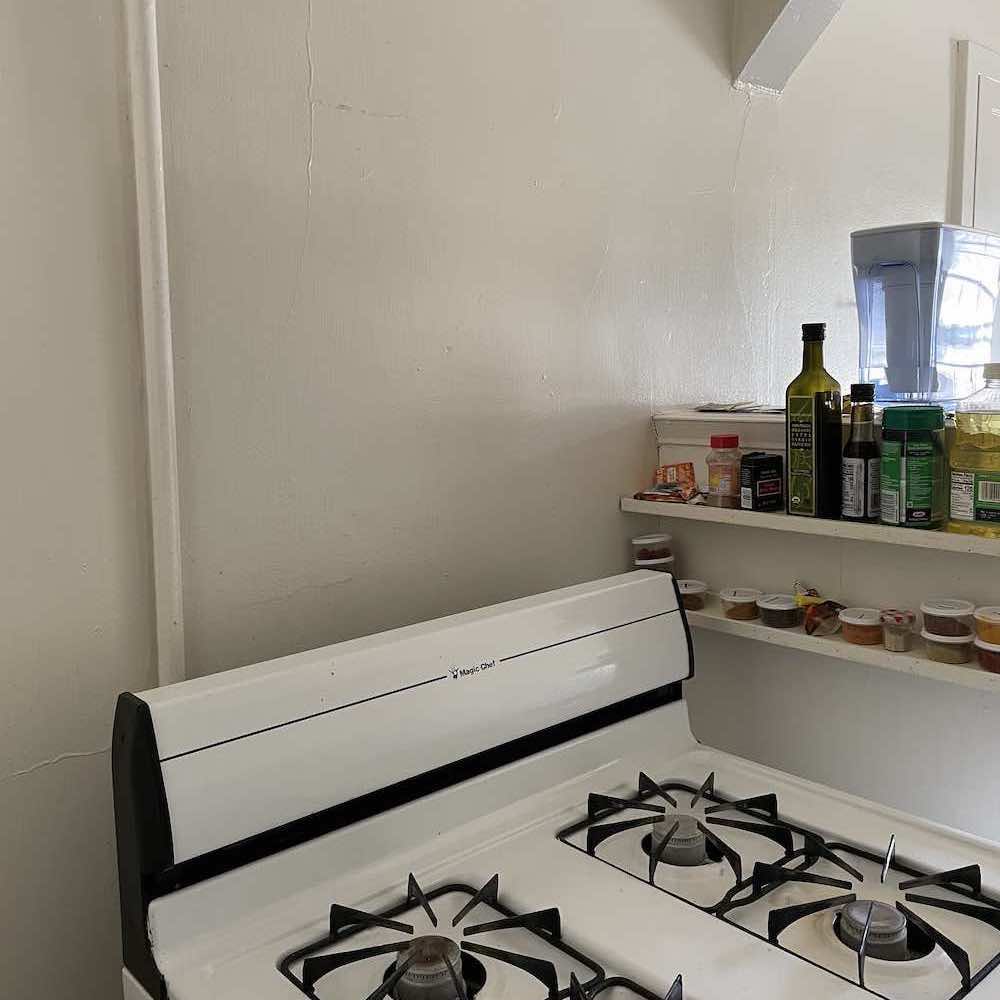
Or, we can make it so that my kitchen feels more homier. Who doesn't enjoy living, laughing, and loving? I know I sure do. Let's hang up an appropriate poster to cherish life.
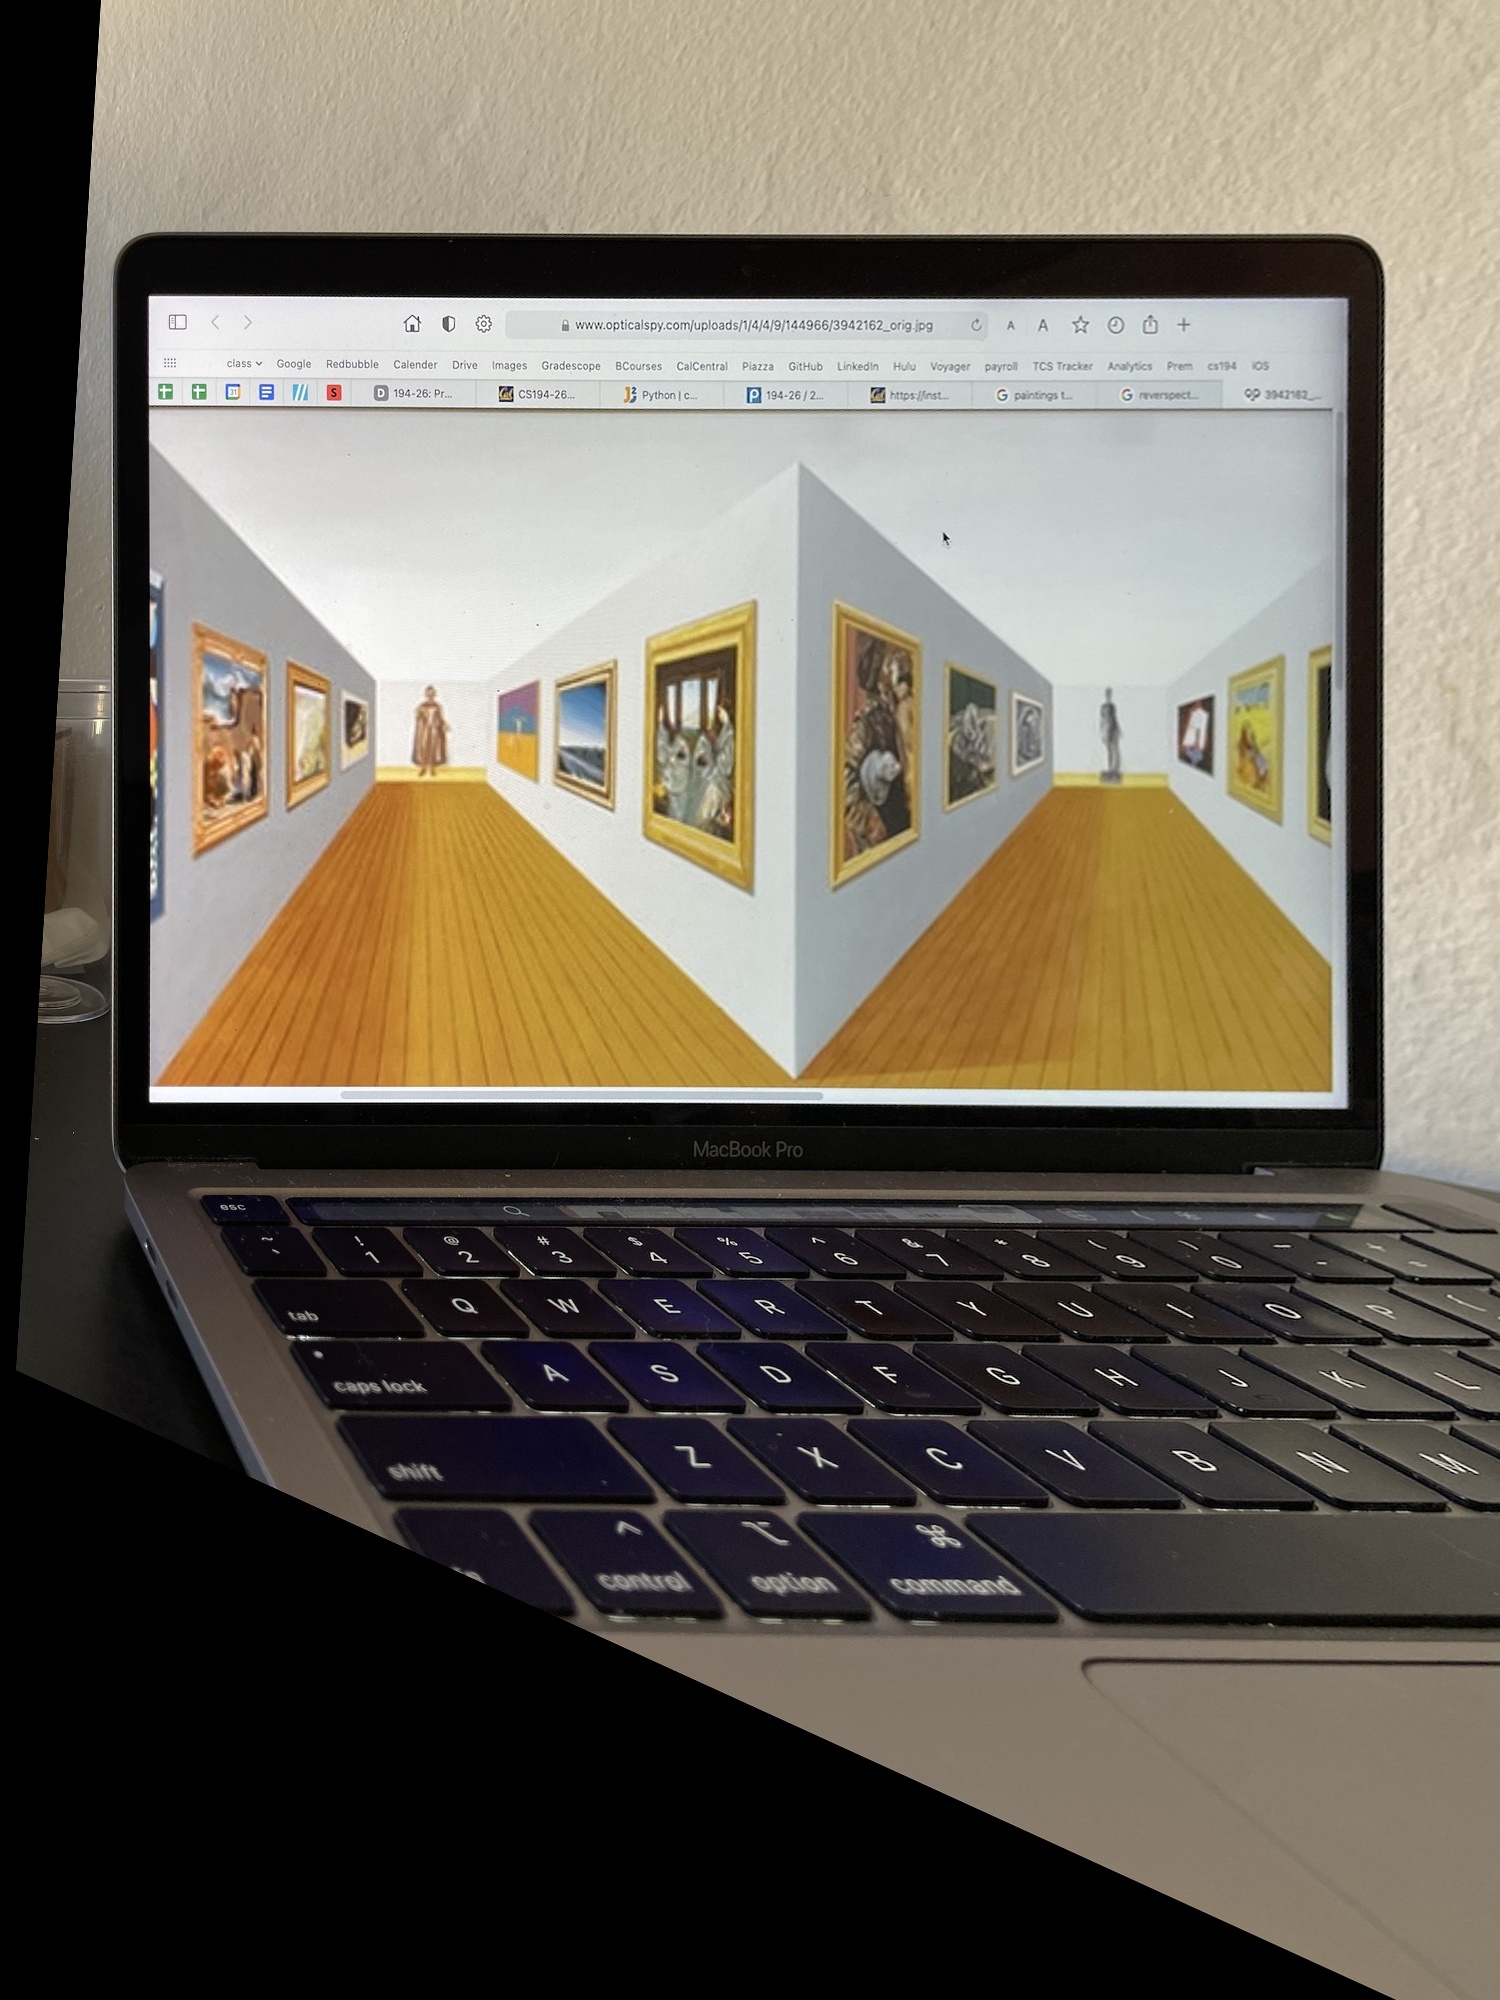
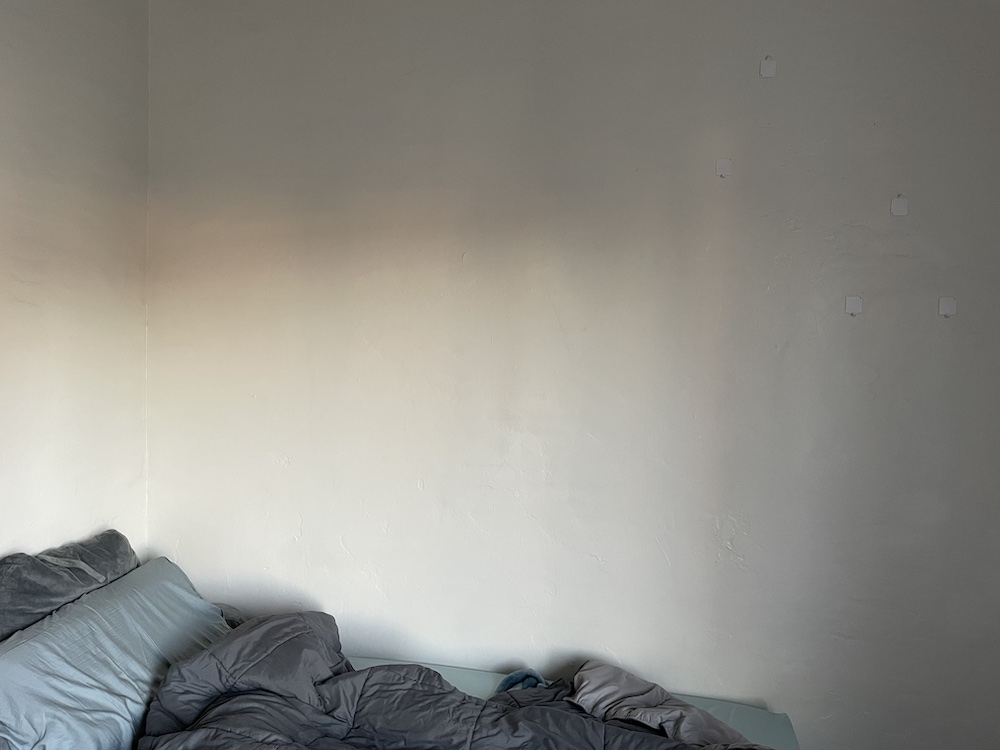
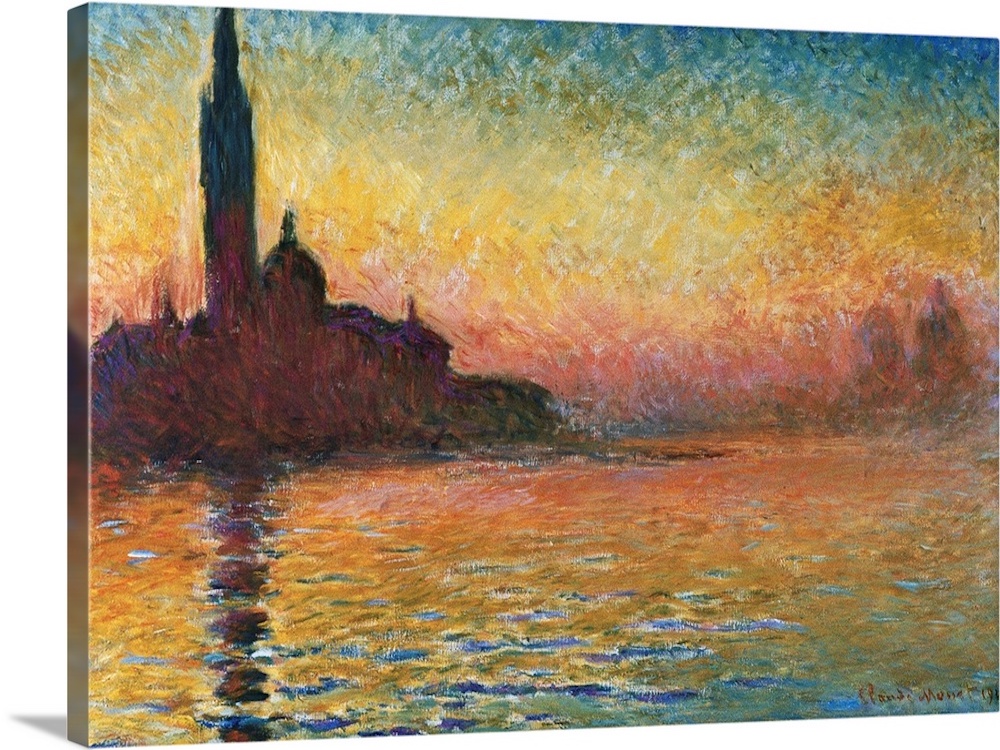
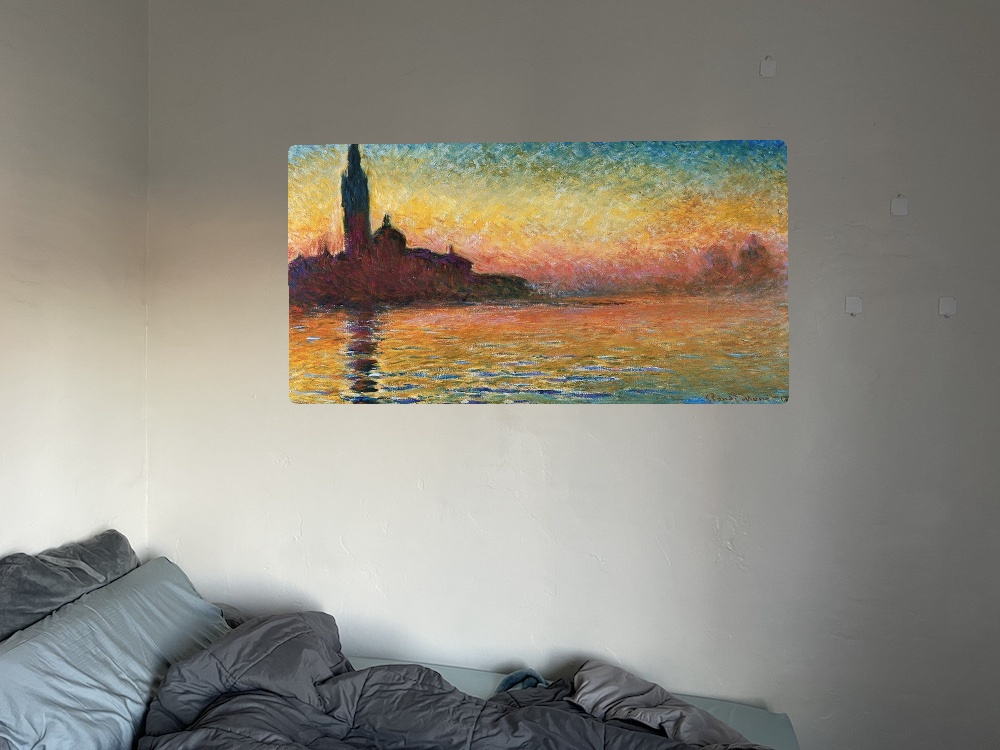
Finally, lets add some color to my bedroom. Right now, it looks pretty bleak with no paintings or posters. However, I do not want to settle for anything less than the best. So, lets see how an authentic Monet painting would look in my room.
Pretty! I guess I have found a new way to try out decorating my room and house! How spendid.