Project 5: Facial Keypoint Detection with Neural Networks
Aaron Sun 3033976755 Fall 2021
Part 1: Nose Tip Detection
Pre-processing
Our goal for this section is to train a model which can identify the nose tip of a person. We use the provided dataset with labeled faces and use only the point in the center of the nose.
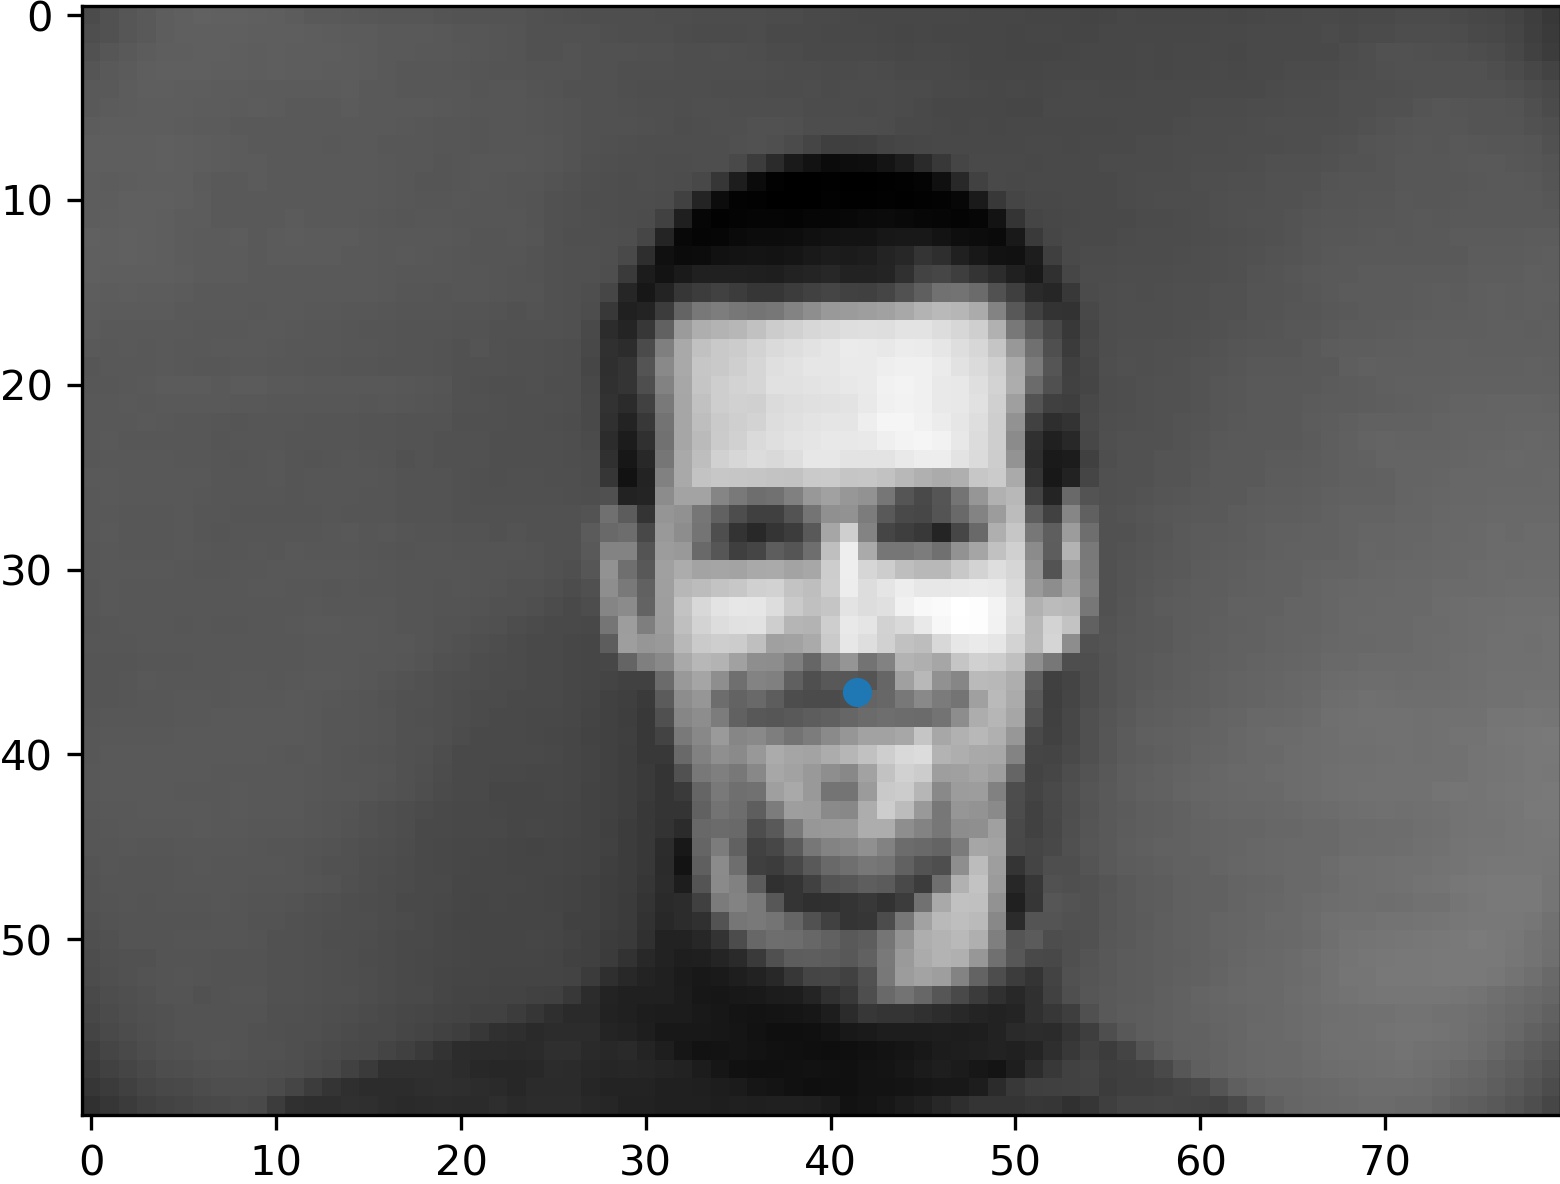
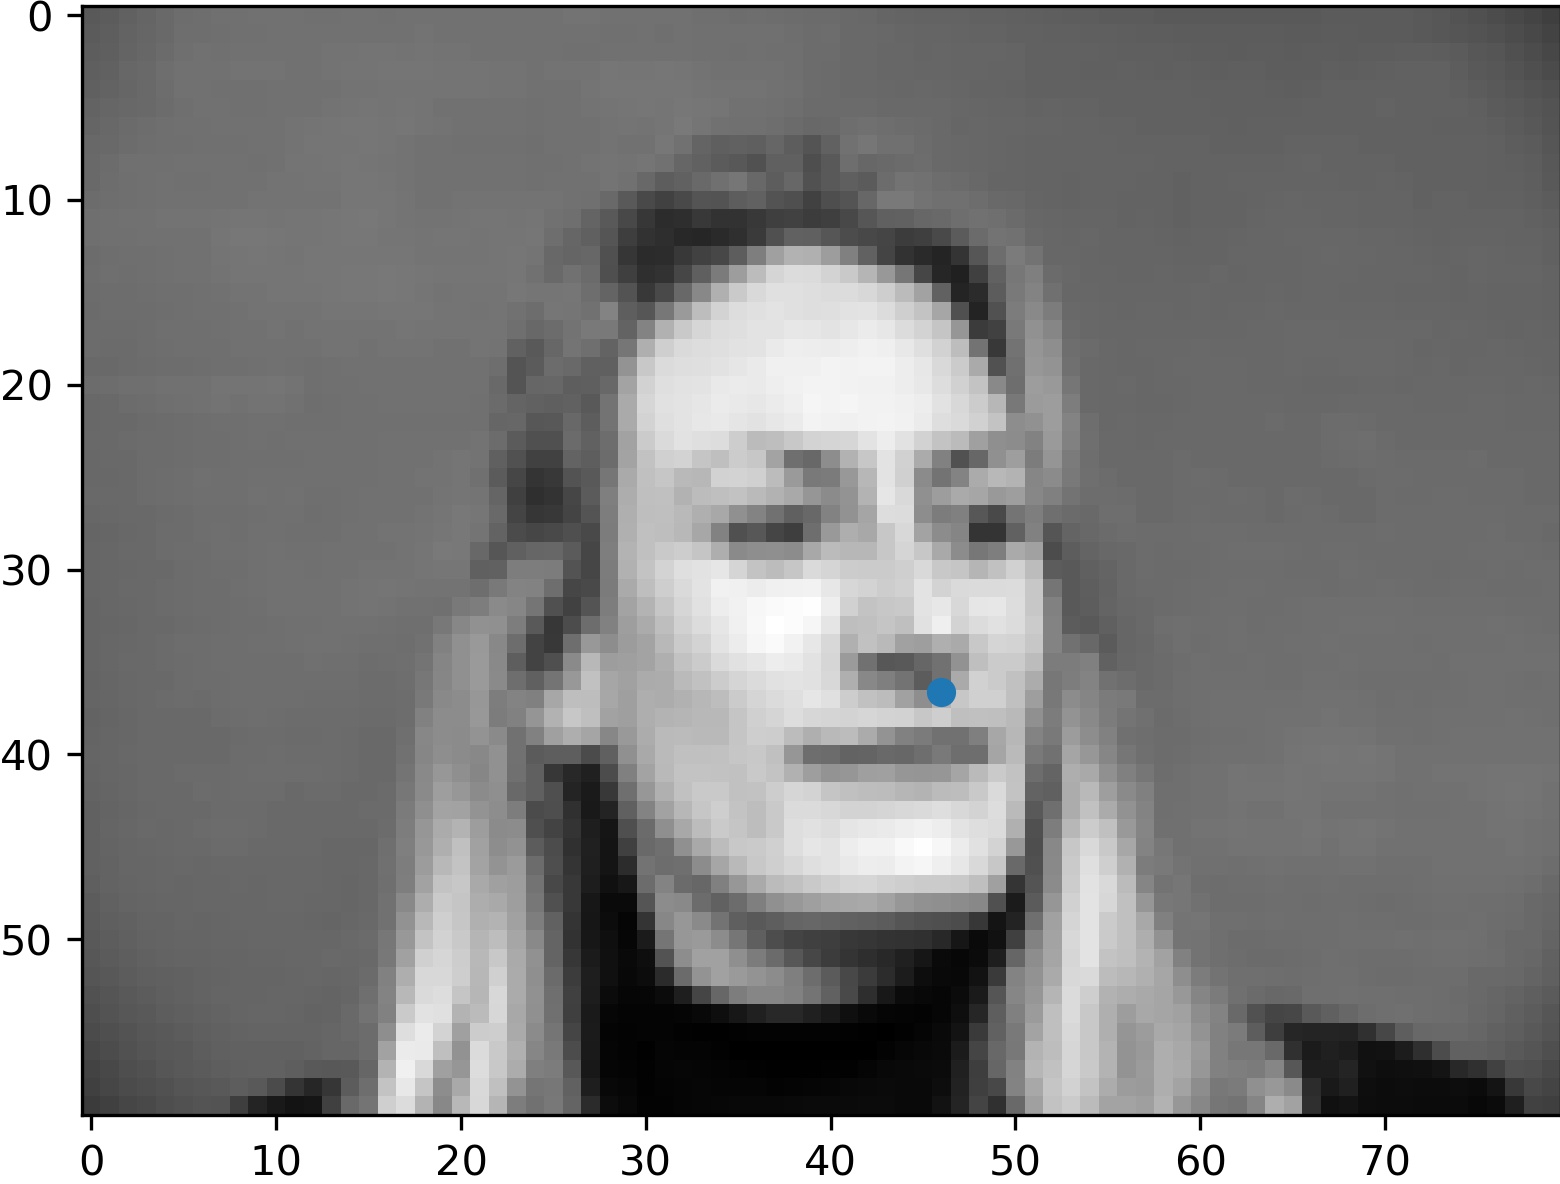
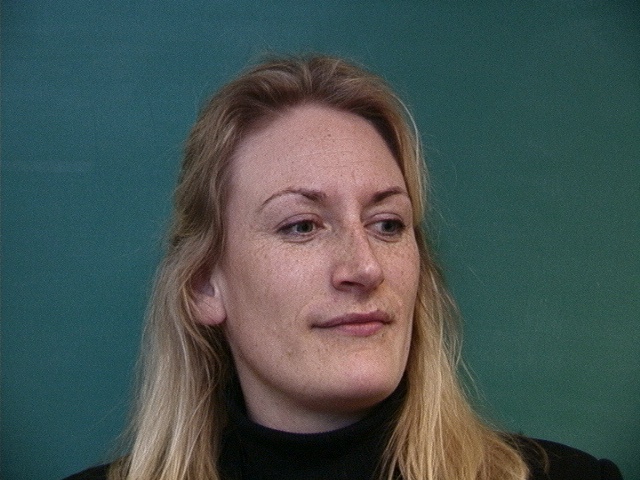
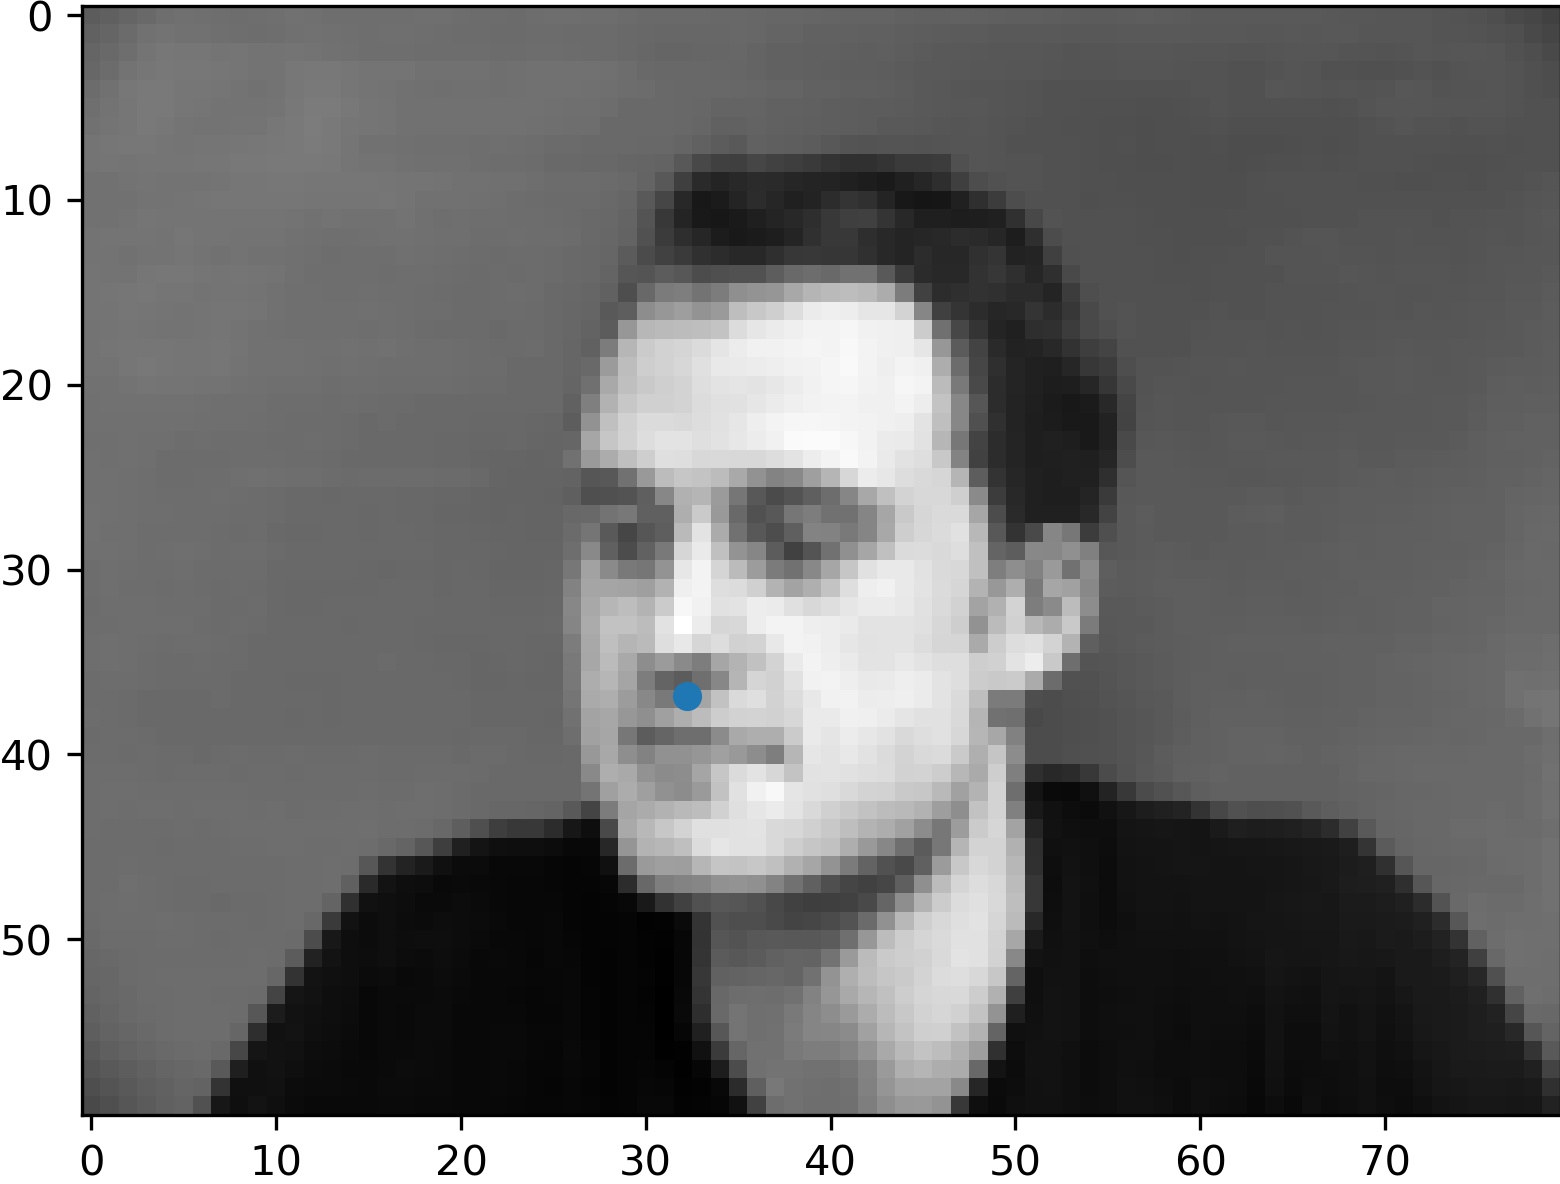
We preprocess the data by converting the image to grayscale, then normalizing the image to float values between -0.5 and 0.5. We also resize the image to 80x60 to speed up training. Let's look at our images after some processing.
The right image is the original image, while the left image is after processing and with the labeled datapoint.

Network Parameters
We designed a basic CNN to tackle this problem. We first use a series of convolutional layers before flattening the tensor and then going through various fully connected layers.
Here are the details:
- 3x3 2d Convolution with 8 filters, followed by ReLU and 2x2 max pool.
- 3x3 2d Convolution with 16 filters, followed by ReLU and 2x2 max pool.
- 3x3 2d Convolution with 24 filters, followed by ReLU and 2x2 max pool.
- A fully connected layer with an input size of 960 and an output size of 512, followed by ReLU.
- A fully connected layer with an input size of 512 and an output size of 2.
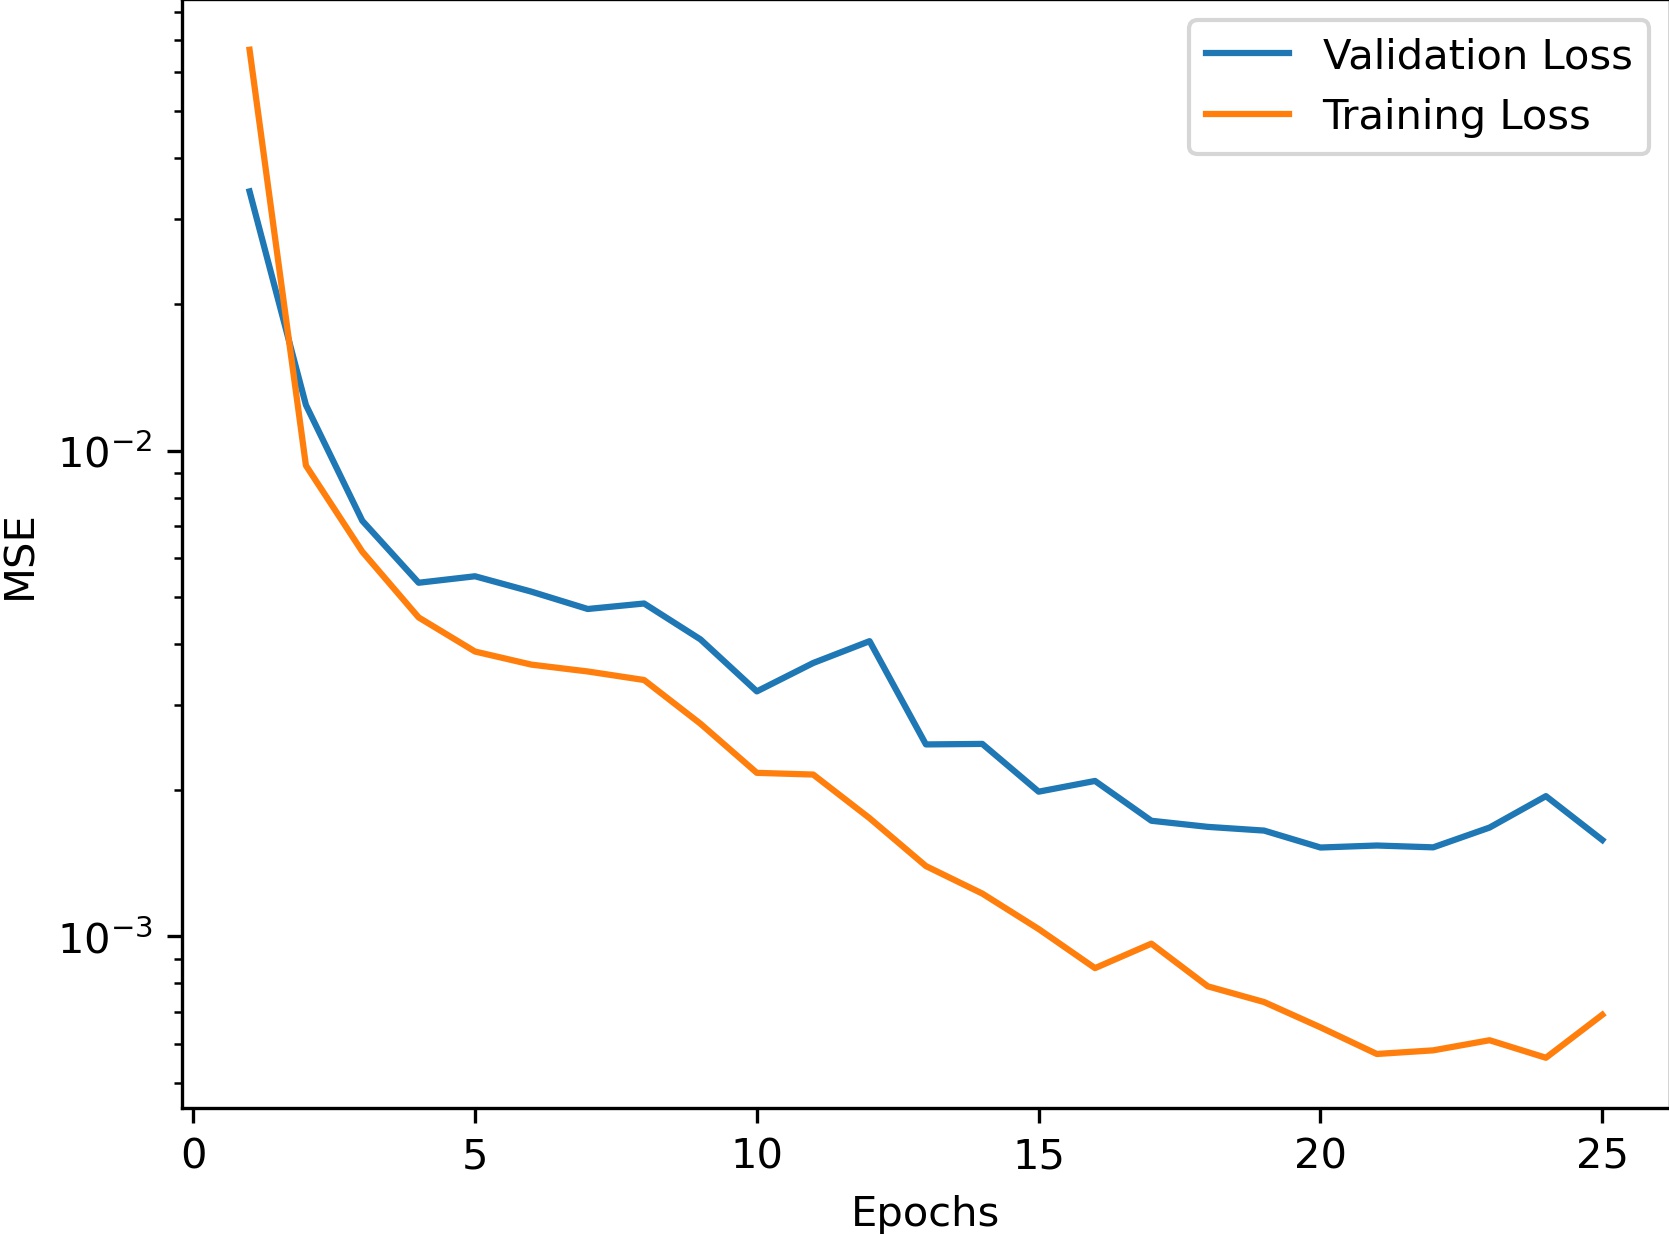
Training
We used the Adam optimizer with learning rate 1e-3 over 25 epochs. Our data was split into 192 training images and 48 validation images.
Here's the graph we got for the loss over the number of epochs trained:
Hyperparameter Tuning
We did a little bit of hyperparameter tuning by looking at the training loss for differing training epochs and learning rates. Here are our results:
| Epochs (Below) /LR (Across) | 0.01 | 0.001 | 0.0001 |
|---|---|---|---|
| 10 | 0.00486 | 0.00436 | 0.00493 |
| 15 | 0.00525 | 0.00441 | 0.00455 |
| 20 | 0.00282 | 0.00216 | 0.00441 |
| 25 | 0.00495 | 0.00227 | 0.00505 |
It looks like the results aren't very different even when we change these parameters.
Results
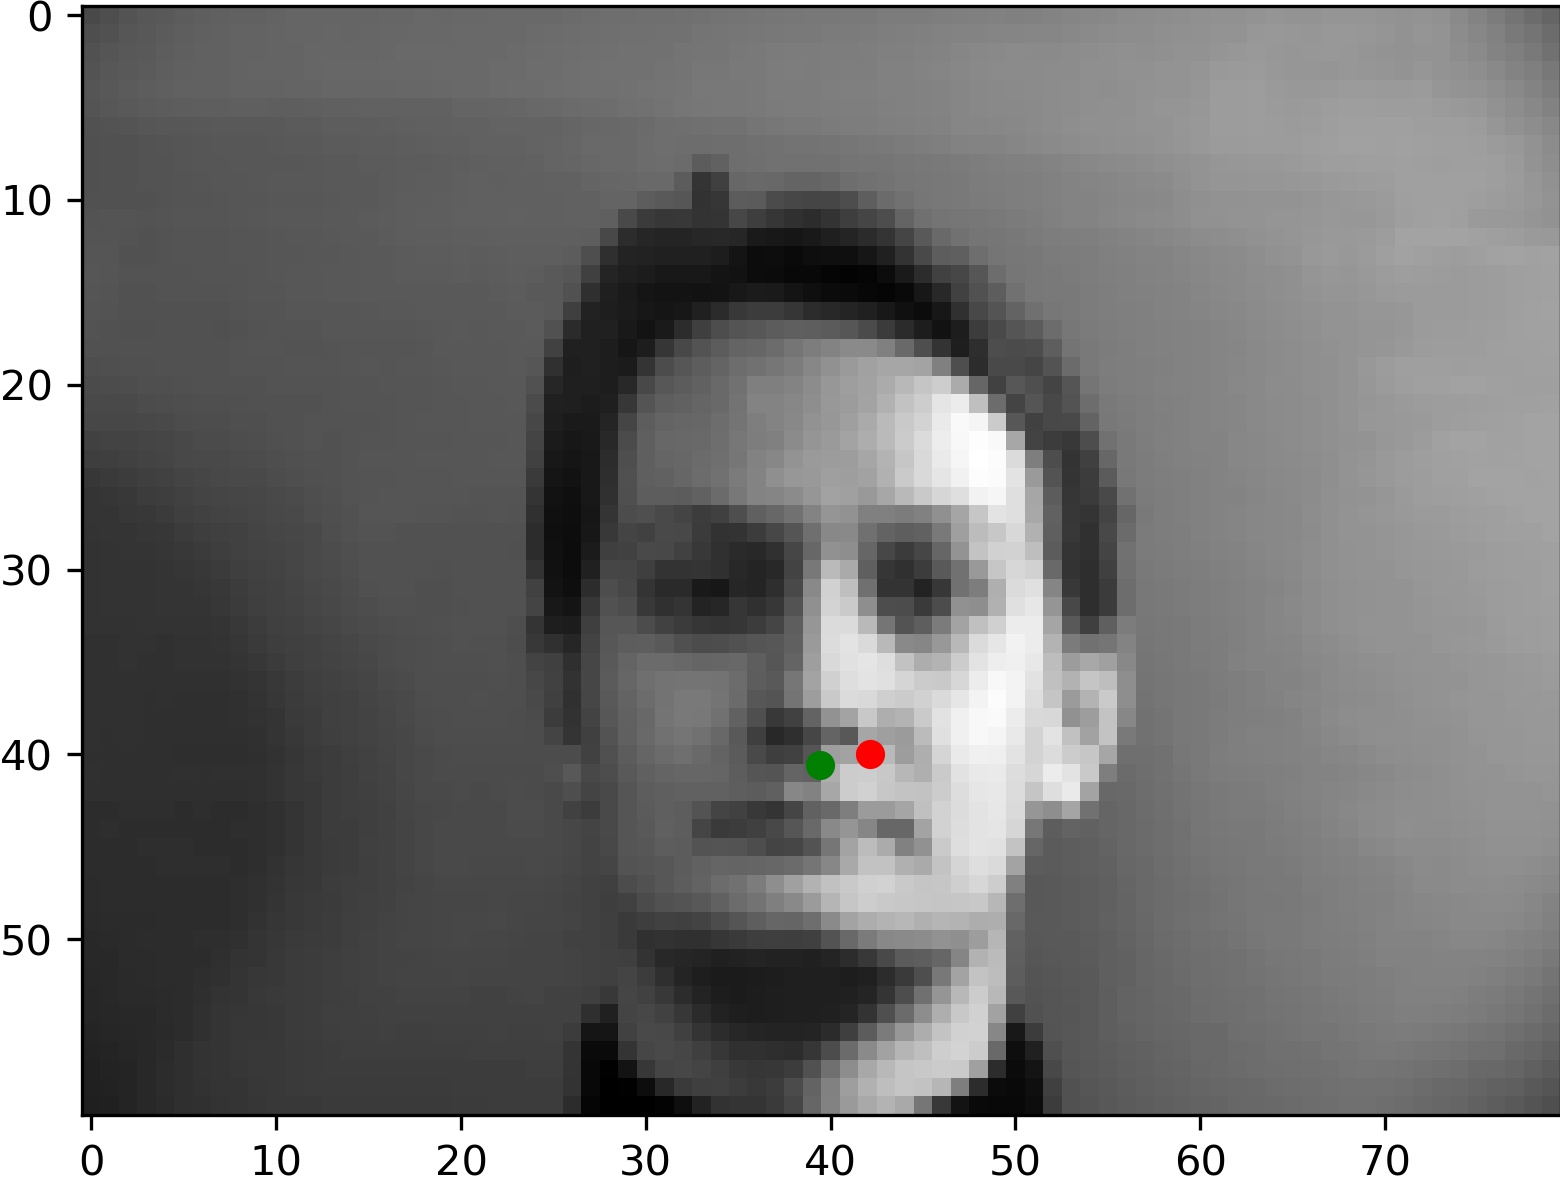
Let's look at some of our model's predictions on the validation set. First, two predictions which were pretty accurate.
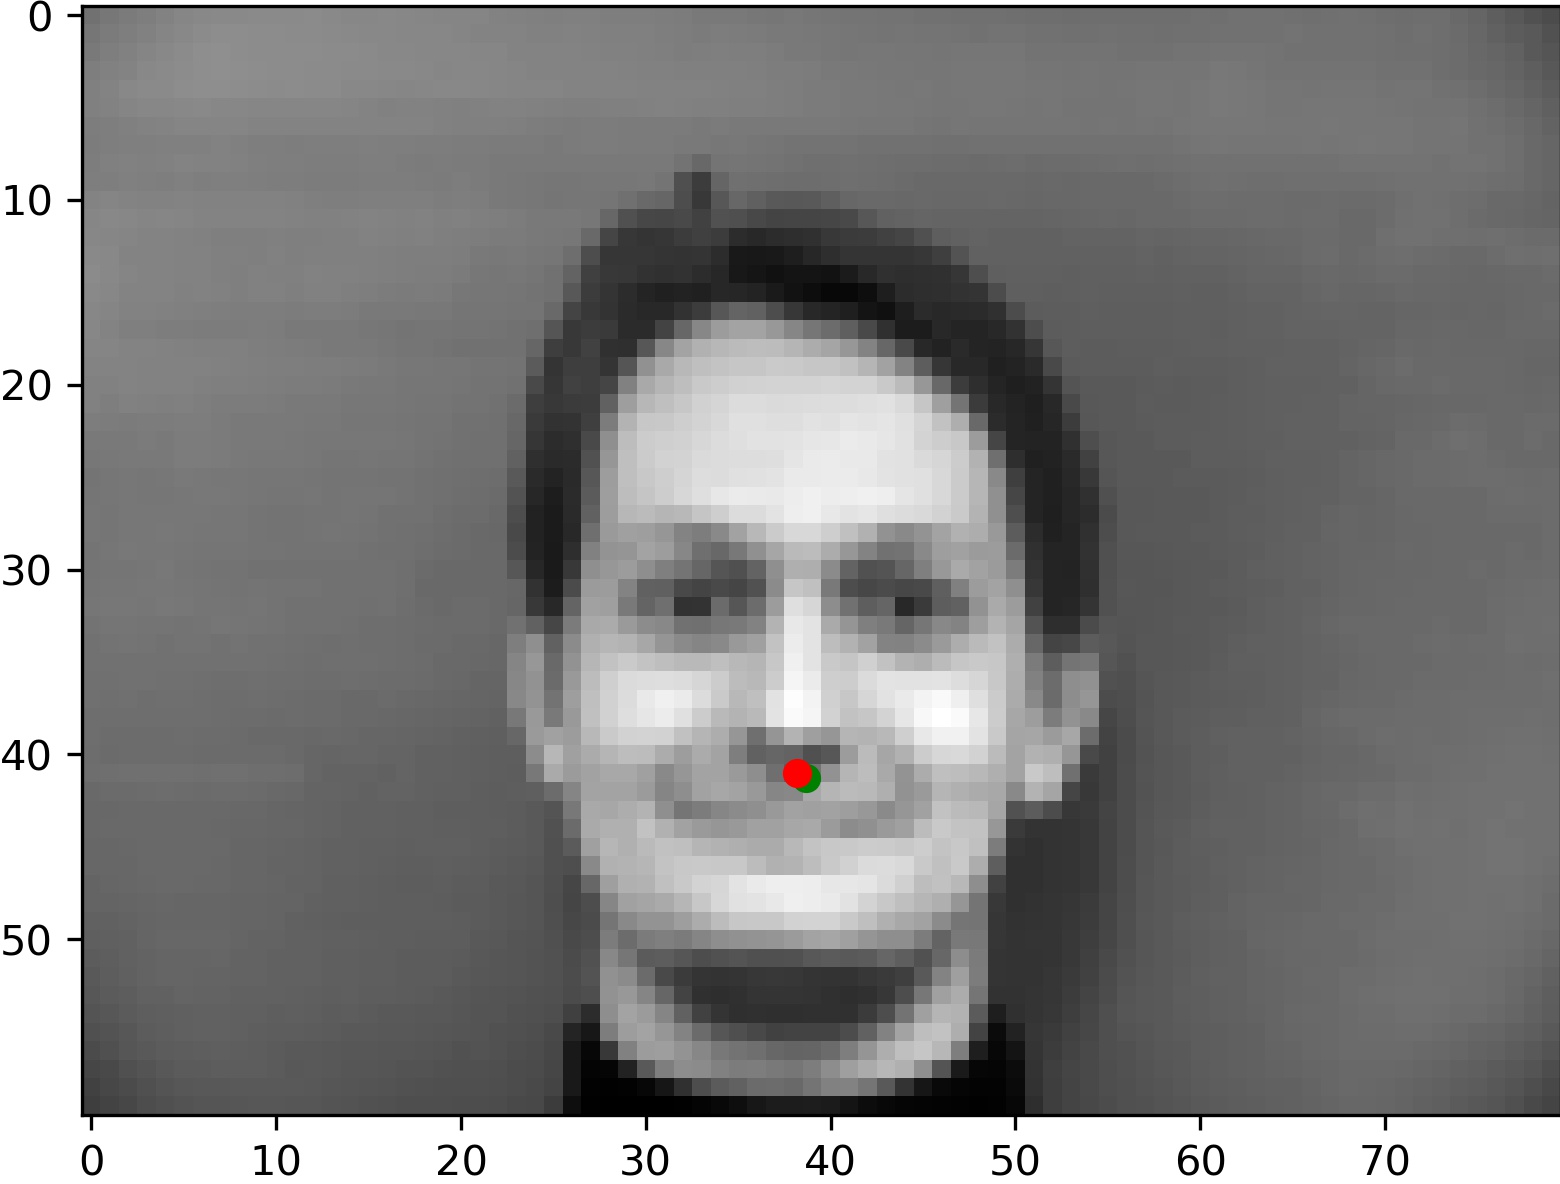
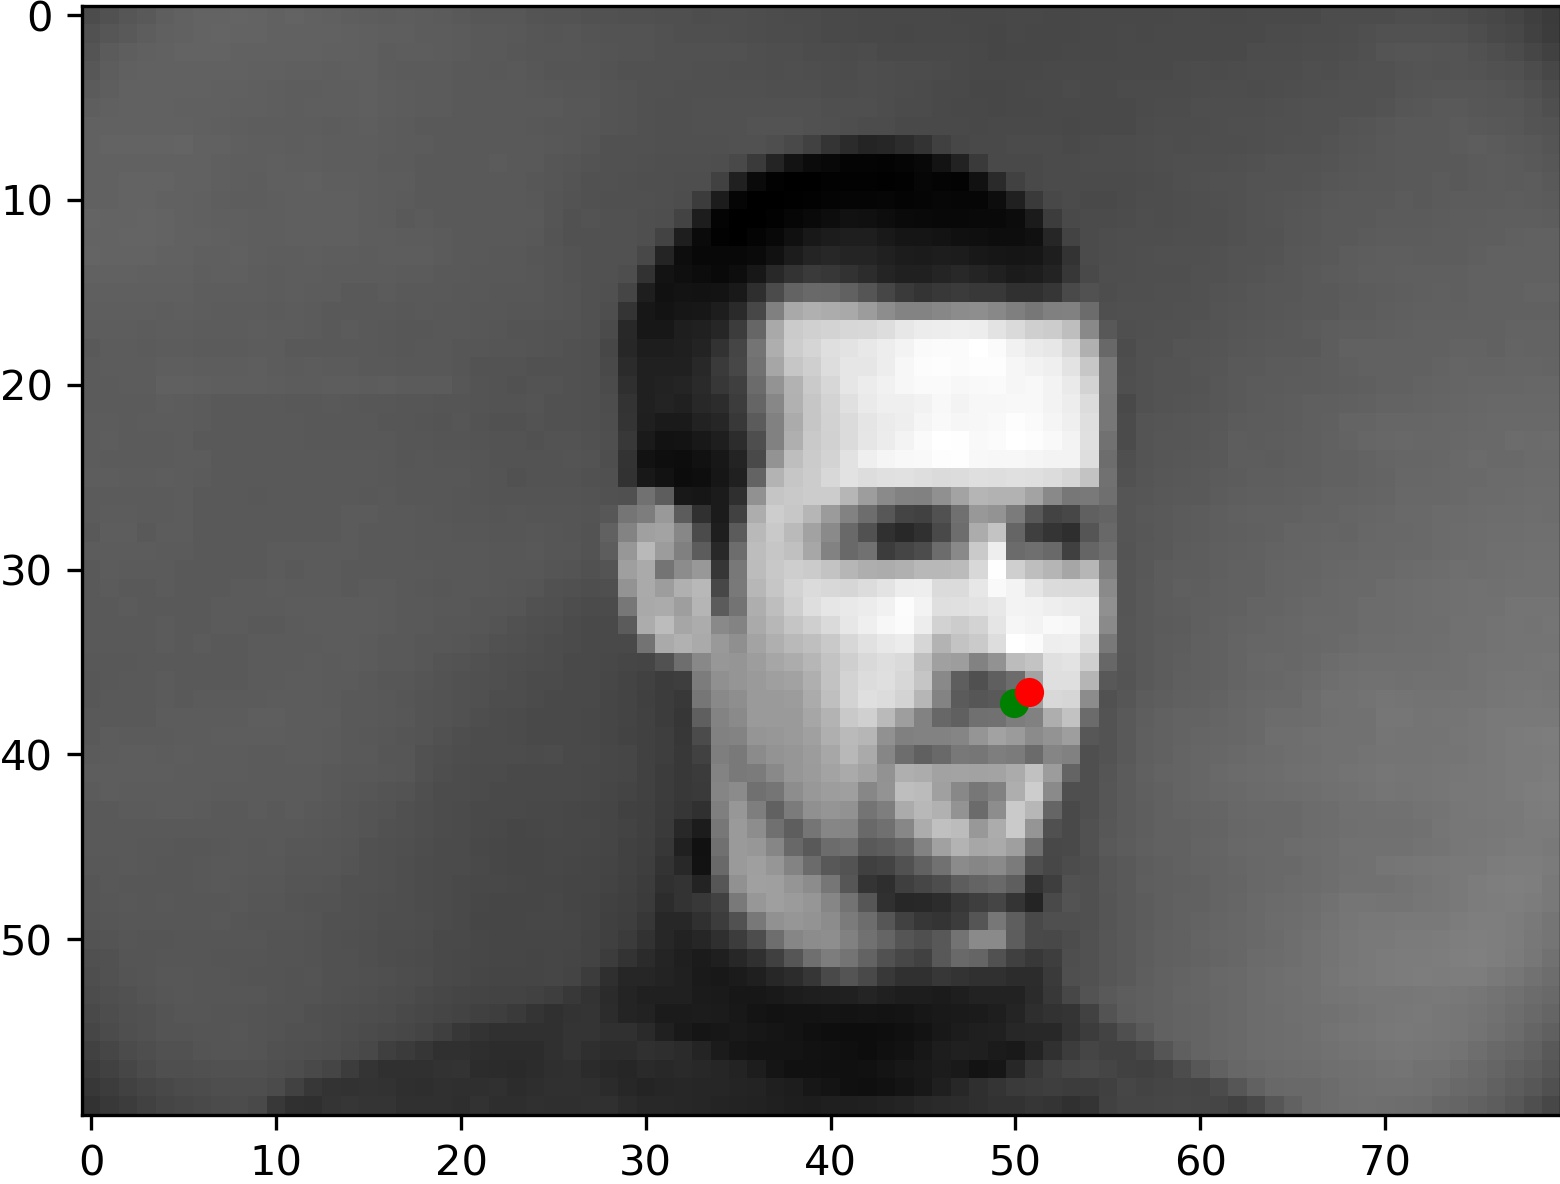
The true labeled point is given in green while the model's prediction is in red. Looking good! Unfortuantely, not all results were this accurate.
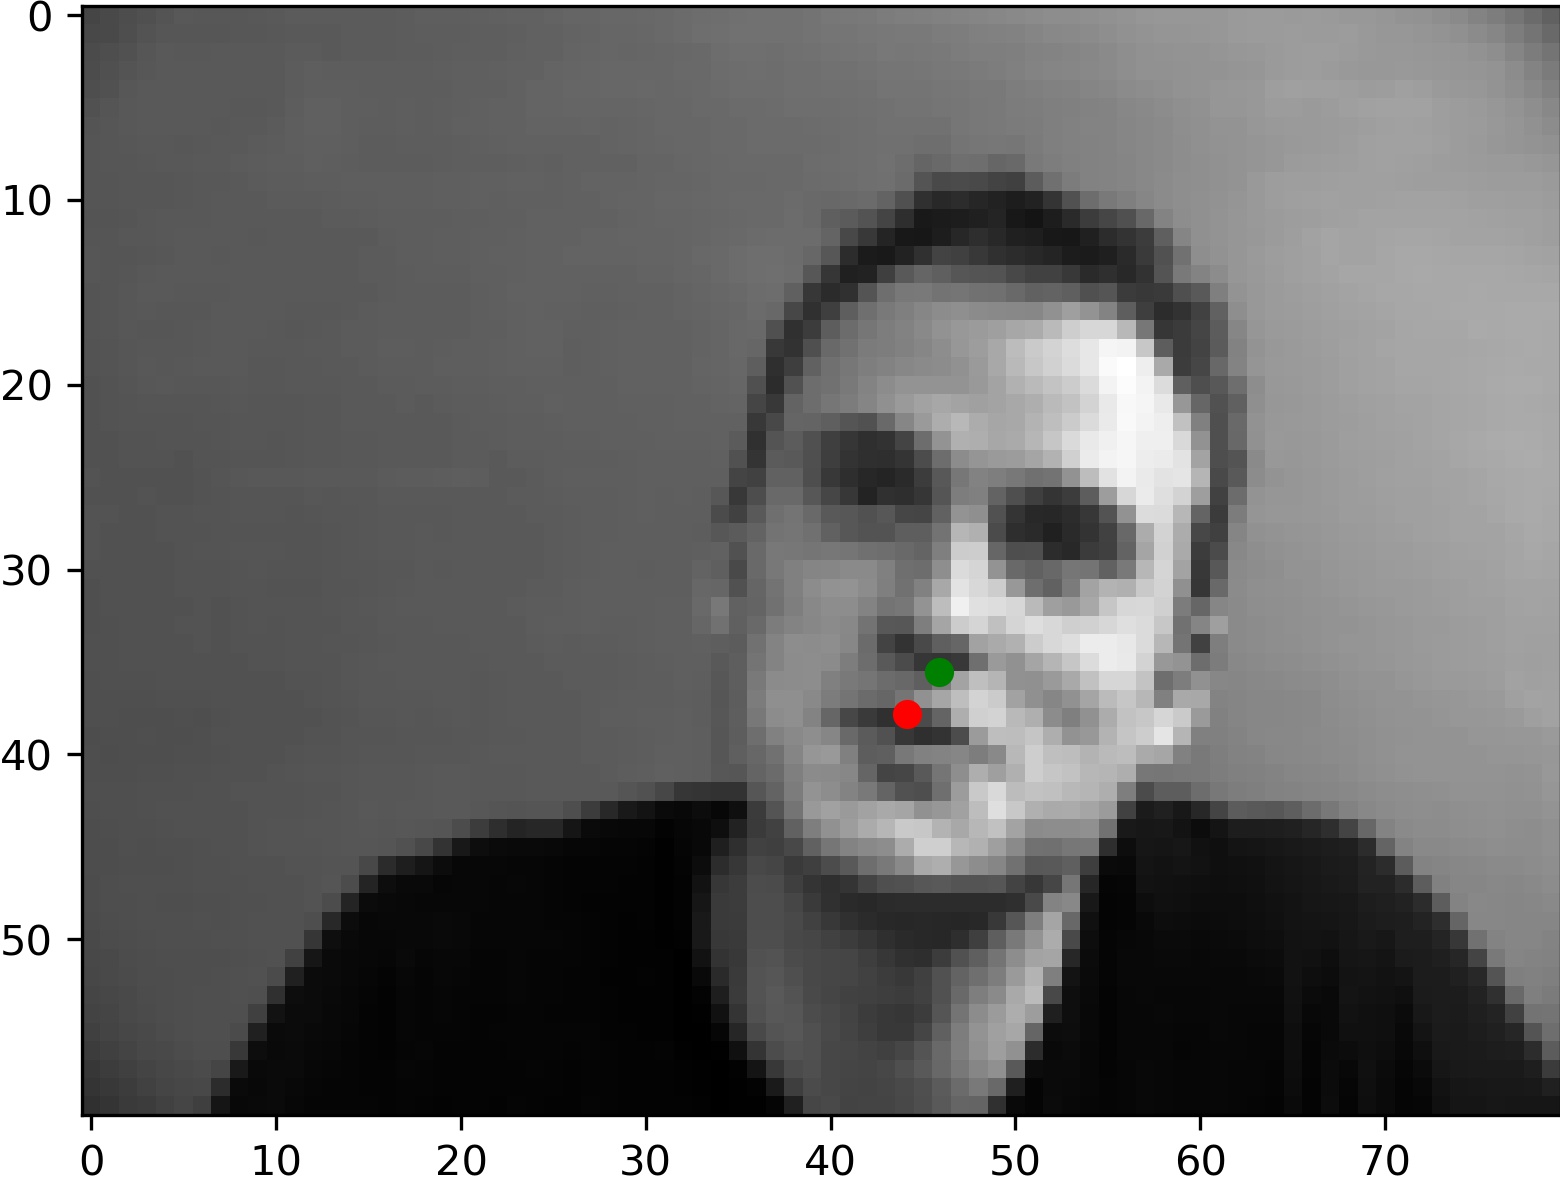
These predictions from the model are relatively far off from the true label. For the left image, this might be because the lighting is coming from the right side of the image, and causes the right side of the face to be brighter than the left side. Because of this, the model has difficulty identifying the location of the nose. For the right image, the model seems to think the open lips is the bottom of the nose. This is plausible since the shape and size of the shadow from the open lips is somewhat comparable to the shadow from a nose.
Part 2: Full Facial Keypoint Detection
Data Augmentation
In this section, we want to predict on all 58 of the points of interest on the face. However, we may be lacking in data in order to perform this procedure. To combat this, we use data augmentation to synthetically generate more data.
Here are some examples of data we augmented. We first use color jittering with parameters 0.5 for each input using pytorch's built in color jitter. Then we rotate the image and points by a random amount between -20 and 20 degrees. Finally, we translate the image and points randomly by 10 pixels.
Model Architecture
We use a more complex architecture for this problem since it is more difficult. We also use an image size of 240x180.
- 3x3 2d Convolution with 8 filters, followed by ReLU.
- 3x3 2d Convolution with 8 filters, followed by ReLU and 2x2 max pool.
- 3x3 2d Convolution with 16 filters, followed by ReLU .
- 3x3 2d Convolution with 16 filters, followed by ReLU and 2x2 max pool.
- 3x3 2d Convolution with 32 filters, followed by ReLU.
- 3x3 2d Convolution with 32 filters, followed by ReLU and 2x2 max pool.
- A fully connected layer with an input size of 15808 and an output size of 528, followed by ReLU.
- A fully connected layer with an input size of 528 and an output size of 256.
- A fully connected layer with an input size of 256 and an output size of 116.
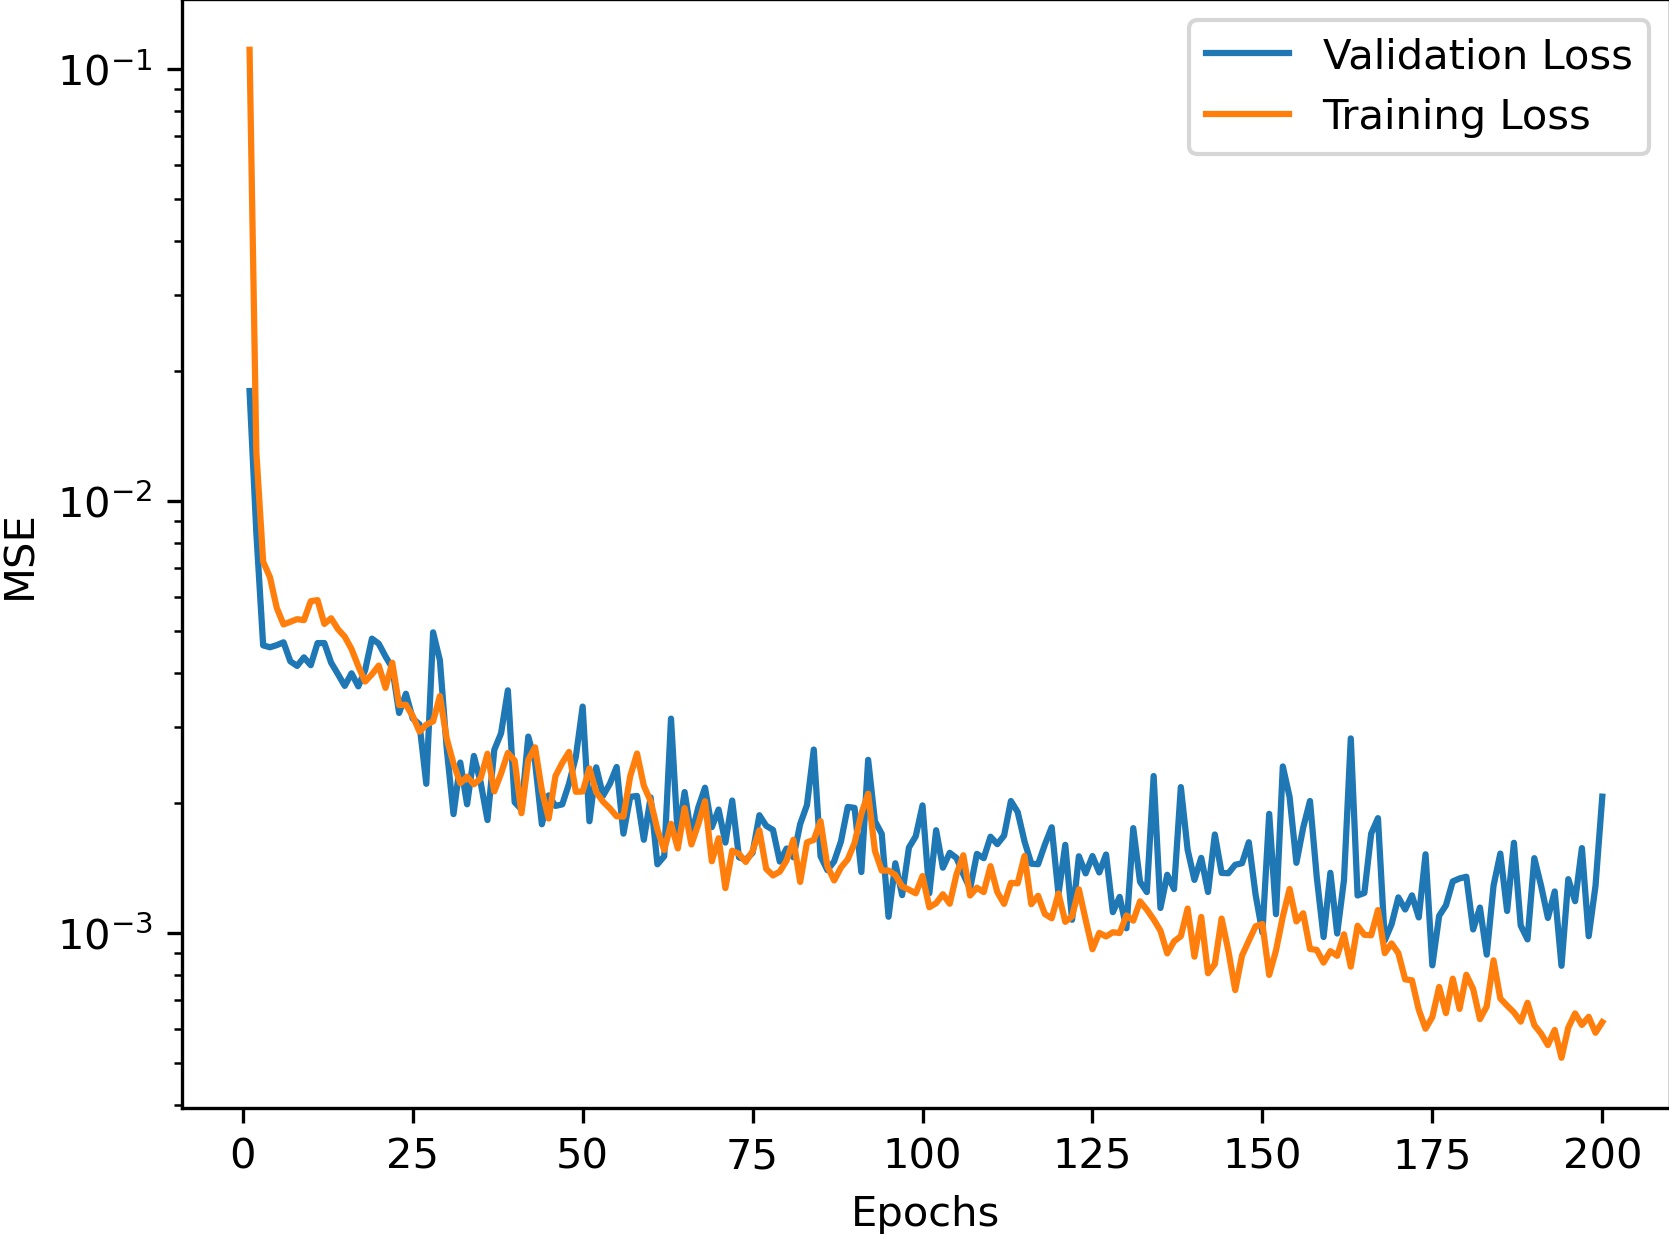
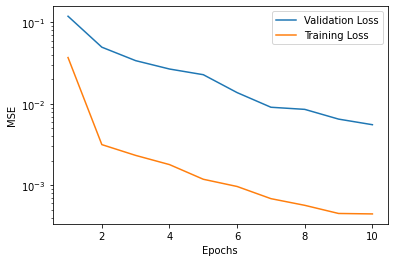
Training
We trained for 200 epochs with a learning rate of 1e-3 using the Adam optimizer. The training graph is shown below.
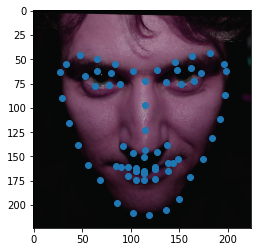
Results
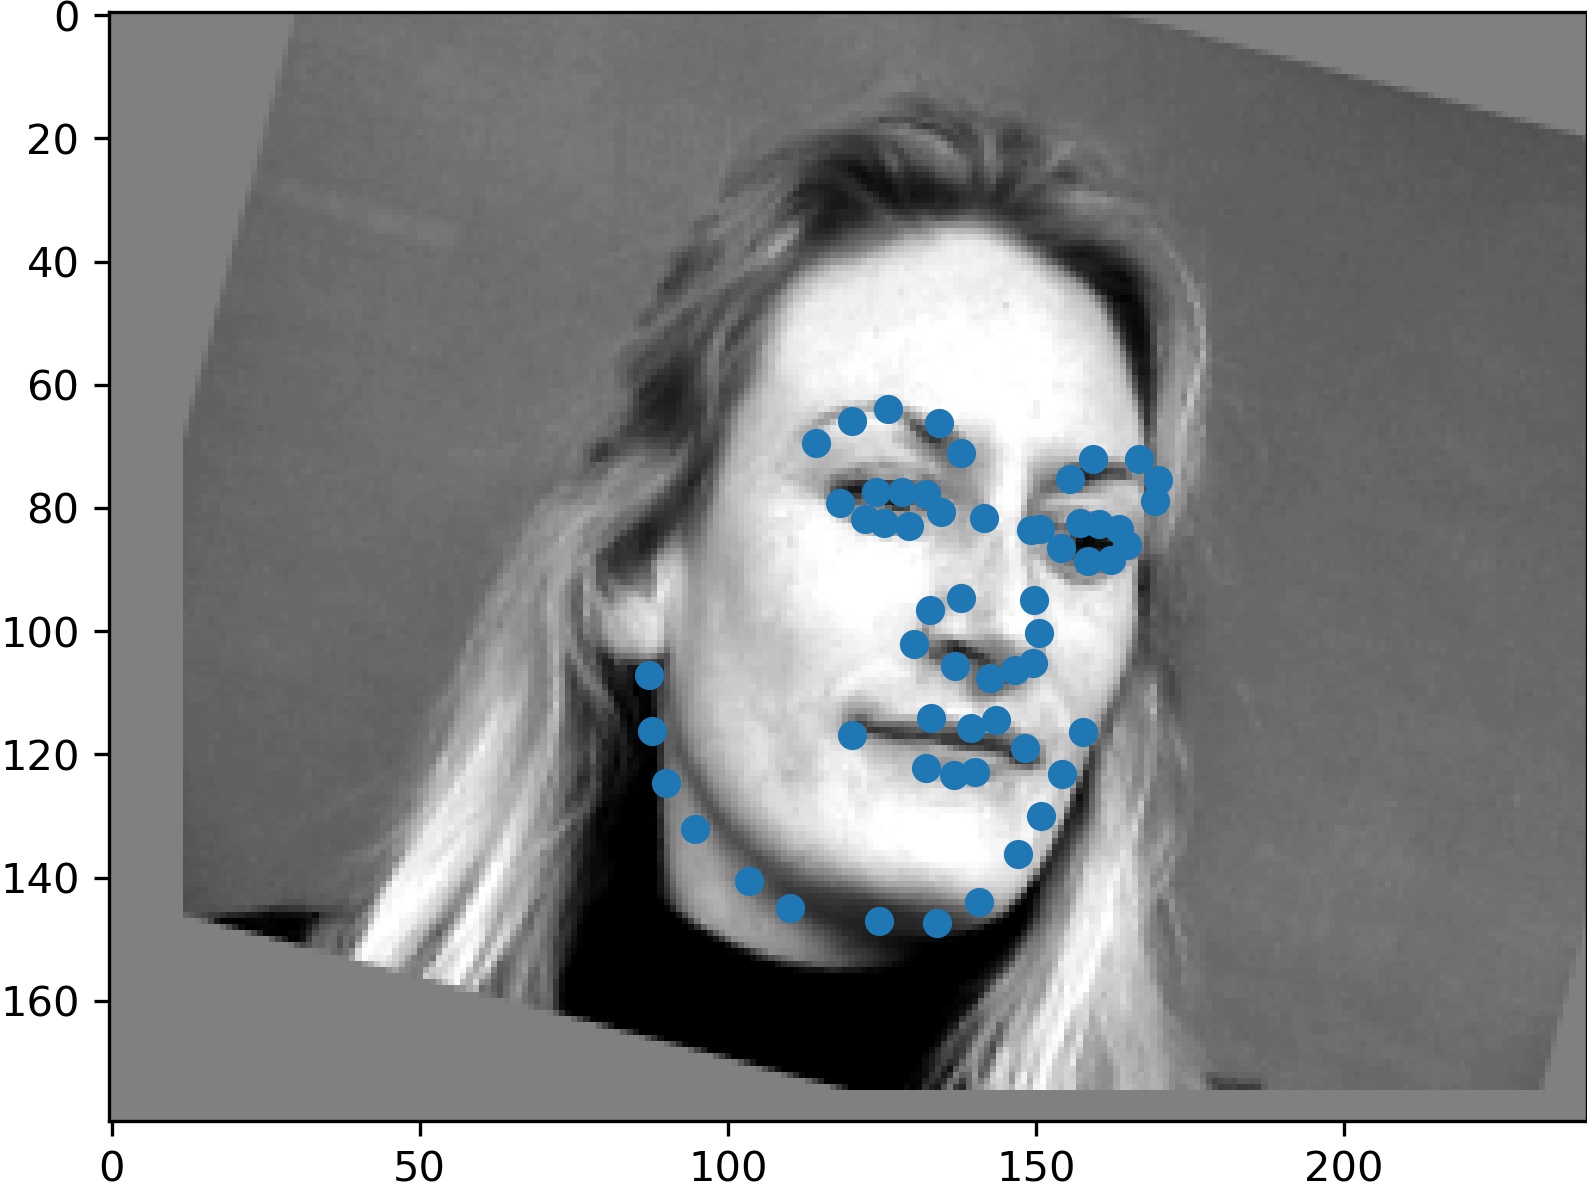
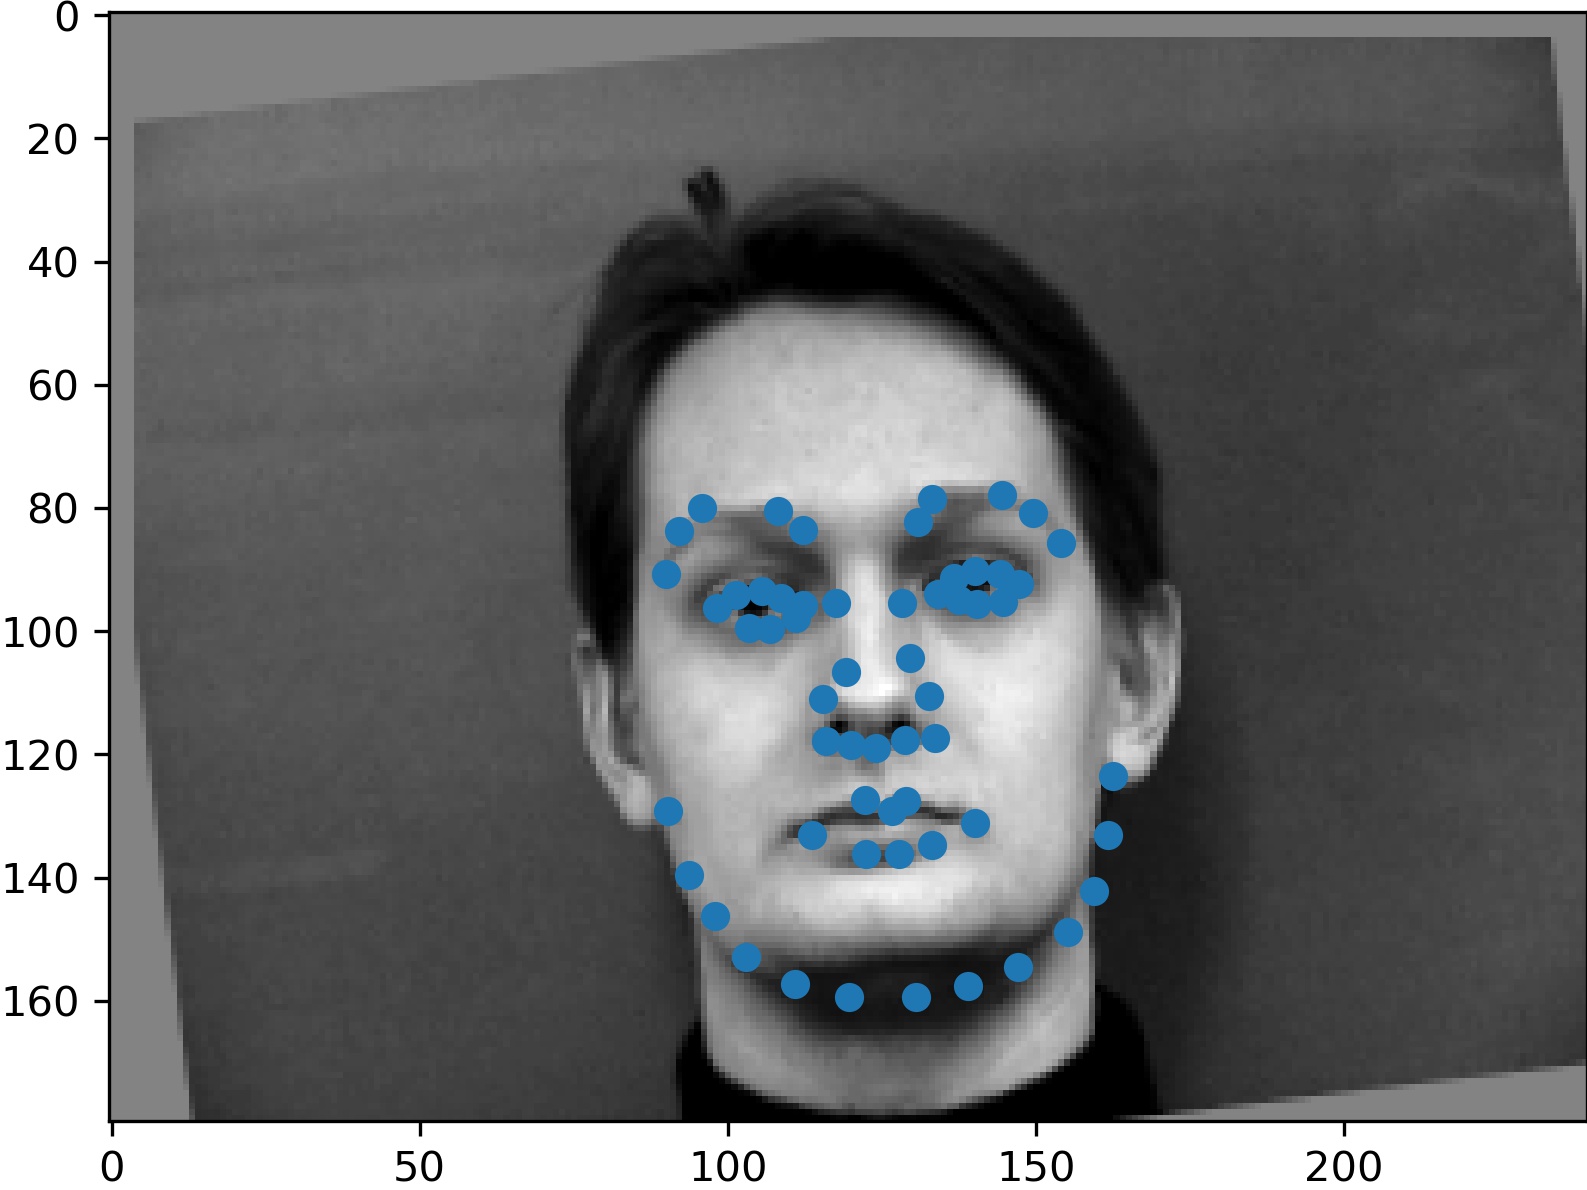
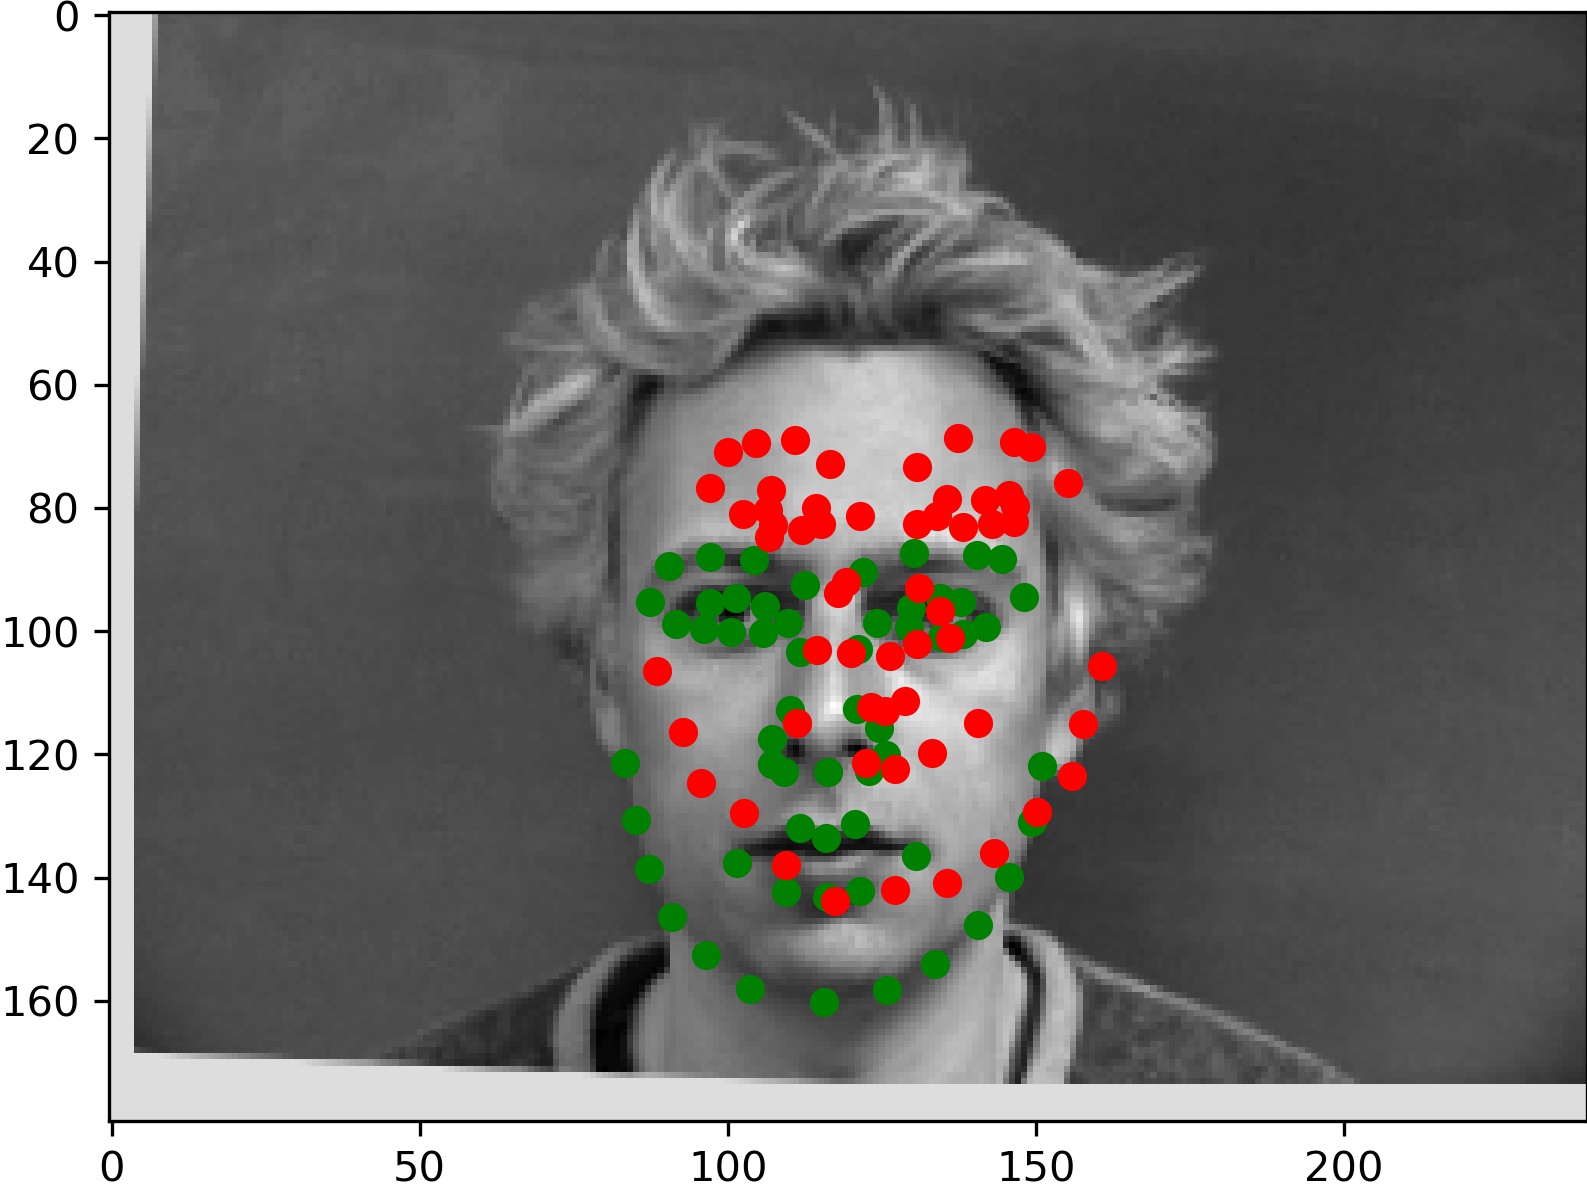
Here are two examples for which the model gave relatively accurate predictions:
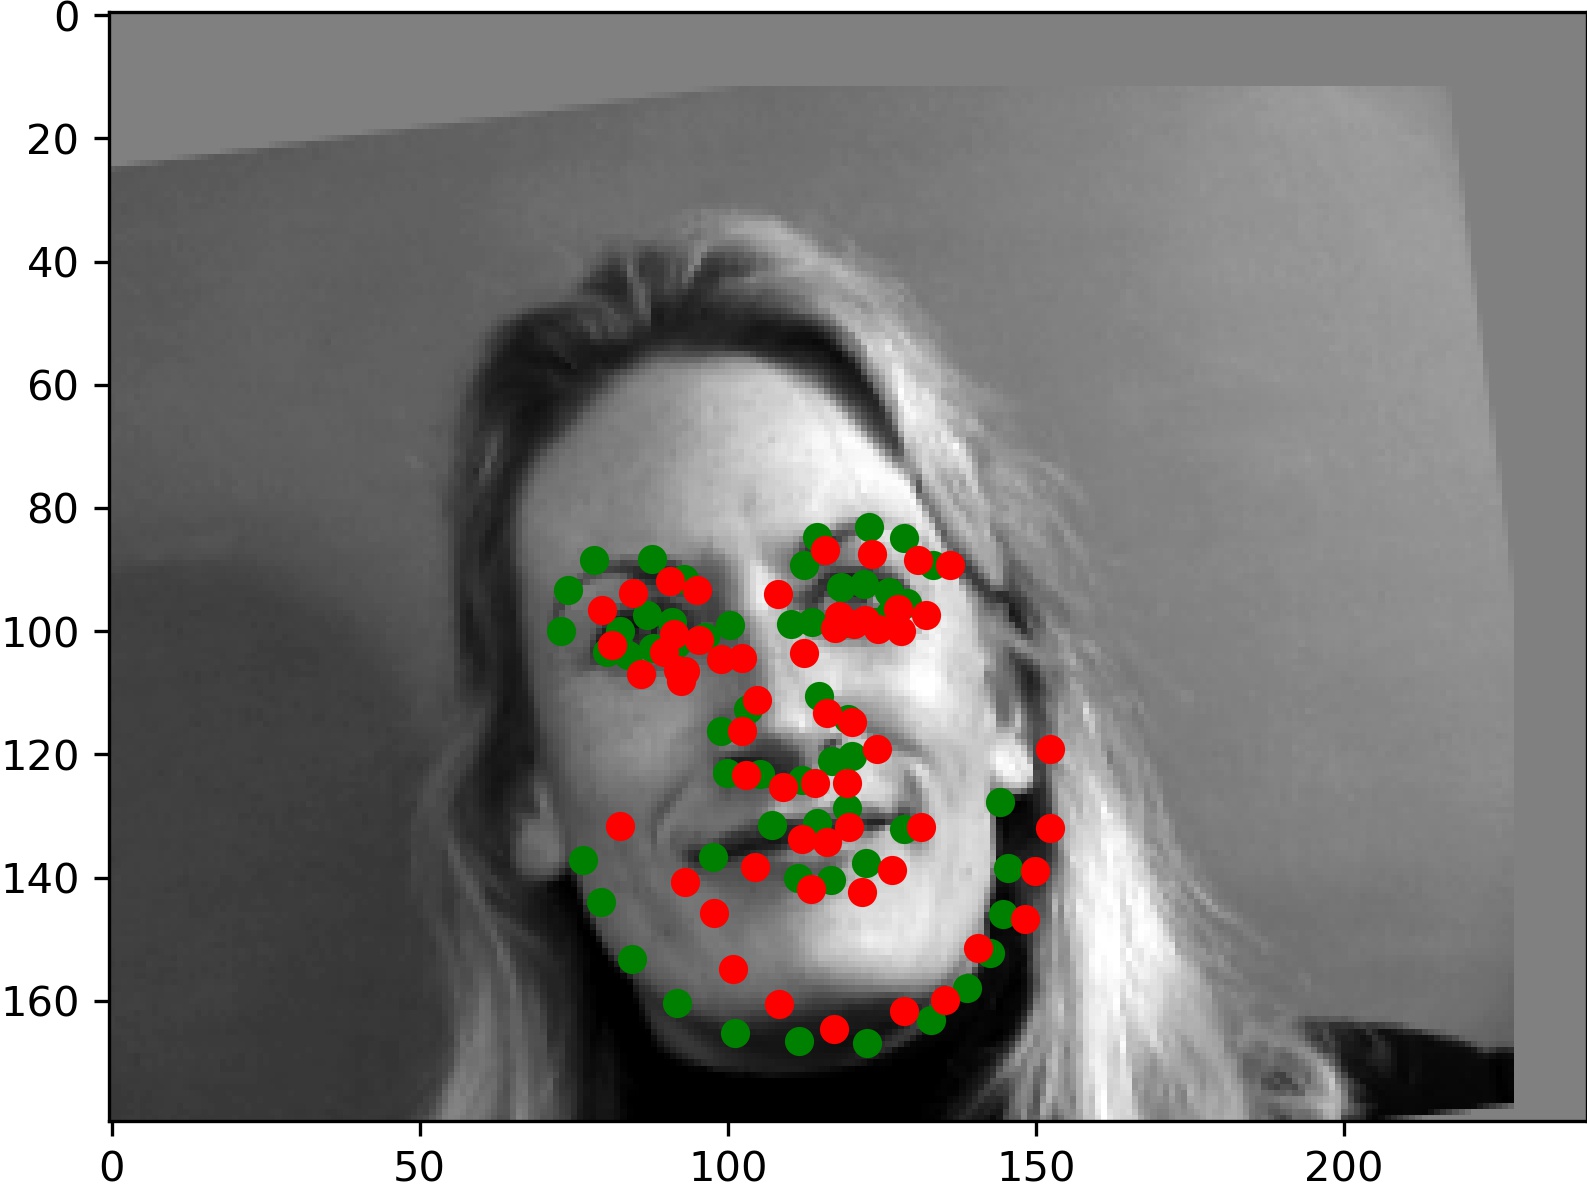
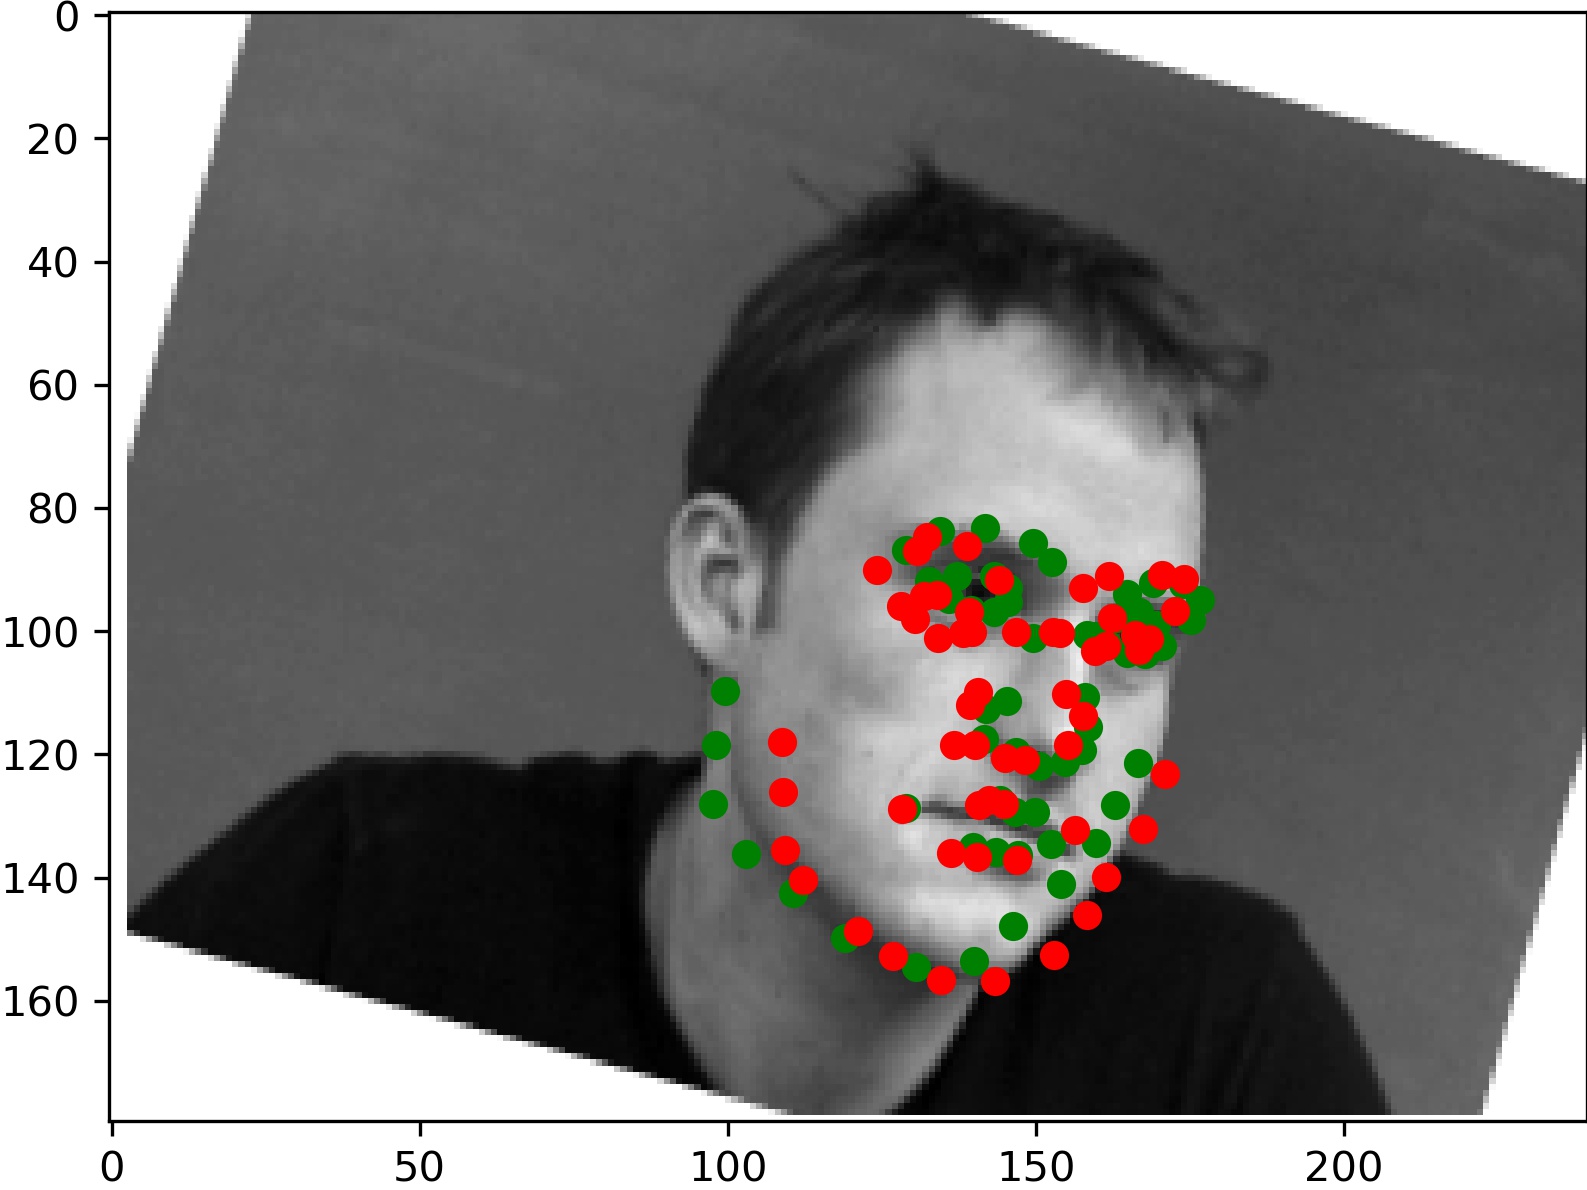
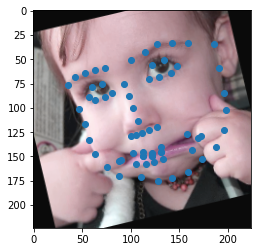
And two which didn't work as well:

For the left image, it seems like the hands caused the model to inaccurately determine where the face was. We think the model believed the left hand was part of the head, making model believe the center of the face was further right than it actually was. Similarly for the right image, it seems the large hair was misattributed as part of the face and caused the center of the face to be percieved by the model to be higher than it actually is.
Filter Visualization
We tried visualizing the learned filters on our first and second convolutional layers. Here is what we got:


Part 3: Train with a Larger Dataset
Dataloader
We use some extra data augmentations in this section. First, we use pre-selected bounding boxes to crop the images and then resize it to 224x224. Then like before, we do a random translation and rotation on the points and image.
In addition, we use some built-in augmentations from torchvision.transforms. We use color jitter with all settings as 0.2 and we normalize the mean = [0.485, 0.456, 0.406] and std = [0.229, 0.224, 0.225]. Here are some sample data points after processing:
Neural Network
We use pytorchs' built-in, pretrained ResNet18. We update the last linear layer to be mapping 512 to 136 for our number of points.
Training
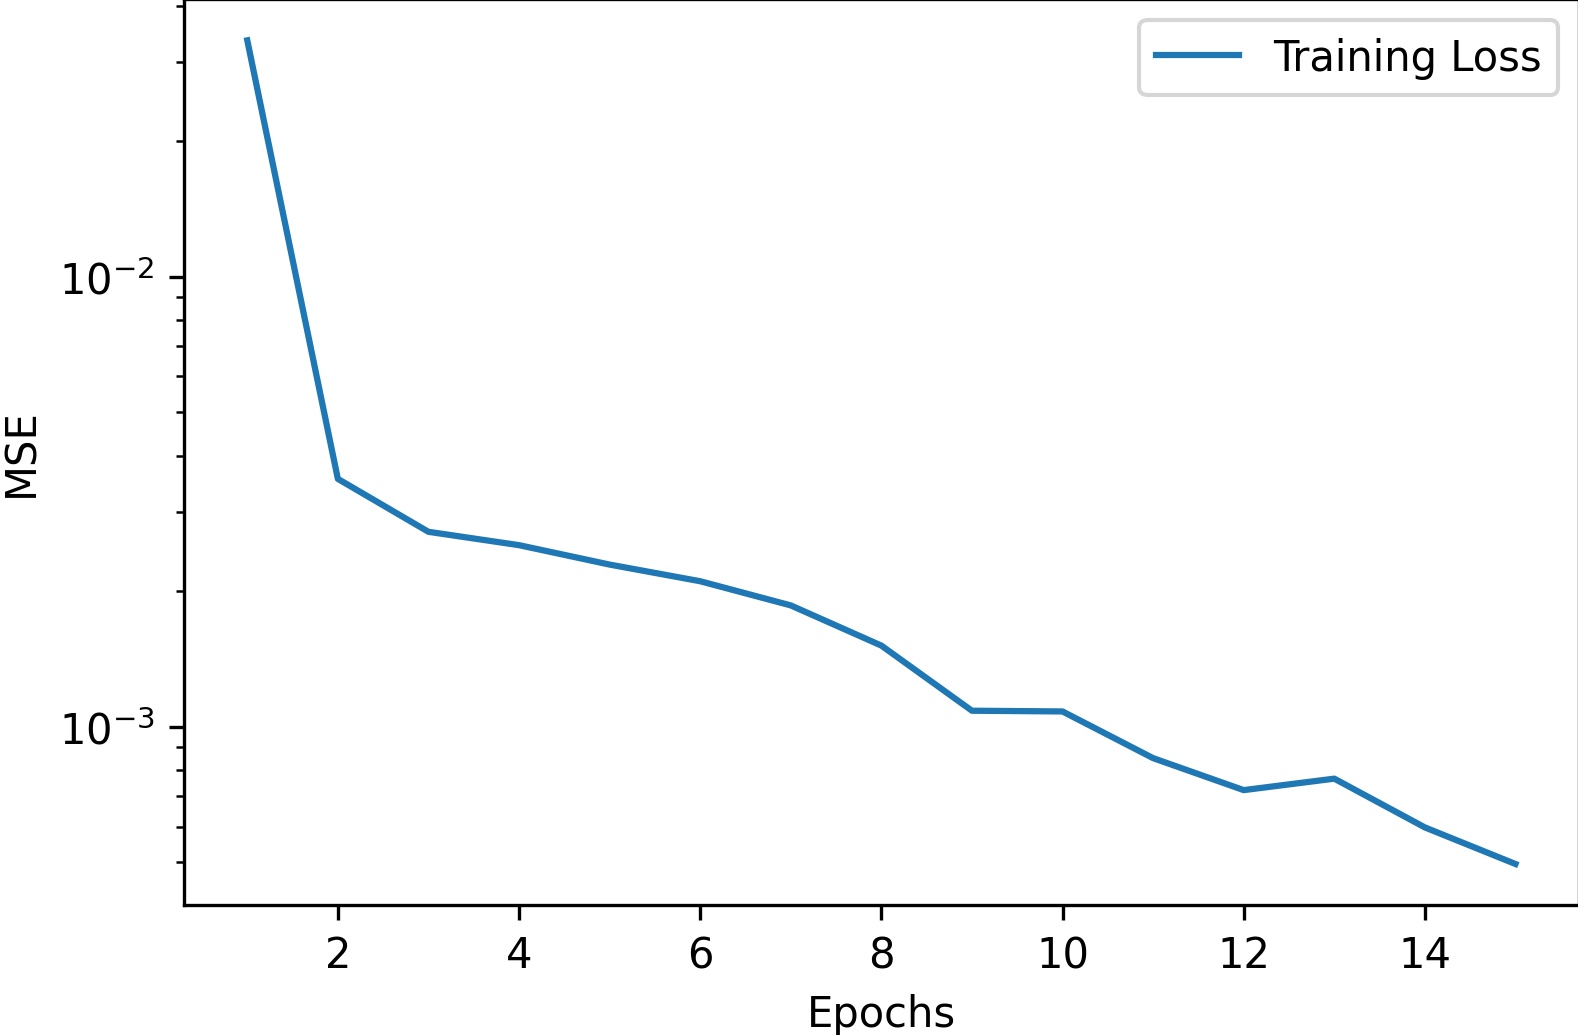
We split the data into 80/20 for training and validation. Then we used batchsize 256 on learning rate 1e-3 using the adam optimizer for 10 epochs. This gave us the following training graph:
Then, we trained using the same settings on the entire dataset. However, this time we did 15 epochs (we couldn't do 15 on the split due to time constraints).
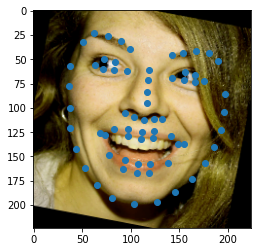
Results
For some reason, on the test dataset on kaggle our new model did worse than the one trained on less epochs. This may be due to some overfitting after training over a longer period. We ended up with a MSE of 13.19555.
Here are some sample results:
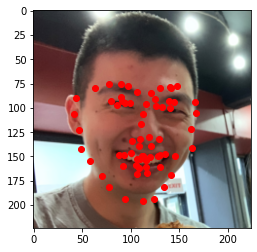
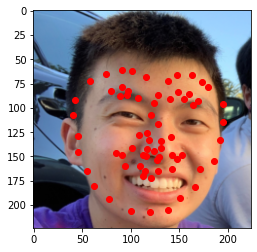
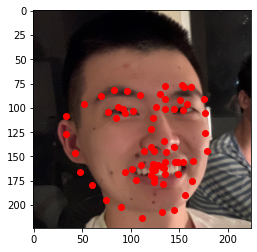
We see that the model is having signifcant trouble with my images. The first (left-most) image is where it does the best, and does a decent job outlining the keypoints of my face. However, for the other two image, the quality of point labelling suffers. For the second image, the model seems to think my face is higher than it is. This may be simply because I defined the bounding boxes myself, and it does not match the convention of our input data. For the third image, the output is close, but it is just slightly off.
It looks like the model has trouble unless the input is exactly in the same format as our training data, as the self-defined bounding boxes don't work very well.
Bells and Whistles: Creating a Morph Sequence
I got some extra images of myself in addition to the ones from above. Then I cropped them all, run the network to generate keypoints, and finally used the code from project 3 to generate a movie. Here's how it turned out! Since the keypoint selection certainly isn't perfect, the movie looks a bit strange. But here it is!

I would've gotten more images, but I would have to select the boxes myself which is quite slow, and then run the project 3 code which would take just as long.