In this project, I will be exploring facial feature detection mechanisms with PyTorch. Tuning hyper-parameters, utilizing convolutional neural nets, and adding custom layers to the neural nets all amalgamate to create a machine learning model that can detect specific features of the human face.
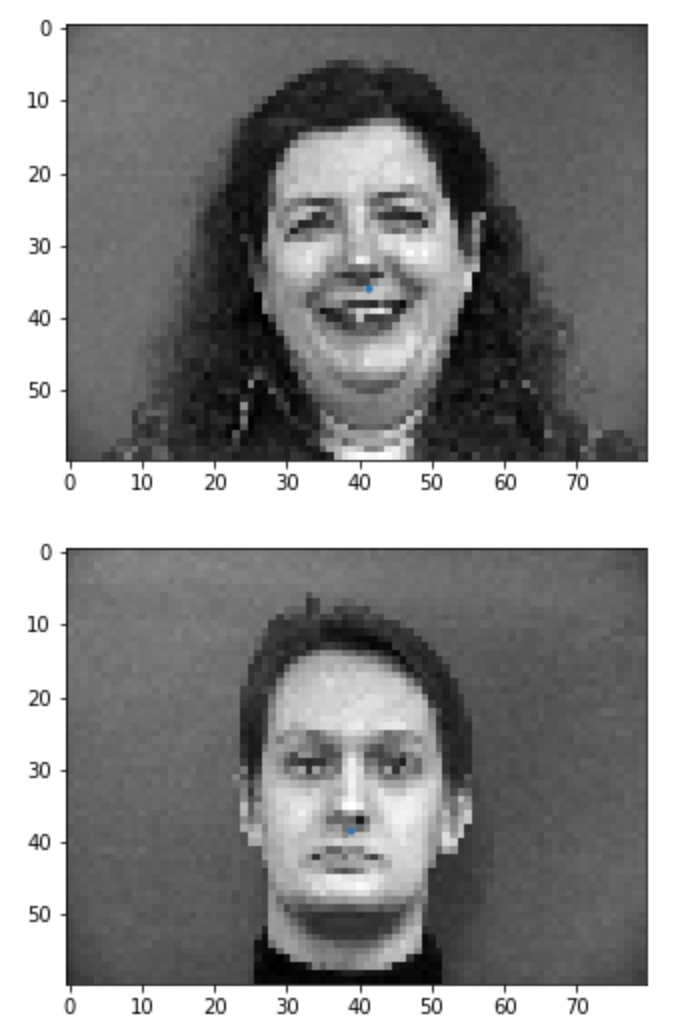
I've used the imm_face_db to train my model as well as for validation. The first 32 individuals are used for training and the last 8 individuals are used for validation. Each individual images carry multiple perspectives of the face. The first part is more for understanding how to use PyTorch and implementing a nose tip detection model. Firstly, we would have to preprocess the db into a custom Dataloader for training. Here is an example processed data with the label.
The blue dots represent the actual nose tip feature. We've resized the image using cv2.resize to make it into a more realistic dimensions for training multiple epochs. If we were to save it in terms of Dataloader, here is what the data looks like.
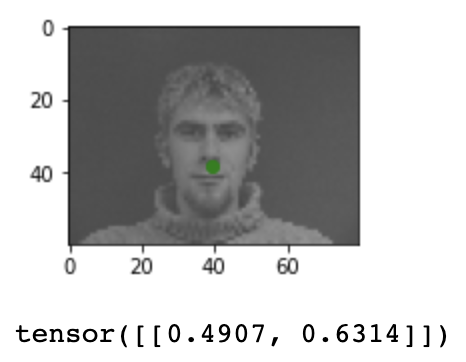
As you can see, the label is saved in the format of 'tensor' matrices. They
behave like numpy arrays but are used for forward propagations during the
actual training process to consistently tune the parameters. For our loss
function, I've used nn.MSELoss. For our optimizer function, I've used Adam
with a learning rate of 0.001. Here is a basic outline of my first attempt
of creating a nose tip detection model:
1. for input x (image tensor)
2. x = Convolutional(x, in_channel=1, out_channel=12, kernel_size=7)
3. x = ReLU(x)
4. x = MaxPool2d(x, kernel_size=2)
5. x = Convolutional(x, in_channel=12, out_channel=12, kernel_size=5)
6. x = ReLU(x)
7. x = MaxPool2d(x, kernel_size=2)
8. x = Convolutional(x, in_channel=12, out_channel=12, kernel_size=3)
9. x = ReLU(x)
10. x = MaxPool2d(x, kernel_size=2)
11. x = Linear(x, in_features=336, out_features=168)
12. x = ReLU(x)
13. x = Linear(x, in_features=168, out_features=2)
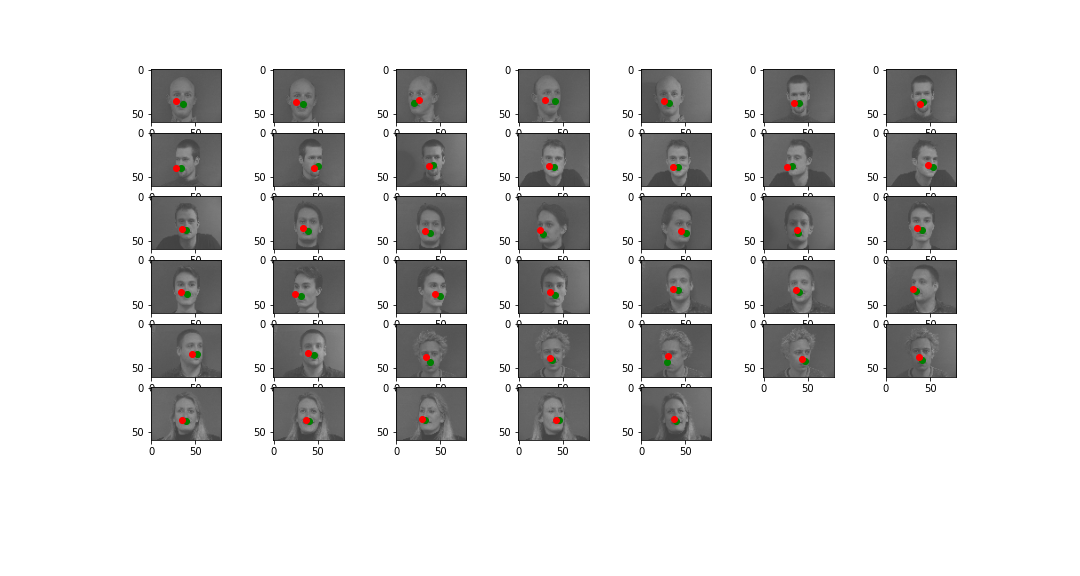
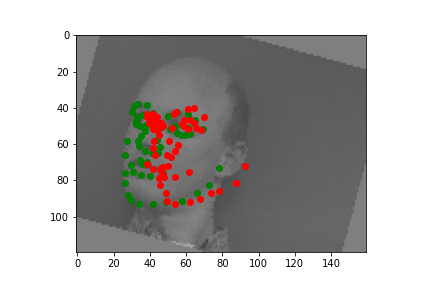
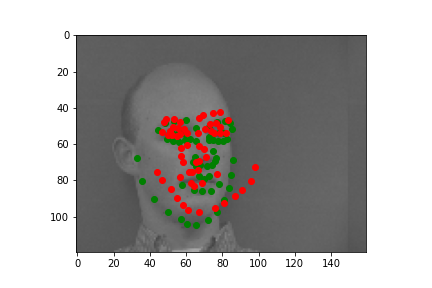
And, here are the results on the validation set after training for 20 epochs.
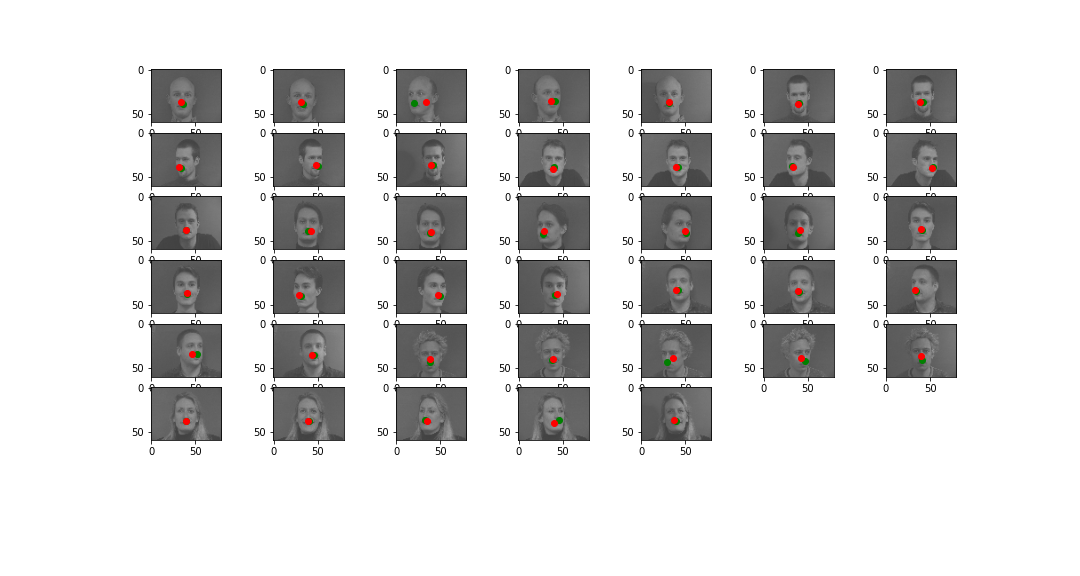
The green points are the ground-truth annotation while the red points are predictions. The training model works fairly well, and we were able to produce lots of Rudolphs. The running_loss value is certainly diminishing over multiple epochs. Here are the modifications that I've made to tune the hyper-parameters, and their respective results:
x = Convolutional(x, in_channel=1, out_channel=12, kernel_size=7)
x = Convolutional(x, in_channel=12, out_channel=32, kernel_size=5)
x = Convolutional(x, in_channel=32, out_channel=22, kernel_size=3)
x = Linear(x, in_features=616, out_features=308)
x = Linear(x, in_features=308, out_features=2)
Before
After
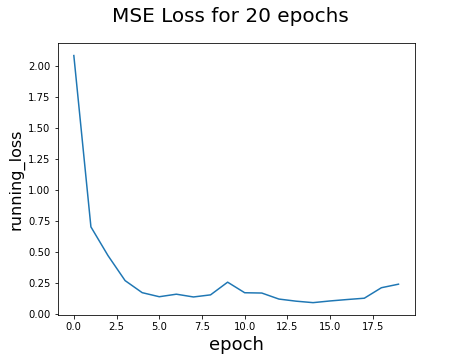
Analysis: The result is actually worse than before, this may be the case due to a drastic changes in the channel sizes for single step. Unlike before, we have increased our channels of CNN to 32 at some point, leading to a more drastic changes in fully connected layers. Even with the low learning rate, the changes to the parameters are too drastic that it may cause an increase in running_loss after certain number of epochs.
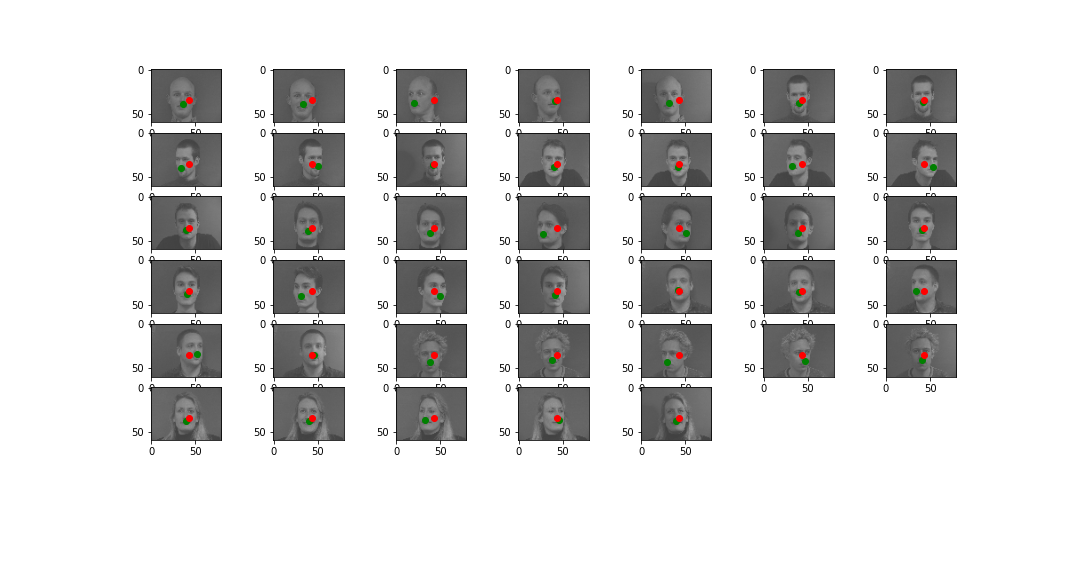
Before
After
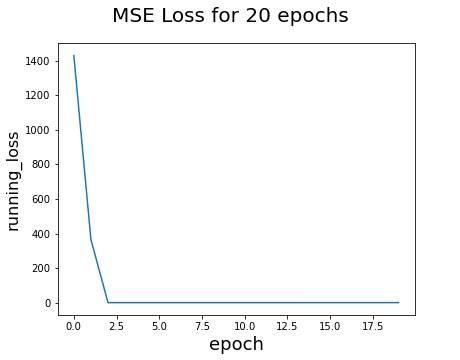
Analysis: As you can see for the loss graph, the loss value significantly drops to zero on the first few epochs, and stays there. This may look promising, but the result for validation set is not really good. This maybe a result of overfitting the training set. By increasing the learning rate, the model tends to be more vulnerable to new inputs and labels, such that it will overwhelmingly influence its parameters. Although learning rate seems important, the appropriate number is necessary.
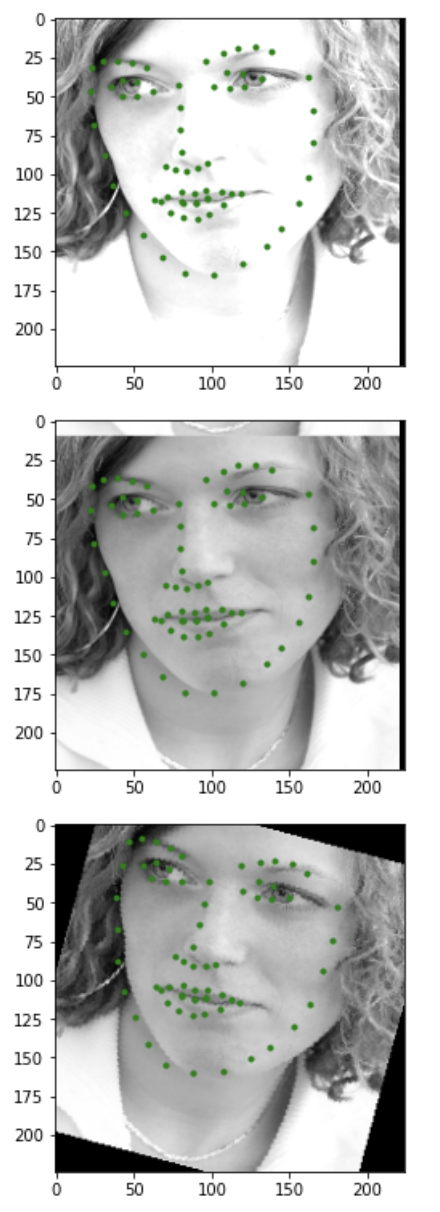
Using the same Dataloader from the previous part. We will attempt creating a full facial keypoints detection model. Firstly, we will try augmenting the data to produce color-jittered / shifted / rotated images that can be a good variance to the training set. Here are some example augmented data:
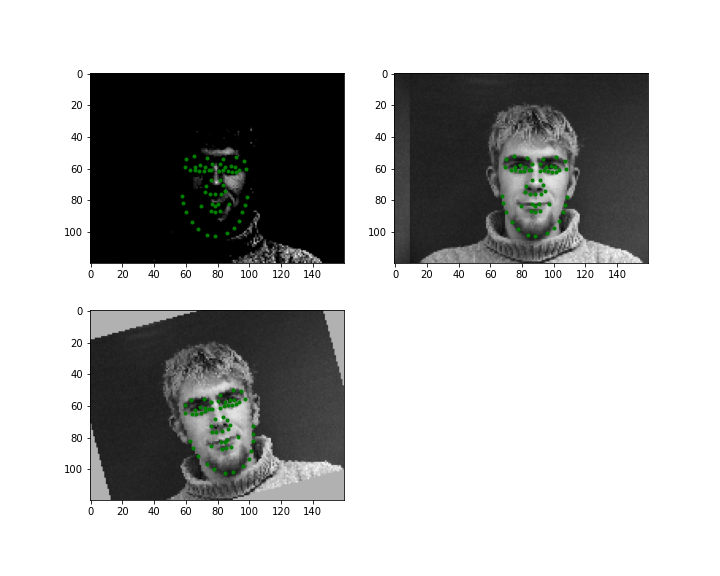
As you can see, the left top image is color-jittered using torchvision module.
The right top image is shifted towards the right by 10 pixels. The left
bottom image is rotated counter-clock wise by 15 degrees. Here are the information
regarding the facial feature detection model:
(conv1): Conv2d(1, 12, kernel_size=(7, 7), stride=(1, 1))
(conv2): Conv2d(12, 18, kernel_size=(5, 5), stride=(1, 1))
(conv3): Conv2d(18, 21, kernel_size=(4, 4), stride=(1, 1))
(conv4): Conv2d(21, 24, kernel_size=(3, 3), stride=(1, 1))
(conv5): Conv2d(24, 28, kernel_size=(2, 2), stride=(1, 1))
(fc1): Linear(in_features=84, out_features=100, bias=True)
(fc2): Linear(in_features=100, out_features=116, bias=True)
(uf): Unflatten(dim=1, unflattened_size=(58, 2))
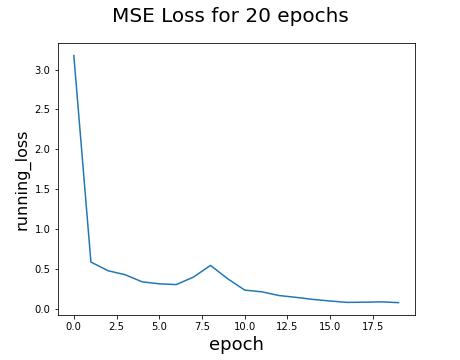
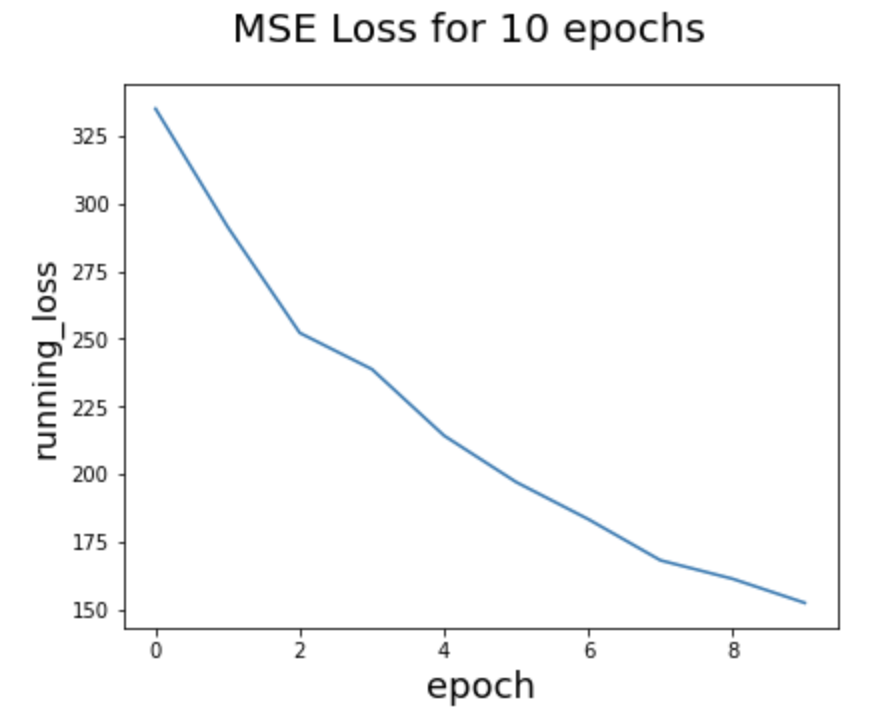
I've used the same optimizer and loss function from part 1. Here is the
MSE Loss over 20 epochs:
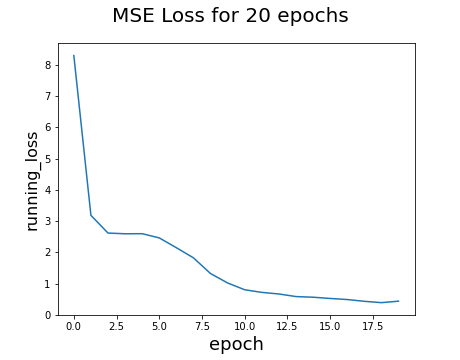
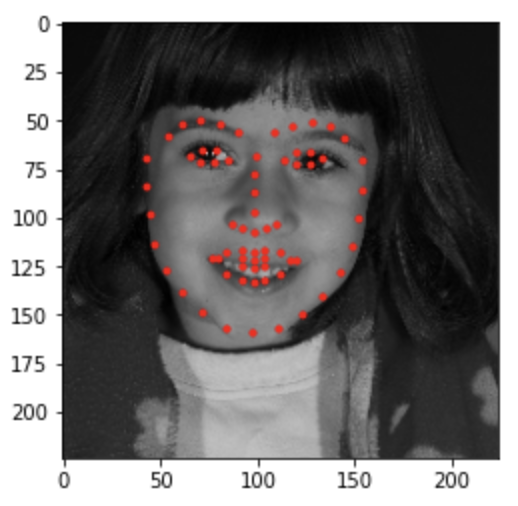
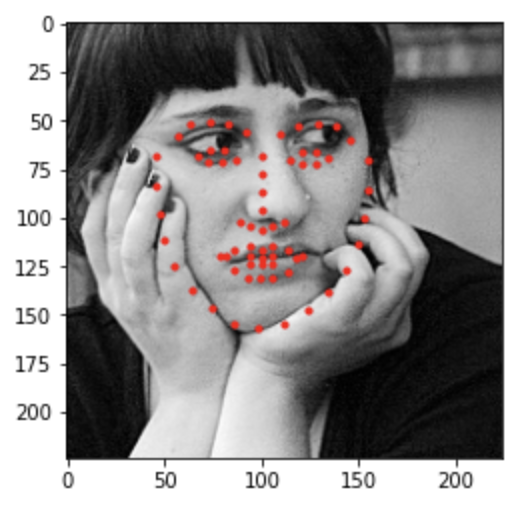
There is a clear diminishing pattern in the loss function, which is good. Here are some good and bad results from running the validation set. Green points are the ground-truth and red points are predictions:
Good #1
Good #2
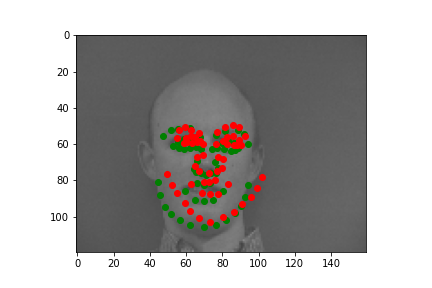
Bad #1
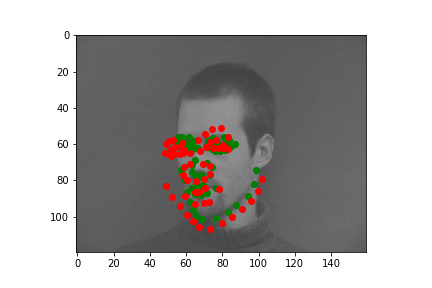
Bad #2
Overall, our model does produce some facial feature outputs that does a
decent job on pinpointing key features like eyes, noses, and mouths.
Looking
at the good image case, the first image clearly shows a forward facing face
and the second image clearly shows a left facing face. The prediction does
a decent job on figuring out which direction the face is facing towards, and
predicts facial features based on it.
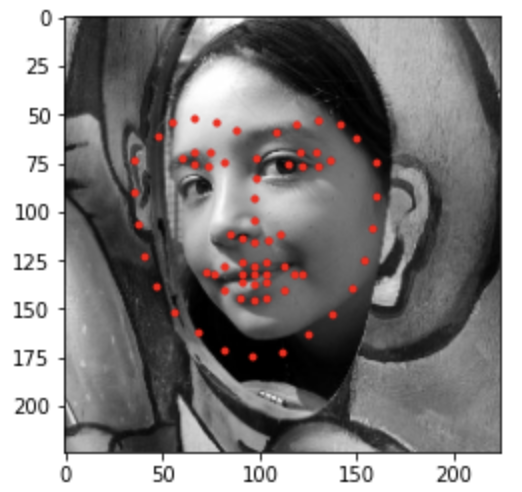
On the other hand, the bad image case
shows either dislocations of the prediction points or incorrect facing.
The first bad image shows how predictions are less angled and more centered
than the ground truth. The second bad image shows how the prediction is
facing leftwards while the ground truth is facing rightwards. The reason for
bad image cases can be due to either less appropriate hyper-parameter values
or lack of datasets.
To train with larger dataset, we have to use the GPUs that Google Colab provides to be able to train models more efficiently. With given bounding boxes and labels, I've preprocessed each image to crop and augment correspondingly. Here is an example of an augmented training data from ibug face (Brightness, Shifting, Rotating)
I've used a pre-trained model for this section. ResNet18 is a Convolutional Neural Network that is 18 layers deep. To match the input channel, I had to unflatten and send the grayscale images to 3 layers, so that I will be able to input the images correctly into the net. After training for 10 epochs, here is the running_loss value curve.
Due to time constraints, I wasn't able to train more epochs, but the MSE loss certainly shows a decreasing trend, such that the model is indeed heading closer to the solution. Here are some test images that ran well and poorly.
Good #1
Good #2
Bad #1
Bad #2
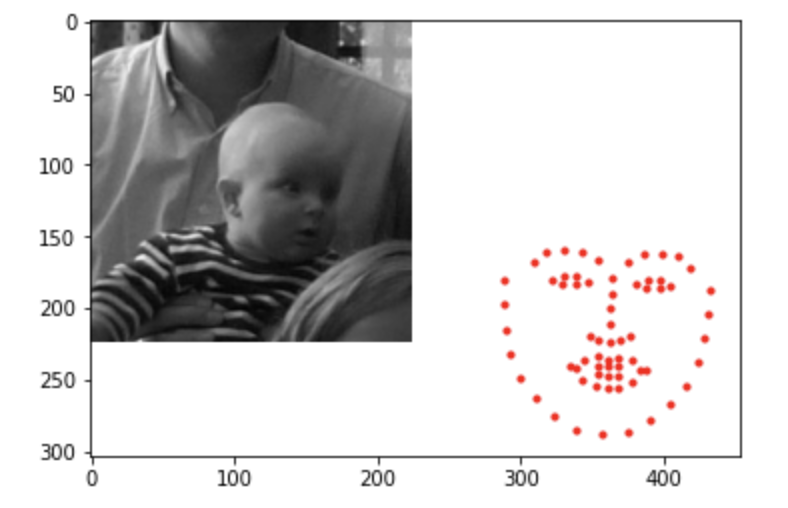
Looking at the bad examples, we can see that the model tends to produce the same exact facial features with different positions. This maybe due to lack of training that could've added some variation in the feature specifics. The second bad image was unable to detect the baby's face due to its darkness and facing away from the center. A potential fix to this model is to increase learning rate, so that the model will reach loss closer to zero at a faster rate. Also, the brightness color jitter was not significant enough to take in account for actual dark images. Here are some examples that are run on my personal image collections.
Hyun Jae 1
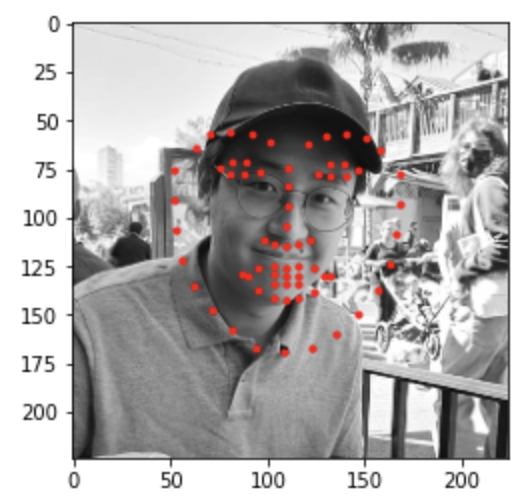
Hyun Jae 2
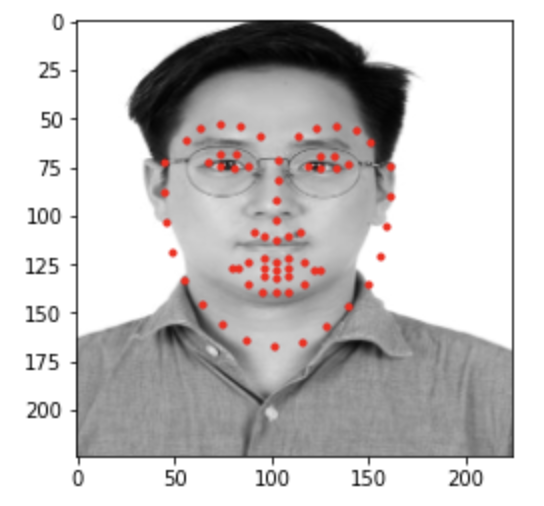
Hyun Jae 3
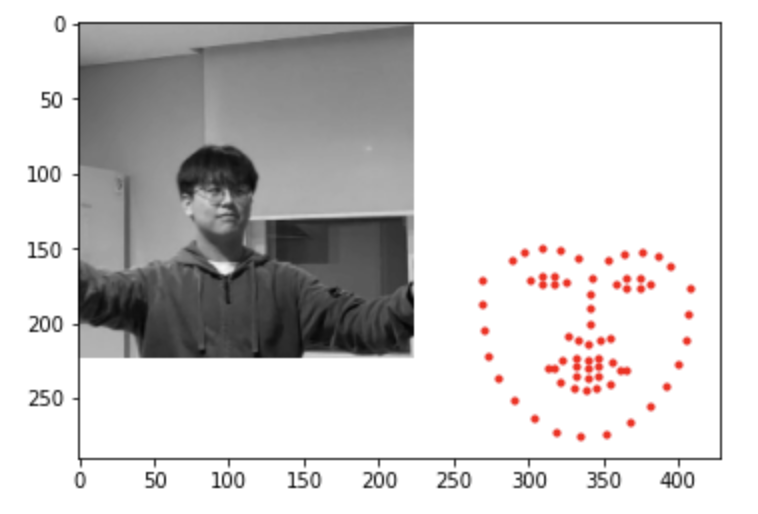
The first two images were at least be able to locate the face in the image. It still shows the same exact facial architect, but was able to pinpoint the location. The third image was unable to detect the face at all. This is due to the shades that appears on my eyes by my own hair. This may diminish the values of certain pixels in the eyes, so that models have harder time detecting.
Maching Learning is all about preprocessing the data and tuning the hyper parameters. The actual magic happens during the training process, but that is not our realm to do the computations. Being able to augment data to produce valuable training sets, selecting correct in/out channels with decent learning rate, and structuring the convolutional/fully-connected layers in the model were the things I have learned during the project.