Overview
In this project, I utilized PyTorch to implement a convolutional neural network for identifying facial keypoints using two different datasets. For part 1, my first model solely predicts the nose keypoint of a given face. For part 2, I first performed data augmentation and then used the augmented dataset to identify all 58 facial keypoints. Finally, in part 3, I utilize the ResNet-18 model architecture for predicting facial keypoints on a much larger dataset (and bounding box-based cropping + augmenting it as well) with 68 keypoints.
Part 1: Nose Tip Detection
For nose tip detection, I use 3 convolutional layers, all with a kernel size of 5x5 and output channels of 32, 20, and 12. After each conv layer, I have both a ReLu and MaxPool layer with a size of 2x2. Finally, I use two fully connected layers (with a ReLu layer in between them), the first outputting 32 channels and the final outputting 2, for the x and y coordinate of the nose keypoint. I use MSE as my loss function and an Adam optimizer with a learning rate of 0.001. I used a batch size of 4.
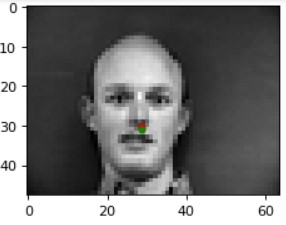
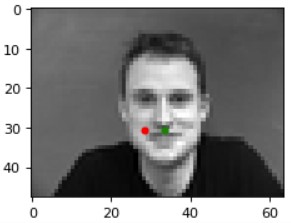
Sampled Images and Corresponding Ground Truth Keypoints from DataLoader:

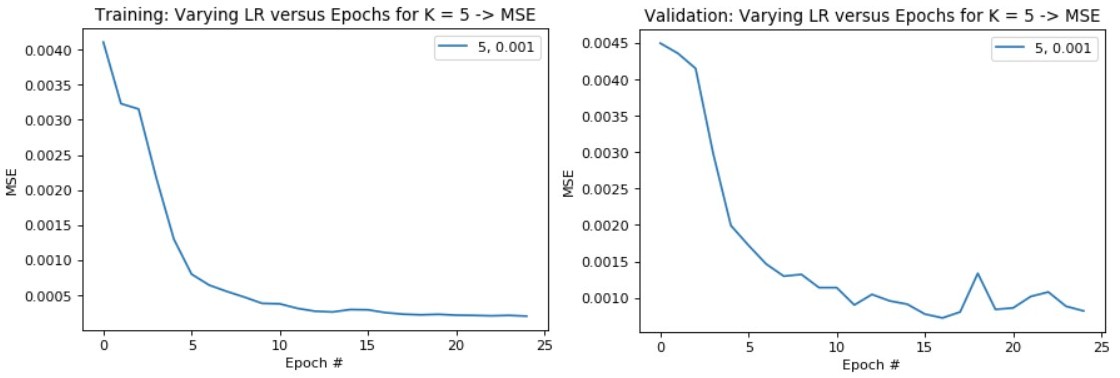
Hyperparameter Tuning - Learning Rate and Kernel Size:
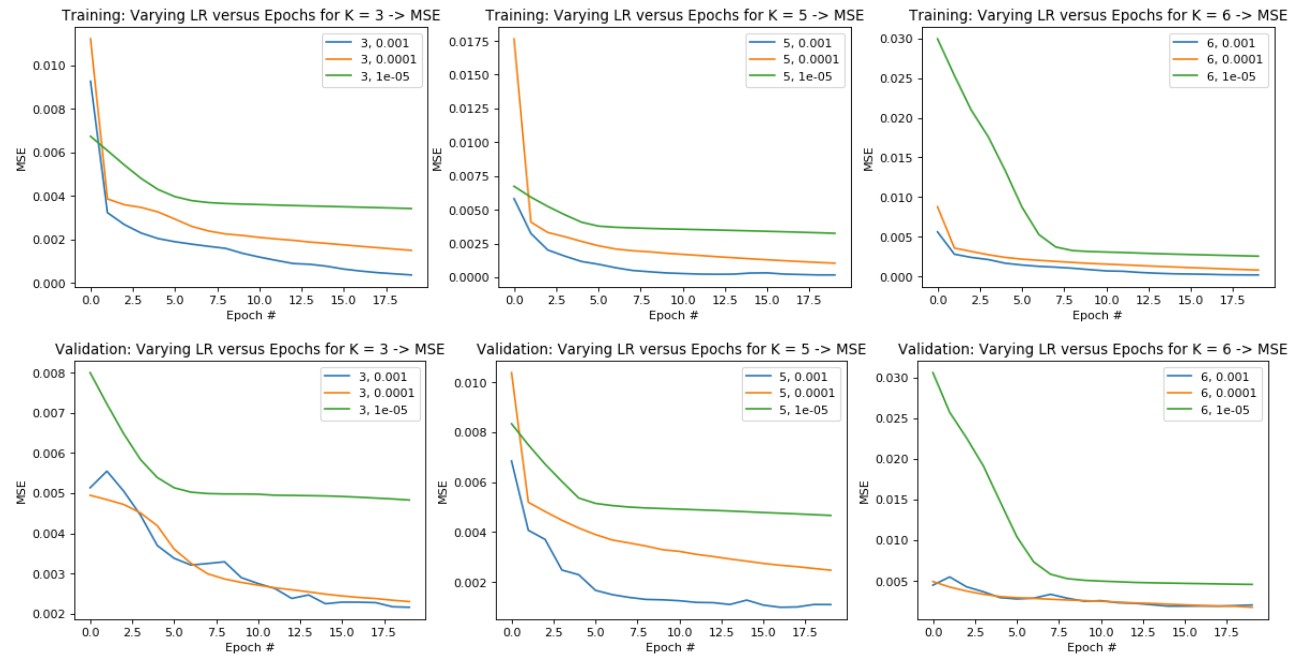
The best hyperparameter pair is Filter Size K = 5, Learning Rate = 1e-3
Training Loss over Epochs (Top)
Validation Loss over Epochs (Bottom)
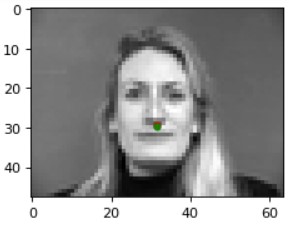
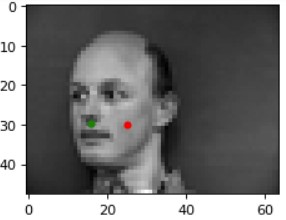
Results (Green: Ground Truth, Red: Prediction):
|
|
|
|
The model most likely fails in these two cases above because in the left image, the lighting is a bit darker than the rest of the dataset, the individual captured is not centered within the image unlike the training dataset subjects (he is shifted significantly over to the left and in this part, we do not implement data augmentation to ensure that the model does not overfit in this manner), and he has a much larger forehead/rounded face than most of the individuals in the training dataset. As for the right image, the model may be failing due to the asymmetry of the shadows on the individual's face-- especially the lack of definition of their left cheekbone compared to the other side, which may affect the nose keypoint classification due to its locality (which we take into account during convolutions and max pooling).
Part 2: Full Facial Keypoints Detection
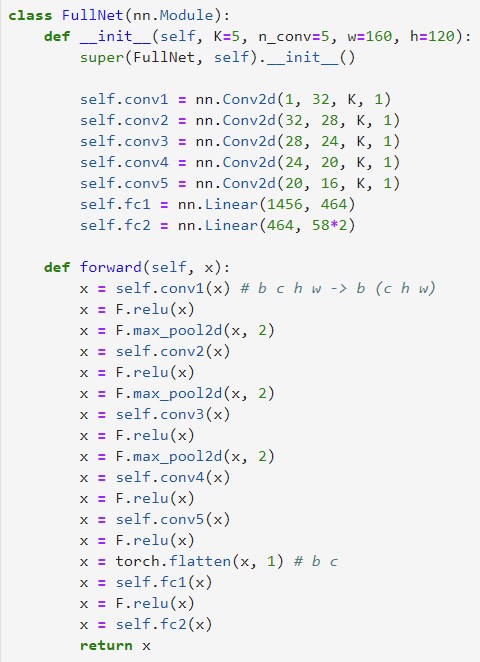
For full facial keypoint detection, I use 5 convolutional layers, all with a kernel size of 5x5 and output channels of 32, 28, 24, 20, and 16. After each of the first 3 conv layers, I have both a ReLu and MaxPool layer with a size of 2x2; for the last two conv layers, I just have a ReLu layer after them. Finally, I use two fully connected layers (with a ReLu layer in between them), the first outputting 464 channels and the final outputting 116, for the x and y coordinates for each of the 58 keypoints. I use MSE as my loss function and an Adam optimizer with a learning rate of 0.001. I use a batch size of 4.
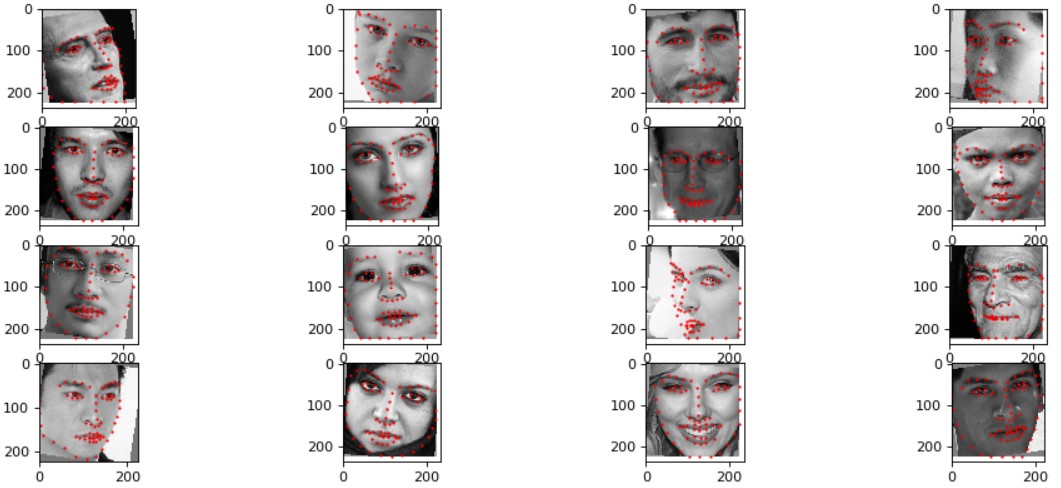
Sampled Images and Corresponding Ground Truth Keypoints from DataLoader:
For my dataloader, I implemented data augmentation where I randomly shifted and rotated the input images by [-6, 6] both vertically and horizontally and [-15, 15] degrees respectively. The ground truth facial keypoints were also transformed using the corresponding shift and rotation amount.

Model Architecture
Training and Validation Loss Across Iterations:
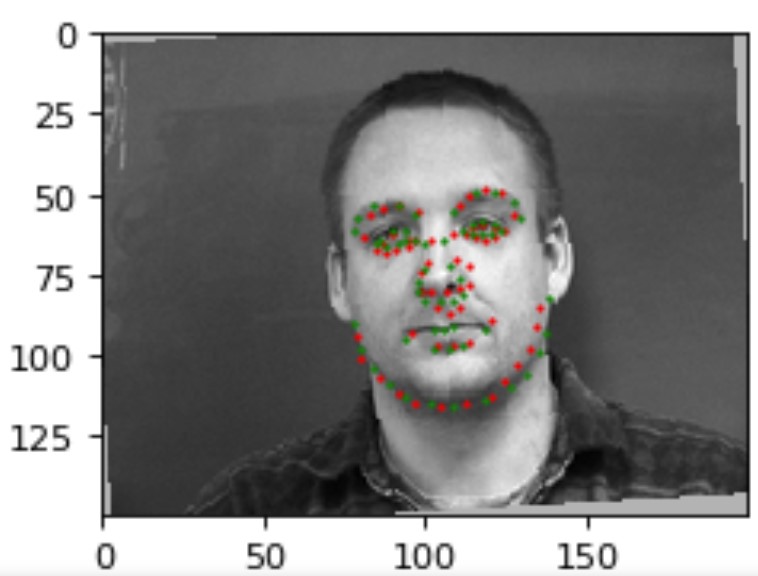
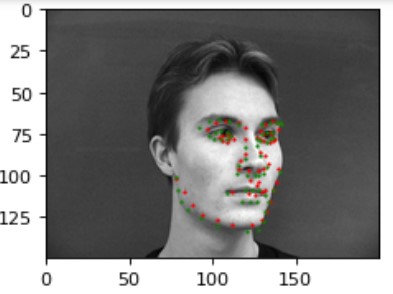
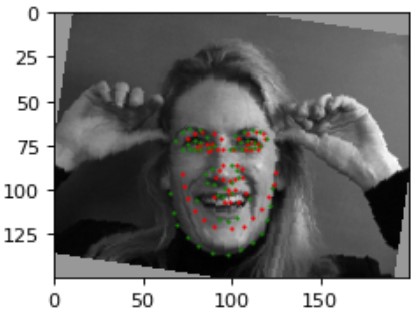
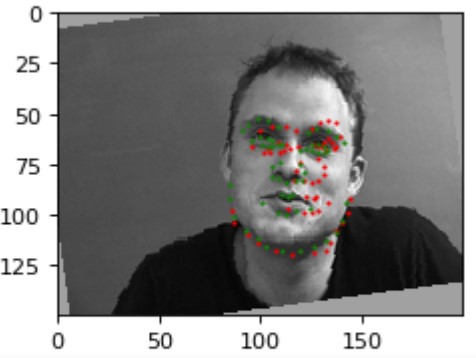
Results (Green: Ground Truth, Red: Prediction):
|
|
|
|
The model most likely fails in these two cases above because in the left image, the individual is using an expression/hand gestures not seen in any of the training data, which is significant because we take into account the positioning of the keypoints with respect to the overall structure of the image during convolutions and max pooling. The image on the right seems to be performing badly most likely due to the individual contorting their face in a unique way and most significantly, the rotation of this image (due to augmentation) is quite large relative to the other images in the dataset.
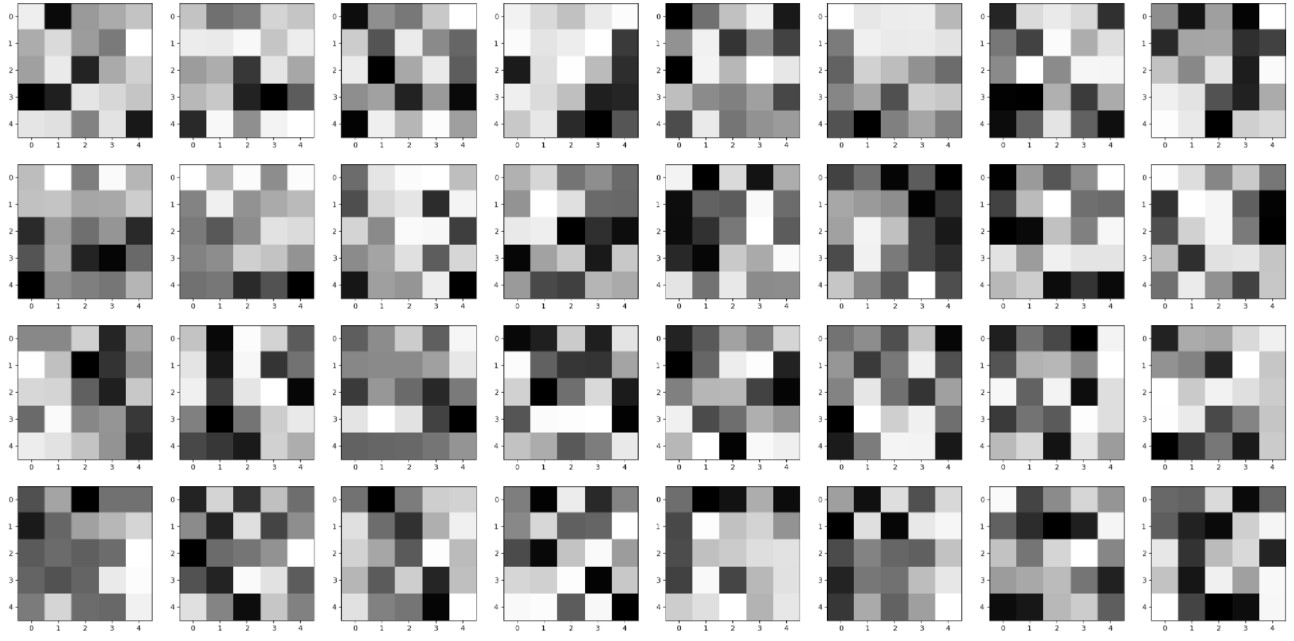
Learned 5x5 filters of the first convolutional layer:
Part 3: Train With Larger Dataset
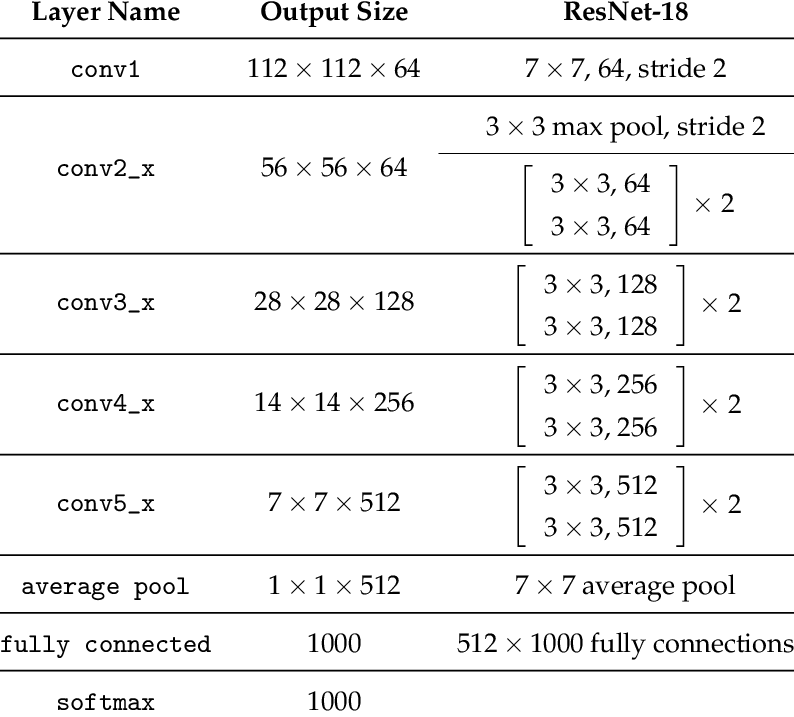
Finally, for a large dataset of 6,666 images, I first had to implement a dataloader that took in the bounding boxes associated with the location of the face within the image and crop the image/transform the landmarks accordingly. I also augmented the dataset using my implementation from Part 2. Then, I used an open source implementation of ResNet-18 with a learning rate of 0.001 and 10 epochs. I use a batch size of 4 with 95% of the original dataset and 95% of the transformed dataset as training and 5% of each as validation.
Sampled Images and Corresponding Ground Truth Keypoints from DataLoader:
For my dataloader, I implemented the same form of data augmentation where I randomly shifted and rotated the input images by [-6, 6] both vertically and horizontally and [-15, 15] degrees respectively. The ground truth facial keypoints were also transformed using the corresponding shift and rotation amount. I also had to take into account the bounding box cropping and resizing of the input image for transforming the ground truth facial keypoints.
Model Architecture
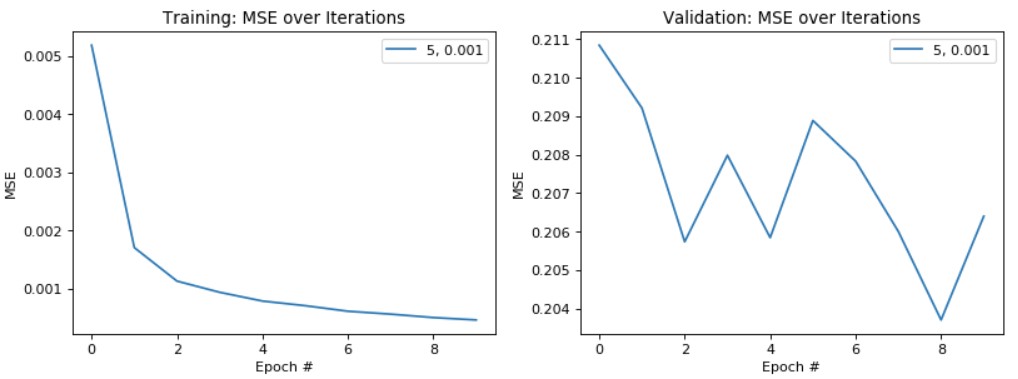
Plotting Training/Validation Losses for ResNet-18, batch size = 4, Training Set: 95% of original dataset:
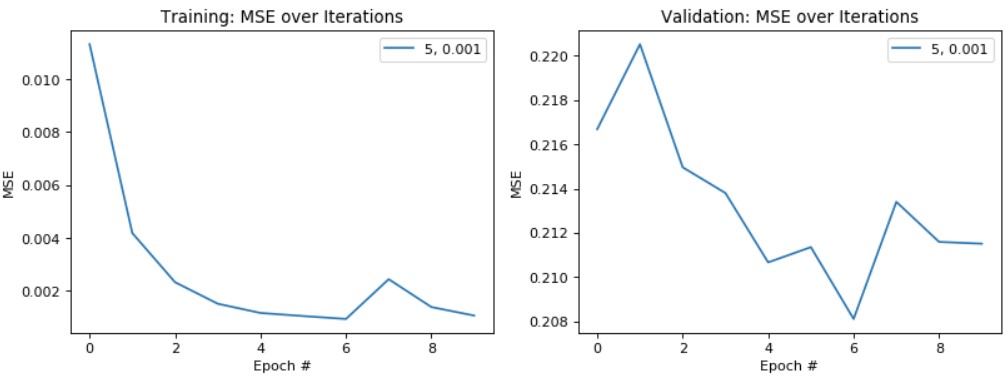
Plotting Training/Validation Losses for ResNet-18, batch size = 64, Training Set: 80% of original dataset:
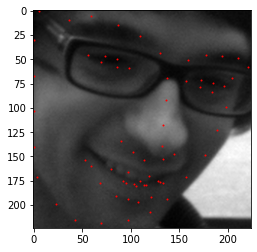
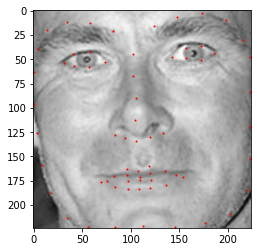
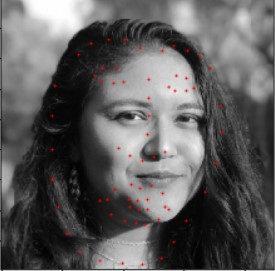
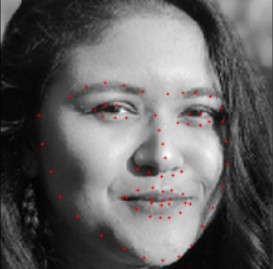
Test Prediction Results (Red: Prediction):

|
|
|

|
Overall, by using a smaller batch size (which traded off a longer training time for a lower loss) and a larger percentage of the dataset as my training dataset, I was able to reduce both the training and validation error of my model. This isn't always ideal especially if taken too far, it may lead to overfitting (which indeed was occurring as my training error was quite low around 0.0005, but my validation error remained around 0.206). With my final model, I was able to achieve a testing score (MAE) of 8.27309.
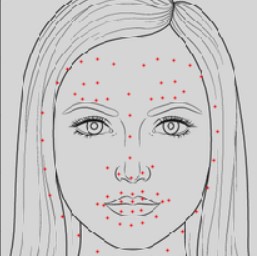
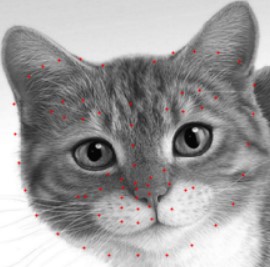
Custom Images:
|
|
|
|
The model doesn't do too well on the first image as the bounding box for my face isn't as tight, so there is quite a bit of noise from the background-- since there is a lot of texture/patterns from the trees. We can see that once we make the bounding box for my face tighter in the second image, the accuracy of the predicted keypoints becomes significantly better. For the third image, I tried seeing how the model would perform on a drawing of a face with barely any shadows/details. It performs a bit better than I thought it would-- the general structure of the face, lips, and nose is pretty decent, even if the eyes and eyebrow keypoints are shifted significantly upwards. Finally, out of curiousity, I tried out the model on the face of a cat and again, the model performs better than I expected. Again, the keypoints marking the general structure of the cat's face is pretty accurate. The eyes are again off and a cat (as per my knowledge) doesn't have eyebrows, so the confusion with the output makes sense. Finally, the model actually outputs keypoints indicative of the cat's "spread-out" nose and large muzzle/lip area, which is pretty interesting. Overall, this shows that our model is pretty versatile for certain feature keypoints.