In this project, I will use convolutional neural networks to automatically detect facial keypoints. The tool I use is PyTorch.
In this part, I will detect only the nose tip point.
To preprocess the images, I turn them into grayscale and then normalize them to scale from -0.5 to 0.5. The output of skimage.color.rgb2gray already gives floating values from 0 to 1. All I have to do is just deduct 0.5 off. The images are resized to (60, 80). Then, I need to define the nose tip dataset. It inherits PyTorch's Dataset class. For the __getitem()__ function, I use the example code for help. The dataloader wraps up this dataset with batch_size=1 since it is a small dataset.
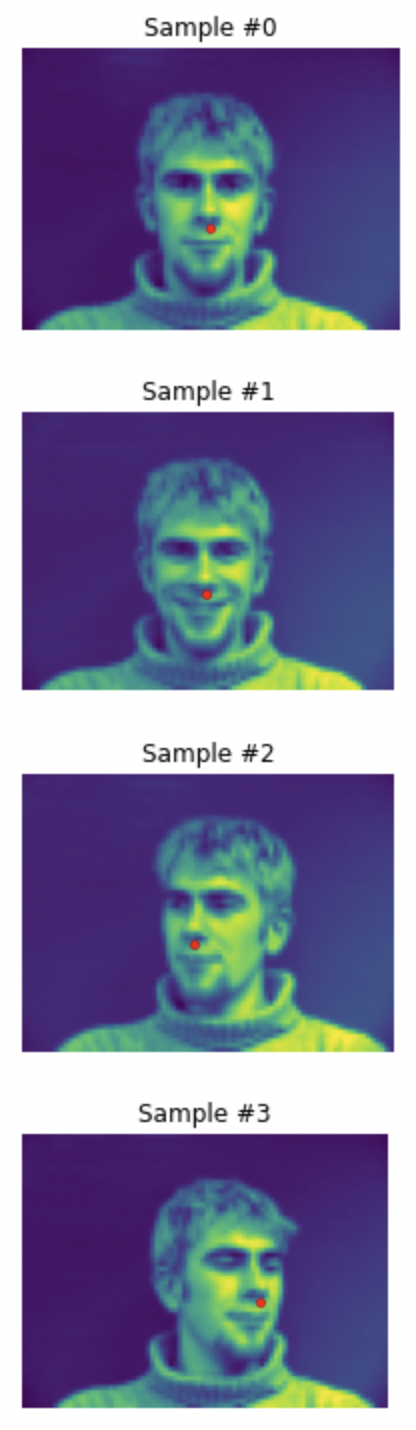
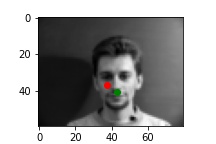
Below are some sampled images visualized with ground-truth keypoints.
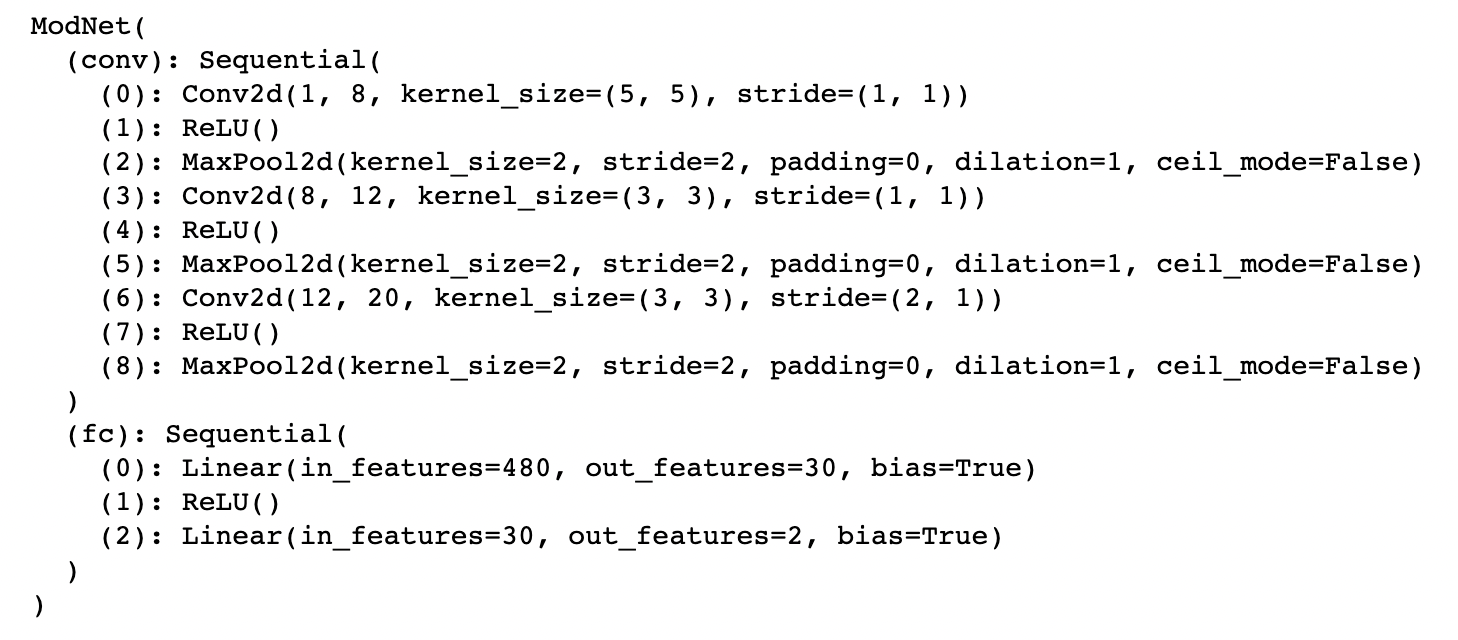
The model I use is below.

criterion = nn.MSELoss()
optimizer = optim.Adam(net.parameters(), lr=1e-3)
I use MSE(mean squared error loss) as loss function and Adam with learning rate 1e-3 as optimizer.
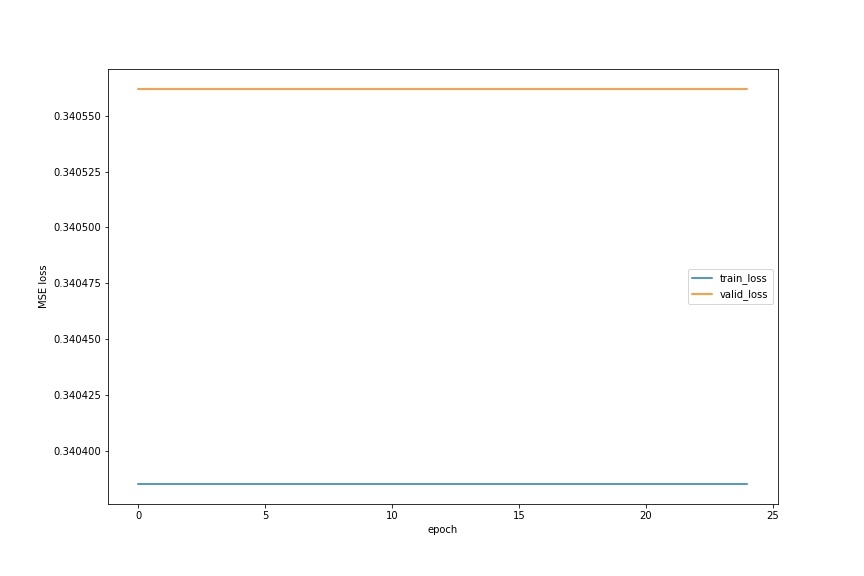
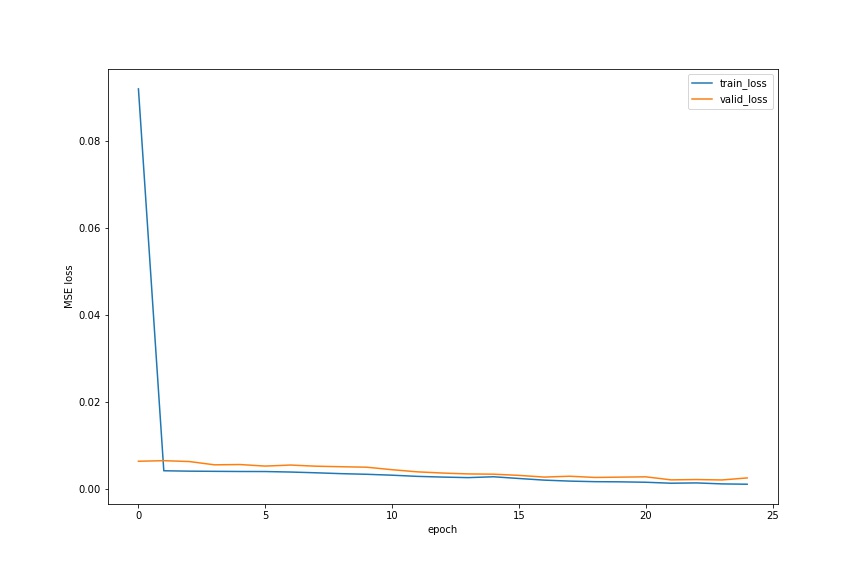
I split my dataset to 192 images of training set and 48 images of validation set. I train for 25 epochs, and below is the the train and validation MSE loss plot across epochs.
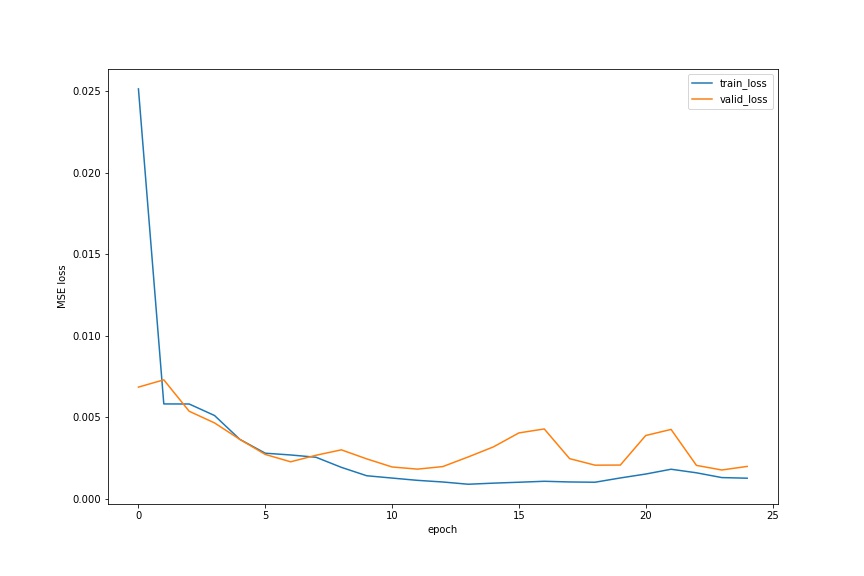
The curves are not as smooth as I think, but it shows a good trend. Also, the validation loss still fluctuates. I will improve this in the next section.
The first parameter I modify is the learning rate. I decrement it to 1e-4. The plot is below.
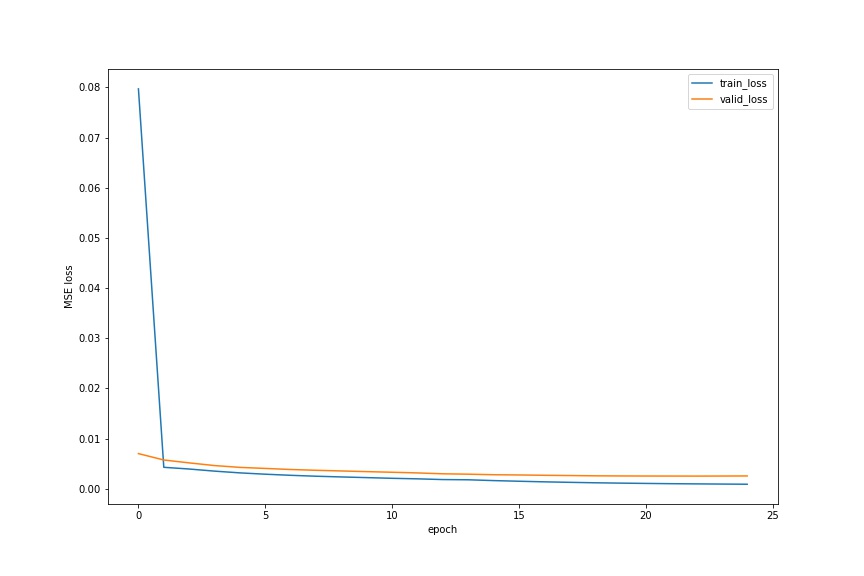
The curves become much more smooth. However, the loss is not very good.
Another parameter I modify is the channel number. I decrease it. Below is the new structure of my model.
And also the plot.
You can see that it is the worst among all three. It tells us that we should use more channels.
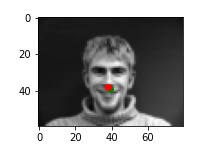
Green points are the ground-truth points, while the red ones are my predictions.
Below are two facial images which my model detects the nose correctly.
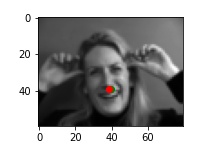
And 2 more images where it detects incorrectly.
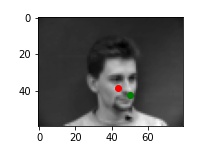
I think it fails because the man/woman is not facing to the front. Instead, he/she changes the posture, which makes my simple network hard to detect it correctly.
Now, in this part, I will detect all 58 landmarks instead of just the nose tip.
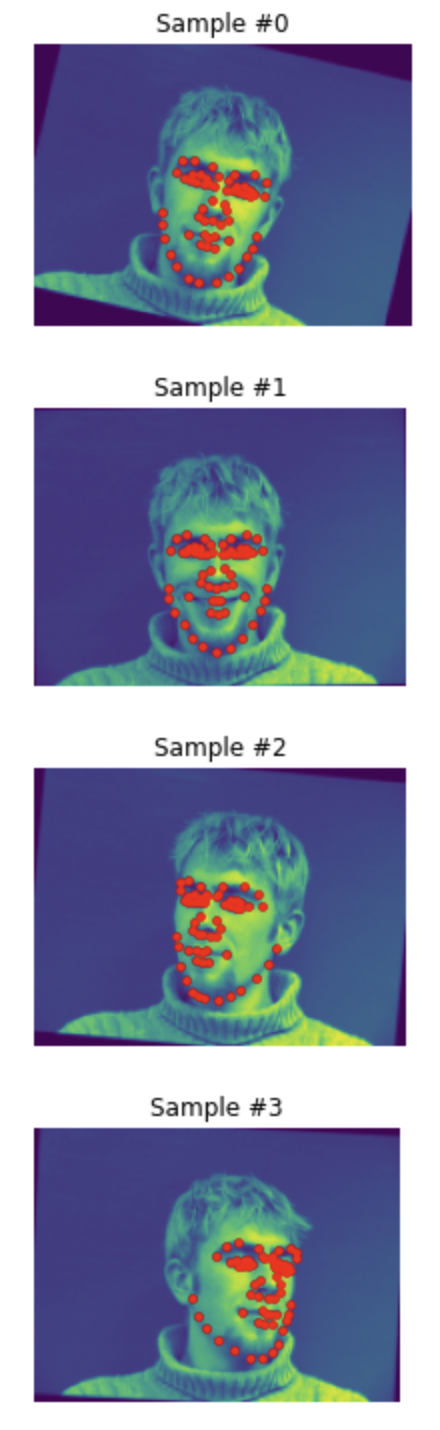
The process is very similar to part 1, but one difference is that all the images are resized to (120, 160). In addition, I add data augmentation to prevent my model from overfitting. I use rotation and ColorJitter. My dataloader uses batch_size=4. The images are still split in the same way as part 1.
Below are some sample images along with transformations.
The model is below.
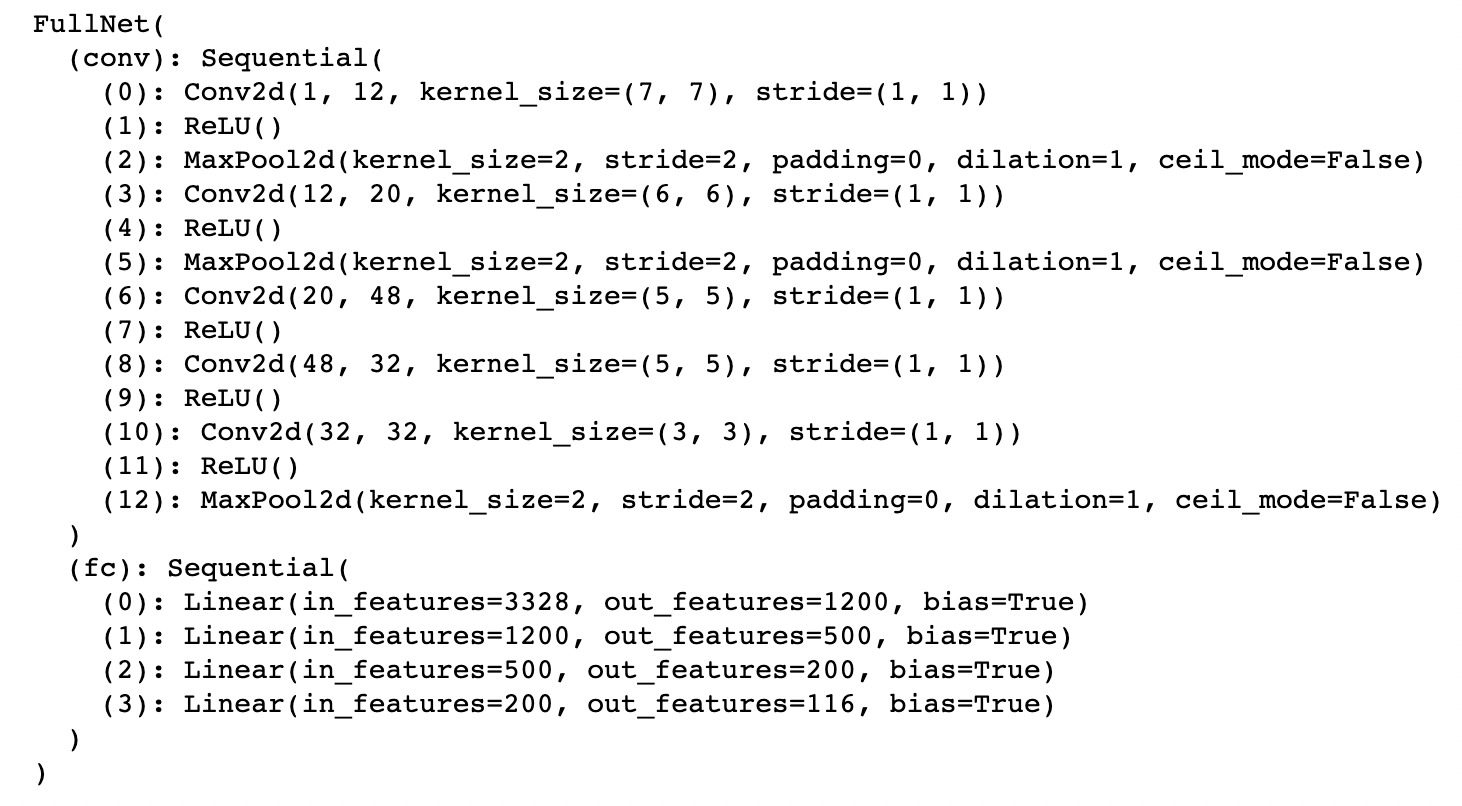
The loss function and optimizer I use is below.
full_criterion = nn.MSELoss()
full_optimizer = optim.Adam(fullnet.parameters(), lr=5e-5)
I train for 25 epochs. Below is the plot showing both training and validation loss across iterations. Again, training set has the first 192 images and validation set has the rest.
The plot doesn't show the loss clearly. The actual values are below.
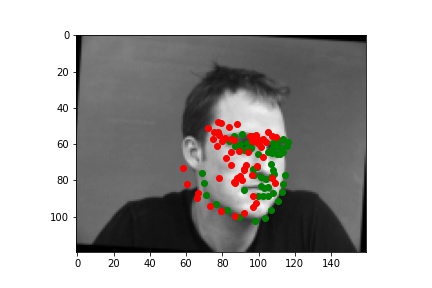
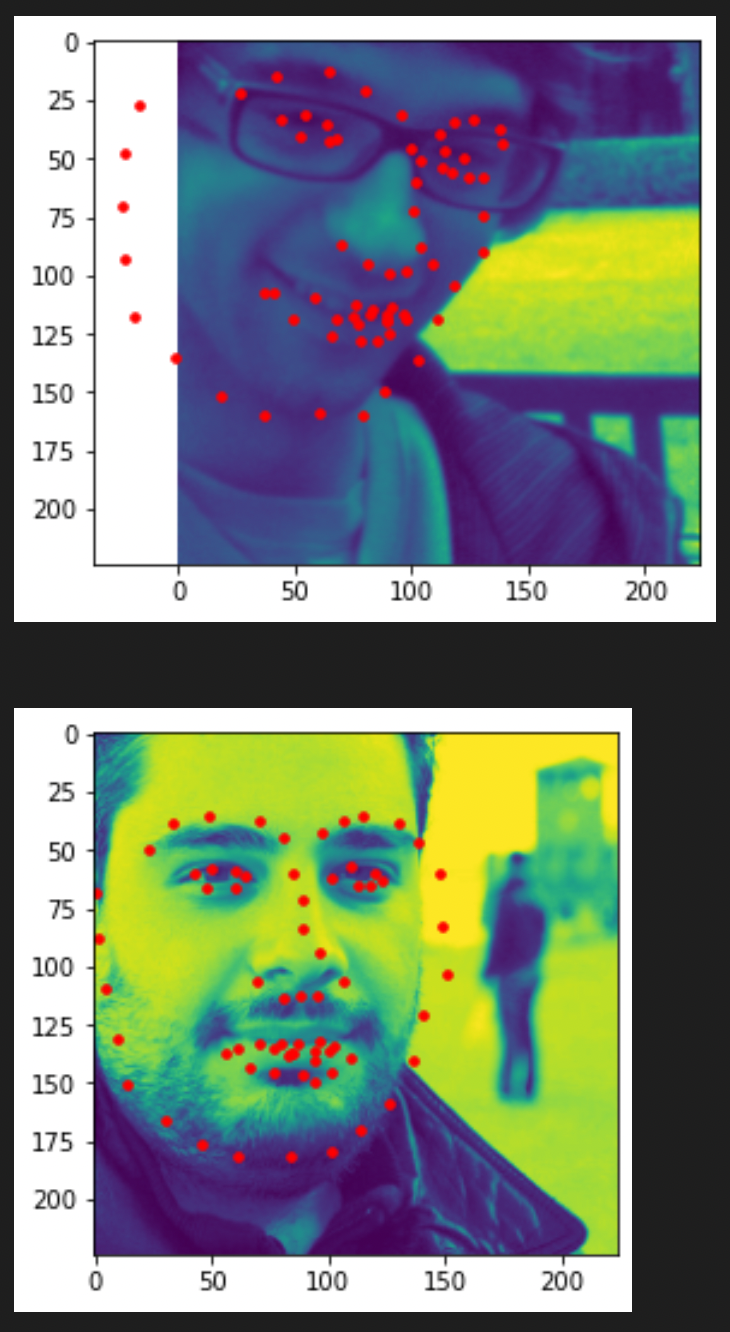
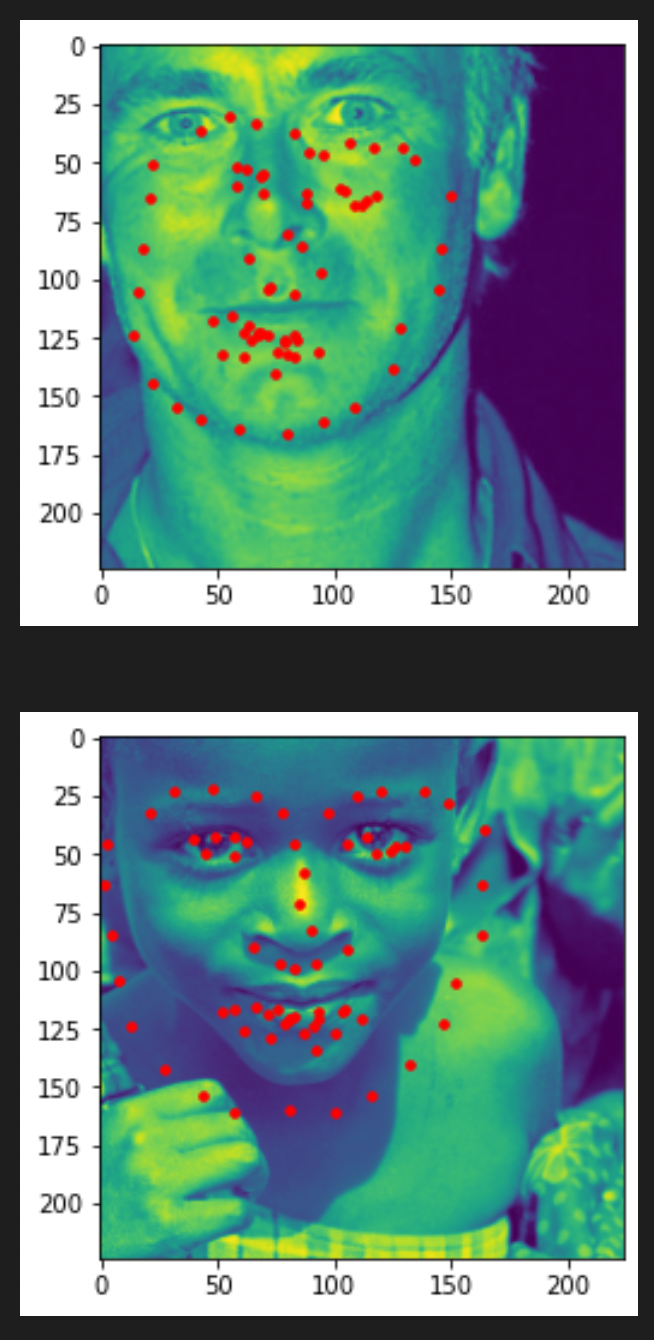
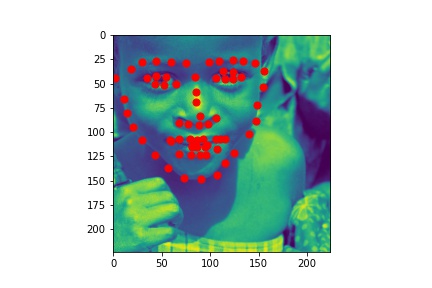
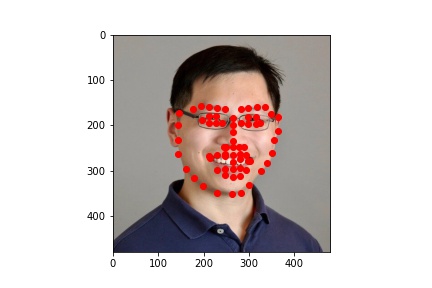
Green points are the ground-truth points, while the red ones are my predictions.
Below are two facial images which my model detects the landmarks correctly.
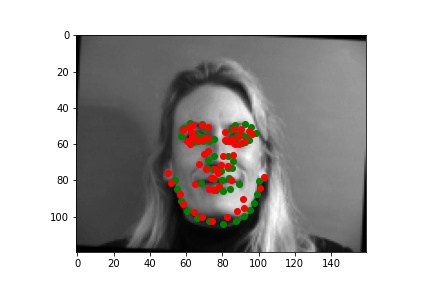
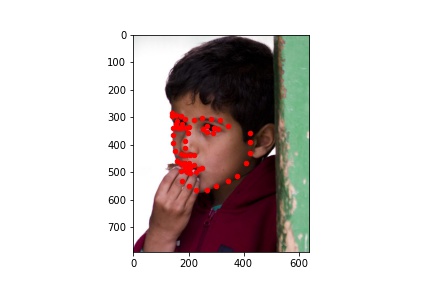
And 2 more images where it detects incorrectly.
It fails because the model is not too adapted to the random transformations and the posture is very differernt than others (id=213, the man is facing sideways, which is a very different posture) and my model doesn't learn that well.
Below are the 12 filters of my first convolution layer.
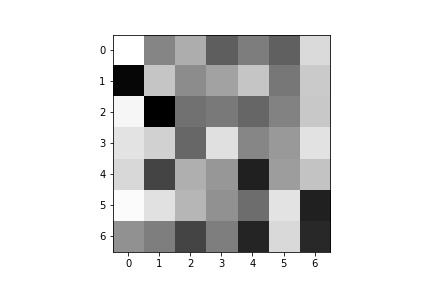
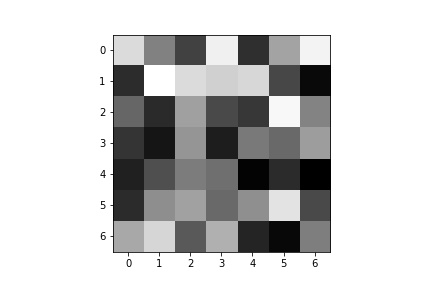
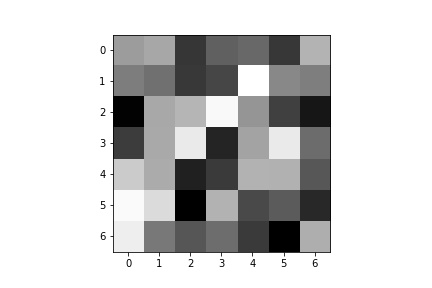
Unfortunately, I can't find any human-readable information from these filters.
For this part, I will use a larger dataset(ibug) for training a facial keypoints detector. This dataset contains 6666 images of varying image sizes, and each image has 68 annotated facial keypoints.
I use the example code to script the lanmarks and bounding boxes of each image. For bounding boxes with negative values, I simply skip those images. I crop the image by that bounding box, and resize it to (224, 224) in grayscale. Like the previous two parts, I use (0,1) ratio of the image as my landmarks instead of the actual coordinates. The bounding boxes are not very accurate, so I scale the width and height by 1.5. For data augmentation, I use Gaussian Blur, adding Linear Contrast, Gaussian Noise, changing Brightness, and Affine Transformation(scaling, translation, rotation). This is achieved with the help of imgaug package.
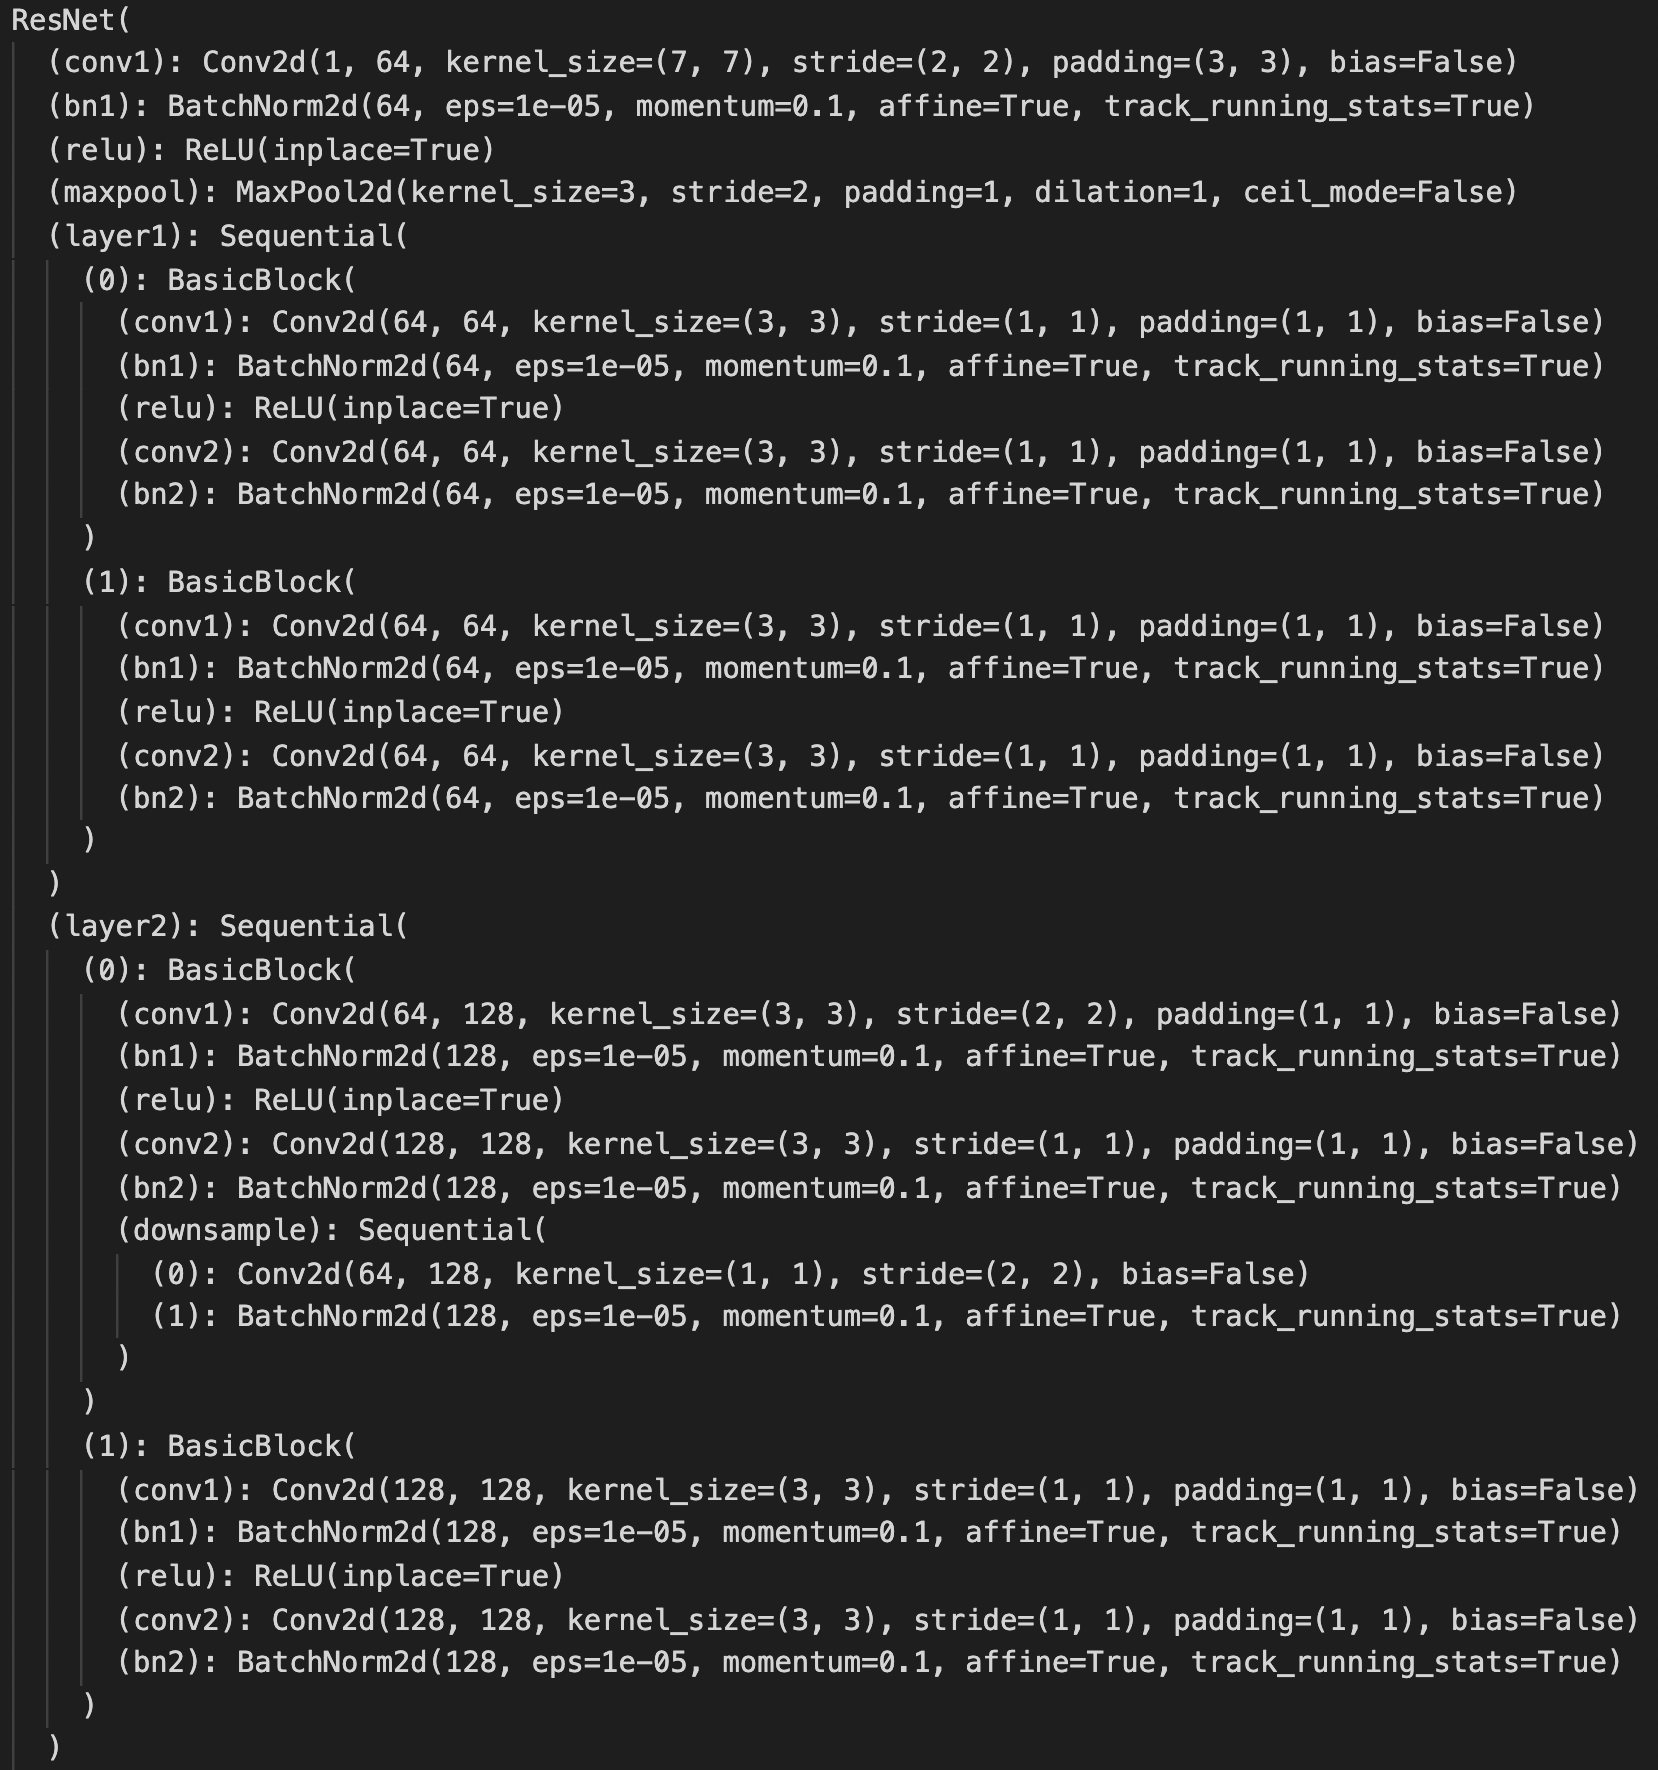
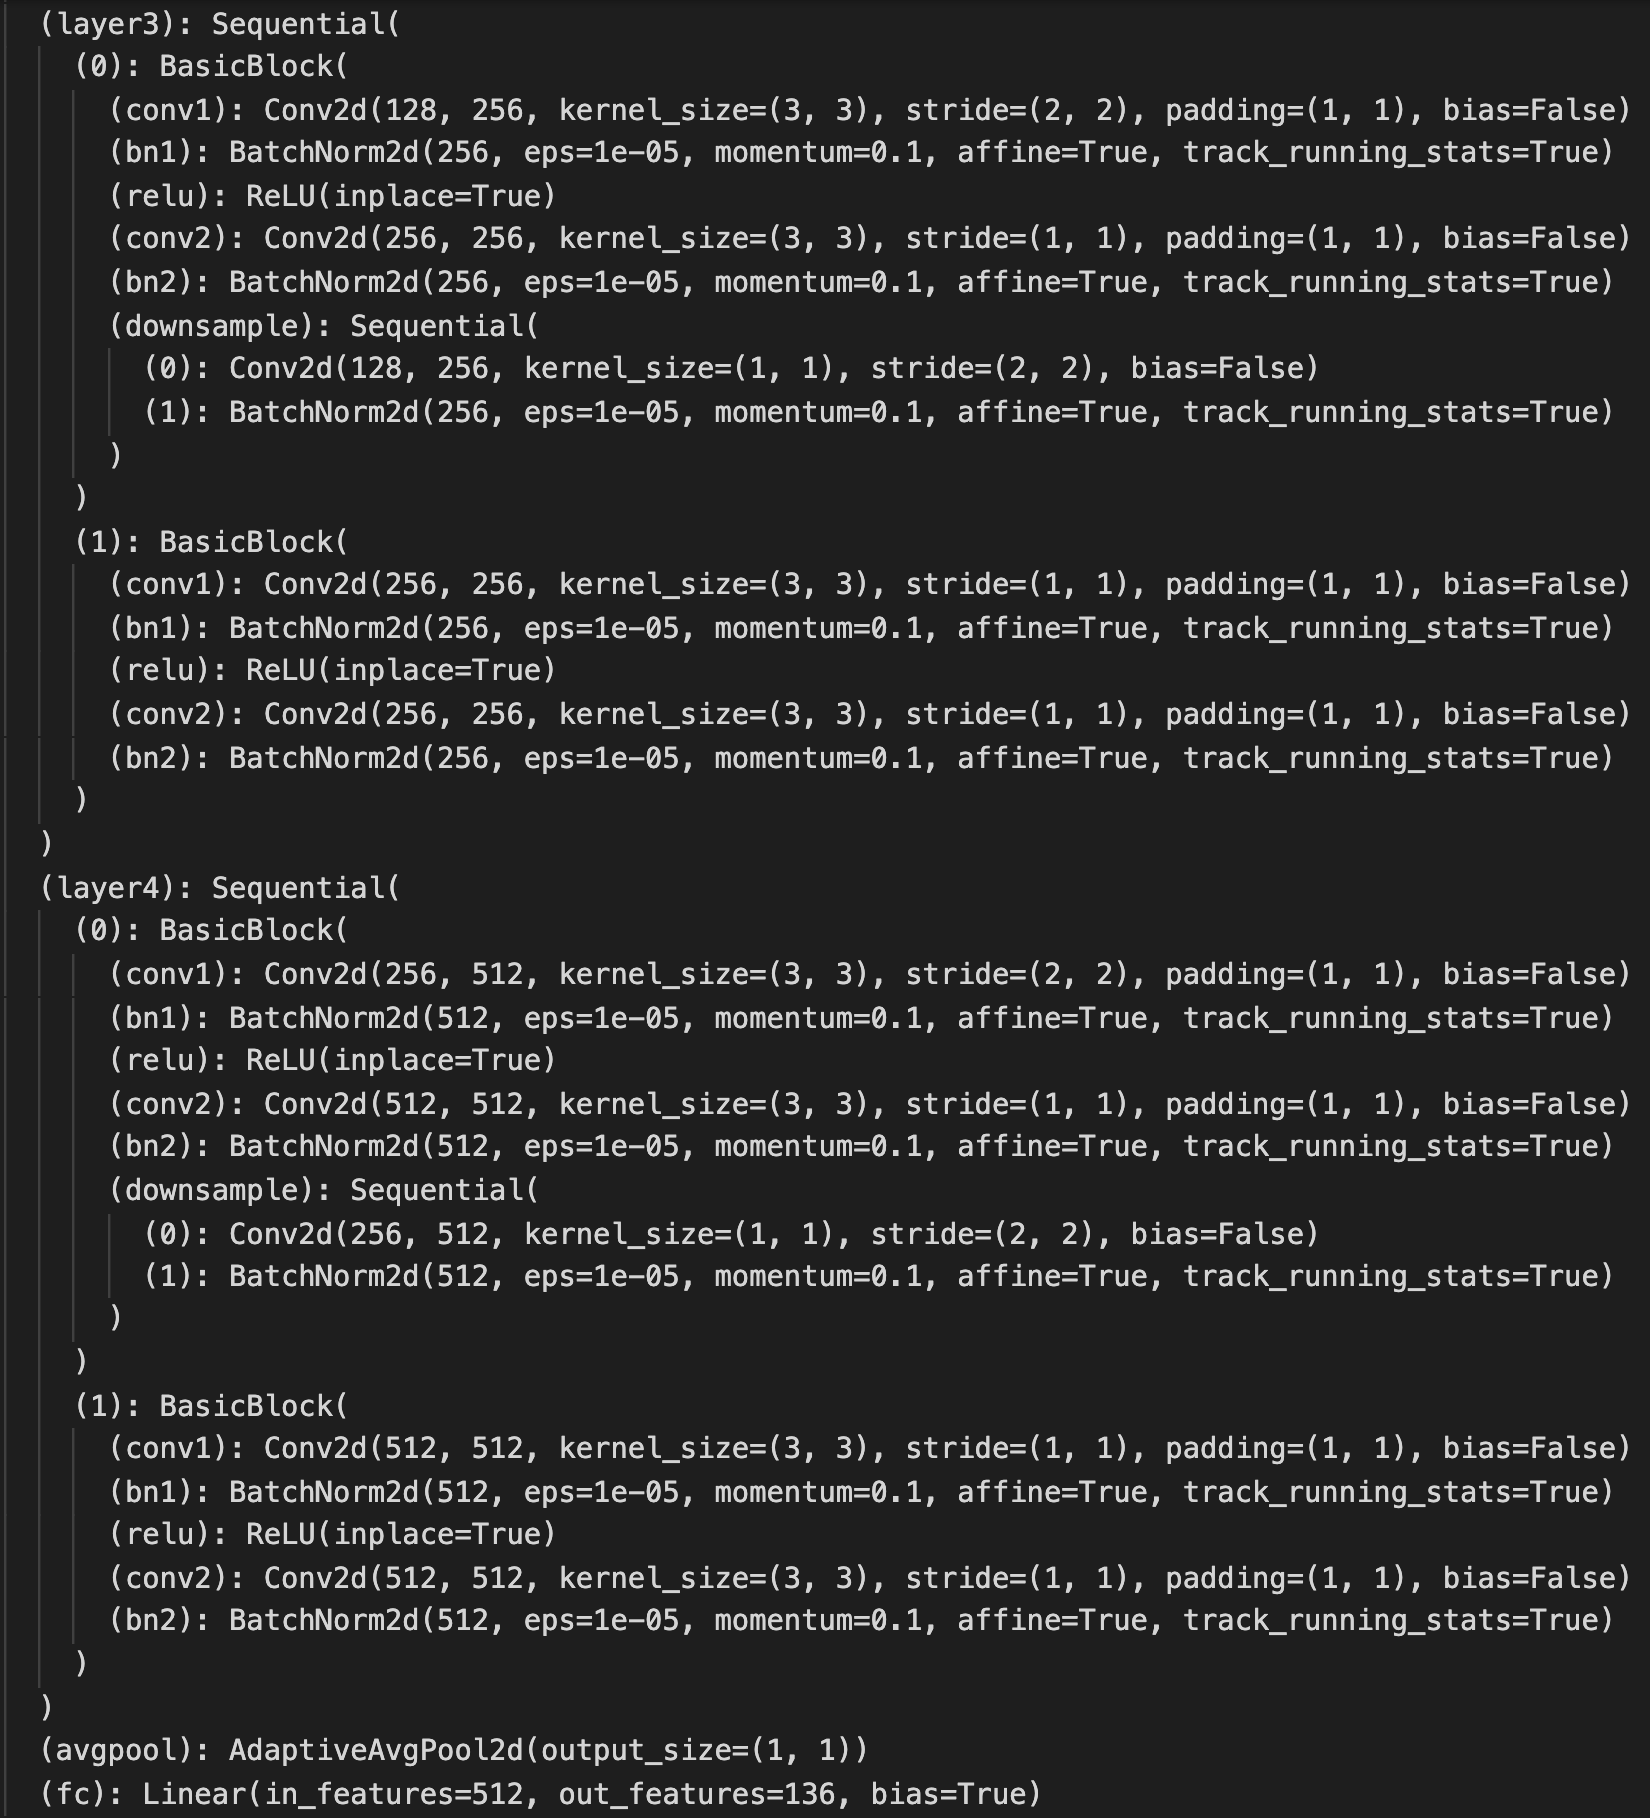
I use ResNet18 as my model. I have two modifications: 1. input channel of the first convolution layer is set to 1 instead of 3; 2. output size of the last fully connected layer is set to 136 instead of 1000 to predict the 68 landmarks.
Below is the detailed structure.
The loss function and optimizer I use is below.
criterion = nn.MSELoss()
optimizer = optim.Adam(newmodel.parameters(), lr=1e-4, weight_decay=3e-5)
For training, I random split the dataset and set up training and validation dataloder as below.
train_set, val_set = torch.utils.data.random_split(dataset, [5952, 578], generator=torch.Generator().manual_seed(23))
train_dataloader = DataLoader(train_set, batch_size=32, shuffle=True, num_workers=4, worker_init_fn = worker_init_fn)
test_dataloader = DataLoader(val_set, batch_size=32, shuffle=False, num_workers=4, worker_init_fn = worker_init_fn)
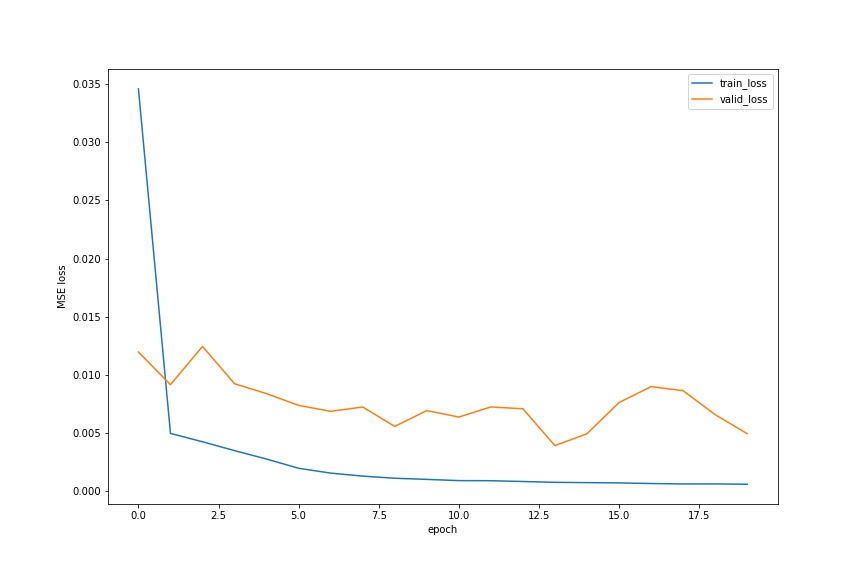
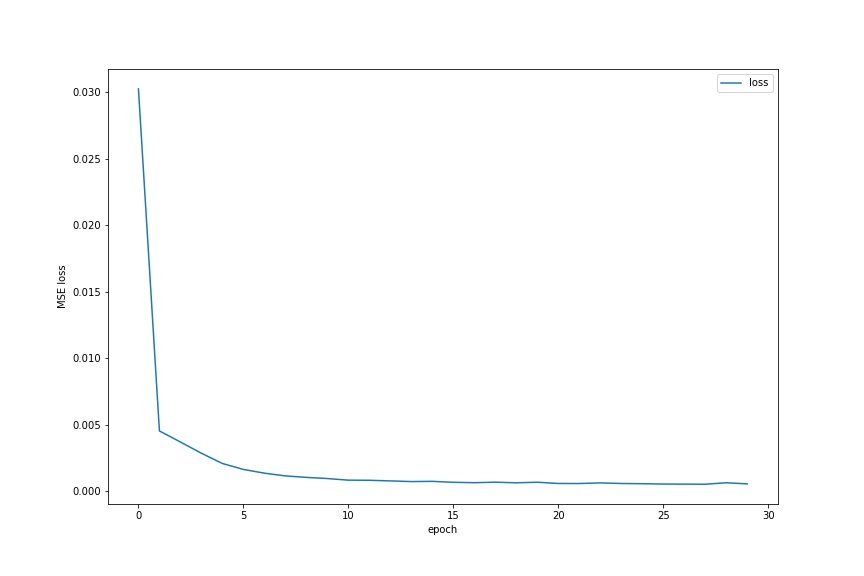
I train for 20 epochs. Below is the plot showing both training and validation loss across iterations.
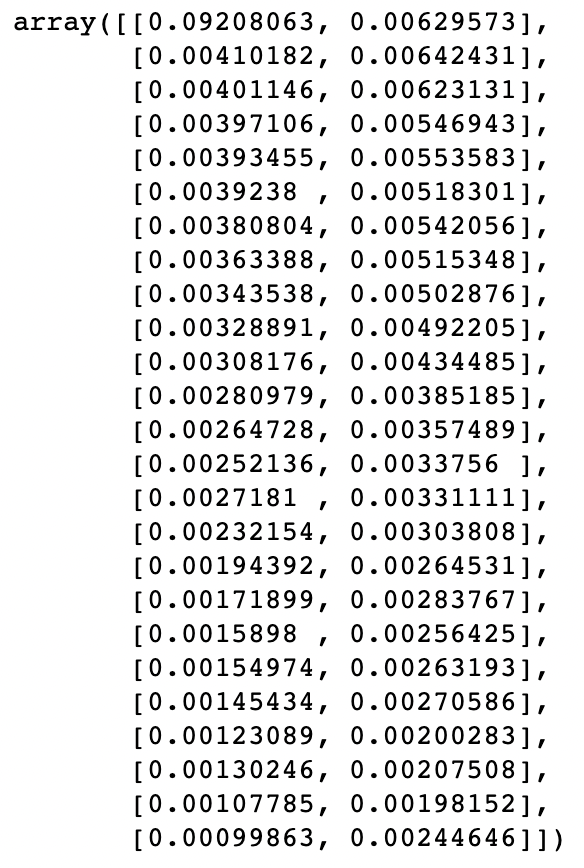
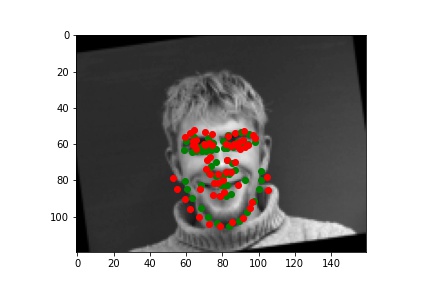
From there, I decide to choose the previous hyperparameters and use the entire dataset to train my model. I train for 30 epochs. The full dataset training MSE is below.
For the test set, I create a new dataset with no transformation. The images are resized to (224, 224) and to grayscale, but for the final submission, they are converted back according to the instructions.
Below are some predictions from the test set. Notice that I don't have the ground-truth landmarks because they are from the test set.
I think some detections fail because my model is not trained too well for different face shapes.
After doing some research, I decide to use a new model for detecting the landmarks, and it is exactly what Bells & Whistles ask me to do!
The key takeaway is to turn the regression problem of predicting the keypoint coordinates into a pixelwise classification problem. After introducing upsampling via transpose convolution, I can have 68 heatmaps each corresponding to one facial landmark.
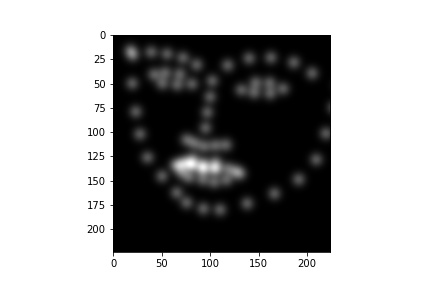
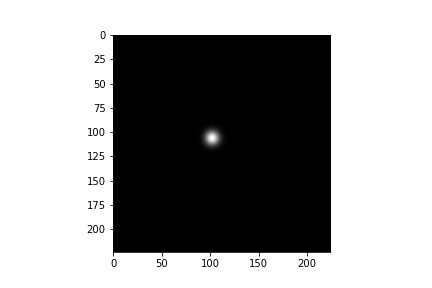
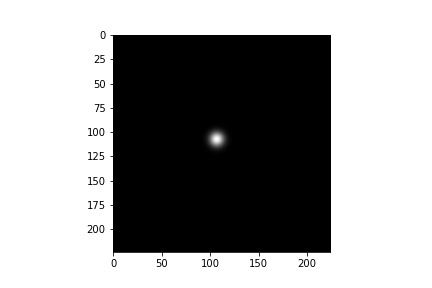
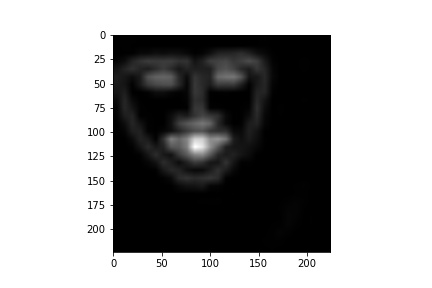
The first step is to create heatmaps from landmarks using 2D Gaussian distribution at that keypoint location. Below is the visualization (I choose sigma=5).

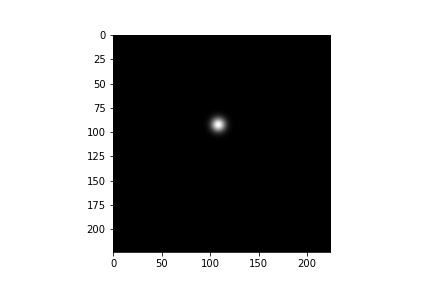
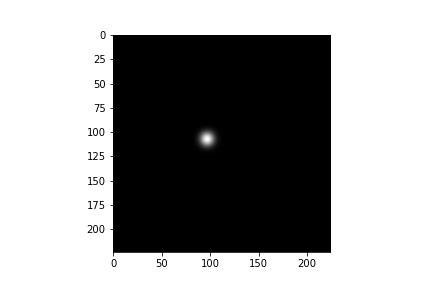
Also some single landmark gaussian distributions.
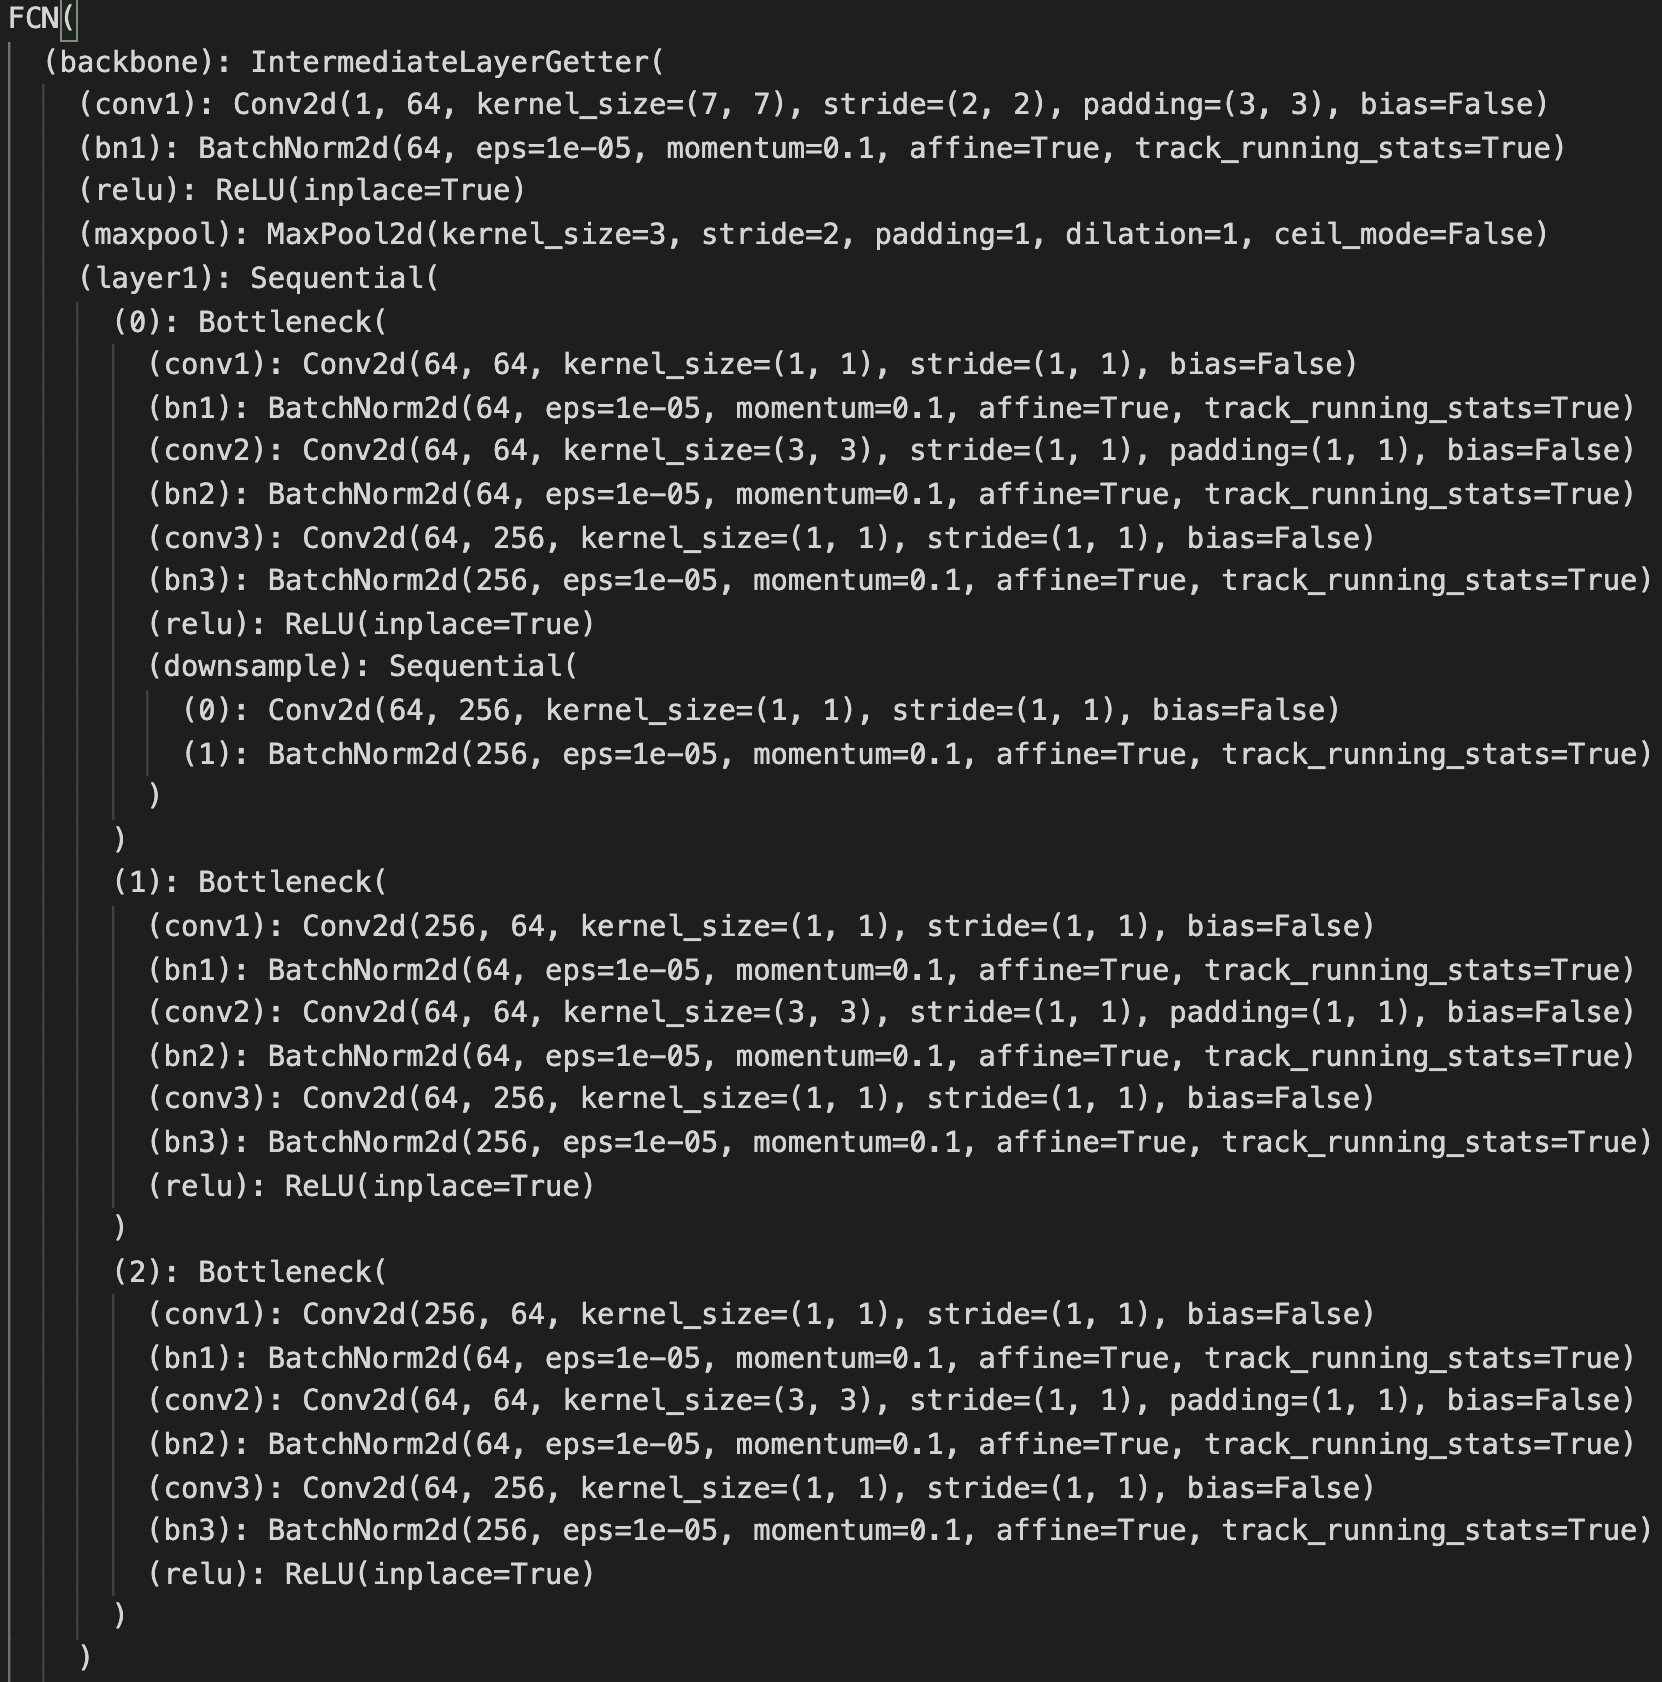
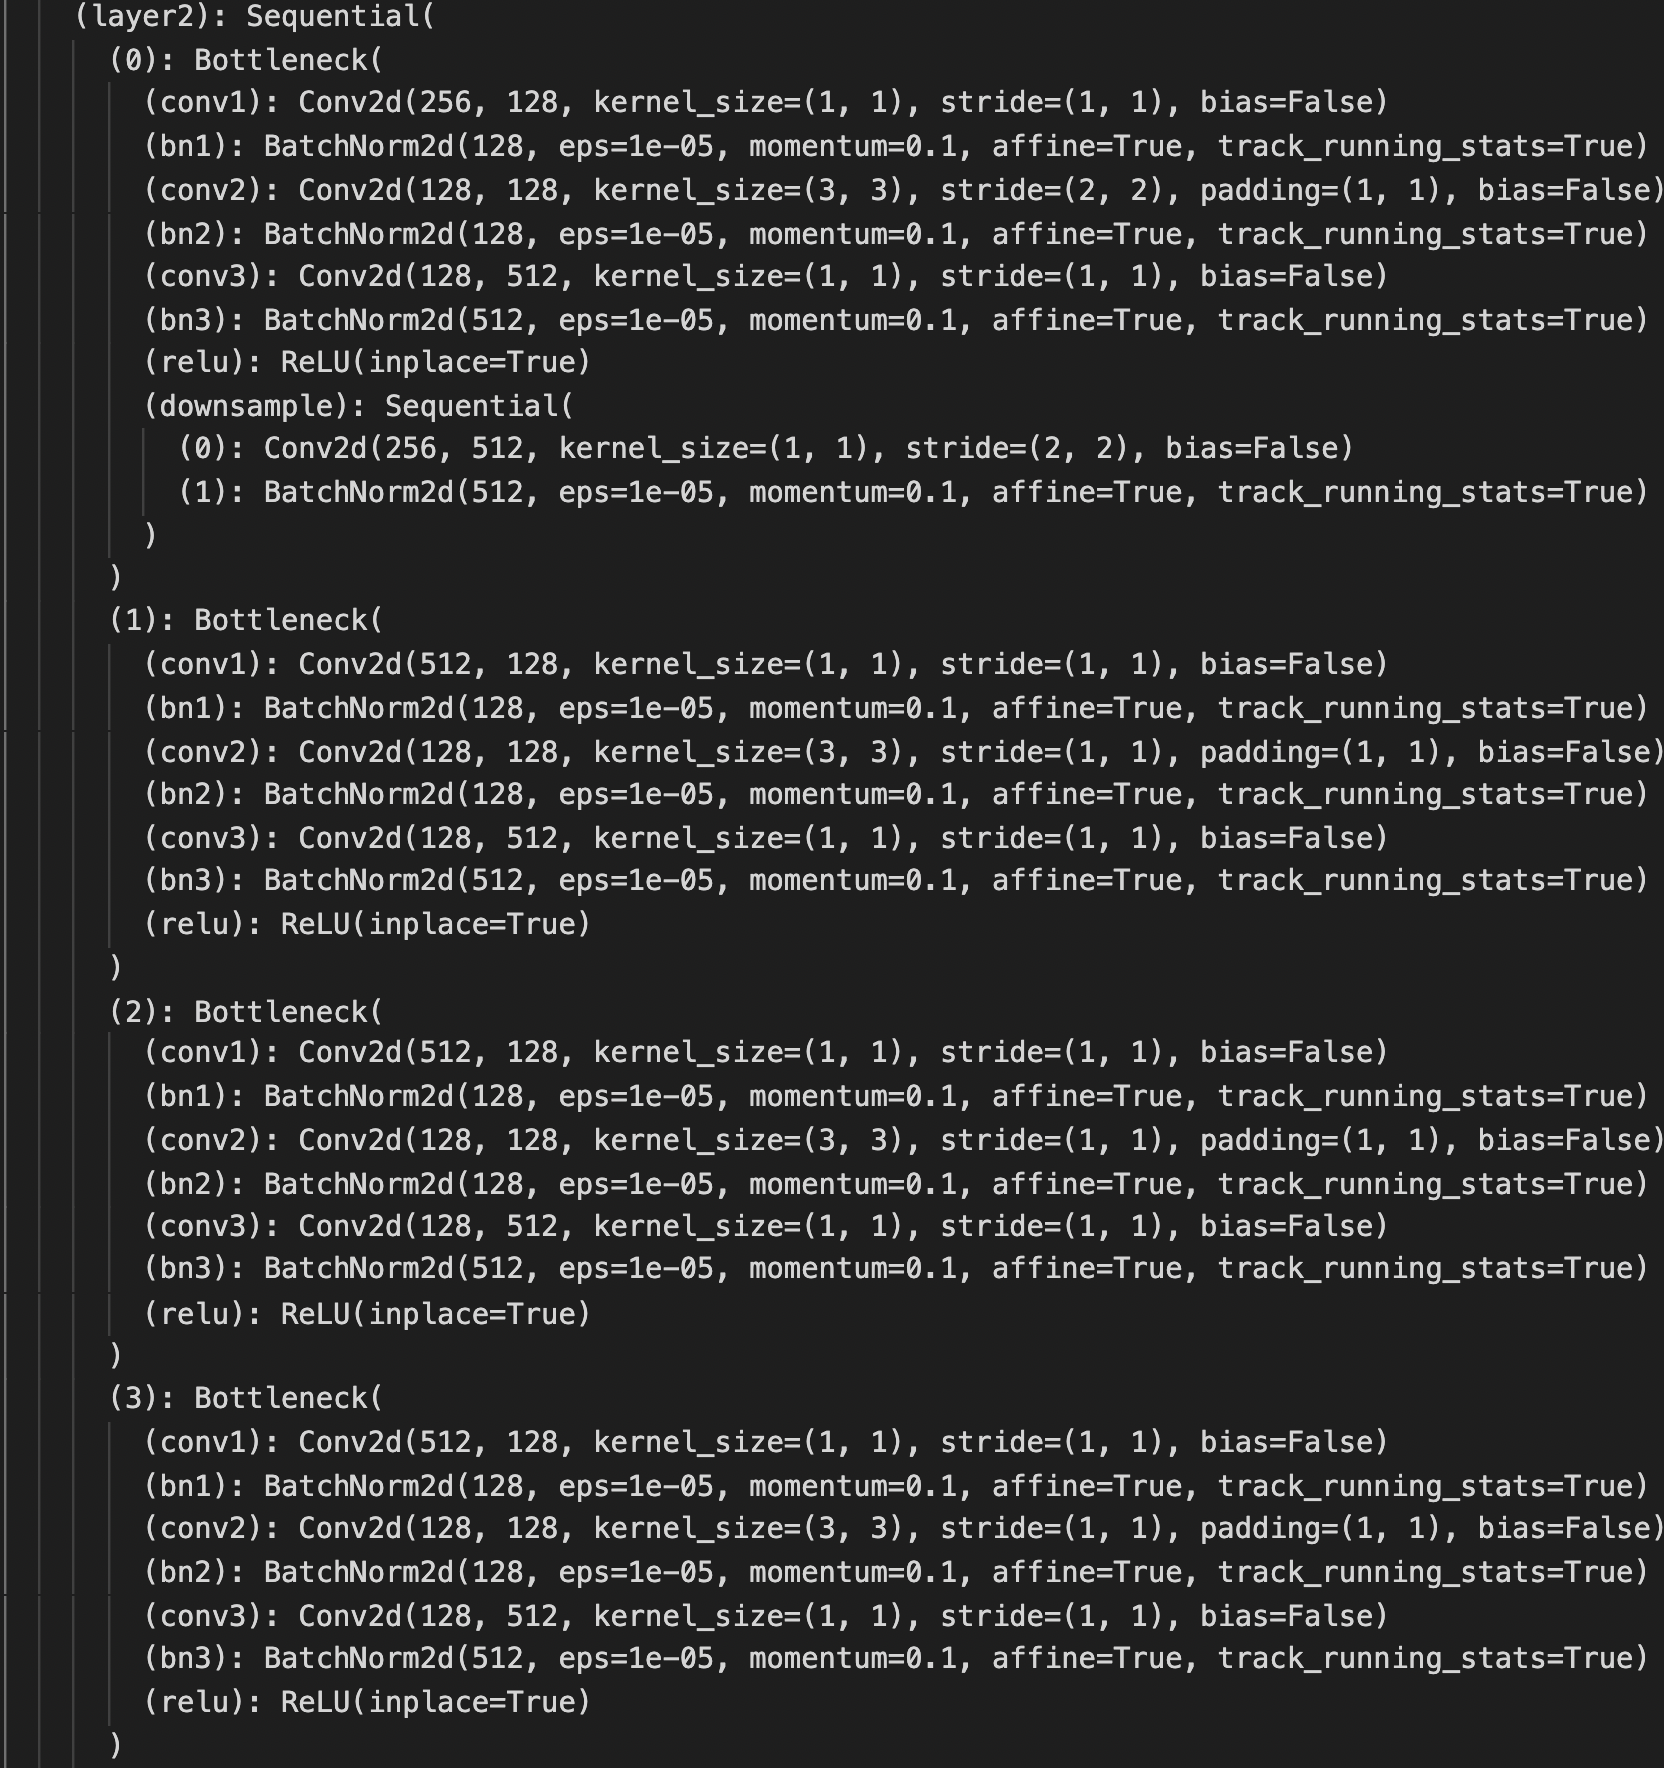
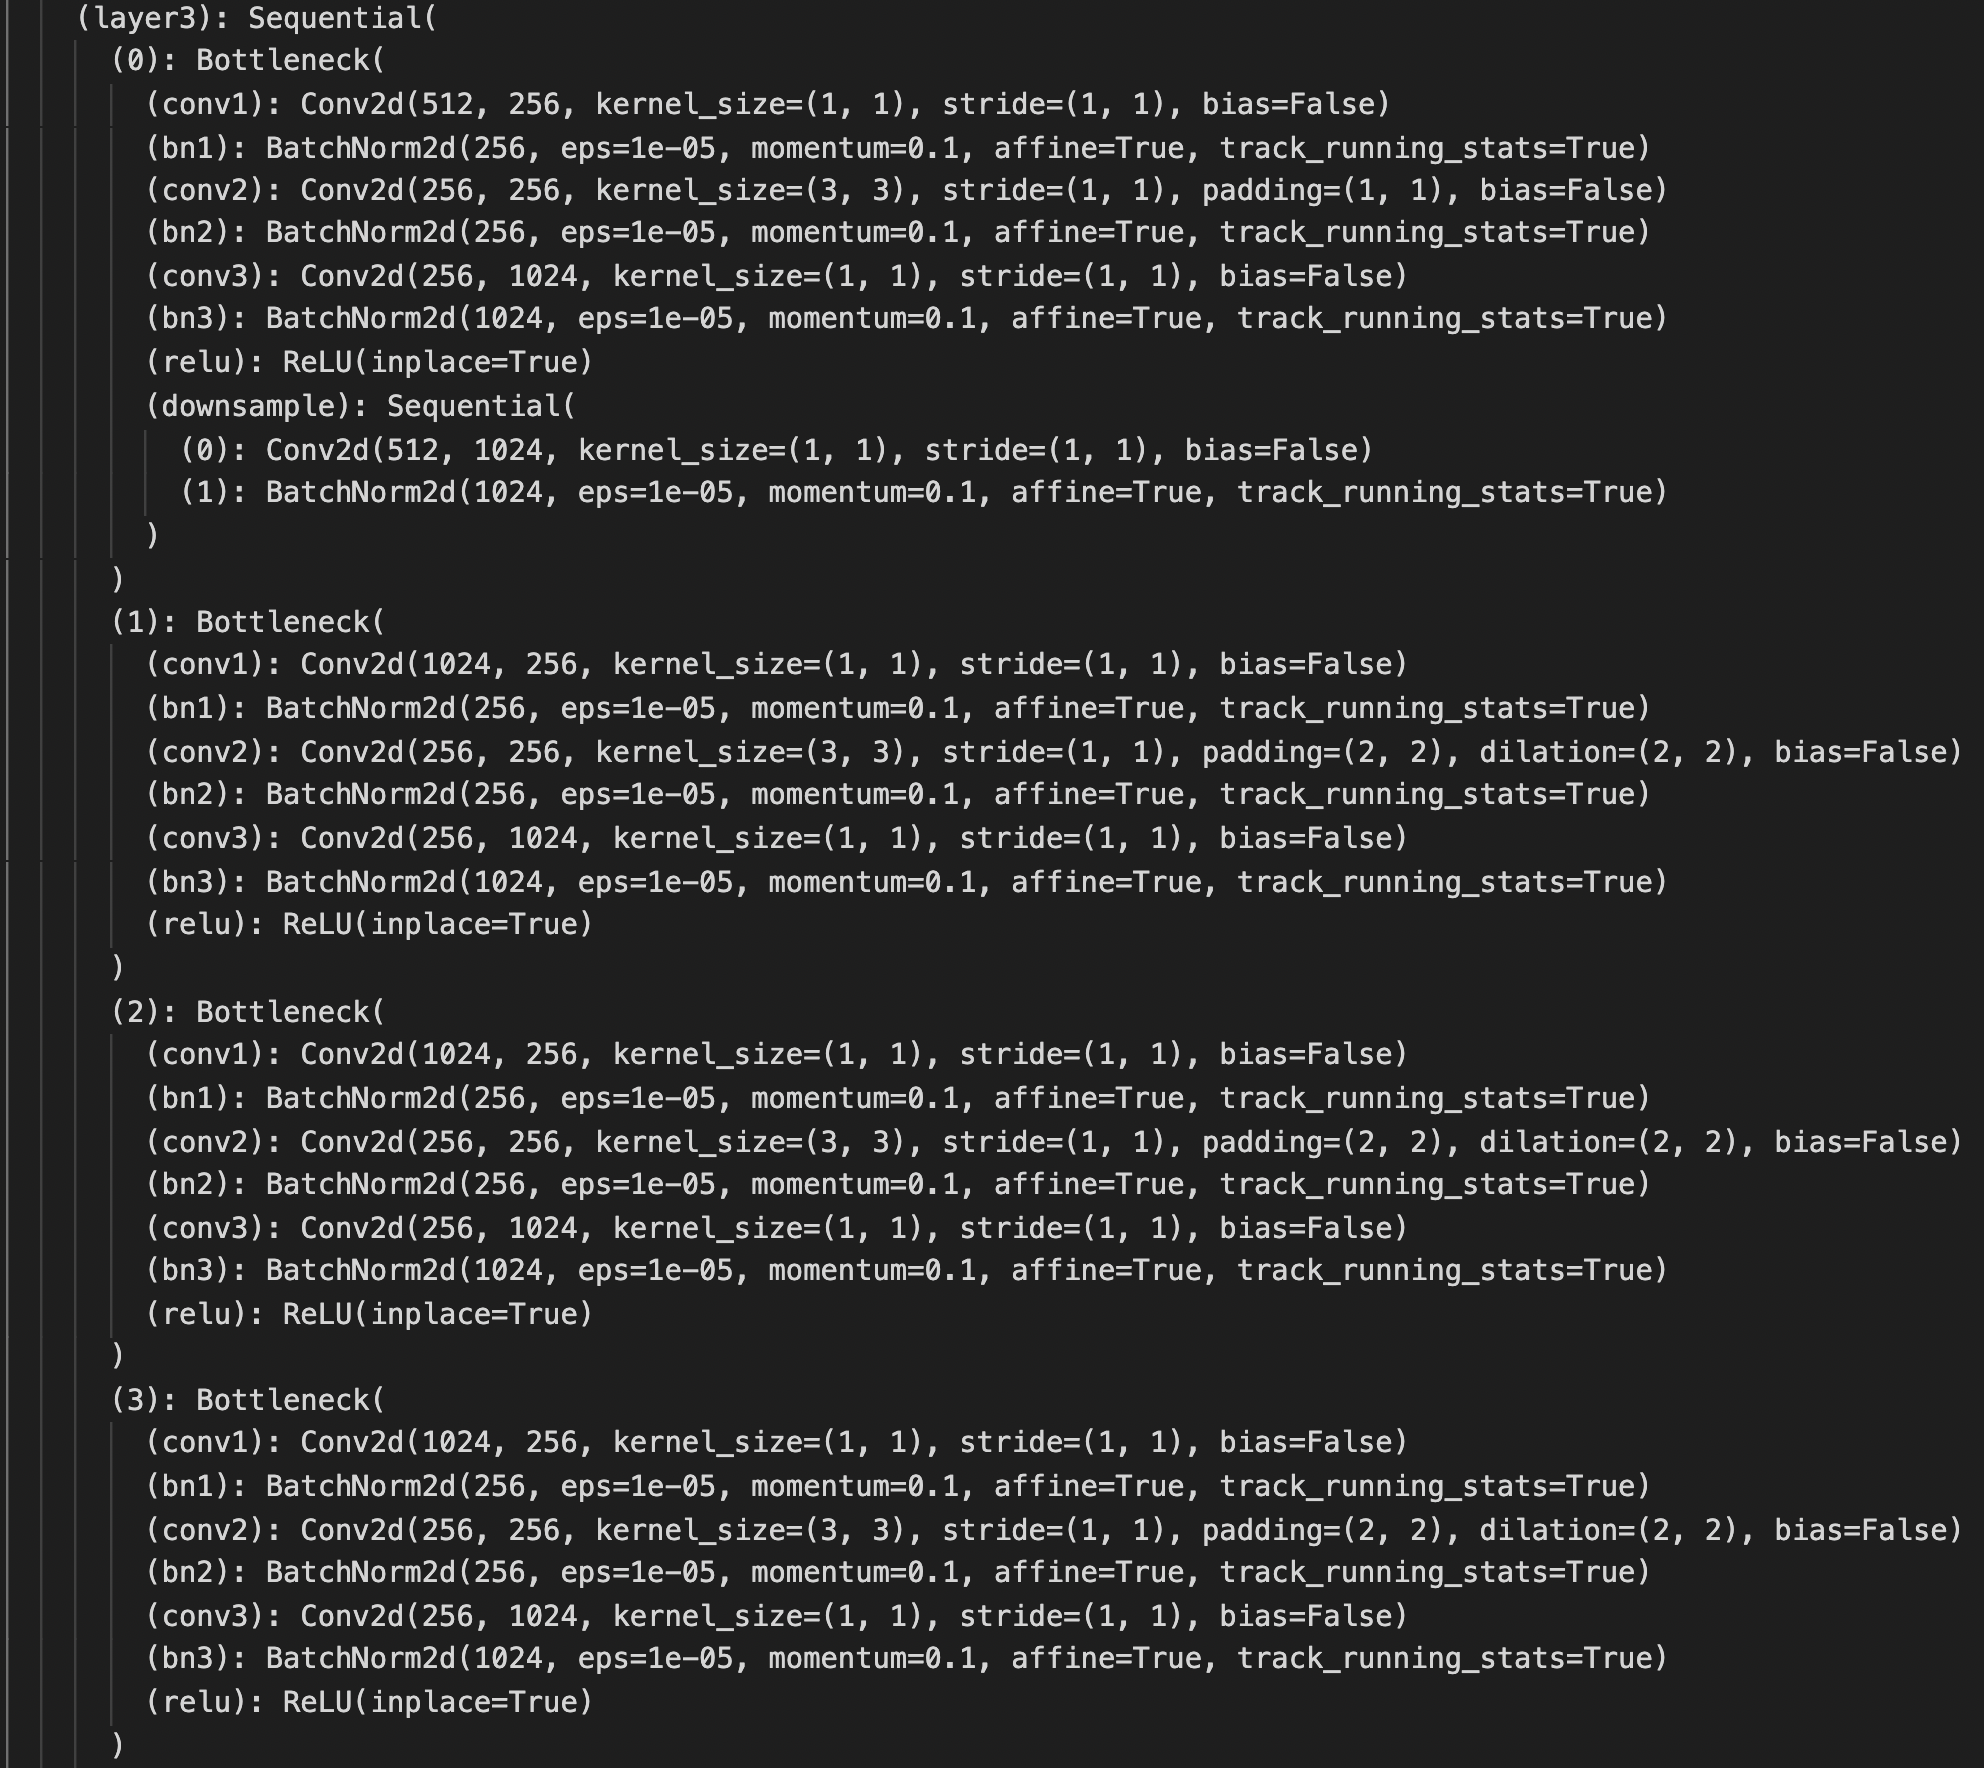
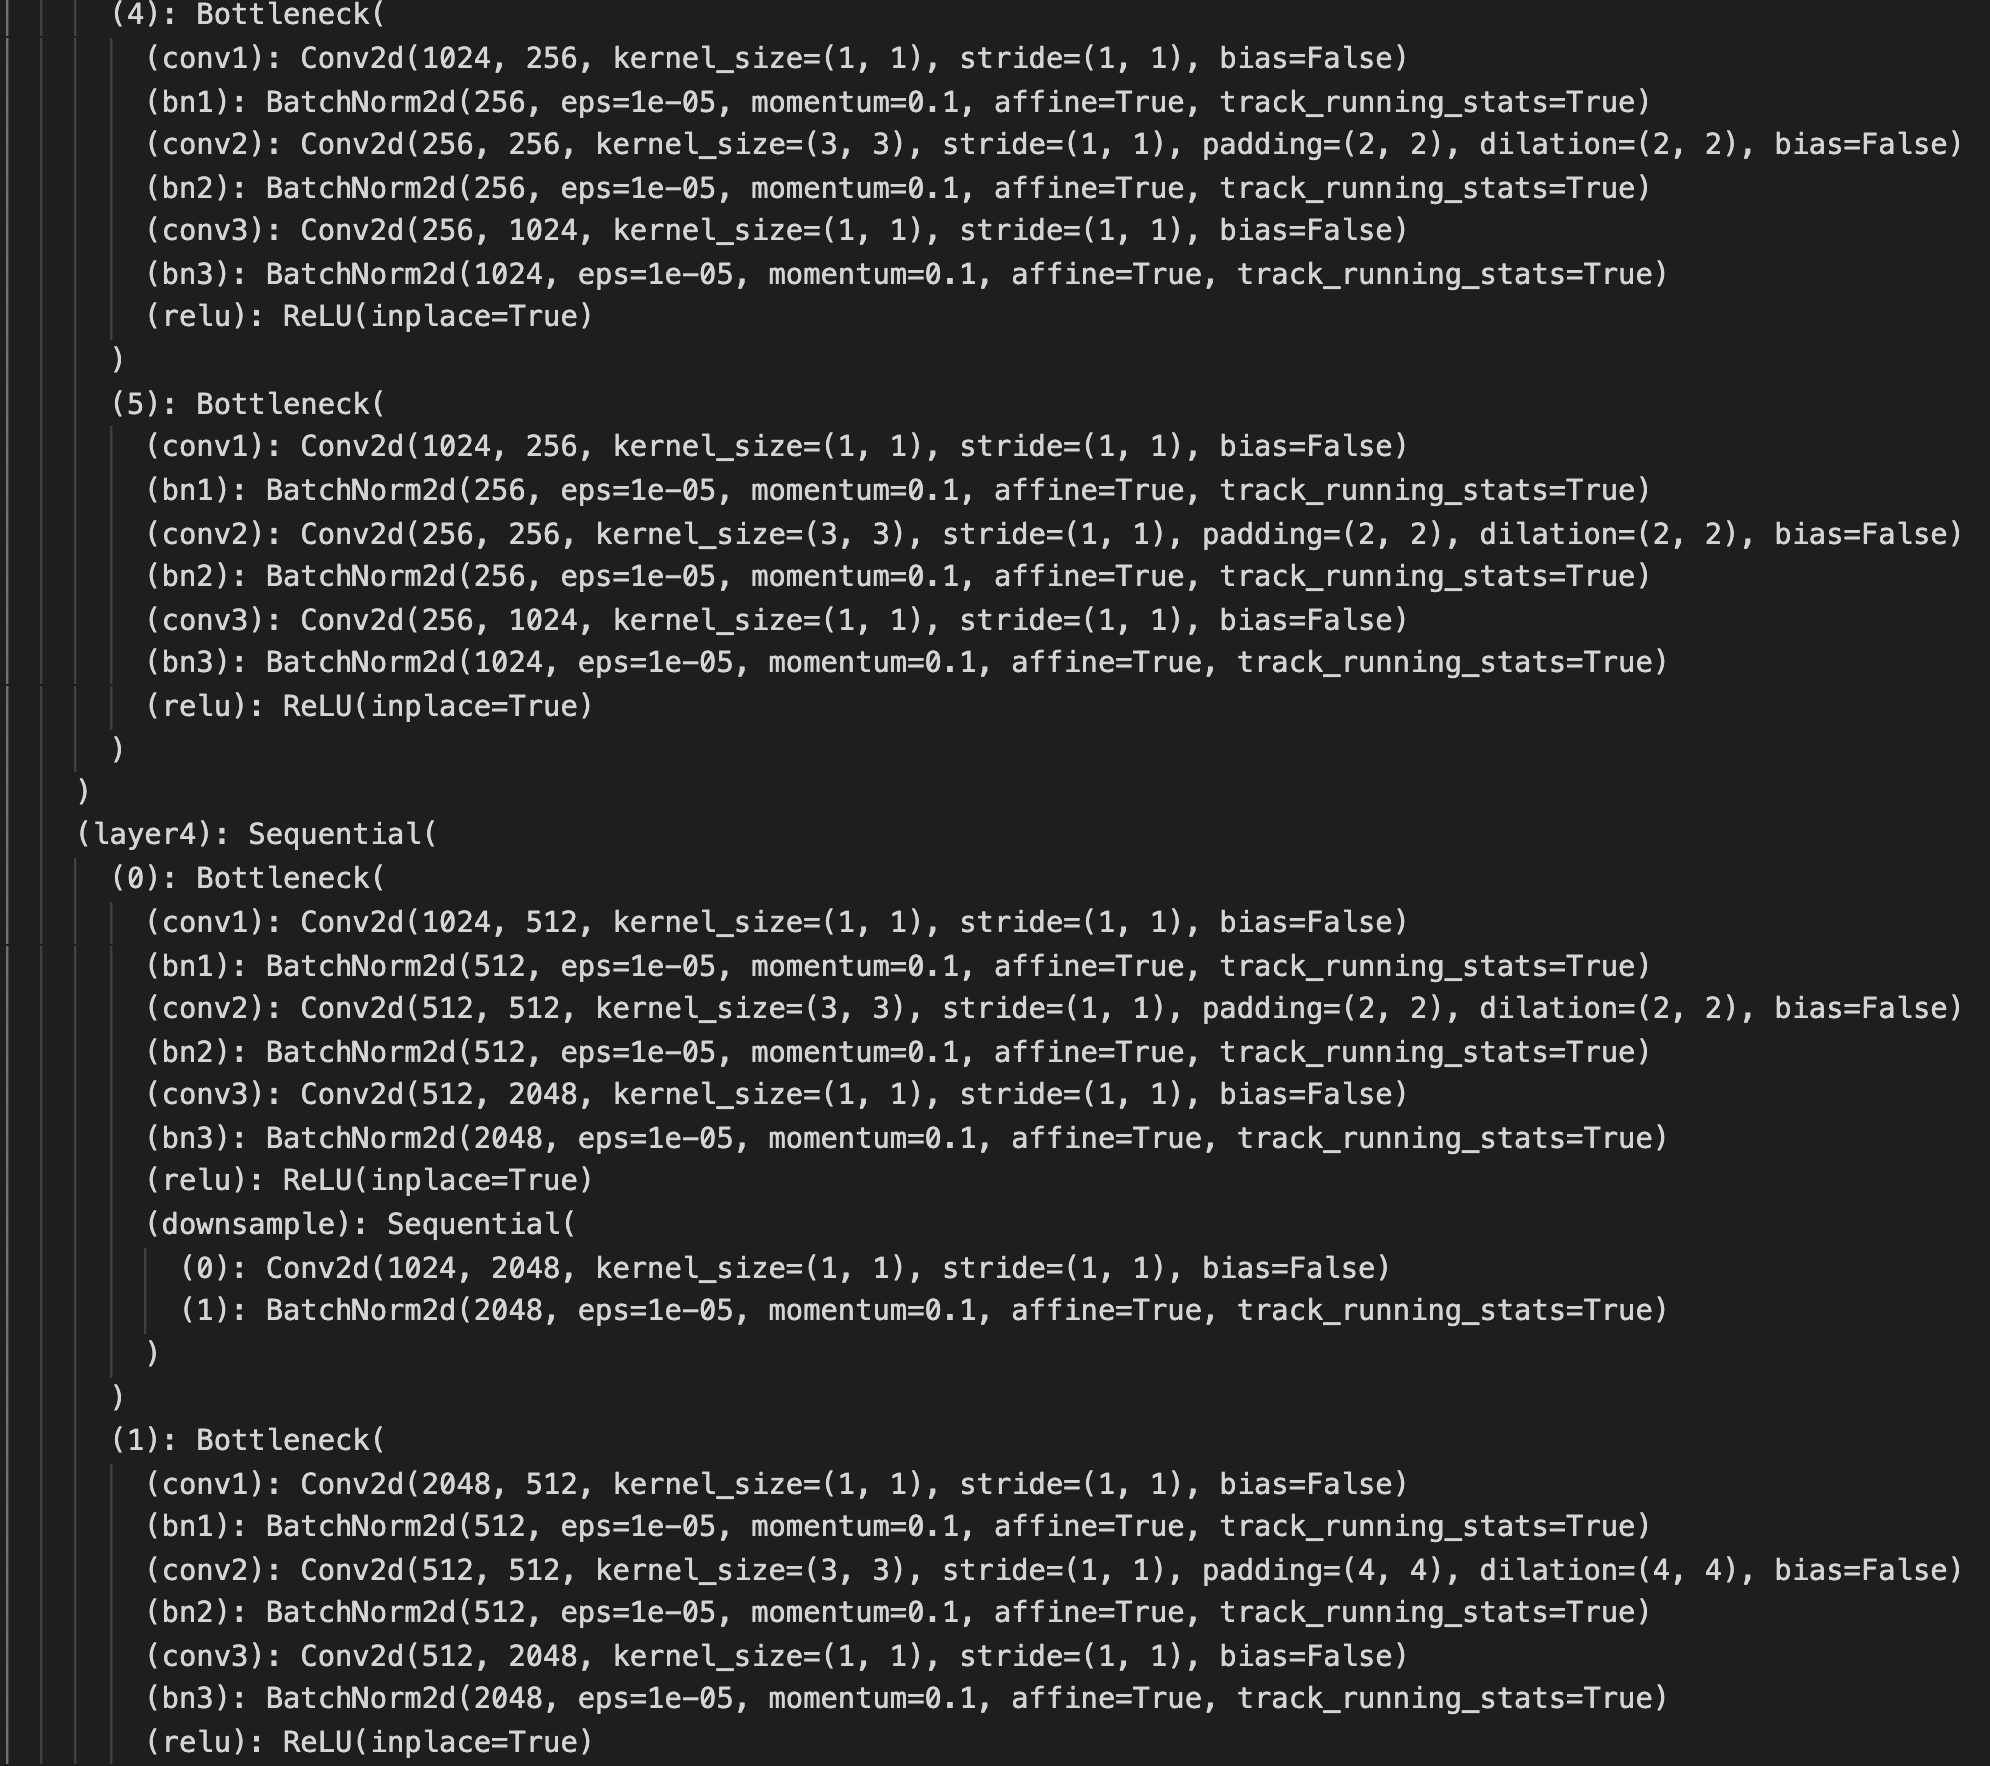
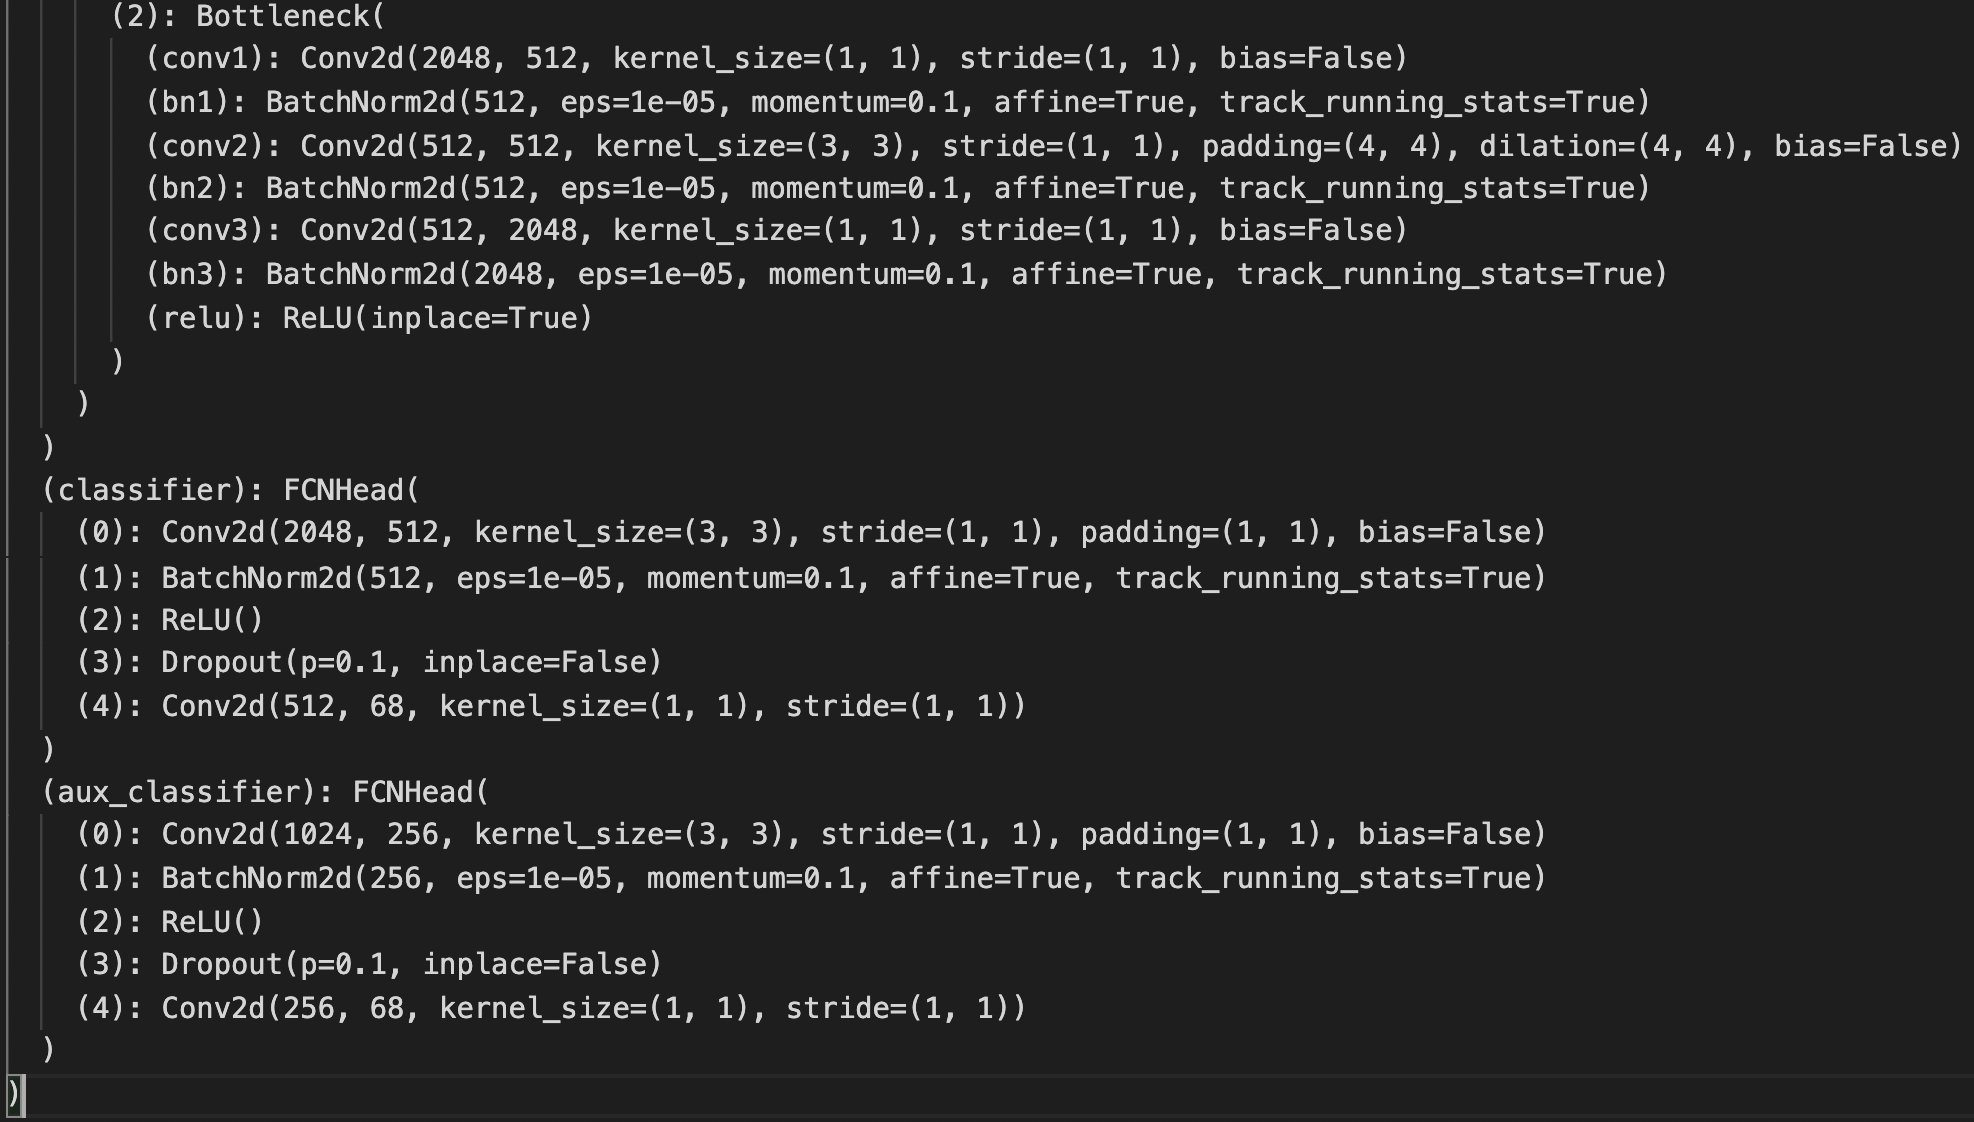
Luckily, I can use the pretrained FCN_ResNet50 model with modifications: 1. the input channel of the backbone conv1 is set to 1 instead of 3; 2. the output of last classifier layer is set to 136 instead of 21 and also the auxiliary classifier. The structure is below.
I use the same metrics and split, and I train for 10 epochs. Below is the plot.

From there, I decide to choose the previous hyperparameters and use the entire dataset to train my model. For this training only, I use all the 6666 images to get a better result on Kaggle. As I mentioned earlier, some of the bounding boxes are not correct. If the coordinate of the top left corner of the box contains negative value, I set it to 0 with no harm. I train for 50 epochs. The full dataset training MSE is below.
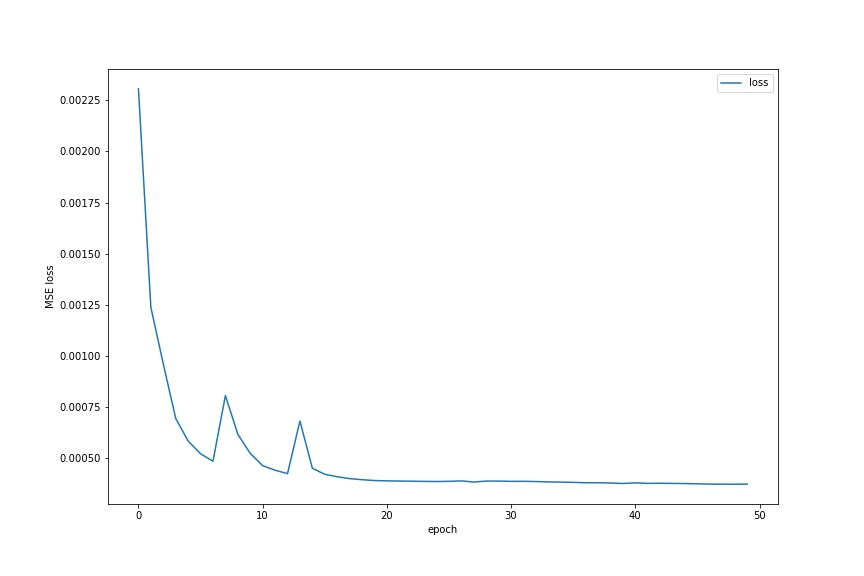
There are some fluctuations, but the overall trend is showing that my model is converging.
To transform the heatmaps back to the (x,y) coordinates, I use the weighted average of the top-n points (density) of the heatmap as the keypoint. I use n=25. However, this method is not perfect. I may spend more time on choosing that n compared with MSE. Also, if there is a keypoint around the corner, then I should use less top-n points, but if it's in the center, then I should use more. I didn't implement this method, but I will if I have enough time.
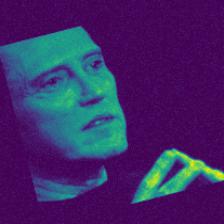
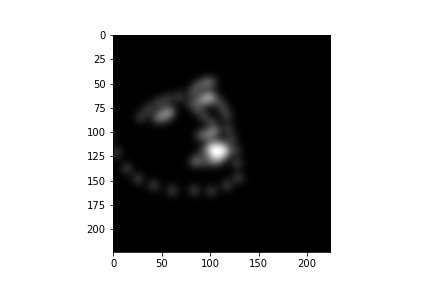
Here is one output of the model (68, 224, 224).
Comparing to the previous prediction by ResNet18, it is much better!
Here are some test images with the predicted landmarks on the original images.
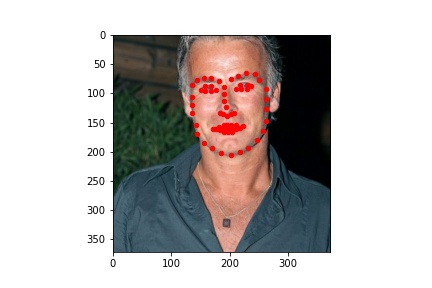
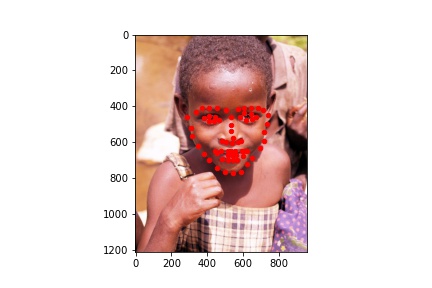

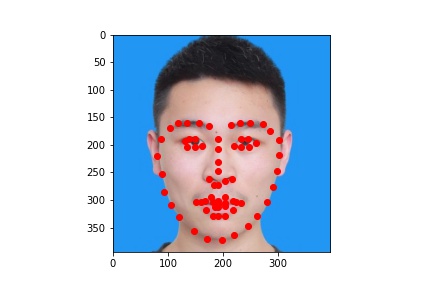
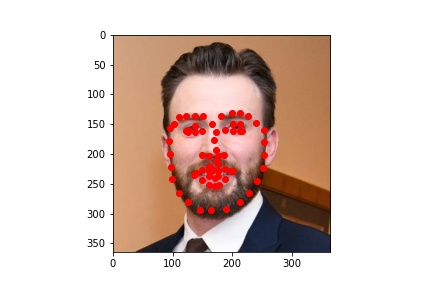
The detection looks pretty good! I think my new model is now very good at detecting facial landmarks. And for my own photos, all three people have standard postures, which makes my model good at detecting the landmarks.