Project 5: Facial Keypoint Detection with Neural Networks
CS194-26 Fall 2021
Project 5: Facial Keypoint Detection with Neural Networks
Part 1: Nose Tip Detection
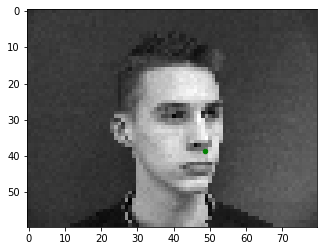
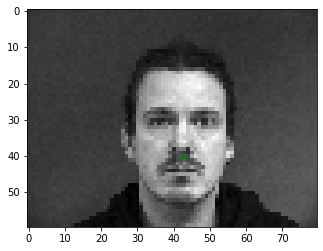
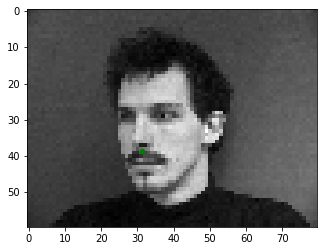
Ground Truth Keypoints
Using a custom dataloader for the IMM Face Database, I converted each image into Grayscale and downsampled the image size to 80x60. Below, I show three labeled images sampled from my dataloader.
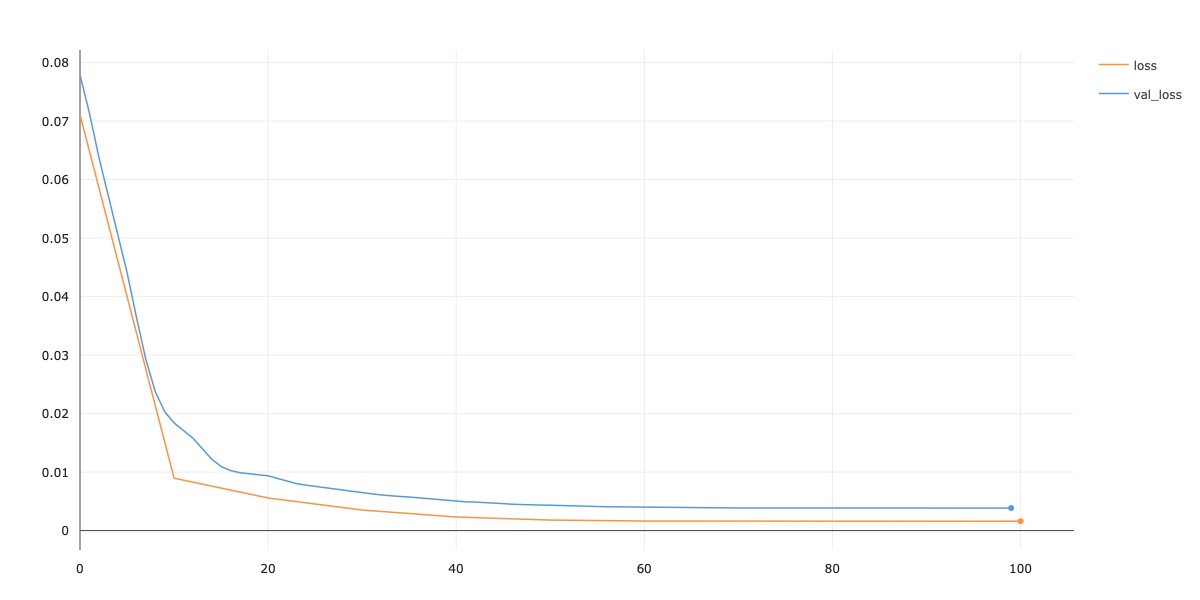
Training Process
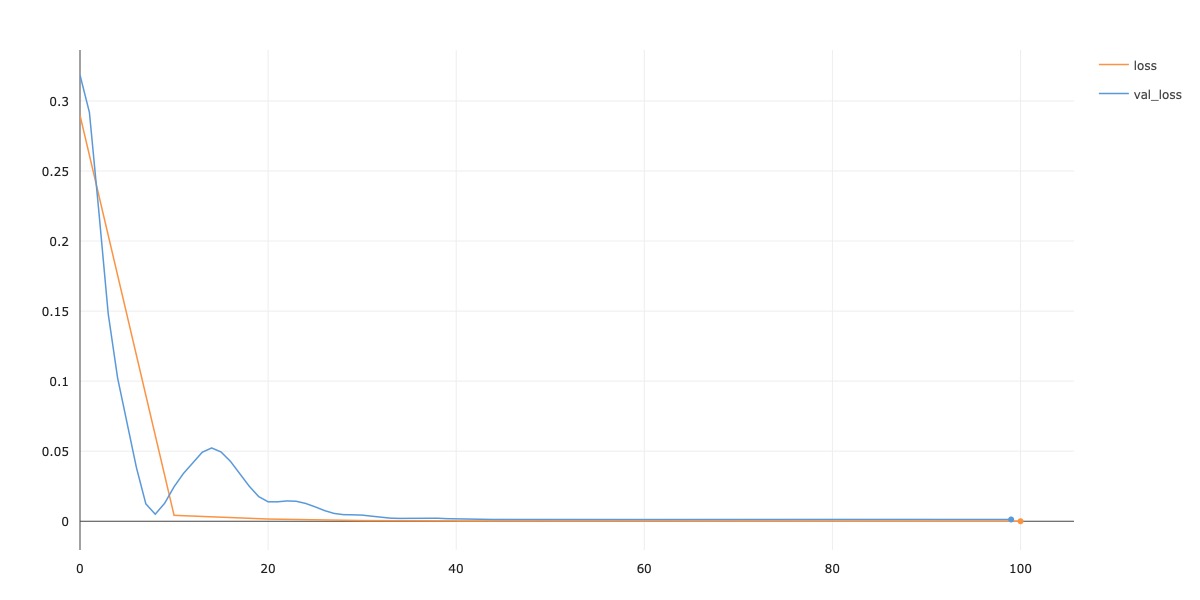
Next, I define and train my model on this training data. For my model, I follow the ResNet18 architecture, except each residual block is reduced from two convolutional layers into just one convolutional layer. Thus, I'm able to keep my model within the constraint by using just 4 convolutional layers. Additionally, the number of input channels into my architecture is 1 instead of 3, since I work with grayscale images. Finally, the output size of the linear classifier layers is now 2 (since I try to predict a nose tip keypoint). I'll refer to this architecture as a MiniResNet18. I use Adam and a learning rate of 1e-3 for optimization. Below, I plot the training / validation loss curves for this model on the training / validation dataloaders.
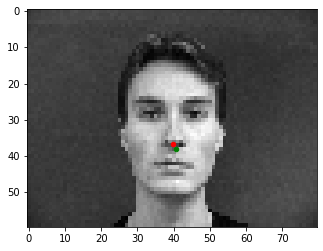
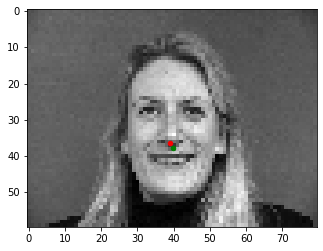
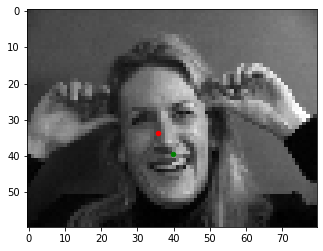
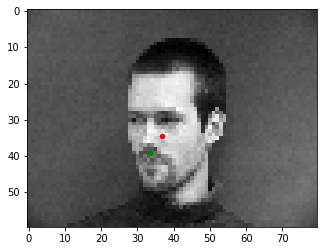
Training Results
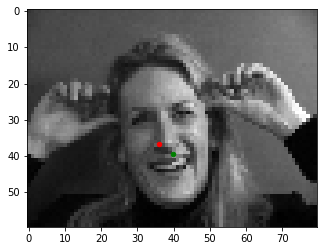
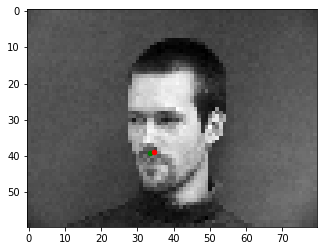
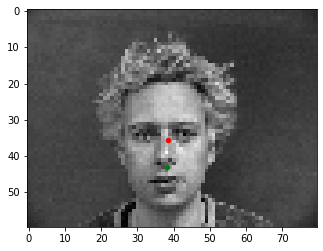
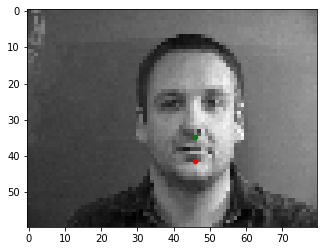
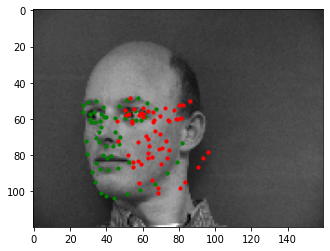
With the model weights saved at the point of best validation loss, I evaluated the model on the validation dataset. I show two examples where the nose was detected correctly, and then two examples where it was incorrect. The green and red points are the ground truth and predictions, respectively. To me, it seems that the incorrectly detected examples are on images where the subject's face is turned or rotated, and thus the nose is not centered in the image. Since my model was not trained on data augmented with random flips and rotations, I believe my model is not robust to these types of variations.
Hyperparameter Tuning
ResNet18: I first tried using the full ResNet18 setup in place of my MiniResNet18. I used two convolutional layers per residual block. Below, I show the training / validation loss curves for this model, and show how the predictions this new model makes on the incorrect images above. While the rotated image is not completely correct, the image of the face turned performed better.
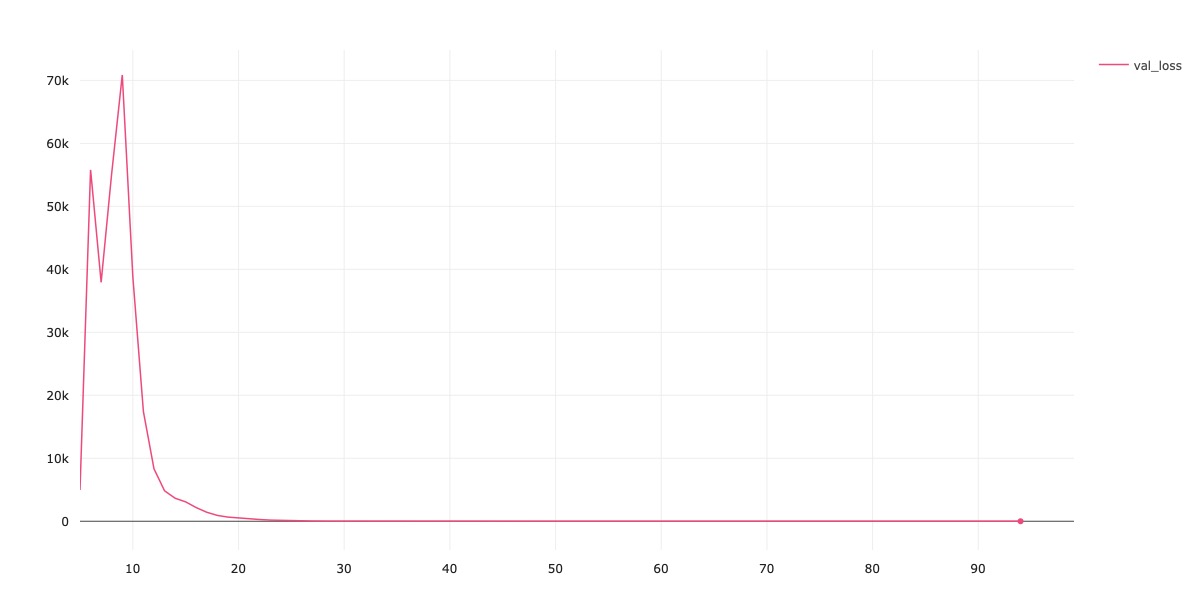
Increased LR: Next, I increased the learning rate from 1e-3 to 1e-1. I was inspired to try this experiment because of the spike in validation loss around epoch 15 in the above plot. Note that this experiment is performed on the setup for MiniResNet18. As seen in the plots, the validation loss blows up in the first 10 epochs, before settling down again. Additionally, some images that were correctly labeled by the model are now labeled incorrectly. I display three of these results below.


Part 2: Full Facial Keypoints Detection
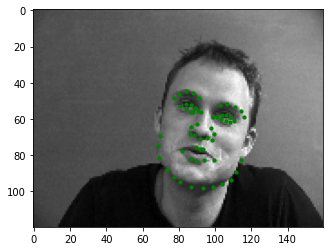
Ground Truth Keypoints
Now, we move on to detecting full facial keypoints (instead of just detecting the nose tip). Below, I show some training images with the labeled ground-truth keypoints.
Training Process
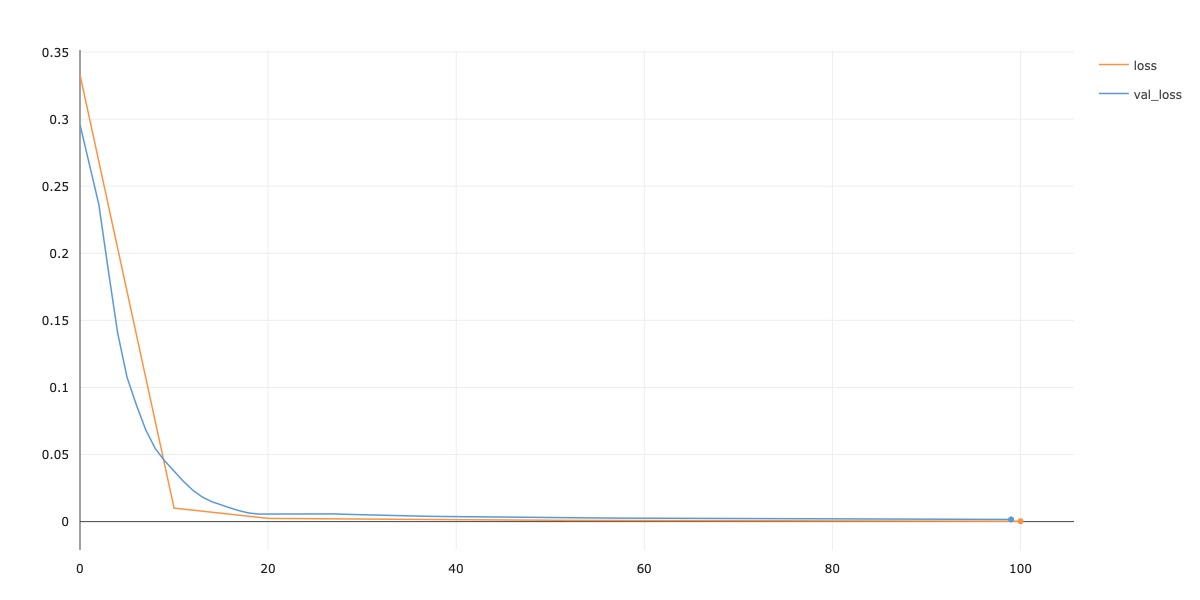
My model architecture is the same MiniResNet18 setup, as described above in the training process of Part 1 in this project. The only difference is that now, I use an output size of 116 for the 58 facial keypoints I am trying to detect. The hyperparameters that I used are: batch size of 256, lr of 1e-3, and Adam optimizer. For training data augmentations, I added in ColorJitter, using the default PyTorch parameters. I trained my model for 100 epochs. Below, I show training and validation loss curves.
Training Results
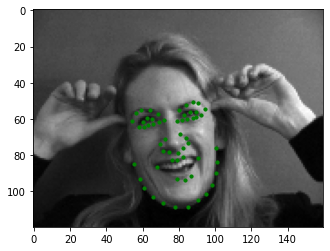
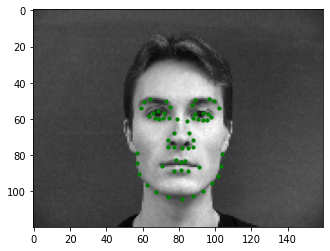
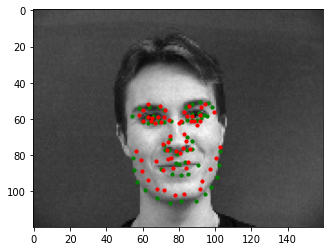
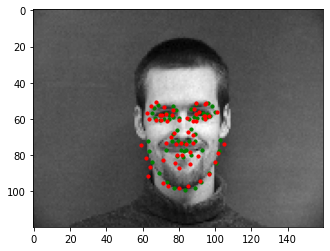
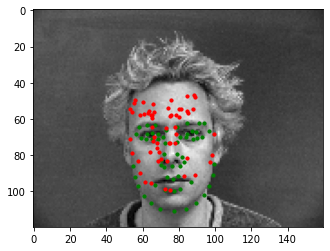
Now below, I show two faces on which the network detects facial keypoints very well, and below that I display two images where it detects the facial keypoints incorrectly. I believe these two examples were predicted incorrectly because my model is not sensitive to rotations. In part 3 of the project, I implement rotations and flips (as well as other data augmentations) during training, which improves test performance greatly.
Visualized Filters
Below, I show some of the learned filters from my first convolutional layer. The visualized filters look like this:


Part 3: Train with Larger Dataset
Kaggle Competition
I submitted my test results to the class Kaggle competition. At the time of writing this, my class rank is #19 and my reported MSE loss is 23.55957.
Training Process
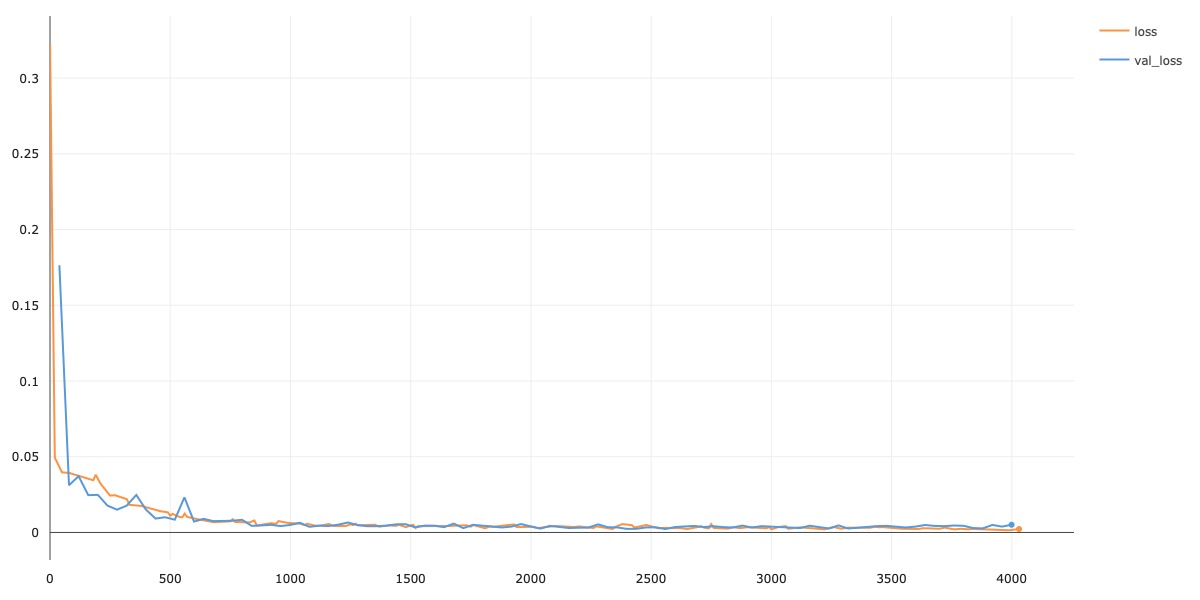
In this part of the project, I used the full ResNet18 architecture. I used 3 input channels since I used all the RGB channels, and for the output size of the linear classifier I used 136 (for the 68 keypoints). For hyperparameters, I used a batch size of 128, learning rate of 1e-3, and Adam optimizer. I trained my model for 100 epochs. Also during training, I used a variety of data augmentations on both the images and keypoints as well. The augmentations I used are from the Albumentations package, which automatically helps me preserve the keypoints after transforming. The augmentations I used are as follows: HorizontalFlip(p=0.5), Rotate(p=0.5), VerticalFlip(p=0.5), RandomBrightnessContrast(p=0.5), ColorJitter(), GaussianBlur(), GaussNoise(), HueSaturationValue(). Below, I plot the training / validation loss curves for this model.
Testing Results
Below, I show some of my keypoints predictions on the testing set.
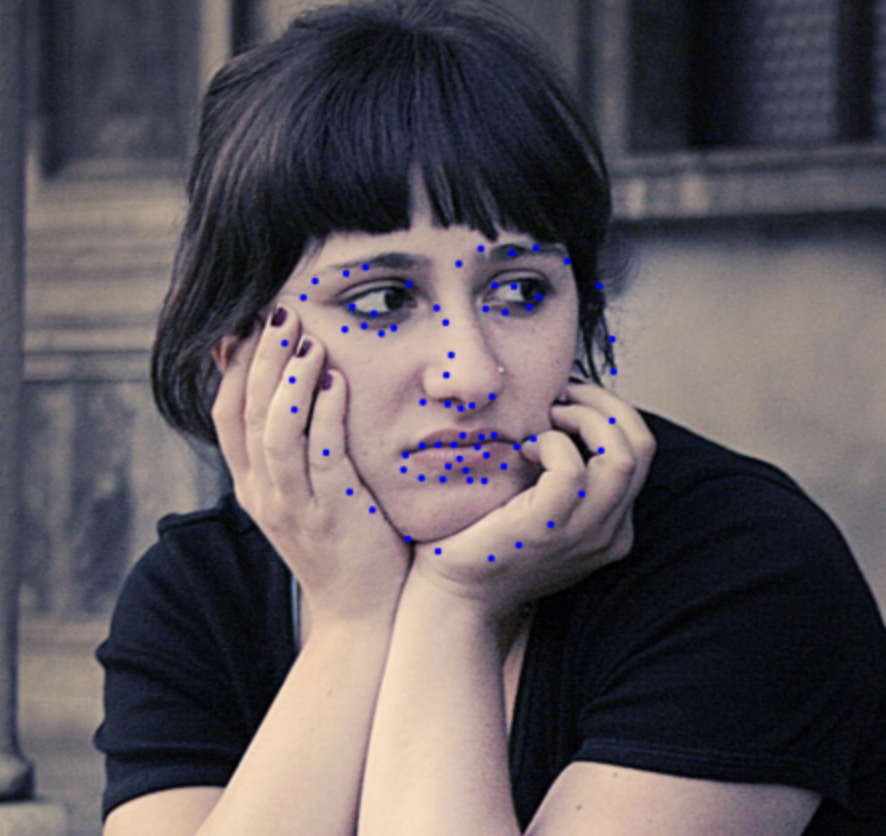
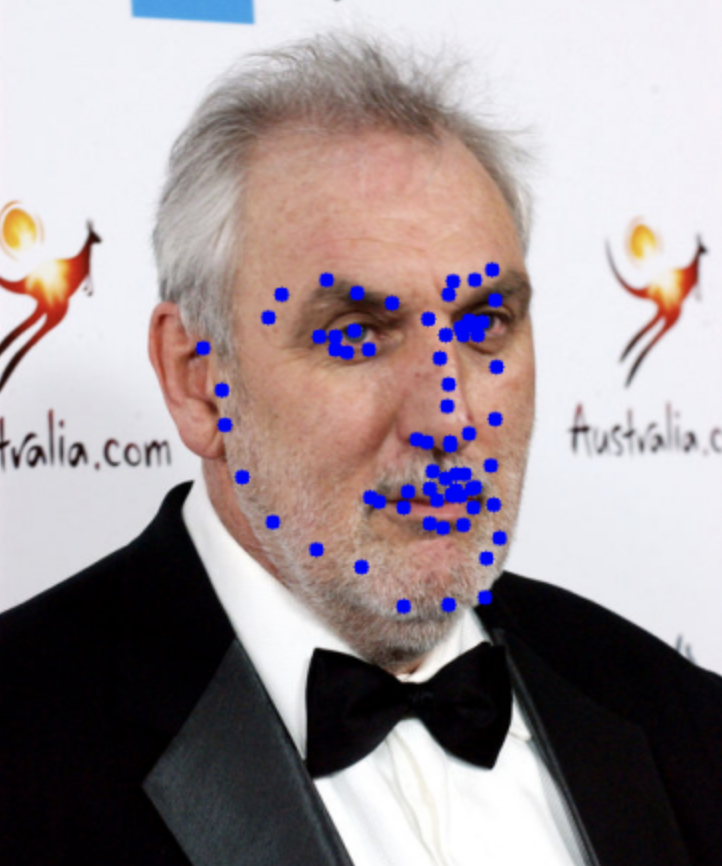
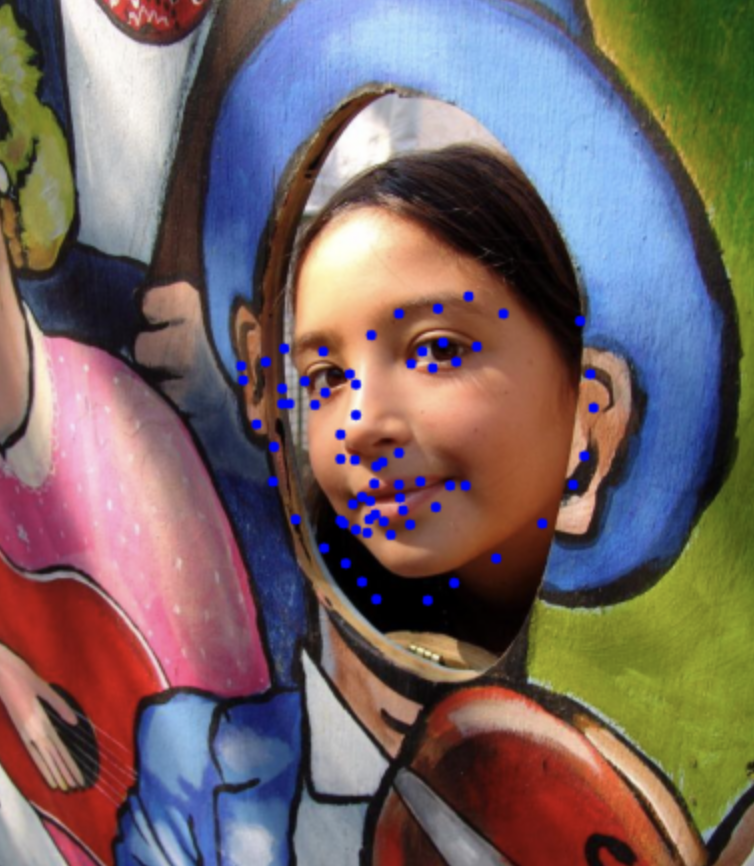
I chose these images because it demonstrates some of the difficulties that my model faces when predicting facial keypoints. In the first image on the left, the person's hands are partially obscuring the bottom half of their face. Since the colors of the person's face and hands are the same, the model predicted keypoints into the person's hands, far away from the actual points on the face. In the second image, the face is slightly turned. The half of the face with the facial outline clearly shown is predicted correctly, but the other side, which is obscured by the turned face, is not predicted well. Finally in the last example, the little girl's face is put through a wooden hole and turned, giving the model difficulty to correctly place the keypoints down.
Personal Photos
Finally, I show some of the keypoint predictions on photos from my collection.
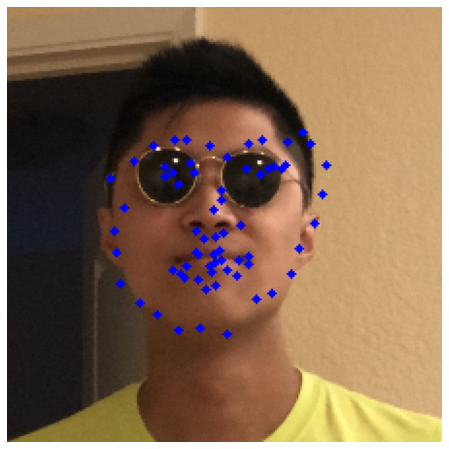
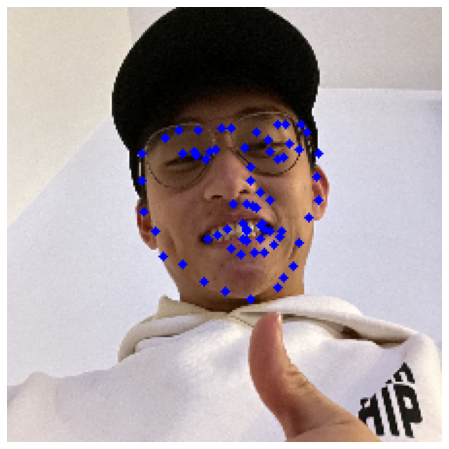
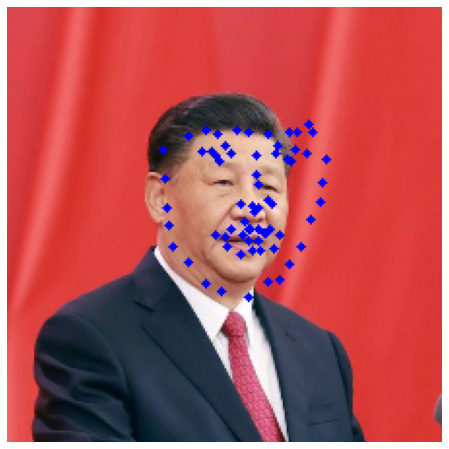
In general, my model predicts the facial keypoints pretty well on these images. In the images with glasses, the eyes region is not as well predicted. Also, I think one reason for why it is not as accurate on the third image is because of the Communist Red background color, which the model has likely not seen in the training images. The other two images are similar to ones that it has seen during training, which are just naturally colored backgrounds.