Project 5: Facial Keypoint Detection with Neural Networks
By Sriharsha Guduguntla
Project 5 entails taking a dataset of facial images and their associated keypoints as labels and building a Neural Network model that is able to predict these keypoints on new facial images. It contains 3 parts, the first one being a model that simply predicts the nose keypoint of a face using 240 images in the dataset. The second part involves using the same dataset to predict all the facial keypoints. The last part involves taking a much larger dataset of facial images and building a more powerful neural network that is able to more accurately predict keypoints.
Part 1: Nose Keypoint Detection
Here are some images I sampled from my dataloader

For this section, I trained a neural network to detect just a single keypoint that
is located on the nose of the facial image. I used groundtruth labeled nose keypoints to train
the network. The training was done with a dataset of 240 pictures and a training_size =
192
images and a validation size = 48 images. I used a batch_size = 64 and
the Adam
Optimizer with
a learning_rate = 1e-3. I trained the network over 15 epochs. The
neural network I
used
is
summarized below with 3
convolutional layers and 2
fully connected layers. I used a MaxPool2d(2, 2) layer after each convolution
layer. I applied Relu functions after each layer except the last fully
connected
layer. Finally, I used MSE loss. The network is as follows:
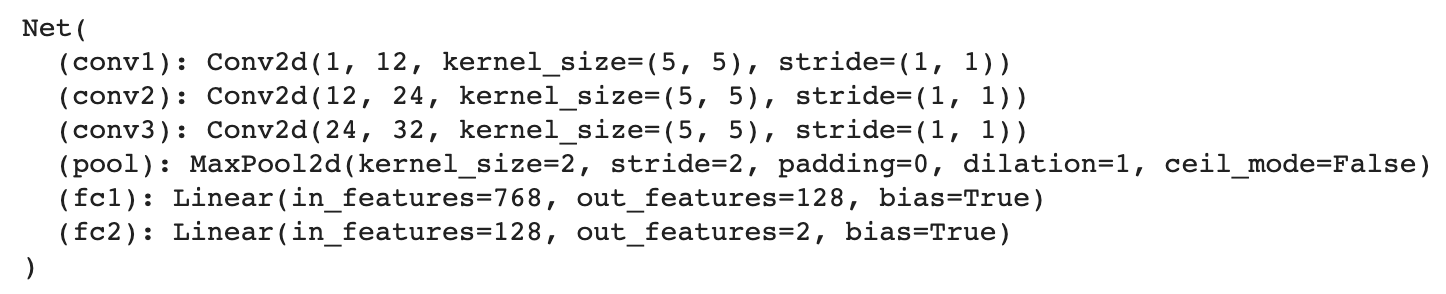
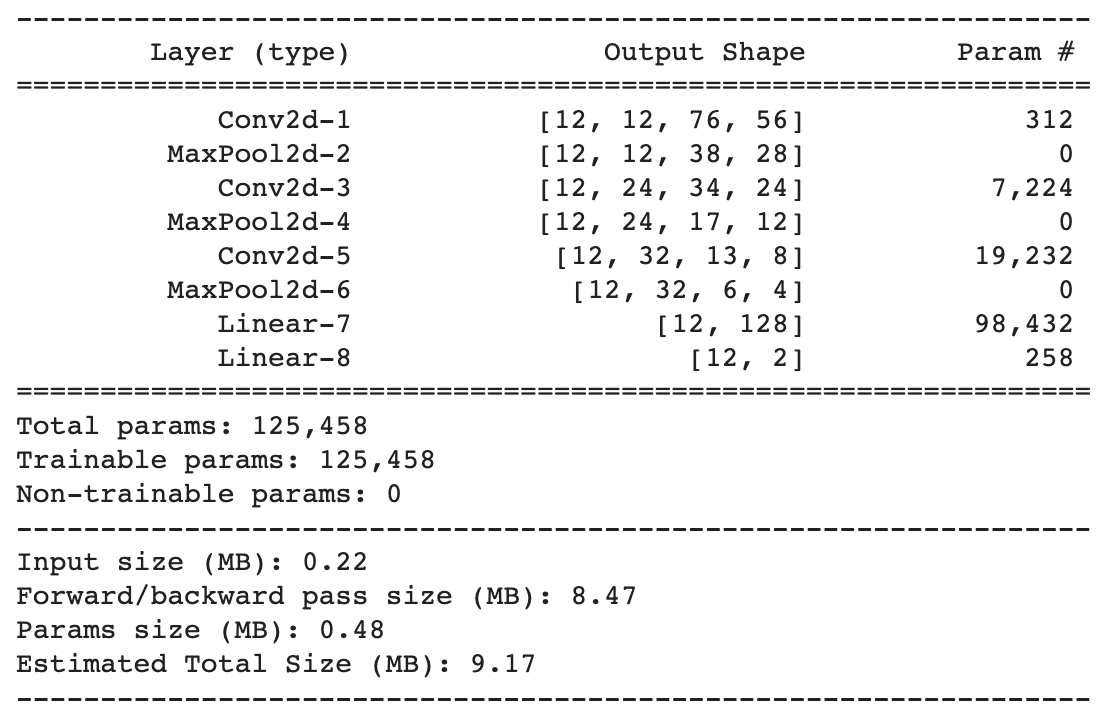
Network Detailed Summary
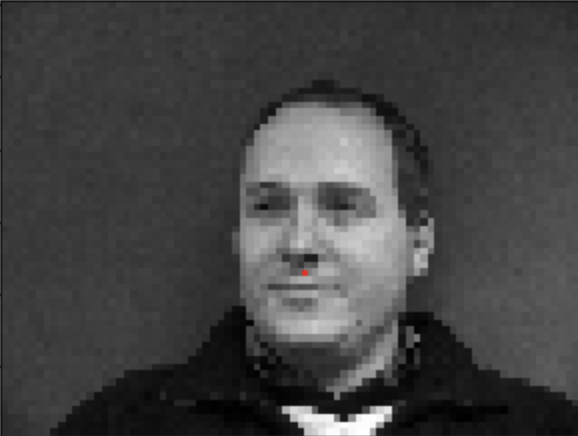
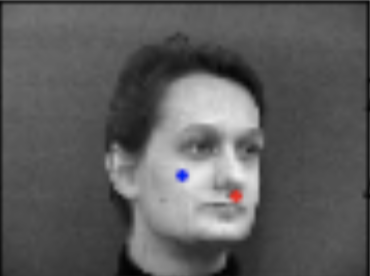
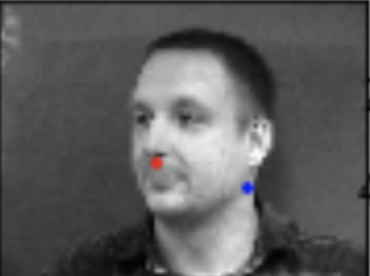
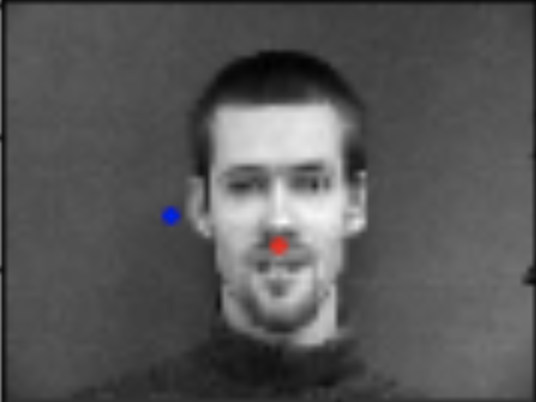
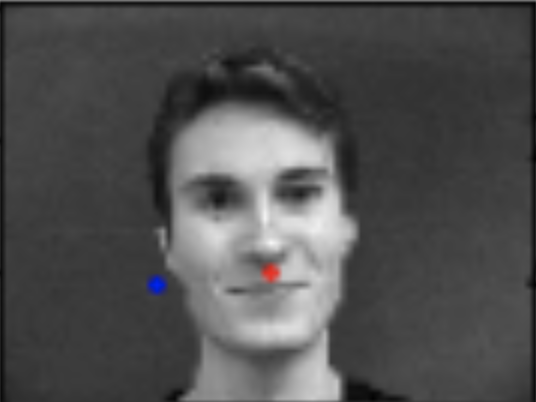
The red in the pictures below is the original groundtruth nose keypoint and the blue is the predicted keypoint by the network.
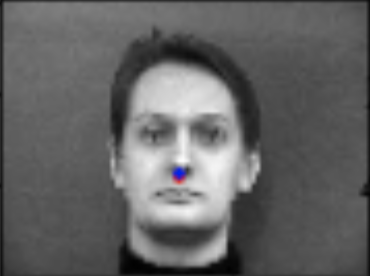

Here are two more examples outputted by the same trained network that did not work so well. Perhaps, this may have been because of the lack of data, particularly faces that were facing sideways in the angles that are shown below. With more examples of those angles, the model likely would have done a better job of predicting the nose keypoint.
Then, I decided to try varying the learning rate and set it to 1e-1 and
then also kept only 1 Conv2d layer instead of 3. However, results were a lot worse with this combo
as is evident by the following frontal facing images below. The
predictions are way off with this network even for simple frontal facing images. My validation loss
was around 2.25e-1 which is a good amount higher than the previous network.
Here is a graph of the validation losses vs. the training losses per epoch while training the best network.
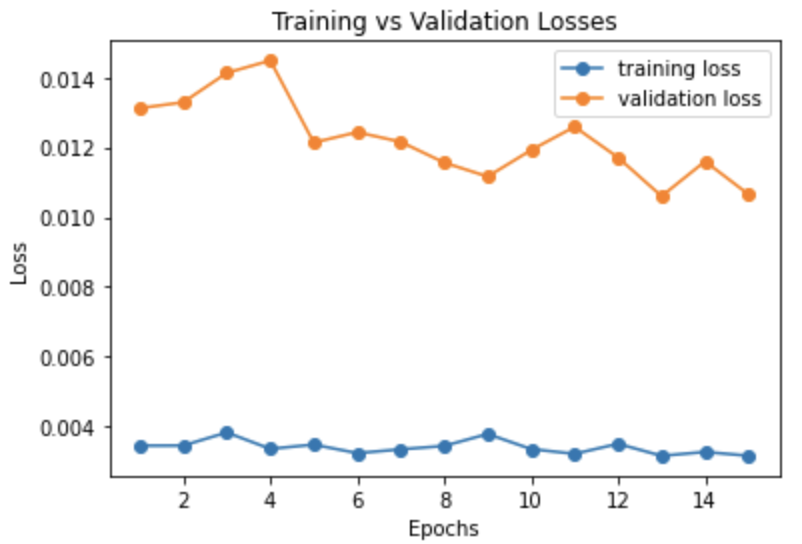
Validation vs Training Loss over 15 epochs
Final Training Loss = 3.2e-3
Final Validation Loss = 1.06e-2
Part 2: Full Facial Keypoints Detection
Here are some images I sampled from my dataloader

For this section, I trained a neural network to detect all the facial keypoints (58
keypoints) of a facial image. I used groundtruth labeled keypoints to train
the network. The training was done with a dataset of 240 pictures and a training_size =
192
images and a validation size = 48 images. I used a batch_size = 64 and
the Adam
Optimizer with
a learning_rate = 1e-4. I trained the network over 100 epochs. The
neural network I
used
is
summarized below with 5
convolutional layers and 3
fully connected layers. I used a MaxPool2d(4, 4) after the last 2 convolutional
layers. I applied Relu functions after each layer except the last fully
connected
layer. Finally, I used MSE loss. To prevent overfitting, I decided to do data augmentation by
applying random affine transformations like rotations (-15 to 15 degrees) and translation (-10px
to
10px). I also randomly adjusted the brightness and saturation of different images. By doing data
augmentation, the network does a better of job of generalizing its patterns rather than trying
to overfit to a certain set of faces that are all perfectly aligned. The
network is as follows:
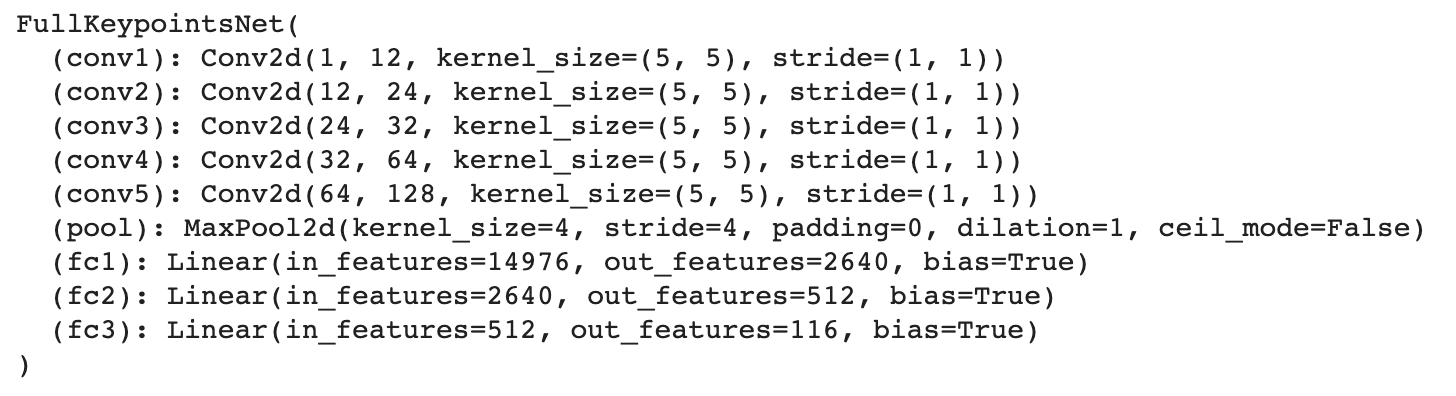
Network Detailed Summary
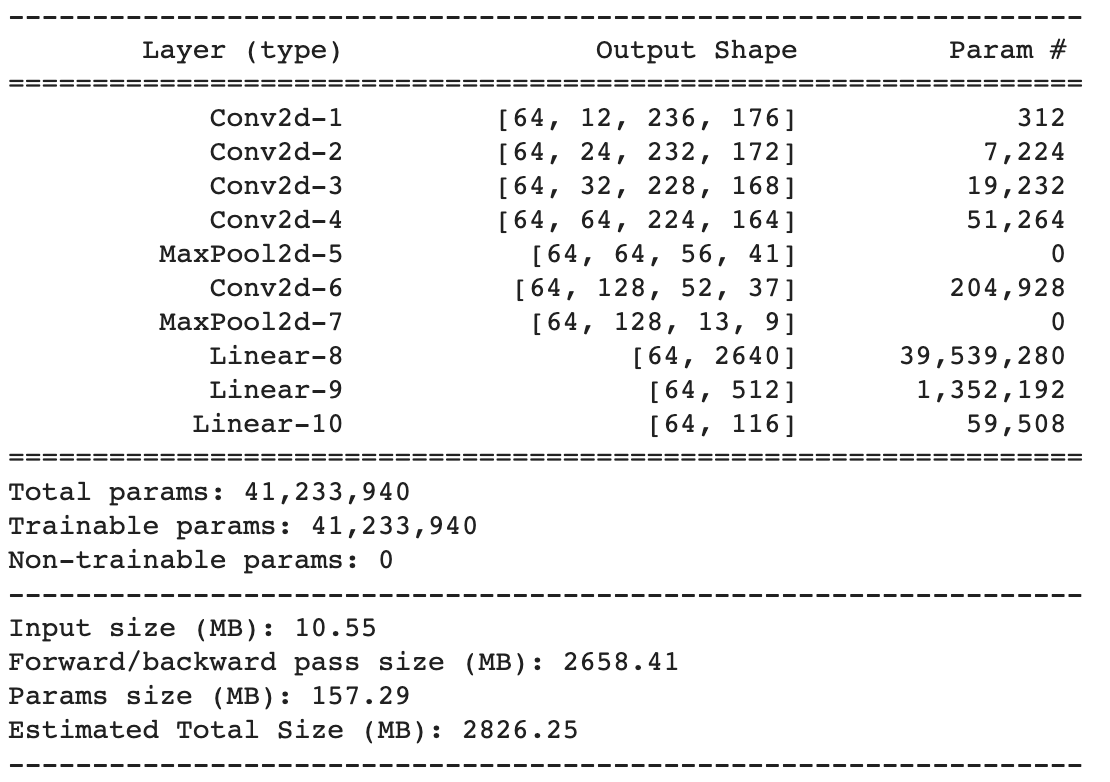
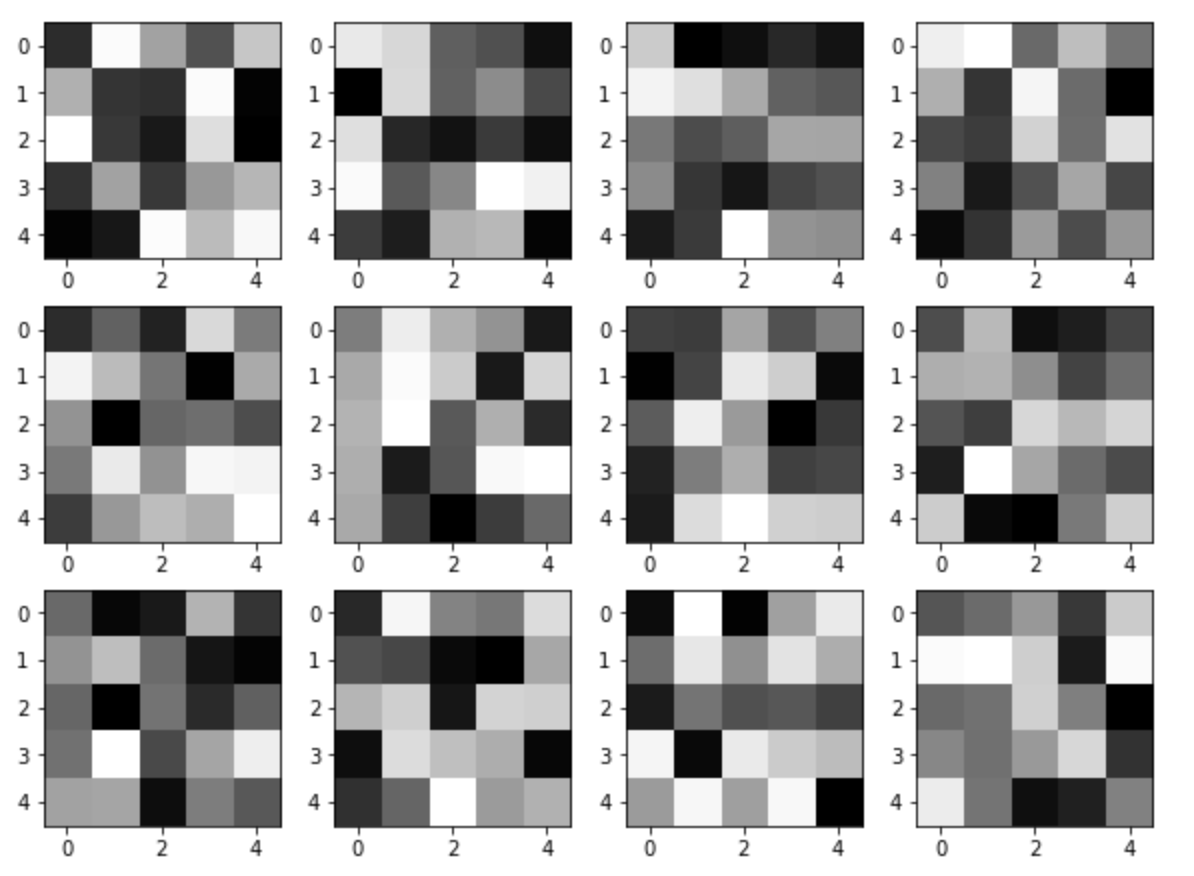
Here, we have a visualization of the twelve 5 x 5 learned filters of the first Conv2d layer
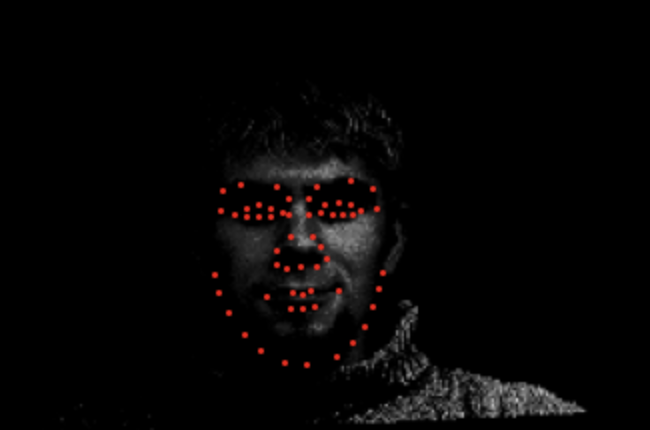
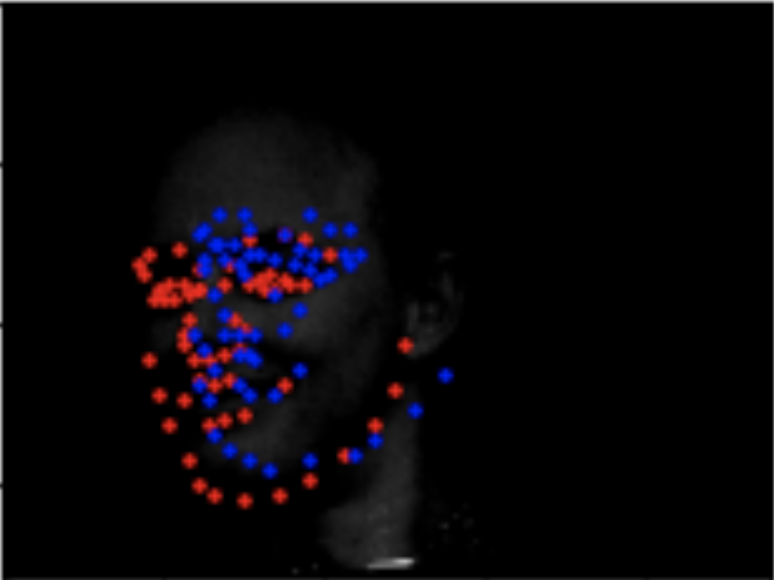
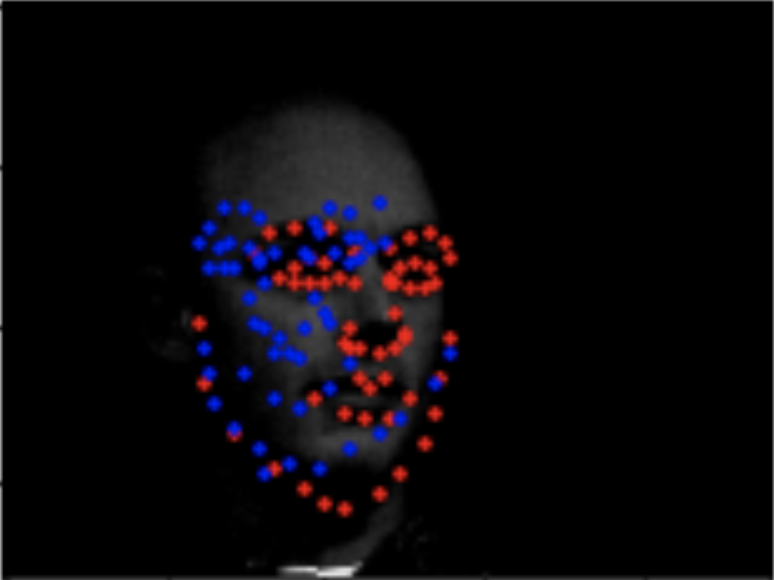
The red in the pictures below are original groundtruth keypoints and the blue are the predicted keypoints by the network.
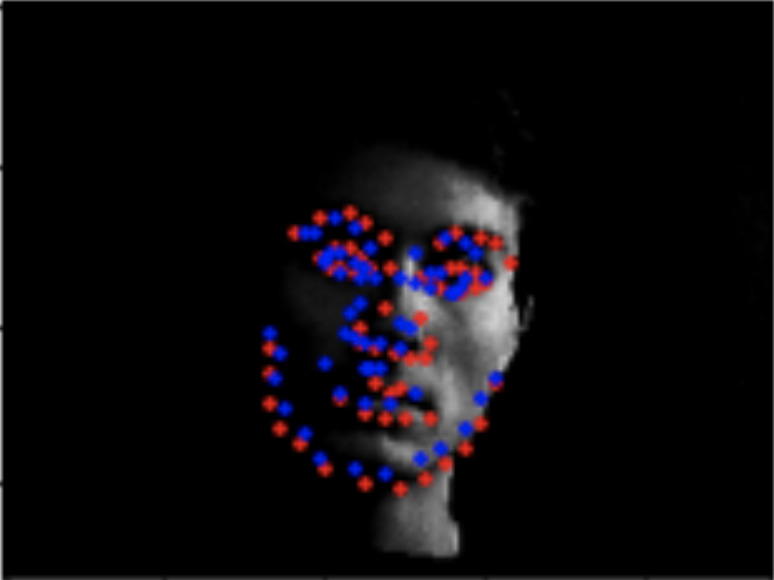
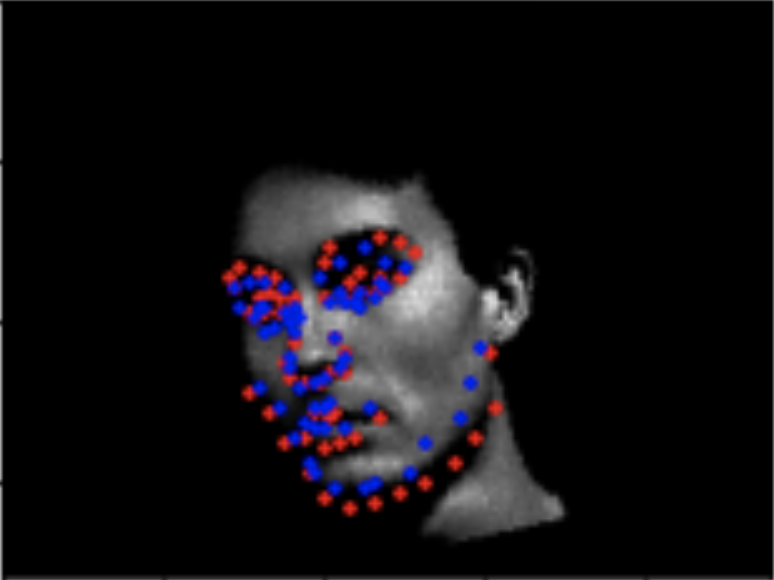
Here are two more examples outputted by the same trained network that did not work so well. Perhaps, this may have been because of the lack of data, particularly faces that were facing sideways in the angles that are shown below. With more examples of those angles, the model likely would have done a better job of predicting the nose keypoint. Moreover, the dataset itself is just small and does not have enough examples to get better estimates. Another potential reason that these particular images didn't pan out so well is because their saturdation/brightness ratio was not ideal making them almost too dark for the neural network to be able to grasp facial features. I noticed that the pictures with more lighting (aka brighter), tended to have more accurate keypoint predictions.
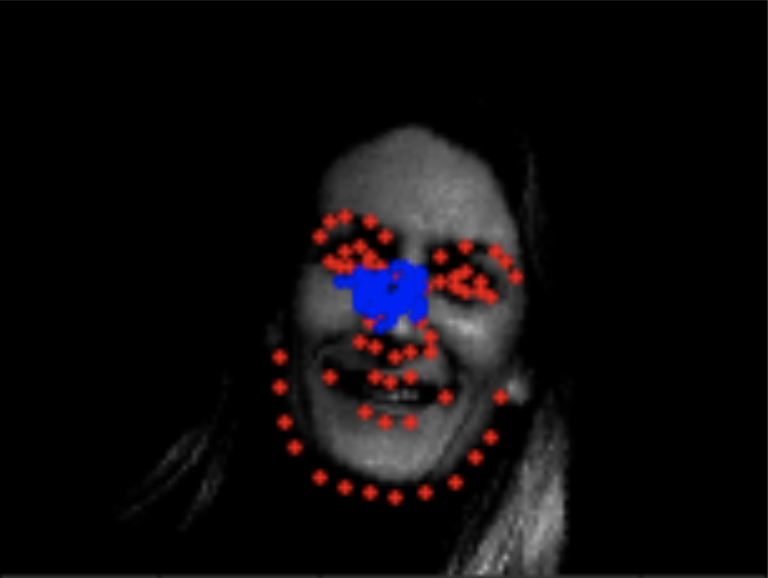
Then, I decided to try varying the learning rate and set it to 1e-6 and
then also changed the out_channels of the first Conv2d layer to 4 (used to be 12). Moreover, I ran
it for 50 epochs instead of 100 epochs. However, results
were a lot worse with this combo
as is evident by the following images below. My guess is that the learning rate was too low and did
not really allow the program to come down to a more ideal loss value because it kept undershooting.
Moreover, the points are bunched up in the outputs which indicates that there might not have been
enough channels (likely the 12 out channels being changed to 4).
The validation loss that I got for this was 1.7e-2 which is significantly larger than
the validation loss for the previous networ.
Here is a graph of the validation losses vs. the training losses per epoch while training the network.
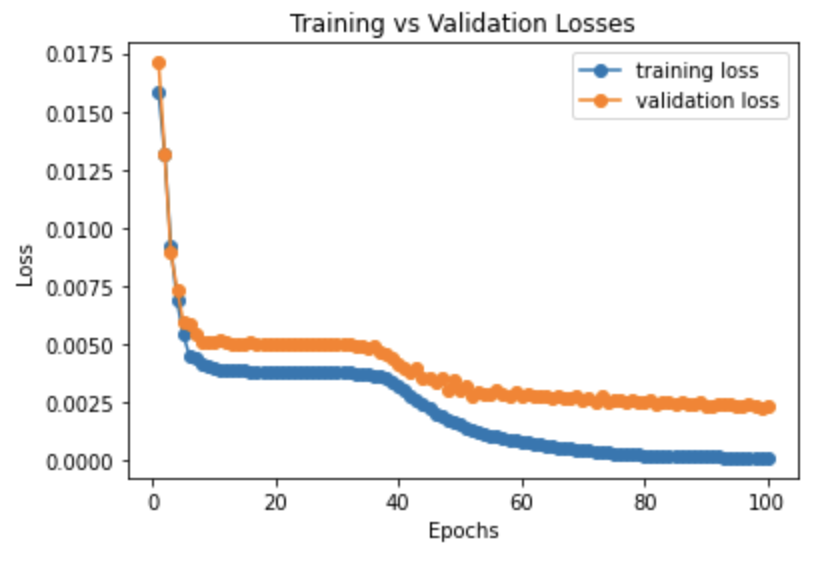
Validation vs Training Loss over 100 epochs
Final Training Loss = 1.16e-4
Final Validation Loss = 2.34e-3
Part 3: Train With Larger Dataset
For this section, I trained an existing neural network from PyTorch (ResNet18) to
detect all the
facial
keypoints (68
keypoints) of a facial image. I used groundtruth labeled keypoints to train
the network. The training was done with a dataset of 6666 pictures and a training_size =
6618
images and a validation size = 48 images. I used a batch_size = 64 and
the Adam
Optimizer with
a learning_rate = 1e-4. I trained the network over 80 epochs. The
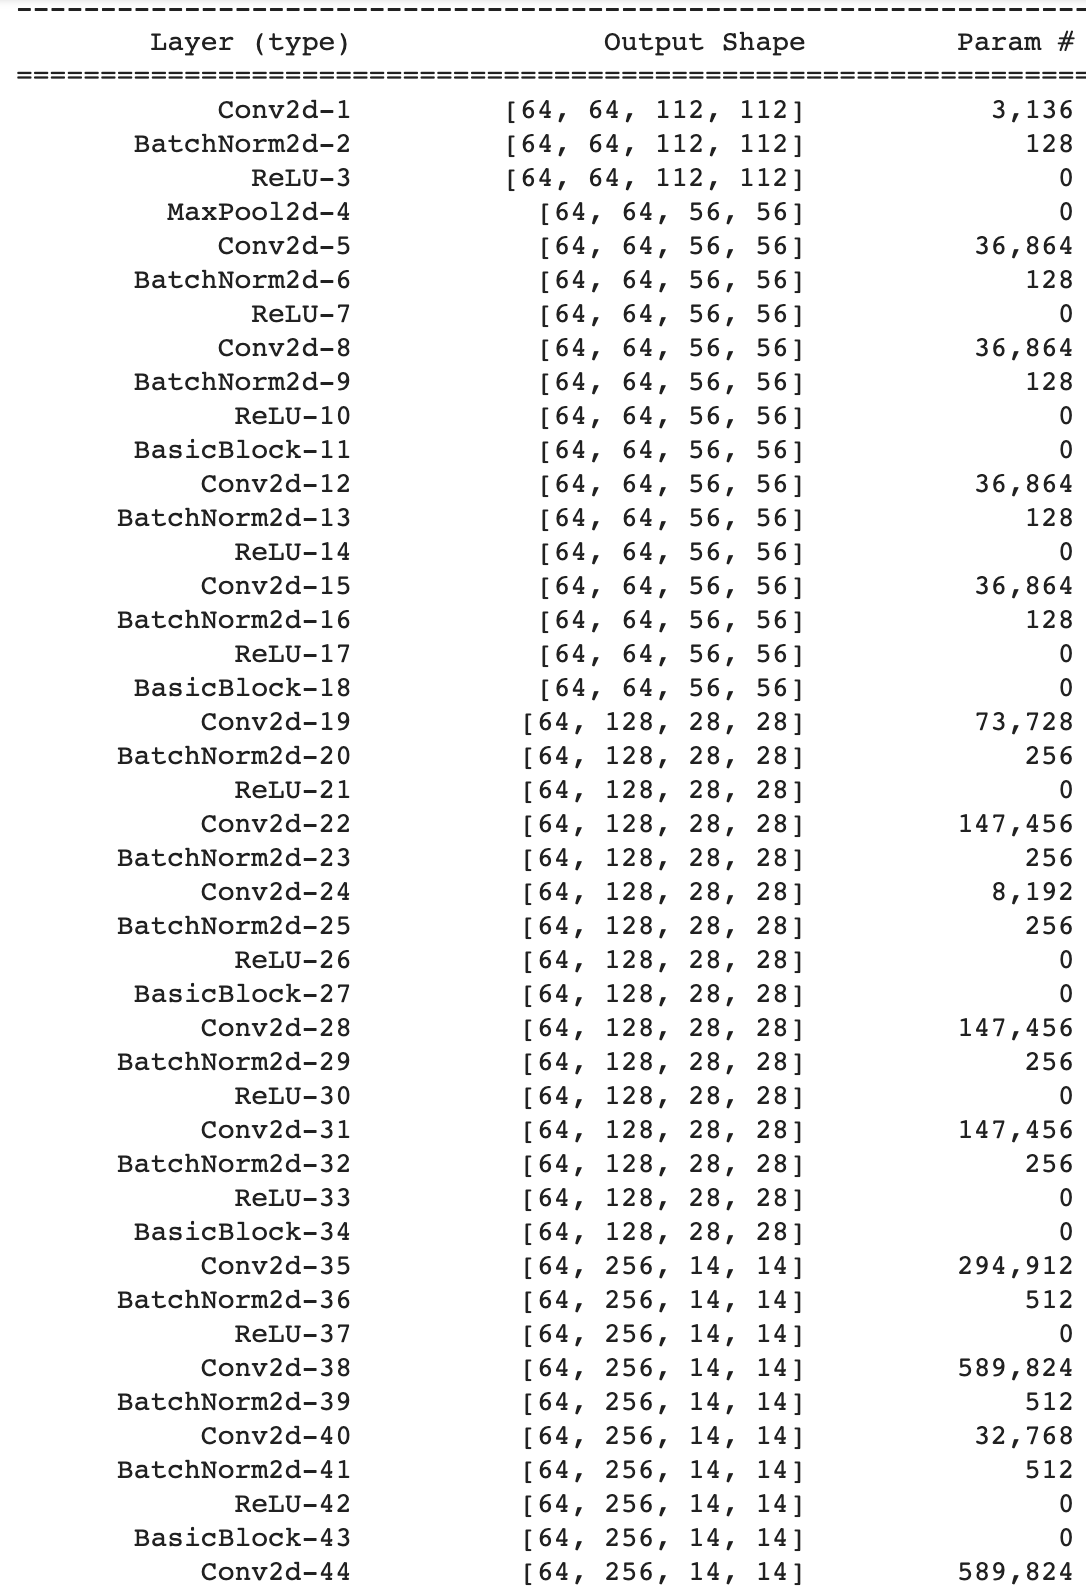
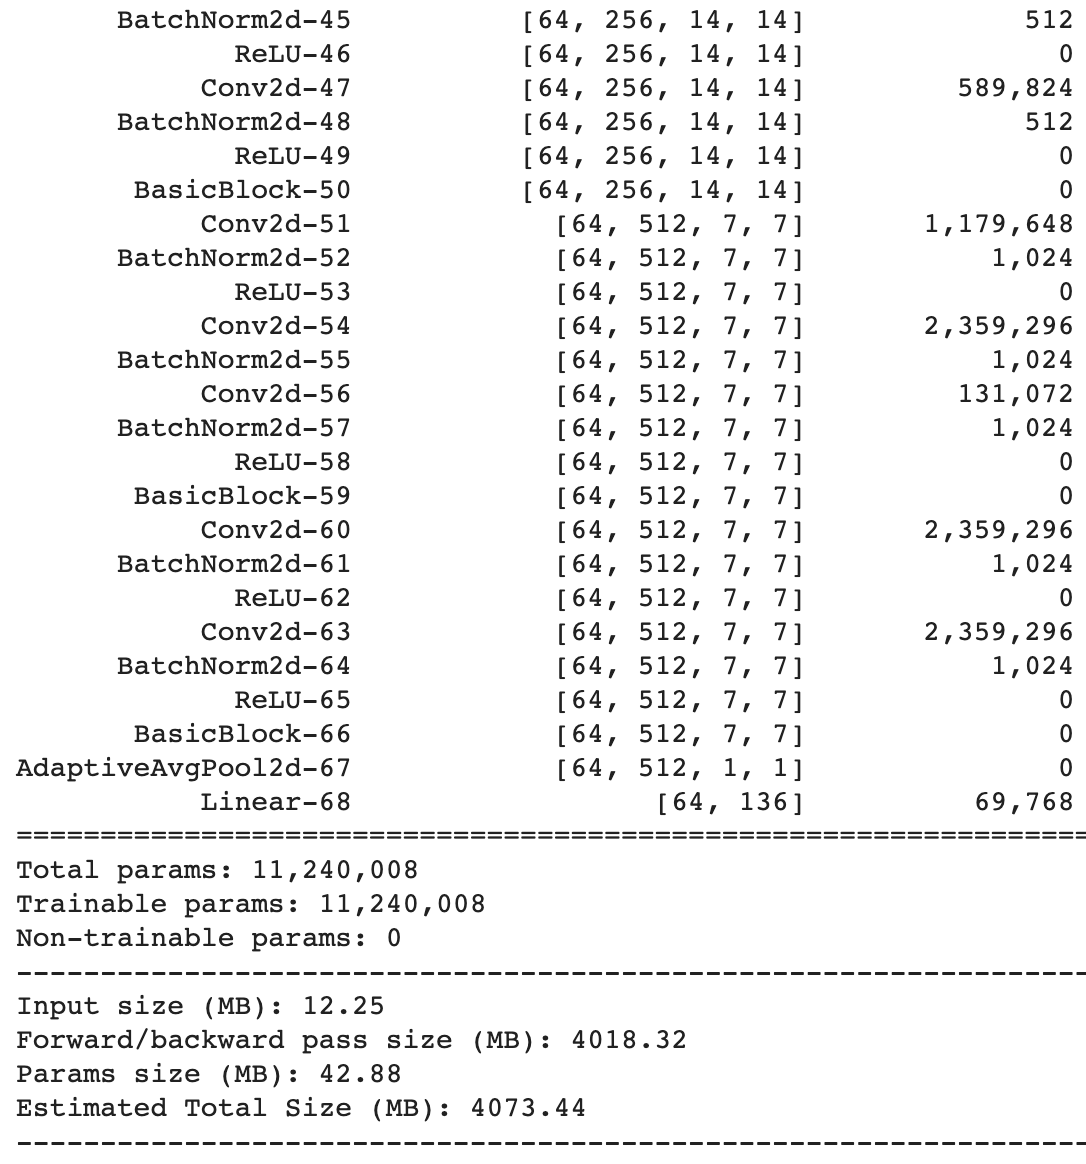
ResNet18 Neural Network that I
used
is
summarized below. Finally, I used MSE loss. To prevent overfitting, I decided to do data
augmentation by randomly adjusting the brightness and saturation of different images. By doing
data
augmentation, the network does a better of job of generalizing its patterns rather than trying
to overfit to a certain set of faces that are all very similar. The
network is as follows:


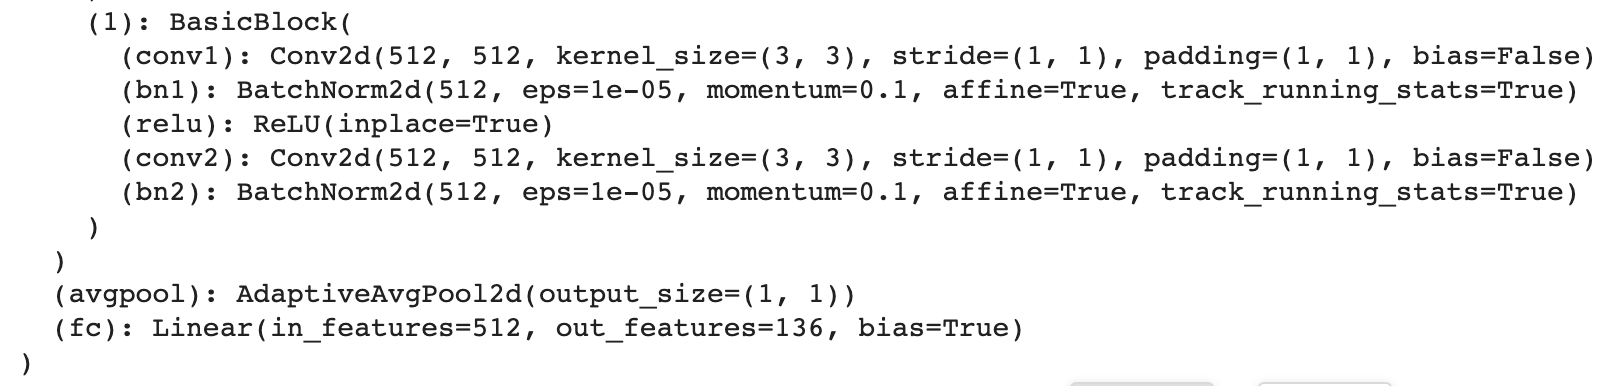
Network Detailed Summary
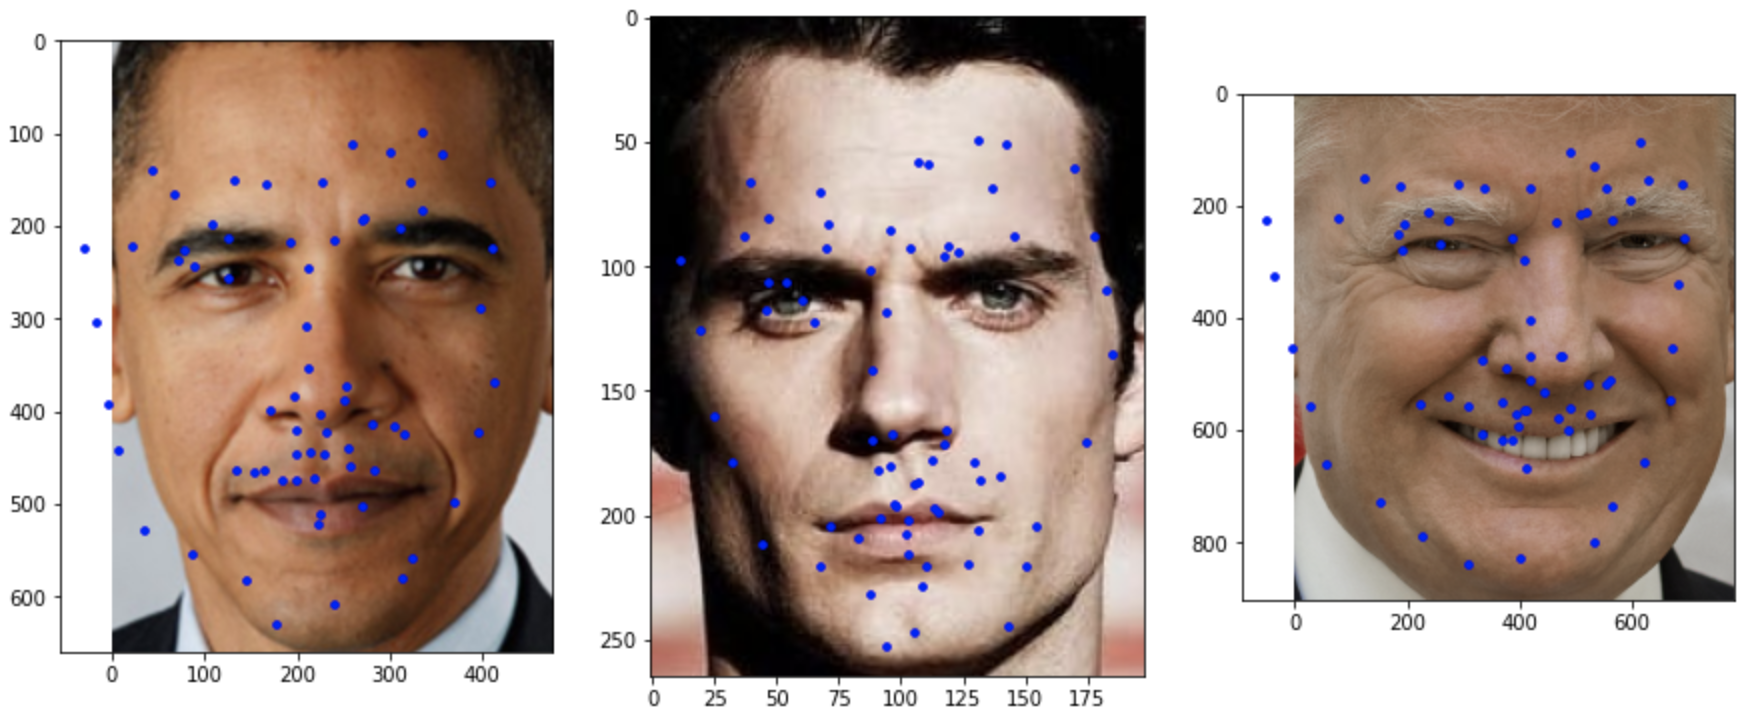
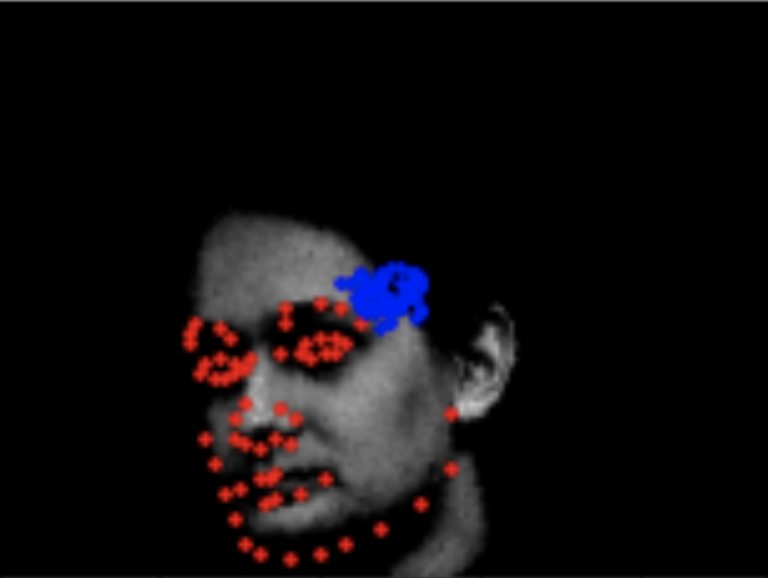
The blue are the predicted keypoints by the network. Here are some examples of the predicted outputs from the network.
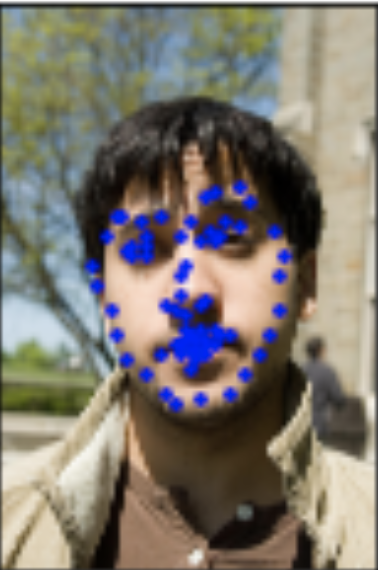
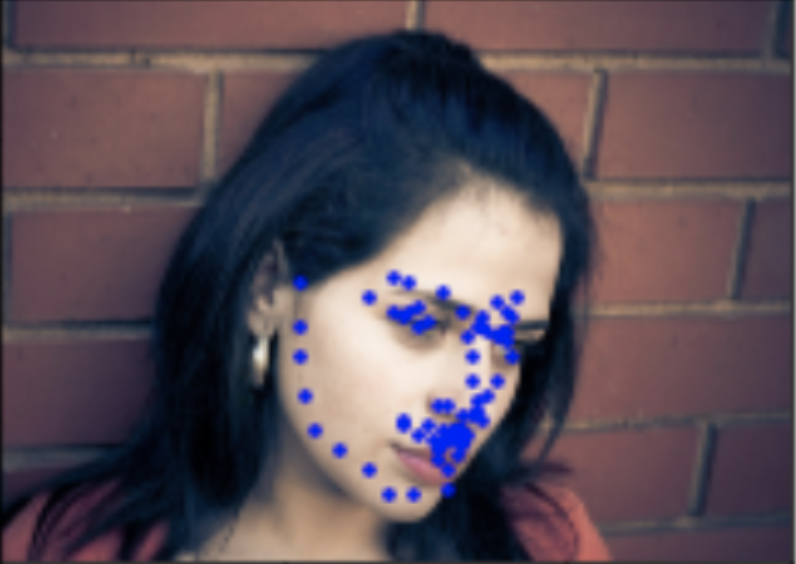
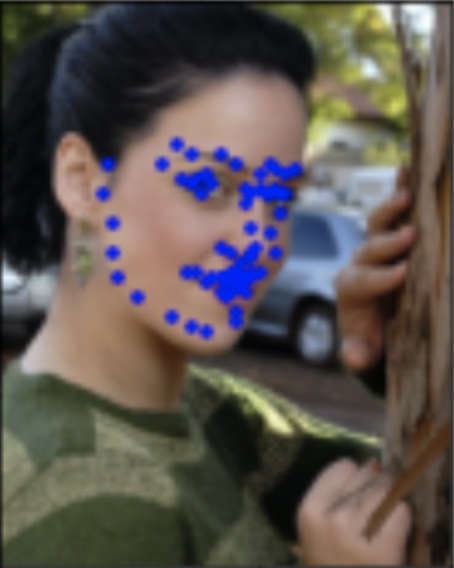
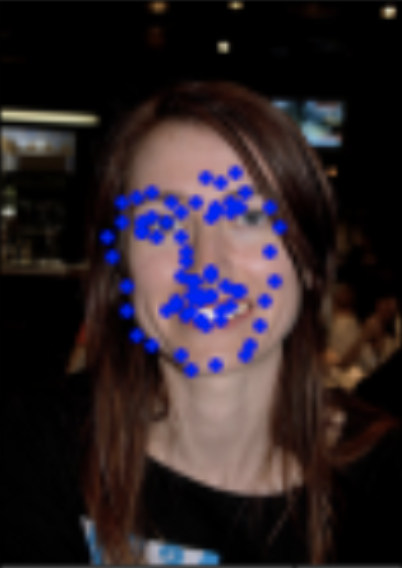
Here are three more examples of my own pictures that I tried running the network on. As you can see, the points are pretty decent on the three images that I chose. It does well on images with less hair like the Obama and Trump pics because the hair can potentially introduce noise into the network that was not well represented in the original training set. Otherwise, for the most part, all my predictions are not that bad and they capture the outline of the faces fairly well.