Programming Project #5: Facial Keypoint Detection with Neural Networks
Ujjaini Mukhopadhyay
Part 1: Nose Tip Detection
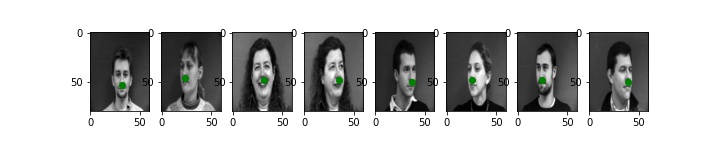
In this section, I created a neural network that identifies a pixel as a nose tip. In order to do this, I first needed to create a dataset and dataloader. The code to create a dataset roughly follows from the code provided. I enveloped it into a PyTorch style dataset by adding a __getitem__() method and a __len__() method. Here, I have sampled a few images and represented what ground truth is using a green dot.
Then, I created a CNN. I used 4 convolution layers and 2 fully connected layers using filter sizes of 5 and 3 (only for the last conv net). I also added max pooling after every layer except layer 3 because I realized that my image was getting too small. For my fully connected layers, I used 48 filters and brought that back down to my output size of 2 (x and y). To train my neural network, I used MSE (mean squared error) and the Adam optimizer.
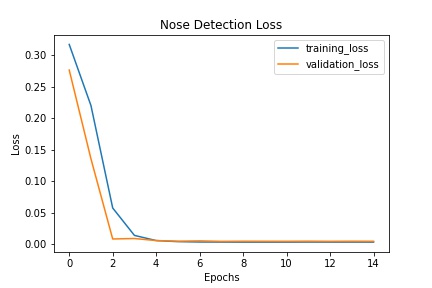
Here is an output of the loss after 15 epochs using a learning rate of 0.001:
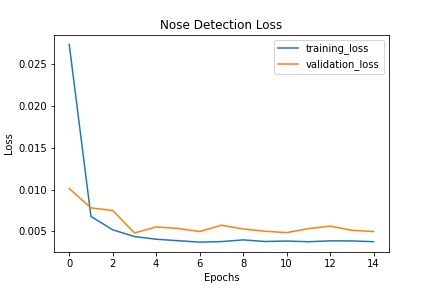
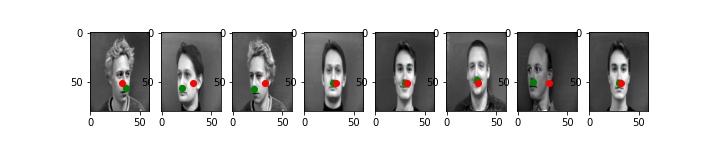
Below are some of my validation results using learning rate 0.001 which gave me the least loss. Note: the validation data was not used for training so this is entirely what the model predicted seeing a brand-new image.
As you can see, this does really well for faces that are looking head-on and even reasonable well for faces that are slightly turned. However, for people with strong jawlines, it seems that some part of the jaw is being identified as the nose instead. This is seen in the second and third picture.
Here is an output using learning rate = 0.01:
Here is an output using learning rate = 0.0001:
I think 0.001 looks the best, but to be honest, you can't really tell much of a difference, even if there is a difference in loss. Whatever we do to the learning rate, however, the side profiles are still having trouble being recognized properly. I believe this is because of lack of data for side profiles.
Part 2: Full Facial Keypoints Detection
For this part, I created a neural net which identifies points as facial landmarks given the training data.
Again, I had to create a custom dataset, but I also defined a set of transforms so that I could do data augmentation. The transforms that I used were rotation and color jitter along with resizing and making the picture grayscale. Here are some examples from the training set.

I built a CNN here with 5 layers of 32, 64, 64, 128, and 512 channels with a filter size of 3, meaning that as I make the image smaller, I'm also increasing the number of channels. I also added a max pool layer after the 1st, 3rd, and 5th so that again, I'm not making my image too small. As before, every conv net is followed by ReLU activation. I used learning rate = 0.001 for all of these examples.
The hyper parameter that I played around with was number of epochs. Here we can see the total loss for up to 25 epochs:
However, I noticed that training for 25 epochs was actually overfitting. Since most of the images in the dataset are straight forward (even with the rotation data augmentation), I was getting something like this:

On the other hand, if I trained my data for only 10 epochs, I ended up with a result that left something to be desired. It seems underfitted:

Training for 15 epochs seemed to do the trick: we avoided the overfitting seen in 25 epochs, but were still close to a face. Here are some examples:


As you can see, it still doesn't work the best on faces turned to the side as seen in the 1st and 5th image. However, for the rest of the images (yes, some of them are repeats, but different expressions!), it seems to be working pretty well! It probably doesn't work well for faces turned to the side because the dataset is really small in that regard. Only about 1/3 of the dataset has faces turned and that too, that fraction is split between turned to the right and turned to the left. I would likely need more data for those two. Something that I would have liked to try to see if I could get better results is to particularly add artificial data for only the results that are turned sideways. Then, I could possibly weight these samples a little more and get better results.
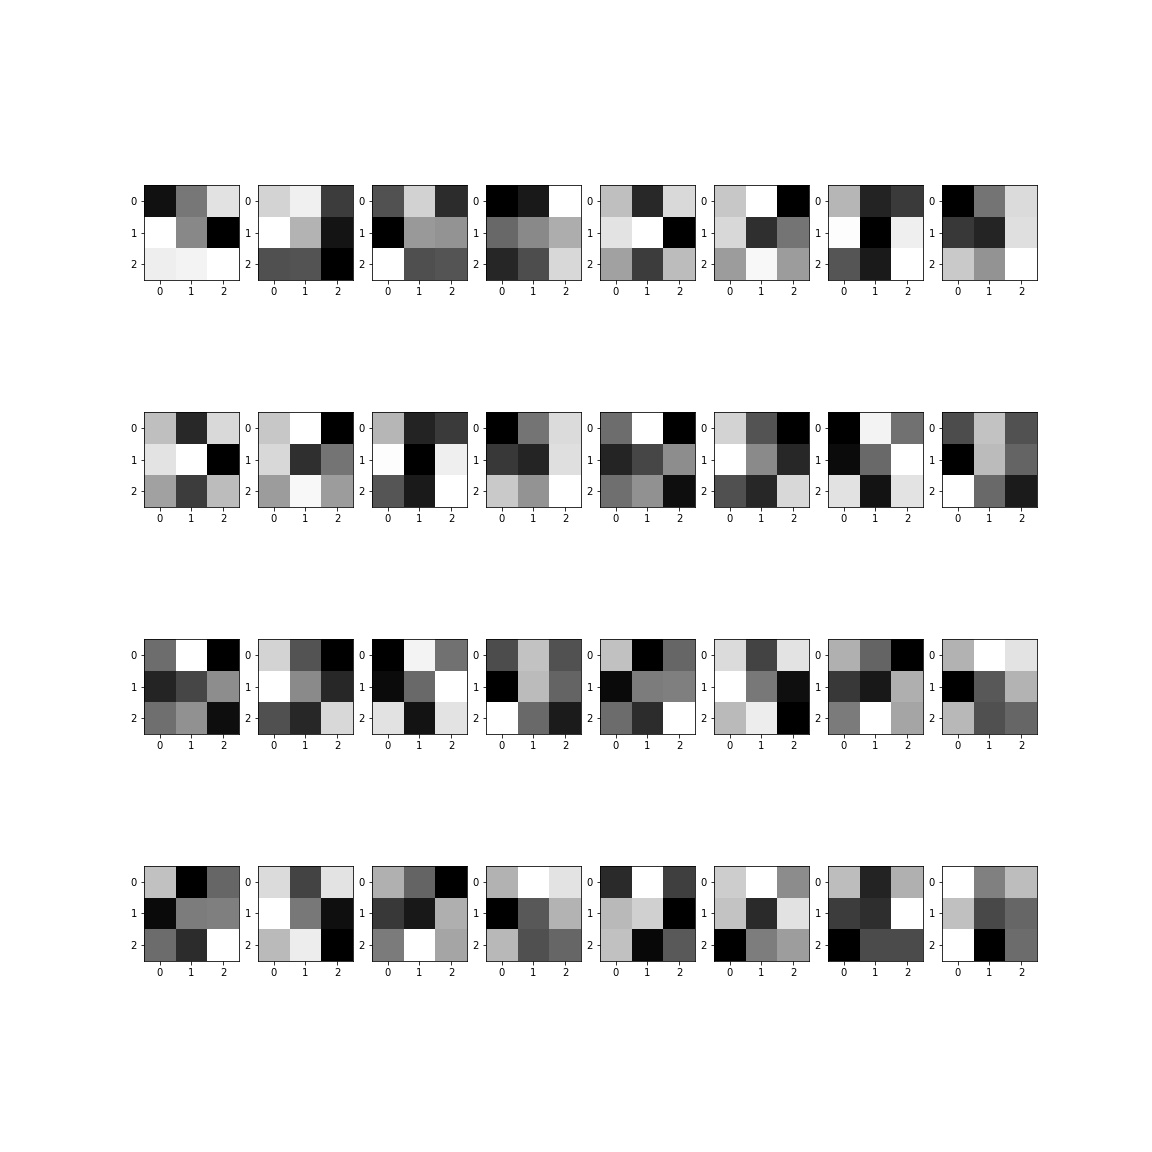
Here are the filters:
Part 3: Train With Larger Dataset
For this, I used a pre-defined architecture (ResNet18). This architecture is special because it feed outputs from layers to layers that are more than 1 step ahead of it. This means that something in layer 2 could be fed to something in layer 5.
Here I also defined my own dataset/dataloader similar to the previous two parts. However, I also added a cropping transform that cropped around the bounding box. This is so that the neural net only has to focus on identifying what the facial landmarks are and doesn't really need to identify WHERE the face is located. I also had to do some manipulations after running the net in order to get back actual coordinates. This involved multiplying by the width and height of the bounding box and then adding the offsets for the top left corner.
My MSE on Kaggle is 12.10507 (name is Ujjaini M.).
The neural net architecture follows what comes in the given resnet 18 model in pytorch.
I had to change the first layer to take in 1 color channel (instead of 3), and the output layer to output 136 points to fit my problem constraints.
More specifically, resnet is made of a basic block which does a convolution, batch normalization, ReLU. This is passed both to another set of convolution, batch norm, and ReLU, BUT it is also manipulated so that it can be fed to the next basic block without passing through the second set. This is how we manage to create skip connections. Resnet 18 does this with 4 layers of 2 Basic Blocks each. Another thing to note is that only the first conv net of every layer is downsampling (using stride). Furthermore,ResNet18 does not use bottlenecks. The architecture also has a beginning convolution that is able to correctly take in the input image (this is what we changed) and a fully connected layer at the end which outputs to the correct output size (this is why we changed it above).
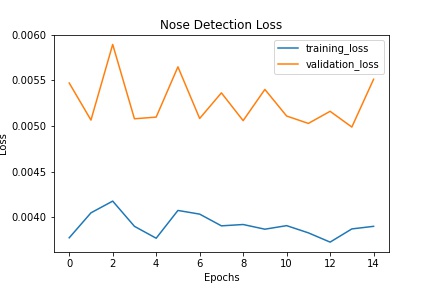
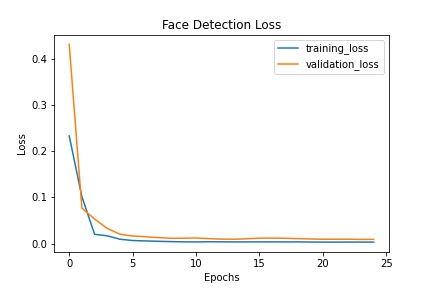
Here is the Training and Validation Loss:
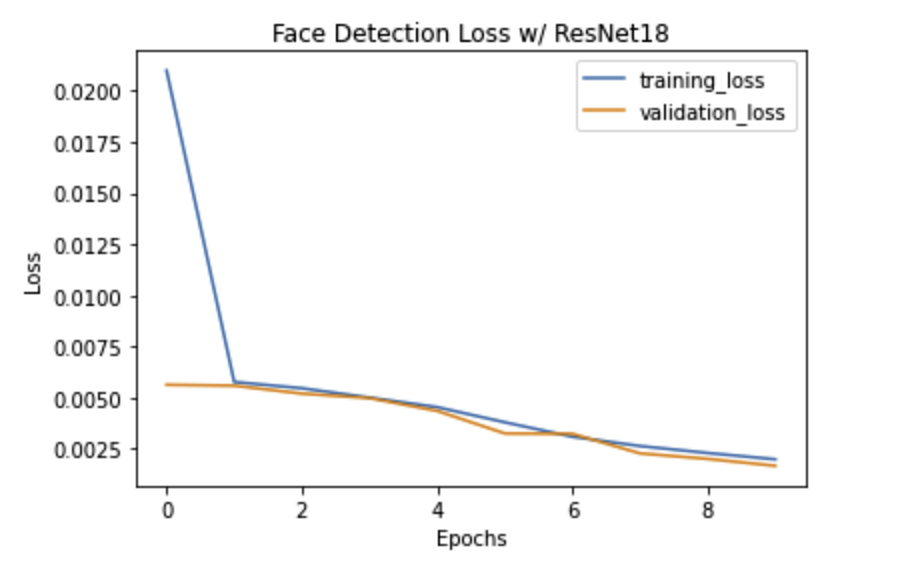
We can see that even though we only trained for 10 epochs, both training and validation loss converge!
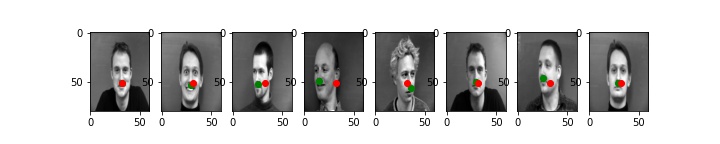
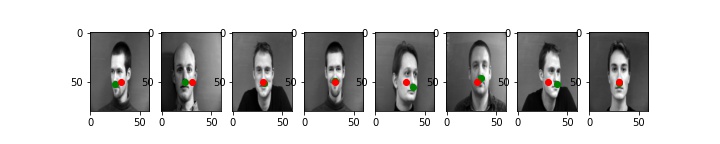
Here are some examples on the test set:
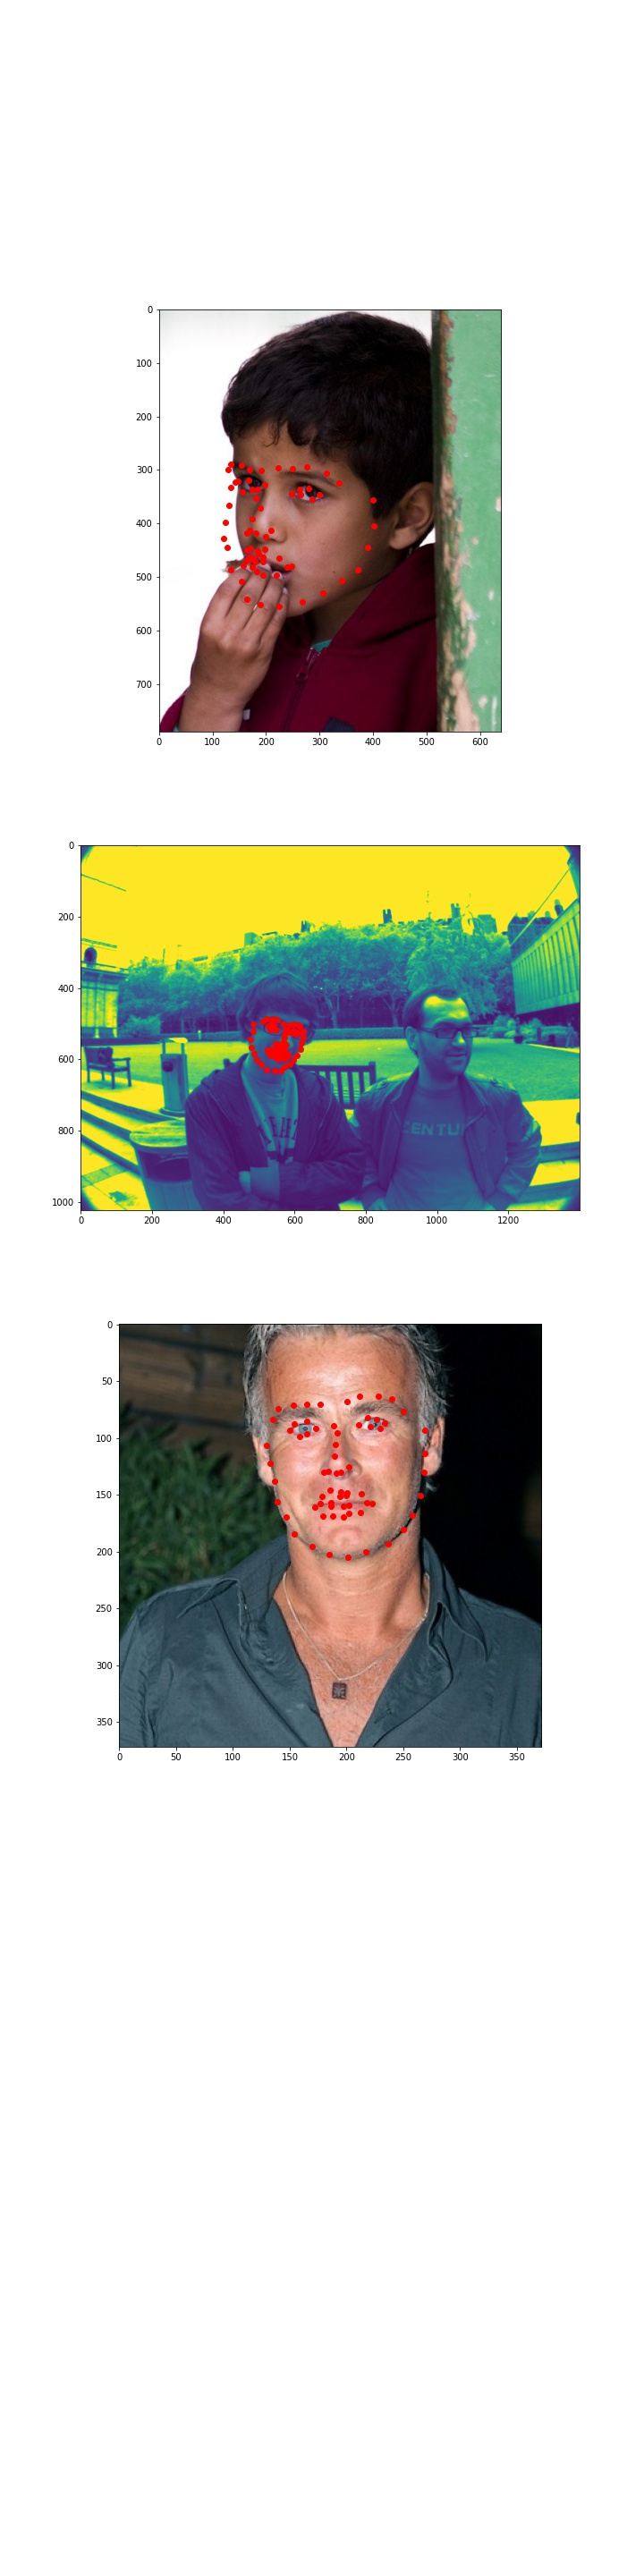
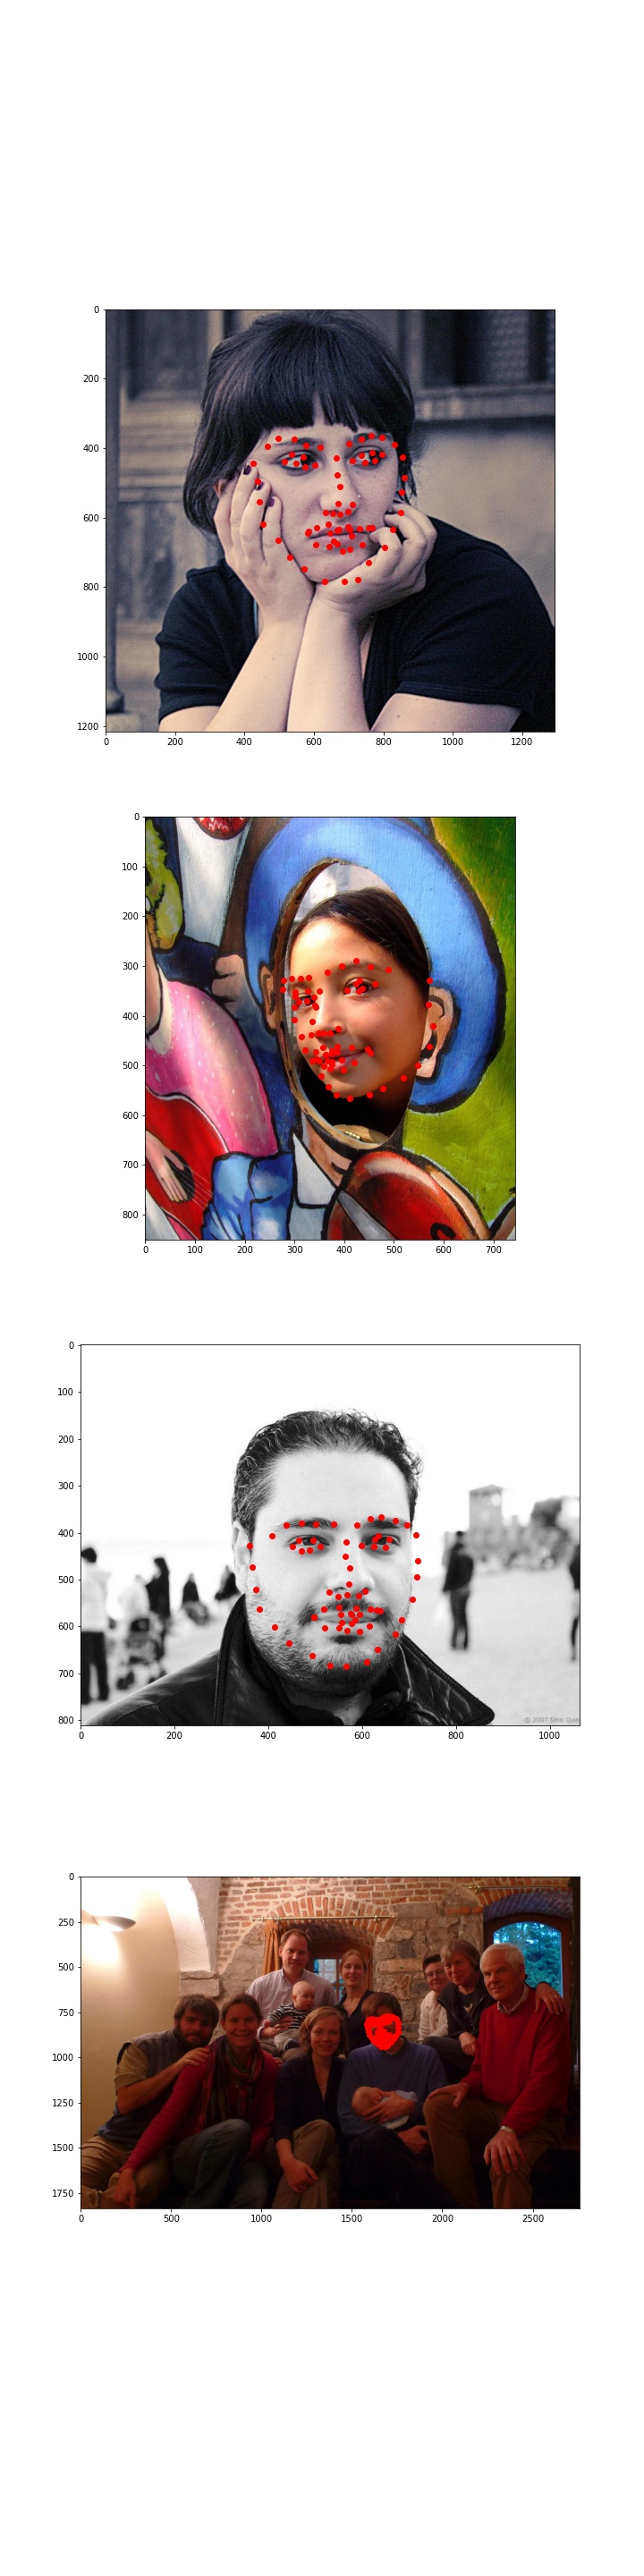
Here are some examples on my own images:

As you can see, the outputs are pretty good. I did notice, however, that the outputs are incredibly dependent on the bounding box. I think it would be a really cool experiment to see how to identify the bounding box itself and try to do the entire procedure through a neural network system.