
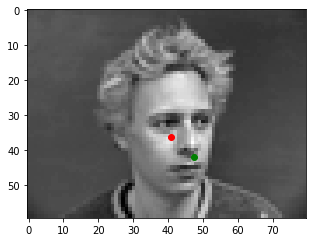
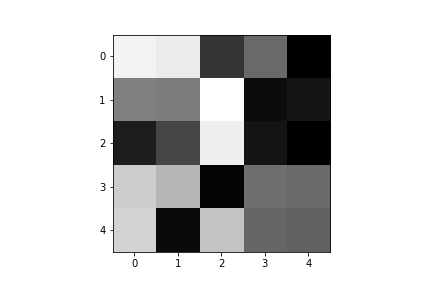
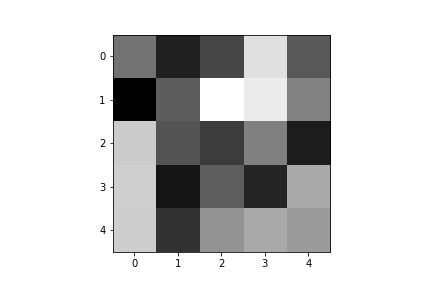
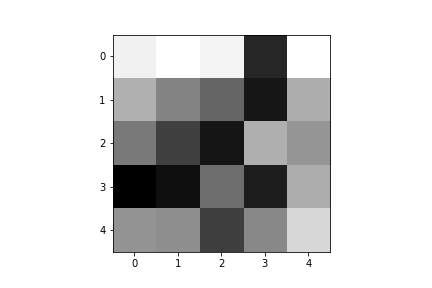
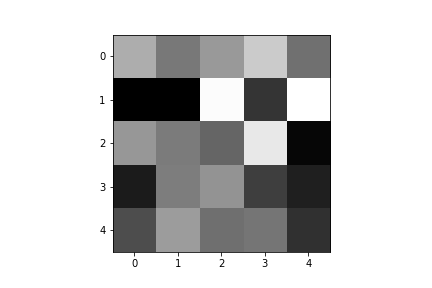
For the first part of this project, I wrote a custom data loader based on the guidelines provided here so I could sample the data in batches. Once I loaded in the images and nose keypoints from the IMM Face Database, I converted all the images to gratscale and resized the image to (80,60). I also converted it to a Tensor and subtracted 0.5 from all the pixel values so that these values would be normalized in the range [-0.5, 0.5]. Below, you can see a few samples of the images and the nose tip keypoints.
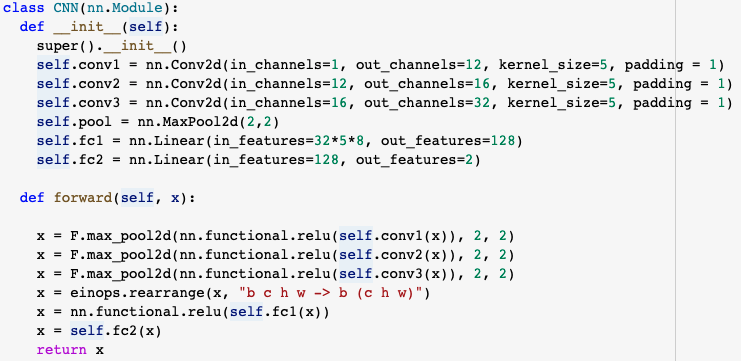
Then I wrote a basic Convolution Neural Network that uses 3 convolutional layers, along with ReLU for non linearity and max-pooling layers for downsampling after each pass through a convolutional layer. I then have 2 fully connected layers but only use a ReLU after the first one so that we don't restrict our value range. The output of the final layer will be a length 2 tensor - the (x,y) coordinate of the nose keypoint. The detailed architecture can be seen below:
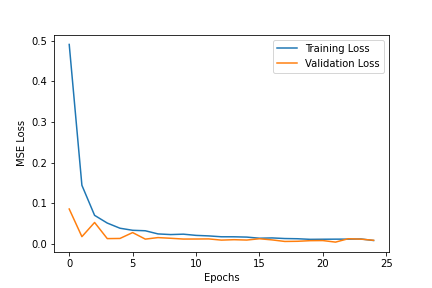
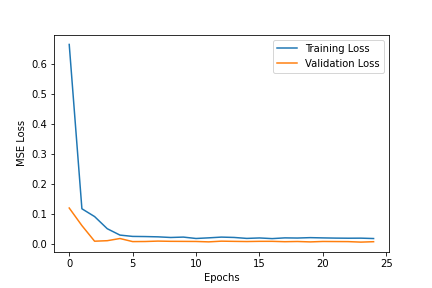
As per the spec, I used Adam as the optimizer, Mean Squared Error as the prediction loss and ran 25 epochs at a learning rate of 1e-3 with a batch size of 30. That yielded the following loss graph with validation MSE loss reaching 0.00872 in the final epoch and training MSE loss reaching 0.00815 (The similarity in losses is indication we are not significantly overfitting).
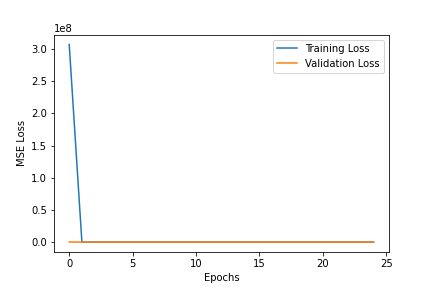
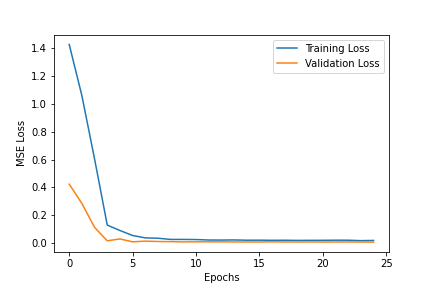
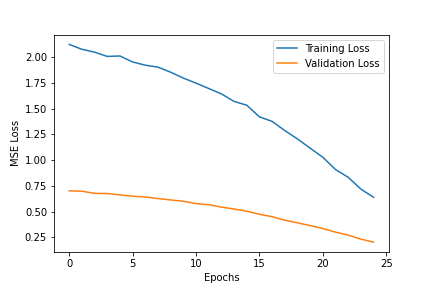
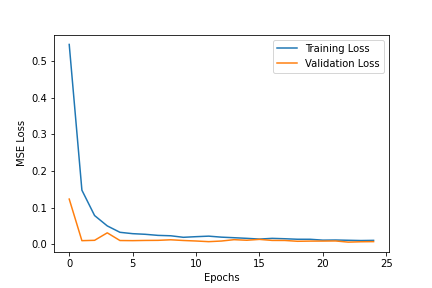
For hyperparameter tuning, I tried to change the learning rate (ranging from 1e-5 to 1e-1) and you can see the respective graphs for the losses below. Generally, 1e-3 was the best learning rate as it did not jump around as much as 1e-1 and 1e-2 but also converged to lower values than 1e-4 and 1e-5.

Another hyperparameter that I tried changing was the kernel size - I tried it at 3x3, 5x5 and 7x7. Changing the kernel size would change the number of parameters the model has to learn and the computational cost but also the size of the features that are learned. The final validation losses for these 3 sizes were approximately 0.0093, 0.0060, 0.0071 (the training was re-run several times to see if this ordering would change) which signifies the 5x5 kernel is the most suitable. The graphs of the MSE losses for the different kernel sizes can be seen below:
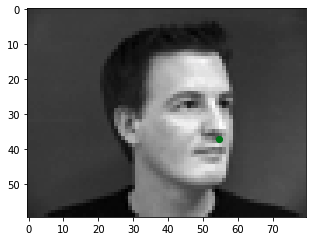
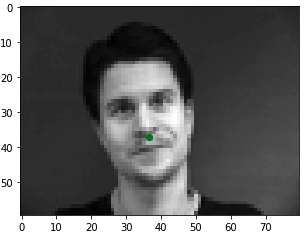
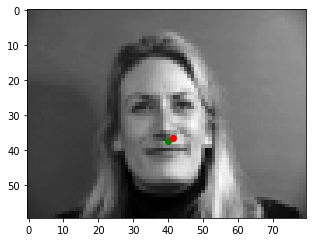
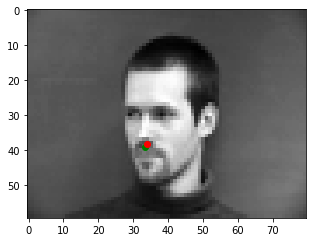
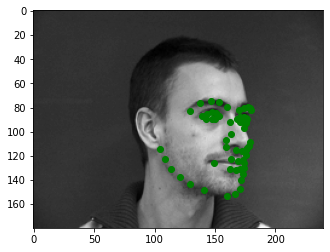
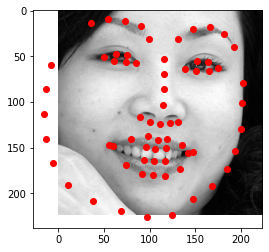
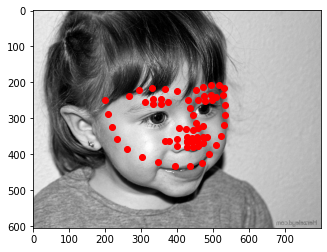
Therefore, using a learning rate of 1e-3 and a kernel size of 5x5, I trained the network on the first 192 images and then used the last 48 as my 'test set'. Below are some of the results I got. You can see that the model performs well when the subject is facing directly forward or is not tilting their face too much because the majority of faces in the dataset have this orientation. However, when there is a significant sideways tilt, the prediction is much less accurate. (Note: Predictions are in red and ground truth is green)

For this part of the project, we are trying to predict all the facial keypoints not just the tip of the nose.
Therefore, I had to write a new data loader that would load in all these values from the IMM Face Database. From the
last part, we saw that there aren't enough images in the dataset therefore I also used data augmentation this time.
Essentially, I looped through all the images in the train set and for each one, I added a color jittered version
(based on this function)
and a randomly translated version. For the translation, I also had to translate the keypoints. This allowed the dataset
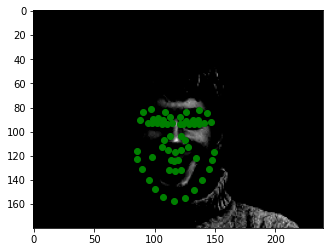
to go from 240 images (192 train, 48 test) to 624 images (576 train, 48 test). Below are some sampled images
from your dataloader visualized with ground-truth keypoints.
For this Part of the project, I used a similar architecture to Part 1 but I added 2 more convolution layers
(for a total of 5) since we need to extract more features from the data now. I tried going upto 7 convolutional layers
but saw very minimal changes in the validation loss at the cost of greater training time, which signifies that it
probably led to overfitting. I also did some hyperparameter tuning by trying a range of learning rates and kernel sizes
similar to task 1 and once again, found a kernel_size of 5 to be the best along with a learning rate of 1e-3.
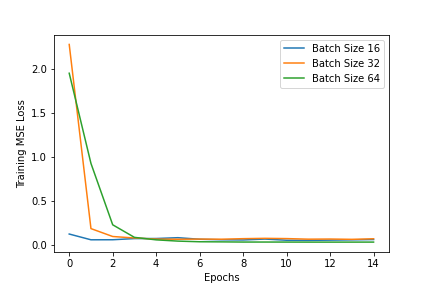
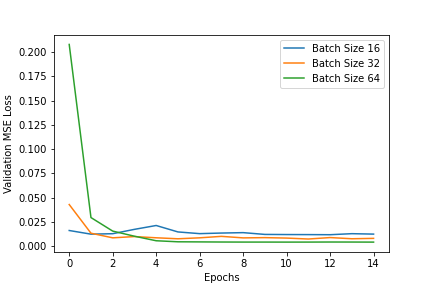
Another thing I tried was changing the batch_size to see the impact on validation and training losses and this
can be seen in a graph below.
The training loss for a batch size of 16 decreases the most quickly but both batch size 32 and 64 eventually reach a
lower training loss. In the validation loss, batch size 64 gets the lowest value eventually but takes the longest to reach
there. Therefore, for my actual predictions, I chose a batch size of 32 as it achieves low loss without requiring
many epochs of training.
The final architecture can be seen below. I trained for 15 epochs with learning rate 1e-3 and batch size 32.

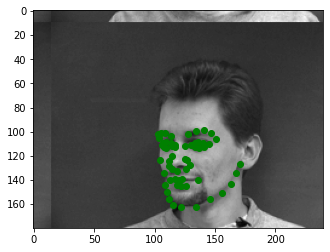
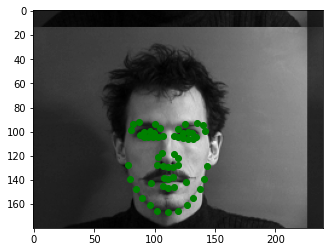
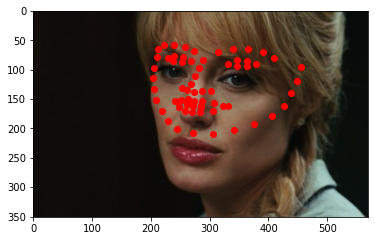
Below are some of the predictions this model generated. Once again, we can see the ones where it performs well is where the person is looking directly or almost directly forward. This is because despite the data augmentation, the majority of images in the dataset are still with this facial orientation so the images where it does badly is where the person is looking sideaways or their head is tilted. In these cases, you can see the model biases towards the keypoints being in the center.
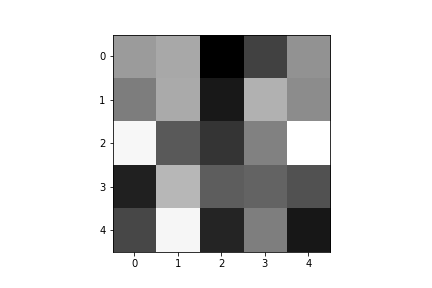
We can also visualize the filters that were learned by the first convolutional layer:
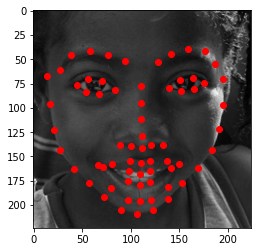
For this part of the project, we used a much larger dataset (the ibug dataset) which has 6666 images. While loading these images in, I converted each to grayscale, normalized it, cropped it according to the given bounding box and then resized it into a 224 x 224 image. This also meant the facial keypoints had to be adjusted to this new size and crop dimensions. Then, I performed data augmentation similar to Task 2 to add color jittered and randomly translated versions of the images. Some samples from the dataset can be seen below with the ground truth markings.
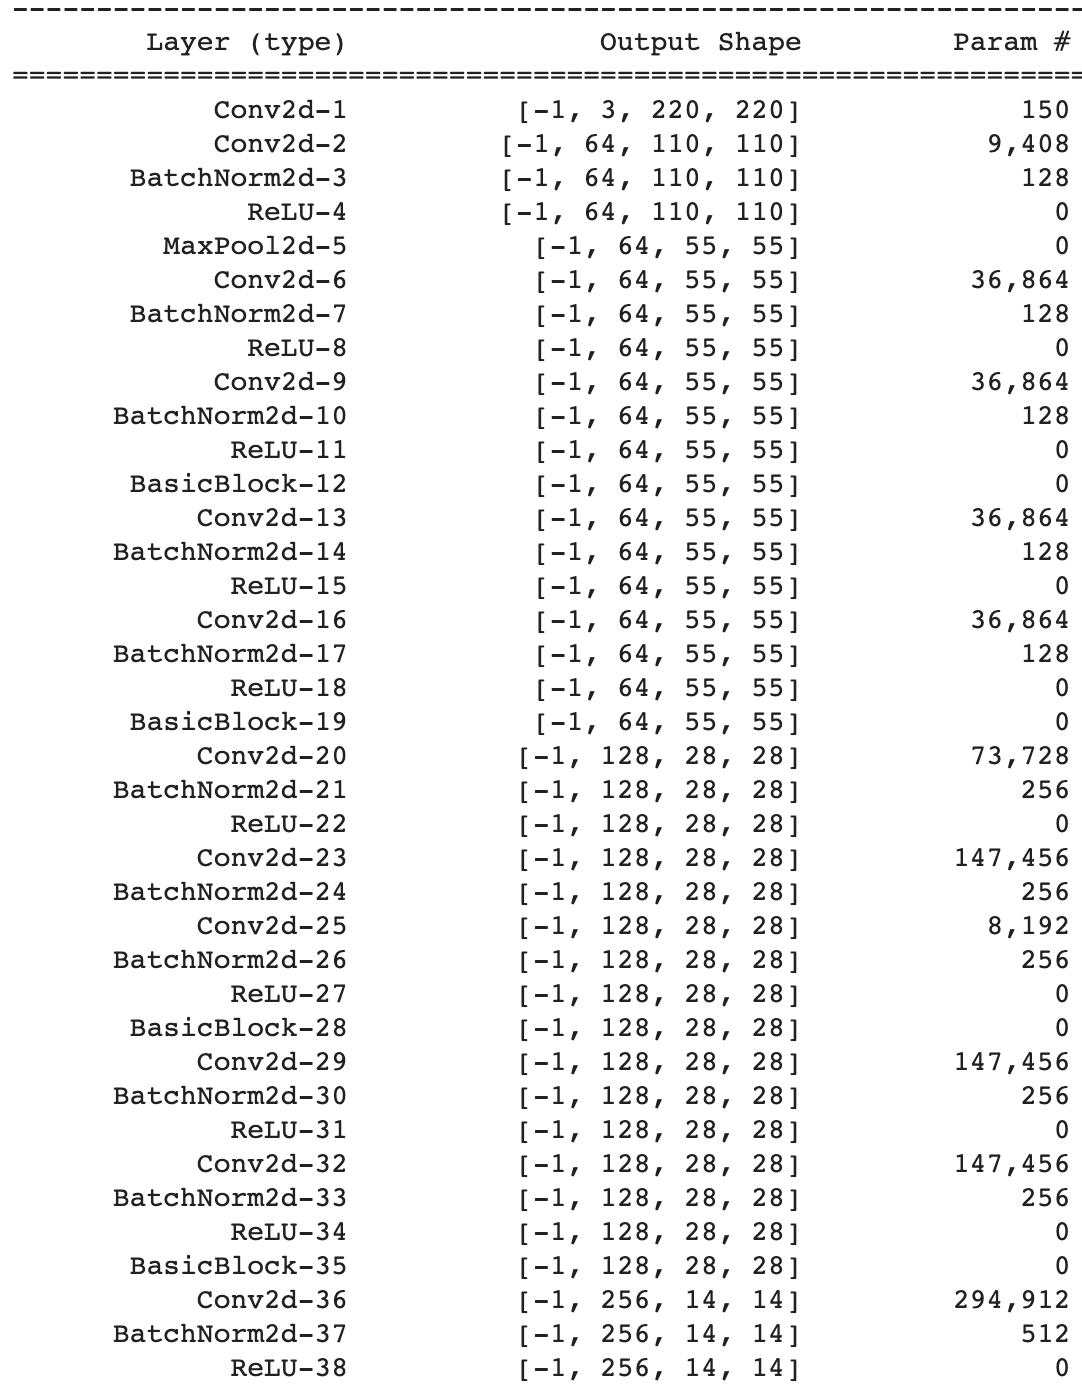
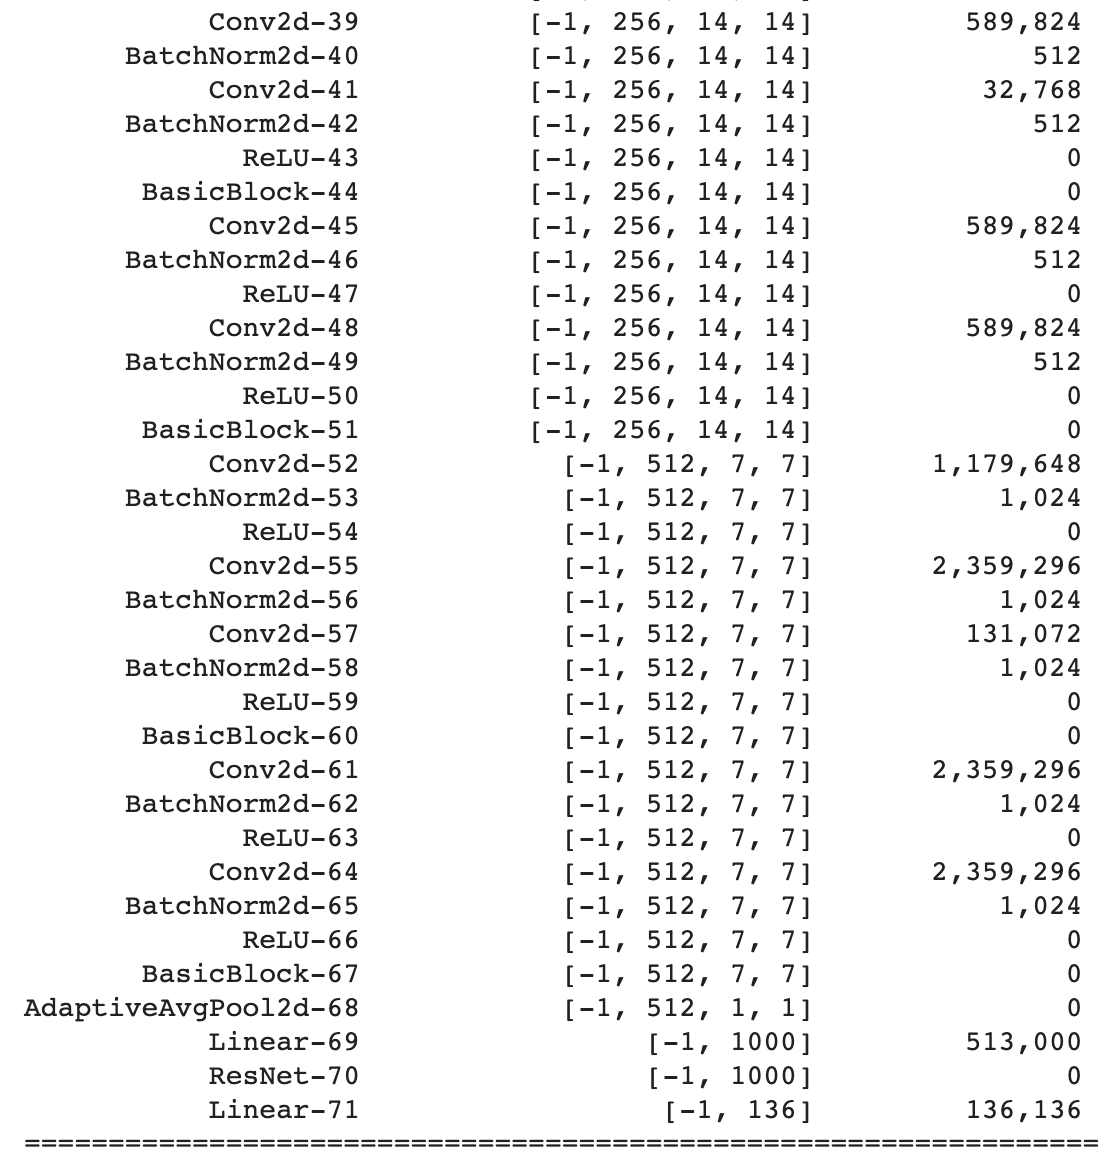
For the actual CNN, as per the guidance in the spec, I chose to build on the existing ResNet model which is used often for computer vision. The only changes I made were to add an extra convolutional layer in the beginning and a fully connected layer at the end. The reason behind doing so was so I could only pass in 1 channel (as the image is greyscale) and get an output in the desired shape (58 keypoints x 2 points for each). For the hyperparameters, since the model takes ~1-2 hours to train, I was not able to do full hyperparameter tuning but tested the training loss on small subsets of the data and chose the following parameters: Learning rate 1e-3, Batch size 64 and 10 epochs. The detailed architecture can be seen below:
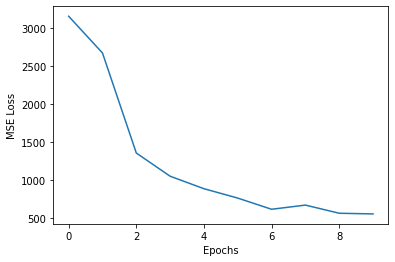
After running the model for 10 epochs, the following was the change in the Training MSE loss:
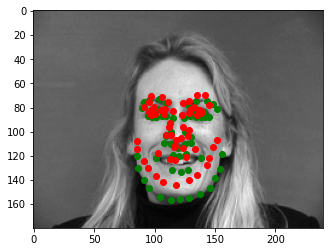
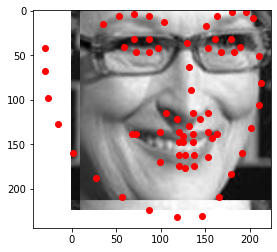
We can also visualize the results on some of the images in the test set. Generally, the model performs well but trends to struggle in distinguishing between the chin and the lips since they have similar shapes and could both be recognized by the same filter, which leads to some of the errors.
Some of the strong examples:
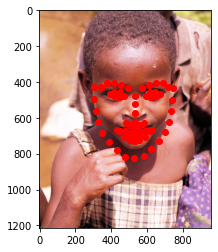
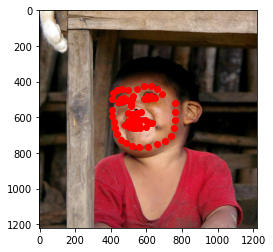
Less successful examples (All of them detecting the keypoints higher than they actually are):
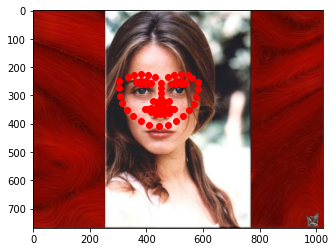
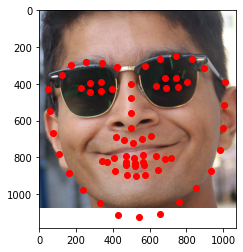
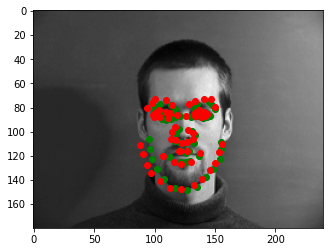
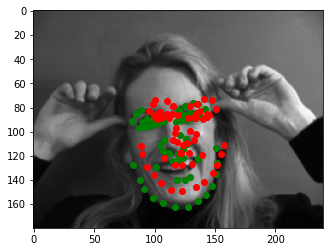
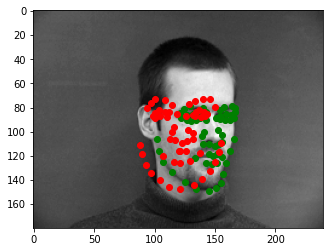
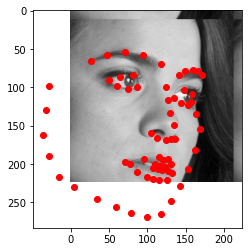
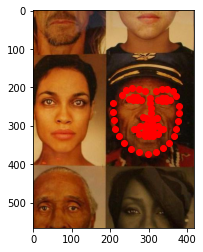
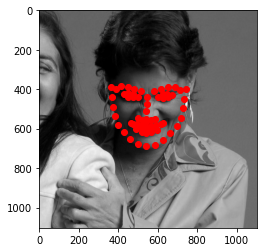
On submitting to Kaggle, my MSE score was 57.05850 and my submission was under "Shreyans Sethi" here. I also used the trained model to predict the keypoints on some of my own images and the results can be seen below. In the first image on the left, it gets the width of the face generally right and it is interesting to see that it tries to predict the placement of the eyes despite the sunglasses. In all 3 images, the eyebrows are very well matched whereas lip predictions are lower than they should be. Eyes are succesful for the right image but not as much for the middle image.