Part 1: Nose Tip Detection
DataLoader
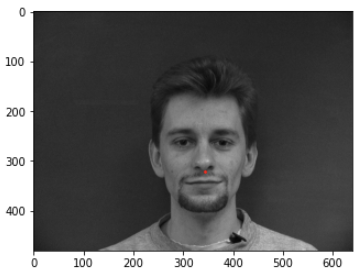
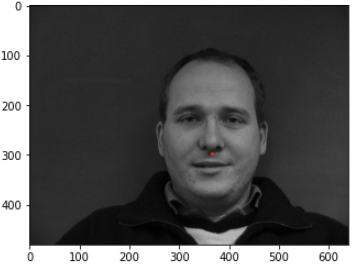
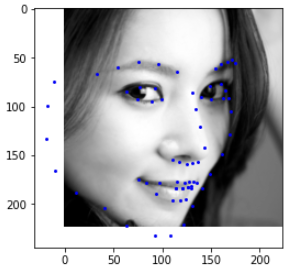
We first use the data from the IMM face dataset to create a DataSet and DataLoader in order to manipulate the data. In the DataLoader, we performed a transformation to rescale the image to a smaller 60x80 size. The DataSet included images and the nose keypoints. Some samples are shown below:
Convolutional Neural Net
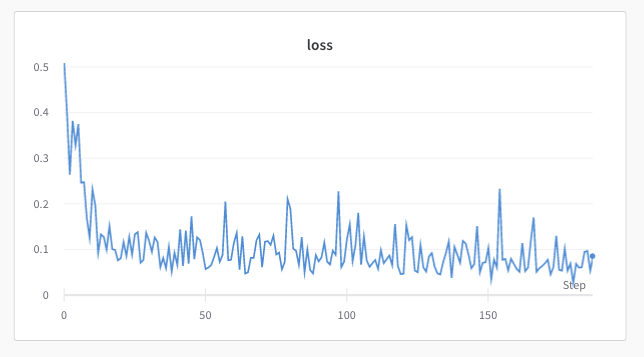
Using PyTorch, I created a Convolutional Neural Net trained on images with the nose point labeled. The input to the neural net are 60x80 images and it outputs a coordinate x and y to make 2 outputs. The CNN I used to train used a kernel size of 5, 3 convolutional layers, and 2 fully connected layers. I tried out different numbers of epochs and learning rates and ended up deciding to use at 20 epochs to attempt to get the network to learn the different poses. I also tried out different values for convlutional parameters and ended up deciding on 8, 16, 24 for the 3 convolutional layers because too less and it would not be able to learn the features and too many and it would not be able to find an efficient way to leearn the features.Loss Function and Optimizer
We used MSE Loss as the loss function. I was able to train the network using 20 epochs and toward the end, it was converging on a loss and unable to decrease with further training. Here is the Training and Validation loss graph where blue is the training loss and orange is validation loss.
Results
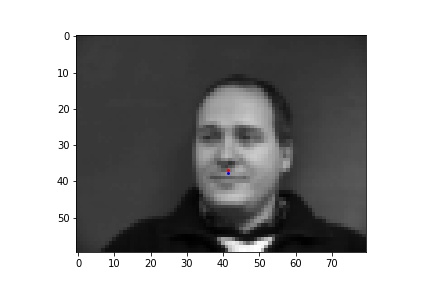
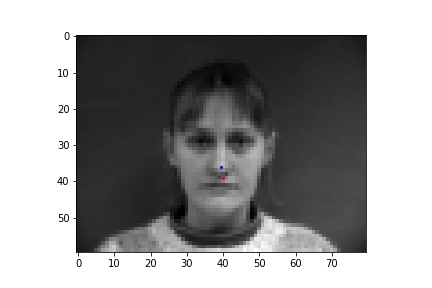
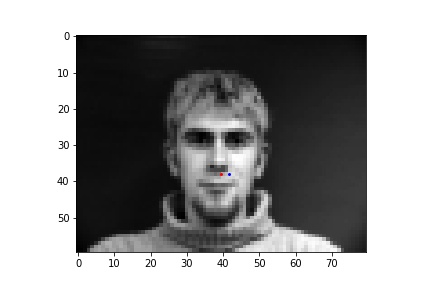
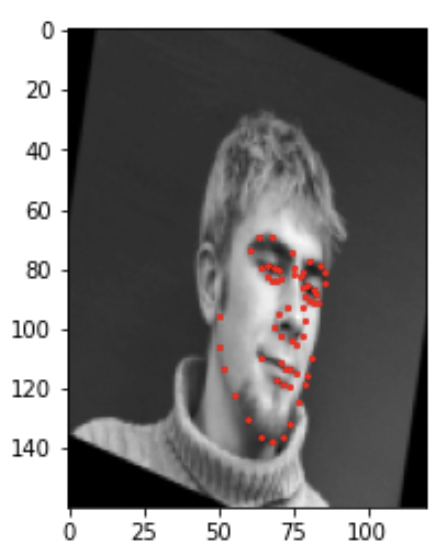
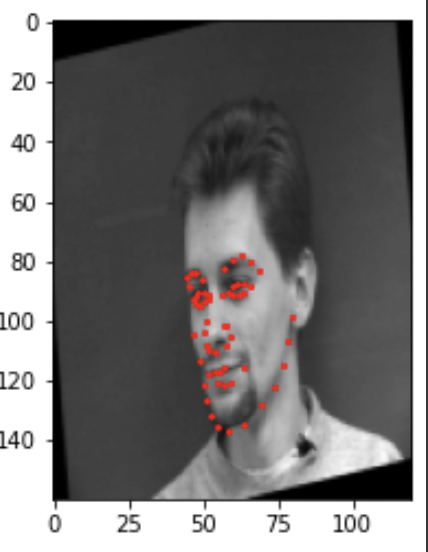
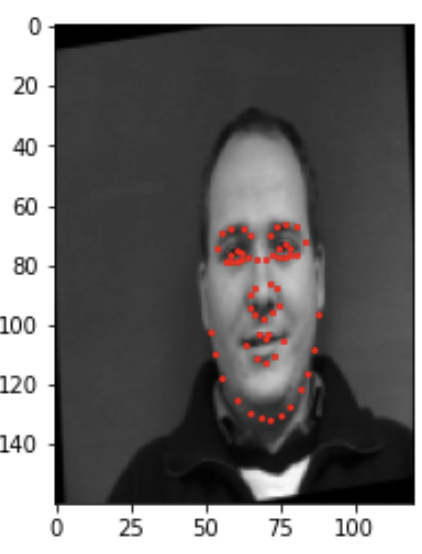
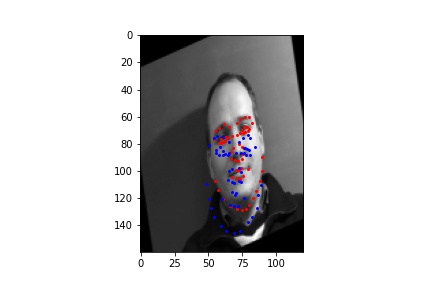
The network was okay at detecting nose keypoints, however if the nose was not in the center of the image with the person facing straight it was poor at detecting the nose.Here are some nose keypoint detections that worked, where the red point is the label and blue is the predicted.
Here are some nose keypoint detection that did not work as well
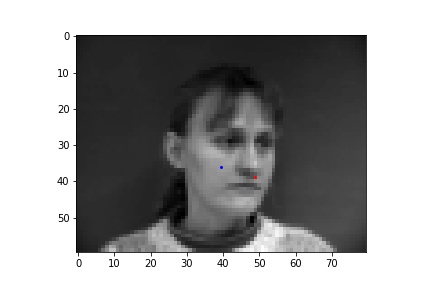
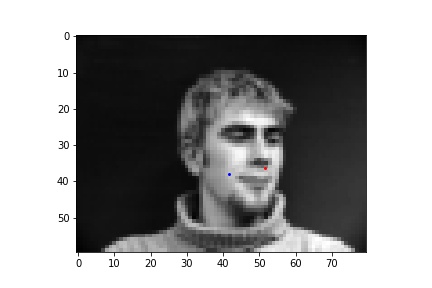
As you can see, when the faces are turned to a side, the neural network is poor at detecting the proper place of the nose. This can be improved with more data where faces are turned to one side or using data augmentation to create altered data.
Part 2: Full Facial Keypoints Detection
DataLoader
We first use the data from the IMM face dataset to create a DataSet and DataLoader in order to manipulate the data. In the Dataloader, we use data augmentation to create a more robust dataset using the smaller dataset we have available. In the Dataset, we add a transformation with rotation, add noise to the image, and use color jitter for contrast.Here are some examples of images in the dataset:
Convolutional Neural Net
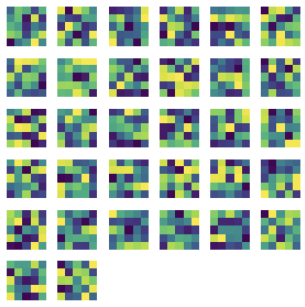
Using PyTorch, I created a Convolutional Neural Net trained on images with the face points labeled. The input to the neural net are 160x120 images and it outputs 58 coordinates x and y to make a total of 116 outputs. These coordinates are all labeled facial keypoints. The CNN I used to train used a kernel size of 5, 2 padding, 2 stride, and batch size of 12. After alot of tweaking layers of the convolutional neural net I ended up having 5 convlutional layers of side 32, 64, 128, 256, and 512. Then I added 3 fully connected layers with 4 pooling layers. I also ended up using 20 epochs to train.As the convolutional neural net trained, it was able to learn a set of filters as shown below. Using these filters it was able to detect which combination would lead to detecting certain facial features.
Loss Function and Optimizer
We used MSE Loss as the loss function and the validation set and training set loss is shown below with blue as the training set and orange as the validation set.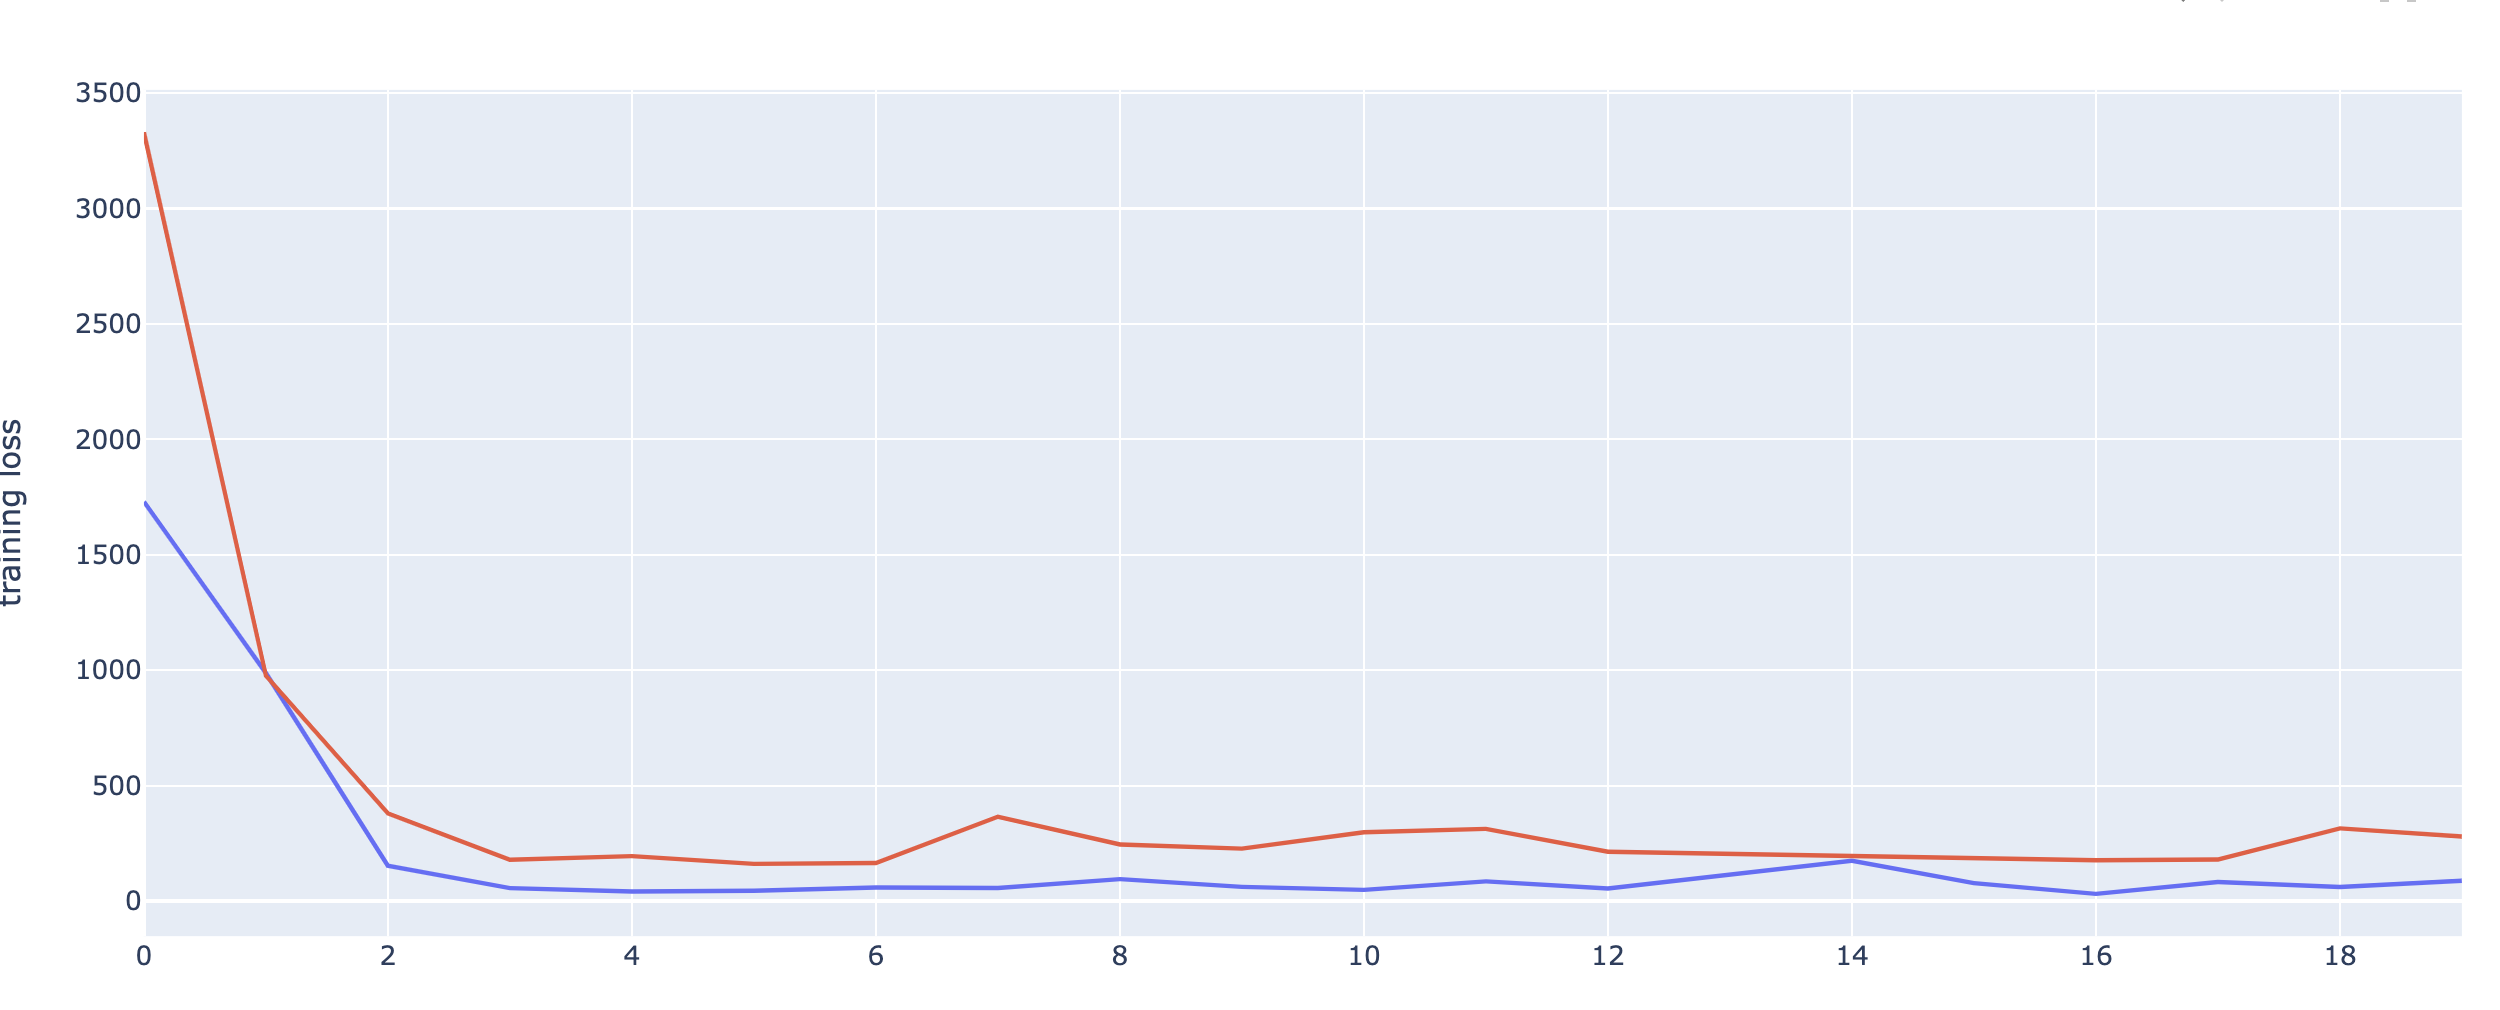
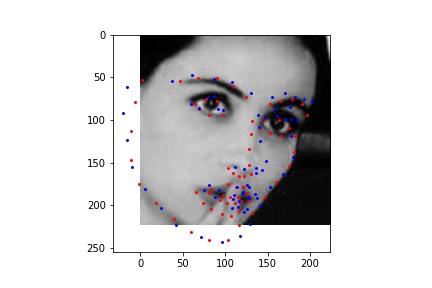
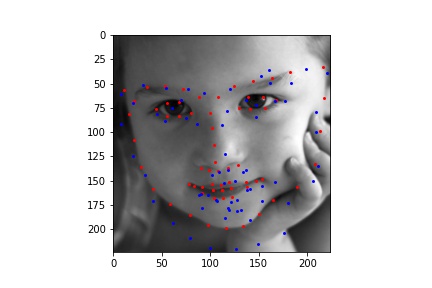
Results
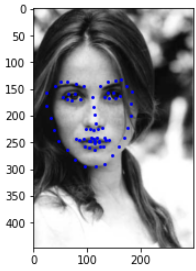
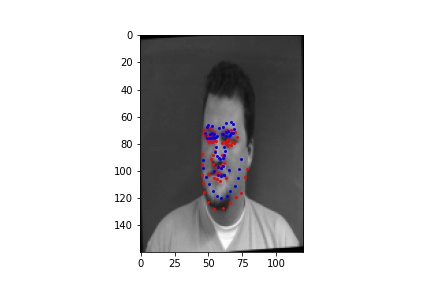
The results were decent when the face was in the middle and pointing forward, however the neural net was still not great at detecting rotations and head turns.Here are some facial keypoint detections that worked, where the red point is the label and blue is the predicted.
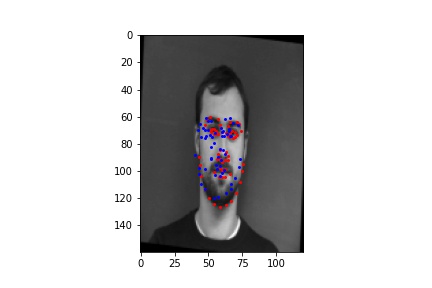
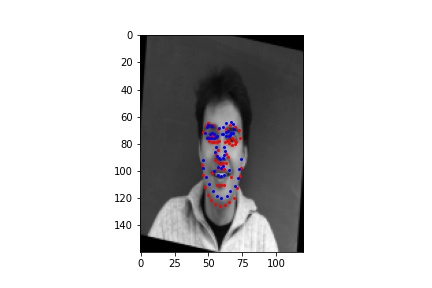
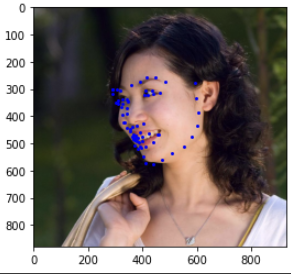
Here are some facial keypoint detections that didn't worked as well.
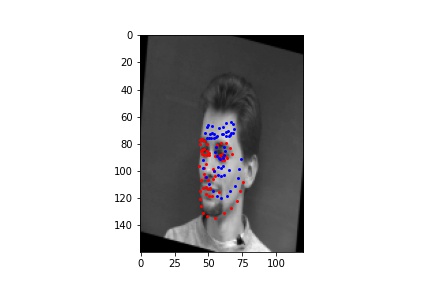
The Neural network was especially having a hard time with both rotation and head turns which led to incorrect predictions. However it learned the typically shape of facial features pretty well and was able to work well for straight faces with slight angles. There wasn't neary enough data in order to train more with different angles. When I added the angle transformation the loss became alot higher and was worse at predicting because it had to account for another factor in the image and didn't learn it as well.
Part 3: Train With Larger Dataset
DataLoader
We use the data from the ibug face in the wild dataset for training on a more diverse set of faces. We will create a DataSet and DataLoader in order to manipulate the data and found that localizing the points around 0 for the landmarks helped our network train better, so that landmarks were from -0.5 to 0.5 greatly improved the neural network performance. We then also tranformed the image into size of 224x224 for inputing into our neural network.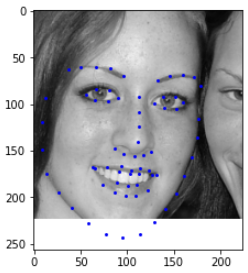
Convolutional Neural Net
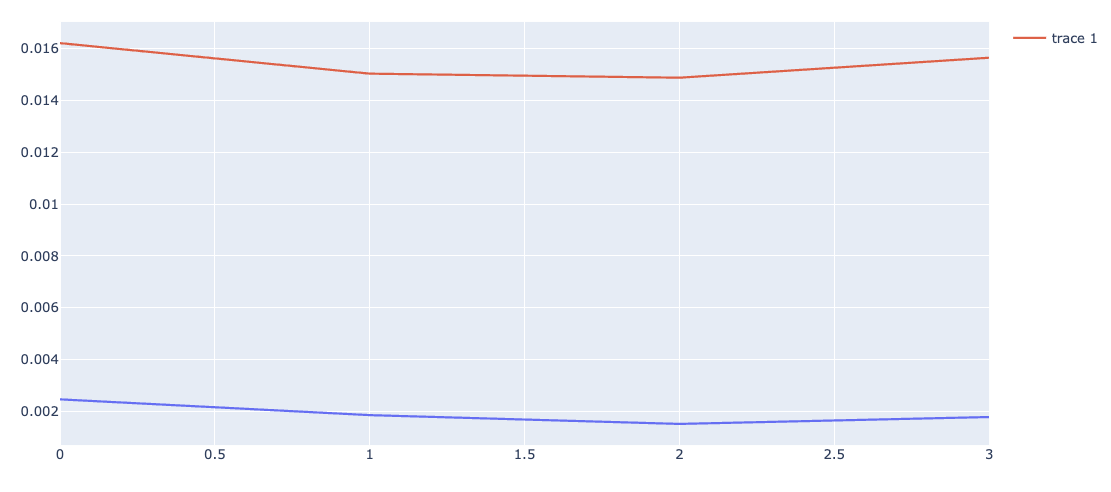
For part 3, I decided to use the ResNet18 to train on the images in the ibug dataset. I had to adjust the input parameters to take in the images of size 224x224 and to output 68 points of x and y for a total of 136 outputs. I decded to set the first convolutional layer to have size 64 with kernel size of 7, stride of 2, and padding of 3. For the final fully connected layer, it outputs 136 points. While training, since the dataset was already huge I set it to use 8 epochs, however I saw that the validation loss was going up and ended up stopping the run at 4 epochs. I also played with the learning rate and found that at the start it might be helpful to start with a larger learning rate and slowly make it smaller as you go onto more epochs.I used MSE Loss as the loss function and the loss graph for the first part of training is shown below.
Since I only used a couple of epochs the validation graph ended up being very minimal. The orange line is the validation error and the blue line is the training error at the end of the epoch
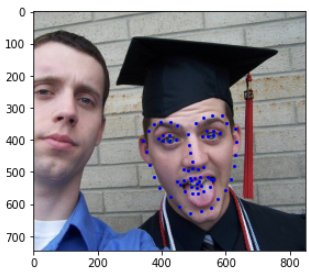
Results
Here are some results from the validation set. The red points are labels and blue is predicted points. The resnet ended up working very well and was ablee to get points very close to the labels in most of all the images in the validation set. Some of the points that are outside of the bounding box are off which makes sense since the cropped bounding box is passed into the neural net and it can only infer where the face would end up being. However for the most part the shape of the face is correct and it is able to correctly find where it is and was even able to decently well with the face in different directions. This may be because we had a massive dataset that was not set so each image has no specific pose or direction and the network had to learn exactly how to predict the direction and rotation.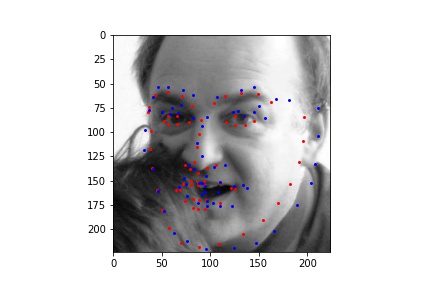
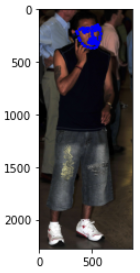
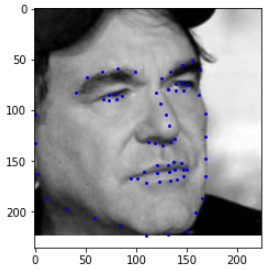
Here are some results from the test set sent to Kaggle Competition where blue are the predictions. I ended up with a MAE loss of 13.07