Cs 194 Project 5:

Facial Keypoint Detection with Neural Networks

Part 1: Nose Tip Detection

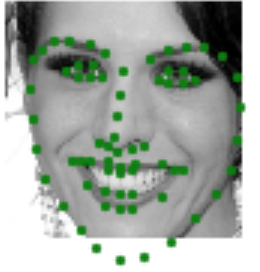
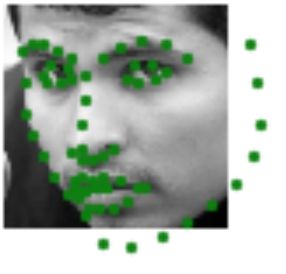
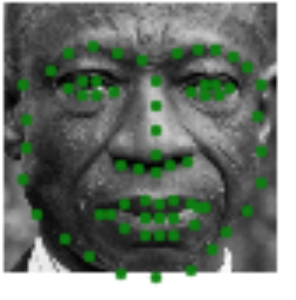
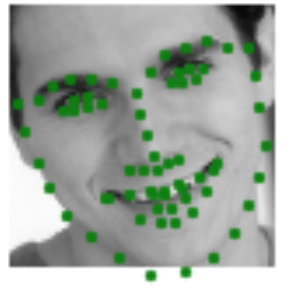
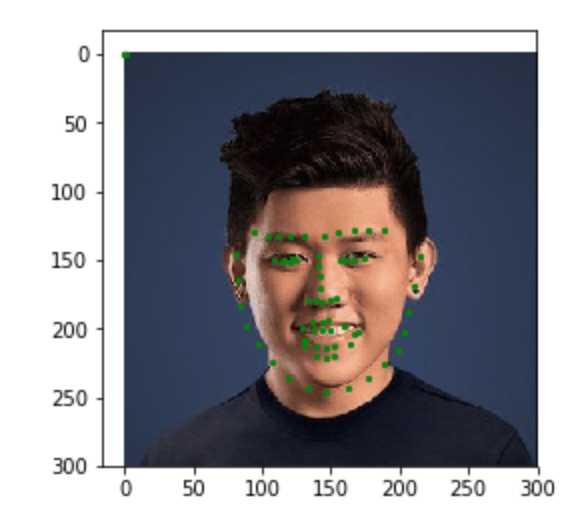
The goal of this part is to be able to predict the location of the nose keypoint on an input face image using a convolutional neural network. The first step is to create a dataloader for our face dataset. Here are some sample images from my dataloader visualized with the ground-truth keypoint.


Convolutional Neural Network Architecture

  • Conv2d: 1 input channel, 6 output channels, 5x5 kernel
  • Relu
  • MaxPool (2x2)
  • Conv2d: 6 input channel, 16 output channels, 5x5 kernel
  • Relu
  • MaxPool (2x2)
  • Conv2d: 16 input channel, 32 output channels, 5x5 kernel
  • Relu
  • MaxPool (2x2)
  • Fully Connected 768 x 120
  • Relu
  • Fully Connected 120 x 2
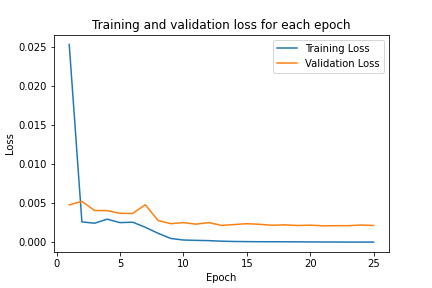

Training

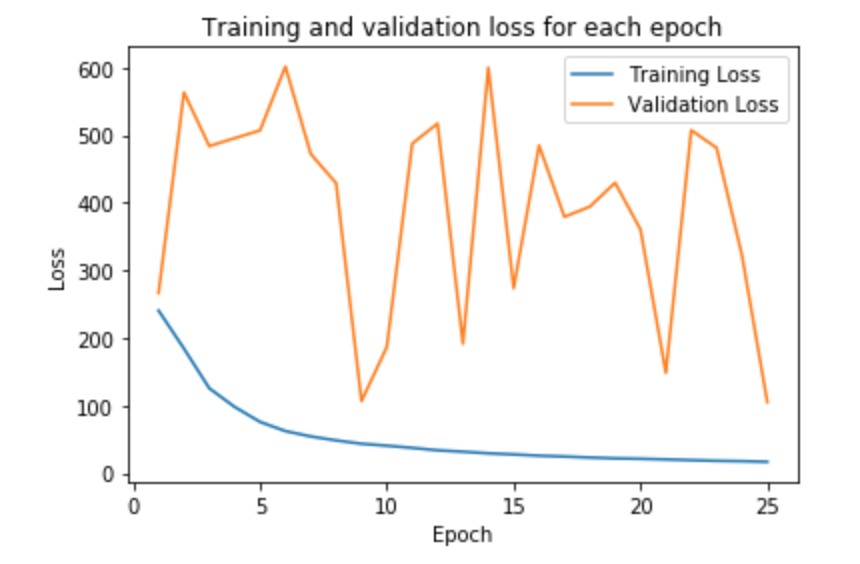
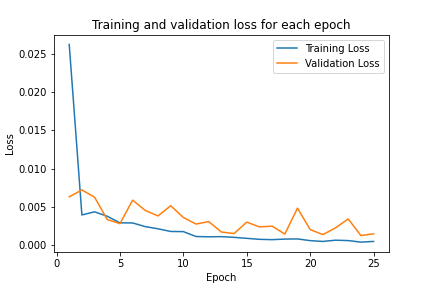
We now train our model for 25 epochs, using adam optimizer, MSELoss as our criterion, and 0.001 as the learning rate. Shown below is the plot for the training and validation MSE loss.


I also did hyperparameter tuning to see if I could make the model performance better. I first tried varying the learning rate to be 0.05. I then tried modifying the model architecture by increasing the sizes of the convolutional layers, and also adding one more fully connected layer. Here are graphs of the training and validation accuracy over time

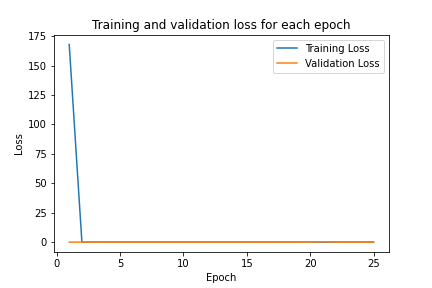
Varying Learning Rate

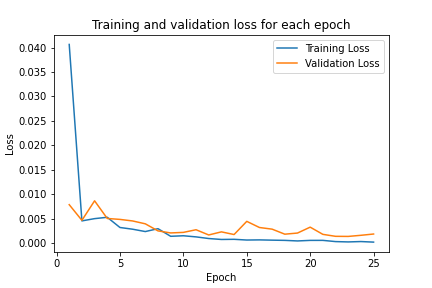
Changing model architecture
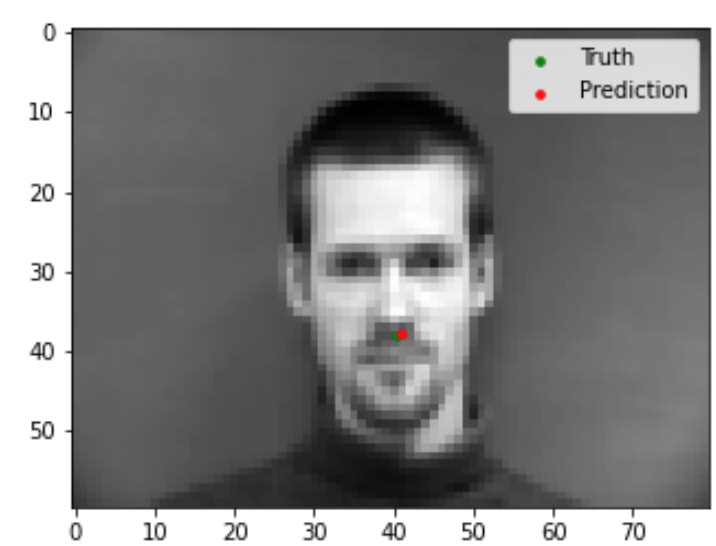
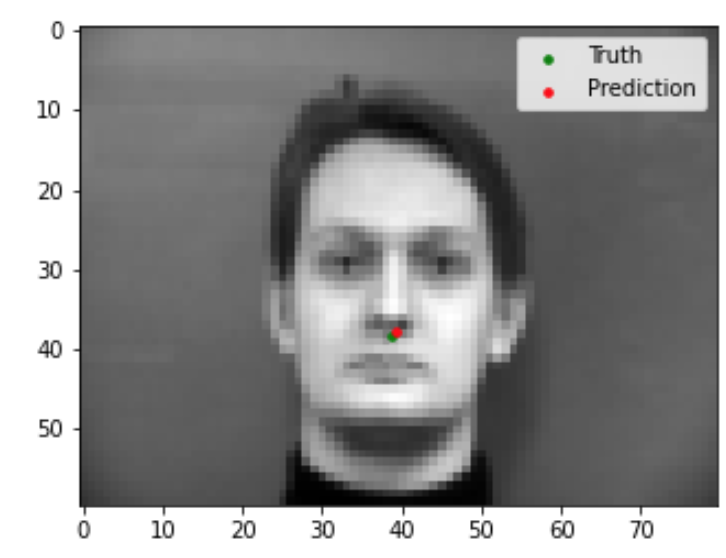
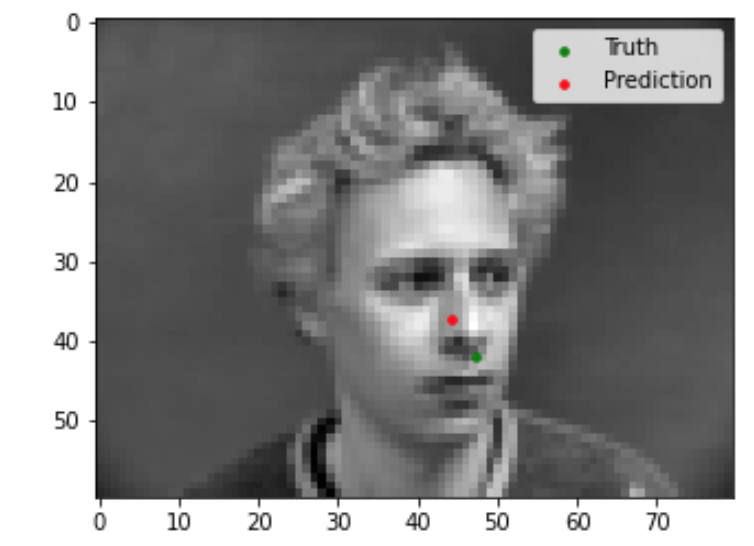
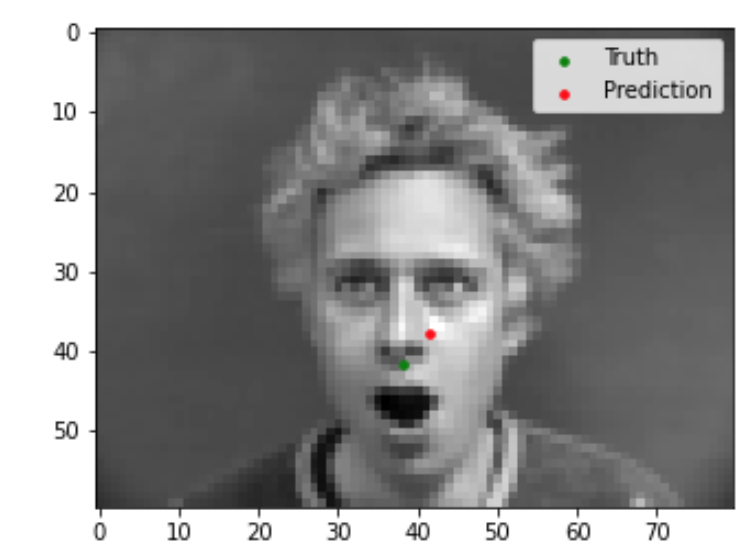
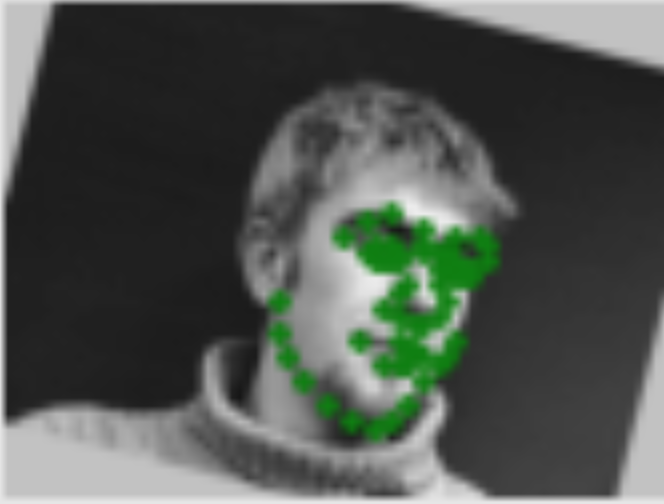
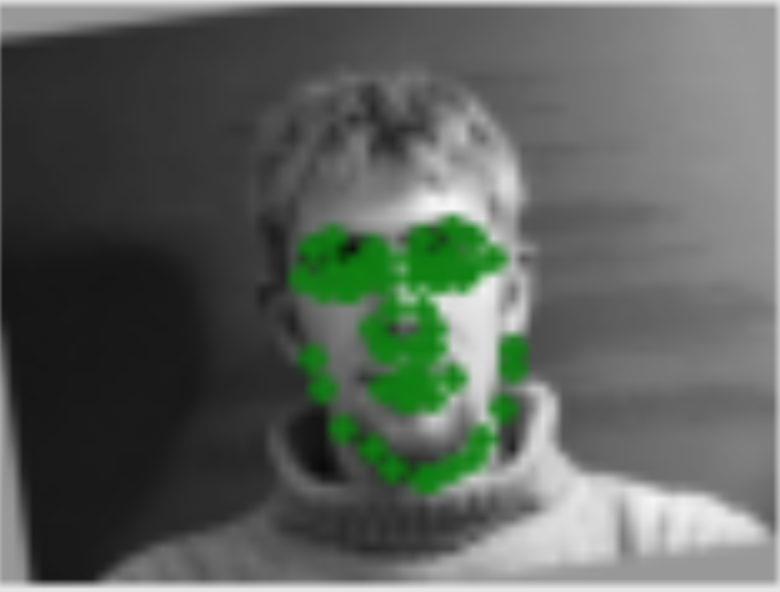
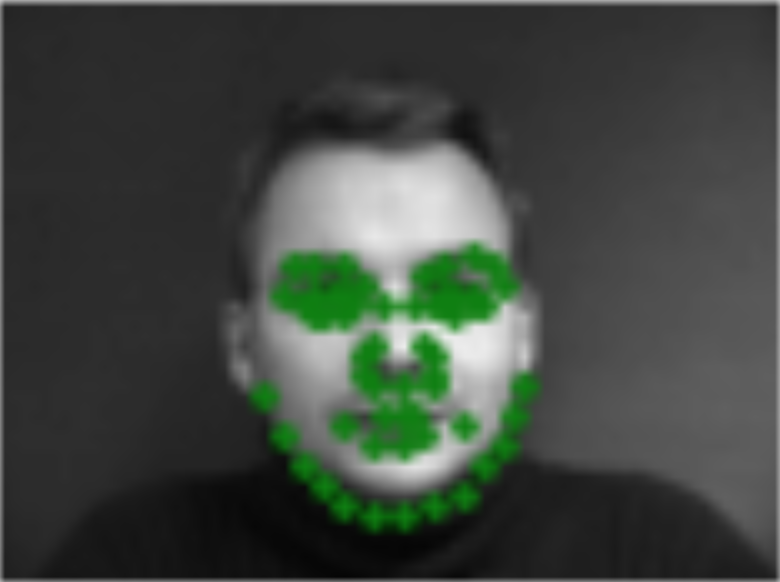
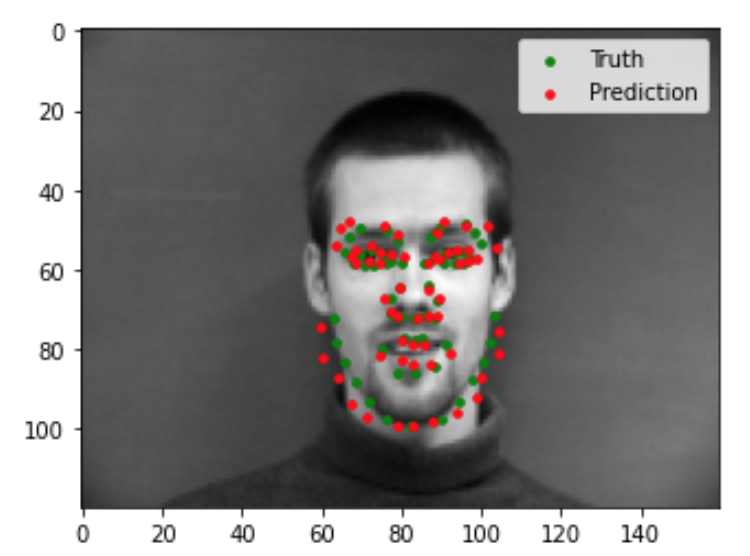
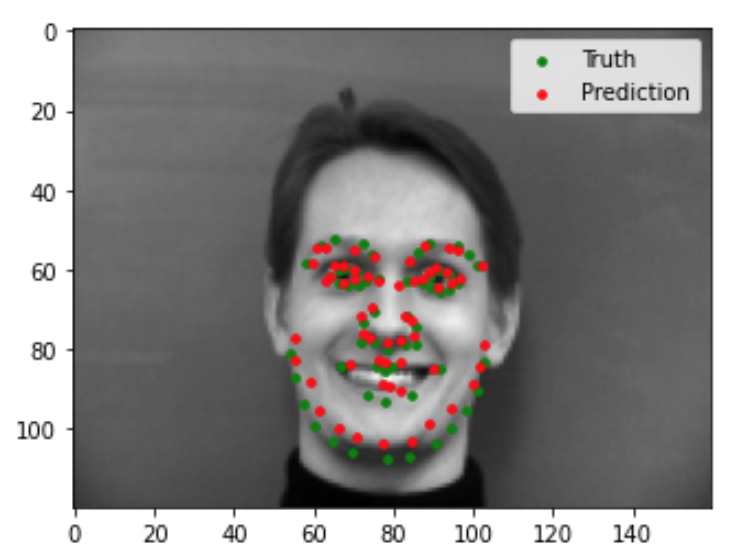
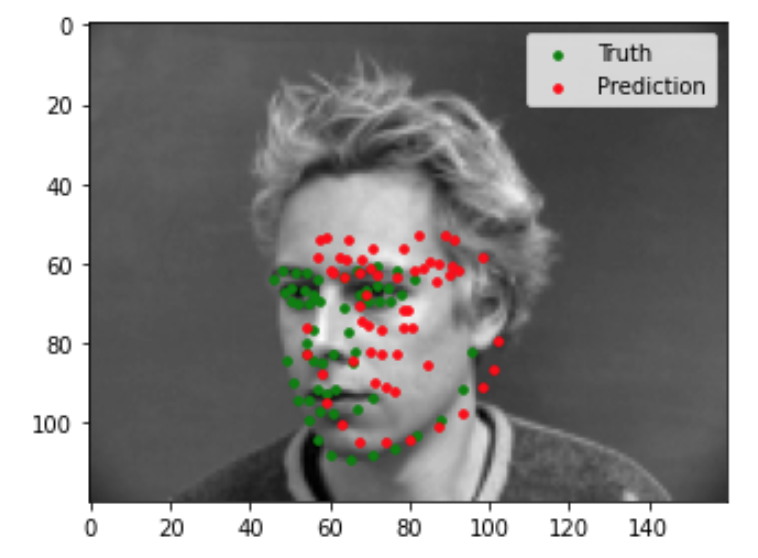
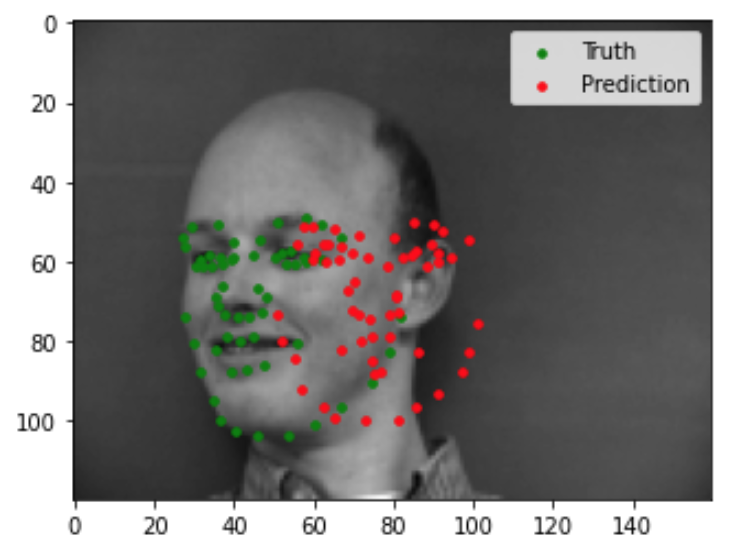
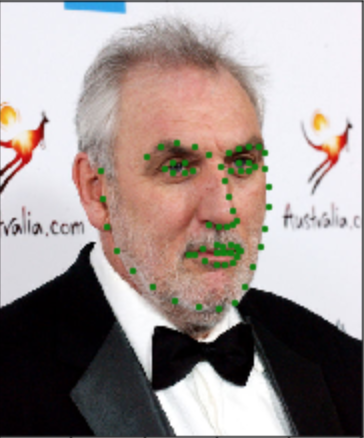
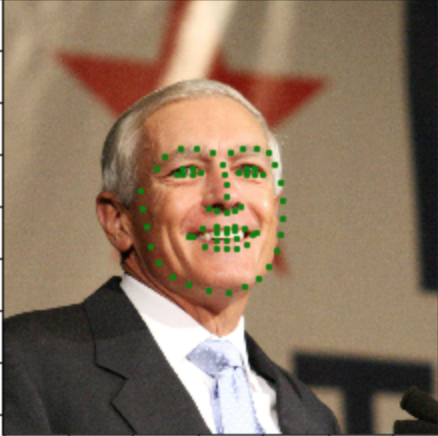
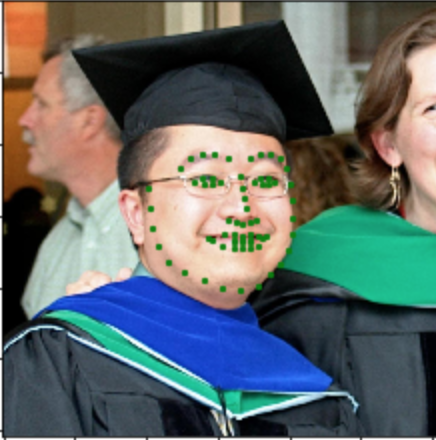
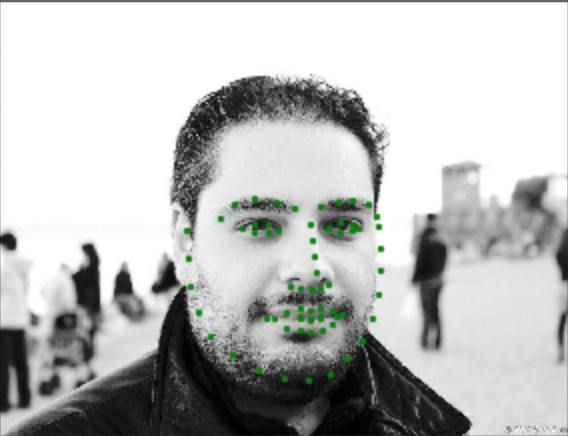
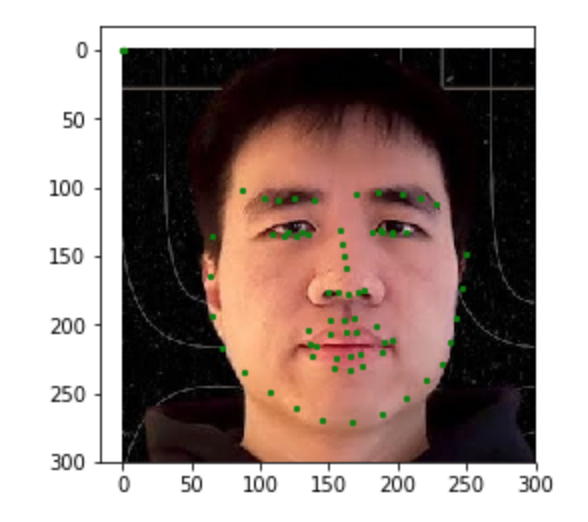
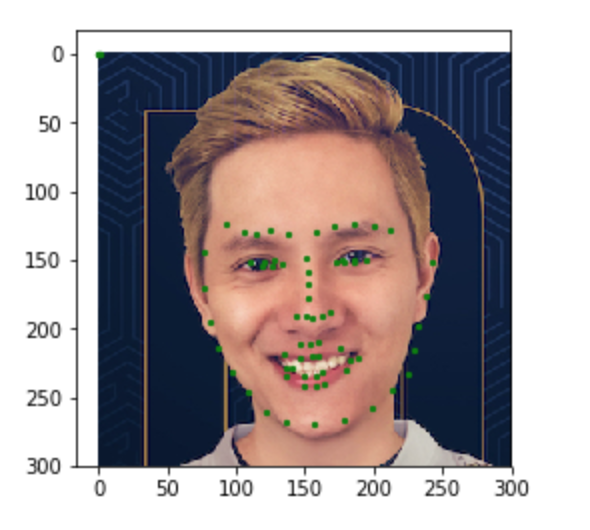

Evaluation

Now we can evaluate our trained model to see the quality of its predictions. Shown below are 2 images that the model did well on, and 2 images that the model did not do so well on. Based on these examples, it seems like my model is able to generalize well to images where the face is in a standard orientation with the mouth closed. In the two images that my model did poorly on, the person's face is turned sideways in the first, and the mouth is open in the second.

Part 2: Full Facial Keypoints Detection

We now want our model to be able to detect all facial keypoints in a face image, not just the nose. We also apply some data augmentation to prevent the model from overfitting. I chose to apply small rotations to images between -15 and 15 degrees to images as my method of data augmentation. Here are some samples from my dataloader:


Convolutional Neural Network Architecture

  • Conv2d: 1 input channel, 6 output channels, 5x5 kernel
  • Relu
  • MaxPool (2x2)
  • Conv2d: 6 input channel, 16 output channels, 5x5 kernel
  • Relu
  • MaxPool (2x2)
  • Conv2d: 16 input channel, 32 output channels, 5x5 kernel
  • Relu
  • MaxPool (2x2)
  • Conv2d: 32 input channel, 64 output channels, 3x3 kernel
  • Relu
  • MaxPool (2x2)
  • Conv2d: 64 input channel, 128 output channels, 3x3 kernel
  • Relu
  • Fully Connected 1280 x 512
  • Relu
  • Fully Connected 512 x 256
  • Relu
  • Fully Connected 256 x 116


Training

I trained for 25 epochs using a learning rate of 0.01, batch size of 8, adam optimizer, and MSE loss. Here is the graph of training and validation loss:


Evaluation

Shown below are 2 images that the model did well on, and 2 images that the model did not do so well on. Similar to the previous part, my model does well on faces that are in a front-facing orientation. The two images that it doesn't do well on are ones where the person's face is turned to the side. My model may have overfit to frontal-facing orientations, or just does not have the complexity to generalize to different orientations of faces yet.


I also visualized the filters learned in the first and second convolutional layer of our network:


Layer 1:


Layer 2:

Part 3: Train with Larger Dataset

In this part, we train on the ibug face in the wild dataset. For this dataset, I first had to crop our images according to their specified bounding boxes. This was because we only want to feed the face portion of each image into our model. I also applied the same rotation data augmentation technique that I applied for part 2, and also added color jittering. Here are some images with labeled keypoints sampled from our dataloader.


Architecture

The architecture I used for this part is based of Resnet18, with a few modifications to fit our current task. First, I changed the first convolutional layer to have 1 input channel, as our input images are grayscale. Last, I changed the output dimension of the last fully connected layer to 136, to account for 68 keypoints. I left the rest of the layers unchanged.


Training

I trained for 25 epochs using a learning rate of 0.01. Here is the graph of training and validation loss:


Test set images

For my final model, I trained on the entire training dataset (no more training/validaiton split) for 200 epochs. Here are some results of the model in action on some test set images.


Chosen Images

Here are some results of the model in action on some images of top TFT streamers.

Kaggle

For my Kaggle submission, I trained my model on the entire provided dataset for 3300 epochs with a learning rate of 0.01 and batch size of 16. My Kaggle username is Kevin Chen and my Kaggle score is 6.63344

Bells and Whistles

I chose to create a morph sequence using automated keypoints prediction. The images I chose in the sequence are the ones of TFT streamers shown above. Here is the morph sequence: