Part 1: Nose Tip Detection
Dataloader
For part one, we use the IMM Face Database to train a model to detect a nose keypoint. We use a dataset with 40 people and 6
angles per person. The dataset also contains 58 facial keypoints per image. For part one, the first 32 people are our training set
and the last 8 people are the validation set. In order to train our neural net, we need to define a dataloader that will
allow us to iterate through all the images. The dataloader gets the image and the nose keypoint, resizes the image
to 80x60, normalizes the values to be between -0.5 and 0.5, and converts the image and nose keypoint to tensors.
Below are some images with the nose keypoint plotted.
| Images with the nose keypoint plotted |

|
CNN
For this part, our CNNs will have a convolutional layer, max pooling layer, and Rectilinear Unit (ReLU). I used three
convolutional layers. The first had 12 output channels, the second had 20 output channels, and the
third had 32 output channels. The first two had a 5x5 kernel size and the last one had a 3x3 kernel size.
There were two fully connected layers with output sizes of 256 and 2.
Net(
(conv1): Conv2d(1, 12, kernel_size=(5, 5), stride=(1, 1), padding=same)
(conv2): Conv2d(12, 20, kernel_size=(5, 5), stride=(1, 1), padding=same)
(conv3): Conv2d(20, 32, kernel_size=(3, 3), stride=(1, 1), padding=same)
(fc1): Linear(in_features=2240, out_features=256, bias=True)
        (fc2): Linear(in_features=256, out_features=2, bias=True)
        )
Loss Function and Optimizer
Using the Mean Squared Error function as the loss function and the Adam optimizer, I trained my neural network using a learning rate of 0.001 and 20 epochs. To determine this value, I played
around with various variations of different parameters to see what produced the optimal results.
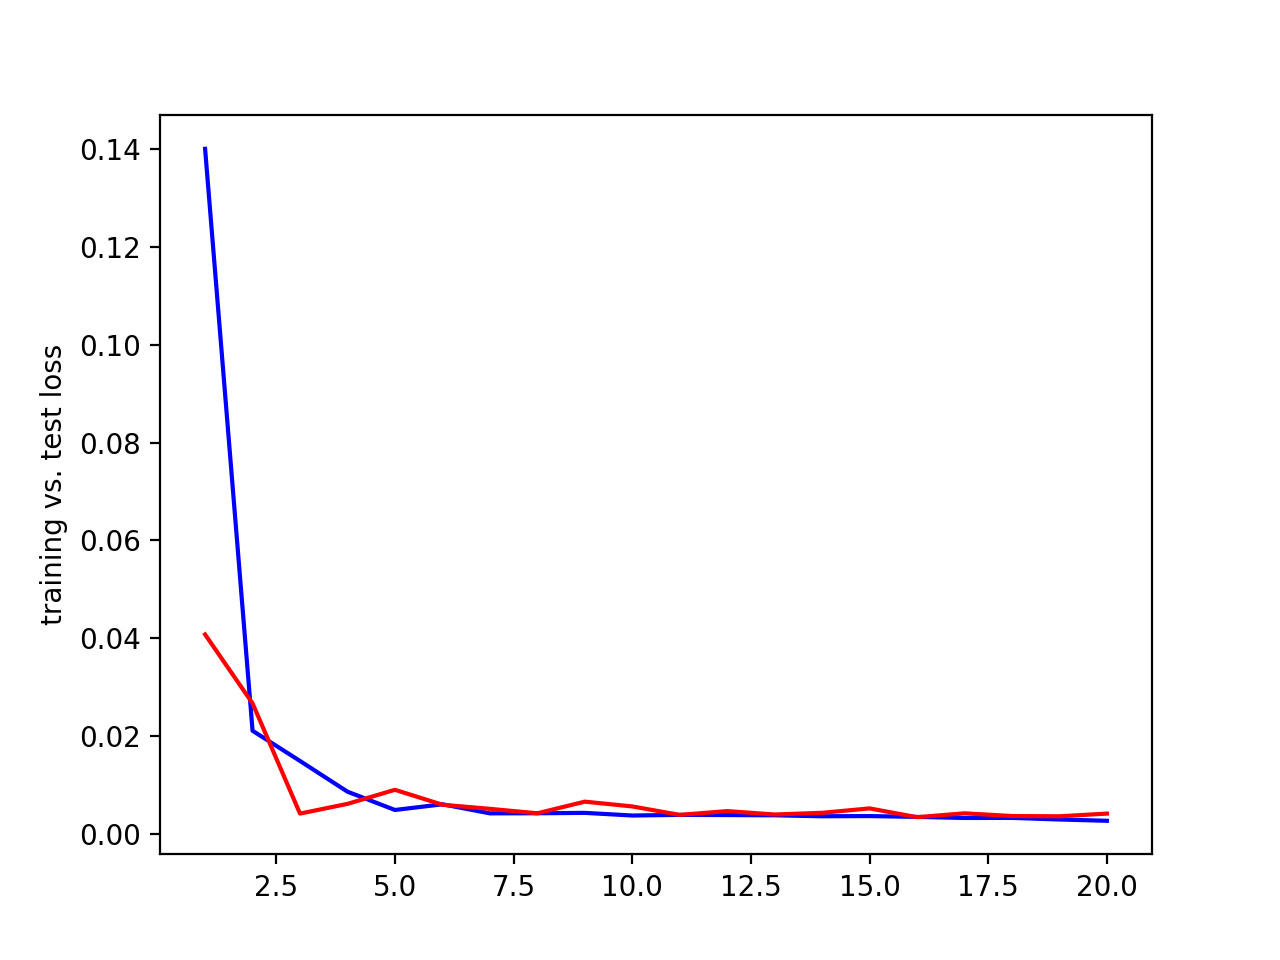
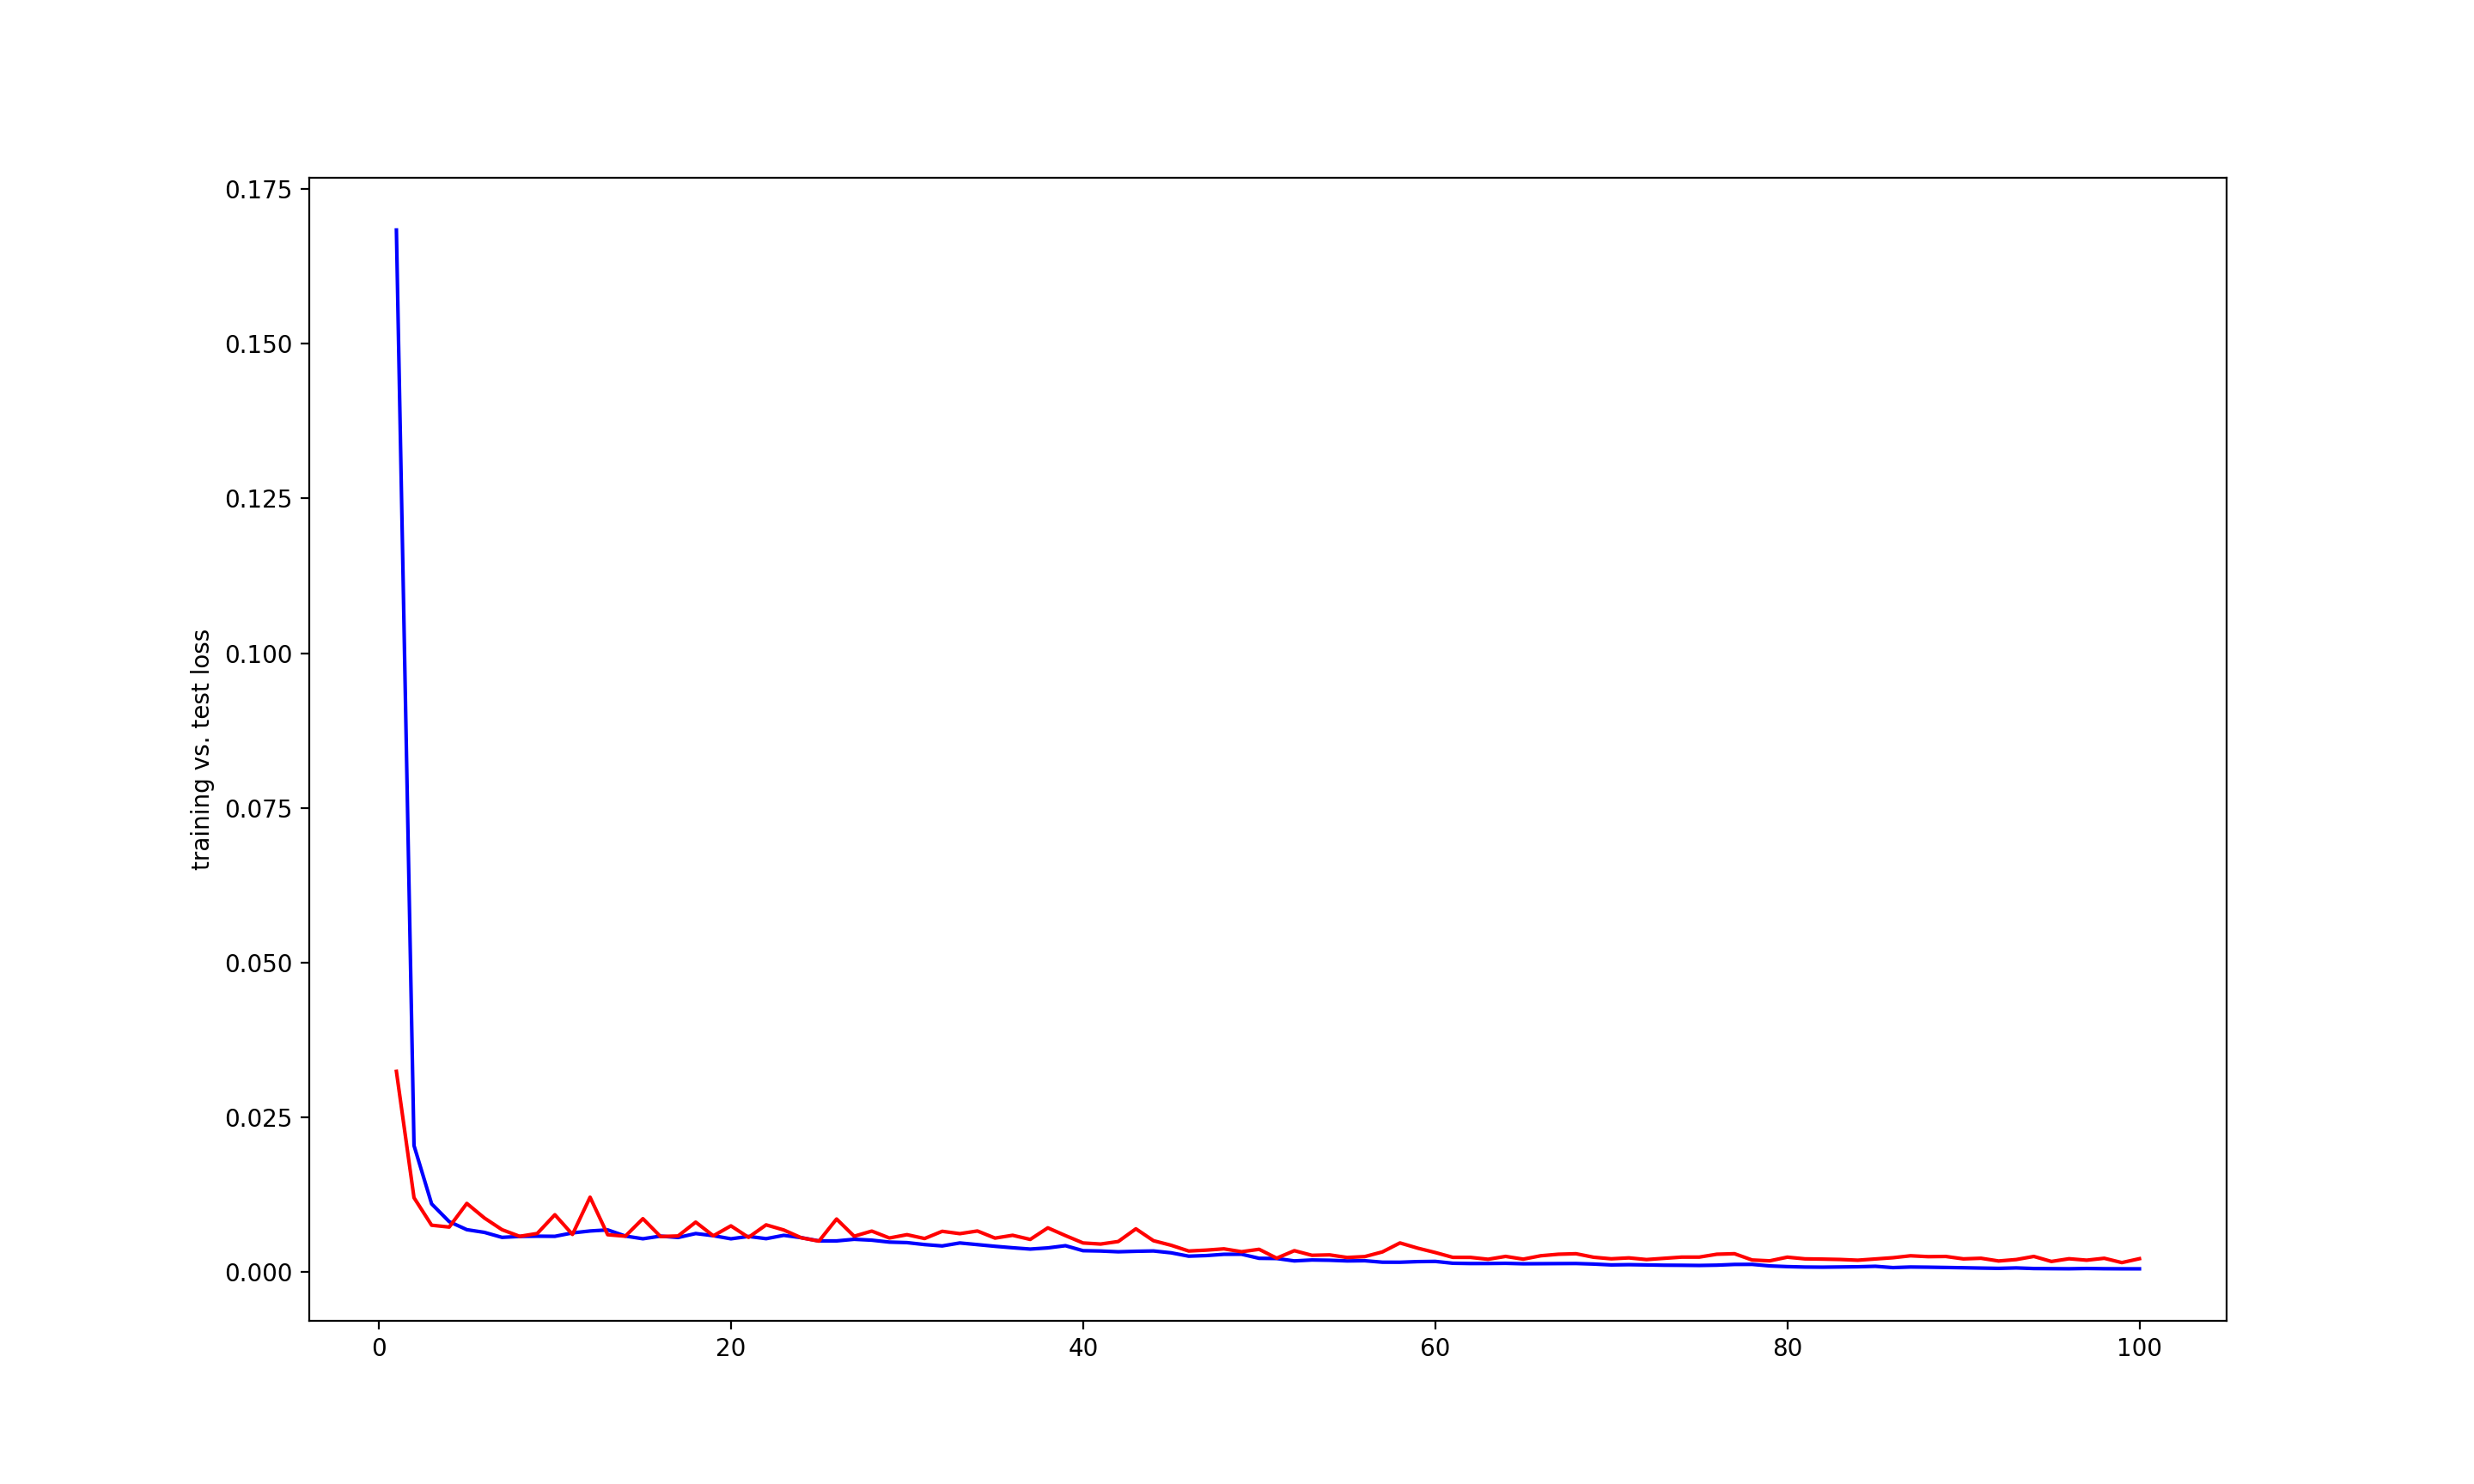
Using 20 epochs, batch size of 40, and a learning rate of 0.001, we get the following result. Blue = training loss, red = validation loss, x axis = epochs, y axis = loss.
Hyperparameter Tuning
I tried various learning rates and filter sizes to see what produced the best results. Below are the results.
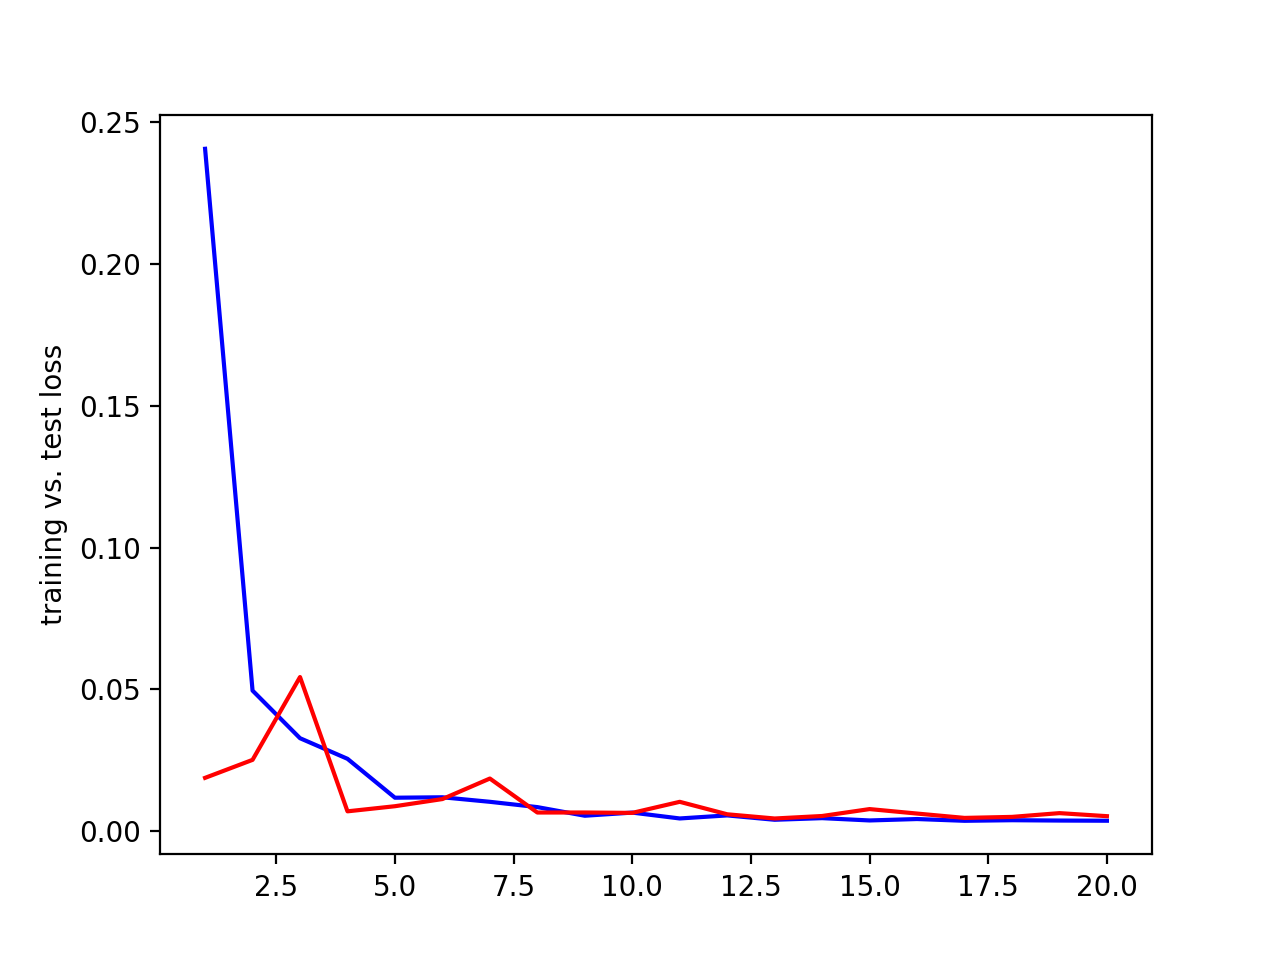
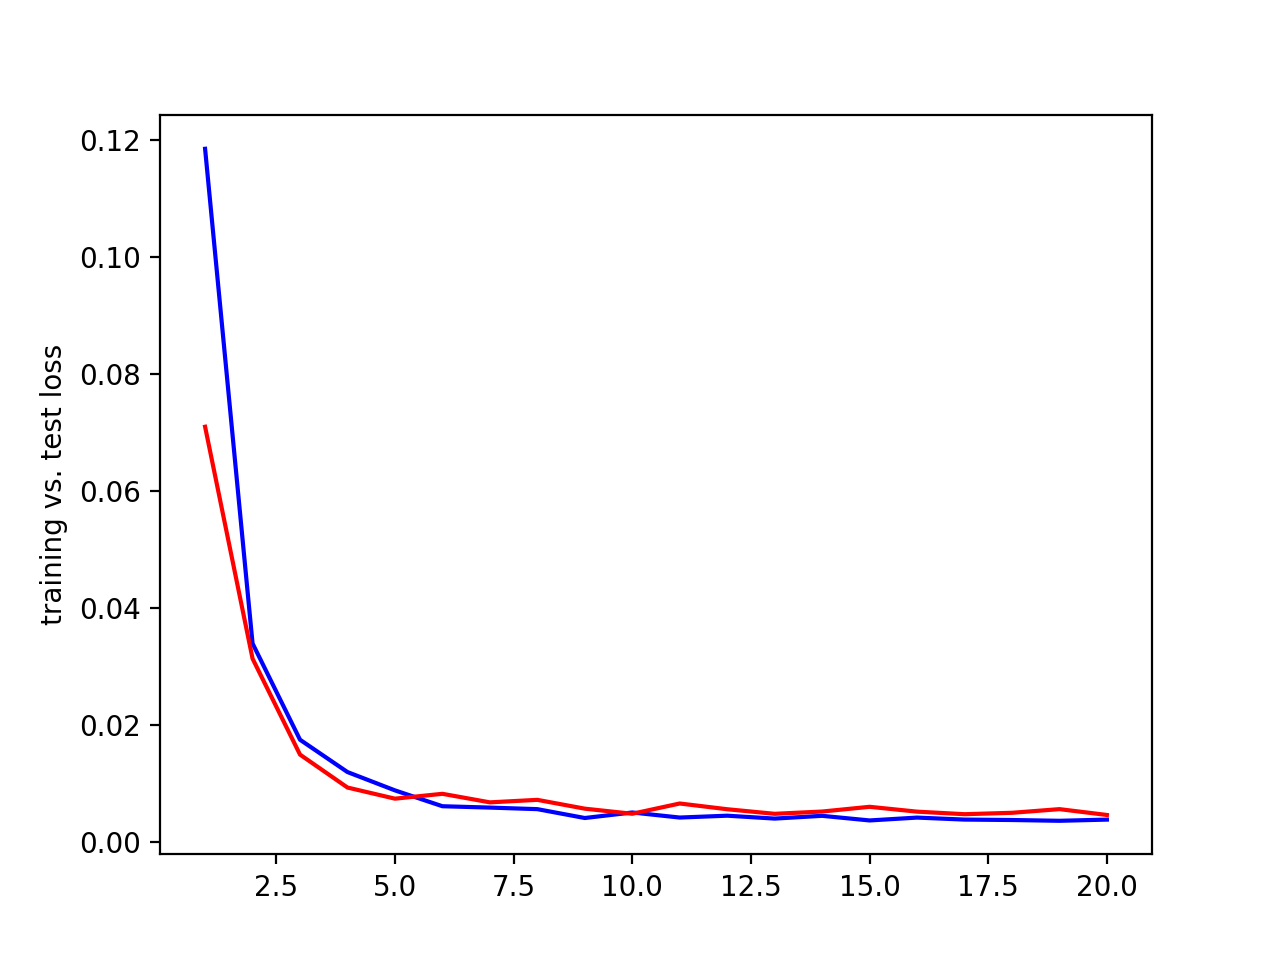
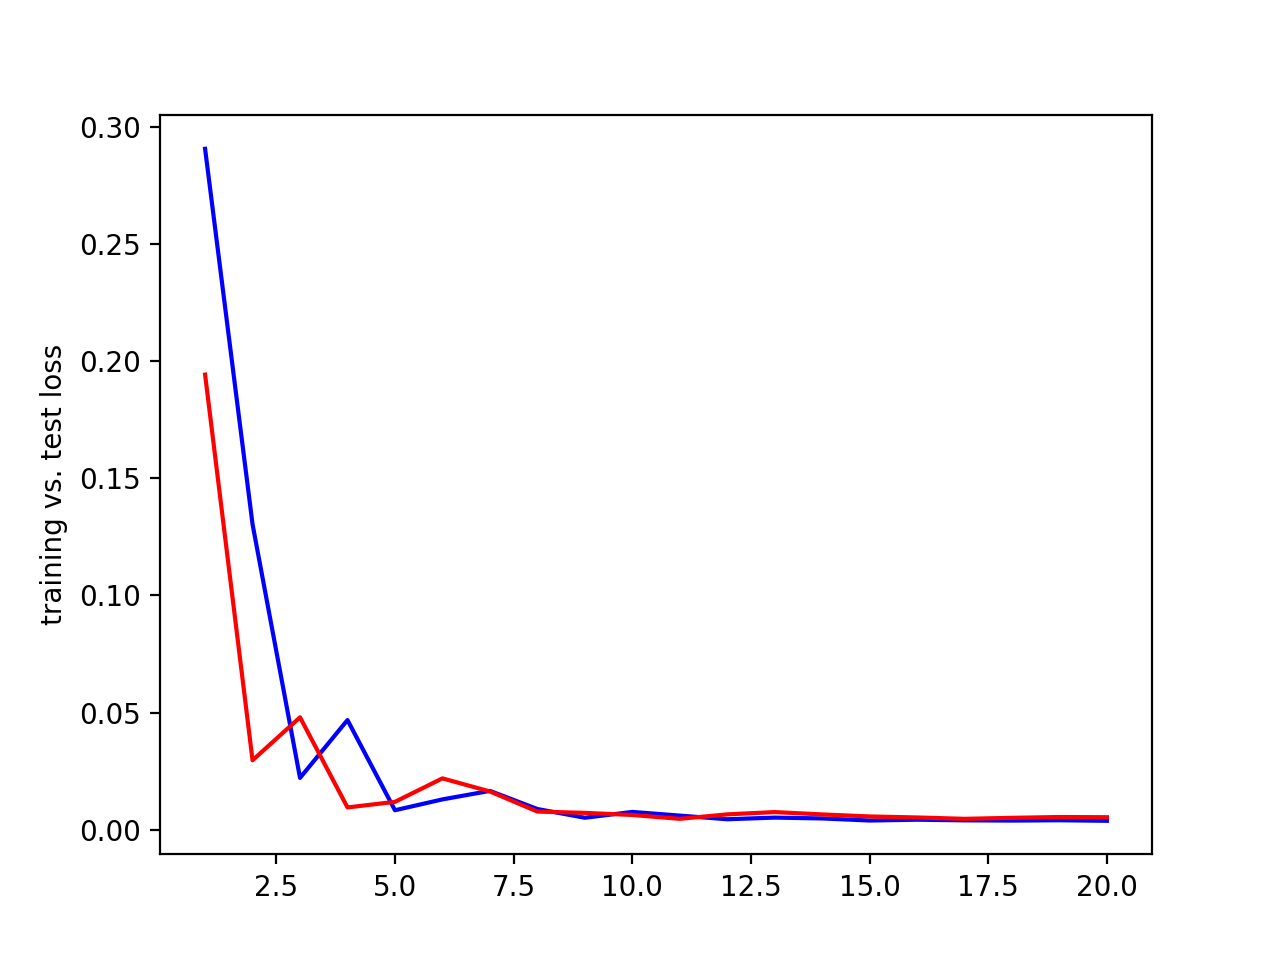
Testing filter sizes. Blue = training loss, red = validation loss, x axis = epochs, y axis = loss.
| 3 convolutional layers with 3x3 filters |
2 convolutional layer with 5x5 filters and 1 with 3x3 filter |
3 convolutional layers with 5x5 filter sizes |
|
|
|
Clearly, the middle one with 2 convolutional layers with 5x5 filters and 1 with 3x3 filter produced the best result. Using these filter sizes,
I played around with different learing rates.
Testing learning rates. Blue = training loss, red = validation loss, x axis = epochs, y axis = loss.
| 0.005 learning rate |
0.001 learning rate |
0.0005 learning rate |
|
|
|
The 0.005 and 0.001 learning rate perform the best. A 0.0005 learning rate took longer to stablize the training loss and didn't perform as well as the 0.001 and 0.005 results.
Results
Sampled image from dataloader with ground-truth keypoints
Train and validation MSE loss during the training process (training = blue, validation = red, x axis = epochs, y axis = loss) with 20 epochs, batch size of 40, 0.001 learning rate, and the CNN described above.
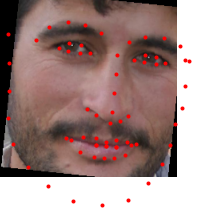
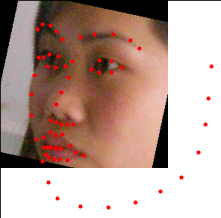
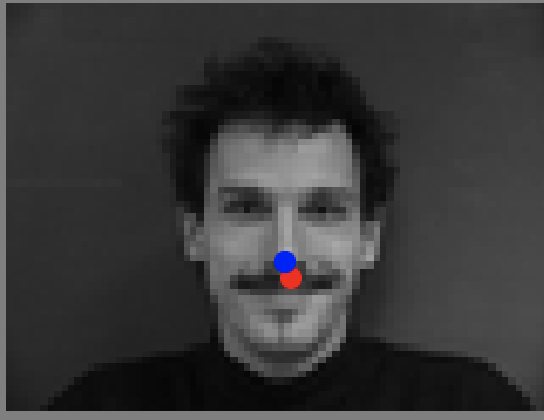
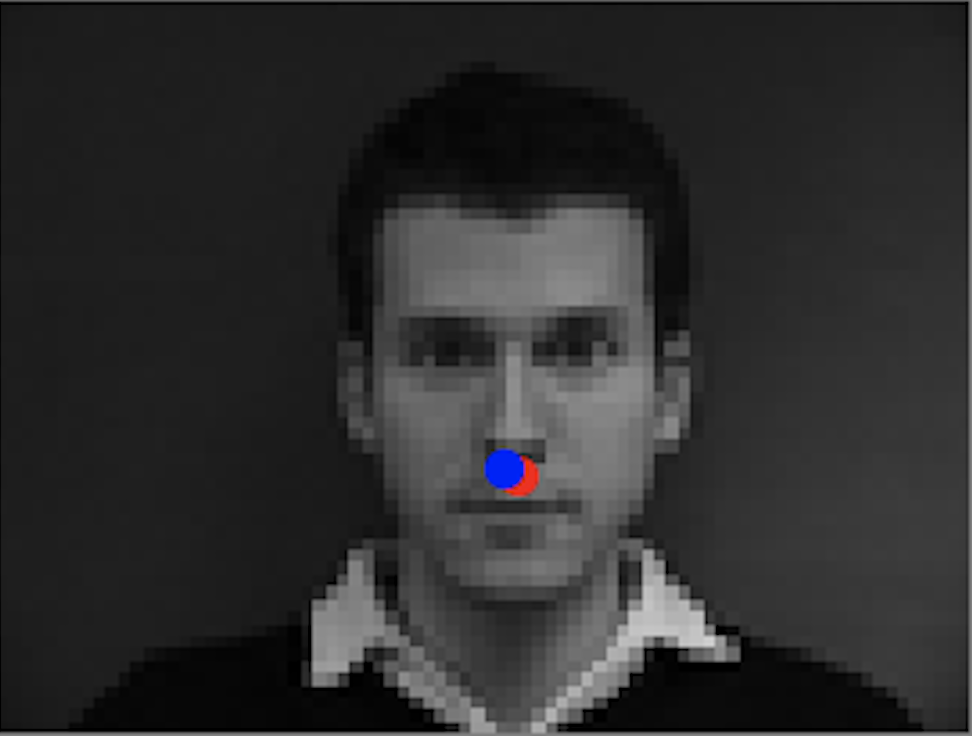
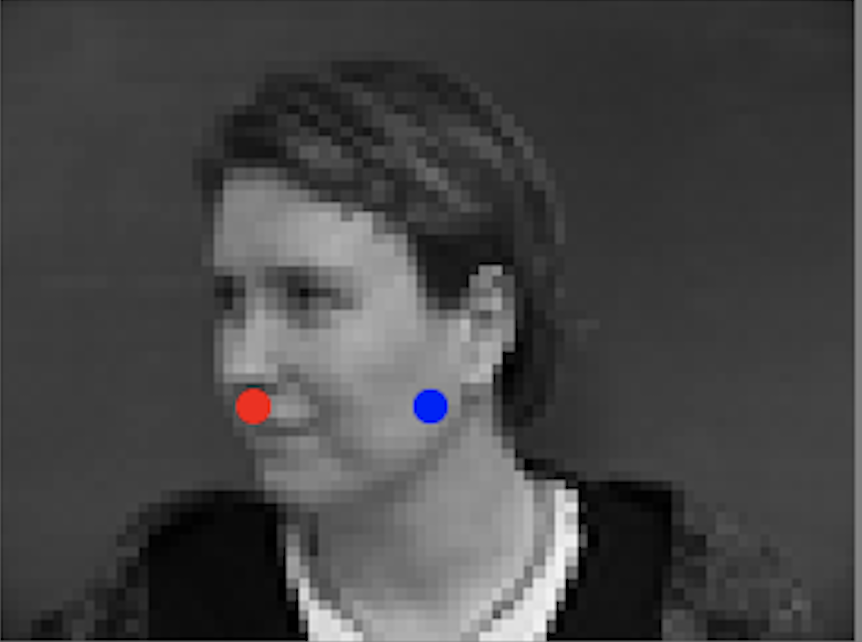
Final Results (Blue = predicted nosepoint, red = actual nosepoint)
| Successful result |
Successful result |
Unsuccessful result |
Unsuccessful result |
|
|

|
|
I think the cases where the model fails are cases where the person is in a signficantly different position from the average face and nose position. For example,
these two failure cases both have the person turned to one side. You can see how the model does much worse on the rightmost image where the person is completely turned to the side versus the
second from the right image which is still unsuccessful but slightly better because the person is turned away from the center position a bit less. The model performs really well when
the person is facing straight forward with no random objects like hands in the photo.
Part 2: Full Facial Keypoints Detection
Dataloader
For this part, we want to detect all 58 facial keypoints in the images instead of just a single nose keypoint. In order to train the neural network, we write a dataloader
that resizes the image to 240x180, applies three types of data augmentation (random change in brightness/saturation, random rotation between -15 to 15 degrees, and a random shift between -10 to 10 pixels) to the images,
updates the keypoints accordingly based on the data augmentation, and converts the images and keypoint arrays to tensors.
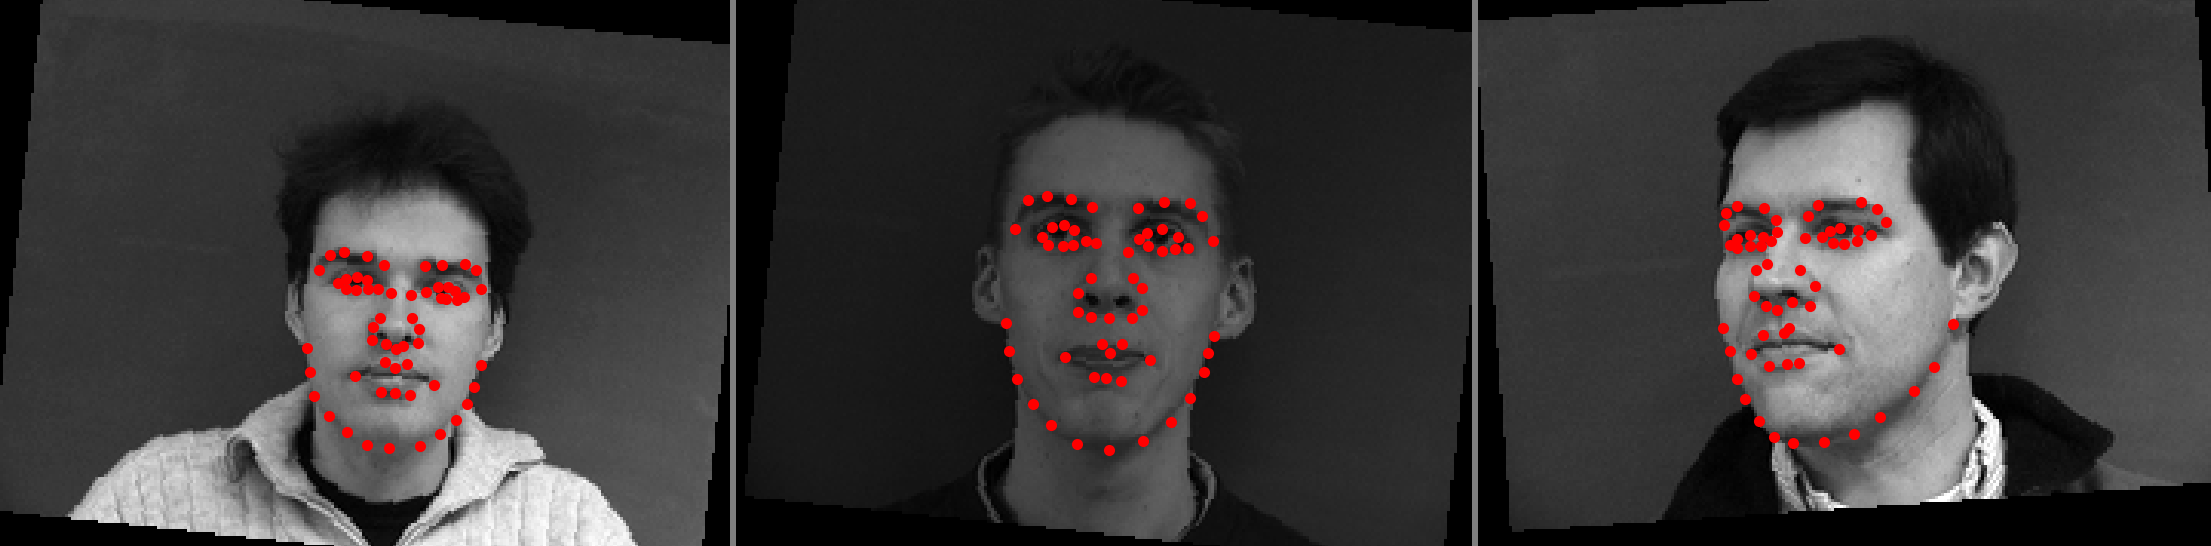
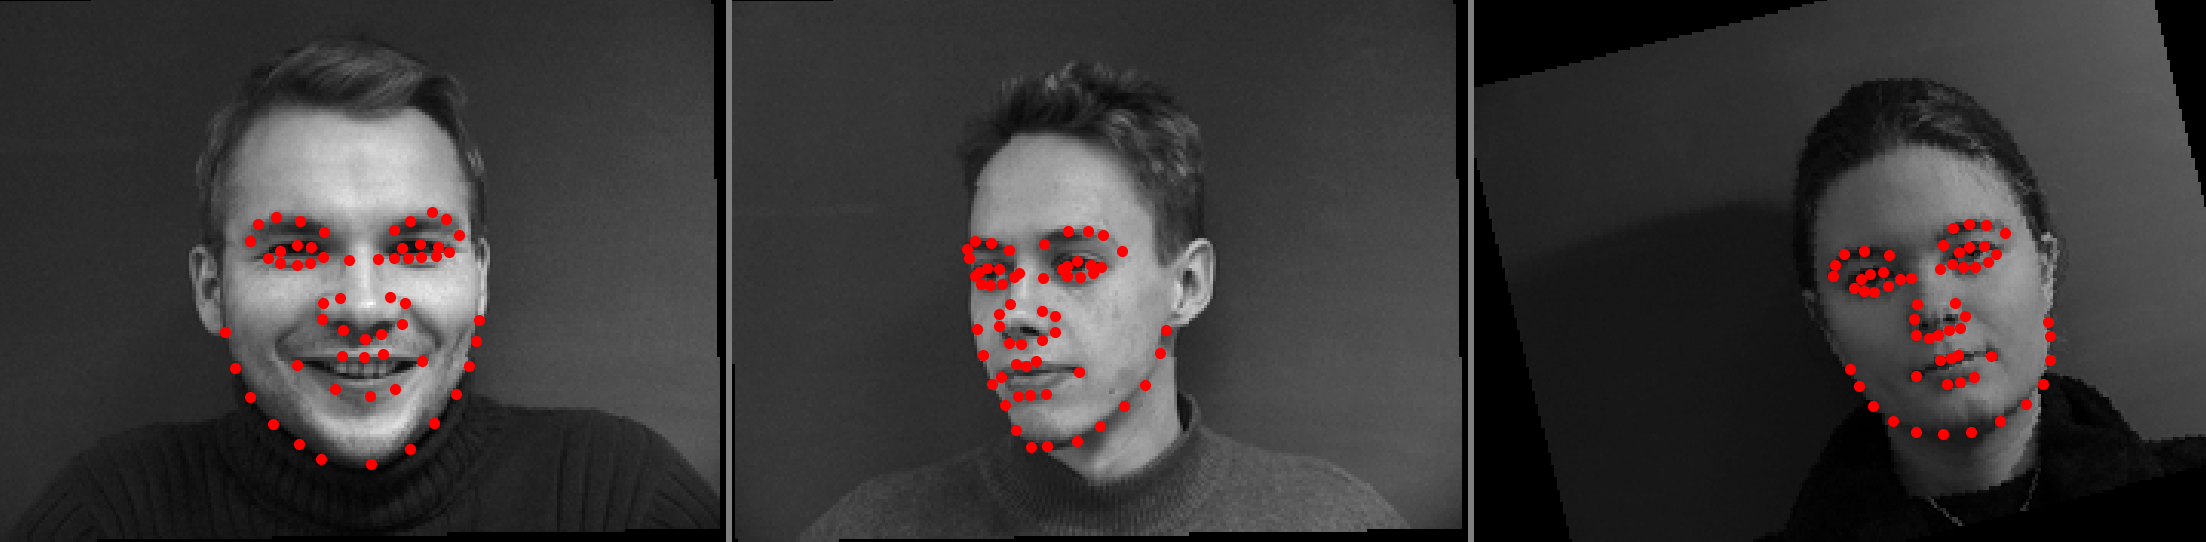
Below are some of the images with their ground truth keypoints plotted.
CNN
Part two uses more convolution layers because it has larger input image sizes. For this part, I wrote a CNN with
5 convolution layers, with each having a ReLU and maxpool layer. The first convolution layer had a kernel size of 7x7 and
8 output channels, the second had a kernel size of 5x5 and 16 output channels, the third had a kernel size of 5x5 and
20 output channels, the fourth had a kernel size of 5x5 and 26 output channels, and the fifth had a kernel size of
5x5 and 32 output channels. These were followed by three fully connected layers, where the first two fully connected layers were followed
by a ReLU. The three fully connected layers had output sizes of 512, 256, and 116, respectively.
Net((conv1): Conv2d(1, 8, kernel_size=(7, 7), stride=(1, 1), padding=same)
(conv2): Conv2d(8, 16, kernel_size=(5, 5), stride=(1, 1), padding=same)
(conv3): Conv2d(16, 20, kernel_size=(5, 5), stride=(1, 1), padding=same)
(conv4): Conv2d(20, 26, kernel_size=(5, 5), stride=(1, 1), padding=same)
(conv5): Conv2d(26, 32, kernel_size=(5, 5), stride=(1, 1), padding=same)
(fc1): Linear(in_features=1120, out_features=512, bias=True)
(fc2): Linear(in_features=512, out_features=256, bias=True)
        (fc3): Linear(in_features=256, out_features=116, bias=True)
        )
Results
Sampled images from dataloader with ground-truth keypoints
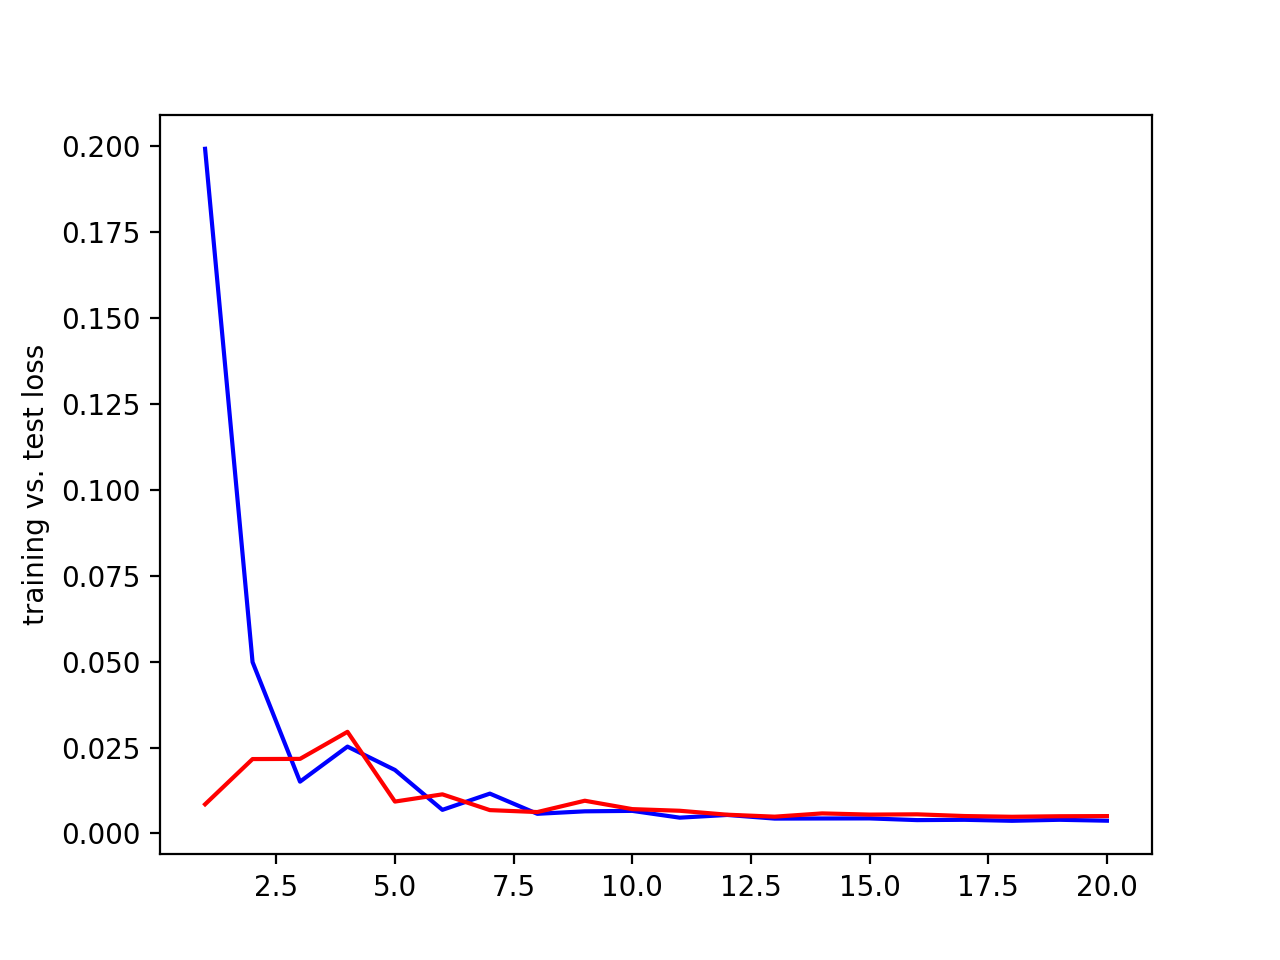
Hyperparameters + training/validation loss
The above CNN model was used with a learning rate of 0.001, 100 epochs, and a batch size of 20.
Below is the training and validation MSE loss during the training process (training = blue, validation = red, x axis = epochs, y axis = loss).
Learned filters for the first convolutional layer

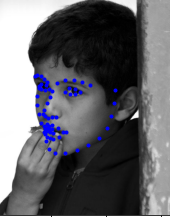
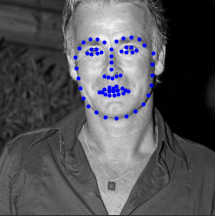
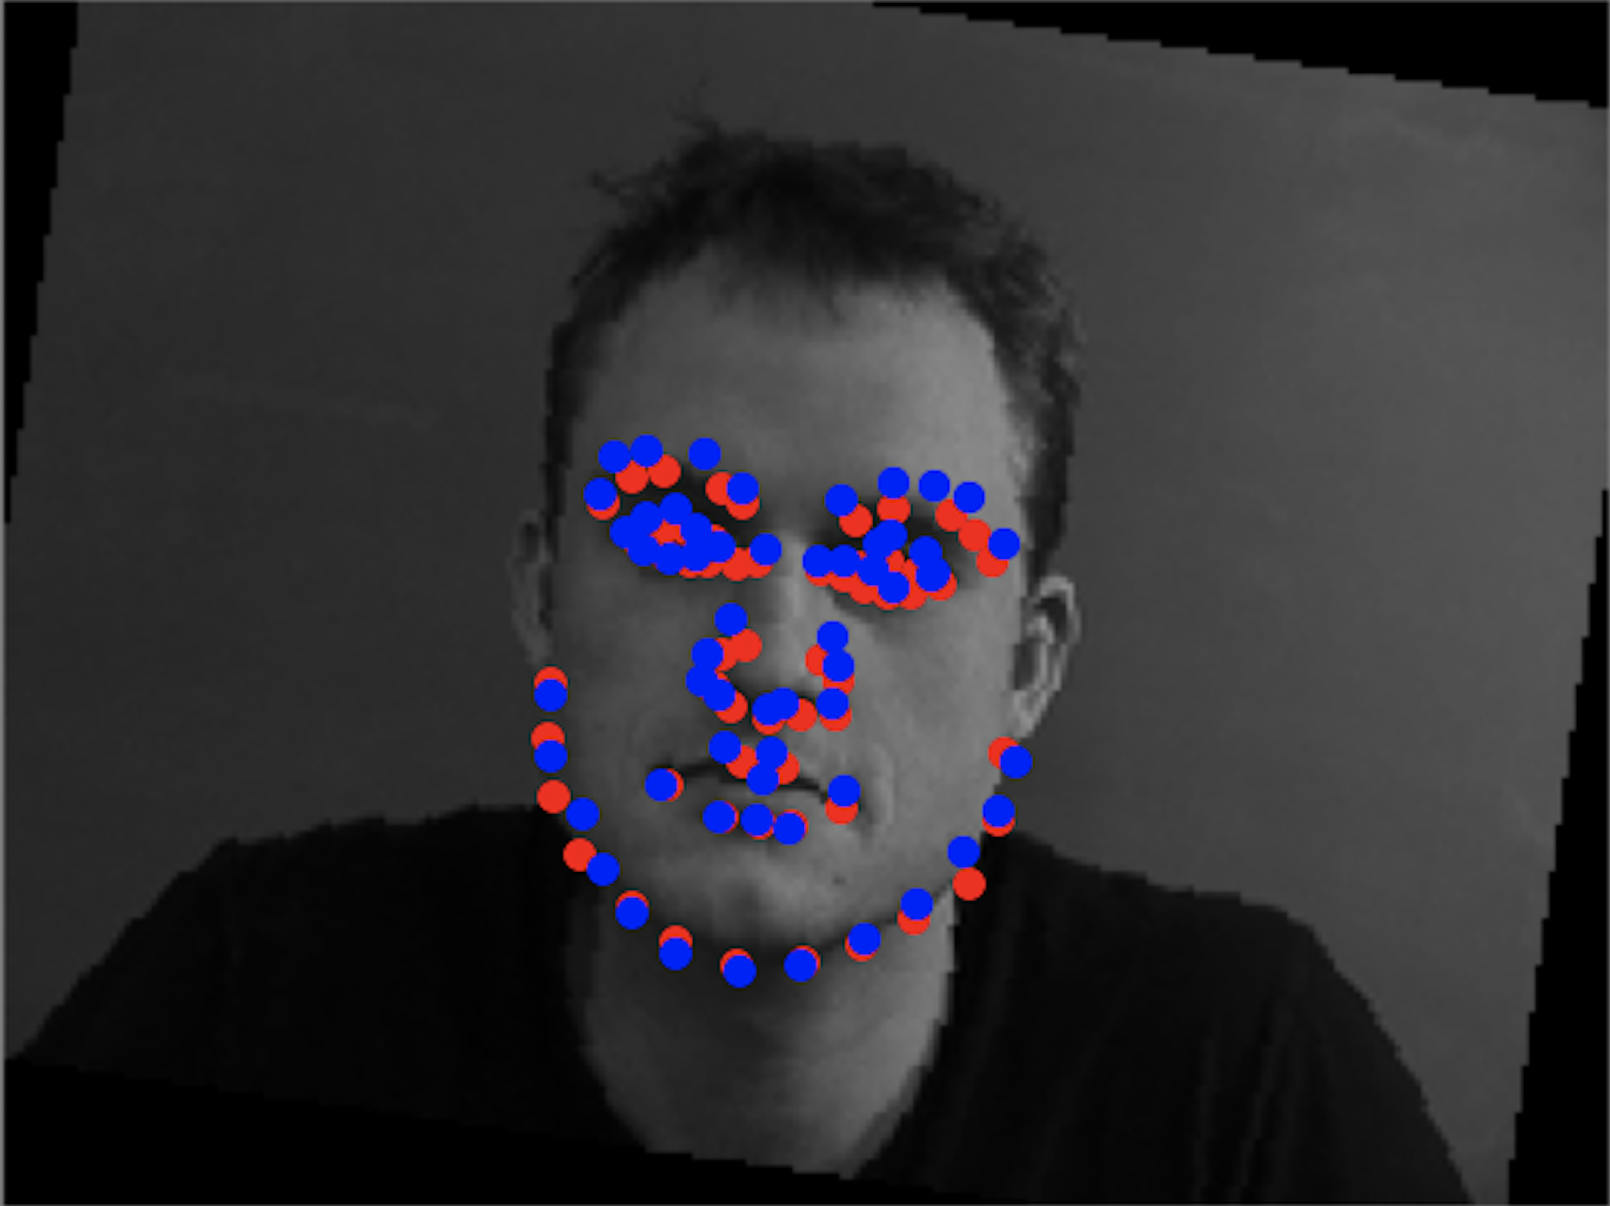
Final Results (Blue = predicted keypoints, red = actual keypoints)
| Successful result |
Successful result |
Unsuccessful result |
Unsuccessful result |
|
|

|

|
Similar to part 1, the cases where the model fails had people in a signficantly different position from the average face (eg. really rotated, very different lighting compared to most other images, or with different facial expressions like the open mouth seen in the rightmost result).
Part 3: Traing with Larger Dataset
Dataloader
For part three, we are using a much larger dataset to train a facila keypoint detector. This dataset contains 6666 images with 68 facial keypoints each. To train a CNN, we need to create a dataloader. We use the first 6000 images as the training set and
the last 666 images as the validation set. Given the dataset has faces that might only be a small portion of the entire image, we have to crop each image by the bounding box to get only the face of the image. The dataloader first cropped the images using the provided
bounding boxes, resized the cropped image to 224x224, applied data augmentation (color jitter, image rotation between -15 and 15 degrees, and image shift between -10 and 10 pixels in both the vertical and horizontal direction),
updated the keypoints accordingly, and converted the images and keypoints to tensors.
Below are some of the images with their ground truth keypoints plotted.
CNN
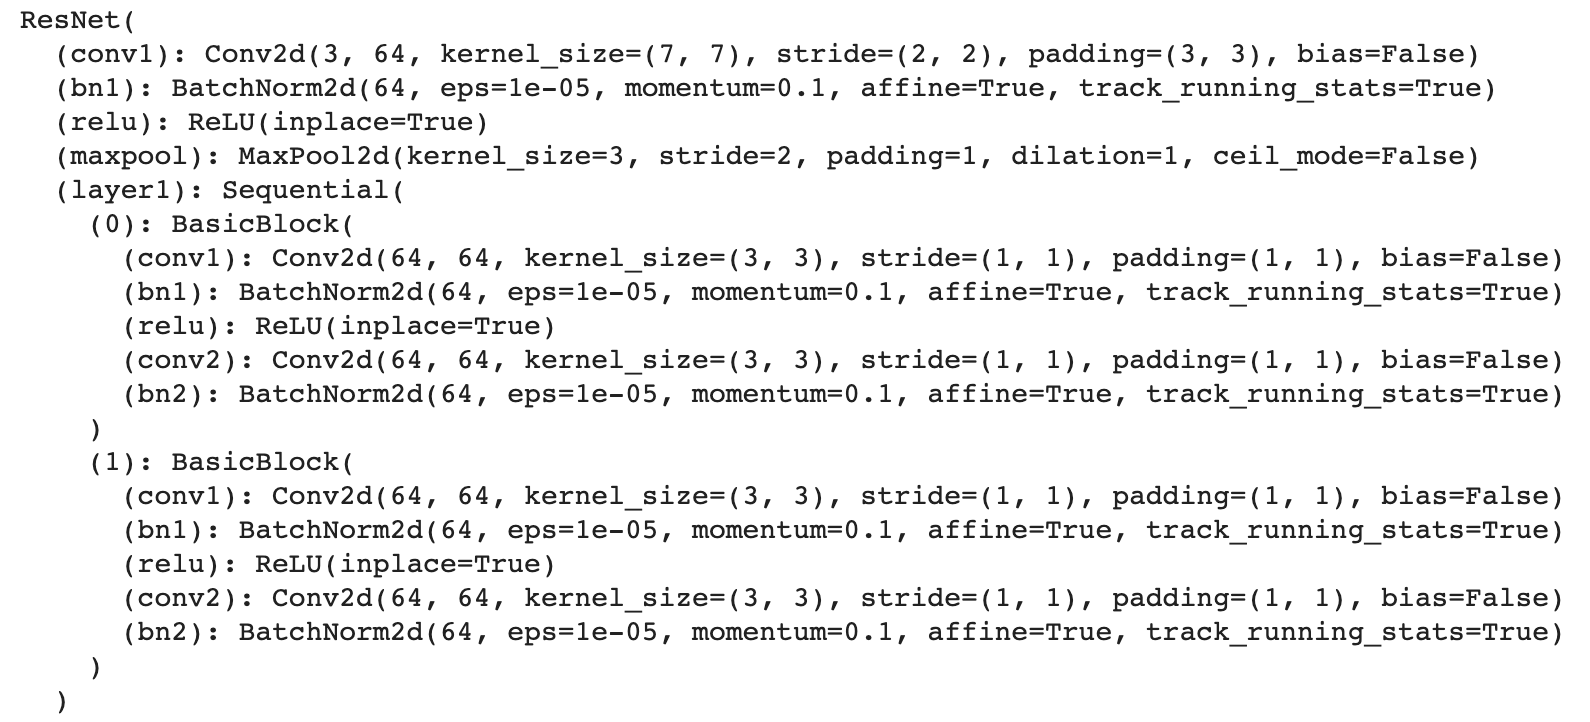
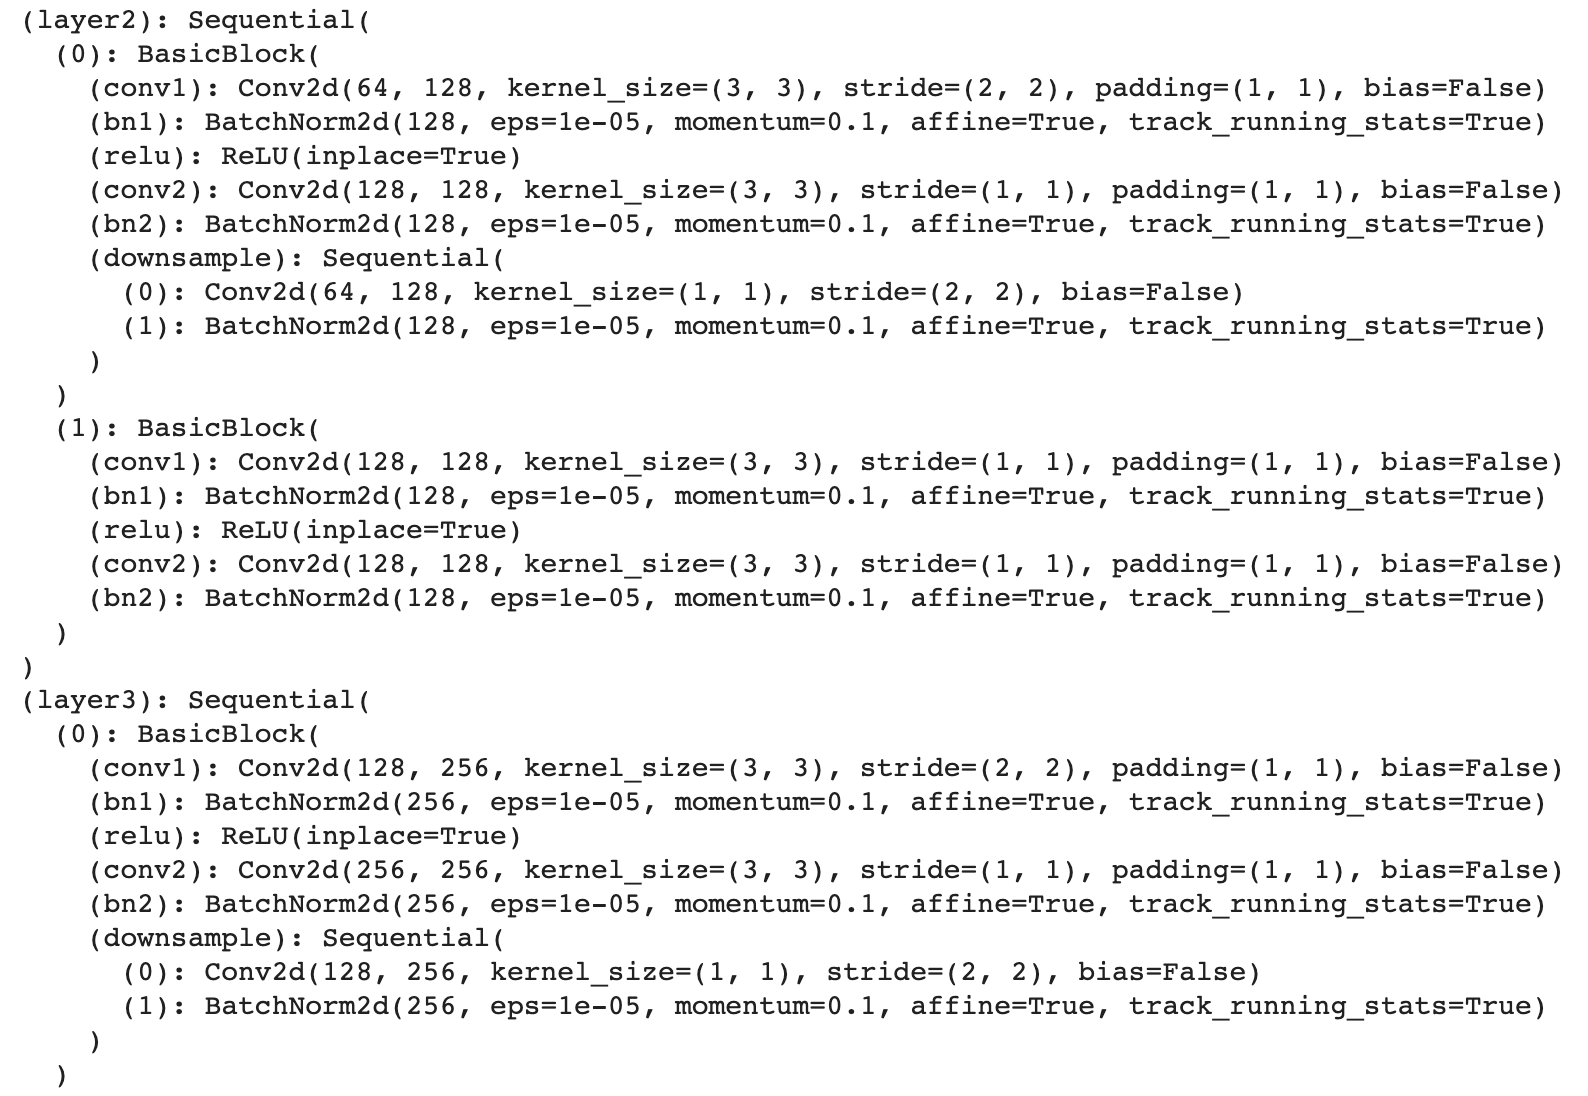
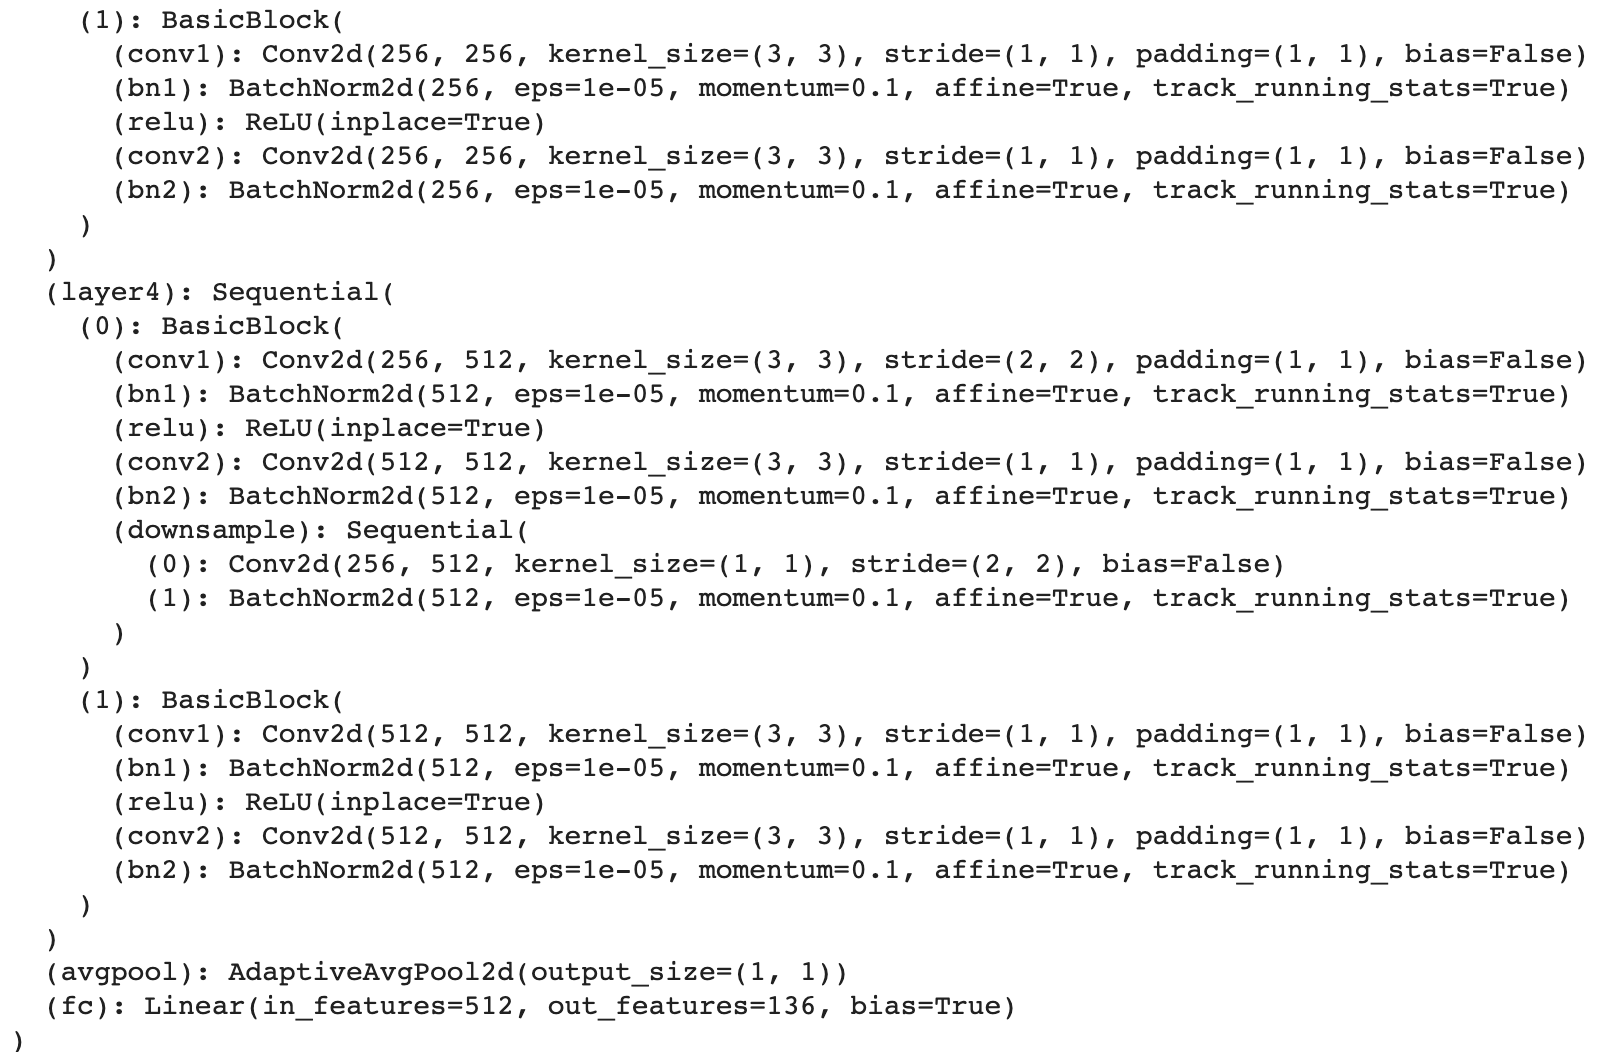
For the CNN, I used ResNet18. I used the pretrained model with the grayscale image as all three of the RGB channels so that the input channel could remain at 3. I changed the output channel to be 136 for the (x,y)
coordinates of the 68 landmarks of every face. Below is the detailed model.
Results
Sampled images from dataloader with ground-truth keypoints
Hyperparameters and loss plot
I used the CNN architecture detailed above, a learning rate of 0.001 with the Adam optimizer, a batch size of 8, and
24 epochs. Loss was calculated using Mean Squared Error.
Below is the training and validation MSE loss during the training process (training = blue, validation = red, x axis = epochs, y axis = loss).
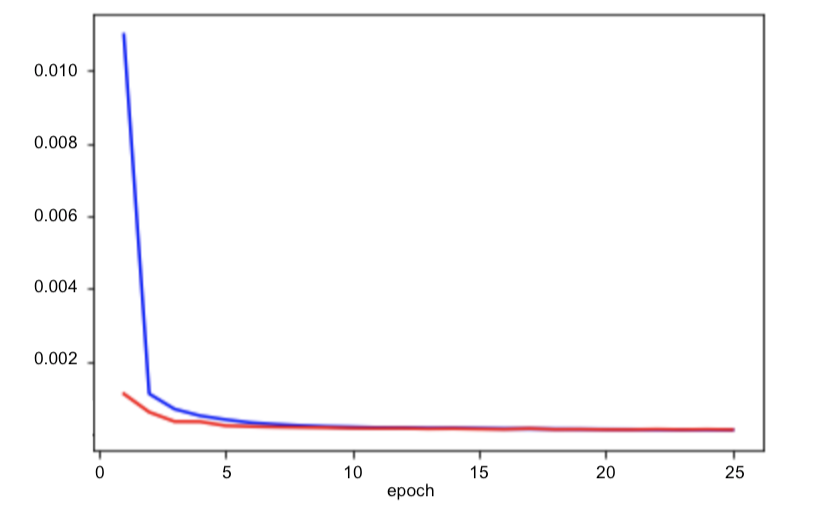
Kaggle Results
The submission to Kaggle under the username shainachen scored 6.62266.
Running the trained model on images in the testing set
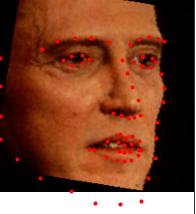
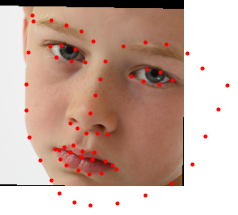
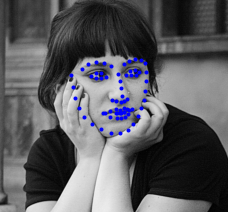
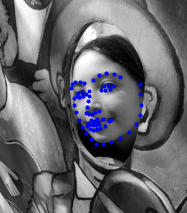
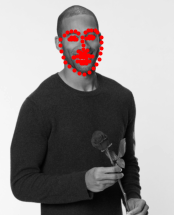
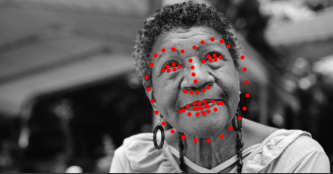
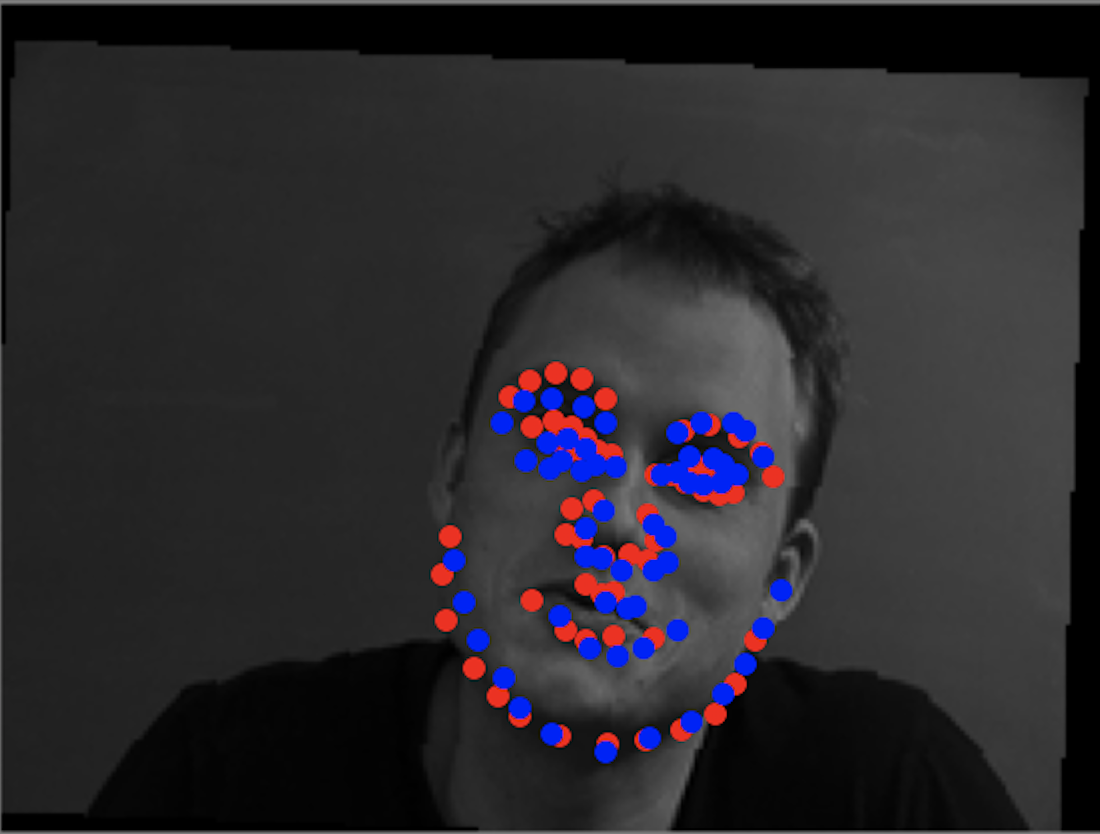
Given 1008 images without keypoints labelled, I ran the trained net on these images to predict the facial keypoints. Below are some of these results (keypoints applied to the original images that were converted to grayscale images).
Clearly, ResNet18 does a pretty good job of detecting facial keypoints.
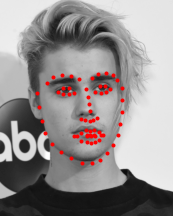
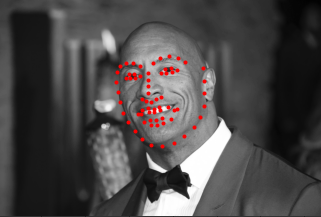
Testing with personal images
Now, applying this to a collection of images that I found on the internet, we see similarly good results.
Successful images
The above images worked pretty well. The model is able to detect the facial keypoints even when the face isn't facing directly forward, which is pretty impressive.
Failure case
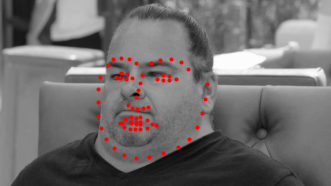
The model didn't work as well on Big Ed because his facial expression and structure are further from the average than many of the other people above. Here, the model had a hard time detecting his chin, jawline, and mouth.